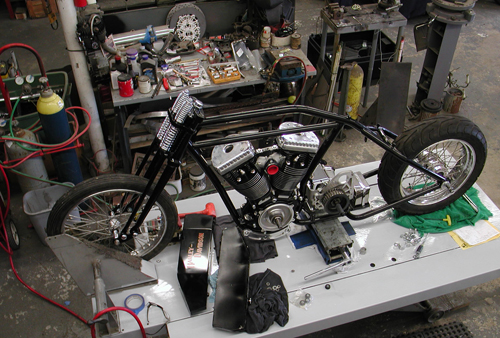
5-Ball Factory Racer, Part 6
By Robin Technologies |
How do you feel about your computer? I could easily take my old .357 Smith and Wesson revolver and blow this sonuvabitch into the briny harbor Pacific waters. I'd set the smoking gun down, go find a job driving a trash truck, and be able to hang out with the bros and drink beer until my kidneys failed, then you could toss my carcass into the Pacific along with my IMac. Life is nuts.
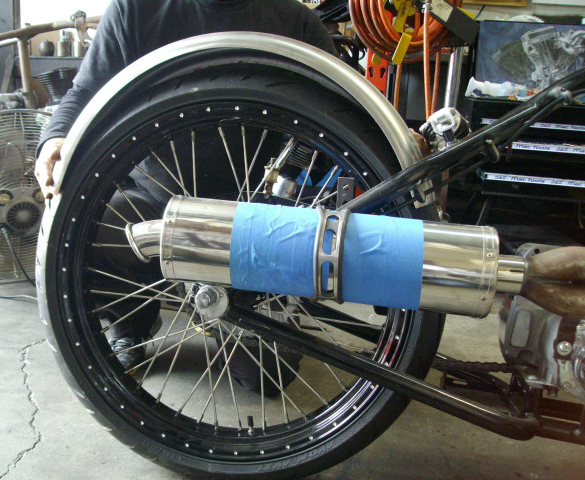
Ah, but the 5-Ball Factory Racer is coming right along. I hauled it down to Chica's for rear fender fitment, never thinking about the front fender. Should I? Chica makes his own wide ribbed fenders 5 and 6 inches wide. They're available for old tall 16-inch wheels and 18-inch wheels for an easy fitment to the tires. On my way south of Long Beach, California, I swung into Todd's Cycle. He was jammed with work. It's odd in this dour economy to see shops cookin'. Chica also was hustling to fill wheel orders, work on vintage bikes, and rebuild engines. I stopped in another shop on the edge of Long Beach, Richard Graves's car restoration facility. Damn, he does sharp work. He was working on a '50s Ariel square four.
Graves was also jammed with work, so the world ain't all doom and gloom. We just gotta provide a valuable service and be honorable businessmen, and we'll survive, goddamnit. Like Dave Rash, of D&D Exhaust says, “Motorcycles are mechanical Valiums. The world can go to shit, and the brothers take care of their motorcycles.”
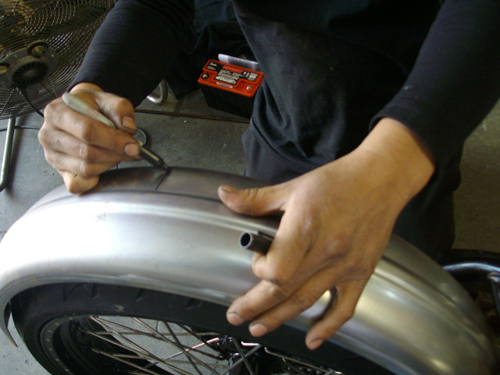
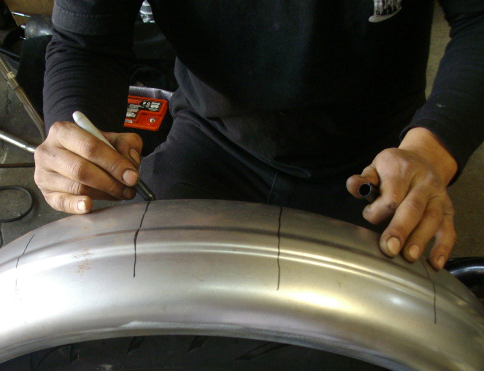
I like that notion. Chica marked my fender for stretching since his fender wouldn't wrap about a knockout Black Bike 23-inch wheel with an Avon Tyre. He indicated where the stretching would take place every 4-5 inches with a felt pen, then went to his machine. “You need to stretch it the same amount,” Chica explained, “and stagger the stretching maneuvers to prevent the fender from warping or twisting.”
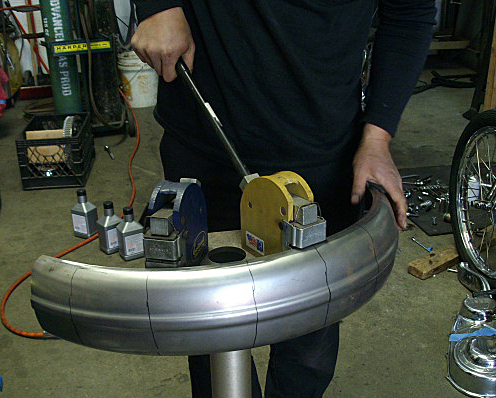
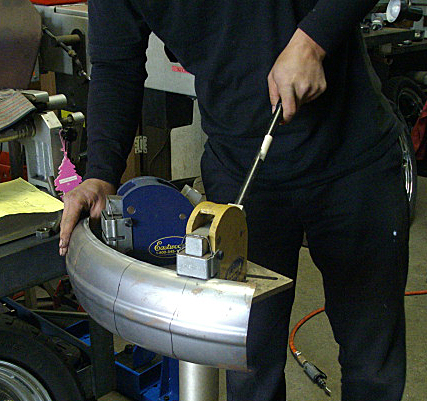
I asked Chica if his fenders needed additional support where the fender rails would be attached. He pointed out that the extreme contours and the ribs added extra structural strength. But he did recommend two fender straps over the frame cross-member.
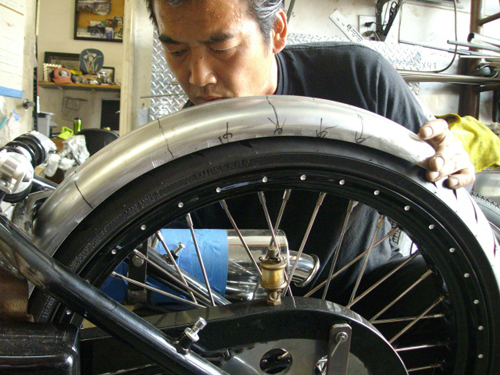
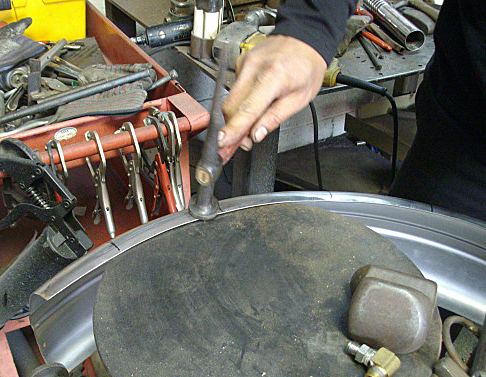
That did it, and Jeremiah and I loaded up the Racer for the return trip to the Bikernet Interplanetary Headquarters deep in the Wilmington ghetto. I started to work on the rear fender installation immediately. I bobbed it about 4 inches, but was grabbed by the rear wheel adjustment designed by Rick Krost of U.S. Choppers and manufactured by Paughco.

It's interesting, and I'm still getting the quirky hang of it. It automatically adjusts the ¾-inch axle back and forth, and up and down about ¾ inch. That element makes mounting the rear fender even more interesting. I was forced to don my patience- and-remain-flexible hat. Who knows if it's right, but I tried to work in several fender fluctuation means, so I could adjust it if necessary.
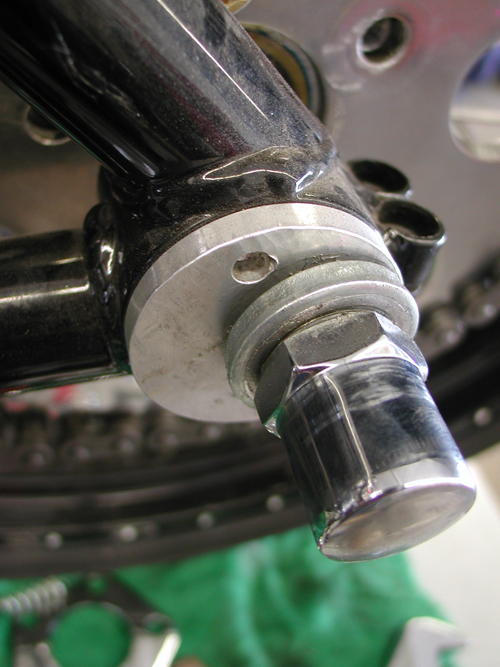
The fender was mounted with a single bolt at the bottom behind the battery case. Then, with the fender spaced evenly from the tire throughout the complete radius, I marked drilling holes for the fender straps. I drilled the holes, and the gods of stainless steel blessed my ass that day with a keen sense of accuracy. The holes and the fender straps lined up. I had to keep an eye on the axle adjustment, or the wheel was cocked right or left in the frame. “Ya gotta watch for the sweet spot,” Rick Krost said. I called him in the middle of the night to quiz him about wheel adjustment and alignment.
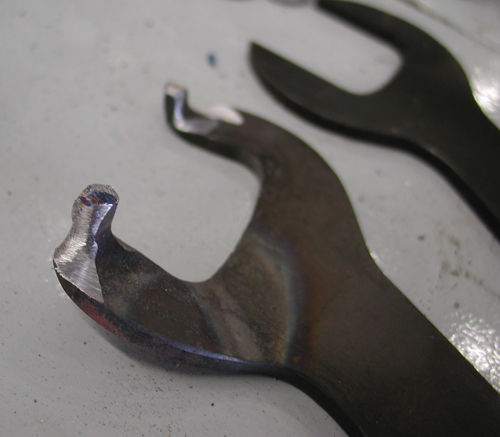
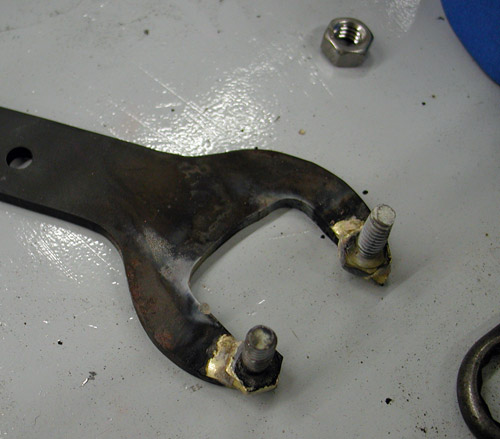
I also needed to make a spanner wrench for his axle adjusters. I was in a hurry one night and built a crappy one with some strange punched out flat open-end wrenches. I just heated, bent the tangs, and ground it to fit. It was sloppy, and ultimately, I built another one with brazed ¼-20 bolts to another wrench. It fits much better.
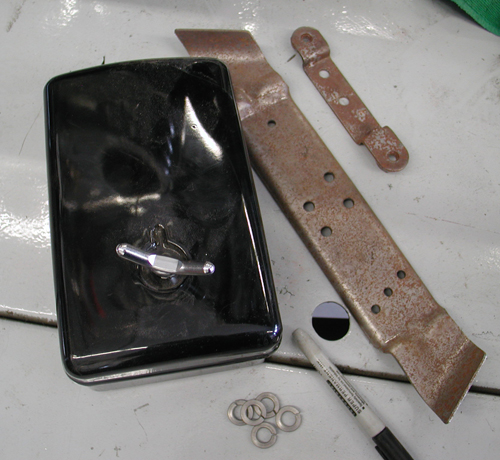
I also attached the Pauchco toolbox strap to the chain side of the bike, since the pipes would interfere on the right. It worked out perfectly for an additional installment point for the chain guard.


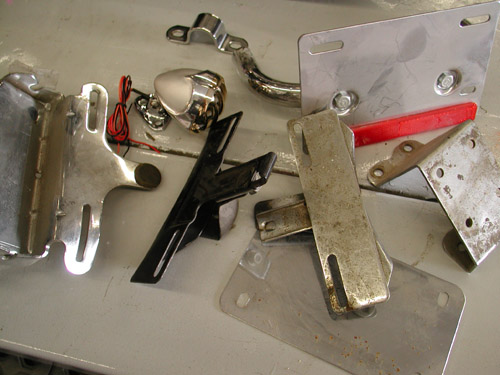
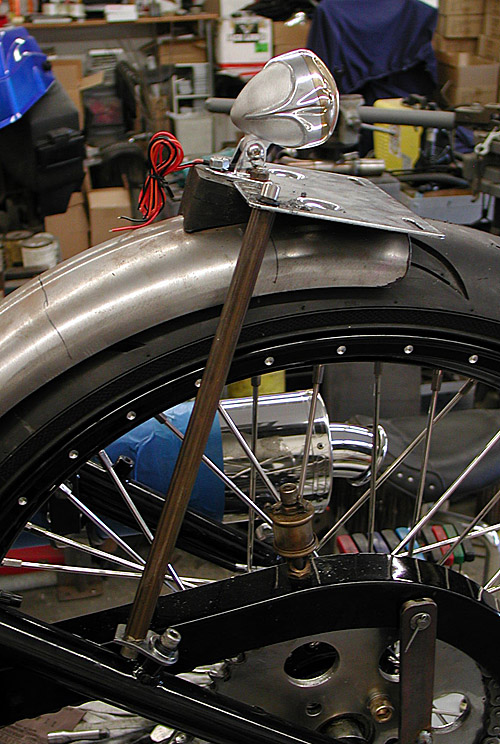
Next midnight run in the shop included grappling with mounting the Crime Scene taillight. It's a cool bastard, but I didn't have anything to mount it with. I dug through old boxes of parts, stock license plate rings, mounts, you name it, until I found an old rubber mount for license plate holders. It was already drilled for my three-point mounting taillight triangle. I found a thick license plate backing plate and went to work.
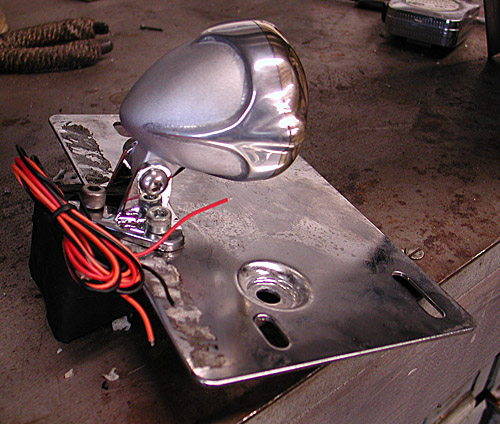
I drilled it to catch two of the Crime Scene holes and held the taillight over the license plate. I thought I had it made. I drilled the fender so the lip of the license plate will hang just slightly over it, for a proper, readable angle. Not sure I was successful. We'll see the first time I'm pulled over for speeding in Wyoming.
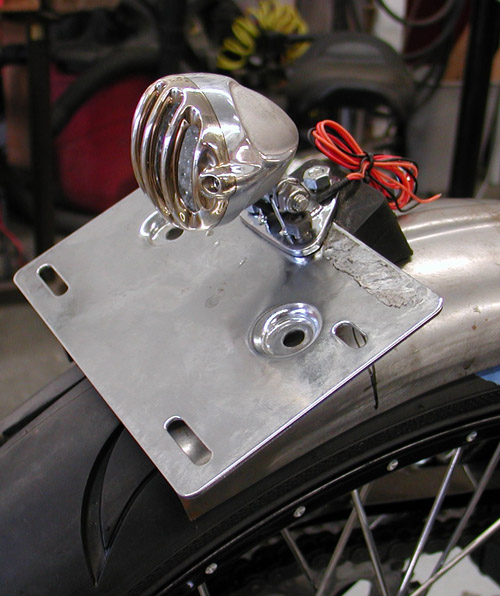
The one item I missed was the spacing for the bonaroo cool license plate ring. I'm not sure I didn't drill the holes too far into the plate, but I was thinking about strength and not bling. From that point, I moved to making fender rails. I can't do anything status quo. So I drilled corner holes in the backing plate, machined more brass, cloverleaf stock with 5/16 coarse threads and bent tabs and mounted them to the frame. Sorta crazy, but actually strong.
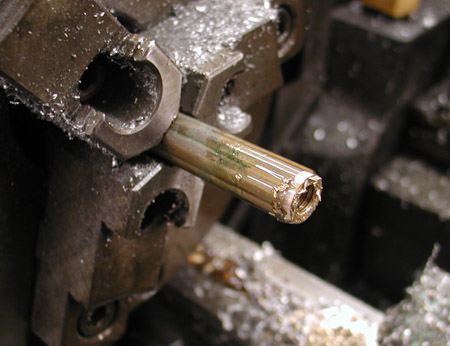
Evan at Power Plant Motorcycles on Melrose in Hollywood coached me on cutting threads in brass. “You need deep thick threads, so don't cut fine threads in brass,” Evan said. “It's soft.”
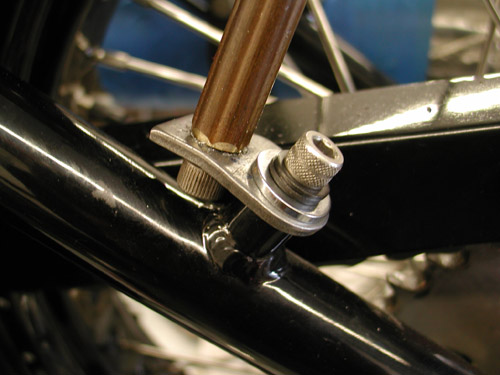
He also showed me a trick on his new antique lathe for centering cutting bits, which I'll never forget. I'll demonstrate in another tech in the near future. His shop was also busy, when I last stopped in. He builds vintage bobbers with very cool hand- made components. No CNC billet shit for Evan. Watch for his Chopper Challenge feature bike to show up on the pages of Cycle Source.
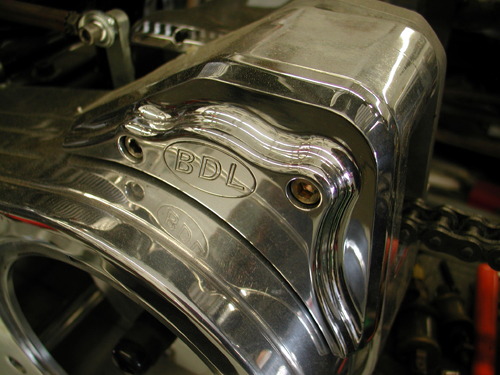
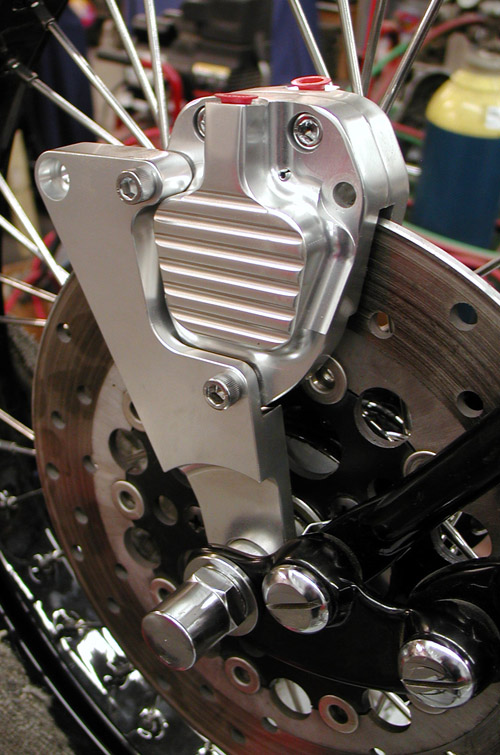
The guys at BDL helped with a super deal on a GMA front brake caliper, bracket, and hand lever. Unfortunately, they only make a springer bracket for the right side, so I modified for the left and built my linkage. Dealing with a narrow Paughco Springer and a front brake is a challenge to fit everything and center the caliper over the rotor. I still need to machine an axle spacer. I also need to deal with this billet bracket. I'm looking for some super cool art deco piece to bolt up front, like a hood ornament from an old Packard.
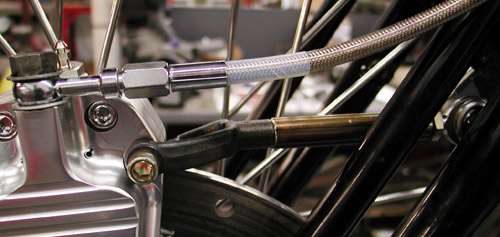
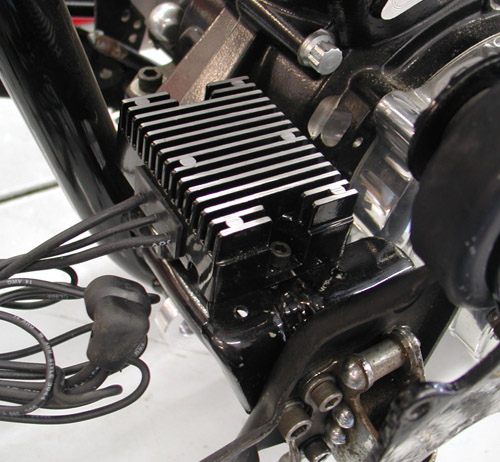
I had to deal with the suicide clutch situation. I had a vintage H-D rocker clutch system, minus the linkage and spring. I made the linkage with a spare Paughco toolbox-mounting bracket. Then while digging around, I discovered what I thought was a regulator mounting bracket. It would work perfectly for the regulator and had the space, and holes drilled for a clutch cable bracket. I went to work digging around for the perfect cable guide.
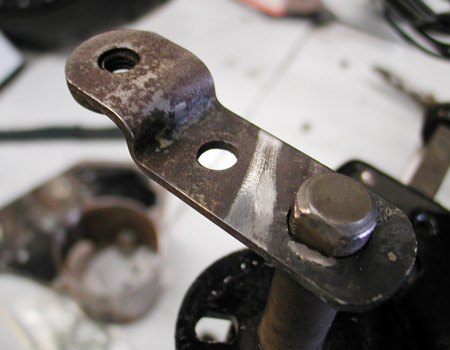
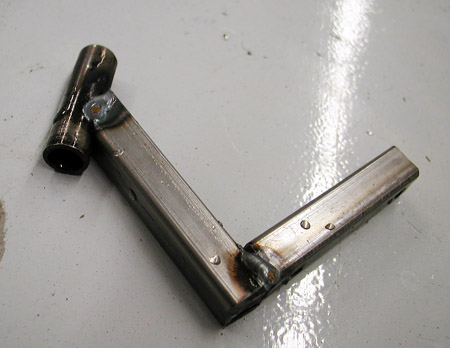
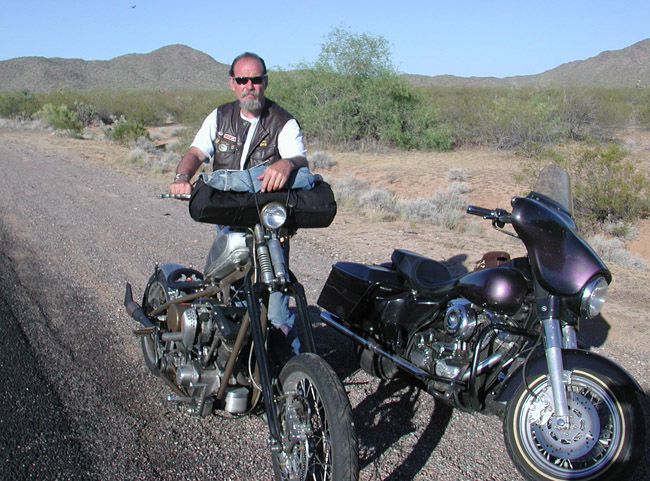
About this time, the Laughlin River Run surfaced and I rode my King into the desert. Two weeks later, I was called to duty on my Sturgis Shovelhead chopper to ride back into the desert to Cottonwood, Arizona for the Smoke Out. On the way I helped a couple broke down in the desert with a wiring problem. As we tinkered with his rigid Sportster, fulla devil tails welded everywhere like handles on wrought-iron furniture, I noticed his suicide clutch set up and his linkage and it gave me some good notions for a cable pinching system.
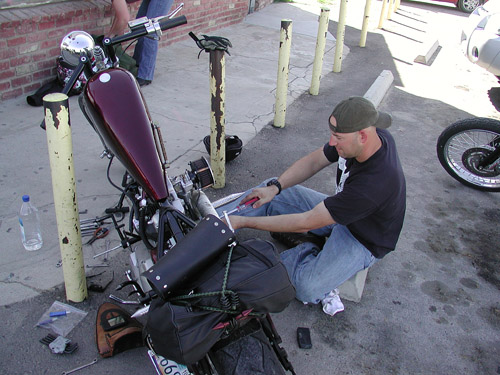


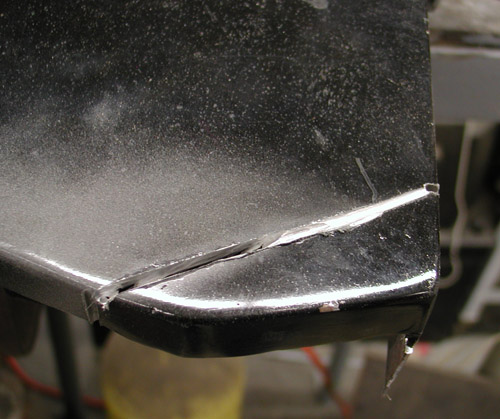
Between Laughlin and Cottonwood, I finally rolled around to cutting the front of the tanks to make room for fork stops with the Paughco narrow springer. As it stood the springer stops would smack the Factory Racer tanks, and my turning radius was shot. I went to work with a Makita cut- off saw and a plasma cutter to slice a new piece of 14-or 16-gauge steel for the replacement. The tanks were painted and that fucked with my MIG welding. Always clear the paint away from the welding area. The smoke from the heated paint messes with the pure oxygen and gas required for proper penetration. I'll work on that more with the next tank.
I'm getting close to making some final welds, while praying that a TIG welder will wander into my shop. But first, I needed to drop in the Baker N1 drum for 5-speeds. This is the simplest modification on earth. It's so easy even I could do it, amazing. These N1 drums… well I'll let Trish Horstman and James Simonelli tell you the facts:
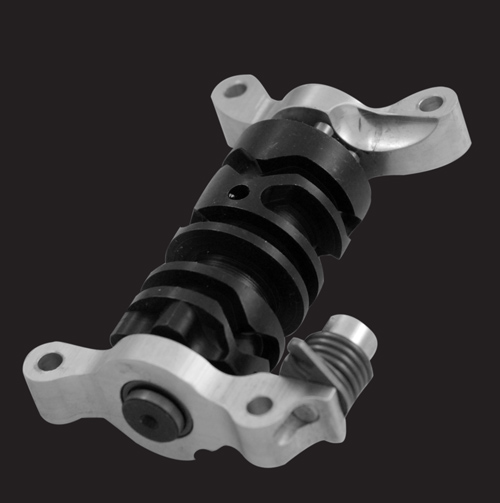
Five years ago we developed the N1 drum for drag racers and street racerswho used our 6-speed overdrive. The N1 shift pattern (Neutral-1-2-3-4-5-6) wasdesigned to prevent false neutrals during aggressive 1-2 upshifts by positioningneutral under 1st.
The jockey shift/foot clutch crowd soon discovered the benefitsof the N1 pattern. The big lever ratio of a jockey shift lever desensitizes the feelof the detents in the transmission such that finding neutral is a crapshoot withbad odds. With neutral on bottom (or all the way forward), the jockey shifter canmindlessly tap all the way down to neutral thus allowing him to put both feet onthe ground as he rolls up to the stop light.
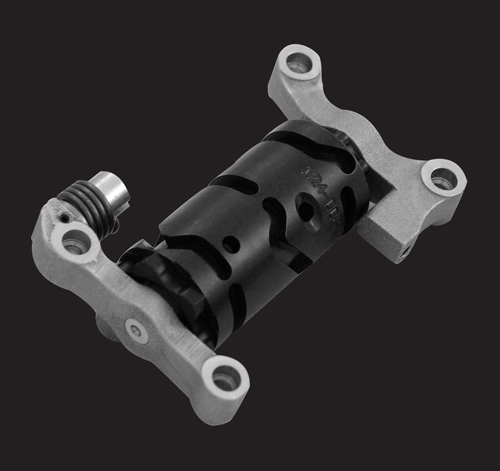
Today, a whole new crowd is realizing the benefits of the N1 pattern. Pingel’selectric shifter is slicker-than-snot and appeals to racers as well as those withrestricted movement in their left foot and left hand. Utilizing an N1 drum inconjunction with Pingel’s electric shifter makes finding neutral (with the solenoid)seamless, and yields a solenoid-actuated shift system that almost makes footshifting obsolete.
PN DESCRIPTION FITMENT
5-6QT-A N1 drum & pillow block assembly, 6-speed BAKER 6-spd overdrive except*
5-6QT-A1 N1 drum & pillow block assembly, 6-speed *Old 6-into-4 (S&S case) &Frankentranny
124-OD6RN1-A N1 drum & pillow block assembly, 6-speed RSD right-side Drive 6-speed, 2ndgeneration
124-DD6N1 N1 drum & pillow block assembly, DD6 DD6, all
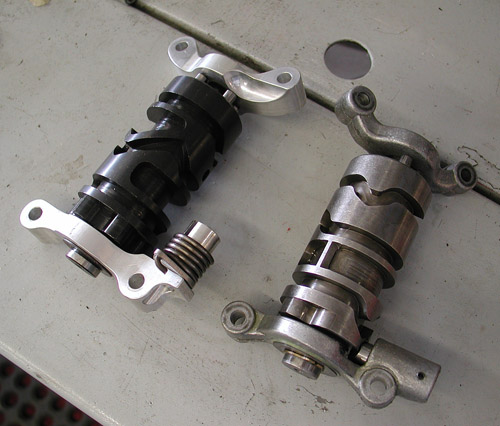
2-5R-N1 N1 drum & pillow block assembly, 5-speed Single pole neutral switch 5-spds
2-5RL-N1 N1 drum & pillow block assembly, 5-speed Double pole neutral switch 5-spds
FEATURES/NOTES:
– N1 shift system option available at no additional cost with purchase of a complete transmissionor builder’s kit
– 5-speed N1 shift systems fit H-D 5-speeds and BAKER 5-speeds
– For aggressive shifting we also recommend the use of our anti-overshift ratchet pawl, PN555-56A for 5-speeds through 1999 and 555-56L for 5-speeds 2000-up. For example, this pawlmechanically prevents an unintended 1-3 up shift during an intended 1-2 upshift
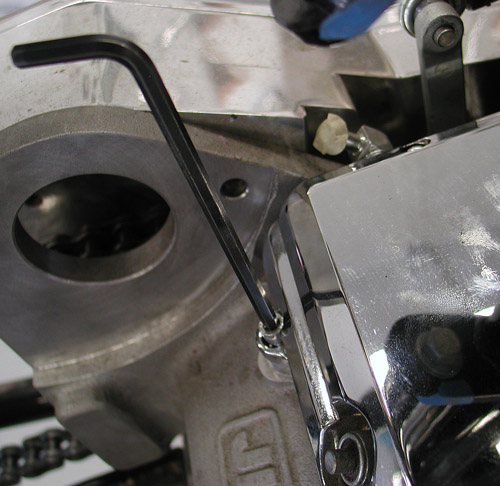
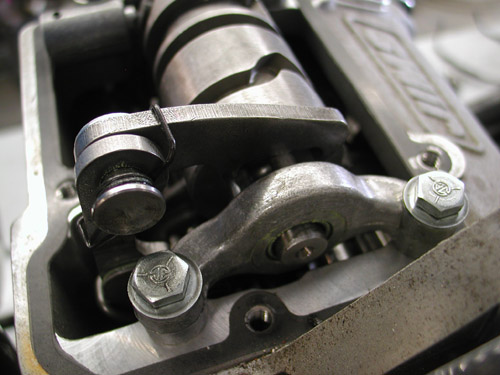
Okay, so I popped off the ¼-20 Allens off the top of the tranny cap. Since, within five fasteners there were three sizes, I placed them neatly in the battery pan to prevent mixing up the formula. The lid came right off.
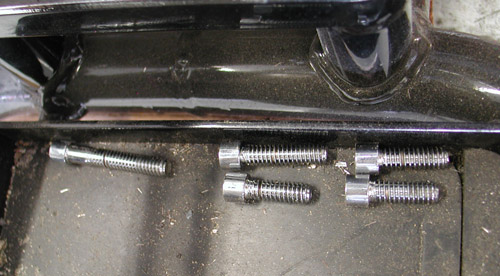
Then the four 7/16 hex heads need to be removed and the drum and pillow blocks came off as a single unit. Don't forget to lift the shifting arm, and keep it up when you replace the drum.
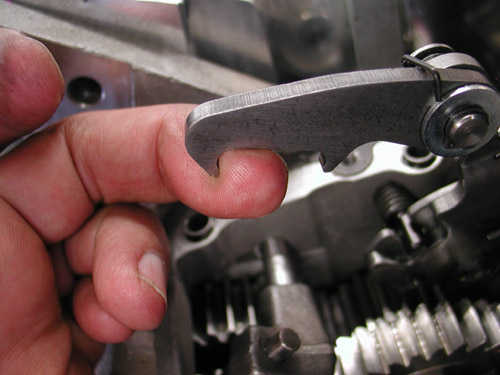
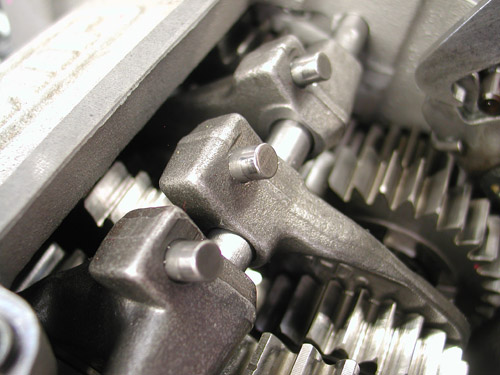
It might feel slightly snug to remove since there are guide inserts pressed into the case to hold the drum perfectly aligned. I studied the drum as I removed it and set it in exactly the same position on the bench to insure I put the new N1 drum back exactly the same way.
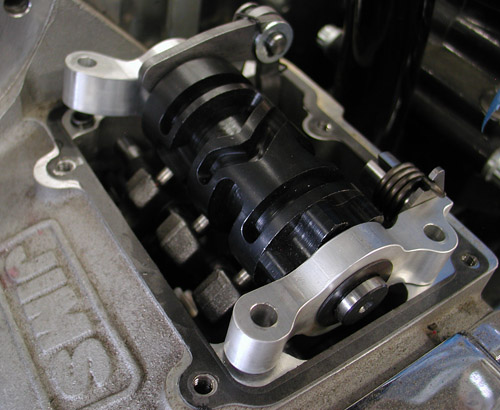
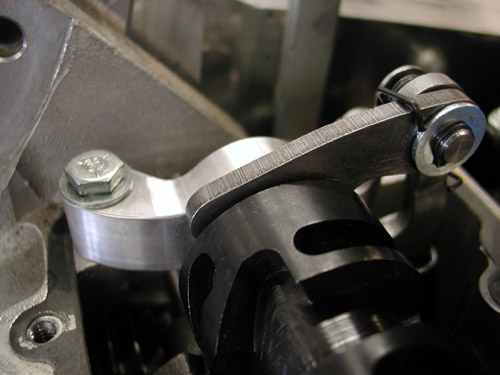
I told myself the old mechanic's rule as I replaced the drum and aligned the shifting forks: Don't force anything, jackass. I carefully aligned the shifting forks, then made sure the pillow blocks fit comfortable over the inserts before rolling the fasteners back into place and torquing them to 130 inch pound of torque or 10.8 foot pounds.
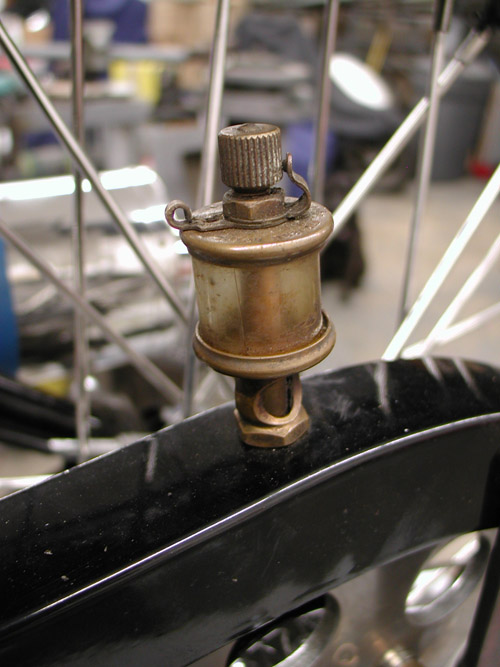
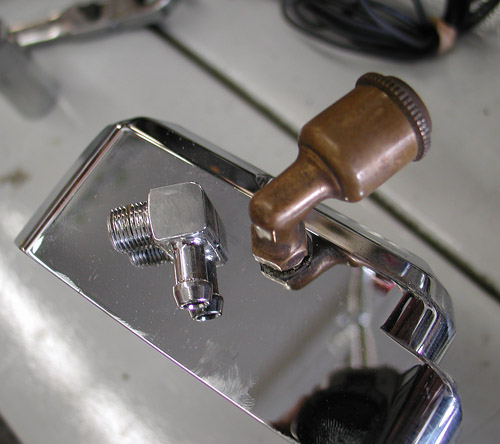
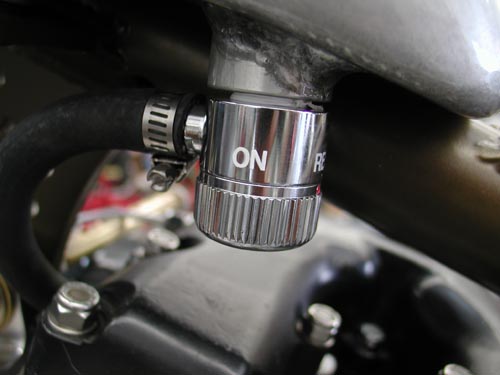
I smeared a dab of tranny oil on the lip of the transmission lid and slipped it into place, then tightened the fasteners to 130-inch pounds of torque. Oh, I forgot. I replaced the standard vent with something brass, mechanical, and vintage. What the hell. I'm going for that vintage appearance.
That's it for this installment. Next, I will install an Exile sprotor rear brake and 48-tooth sprocket. I'll finish all my welds, strip her down, and head to powder coating and paint. I have the color scheme down. It's going to be wild. I've also promised not to hit any more events between now and Sturgis for maximum shop time. We'll see if I run out of whiskey and women or not. Hang on.

Bandit 2006 Sturgis Shovel
By Robin Technologies |

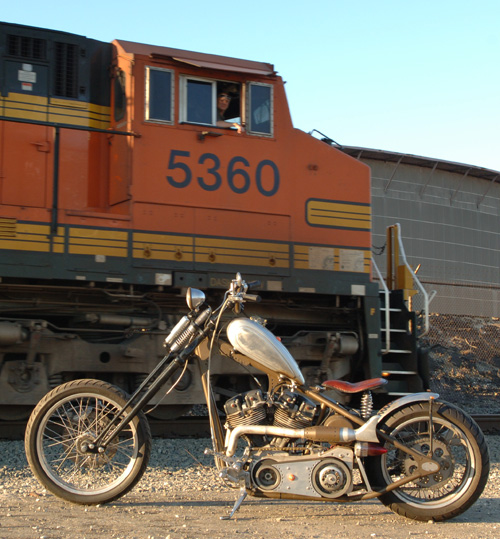
Editor's Note: You've seen the “American Iron” feature. Chris Maida, the editor, asked us to reshoot it, but we kept the original shots near the Wilmington, Califa, Port of Los Angeles rail road tracks. Just happened that a train rolled past in the middle of the shoot. Enjoy.–Bandit
I just did the Old School bit and rode this bike to Sturgis on our Bikernet.com 2005 run from the West Coast.
I cottoned to the pure machine marquee. I didn’t plan to paint it at all, unless absolutely necessary. I wanted to leave most components unblemished metals and incorporate as many iron types (for color) into the mix as possible. I wanted this mess to contain brass, copper, aluminum, steel, and stainless. Of course the steel corrosion dilemma dictated that we use some powder coating for a protective seal. The front end came in black to avoid chrome, so I supplemented the bike with a few additional black pieces, but the frame and some others were powdered to mimic a copper patina. Some aluminum parts were clear coated to prevent complete dulling and afford an acceptable pin striping surface. Some brushwork was applied.

It started with a Shovel engine that a brother gave me with a title. I loaned him a bike when he was down. Due to family illness he was forced to sell everything. There’s nothing better than an engine with a title. I took it from there and ordered a Paughco classic frame to fit me and handle like a midnight dream. Too many choppers today look good but don’t handle worth a damn. I wanted a bike to fit, handle well on freeways, yet be light in city traffic and parking lots. I spoke to Ron Paugh at Paughco and they built me a 4-inch up, 3-inch out, 35-degree raked rigid, wide enough to handle a 180 tire.
I don’t care for wide tire, fat-assed, beachball monsters. I decided to set my limit at 180 and run an O-ring chain for the traditional look. I stuck with a Paughco front end to top off the chassis. It’s one of their new tapered leg springers, 9-inches over with three degrees of rake in the trees. It worked out to be almost 5 inches of trail and handled as light as a dirt bike.
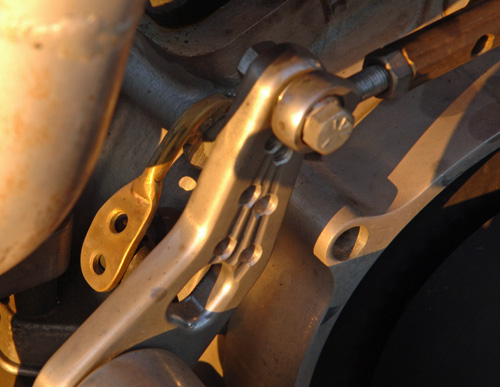
The engine had early stock heads, House of Horsepower cases and was a 105-inch stroker, too much for a rigid chassis. I wanted this bike to last, be a beater, but not be a dog. I contacted friends at S&S and they suggested 93 inches of street power for a balanced, reliable drive train. The stroke was reduced to 4.5 inch with 3 5/8 inch bore. The bike is fast but not a vibrating monster. I also spoke to Lee Chaffin at Mikuni and he suggested a 42mm, flat slide, Mikuni carb. “It will give you sharp throttle response,” he said. If I planned to run the Shovel on the salt flats he would have suggested a 45 mm venturi.
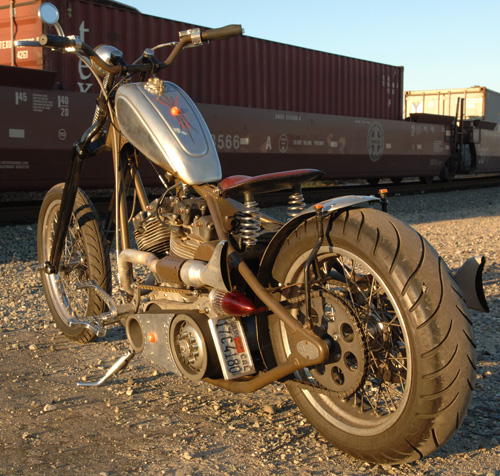
I have a couple of codes when it comes to building choppers. I like to keep them as simple as possible. On the other hand I like an oil cooler and filter to keep the drive train alive. I came across a system that bolted to the front motormount and doubled as a cooler while holding a spin-on filter (Rohm billet oil cooler mount). It was perfect. Other chopper codes include having enough taillight to prevent being run-over and enough gas to take you 100 miles before you hit reserve, or you’re looking for gas stations constantly. In this case I nearly broke the code a couple of times.
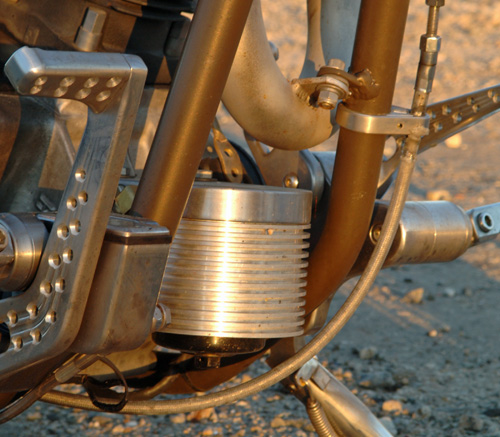
The Sportster gas tank originated on the verge of being beneath the acceptable fuel capacity, 1.75 gallons. It was an old Aluminum XR 750 race tank that we heavily modified. Get this: Some aluminum tanks are against the code, they’re too weak, notorious leakers. I broke the unwritten rule because it was a factory tank—cool right? Not so. “They broke during flat track races,” Berry Wardlaw, the Boss of Accurate Engineering, said at dinner in Deadwood, South Dakota, after I welded it twice on the way to Sturgis. “They ain’t worth the powder to blow ‘em to hell.”
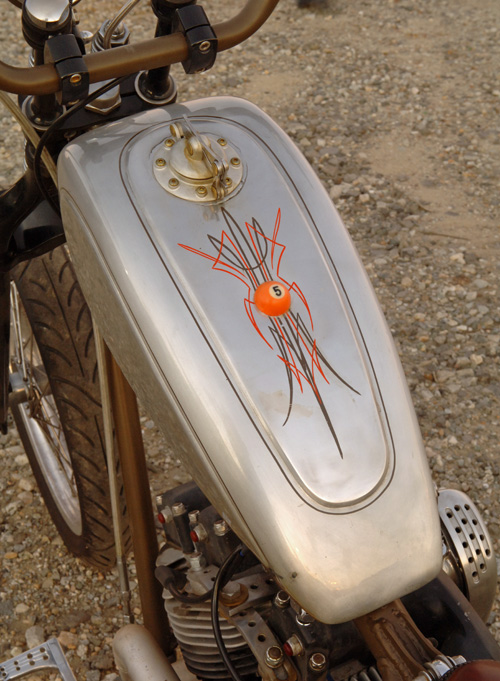
I put more work into that tank than the Martin Brothers pour into a set of one-off artistic sheet metal. First I added additional rubber mounted bungs to the base of the tank for added support, since I didn’t on the last Sturgis rigid. It broke twice. Because the tank would reside on a severe angle we moved the petcock to the rear, also for more fuel capacity. We drilled the tunnel and welded in a plate to allow the entire center section to augment petrol storage. Then I installed a Crime Scene speedster cap for an old school hot rod appearance.

Kent from lucky Devil Metal Works in Houston supported the aluminum theme by hand fabricating an aluminum fender to match the tank, front and rear. We scrapped the front job.
Back to the code. Remember the taillights, so a semi will at least recognize that it’s a motorcycle under his rip-roaring wheels. This is a tough one for me. I like the minimalist approach, but endeavor for some level of survival. The crew at Eye Candy Custom Cycles (.com) developed this hot looking, side-mount ’59 Cadillac taillight. I thought it was the cat’s paw and that I could mount it to glow through to both sides. I installed it to the BDL inner primary, so close and tight to the frame that no one could see it. I broke the code.
I also grappled with some elements of the wiring, but it worked out fine—that’s another story. I’ve been tinkering with bikes for 30 years, yet learned a tremendous amount with this build.
The bike continued to roll together like a dream with the Kraft Tech oil bag, hard copper oil lines, the Lucky Devil sprung seat and 5-speed Rev Tech Transmission. The wheels were Custom Chrome aluminum rims, stainless spokes and chromed steel hubs. This was the first time I ever used Brembo brakes, no problem and I’ve worked with Joker Machine controls for the last five years.
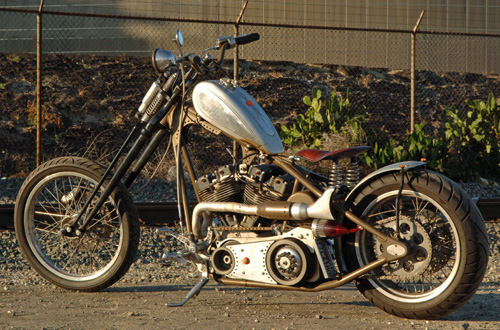
Let’s focus on mistakes I made, so you won’t make them in the future. The hard lines were cool, but I could have installed rubber hose and been finished in a half hour. Plus, since the Kraft Tech, round oil bag, was rubber mounted and the hard lines solid, the street vibration fucked with them and they cracked. I needed vibration resistant furrels. Let’s stick with the oil bag. It’s cool, solid and bolted right up, but battery choice is critical. There was very little space between the battery terminals and the frame. Ultimately, a Bikernet babe was called to the front, to stitch a rubber protective cushion to prevent shorts. That’s too close for everyday comfort.
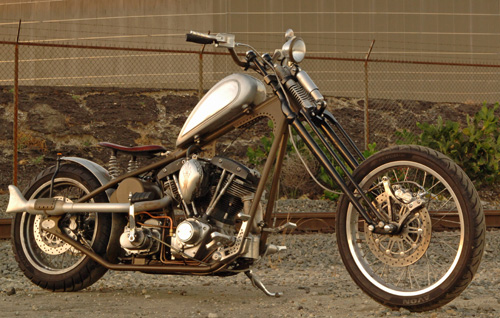
I broke in the bike using the Eddie Trotta formula for success, but missed one element, high-speed interstate travel. If I had put a few miles on the bike at 80 mph, which is against the break-in code, of 55 or less, I would have noticed the severe gearing. That’s where I went wrong. I started with a JIMS 6-speed and stock gearing. Then I discovered that the new Starter system from Compufire, that runs off the engine, wouldn’t be available for Sturgis, so I had to punt. I mounted the Dyna coils under the oil tank, which prevented a standard Compu-fire starter from being installed quick. A kicker was the answer. It fit with my hand made exhaust system using modified Samson mufflers, but I was forced to shift back to a Rev Tech 5-Speed transmission, because I needed the kicker. I should have considered a gear change at that point, but didn’t.

So what happened on the 1500-mile trek to the Badlands? The bike ran like a raped ape, strong and true. The handling was superb, everything remained in place except for the bullshit running lights I attempted to use for more visibility. They vibrated, spun, popped the bulbs and tore at the wires running through the fender rails. The ragged glitch in the road was the gearing. I ultimately replaced the running lights with these no-count reflectors and a H-D teardrop turnsignal under the right muffler.

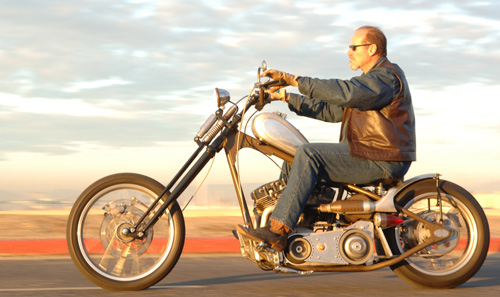
The bike clocked 300 miles before I left town. Another 200 miles down the road toward Arizona, it had the mileage numbers to afford me enough break-in miles to drop the hammer and let her fly. At 90 mph I peeled past big rigs on Interstate10 heading out of the vast Los Angeles plague of concrete and stucco homes reaching dangerously close to the Arizona border. Crossing the state line, into the helmet-free state, I felt relieved to experience 100 degrees in the open desert flying toward Phoenix, another blight of concrete and southwestern architecture. I sensed the buzz in the frame and handlebar grips through Custom Cycle Engineering rubber mounted risers. The Shovel was over-revving and I needed that 6th gear release from extensive vibration, but I kept pushing for the love of speed, a light 520-pound, 93-inch chopper can deliver. She sliced the open road like a high-speed rotary knife through French bread.


I was beginning to buzz my feet off the Joker Machine pegs and adjusted them at the next stop. Rubber inserts on rigid pegs are mandatory, but I flaunted that rule with impunity. Just 60 miles out of Phoenix with the temps cresting 104 degrees and our group, of a half dozen, barreling along at over 90, the Sturgis Shovel quit, pure dead in the fast lane. I reached for the plug wires, then the ignition key that hovered less than a ½-inch from the whirling BDL belt drive. Better not go there, I thought as I signaled to lean right into the slow lane then onto the rough texture of the emergency lane where my baby came to a stop. That’s when I noticed the terrible, over-flowing gas leak at the back of the tank, all over the rear head.
As if the devil knew, one more mile and I would burst into flames in the middle of the searing desert. He flipped my ignition off. I never found an electrical problem or mechanical woe. She turned herself off because the vibration had taken its toll on the aluminum tank.

The next morning I was back on the road after Nick and Charlie at Custom Performance, (Turbo builders for Harleys, in Phoenix), had my tank rewelded and Nick recommended larger, softer rubber mounts. We were back on the road, where I took care of the beast for the rest of the run to Sturgis (kept my speed down), or until I could change the gearing. As it turned out, as I pulled into Deadwood, gas dripped onto that rear plug again. Bad news. There are codes and builders who know which ones can be broken—none. You can check the entire Sturgis Shovel Project build in our Bikernet Tech Department. The tank was repaired in Rapid City, but just two weeks ago I was forced to have it welded for the third time in Los Angeles. When will I learn?
Ride Forever,
–Bandit
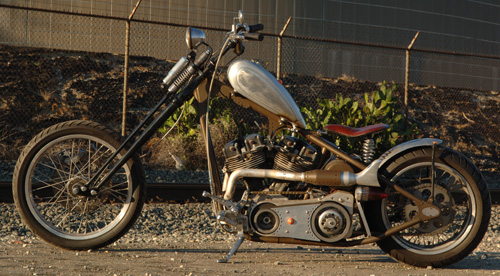
Owner: K. Randall “Bandit” Ball
Home: Wilmington, California
Builder: Bikernet.com
Year/model: 1956 Sturgis Shovel
Time to Build: 9 months
Color: Shit brown
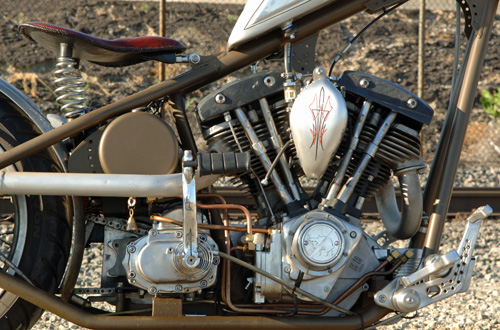
Engine/Transmission
Year/Model: 2005 S&S
Builder: Richard Kransler, Phil’s Speed Shop, and S&S
Displacement: 93 inches
Cases: House of Horsepower
Flywheels: S&S side-winder
Balancing: S&S, 1300 Bob weight
Connecting rods: S&S
Cylinders: S&S with longer skirts
Pistons: S&S forged, 8.2:1 compression
Heads: 1966 Shovelhead by Phil’s Speed
Cam: S&S
Valves: Black Diamond
Rockers: S&S rollers
Lifters: Custom Chrome
Pushrods: Custom Chrome
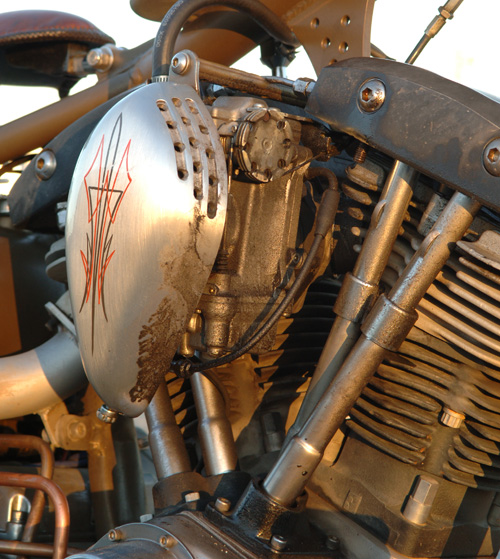
Carb: 42 mm Mikuni
Air Cleaner: Fantasy in Iron
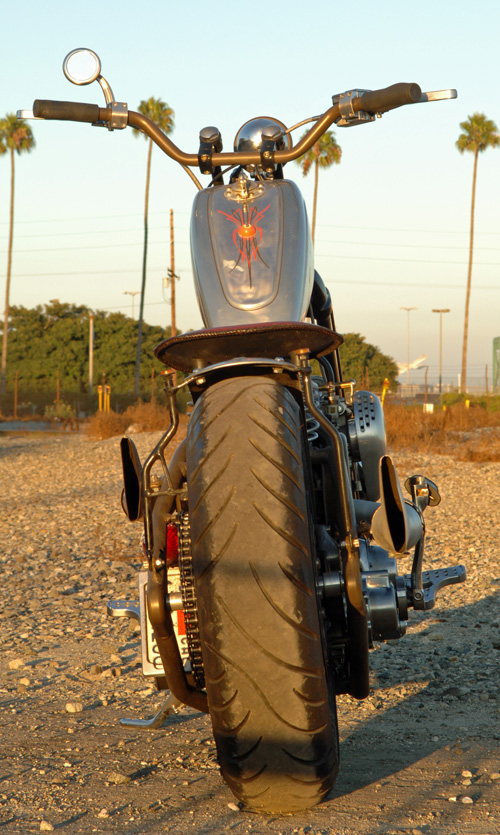
Exhaust: Bandit and Samson
Ignition: Compu-fire, single fire
Charging: Compu-fire
Oil Pump: S&S
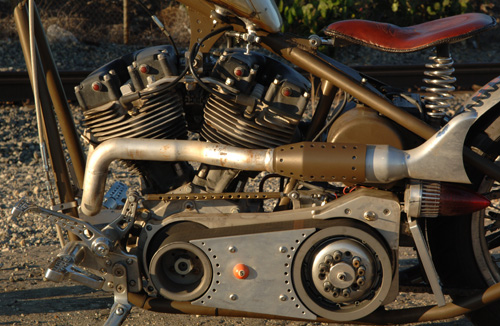
Transmission
Year/model: 2005 Rev Tech, 5-speed with kicker
Case: Rev Tech
Gears: Rev Tech
Clutch: BDL
Primary Drive: BDL open belt
Kick Starter: Rev Tech
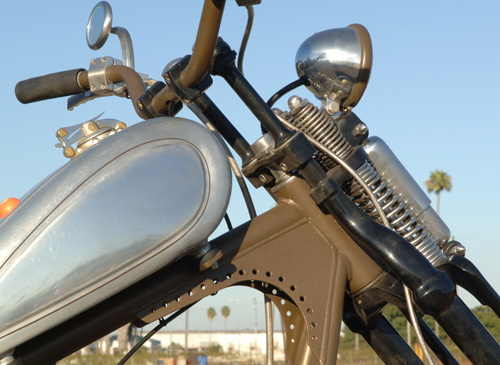
Chassis
Frame: Paughco Chopper
Rake: 35 degrees
Stretch: 3-out, 4-up
Front Forks: Paughco tapered-leg springer
Swingarm: none
Rear shocks: nope
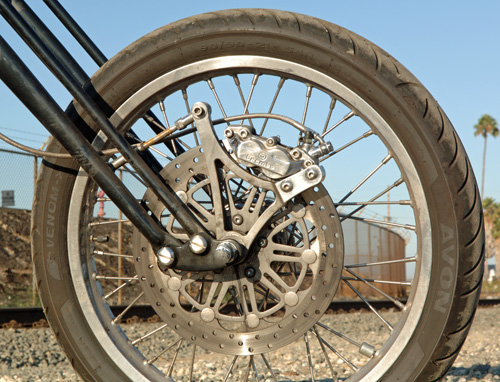
Front Wheel: 21-inch Custom Chrome
Rear Wheel: 18-inch Custom Chrome
Front Brake: Brembo Caliper and Springer Bracket
Rear Brake: Brembo Caliper and Softail Bracket
Front Tire: 21 Avon
Rear Tire: 18/180 Avon Venom
Rear Fender: Kent Weeks
Fender struts: Bandit
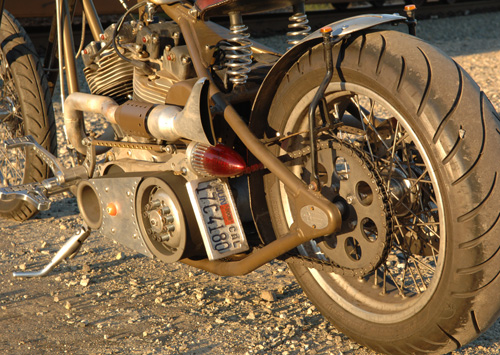
Headlight: Custom Chrome
Taillight: Eye Candy Custom Cycles
Fuel Tank: Aluminum 750 XR
Oil Tank: Kraft Tech
Handlebars: Custom Chrome narrowed
Risers: Custom Cycle Engineering dog bones
Seat: Lucky Devil Metal Works
License Bracket: Eye Candy Custom Cycles
Handlebar controls: Joker Machine
Foot Controls: Joker Machine
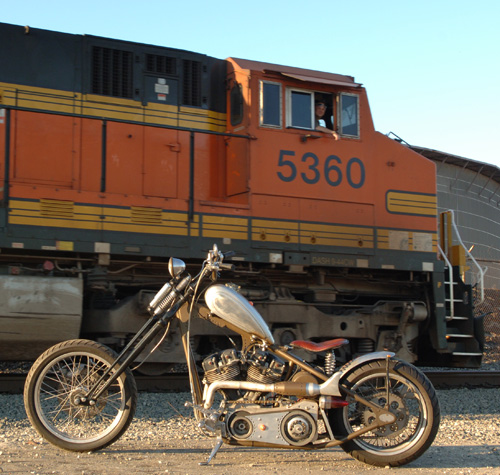


5-Ball Factory Racer, Part 5
By Robin Technologies |


Last episode I was hit hard with life's bullshit obstacles to freedom and creative expression, but that's how it goes. I generally build at least one bike a year and each one represents a milestone of sorts. Or each one represents another year in the life and times of Bandit. I'm not unique. This notion applies to everyone and every project from building a new home, to building a boat or finishing a book. We're so damn lucky to have the freedom and resources to accomplish our goals, small and large. As you sit back and relish any accomplishment, you know it represents a moment in time–hopefully a good time.
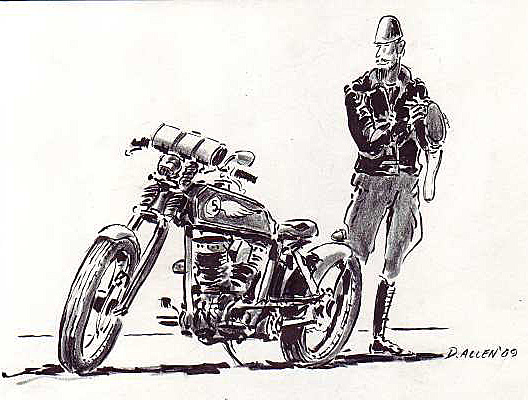
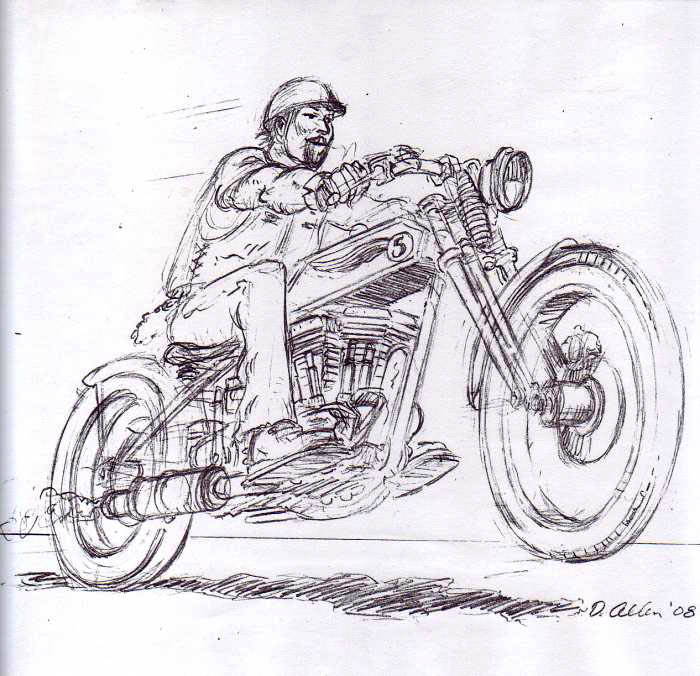
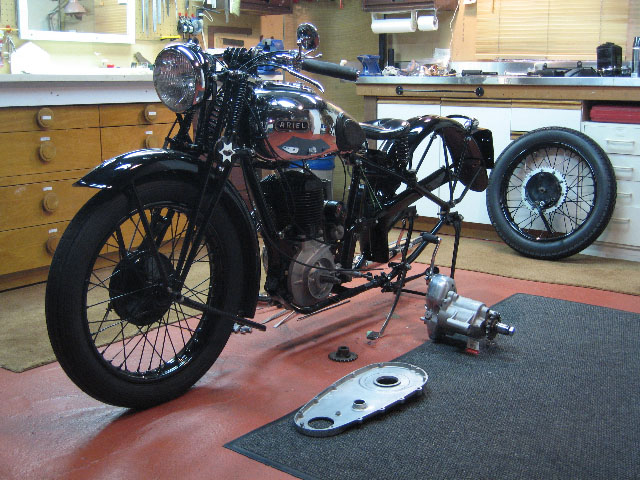
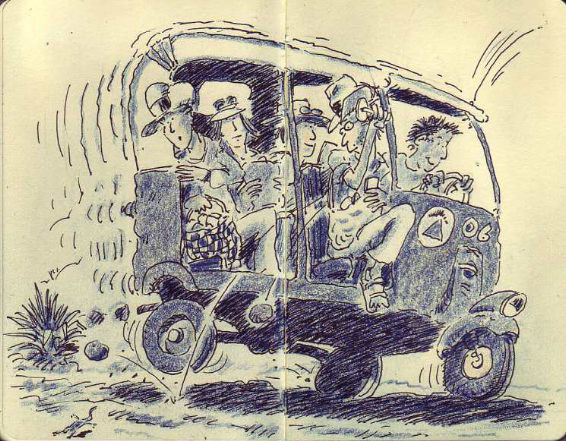
That's very kind of you to offer to runmy bio but honestly it makes me wantto take a nap just thinking about it.How about a pic instead of my stumppulling flathead single '40 Ariel? Wewere born in the same year and havebeen working together for about fifteenyears to keep my bank account drained.As the bike approaches completion itappears to be getting younger and youngerwhile I am definitely getting older and older!
So, recently we tore the March page out of the Calendar and flew into April. A running Racer by the end of April–for the Smoke Out in May, is the goal. The pipes were a major obstacle, yet Jesse James, Illusion Cycles, and Roland Sands inspired me.
I spotted a tight shotgun system on one of Rusty Coones' Dyna Glide custom built in his Illusions shop. That's the direction I wanted to go for the racer look, not along the bottom of the frame in stock 1915 fashion. The muffler on Rusty's bike was a short/short Supertrapp developed with an exhaust guiding cone built by the Illusion team. The two-into-one pipe was designed at WCC, but I decided to give my own spin to the action for the Crazy Horse 100-inch engine.
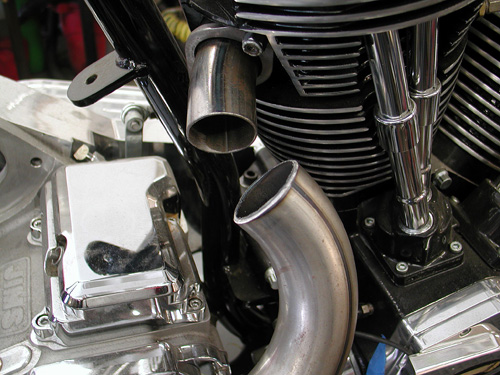
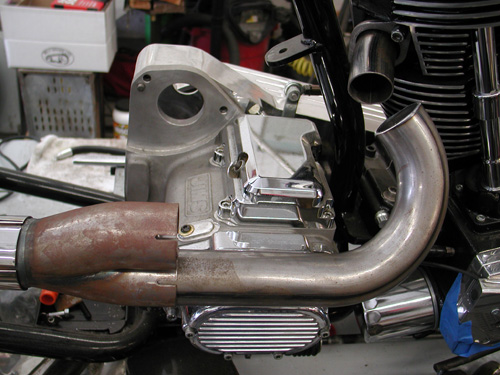
I also recently featured a bike built by Roland Sands with his own shotgun Vance and Hines system. Check it out. It also has a very short muffler system, but I had an all-stainless Scorpion sport bike muffler from the mad designer John reed.
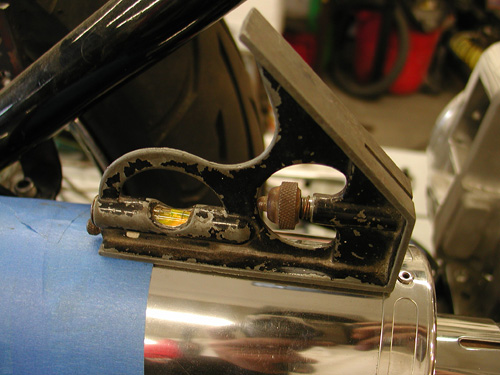
With Roland's design inspiration, I went to work. I had to make the system run tight to the bike, so ultimately I could install a Baker Drive kicker system to the JIMS 5-speed transmission. It had to run high enough not to mess with the rear axle and not too high for leg burning threats. I had one break; the Crazy Horse engine was designed with the intake manifold running out the left side of the engine. That allowed me to manufacture pipes as high as I wanted–watch the legs, damnit.
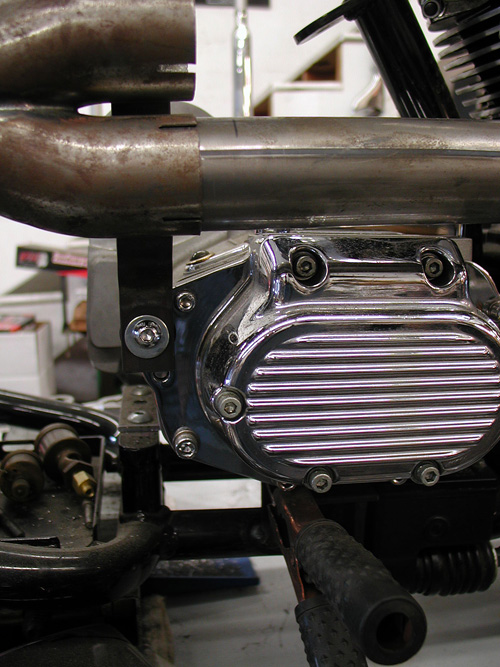
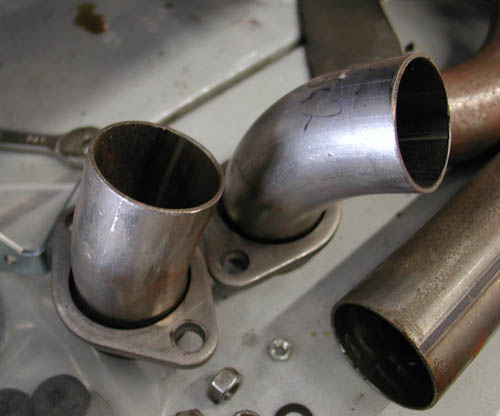
Making pipes is a tricky business. This system is teamed with lots of exhaust manufacturers, so I initiated a phone conference with D&D, and they supplied me with various ends and bends to give me a head start. Vance and Hines and WCC were involved with the design and inspirational aspects, and the Boys from Bassani stopped over for lunch and brought a hand full of bends and a chunk of muffler tubing for my speedometer mounts, a very diverse team. Plus nowadays, when you mess with pipes, the diameter fluctuates from below stock diameters to over 2-inch Bonneville racing exhaust performance demands. I took a day dealing with various sizes and ultimately decided on a 1 ¾-inch system to the two-inch muffler opening.
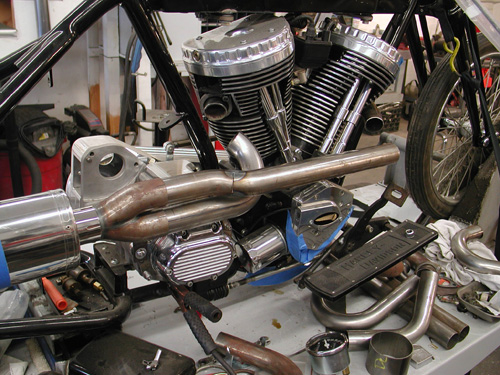
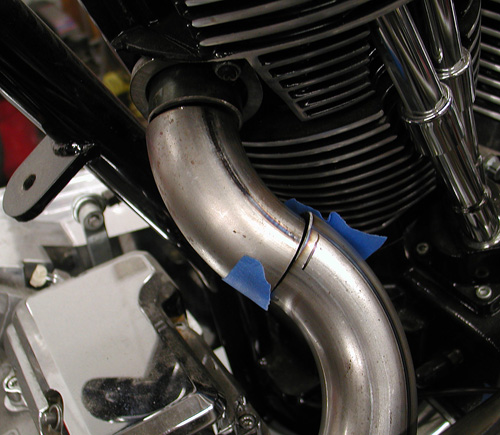
Then I had one of those calm and serene days in the shop–everything fit. It's a Zen thing, when the stars are aligned, and I drank just the correct carefully measured amount of Jack Daniels the night before. For some strange, inexplicable reason, I was tranquil with the dogs wrestling at my feet. The R&B Sirius station shop background music didn't spin any Michael Jackson tunes, and only the 4-tops and Jerry Butler lured me into a false sense of mechanical confidence. I patiently cut, ground chunks of pipes and brackets, then tacked them into place.
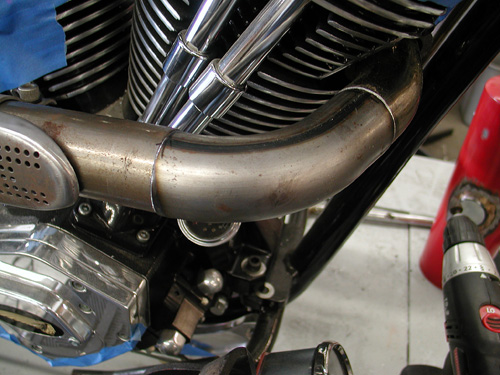
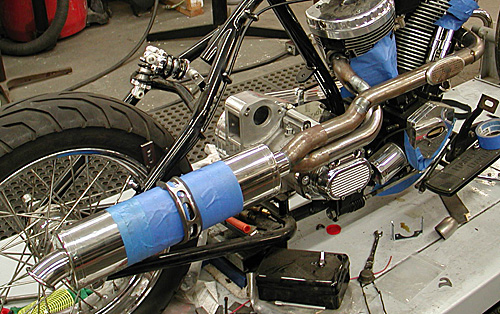
I've been making exhaust systems for about six or eight years, and each year I learn. For instance, I was through the roof to find Hooker Header alignment sleeves, only to discover they hinder performance. That meant I had to move more slowly, meticulously and make sure each segment fit perfectly. I also learned that exhaust wrap can also hinder ultimate performance, by being a heat transmitting barrier. Plus I'm still working on my MIG, pipe-segment welding skills. This year I'm going to clamp a bunch of pipe chunks together and weld them at different feed speeds and electrical settings. I'm determined to nail it down.
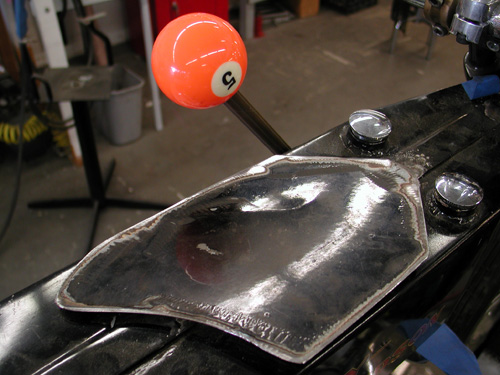
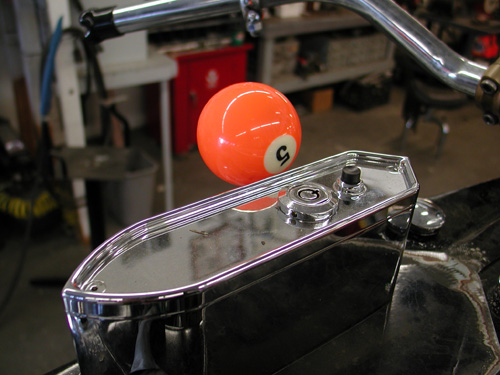


Next, I moved onto a dash plate, cut with a plasma cutter out of a chunk of 16 or 14 gauge sheet metal. My crazy thought was to install the Phil's Speed Shop ignition system onto this plate with the Bikers' Choice Speedometer. In 1915, Speedometers and the constant loss oil pumps were mounted to the top of the tanks, right out in the open, so I decided to follow suit.
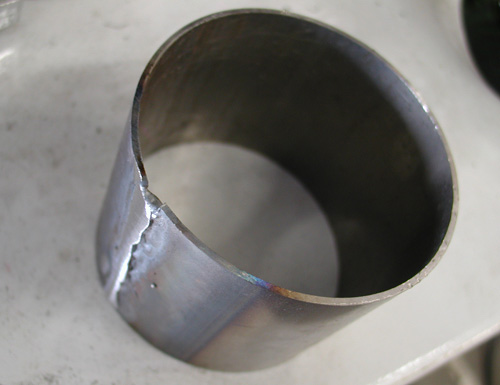
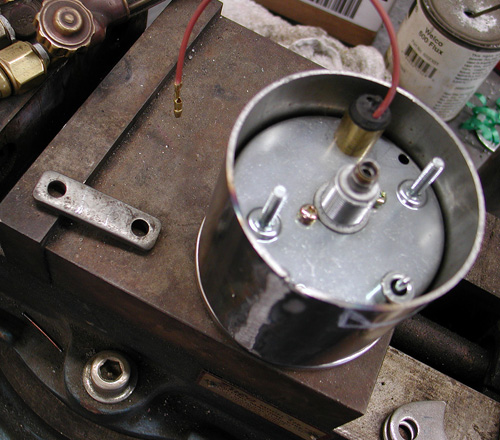
Bassini supplied the tubing for the Speedo, but I needed to be reduced the diameter a 1/2 -inch. I cut it with the Makita and pinched it down until the speedo fit in, and I could still wrap it with something to prevent vibration from beating it to death on the roads to the Badlands.
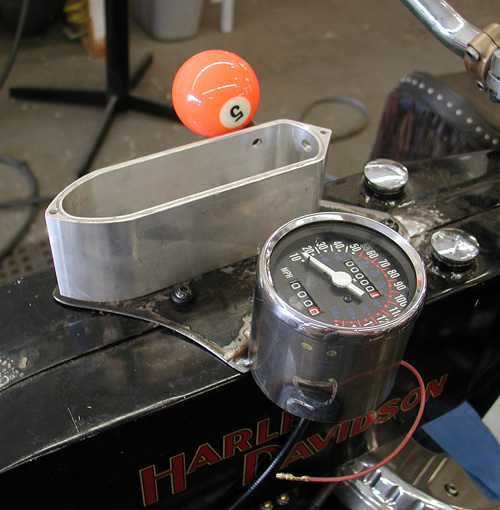

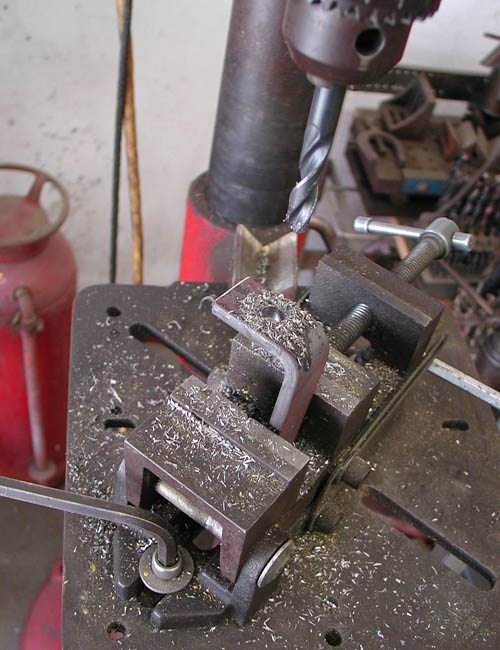
Phil's Speed Shop supplied me with a template so I could mark the holes and weld in studs to hold the ignition system down. It housed, circuit breakers, ignition switch, starter button, starter relay, neutral light and high/low beam switch.
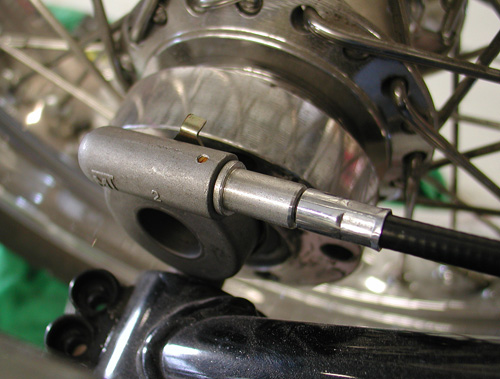
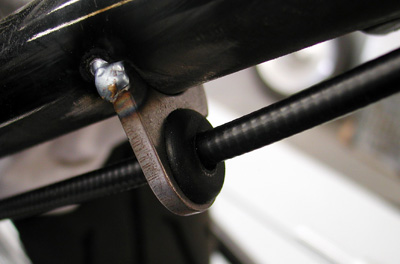
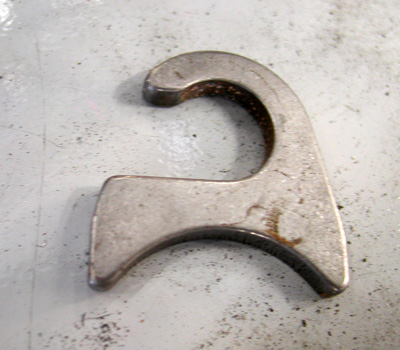
I ran the Biker's Choice speedo cable and drive off the rear wheel in 1915 fashion, but with late model components. I used LA Chop Rods cable guides and grommets tacked to the frame. I played with the plate and position for hours and hopefully got it right. I also cut a notch in the Bassani Speedo mount so I can hopefully reach the trip gauge adjuster. It's going to knat's ass close. In each perplexing case, I shot for functioning symmetrical positions, that don't interfere with other components, like turning the bars.
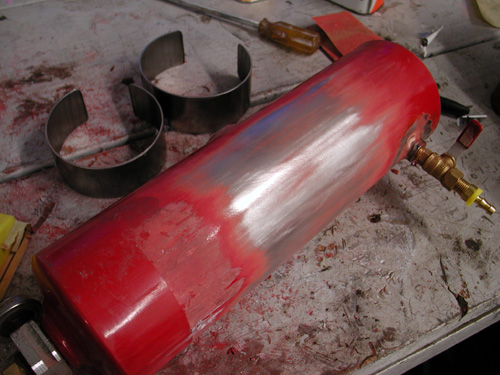
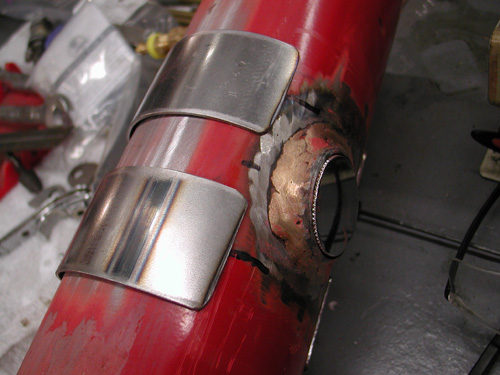
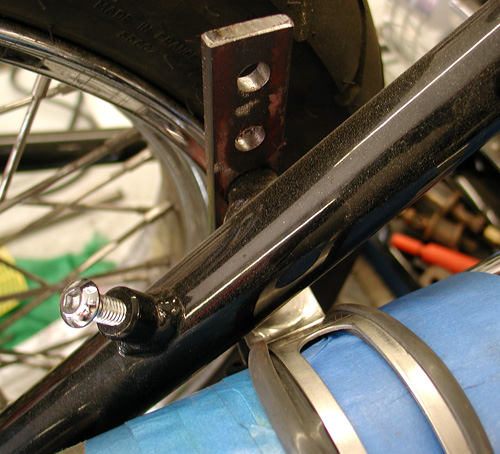
Next, I had the spare gas tank ready to rock, but needed to mount it above the bars. Talk about angst, I looked around for something to use for mounting, like other fire extinguisher clamps, then it dawned on me to use the an old set of handlebar risers, upside down. I found an old set of Jammer risers and bolted them to the bars between the DBBP bronze risers, so far so good. Then I cut them, estimating the height needed to clear the bars, but I was wrong. What happened with harbinger to my Zen aura?
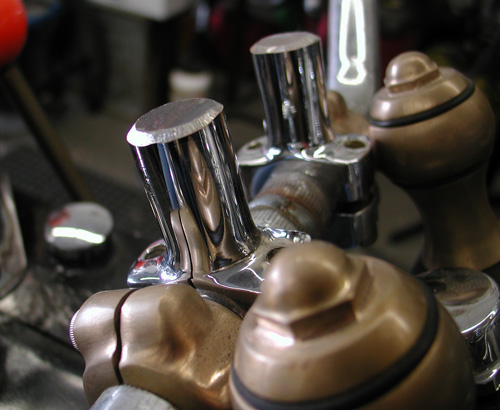
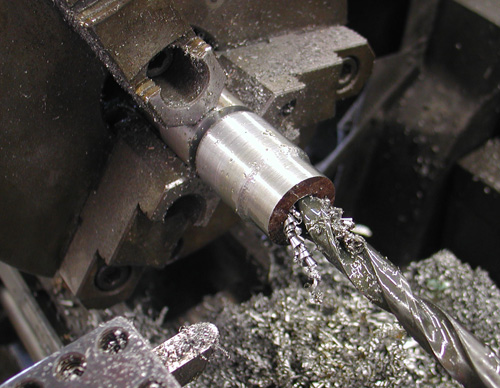
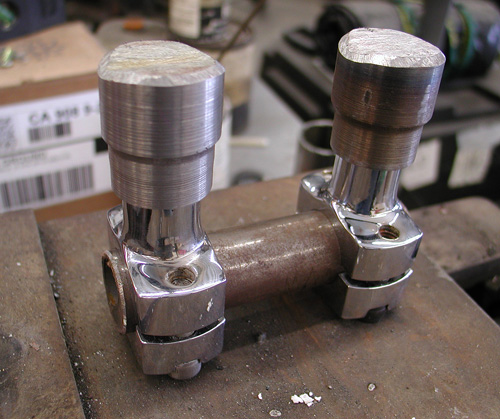
I don't know about other crazed builders, but often a glitch turns into an opportunity. I turned to my lathe to cut a couple of extensions. They widened the base for greater strength. I reached out to NICK Trumbo at Bassini exhaust for a couple of straps. My notion was to weld the brackets to the straps, so if something went wrong, it wouldn't crack the tank and create a dangerous gas leak. I've had my problems with gas leaks in the past.
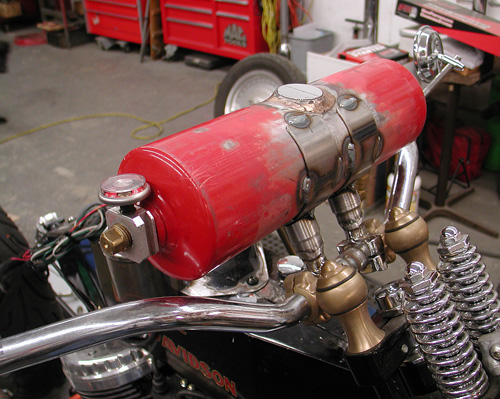
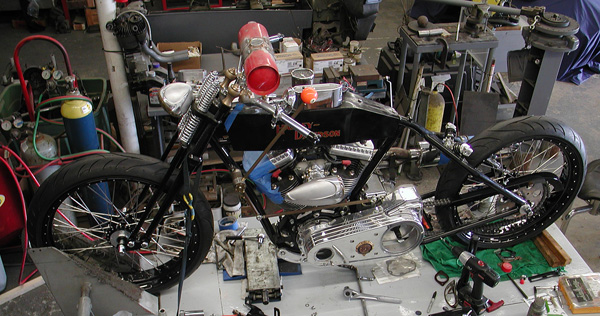
There you have it. Next, we'll mount the fantastic Black Bike Wheels (Avon Tyres), with GMA brakes from BDL, slice the Tanks for fork stops and Chica is going to build a Factory Racer ribbed fender. Rock and roll.

5-Ball Factory Racer, Part 4
By Robin Technologies |


We experienced an incredible month of hiccups and grievances. My computer crashed immediately after I spent a long weekend in Primm, Nevada, locked in a hotel room, rewriting my first Chance book. I lost it all. Then I'm attacked with the vertigo venom and laid out like a sick puppy, terrified that my life as a motorcyclist was over. Then the nasty tenants who rented our 1-bedroom apartment disappeared during the worst economic downturn in our history, we lost that income and needed to pour a minimum of eight grand into that puppy to make it rentable once more. Good god, plus we were burnin' daylight and needed to shovel a new paying tenant into place.
There's my excuse for not working on the 5-Ball Factory Racer more. I hate doom and gloom. Hell, there's no time for that shit. “No time to lose” is one of my codes. I'll rewrite the book over the next couple of weeks, and it will be even better. The apartment will be completed this weekend with finished hardwood floors, completely new kitchen, bathroom, all new paint, a new laundry room and more. New tenants are moving in tomorrow. And Vertigo is like a mystery movie. I was down three days then back at the computer and firing away, just don't ask me to walk a straight line. Plus, the mystery, as to the source or cause is still in full swing. I'll let you know what I find out. I gotta quit snorting paint fumes.
In the meantime, there's 5-Ball Factory Racer progress to report. Since the plan was to build a comfortable vintage looking speedster and ride it to Sturgis, we need enough fuel capacity to fly me across the desert and not leave me in the sand, baking with lonely tarantulas.
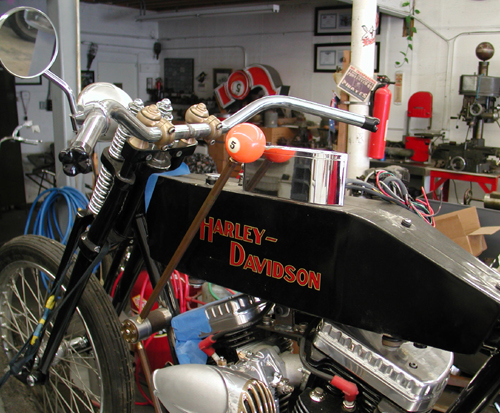
These flat-sided tanks designed by Rick Krost and built by Paughco are in keeping with a 1915 Harley-Davidson board track racer. We measured the capacity of the long narrow tanks, during installation. They come in at exactly 2 gallons–not bad. On the other-hand not comfortable touring levels. Then it dawned on me in my dizzy state. Mike Pullin, the man who created the Run for Breath, as a tribute to his son Justin and Asthma Charities, builds a cool custom/vintage oil tank using antique fire extinguisher bodies. I gave him a call
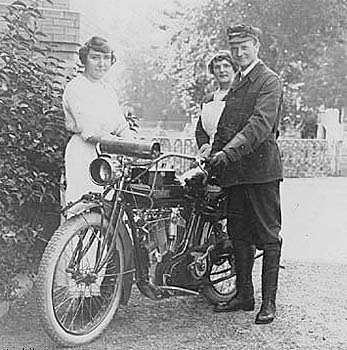
The notion was to build and mount a back-up or reserve tank on the handlebars in keeping with the Prestone acetylene headlight tanks from used from 1910 until the '20s. Harleys didn't discover the use of electric lights until 1916. Before, they had carbide chips, systems like coal miners had on their helmets. Carbide chips became carbide generators and were followed in 1910 or '11 by pressurized acetylene tanks, similar to welding. A small hose fed two nozzles inside the headlight case. The rider had to open the face of the headlight, turn the nozzles on, until he heard the hiss of gas or smelled it, and then physically light the flame to create the light reflecting off the mirror in the back for forward illumination. I asked antique bike expert, Don Whalen of Sierra Madre Motorcycle Company, if these systems worked worth a hill of beans. “It was best to plan rides around full moons,” Don said.
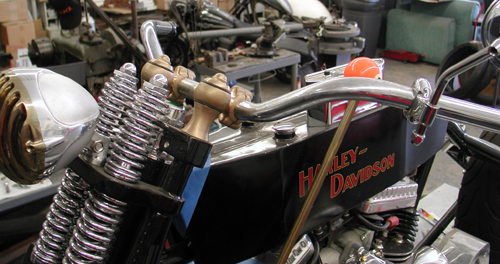
So the notion flourished. I could back up my narrow tank fuel capacity by adding a fire extinguisher full of fuel on the handlebars, and Mike was the master. He makes these generally for chopper riders looking for a cool oil bag. If you happen to have a vintage fire bottle hanging around, send it to Mike. He'll build a vertical or horizontal oil tank out of it, or you can buy bungs from the Bung King, Todd's Cycle, or The Parts Dude and make the bastard your-self. Here's where Mike, the Stealth Man takes over:
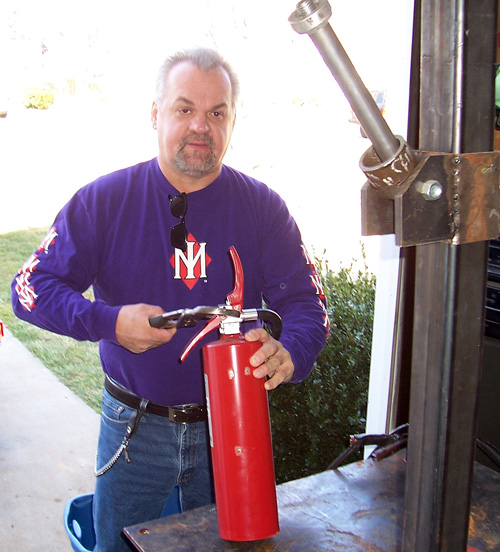
The first step in fabricating the tank was ordering the parts. I ordered all the parts from “The Parts Dude.” The extinguisher itself came from a local hardware store.

Then Chopper John and I had some fun and emptied the contents of the tank and then cleaned the inside with water.
The next step included removing the handle.
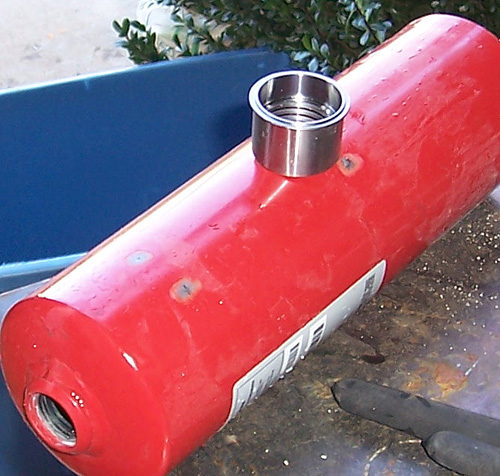
Then we measured for the center of the tank, where the filler cap would be located. Then we decided where we would position the petcock. This is key, depending on the bars.
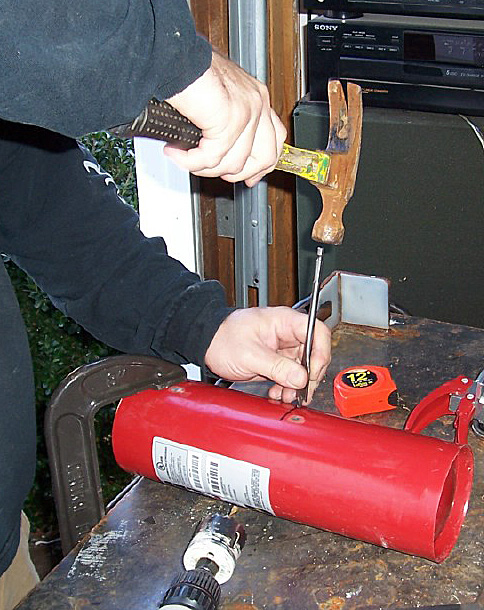


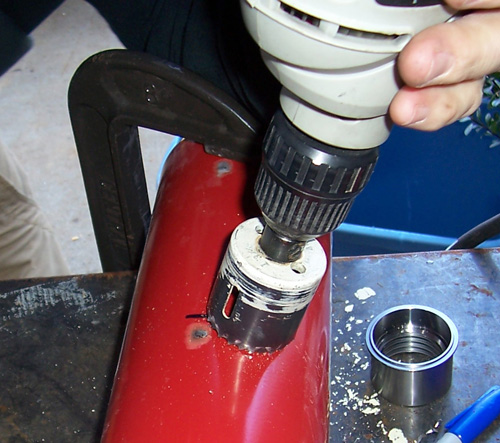
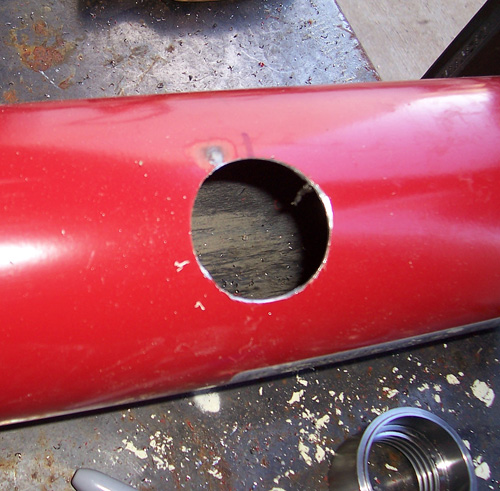
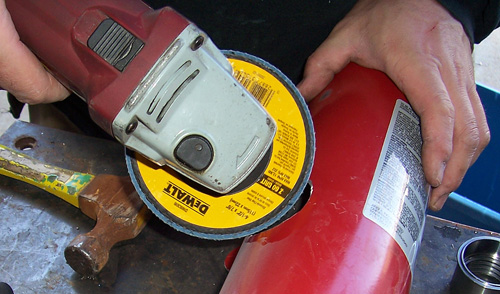
After this was done, we proceeded to drill and cut the holes for the filler cap bung and the petcock bung. I ended up using ¼-inch pipe thread petcock bung.
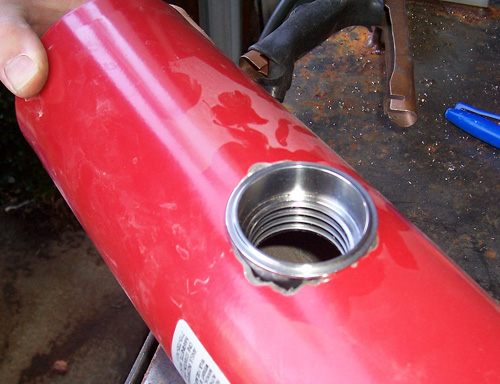
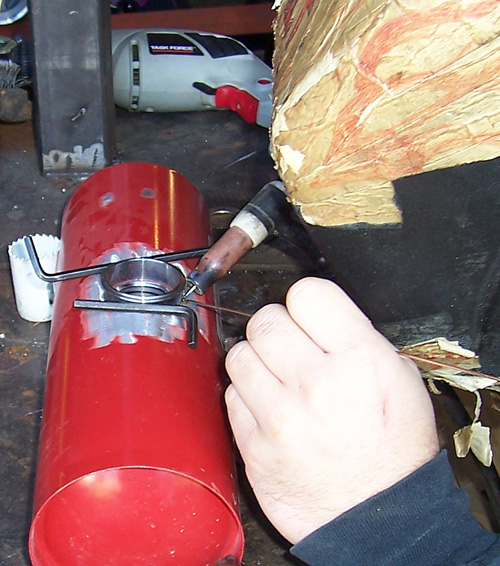
Once this was done, we welded the filler cap bung and the petcock bung in place.
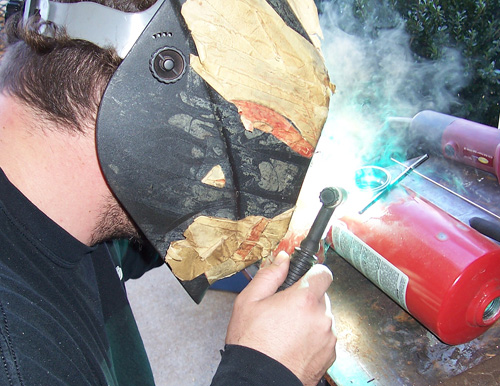
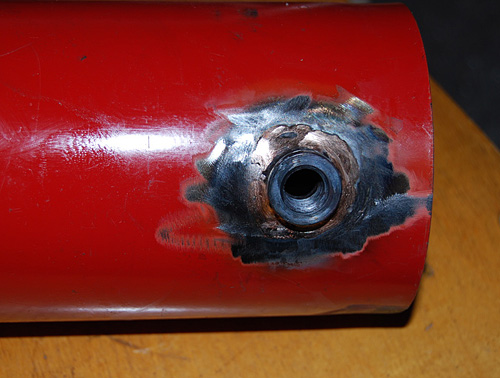
We ground all the welds and checked for leaks.
Chopper John and myself had a great time making the tank. It was the first time we had teamed up on a project since Stealth Bike Works closed. I don't know if I was the first to use fire extinguishers for tanks of any sort, but I know I was the first around the South Carolina area!
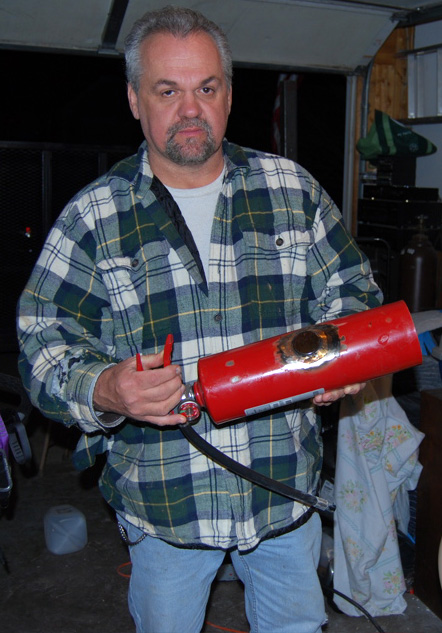
The tank is finished. Came out cool! All you have to do is seal where the handle threads are, with Teflon tape or Teflon paste. You may want to have the tank sealed or use that Kreem stuff. I really don't like the Kreem stuff. I used to go to a radiator shop to have it sealed but they closed. I am sure you have people who can do that.
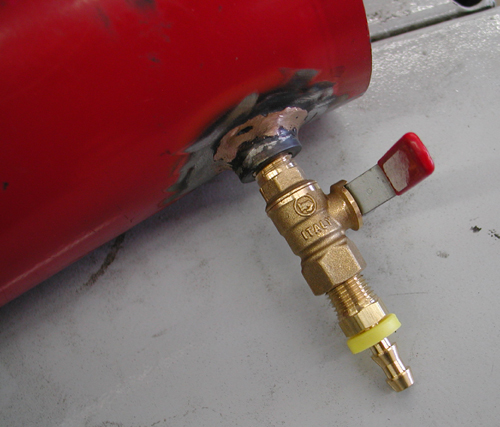
There you have it. We already found a petcock and I'm working on handle/valve end. As it turned out, the vintage jobs from the '20 had pressure gauges, so the rider knew how much acetylene was left for the night ride home. Since this fire extinguisher came equipped with a pressure gauge, we are going to attempt to keep it. Then I need to create a steel cradle and weld it to the bars.
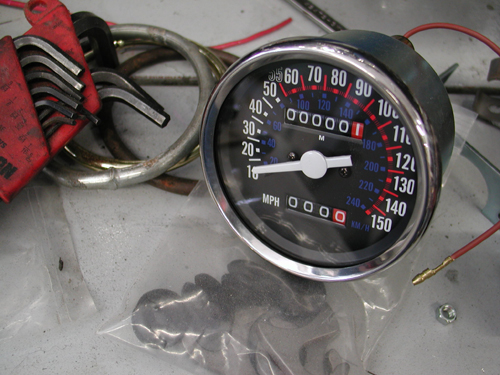
Next, you'll see us mount the vintage Sportster Speedo and I'm going to pick up the Black Bike Wheels next week and run a manual cable drive off the rear wheel with LA Chop Rod bungs.
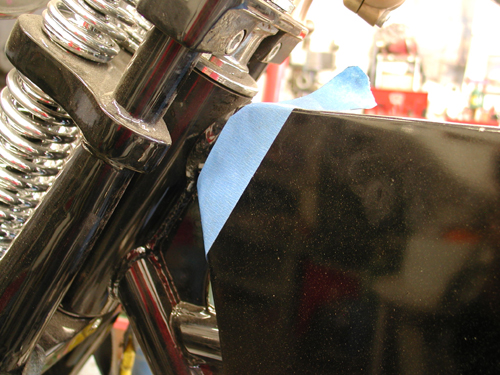
Just when we were confident that the fuel capacity neared 3 gallons, we discovered a handling glitch. The fork stops were under the front of the gas tank. We couldn't live with it. The new narrow tapered leg Paughco springer would smack the tank and hinder turning. So next, we'll slice the front of the tank, decrease fuel capacity a tad, but enhance turning. Check back in a couple of weeks for more major renovations, if I don't stumble and fall off a cliff.

Amazing Shrunken FXR 12: Tools And Linkage
By Robin Technologies |

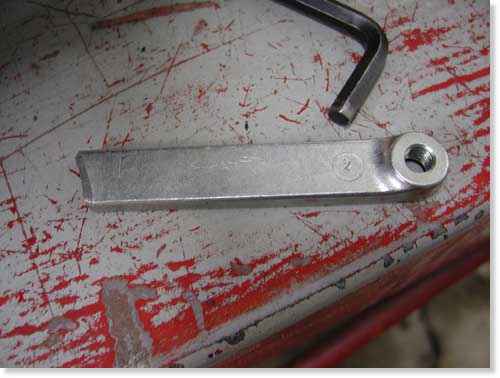
The stock tranny linkage cut to work as our brake linkage.
A week ago I worked on the brake controls with some success. After fabricating a mastercylinder bracket and actually drilling the holes in the proper location, it wouldn’t work. I needed to turn the master cylinder upside down. I called Frank Kaisler to confirm that it was a remote possibility, it was. I cut another chunk of steel plate, drilled the holes again and dug through drawers to find a pushrod. Nothing.
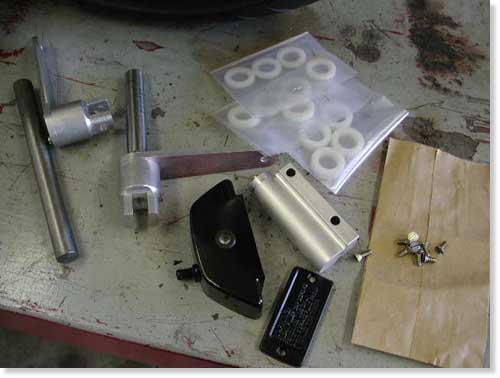
Parts and pieces we used to cobble together brake linkage.
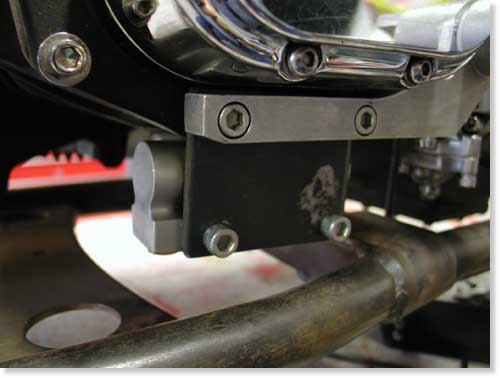
The master cylinder in place upside down under the tranny.
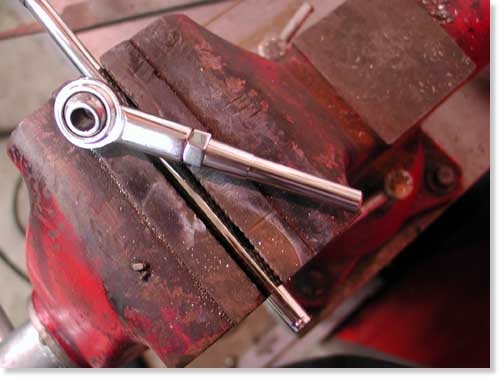
The stock stainless shift rod cut for a master cylinder pushrod.
I used a stainless steel shift rod unit for lots of adjustment, but had to grind/taper the end to fit. I also used the transmission shift lever for the connection. I cut Giggie’s brake axle to length and sliced the tranny shift linkage. Then I welded the linkage to the axle. That was a mistake. I should have machined the pieces to fit together, but it will work. The other end of the linkage was the perfect mate for the shift rod I cut and fashioned for the handmade master cylinder push rod. I lucked out. I think it’s cool.
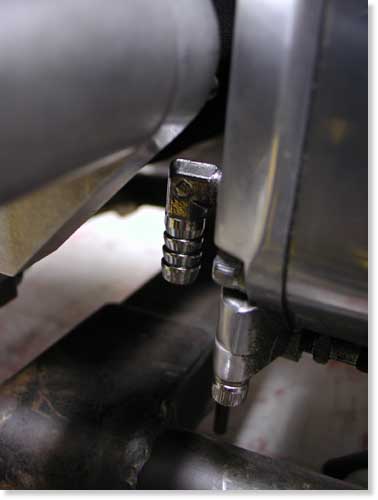
The inlet oil fitting had to be moved to make room for the brake linkage.
Here’s the tranny-gone-brake linkage welded to the brake axle.
That was last weeks endeavor. This week I stumbled. It all began with a set of exhaust I fabricated, from bits and pieces of other exhaust, for the Amazing Shrunken FXR. They worked out all right until my humble associate, Nuttboy, was assigned to grind the welds. Ya see, I held one piece of pipe against another and tacked them. The mating surfaces were not aligned perfectly, so when Nuttboy unleashed the Makita grinder to round off the welds he cut right through the pipes forming cavern-like gaps.
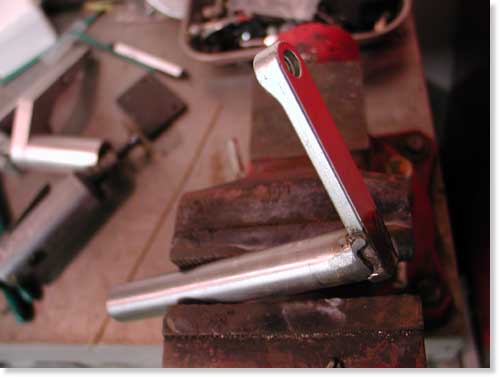
Kustom fab uses pipe inserts to hold pipes aligned securely for welding.
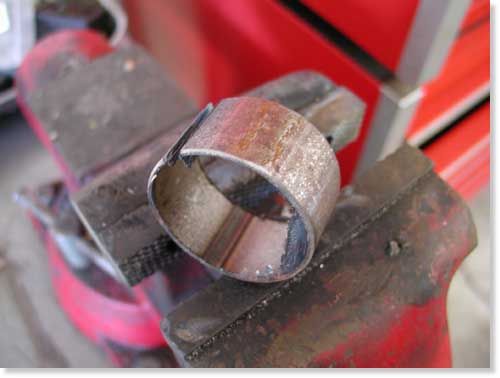
I had to enlarge the slot to make the insert fit.
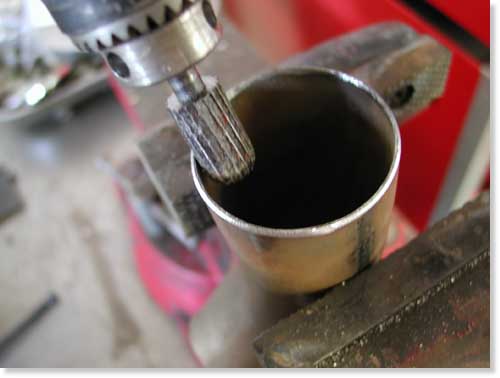
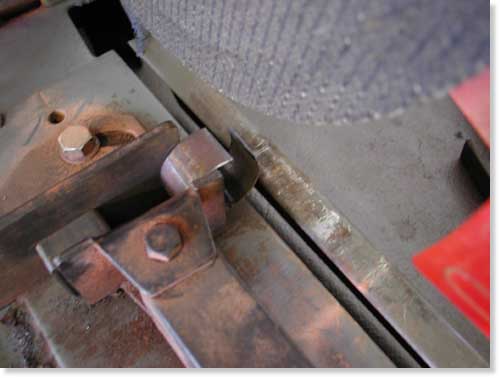
The insert won’t slip into place with burrs in the pipes. I had to grind them clean.
Lots of builders in the industry make their own one-off custom exhaust, so I started asking around about tools. Most don’t have tube benders, so they follow the same strict regime I did. They piece exhaust systems together using bits and chunks of other systems. One company will ship you a kit of various bends to work with. I inquired as to how shops held two chunks of tubing together in order to MIG, TIG or even gas weld pipes. The information highway opened up to me. Roger from Kustom Fab in highway takes a 1-inch section of like pipe, slices it (so the O.D. shrinks) and shoves it in one section of pipe then in the other. Simple system that adds strength but reduces the I.D.

Here’s the insert in place. It works well and adds strength but will restrict exhaust flow.
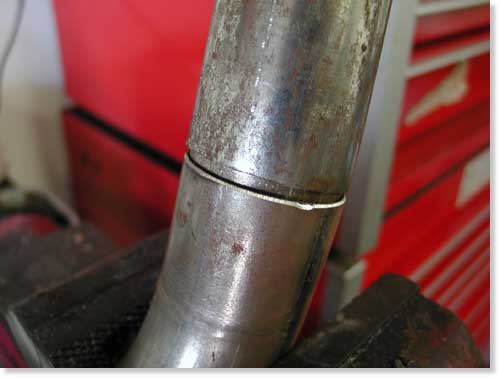
This system also makes welding easy.

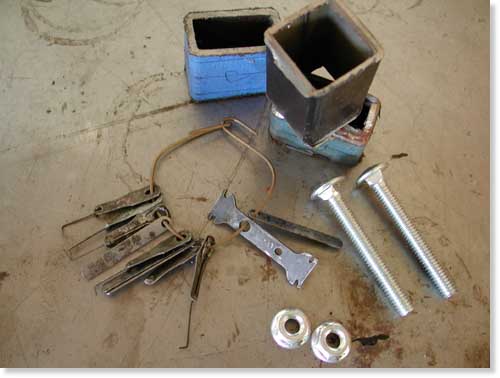
Some of the junk I dug up to kick-off my pipe clamp tool experiment.
Another builder told me of a C-Clamp arrangement using angle iron to lock chunks of pipe in-line. Scott from Chica’s explained a small unique tool that pulls the segments of pipe together using feeler gauge thin material. After tack welding the pipe segment, the clamp is loosened and the feeler gauge material slips out. Irish Rich pointed out that large hose clamps and chunks of angle iron work fine to hold pipes for tacking.
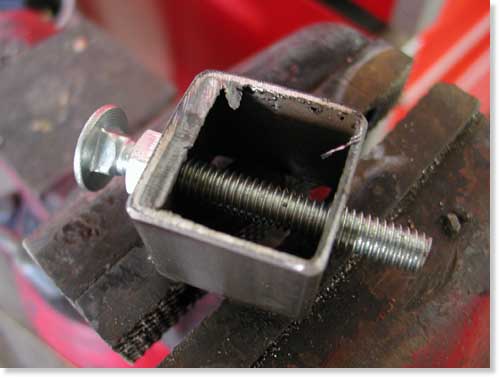
This was my bullshit attempt at building this tool.
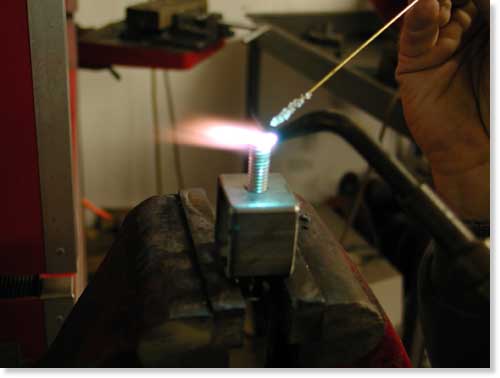
I brazed the feeler gauge to a nail and the nail to the end of the bolt.
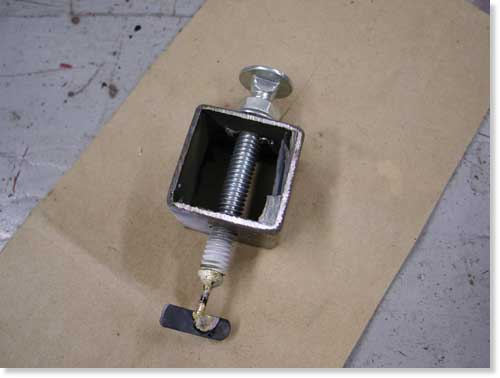
Here’s the completed tool. It looks better than it works.
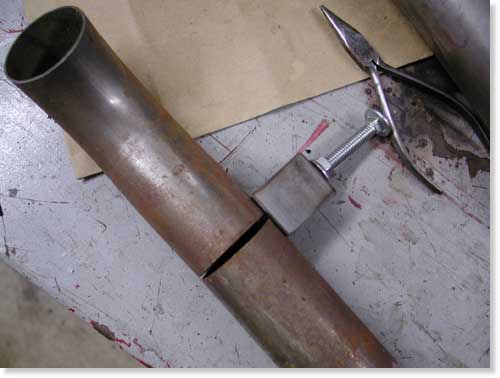
This shows the clamp in place. In order for it to work properly a notch needs to be ground in the pipe for the nail shaft, which is thicker than the feeler gauge.
The guys at Chica’s also told me about a wide stainless hose clamp with slots or holes that can be used to hold two tubes together during the tacking stage.
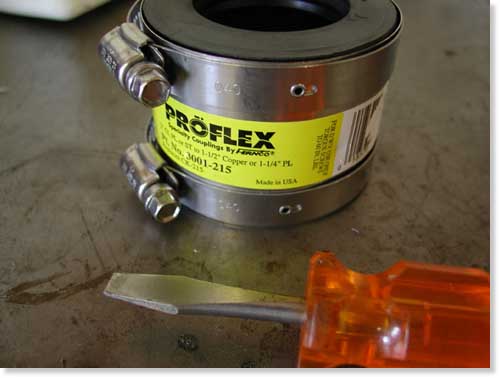
I found this puppy at Home Depot and thought I had hit gold.
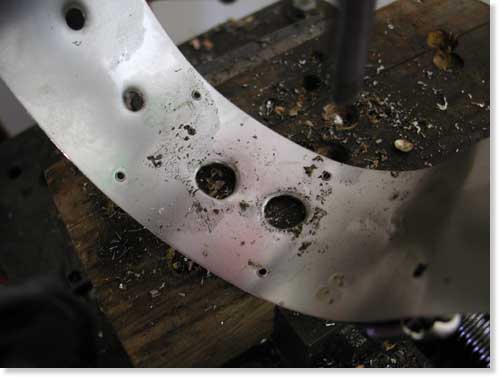
I drilled the stainless strap with a small drill then 1/2-inch for tacking room.
Then Fab Kevin clued me into Holley, the hot rod car part builder, who makes a sleeve that holds two pipes in alignment for tacking. I looked them up on the Internet.
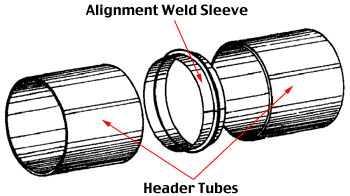
Our “Alignment Weld Sleeve” allows the fabricator to align, hold and weld two pieces of mild steel tube without help. Because no rod is needed, the welder has a free hand. The “Alignment Sleeve” assures a perfectly aligned joint with no weld slag inside to reduce the tube diameter and restrict air flow. Perfect alignment and just the right amount of welding material results in a very professional looking weld. Weld Sleeves are packaged 20 sleeves per bag.
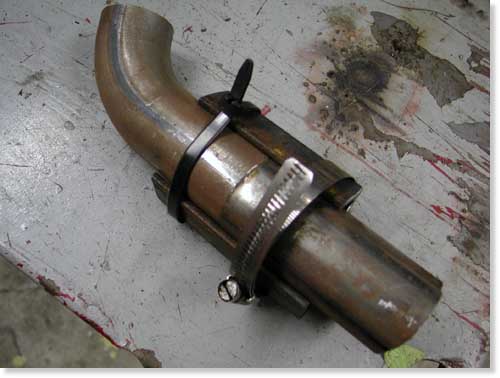
See, I couldn’t find a hose clamp to do the job. I need another hardware store run.
This is where the story runs astray. I followed each veteran’s suggestion and began to fabricated every exhaust pipe alignment device known to man. I cut, brazed, hit Home Depot, bought clamps, hoses, sliced my only .013-inch feeler gauge, dug through drawers and took photos along the way. No shit, I fucked up every tool design suggested.
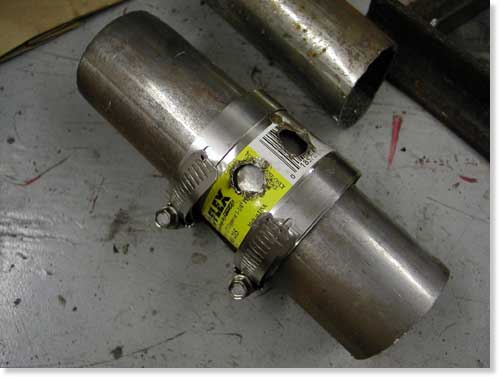
This is how it’s supposed to work. Unfortunately the clamp I bought was too large.
I didn’t have two hose clamps that would pull the angle iron hard against the tubing. The wide stainless clamp notion was golden, but I bought the wrong size at Home Depot. The feeler gauge routine was followed to the finish, but my tool doesn’t work without a notch snipped in the pipe. The C-clamp notion is too involved for my thinking so I decided to buy two clamps and modify them. Of course I didn’t have two spares to screw with. And finally the perfect solution from Holley was unavailable from my local auto parts store. I’m forced to buy their catalog.
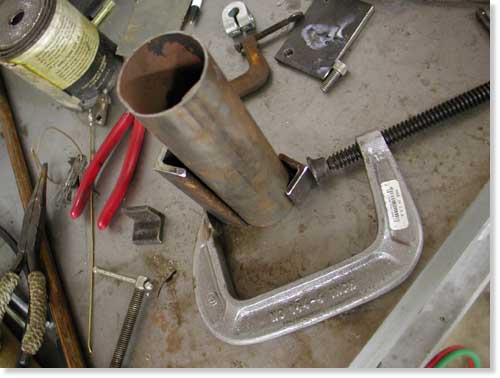
This is the C-clamp notion. I’ll build it after I hit Home Depot again.
If tonight you called and offered me a cool million to build an exhaust system, I still don’t have the tools. I need to hit Home Depot again. I almost fired myself last night, but you get the idea.
–Bandit

Sturgis Shovel Part 13
By Robin Technologies |

Hang on. This is the last of the scintillating segments on building the Sturgis Shovel before I write the treacherous saga of the ride. Somewhere we will publish a feature on the bike in a mag and on the site. Oh, there’s one other tech that will come to pass—hard line assembly. I’m waiting for a CD of images from John Gilbert of Bike Works mag.
So let’s get started. I was burnin’ daylight before the Sturgis run. I saved a ton of cash going with all powder and no additional chrome or polishing. It cost me just $325 to powder all my components for lasting protection.
Throughout this article I will point out my mistakes, so you can avoid them. I did an 80 percent decent job of mocking up the bike prior to powder. That meant that 20 percent had to be dealt with after the finish was applied. Bad news. The only thing I didn’t think through or make brackets for was the ignition switch and circuit breaker brackets. That may seem minor, but wasn’t as you will discover. On the other hand it wasn’t a big deal. You be the judge. Actually, if we wired, fired and rode the bike before final teardown, it would answer all the questions. But few builders take it that far.

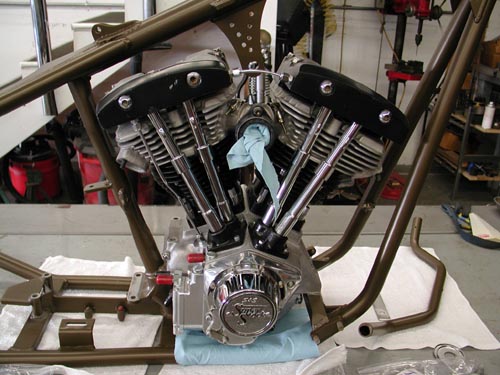
I was jazzed to toss the Paughco Frame on the lift covered with pads. Foremost Powder had plugged all the threaded holes and tapped off the neck bearing surfaces. They did a helluva job. I shaved motor and transmission mounts for a proper ground and installed the S&S modified 93-inch engine and JIMS trans. Then I could install the Paughco Springer without a balancing act.
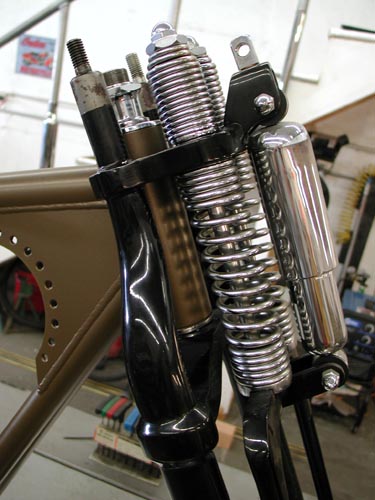
The Springer is easy to install, but takes care. I greased the bearings, slid on the dust shields and ran the whole springer through the neck. Keep in mind that installing the bearing races in the neck is not complete until the bike has been down the road. Any paint, dust or uneven race angle will mean that the bearings will seat further once on the road. Ride it for a week then lift the front end off the ground and jiggle the wheel by the axle. If there’s any movement or dangerous slop, take the bars and top tree off once more and tighten the stem nut until there’s just a hair of drag. Long front ends are more critical because of the leverage against the neck.
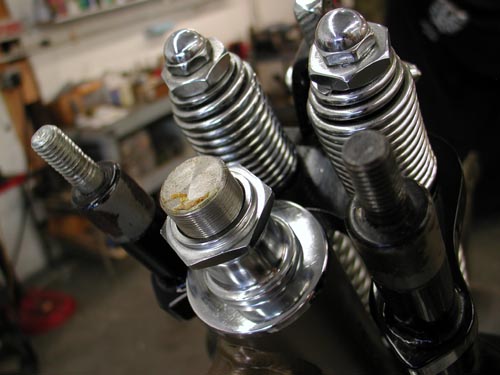
I didn’t bolt down the engine and trans hard, just the tranny plate which ultimately I had to loosen. The engine needs to be completely at ease for the BDL belt alignment so I just spun some stainless bolts into place. Then I installed the front wheel with Doherty spacers, the Brembo brake caliber and centered the wheel. Keep in mind that Brembo supplied the bracket, which is designed to replace a stock, late-model Harley springer brake system. I didn’t have the proper spacer, but a Harley shop had one and I was good to go.
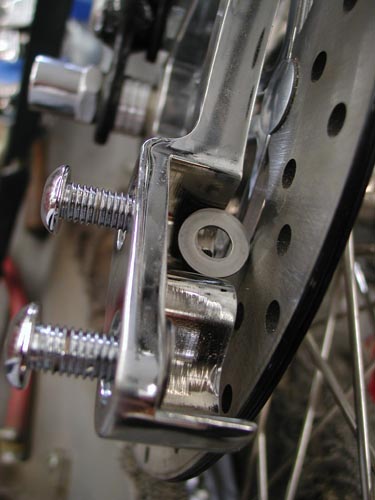
Then I installed the Brembo Caliper. They supplied me with a series of shims. I used feeler gauges to determine centering the caliper over the rotor and stacked the shims until it was set. This is an interesting bumbling, experienced manner for writing articles. I have the insight of riding experience behind images of the bike yet complete. Ultimately we removed the front fender.
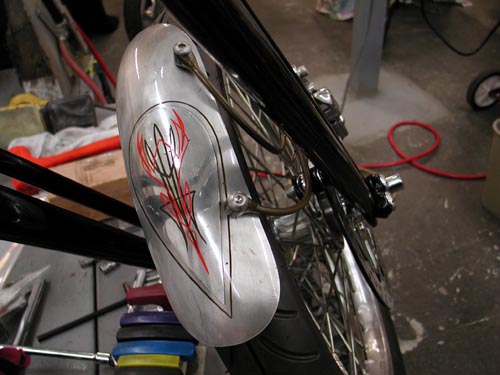
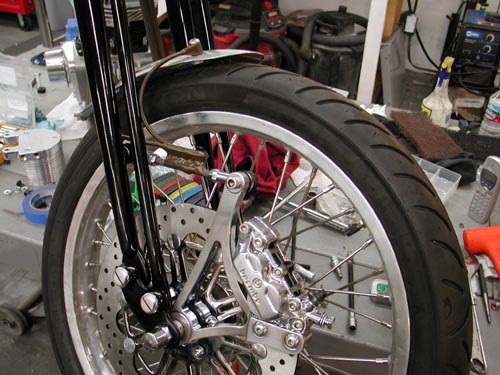
I build the front fender, single sided bracket after Kent’s, from Lucky Devils Metal Works in Houston, caliper mounted fender mounts, which work perfectly. My problem was the initial position of the caliper, too far forward. So I mounted it on the heim joint rod which didn’t work. When the bike went over a bump the front lip of the fender rode up with the caliper and the rear lip rode down with the springer touching the tire. It had to go. So I rode to Sturgis without a front fender ducking rainstorms all the way.
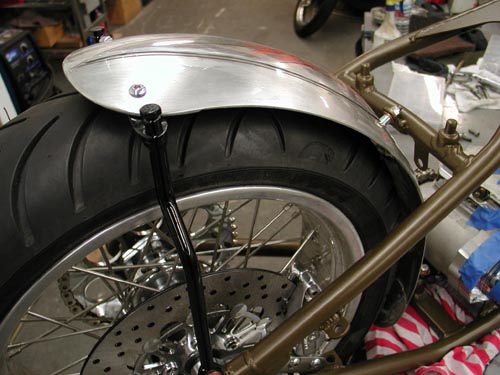
Next I installed the rear fender. Keep in mind that the rear fender, the oil tank and the rear wheel fight for the same spaces. They almost need to go together simultaneously, especially the oil bag and rear fender. Everything slipped into place with nyloc nuts, stainless Allens and red Loctite.
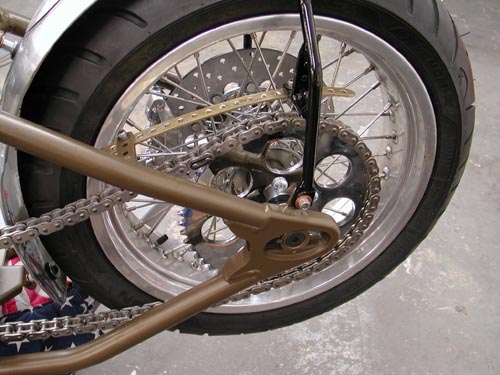
At the time I ran stock gearing with the JIMS 6-speed, until I discovered that I was faced with running a kicker. I didn’t change the rear wheel gearing from the 51-tooth, but I should have. This evening I’ll install a Custom Chrome flat (Sportster styled) 48-tooth sprocket and hope to knock the revs down seriously.

I also mounted the rear Brembo brakes and centered the caliper over the Brembo rotor. No problem. Even my Softail styled anchor bracket worked perfectly welded to the frame and tucked the caliper between the frame rails.
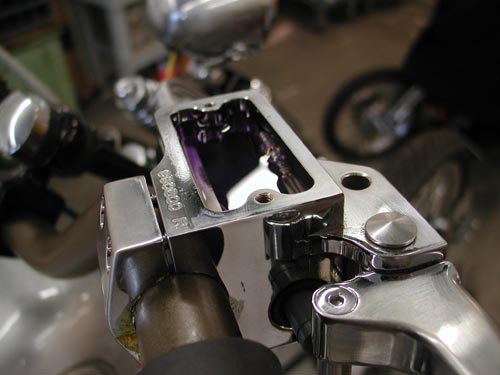
While I’m messing with brakes I’ll cover brake and clutch lines and cables. Instead of making up lines I ordered RevTech pre-assembled lines from Custom Chrome plus all the fittings washers and fasteners. Keep in mind that the front brake master cylinder uses larger master cylinder banjo bolts. They come in 10mm and 12mm. Watch out, and don’t hesitate to order a couple of extra bangos bent at different angles to make sure you’ll have what you need.

I measured my lines and clutch cable lengths a number of times then added an inch for safety. That’s where making your own lines can be helpful. Keep in mind that the front end will turn (clutch cable) and depress (front brake). You’ll need some slack. Plus you might change the angle of your handlebar levers, which will impact the position of the cables and lines. I used Tephlon tape on most fittings although some builders don’t recommend it. Since most of this stuff is chromed, I like the extra sealant.
I use only DOT 5 brake fluid in my bikes, ‘cause I can splash the shit all over the place without concern for paint damage. In many instances you can fill the master cylinder and rock, just by waiting for the bubbles to rise. Another key is to find the right pump can and fill the lines, caliper and master cylinder from the bottom up. Use a new pumper or a pump that’s dedicated to brake fluid only and attach it to your brake bleeder on the front wheel. Most of the time that works like a charm.

I’ve found that most front brakes will basically bleed themselves. Fill the master cylinder on the bars and pump it slowly allowing the bubbles to rise. Let it set overnight and most of the bubbles will rise just by pumping it with short strokes at the lever and watching the bubbles jump to the surface.
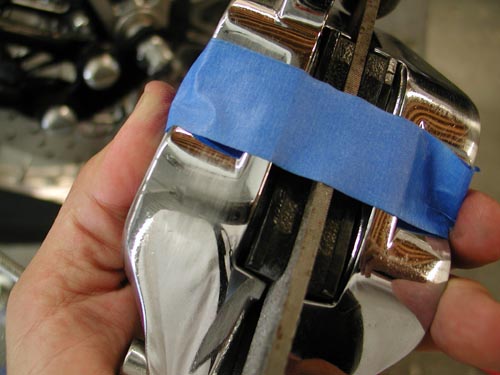
In this case I discovered that some air was trapped in the caliper, so I pulled it off the bike, taped a file (the same width of the Brembo rotor) and turned the caliper so the air could escape through the bleeder nipple. I bleed it a couple of times then returned the caliper to its rightful position. She was good to go.
The rear brake wasn’t so easy because the air couldn’t rise to the master cylinder. I bleed it from the front and the rear, and I think it still has air in the lines although the Brembo brakes worked fine. I received a lot of compliments and comments on the brakes, which I found strange. Brembo has a terrific reputation, but not on Harleys. Riders were surprised to find Brembos on a Chopper.
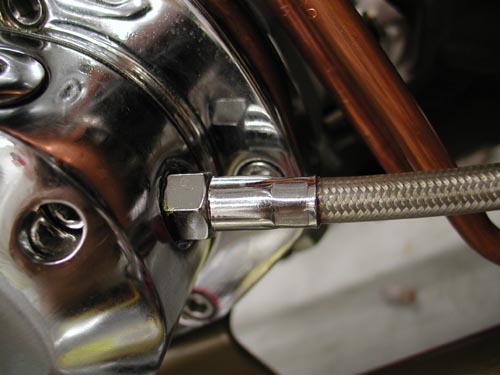
Now for the clutch cable. First I was confused about which cable style to order. I hope to put together an article on it in the near future. I picked the most common late model Evo cable and measured the length several times. Here’s the key. If you’re not replacing a stock cable you have no notion of the length. I pulled a stock cable and measured it, but I didn’t know what model it came from. I went by the length of my stock cable and found the 1990-1999 Fatboy cable length. Then I measured the extension due to the Paughco Frame, CCE risers and CCI bars. Much guess work. If I had all the bucks in the world I would have bought three cables lengths.
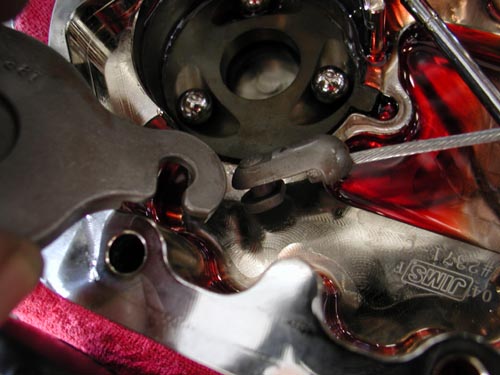
The end cap cable is the reason Baker, JIMS and RevTech transmissions come with a fresh gasket and a quart of transmission oil. They know that you’ll be forced to pull the end cap to install the cable in the ball driven throw-out bearing mechanism. It’s simple but cumbersome. Don’t loose the balls. You’ll need a massive C-clamp removal tool to pop that sucker free. Carefully lift the inner ramp and remove the cable coupling, attach the cable, which you have already screwed into the trans face cover. Return the coupling to the inner ramp by watching the puzzle face. Then put the ramp back in place and the retaining ring and bolt the face cover back into place. Don’t forget to add at least 20 ounces of Trans fluid. It will hold 24 ounces dry.
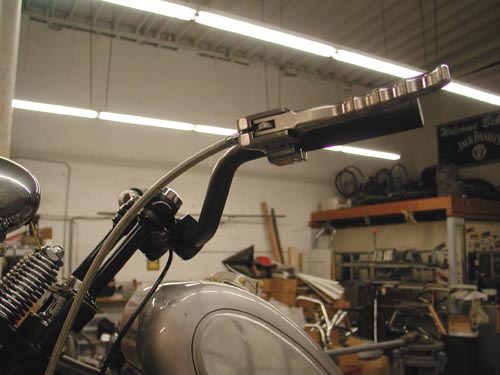
I learned something on this trip. If water gets in the trans it will act up, shift strangely. Drain the fluid and change it. Check your vent.
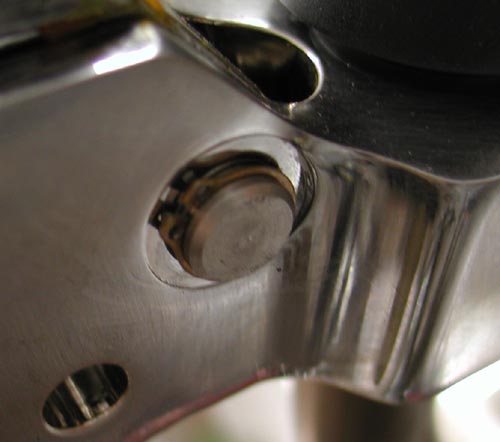
I ran the cable several ways to find the path that fit best, didn’t rub the frame or catch on anything. I used one Arlen Ness cable clamp to secure it and hooked the cable into the greased tephlon bushing in the Joker Machine handlebar control, then replaced the small C-clamp and I was ready for final clutch cable adjustment after the BDL primer was installed.


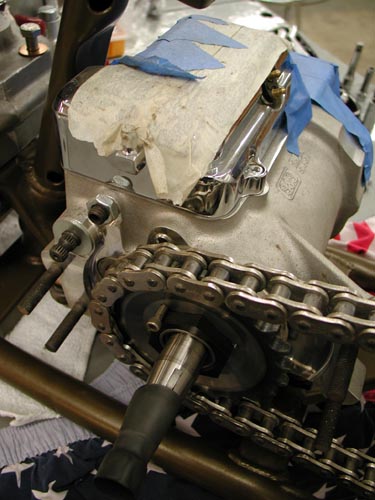
I’m going to cover the 300 BDL installation here and try to explain my shift. My plan was to run the Compu-Fire engine based electric starter system designed by Giggie before he left and took a job at Rivera. Rivera is making inner primary plates for this new system, but when I contacted them Ben Kudon’s response was hesitant. They weren’t ready. Of course I contacted our long-time sponsor BDL and initially they weren’t scheduled to make units, then I was pleased to find out they were, so I ordered one. But Sturgis crept into the picture, and suddenly I was without a starting system and coils hanging under the oil bag interfering with any new starter install.
I had a 300 BDL belt system and a starter but no place to put it. Kent from Lucky Devil shrugged his shoulders and said, “Why don’t you run a kicker?”
Sinwu ripped off her top, jiggled her tits and said, “You have one from Muller in Germany.
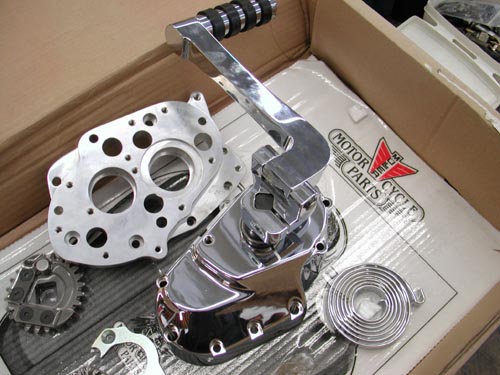
I jammed down the headquarter stairs to the shop and tore open the box. I was jazzed. This is one of the coolest kicker systems to come along. It cleared the rear exhaust pipe and the kicker arm was stylish, unique and strong. I couldn’t believe my luck.
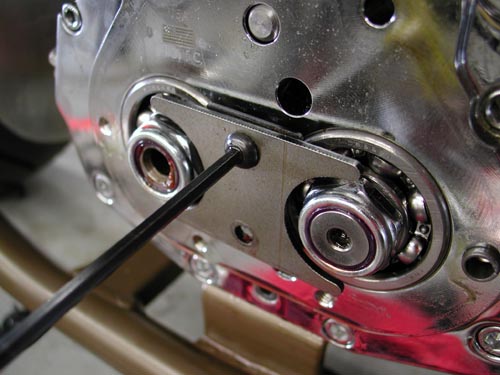
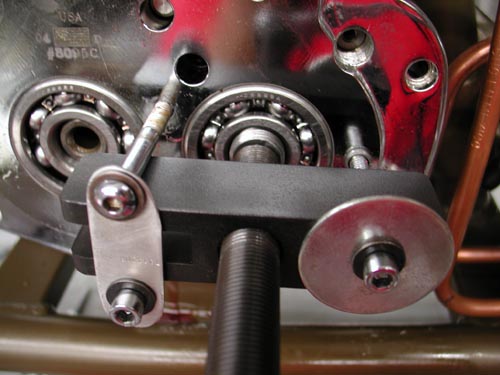
The JIMS 6-speed lined up with the BDL inner primary like a dream. All I needed was to pull the tranny face and press off the trap door, then replace the trap door and tranny cover with the Muller system. Muller even shipped a clutch ramp system that afforded smoother clutch action.
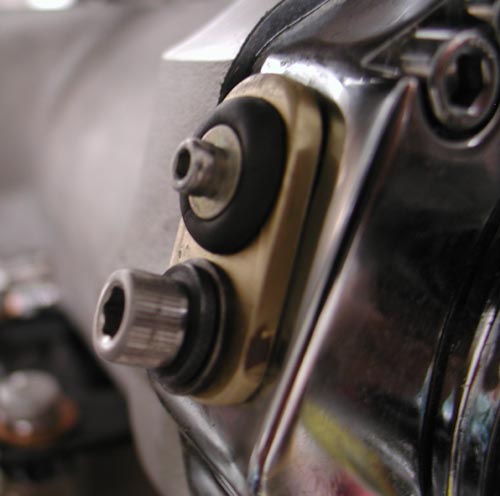
Hell, I’d even build a cool brass plug to cover the speedo-cable hole in the side of the JIMS trap door.
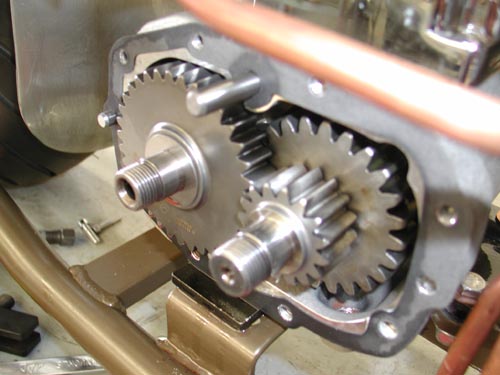
All went well until I removed the JIMS trap door to discover the 6-speed protruding gears. The door was machined to accept the gears and the 5-speed door was not. I was stuck. I contacted Muller in Germany for a 6-speed replacement door. No answer. I called JIMS and ordered the kicker they distribute for the 6-speed. It never arrived, so I called Custom Chrome. If I could order a 5-speed quick, I could use the Muller system. They responded and in three days I had a Rev Tech Replacement complete with kicker and 23-tooth chain sprocket. I yanked the 6-speed and began to install the Rev Tech 5-speed in 4-speed case with a five-year or 50,000 mile warranty.
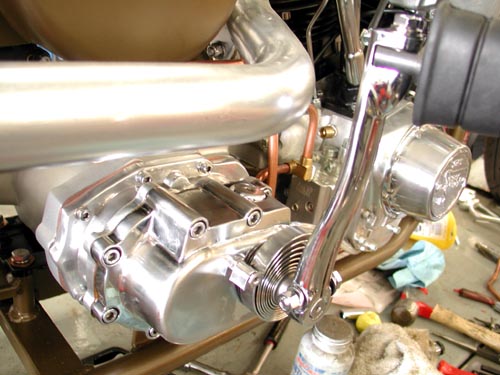
At this point I should have replaced the rear 51-tooth sprocket with a 48 or perhaps a 46, but we’ll see. I removed the kicker cover and installed the clutch cable once more, sealed the tranny and filled it with 24 ounces of fluid.
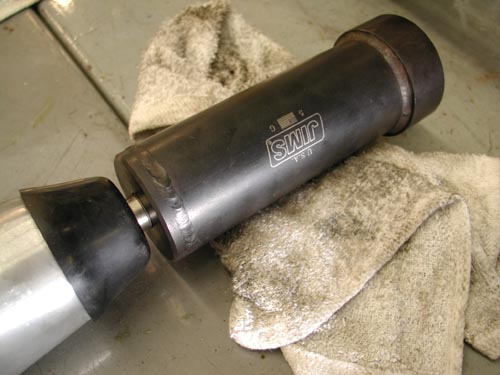
I pulled the massive, left-handed, mainshaft sprocket nut with a JIMS special tool and flopped it around backwards to afford me the clearance I needed for the RevTech chain to pass the 180 Avon tire. I locked it down with the JIMS tool and an Allen setscrew and red Loctite. She was good to go.
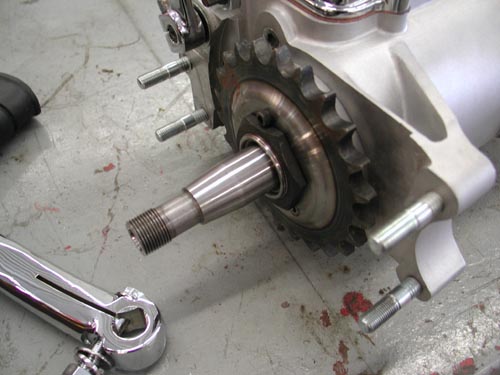
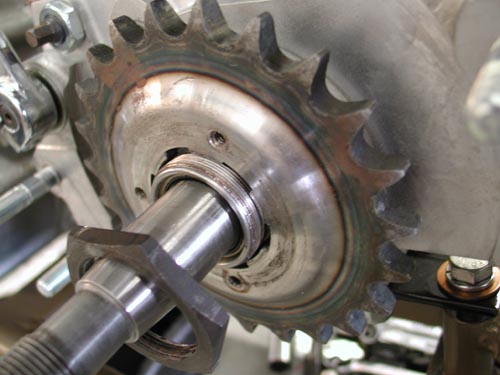

Next, I needed to set up the BDL 300 belt drive system and the Compu-Fire Charging system. I slipped in the Stator, then the small tapered washer, followed by the Compu-Fire Rotor. It’s pasted right on the rotor not to smack it with any hammers. You might knock one of the magnets loose.

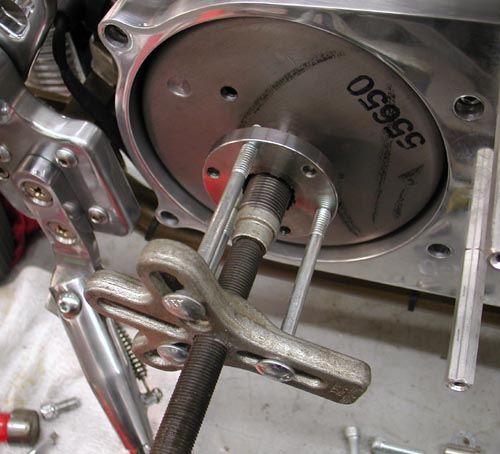
According to the rules sometimes the offset pulley mount doesn’t need the massive flat washer/spacer for proper alignment. But the first move includes installing the inner primary with the engine and tranny loose. I used never-cease on the threads of the transmission and tranny Allens to prevent damage to the threads. Take it back—first I had to remove the inner primary studs from the transmission. They were tight as hell and I used Yield and heat to set them free. Then I positioned the engine and the Trans with the primary.
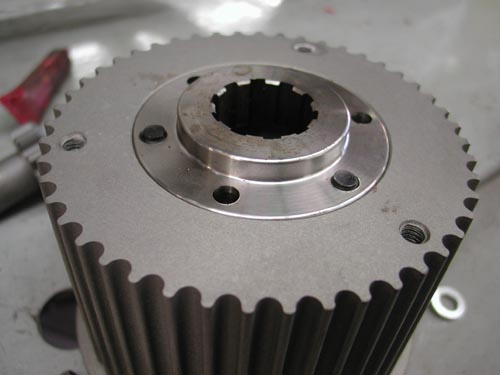
I ran into problems. Nothing wanted to line up. I called a couple of buddies for guidance. I held the engine where it was with a shim under the front motor mount. Then I bolted the primary to the engine and trans. The front of the tranny raised almost .100. I started looking for shims. Bob from BDL told me the code was to shim the tranny plate and not the tranny, so I went to work. It wasn’t a problem to scour around for the right thickness washers. Soon the transmission was aligned, the primary fit easily and there was no drag on the transmission mainshaft.
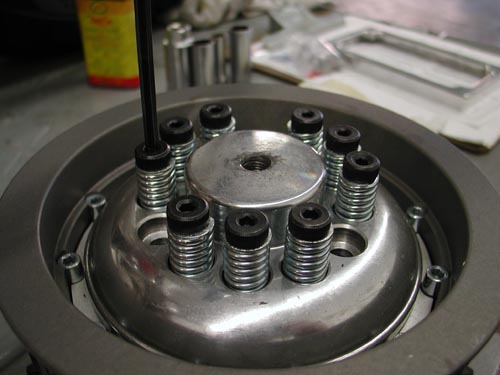
Next, I needed to check the pulley alignment. I installed the pulley using the insert then the pulley and Allens. Since I would be removing and replacing the parts, I didn’t drive the alignment pins into the insert from the rear just yet. I discovered another glitch. I needed some washers or shims behind the engine pulley for alignment. I also discovered that the mainshaft nut wasn’t bottoming out, so the rotor flopped around. That wasn’t right.

I’ve installed a dozen BDL systems without major alignment problems. It takes patience, but once it’s correct, she will last and last. This is a tapered shaft transmission and once it’s installed it doesn’t slip off without a JIMS transmission hub puller tool.
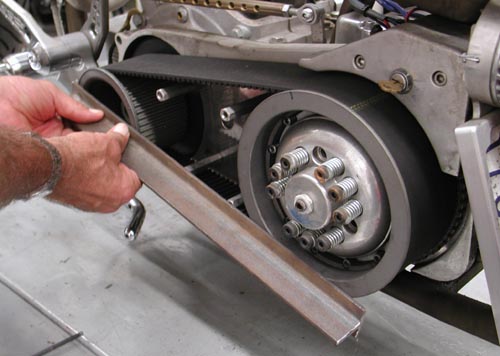
With the pulley and the clutch in place you can test alignment a couple of ways. I used a cast T-Bar across the faces of the pulleys. They need to be exact, which means shims behind the engine pulley.

I made a mad dash to Walkers Machine and bought all the goddamn shims he had. The massive washer that comes with the rotor was only .035 too large. The next item was the inset in the engine shaft nut. I had to machine it to slip over the protruding shaft. This is also an area that takes some running and retesting to make sure it doesn’t seat and settle in, out of alignment. It’s easy to spot a problem. You’ll notice rubber dust around the pulley where it’s riding against the lip.
Remember that the clutch nut is also left-handed. Then the clutch slips into place and with some tugs and working the belt gently, it goes on. If not use two chunks of wood a large bolt and a socket to gently push the pulleys apart. Once it’s run for a while it will be much easier to remove and replace.
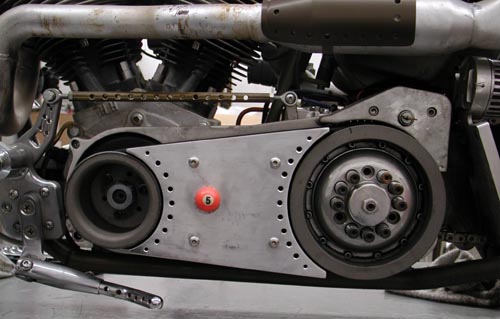

Okay, so I installed the tank, with the Spyke petcock and stripped the spigot threads. It hung for most of the ride. We’ll cover the tank more in the ride saga, so hold on. The seat was also a challenge. I slipped off, so I changed the seat, to one with a lip, then changed it back an added taller springs. That worked.
With the primary aligned I still used never-cease on the primary threads because I knew that I would remove the inner primary once more.

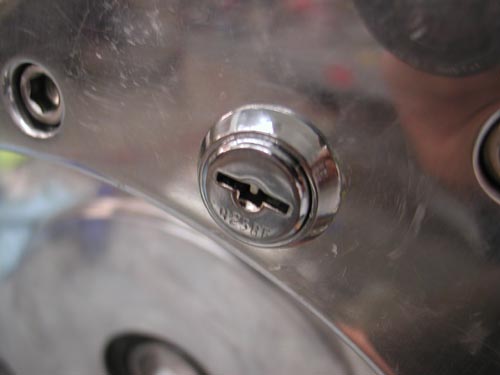
Hang on for this one. I needed to find a place for a toggle switch/ignition switch. I also had this massive aluminum starter motor boss on the inner primary that was going to waste. So I drilled out the starter shaft and installed a marine ignition switch. I glued it in place with a two stage epoxy then drowned it with liquid electrical tape, two coats. It seemed perfect except that the key sang in the wind only 1 inch above the peeling primary belt. No key rings or dice.
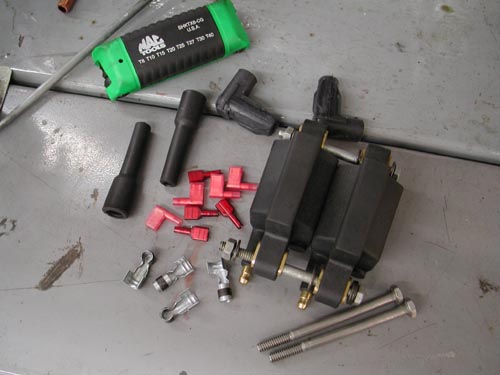
On the inside of the primary I made a brass strap that ran from one starter mounting hole to the other, holding two circuit breakers. One was a 15 amp for the lights and a 30 amp for the ignition. This became a very tight electrical area, dangerously close to the whirling CCI O-ring chain. As it turned out the circuit breakers were a hair or two from the coils. Cozy. I made a couple of wires long enough so that I could remove the primary and set it next to the bike to work on wiring issues.

The next thing I knew, under initial testing, the whipping chain chipped at the aluminum, dangerously close to the electrical. Larry Settle, of Settle MC Works loaned me a chunk of tephlon, which I carved and made a buffer, which worked perfectly to protect the chain from nearing hot wires.
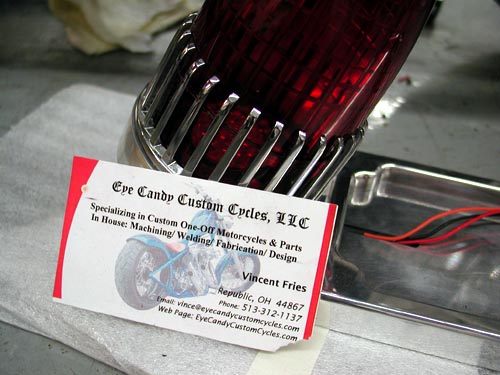
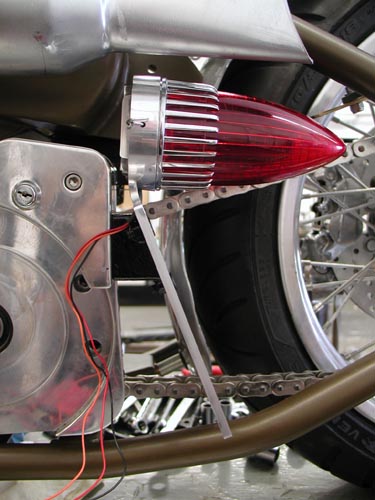
Then came the Eye Candy Custom Cycles ’59 Cadillac taillight. They also make an old Ford style light, which I prefer, but I felt the need for side visibility, especially on the right. The mounting called for the primary once more to hold the taillight/brake light. Finding the proper location was a chore. It either rode too close to the chain or the mounting called for screws through the frame or into the wiring loom. I monkeyed with it for hours and finally designed a tough mounting system that might survive. All went well, but the frame rail still blocks the light and I might move it outbound.
I ran the thin sparkplug wires through the frame in shrink tubing, wired the coil and the Joker machine brake switch and headlight through the hole in the frame too close to the fork stop. Even on a simple chopper an idiot can find his way into trouble.
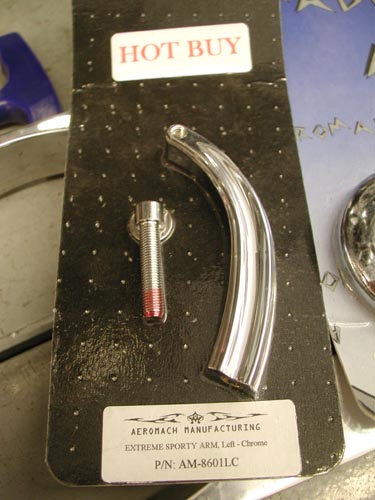
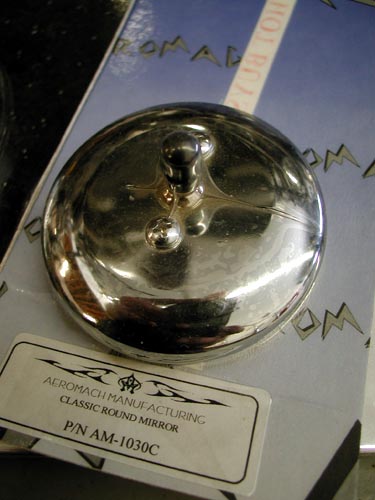
Finally I mounted the stylish Aeromach mirror on the left bar only. It came with all the hardware needed and never gave me a problem. I know I’m missing a link or two, maybe a necessary credit. Don’t hesitate to drop me a line if you need a question answered. You can reach me daily at Your Shots or drop a line to Bandit@Bikernet.com.
Over the next couple of days I will attempt to complete the first saga of the ride to Sturgis. I hope to launch it on Friday. In it I will dig into the problems I encountered, mistakes I made and how I fixed them. Hang On. But beyond the glitches, actually the wiring worked out fine, but I should wire in a kill switch. The bike rode well, comfortable for a rigid, started without major hassle and ran all the way to Deadwood. I can’t complain.


Amazing Shrunken FXR 15 Wiring Hell
By Robin Technologies |

This was actually one of the easiest bikes I’ve ever wired. It’s not a bad notion to sketch out a wiring diagram with consideration for the placement of the components. Think about it long and hard, then take your time. Below this mess I ran the Hardcore Choppers basic wiring diagram and tips on wiring anything.
First, there’s the regulator that bolts over the front motormount. I use Compu-Fire regulators for reliability and they are wired not to over-work the alternator. So you plug the regulator into the case for the alternator connection, run a ground strap under the frame where the rubbermount bolts and the final hot wire to the hot side of the battery, or the hot side of the ignition switch. That wire feeds the charge back to the battery. Presto, goddamnit, the charging system is complete.
I’m lazy and want the wiring system to be as easy and component free as possible. No extra lights, no turn signals, no horns, buzzers or ringdings. I use Bob McKay’s marine ignition switches for toughness, reliability and ease of wiring. They are distributed by CCI or, if not in stock, contact Bob directly (519-935-2424).
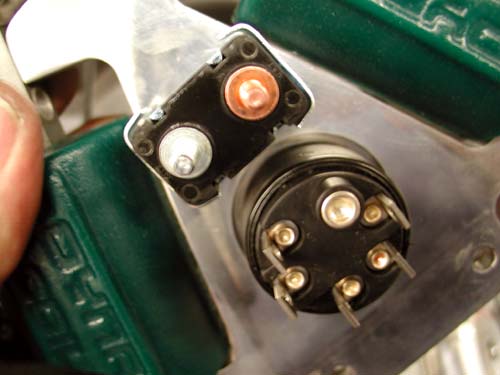
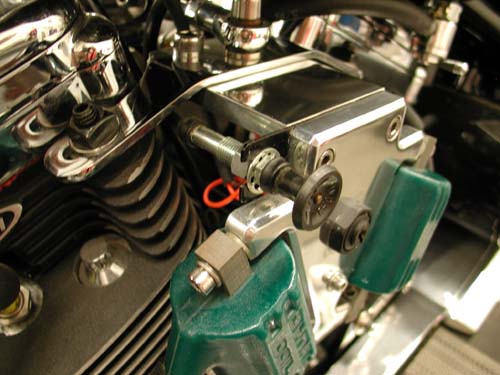
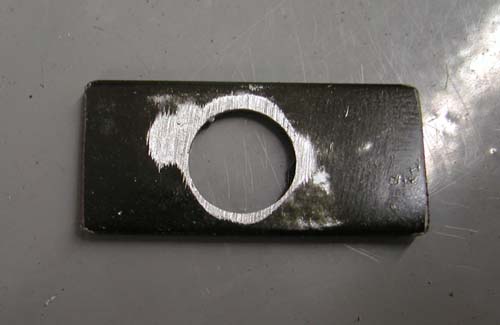
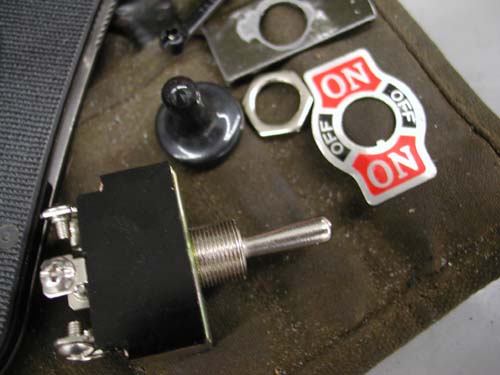

The switch is so complete so you don’t need a starter relay. All it takes is one wire to the starter, one wire from the battery and one wire to the circuit breaker. From the breaker a wire runs to the Compu-Fire single fire ignition system via the coils, one wire to the brake switch, one wire to the taillight and one wire to the highbeam switch. From the highbeam switch two wires ran to the headlight. From the Compu-Fire electronic ignition wires ran to the two Dyna Coils, front and rear and one hot wire that runs to both and the ignition circuit breaker. I ran only one 30-amp H-D circuit breaker, just a couple of inches from the ignition switch.
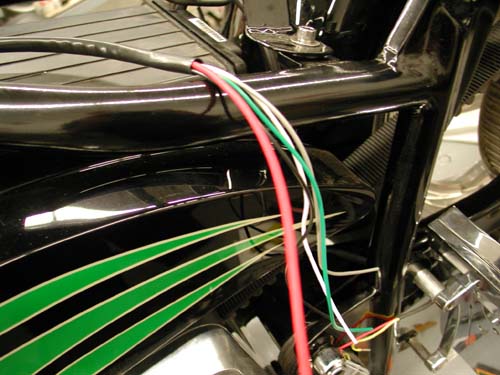
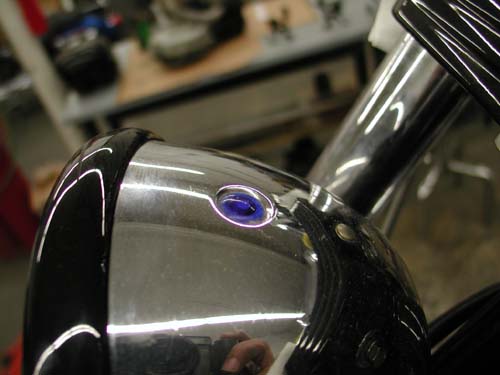
Since I don’t have space for idiot lights (there’s a highbeam indicator on the headlight), I need to run a oil pressure gauge on the engine.
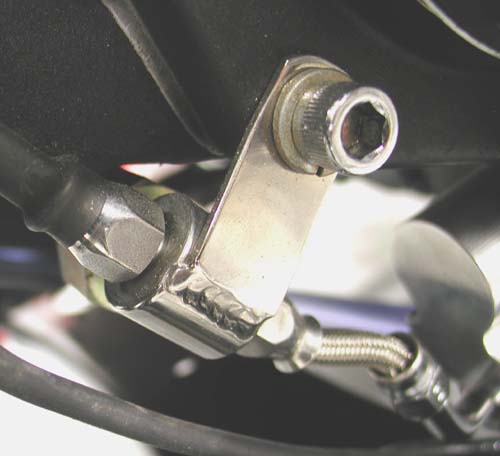
I only use Terry Components brake cables for their service and flexibility. The trick was to find and place the ground straps. The Terry ground strap ran comfortably from the negative side of the battery to the 5/16 starter mounting bolt. That grounded it to the driveline, but I needed a ground from the tranny to the frame. I worked that out by bolting another strap to the sidemount license plate frame bracket (welded to the frame), by making sure the paint was shaved away. I also used the 1/4-20 Allen to support the taillight ground strap. Let’s see, have I forgotten anything?

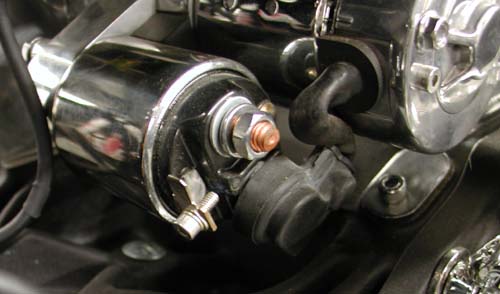
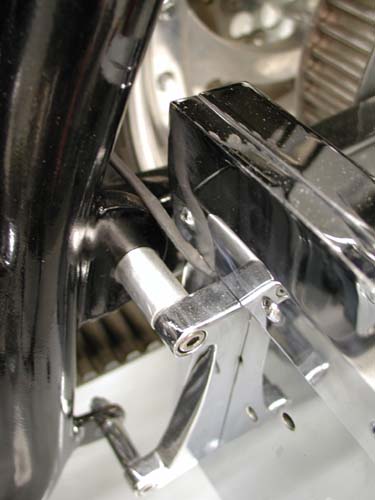

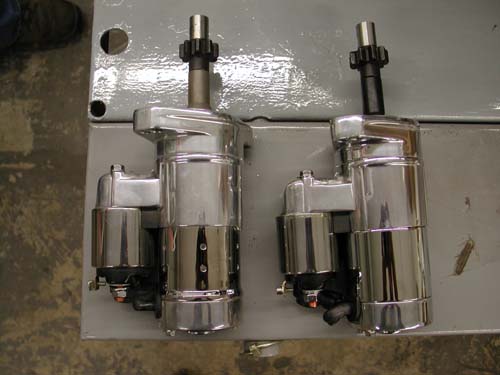
Just before we completed wiring, Giggie, from Compu-Fire, and delivered the new Compu-Fire 53700 hot starter designed to fit any big twin H-D from’90 up. All the special hardware is included and it’s rated to 2KW and was actually shorter by .150-inch for clearance dilemmas with Softail oil cans.
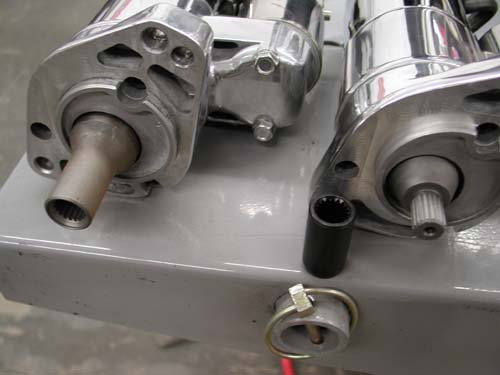
The starter roller bearings are 30 percent longer and it comes with shims to allow builders to install the starter perfectly. The Air gap between the pinion gear from the starter to the ring gear on the clutch basket needs to be between .75 and .125. If it’s too short the pinion gear can’t spin before engagement and collides with the ring gear. It needs to get a tad of momentum going. On the other hand, if the distance is too great, the starter gets up to full speed and fights engagement.
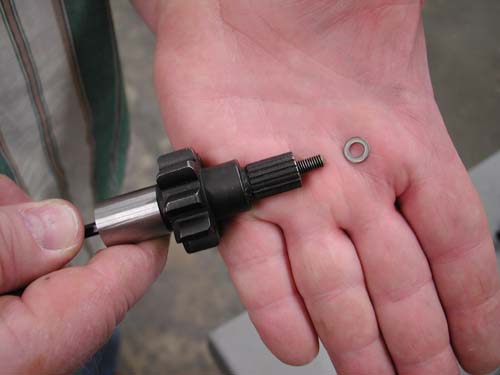
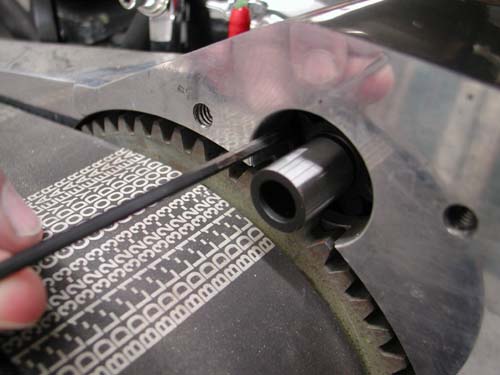
The measurement is difficult and Giggie uses a 1/8 Allen which is .125 across the flats. The shims are .026. Even the coupler on this new Compu-Fire starter is designed for lowered bike, to duck the belt.
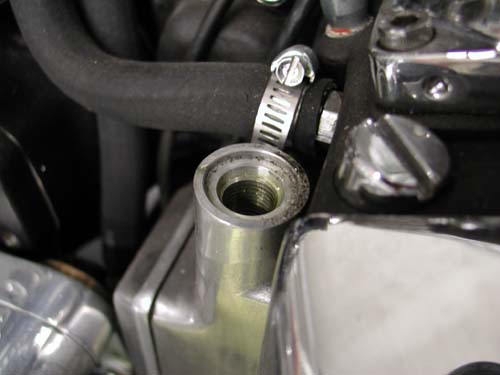
The wiring was completed and we were ready to fire the beast, but first Giggie recommended that we burp the bubbles out of the engine by removing the pump relief cap and using an Allen to pull up the valve and let bubbles pass for a pure oil lubrication.
The bastard fired right up, the Mikuni gushed gas, but as soon as it fired the Mikuni float bowl settled down.
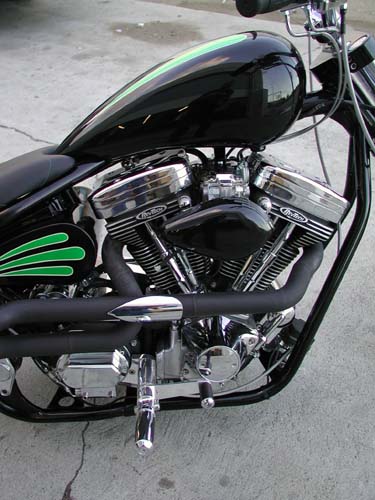

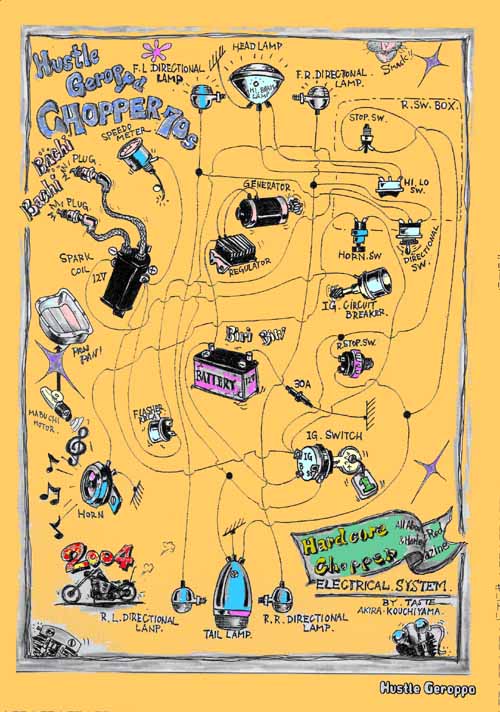
We often get calls for basic wiring diagrams. Here’s one that was taken from an old Easyriders and expanded by the wizards of Hard Core Chopper Magazine in Japan.
Take your time. Keep those copper strands away from sharp edges, moving stuff (like chains) and hot items. Cover everything with shrink wrap. Use extra layers of shrink wrap for more protection and stronger connections. I like to solder connections for a solid, vibration free contact, but some prefer crimping connections to avoid wicking. Watch out. Some of the littlest, coolest switches go to shit in a week under 100 mph vibration.
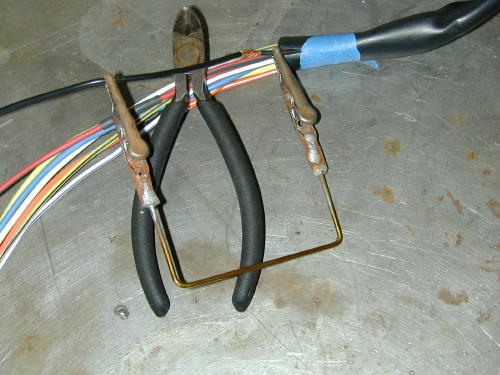
The Frank Kaisler, patent pending, wire junction tool. Send $99.99 to P.O. Box 666, Hollywood, Calif. Send only rolls of quarters.
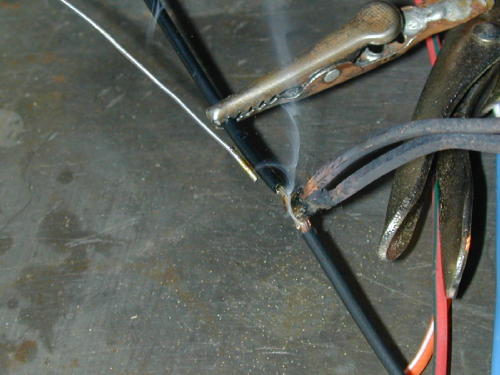
Don’t forget to work in circuit breakers and fuses. If one blows, disconnect the battery and research the problem. I like Terry battery cables for their flexibility, and they allow more amps to flow to the starter because of their low resistance.
Couple more tips: Watch out, wiring around the front-end. That sucker needs to turn. Don’t run the electrical connections too tight. If you run wires through the frame, debur the openings and use extra shrink wrap to protect fragile insulation.
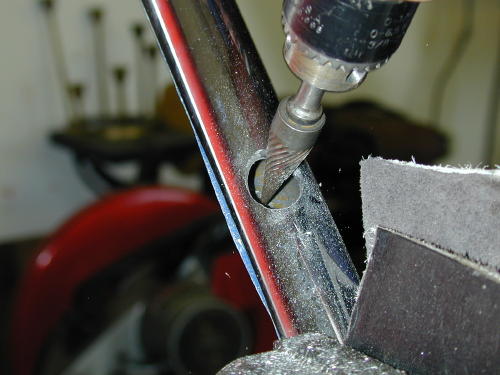
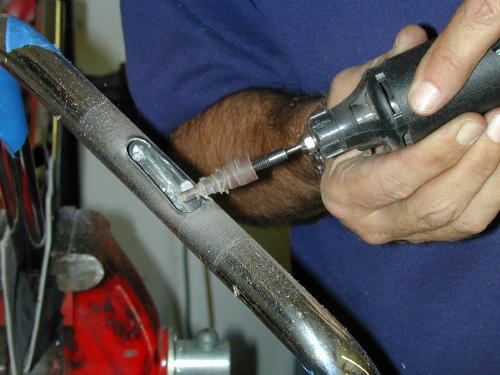
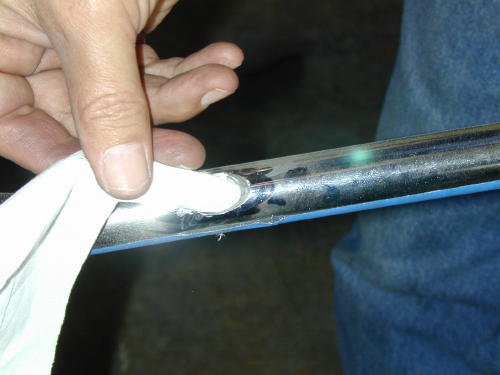
Bandit generally uses 16-gauge for most of the wiring, 18-gauge in the bars and 12-gauge from the battery to the ignition switch.
I called Frank Kaisler, a tech writer for decades, and before I finished reading the above he shouted across the line, “Yeah right, but you’re forgetting plenty, dipshit. Don’t forget to tell ’em about the breakers. Use a 30-amp breaker between the battery and the main electrical circuit (or the battery and the ignition switch). You can use one of the breaker lugs to attach the regulator hot line to minimize wires to the battery. Use 12 gauge wire for the main leads. Use a 15 or 20-amp breaker between the ignition switch and all the lighting connections.
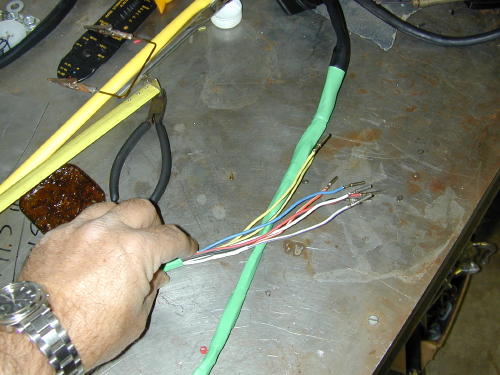
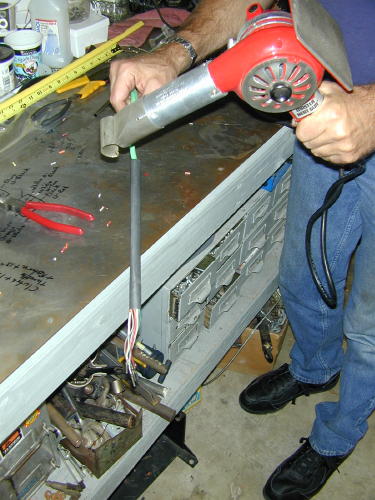
“Goddamnit, you didn’t explain wicking. Solder creeps under the insulation when it flows. The wire will flex against that soldered area and may break.”
“Yeah right, after two hundred years,” I muttered
“Shut up and listen,” Frank lit another cigarette.
“Quit smoking,” I babbled over the phone.
“The way your ride,” Frank coughed, “you won’t last another week. Let’s get back to the wires. I like to remove the plastic insulation on lugs and run shrink wrap right onto connectors, for a clean, stronger lead, and damnit, use the correct connectors. Blue for 14 and 16-gauge wires and red for 18 and 20. And make sure to use the proper ring sizes for stud connections, like the battery, circuit breakers and brake switch studs. Floppy lugs make for lousy connections.”
I was beginning to lose it. We could go on all night about wiring. He muttered something about using rubber grommets with wires that must run through sheet metal and additional ground straps from the headlight to the frame to maintain a solid ground to the front end.
“Don’t forget the final show bike detail,” He said and I remembered all the rats bikes I built in the ’70s with wires running everywhere. “Run wires down the left side of the bike. The hot looking side is always the pipe side.”
“Okay goddamnit,” I said. “I’m not writing a book. Just a handful of hints.” I sensed a lecture coming from a guy who edited bike magazines for 30 years.
“Do it right, Snake,” He coughed lighting another Marlboro, “or don’t do it at all!”
“Thank you, sir,” I said and hung up. Fuckin’ guy is worse than Bandit.
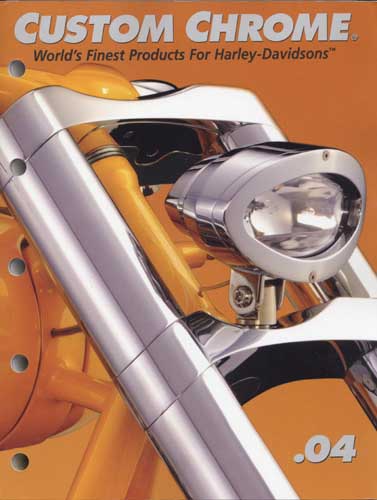
BRAND NEW CUSTOM CHROME CATALOG RELEASED–
Custom Chrome’s new offering for 2004. The California based distributor brings you the most comprehensive product offering in the Harley-Davidson aftermarket! At over 1,200 pages and over 22,000 part numbers, their 2004 Catalog features the new RevTech 110 Motor, Hard Core II, Ares bikekits and noumious frames and forks–everything from nuts & bolts to performance products. It’s the Custom Bike Bible for the year.
ONLY $9.95 + 6.95 Shipping**
Amazing Shrunken FXR 14–Getting Close
By Robin Technologies |

We’re getting right down to the bottom line. Harold Ponteralli, our painter called, “If I deliver the paint can you make it to the show.” I assembled bikes overnight for run deadlines in the past, so we went for it. We installed the new sheet metal, ran the oil lines and picked up a few chrome knick knacks from Long Beach Chrome. Frank was on his way to the Bikernet headquarters with a brown bag full of Goodridge hydraulic fitting. The heat was on.
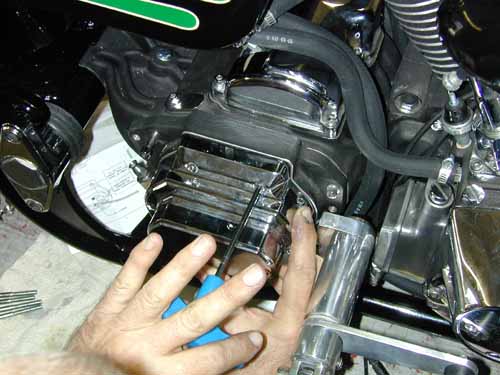
I installed the exhaust while Frank custom cut lines to fit each application perfectly. You can see how the man does it in our King tech articles using Goodridge lines, fittings and shrink wrap. For throttle cables we relied on Barnett for custom cut-to-fit lines.
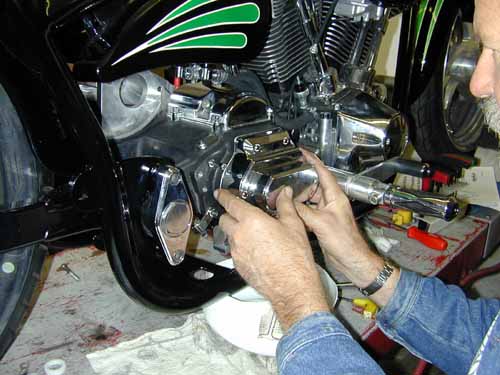
We replaced the Rev Tech 6-speed, cable tranny cover with a Joker Machine clean, chromed billet, hydraulic clutch. Why did we go hydraulic? Hell I don’t know, maybe to balance the Joker controls on the bars? The cover slid right on and we torqued it to specs (15-20 ft. lbs.).
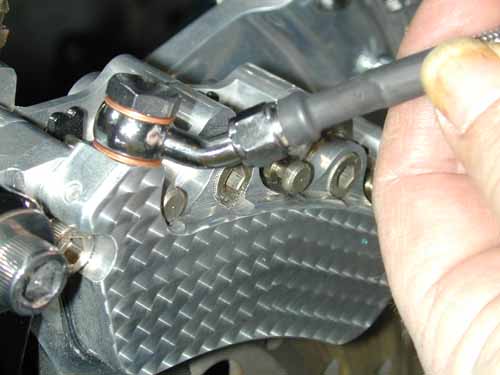
While I wrenched Frank ran a line from the Joker front brake mastercylinder to the Custom Chrome Billet-6 brake caliber. Crazy John took the calipers to a shop to have them milled smooth then engine turned for an added detail. Whatta ya tink?
Then Frank ran a hydraulic line from the H-D rear brake master cylinder (stuffed under the tranny) to the brake switch bolted to the tranny case, through a series of Goodridge fittings. Finally another line was constructed from the brake pressure switch to the rear brake caliper. We kept in mind that the wheel will be adjusted for belt tension and will flex up and down with the swingarm. There needed to be slack in the line.

Finally Frank carefully made a line that ran from the Joker handlebar controls to the Joker hydraulic tranny front. He immediately started bleeding the brake systems and they fell right in line. We watched the direction air bubbles might travel. Generally front brakes can be bled several ways. Some pump the fluid in from the caliper bleeder nipple forcing bubbles north out of the control reservoir. Sometimes, as soon as it’s filled, it’s cooked. No bleeding is necessary.
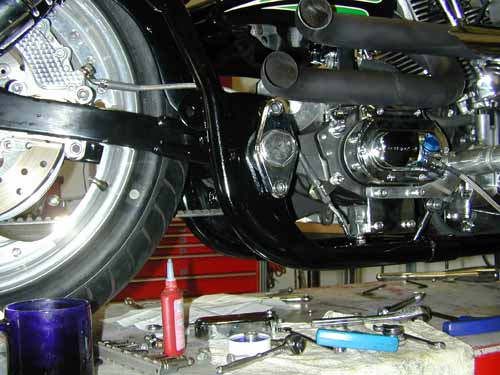
Sometimes I fill the reservoir and pump it slightly until the Dot 5 runs down the line and fills the caliper. This can take awhile, but as it sets the bubbles rise to the top and out the reservoir until it’s cooked again. We were lucky. The rear brake caliper was installed above the master cylinder and the bubbles blasted to the surface with little bleeding. Our Giggie (from Compu-Fire) designed, mid-brake lever worked like a champ with the sharp Custom Chrome pivoting pegs.
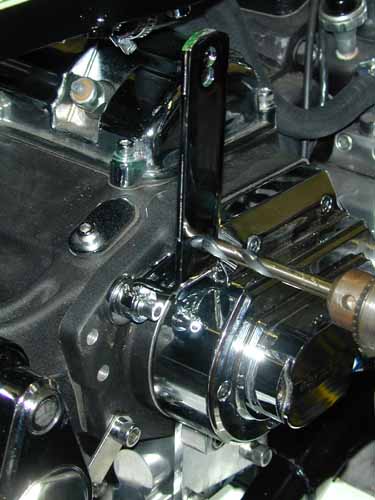
As a side note I coated the pipes with rattle-can barbecue heat flat black. What the hell, if they don’t work, I’ll mess with them again. Oh, and I tried to find a place to stash a H-D rear brake reservoir but couldn’t. I held my breath and entered a Yamaha shop and ordered a small sport bike unit. We made a bracket and stashed it under the tranny.
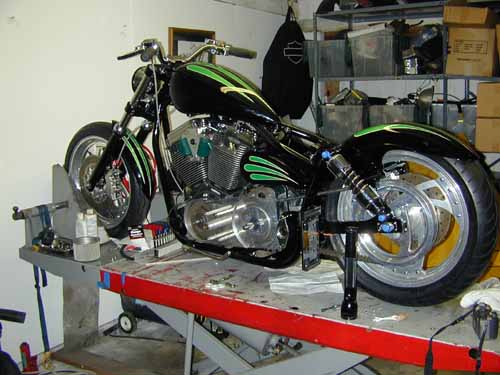
Building custom bikes is all about options, abilities, resources and a handful of rules. Check the John Covington Safety Code in Special Reports. He makes some good points. There’s also various considerations between rubbermounted bikes and rigids. For instance we designed the rear fender to hug the tire, but it moves with the swingarm which means the sonuvabitch better be strong. Also there needs to be considerable space between the seat and the rear fender for shock travel.
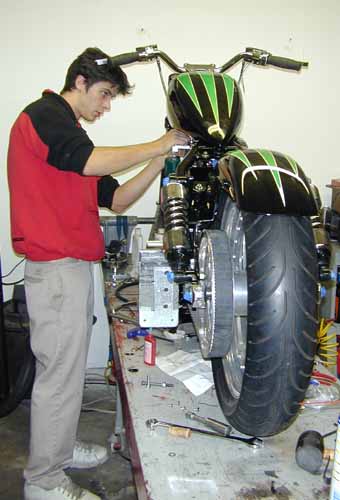
On top of style is ride consideration. I like to build bikes that will hang for a cross country run, handle slick roads and corner without dragging pipes or pegs. And it better corner. That’s what bikes are all about. Alright, I got off the tech. Kyle, the shop intern, installed the Custom Chrome petcock and gas line to the carb. He cut the line and inserted a gas filter (check the arrows for flow direction).

We loaded up the Cyril Huze oil tank with RevTech 10-50 Oil and looked for the UPS man. We waited patiently for the Le Pera styled/Bikernet seat to return to the fold stitched with emerald threads. Harold Ponteralli painted the sheet metal and want to see it in the Easyriders Pomona show. We didn’t make it. Then he jammed us about making the Pomona Roadster Show and we busted our buts. I did a couple of midnight runs installing the Custom Chrome stainless plates under the rear axle and polishing stainless fasteners. The gloss black powder arrived right on time from Dallas. The chrome sparkled and Custom Chrome delivered parts when we needed them.
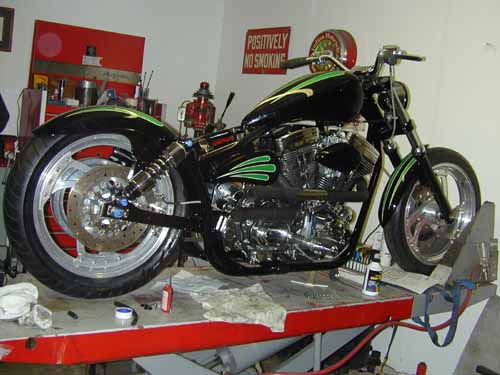
If the seat had rolled in the door, we would have wired the bastard into the wee hours and drug the scoot to the show, but nooo. Cross-eyed, we pulled the 1928 Shovel out of the headquarters, also painted by H-D Performance in Vacaville, California, detailed it and delivered it to Pomona. It was essentially built by Strokers Dallas, and sonuvabitch if they weren’t at the show with a half a dozen Stroker bikes. They took Best of Show and the Shovel took third place in the classic category. Whatta week.
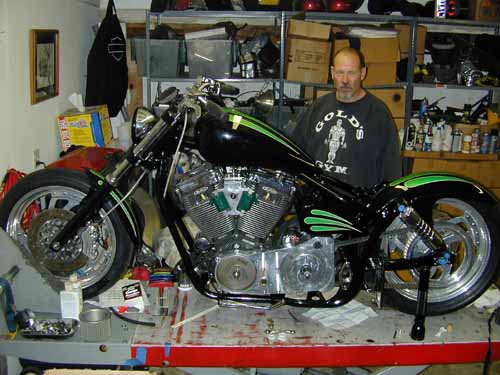
At this point we need final shifter linkage, which Frank fabricated, so we could install the BDL primary drive. Then some wire and we can fire this puppy. Hang on.


Amazing Shrunken FXR 11: Mid Controls
By Robin Technologies |

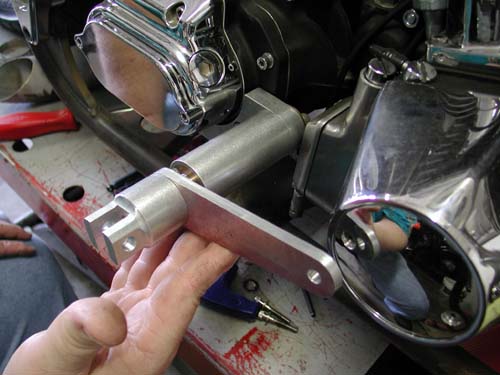
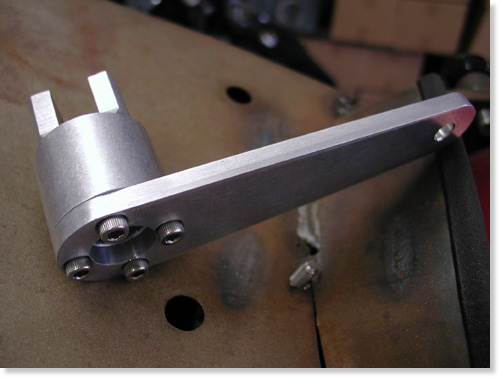
Shrunken FXR mid-controls by Giggie at Compu-Fire. Note: we need flat-headed Allens.
Giggie our master machinist from Compu-Fire rolled up to the Bikernet Headquarters last Saturday. We haven’t seen him for months due in part to his work on new starting systems for the custom market. They are dancing through the final development stages of a system configured to drive off the crank shaft of the motor with a 60- to-one ratio compared to stock 48-to-1. That will leave the area about the tranny available for custom applications or lower seat heights.
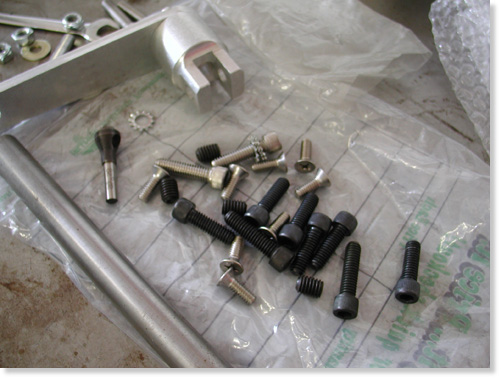
Giggie brought some wrong fasteners but lots of them and counter-sunk drilling tool.
Currently Compu-fire is soon to release a standard starting system, the Gen-2 HT, with 33 percent stronger magnets, 6-roller longer clutch (32 percent longer) with 30 percent more cranking while drawing the same amps from the battery.
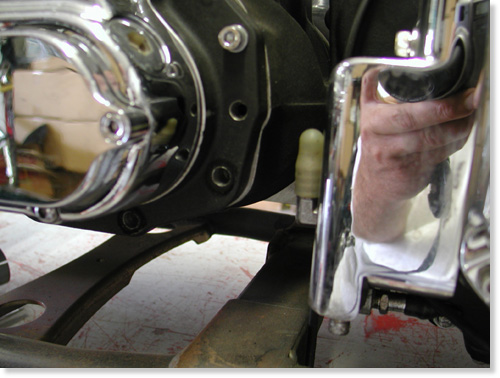
Here’s the tranny without the brake pedal components. There’s some tight tolerances going on.
I spoke to him about our cooling debate and here are some of his thoughts. “You want your oil to run at a minimum temp of 205 to eliminate water vapor or condensation that accumulates in oil,” Giggie said. “At 240 to 260 degrees petroleum based oils begin to break down, although synthetic lubricants could be good to 360 degrees. I have my doubts.”
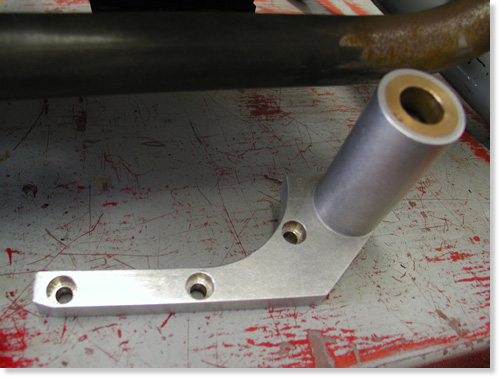
Base bracket to be bolted to the transmission.
Giggie developed an oil cooler for his FLH that kicks on at 220 degrees and off at 200. It has an in-line thermal switch continuously reading oil temp. He installed his cooler in a box with vents and two small electric fans wired to the thermal switch (to cool while idling).
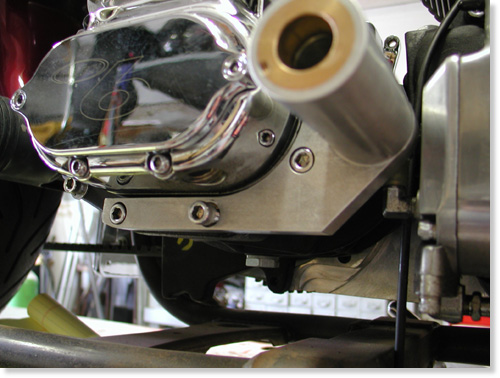
Giggie’s mounting bracket bolted in place.
Regarding our project Giggie dropped off hand machined mid-controls for shifting and rear brakes. Next, we must buy a H-D slave cylinder with remote reservoir with a built in brake switch. We will hide the reservoir behind the oil bag and design a bracket to hold the slave under the trans.
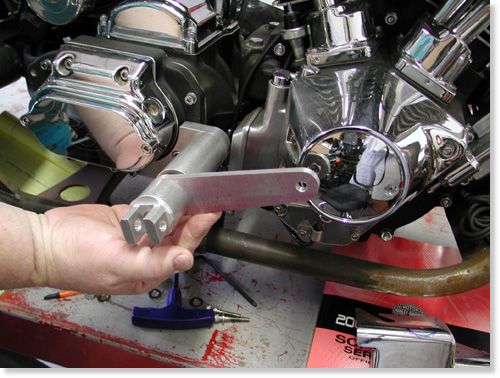
This shows the pedal and shaft in the mounting bracket.
Giggie will supply us with four more bushings to run behind the shift and brake levers, two 1/8-inch thick and two 1/2-inch thick, to allow us variable spacing away from the engine pulley or point cover on the cone.
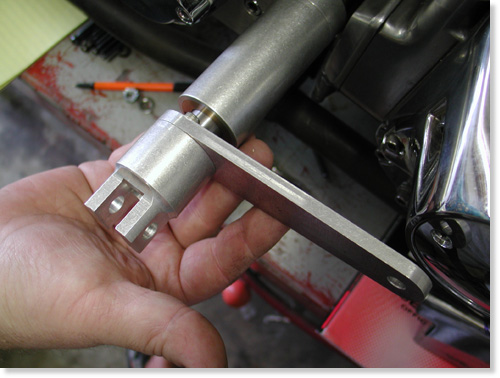
Giggie will supply two different bushing to be installed between the brake lever and the mounting sleeve. We’ll need the space to clear the point cover.
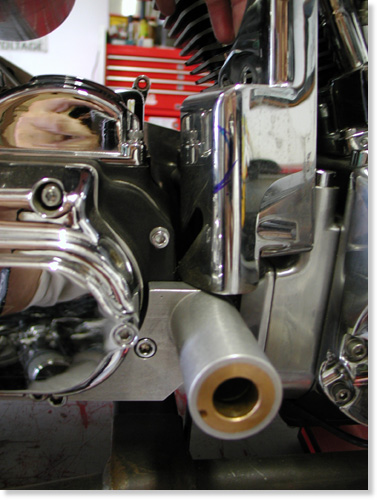
Unfortunately the sleeve hit the oil pump cover. We may be able to remove enough material or just polish the pump. The oil pump inlet fitting will also need to be turned down. It’s close.
With the bushings in hand we can develop our final linkage behind the BDL belt drive plate and Giggie’s tranny plate to connect with the slave piston.
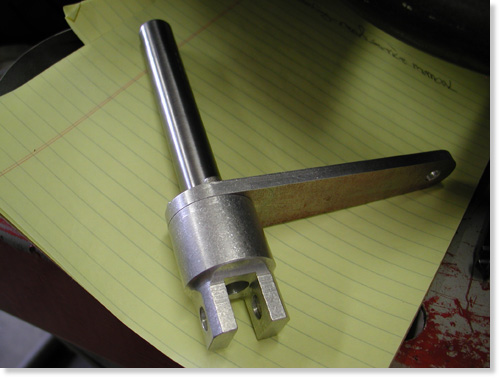
In both cases we need to cut and machine the other end of the shaft, depending on the linkage.
I’ve decided to remanufacture the exhaust system which is now a tight fit around the new brake linkage. Giggie also machined the foot peg mounts to accept any standard, pivoting foot pegs.
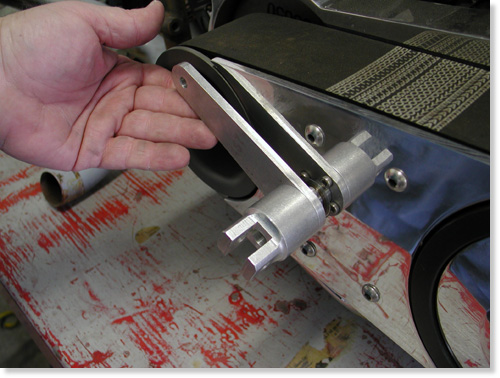
The slick new mid controls for shifting slid through bushings machined into the BDL outter and inner covers.
Next we need the bushings, slave cylinder and a day in the garage hammering and welding a new set of pipes.
–Bandit

Back To Part 10, Page 2
5-Ball Factory Racer Build for 2009-1
By Bandit |

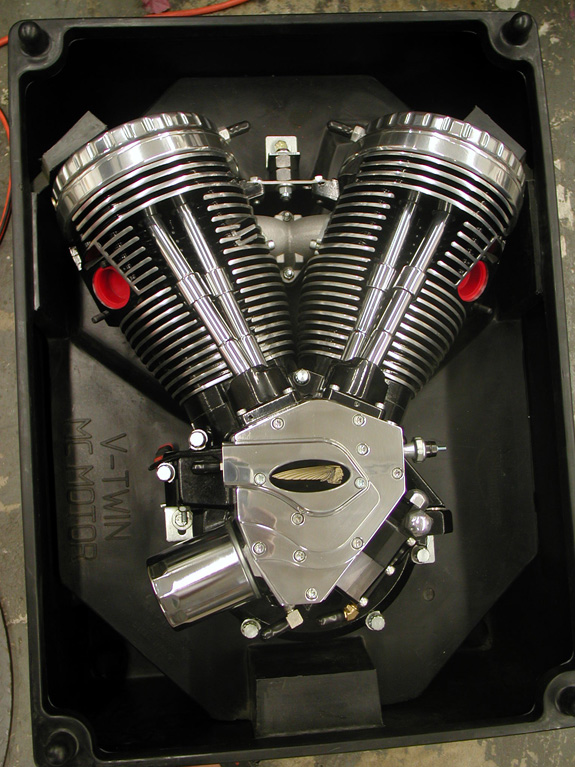
Hey, it's the start of the official Sturgis 2009 project bike, the 5-Ball Factory Racer. For decades guys have built vintage- looking scooters with late model drive-trains. Hell, I built another one at Strokers Dallas in the '90s. Before I dreamed of it, Arlen Ness built a '20s vintage scooter and sidecar around a Sportster engine. Randy Simpson built vintage kit bikes. Don Hotop built some of the finest vintage-styled customs and just last week, I saw a '20s styled bike at the SEMA show in Las Vegas built by the Shadley Brothers for House of Kolors. Beautiful piece. So I ain't the first by a long shot.
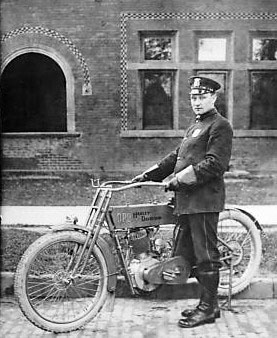
But there is something in the air recently respecting the old iron and bringing it back to life. Some of it has to do with restrictions, and building older bikes is unrestricted. Some of it has to do with nostalgia and some is just a wild departure from the last project. I'm excited every year about this learning process. It's like painting one picture on a massive canvas, finishing it successfully, and then pondering the next easel. I get pumped and begin to research what's available.
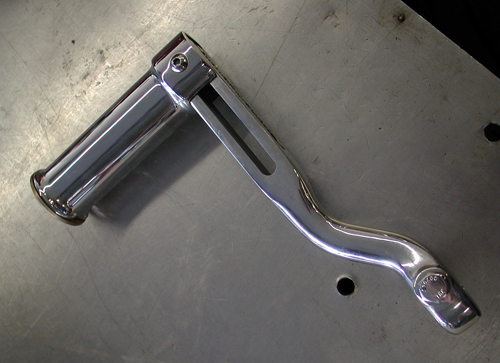
Billy Lane inspired me with his recent Henderson four custom and his notion to find vintage engines and build bikes around them. We traded a 1913 Pope engine for a '20s H-D Peashooter single that I will ultimately build a Salt Flats racer out of with the help of Todd's Cycle. Dennis is working on the frame and tank.

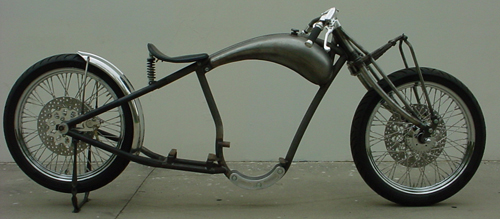
Rick Krost has also been inspirational with his board track racer frame and chassis kit. He was having a tough time finding a manufacturer for his intricate frames, so we drove to Carson City, Nevada and I introduced him to the chopper original, Ron Paugh from Paughco. Paughco Inc. began as a machine shop run by Ron's dad in the '60s when Ron jammed into the shop one day and asked his dad if he could build a Panhead inner primary. They've been building bike parts ever since. Ron was a natural to take on the vintage U.S. Chopper frame.
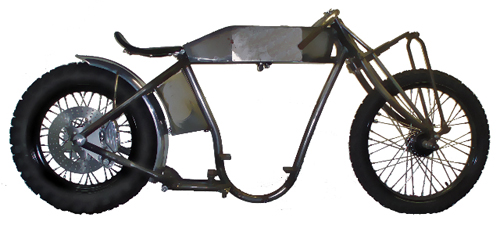
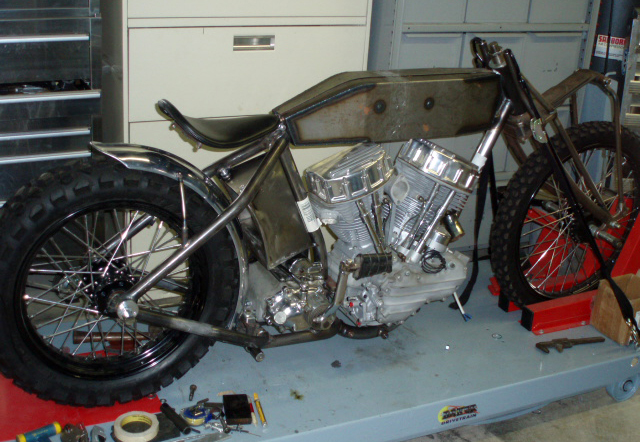
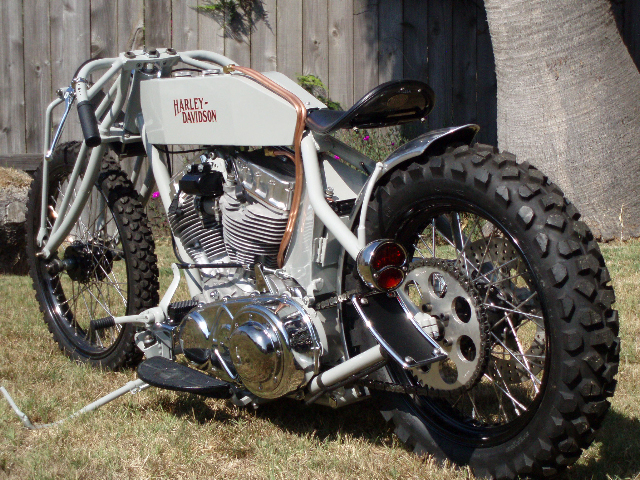
It's a terrific frame and some of the greats in our industry built U.S. Chopper Board Track Customs from Ralph of Knockout Choppers and Vicious Cycles show winner that graced the cover of American Iron recently. But there was an inherent problem with these chassis for a guy 6 foot 4. I was way too tall, but I was still intrigued.
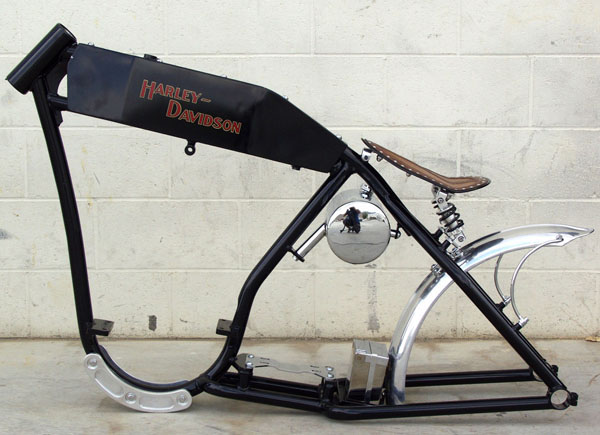




I wanted to build one of these, but in my old age status, I needed some size and forward controls. Then Rick started on his second generation model with the Paughco factory, and they called it the Factory Racer. Initially Ron built the first concept frame, this one. Rick didn't feel it fit his scrunched design criteria and asked Ron to shorten it by 6 inches and reduce the rake. Again, it put the U.S. Choppers design configuration out of my too-tall league. My project was threatened.

I spoke to Rick and told him my concerns, so he developed two frames. In fact, Rick's super-short version turned out to be way too short and he was forced to lengthen it slightly. And so this project began with all Paughco components including their highly secret manufacturing process that allows them to produce absolute classic wide and narrow tapered-leg springers. I went with the narrow job to stay in keeping with the 1915 style.
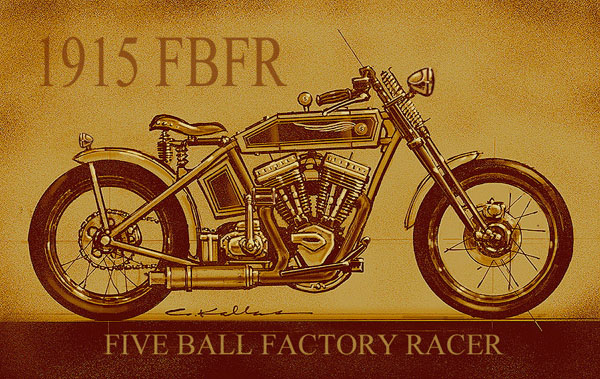
While I ordered parts I reached out to the Bikernet Official 5-Ball Racing Illustrator for an inspirational visual. I fed him information on the format and elements and he made the project come to life. I'm always inspired by each build, but for some reason the 1915 5-Ball Factory Racer held a special significance. We are planning our first Bikernet Vintage Classic Ride and gathering to Sturgis next year, and so perhaps a tradition will emerge.
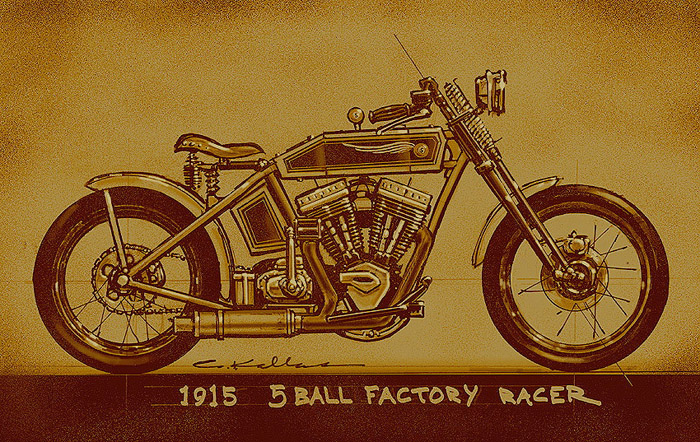
Billy Lane and Chica would like to tag along when we cut a dusty trail with an assortment of vintage and replica bikes to the Badlands. We are hoping we can make our semi-central meeting place the new location of Dale Walksler's Wheels Through Time Museum in Arizona. I spoke to him this morning and he still doesn't have a desert location.
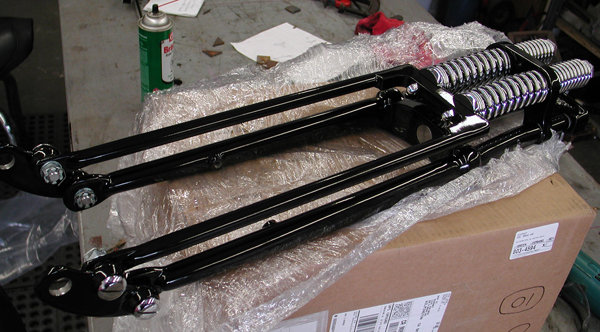
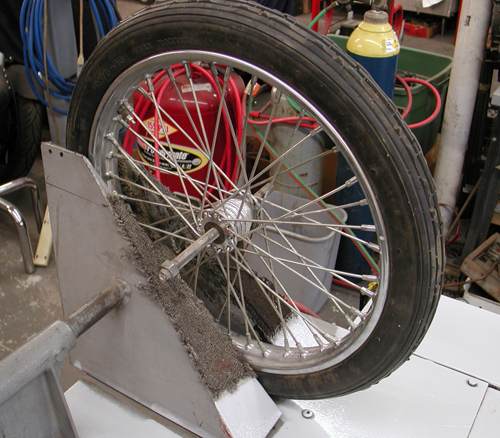
So I was pumped, and I always attempt to build the ultimate bike from a reliability and handling ease standpoint. I always have the notion that this bike will stick with me into my ripe old age; easy to work on, easy to ride, comfortable and durable. I'm not trying to build a show winner or something so exotic that it's not road worthy. I'm after the opposite. I want a bike that is tough as nails and looks that way.
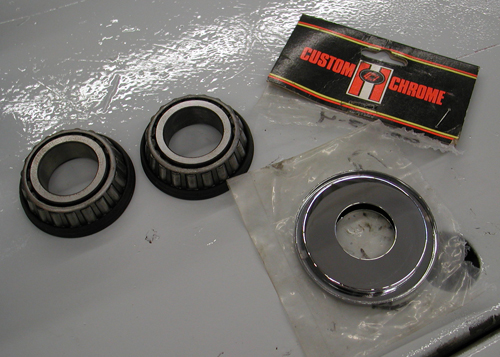
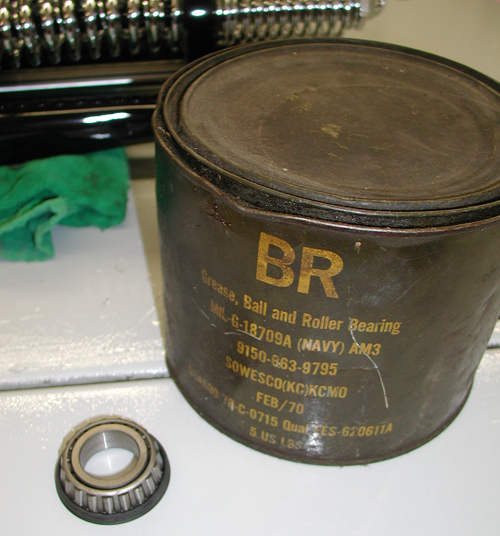
The other code I hoped to follow was one of tradition. Without getting crazy I planned to adopt as many early H-D parts as possible for a Vintage look. Paughco's catalog helped a lot with traditional '20s rectangular footboards, a vertical tool box, and flat side tanks.



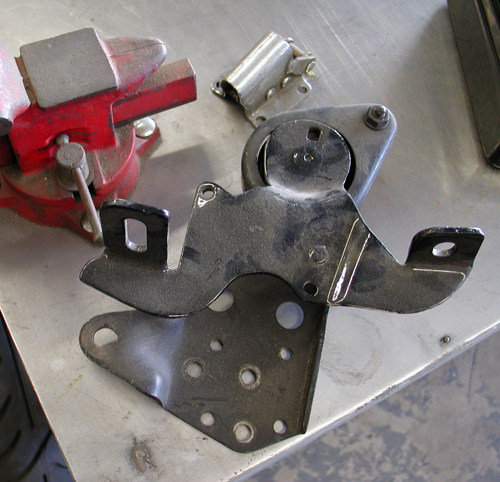
I reached out to Fred Lange for a vintage '20s sprung seat. Nash Motorcycle Company has vintage grips and DBBP in Europe makes bronze dogbone risers. Black Bike Wheels custom-builds 3.50 wide 23-inch wheels and Avon makes tires to fit.
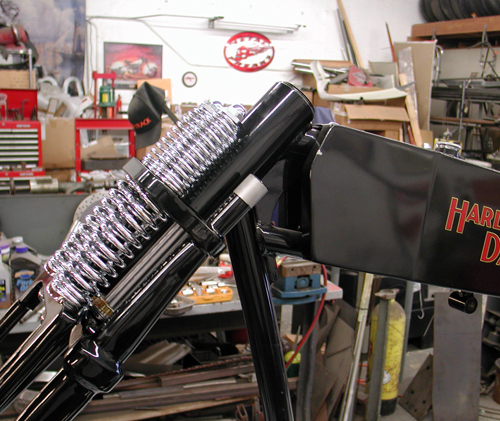
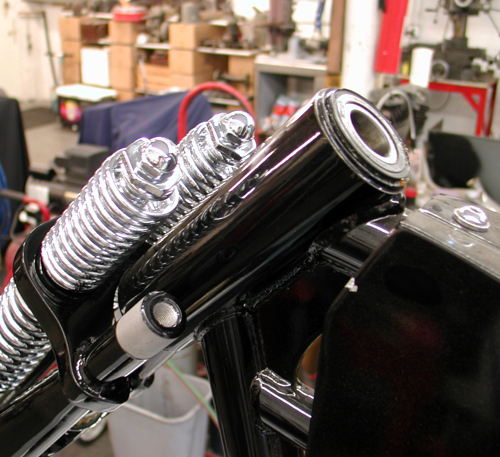
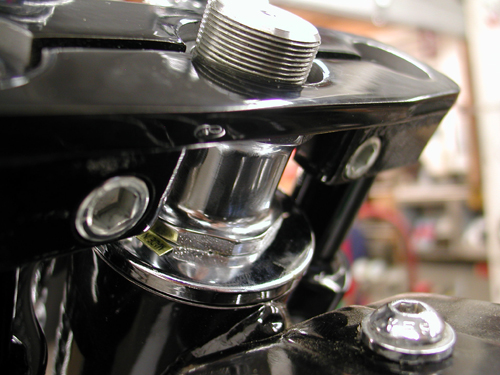
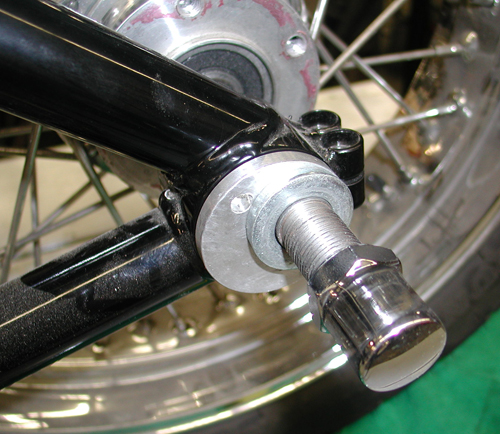
I dug through my lockers of parts for old H-D controls, kickstands and miscellaneous items from the rigid frame era and started a stack of parts. I ordered the coolest headlight, taillight, and air cleaner combination from Crime Scene Choppers, their Rapid series.
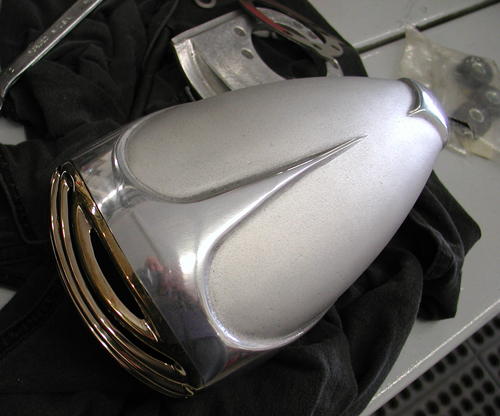
Recently, I ran across a classic shotgun-styled exhaust system with an approved Suppertrapp tuneable muffler. I was going to make my own system, but this one is killer. Part of it comes from WCC and part from Illusion Cycles.
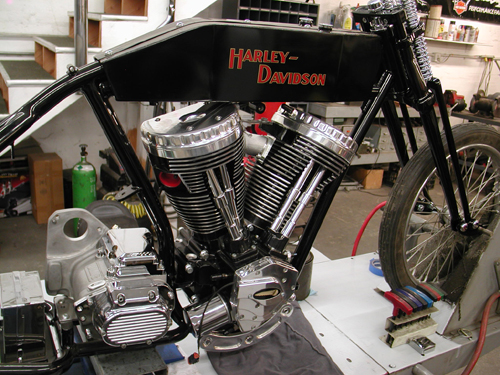



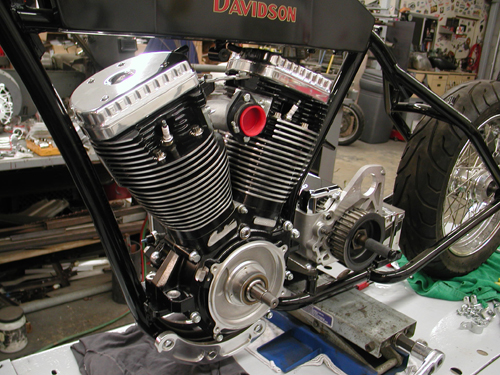
The key to the success of this project is the drive train. I sought a Crazy Horse V-Plus, 100-inch engine for several reasons. It has a classic design, renewed performance, looks and a left-side carb. I will couple it to a JIMS 5-speed transmission with a Baker kicker unit and a 5-1 shifting drum, so I can run a tank shifter and find neutral without a problem.
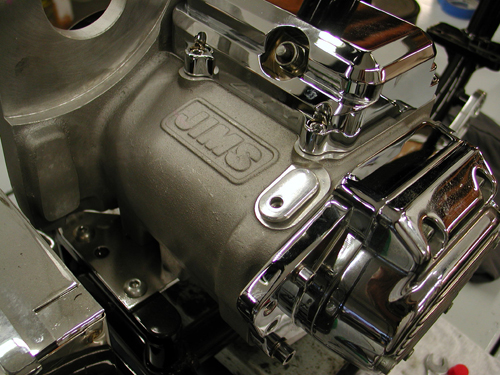
I generally run a BDL primary drive and Spyke and Compu-fire electrical components. I'm going to remount the gas tank with Bung King components and Rick Krost is building the oil bag to fit. For some strange reason I'm sick like a puppy dog today, so I'll stop here, but I will be back shortly with an update. If my head would quit throbbing I'd add some highly inspirational closing, but I'm toast. See ya next time.
