Motorcycle Mania And Hugh King
By Robin Technologies |
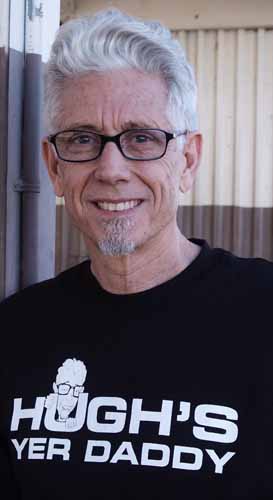
What hit the American Motorcycle industry like straight pipes and tire sizzling burn-outs, at 4 in the morning? Television, in the form of Motorcycle Mania one and two. The introduction of chopper building skills and rebel attitude, unleashed broadband, to citizens all over the country, rocked the biker world. Then chopper heaven in the form of Biker Build-offs struck with round two. Who was responsible for this Tsunami boon to our lifestyle? It was Hugh King, the producer/director/writer and editor at large of Original Productions.
Hugh felt the crisp freedom and wild wanton wickedness of the chopper industry in 1947 as a Milwaukee youngster, with his nose pressed against his living room window. An older neighborhood wildman, Billy Brody, screamed down the street on a bobbed ’46 Indian Chief. He tore across his folk’s lawn and slid to a stop on the front porch ignoring the driveway and garage alongside the house. That scene, on the Oak shrouded street, was emblazoned in Hugh’s expanding creative mind for years to come. In fact he added a wild black and white scene of a biker burning into a bar, to his documentary resume while living off grants and making social action films.
Through the reams of vast, rough-shot, motorcycle footage he learned the Harley biker industry, from event coverage, to land speed record attempts. Hired by Original Productions he produced reality shows. Then one fateful day, while warm California rays graced his small Original Productions, office, Tom Beers, his boss, wandered in.
“Discovery Channel called,” he said. “They want a feature on the custom motorcycle industry. You’ve experienced the motorcycle world. It’s your assignment.” Since the offices were located in Burbank, California, Hugh investigated valley shops and called motorcycle mag editors. A mystery connection was made, and an old crocked finger pointed toward West Coast Choppers. “And the rest is history,” Hugh said.
By Motorcycle Mania two, Jesse became a star. “Viewers wanted to talk to him,” Hugh said of growing audience. “We filmed it for the average Joe and sensed immediately that people wanted to reach out and touch tools. There was a deep longing for the ability to make something out of nothing.”
Jesse smacked a cord in young American viewers with a ballpeen hammer against a flat sheet of aluminum. Fans witnessed pure raw alloy shaped into sleek gas tanks. “The footage of metal being annealed was graphically inspiring,” Hugh said. At that stage he was the producer, director, writer and editor (Tom Beers was the executive producer).
Discovery was rocked and wanted more, so Hugh directed the first four Monster Garage segments, then kicked off the Build-Off series.
Life kicked into high gear for Hugh and again Original Productions was approached by Discovery Channel to make Motorcycle Mania III or “Jesse James Rides Again” starring Jesse James and featuring his buddy, Kid Rock. Jesse worked with wheelwright, Fay Butler, in Massachusetts to learn the intricacies of copper fabricating. Fay manipulates old yoders like an artist’s brush shaping copper. Yoders were used in WWII to fashion sheets of metal for fighter fuselages and wings. Jesse and Fay worked together to shape the copper chopper gas tank.
The MMIII film endeavor raised the bar for Hugh. “I had the opportunity to work with high def film and top quality camera equipment,” he said. “We got to use the highest standard automobile commercial equipment like a Shot Maker and Chapman cranes for dramatic rolling angles.” His life hit overdrive as he filmed the building of the Copper Chopper for Jesse, American Bad Ass Chopper for Kid Rock, and they hit it to Mexico. “Nothing went according to plan,” Hugh said. “We changed the itinerary constantly. The people of Mexico were terrific as we shot from El Paso, Texas and Juarez, Mexico, in 125 degrees, through 350 miles due south to Chihuahua.”
Hugh filmed spectacular footage of the two riders passing smoldering sand dunes, sweeping vistas and lumbering Iguanas crossing the rugged roads toward Copper Canyon.
Having the time of their lives they rode south to Chihuahua, a growing city, and searched through the old market place. Riding west they climbed 6,000 feet to Copper Canyon, in the middle of the Sierra Madres, which is six times longer than the Grand Canyon. They slept in a small village on the lip of the gorge, in a town of 65.
Jesse and the Kid accomplished their goal of escaping fame and fortune as they continued West toward the coast over torturous curved roads through blinding lightening storms and over a territory where the only vocation is hijacking. “We slept in the camera van,” Hugh said, “since there was no place to stay, until we reached the white sand beach on the Sea of Cortez. It was a transcendental experience.”
Motorcycle Mania III will experience limited theatrical release later this year, followed by Discovery Channel airing. Hugh has a year and a half invested in the film while directing Biker Build-offs with Billy Lane, Dave Perewitz, Roger Borget, Paul Yaffe, Indian Larry and currently with Yank Young, Chica, Eddie Trotta, Russ Mitchell, Arlen and Cory Ness. “Choppers have turned my life upside down,” Hugh said. Although the family man doesn’t own a bike, he rides constantly. “I’ll jump anything the builders let me straddle,” Hugh said. You can see the motorcycle mania fever boiling in his gaze.
What’s the future hold for Hugh King? The Biker Build Off series is rockin’ through another chrome and flamed season and even hotter segments are headed for next year. “We kicked off the series with Billy Lane and Roger Borget,” Hugh said. “Initially it was intended as an elimination competition, but no builder can manufacture one ass-kickin’ bike after another, every 30 days. We currently pick builders by regions and diverse styles.” In 2005 he hopes to throw a massive live finale in Las Vegas and take the bike voting interactive.
At 65, Hugh ramped into an all-time high with custom bikes. He’s riding it for all it’s worth and the entire industry benefits.
HUGH KING SIDEBAR:
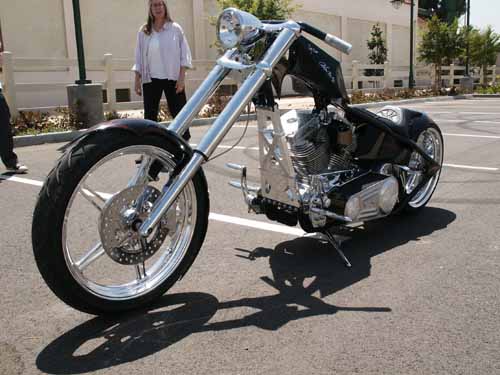
THE LAUGHLIN BUILD-OFF– On April 20th ten of the world’s greatest bike builders thundered into Laughlin, Nevada. For 72 hours in a secret desert shop they worked non stop to create BBO X, a one-off 124 cubic inch, rigid, right side drive, black and chrome, spear-like chopper. Then they presented it to Hugh King, producer of Discovery’s Great Biker Build Off. The geniuses who came together to make this awesome steed were Arlen Ness, Cory Ness, Russell Mitchell, Eddie Trotta, Mitch Bergeron, Kendall Johnson, Matt Hotch, Joe Martin, Chica and Hank Young.
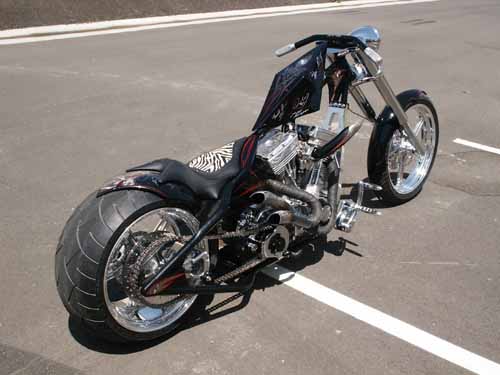
Chica hand fabricated the gas tank. Hank Young made the oil tank. Kendall Johnson was responsible for assembling and tweaking the 124 cc. S&S motor and the Baker 6 speed transmission, Mitch Bergeron was responsible for the frame and the billet down tube (in which was cut in the Roman Numeral X and the Discovery planet), Matt Hotch fabricated the fenders, Joe Martin built the pipes and did the pin striping, Russell Mitchell and Eddie Trotta built the front end and Arlen Ness and Cory Ness were responsible for the paint and the overall supervision of the project.
A special guest appearance was made by legendary seat maker, Danny Gray who fabricated a black leather seat with a zebra stripped manta ray inset.
On Saturday night, April 24th, before thousands at the Laughlin River Run, BBO X was unveiled and formally presented to Hugh King.
Each of the ten builders had competed in Bike Build Off before. Their ten bikes were on display at the Discovery both where the people voted on which motorcycle they thought was best in show.
Matt Hotch’s low slung, blue beach cruiser took the prize. Watch every Monday night for a new Build-Off on Discovery.

Sturgis Shovel Part 6
By Robin Technologies |

Here we go. I’m relunctantly behind the eight ball, or more likely the 5-Ball in this case. The bike is nearly complete and I haven't caught up with the articles. For the most part I was working at Primedia on the bike mags and didn’t have time to breath. No fucking lame excuses. Let’s hit it.
My original plan called for brass sculptures to hang this bastard together in a purely Bandit way. I messed with some odd heavy brass cloverleaf rod that was over a ½ inch in diameter. I wasn’t having my usual creative luck with bending or messing with this material. Kent from Lucky Devil Metal Works in Houston recommended that I use silicone Bronze rod and I’ve since messed with it. I shifted gears from Gargoyles and sculptures to pure mechanics. I started drilling holes is everything.
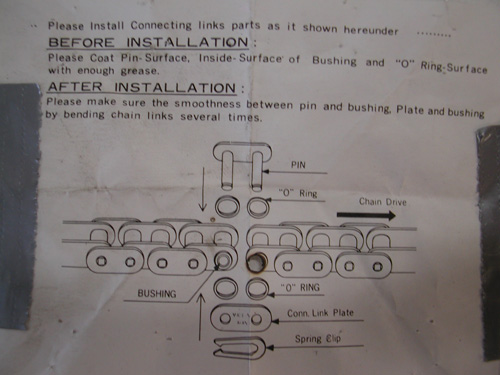
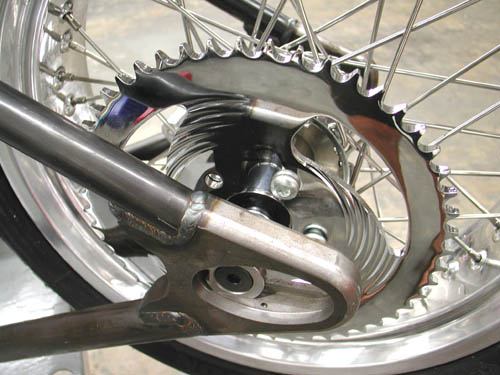
I discovered a piece of ½-inch wide strap that I thought was copper. Remember that the notion behind this mess is to use as much bare metal as possible. As it turned out the strap was brass so I gave it the Scotch Brite treatment and went to work. Before I made or positioned the rear Custom Chrome chain I needed to align the wheel, the transmission and the engine. I used my BDL inner primary and pulled the loose engine and tranny into position. Then I centered my chain axle adjuster and installed the chain using the CCI instructions (above). I have an old chain breaking tool, so I took out just enough links.
With the chain in place, aligned and adjusted the wheel using the Doherty wheel spacer kit (a life saver). I couldn't mess with the requisite chain guard until all was in the correct groove. Although the Paughco custom frame is designed for a belt, I choose the old school route and it worked out well. Lots of extra space to mess with.
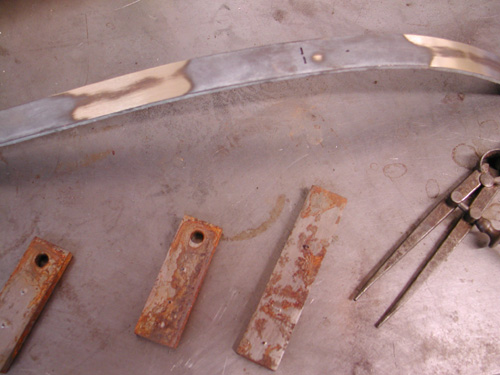
I dug through my drawers of tabs and crap that I’ve had around for 25 years. In the old days Mil Blair would call me from Jammer from time to time and tell me when it was time to shit-can scrap iron. I picked up tabs, spacers and brackets by the fist full and I’ve been moving them from place to place ever since. But damn, when you need a tab it’s bitchin to find just the right size in a drawer. Since I was going nuts with the drilling treatment, I matched the work on the frame with holes in the chain guard and counter sunk the edges for a more rounded look.
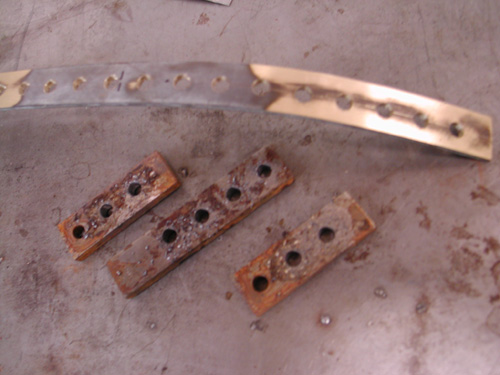
I also hit the top motor mount with a similar treatment. To give it a bit of consistency I measured from center to center on the holes and made all the holes the same diameter, 1/4-inch.

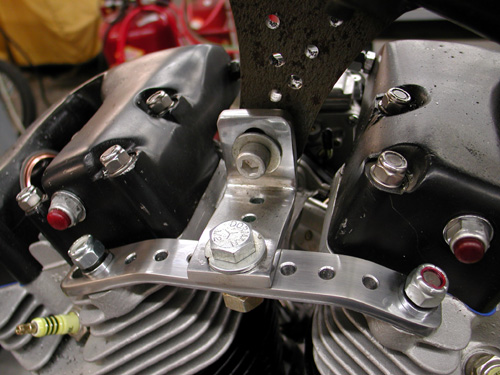
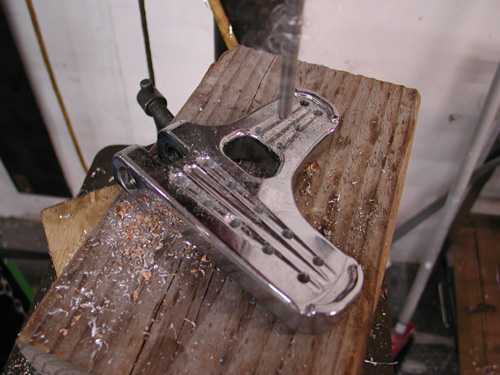
The hole deal became an obsession. I started drilling ¼-inch holes in everything including the Joker machine foot controls. I also went after Russell Mitchell’s Scotch Brite code. I swallowed hard and rubbed a piece of chrome with the coarse material and discovered that chrome reflects everything until it’s brushed with the wiry fabric. It gave it a raw material appearance and I decided that it was cool but a pain in the ass to do.
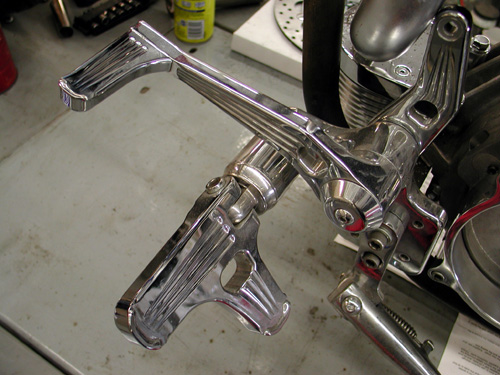
Again, I drilled the holes the same space apart, ¾ of an inch. It’s not always that easy, though. Sometimes the formula just doesn’t work. I use a pair of calipers to hold and mark the distance from hole center to center. If a hole ends up being located too close to an edge of the material, I back off and try another formula. Make sure to plan before you start drilling.
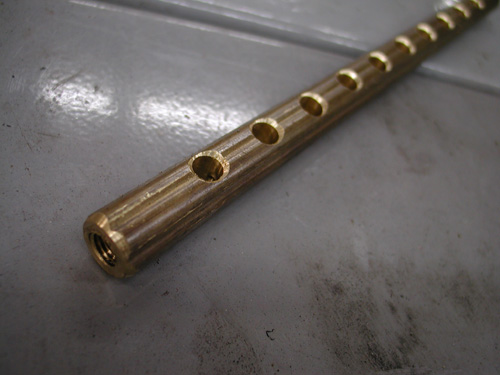
Here’s that damn brass stock. I was determined to have Brass, Copper, Stainless, Aluminum and a bare metal effect on the frame. You’ll see shortly how it worked out. I couldn’t bend that brass shit without destroying it, so I made the shift linkage out of it. I cut it off on a bench lathe and drilled and tapped the ends to 5/16 fine threads to fit the fine thread heim joints. Then I drilled the rod and countersunk the holes to remove the sharp edge.

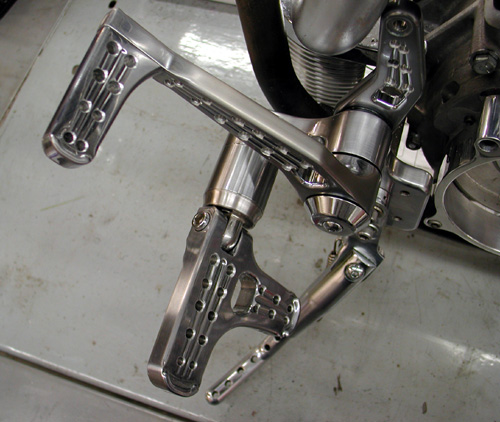
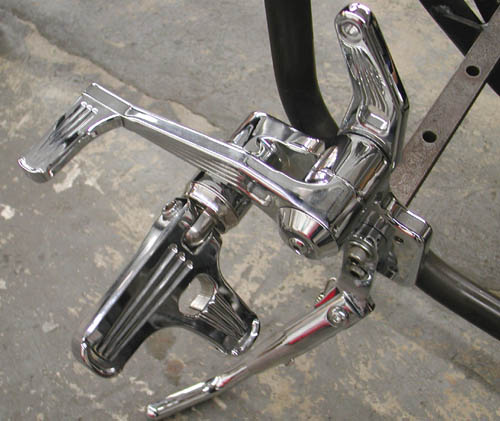
Here’s one of the Joker Machine control sets, rubbed with Scotch Brite and drilled. They make fine controls, some of the best. You can adjust these puppies anyway you choose to fit your riding position, inseam or foot angle.

Before I leave this chapter I’ll touch on this new petcock from Spyke. It’s incredible, if it works well. It’s designed to give you every option for positioning and spigot direction. I ran into only one problem. No wrench lands to help tighten the bastard.
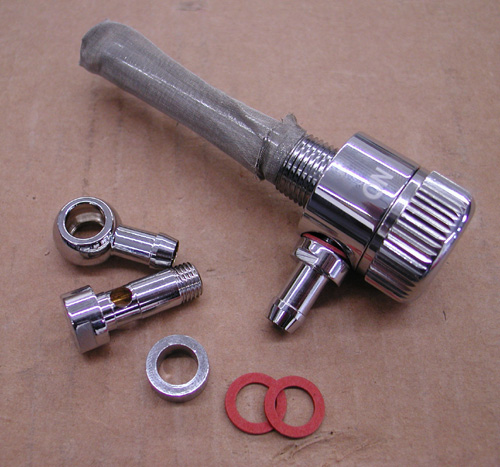
Check it out. You can run it faced in any direction and still read the switch locations and turn the knob without a lever smacking the frame and components. The spigot set allows builders to face the gas line in any direction.

I used the straight spigot and took off one of the fittings because my tank threads are female. The only problem I had was tightening it down, but I’ll get to that after the powder coating returns from Foremost Powder in Gardenia, California.
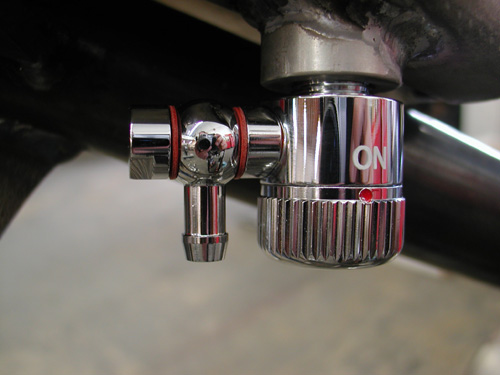
This puppy will revolutionize the industry for petcocks, if it works. I’ll let you know in a week or two.
Ride Forever,
–Bandit
Sturgis Shovel Part 2
By Robin Technologies |
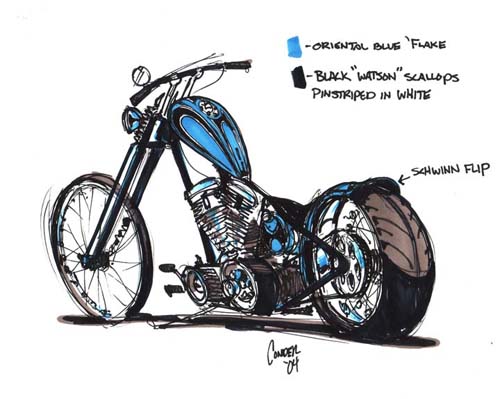

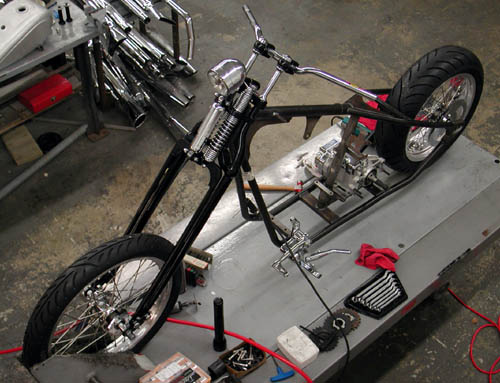

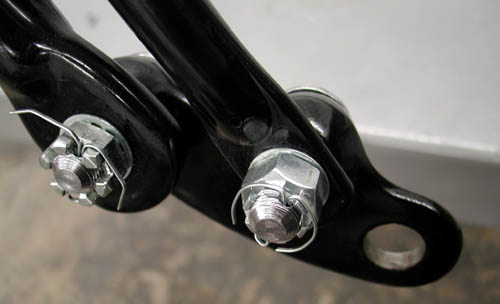
This bike might look like shit, but it should work perfectly. I'm endeavoring to keep it light, tight, narrow and right. So far so good. We've even decided to eliminate paint from the equation, except for rusty metal that may need black powder coating from Custom Powder Coating in Dallas, and the front end was powder coated black at the Paughco factory.

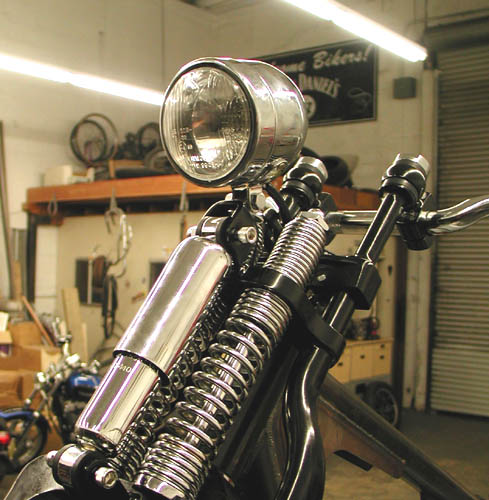
Let's jump into the shop. I was jazzed to receive my Rev Tech wheel order from Custom Chrome. I needed to mock up the frame and ship an image to Tim Conder for a concept drawing. Conder's images inspire any builder. I couldn't move on it until the Custom Chrome wheels were delivered and mated to the Avon Venom tyres. I'm also going to avoid chrome and flashy stuff as much as possible. We're running bare metal in several instances: Wheel rims, aluminum tank, brass fender rails and linkage, copper hard oil lines, and thick wall copper tubing bars. Dig this, we're going to galvanize the frame, rear fender and oil bag. The XR Sportster racing tank which is aluminum was delivered from Cyril Huze. I'm going to leave it brushed aluminum, but the capacity was a minimum 1.75 gallons. I'm mounting it high on the frame so we'll open the tunnel for additional fuel capacity and weld the area shut.
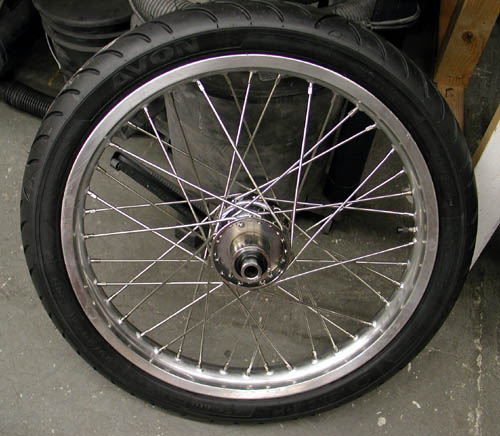
I'm jumping around. Let's get back to the Rev Tech wheels. The spokes are stainless with polished aluminum rims for a long lasting approach. Even the Paughco frame came with brushed aluminum axle plates. We're going to leave 'em alone. Cyril Huze designed a new, between the heads, coil and ignition switch mount. I ordered one without polish or chrome. It's unfortunate that we can't get wheels with Stainless hubs and eliminate chrome all together. The front is a 21 with a 18 by 5-inch rear for a 180 Avon Venom. I don't want a super wide tire. I'm specifically avoiding wide tires. I think they make choppers look like fat-assed chicks. They lose their chopper code of agility and lightness.
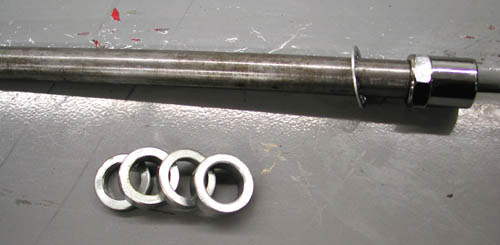
With my Doherty wheel spacer kit I was able to set up wheel spacing quick, for the time being. It's a trick working in the shop by myself and I will try to explain some operations from that perspective. We all face shop blues from time to time. Makes me kick back and rethink various operations when six hands are needed and I'm limited to one on the part and one on the arm of the drill press.
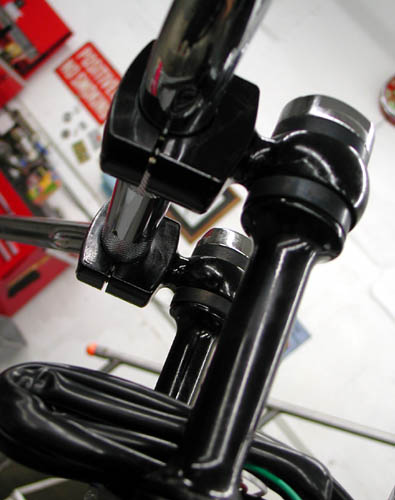
So alone one night I grappled with the installation of the CCI neck bearings (I need a JIMS tool for the races), to install the Paughco springer front end. After a trip to a local fastener store I was able to weave two studs into the rear legs of the front end for traditional, vibration dampening Custom Cycle Engineering risers. The studs needed were 1/2 inch about 2.5 inches long with 1/2-20 threads on one end and 1/2-13 on the riser end. The shop only had two different-length studs and one needed additional tapping to fit.
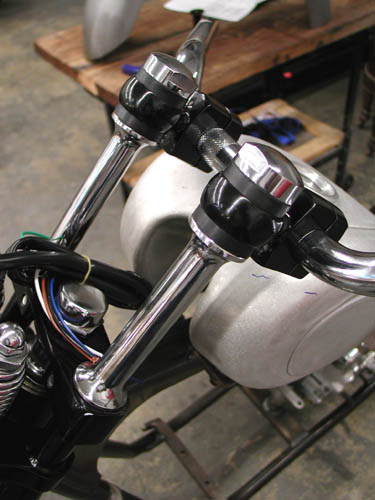

I use these risers on most of my bikes because of the traditional, old school appearance and the vibration element for long runs, but they take a degree of thinking since they shove the bars toward the rider (and often the tank) about 2 inches. I needed to watch for the appropriate amount of tank clearance and ultimately needed the 1-inch longer stems. Very high bars can be a problem with the leverage against the flexible rubber, but with patience, they will work fine. Since each riser is a single unit, they will flex and pivot until they're aligned and tightened down.
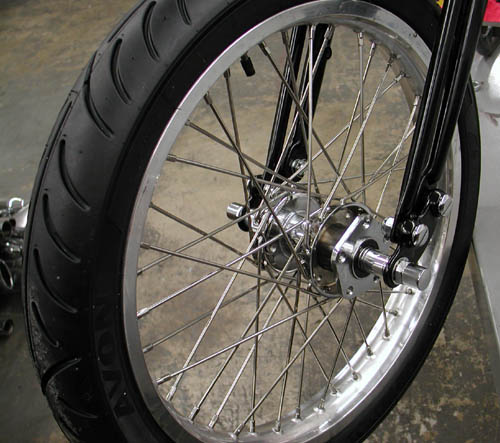
I installed low rise drag bars from Custom Chrome/Khrome Works. I'll see how they fit as the seat is mounted. I ordered a seat at a swapmeet this weekend, black with brass buttons by West Eagle. My plan is to bend thick-walled copper tubing and polish it for the final bars.
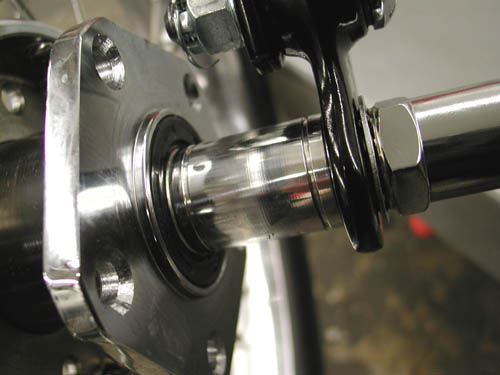

Now Imagine the first time I installed the front wheel, wrestling with the slipping front end and frame, the front wheel, the axle and the spacers simultaneously. Fortunately my 11-year-old grandson was on hand with a rubber mallet to assist. For the rear I used a crate to hold the wheel and the approximate height so I could muscle the axle and spacers through to align it with the frame. It was time for a Corona.

The engine is currently in the hands of S&S for a breast reduction from 103-inch to 93 smooth inches of reliable horse power. I'm waiting on the engine build images to share with you.
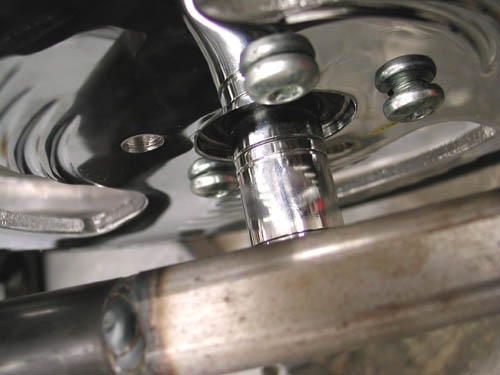
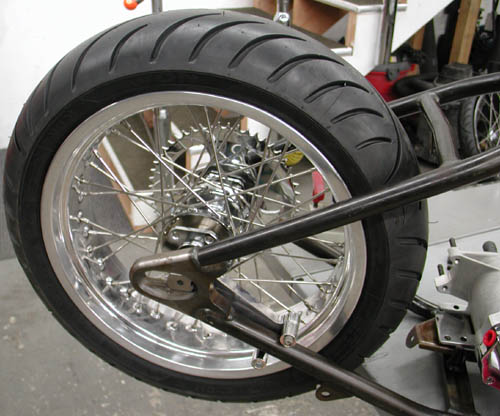
Hold on, I'm slipping the clutch again. Next I mounted the Rev Tech rear wheel with another Avon Venom within the Paughco frame. Unfortunately my Kraft Tech Fender is 9-inches wide and the tire on the 5-inch wide rim runs only 7-inches. I need about an 8-inch wide fender. I'm waiting for the shipment to arrive.
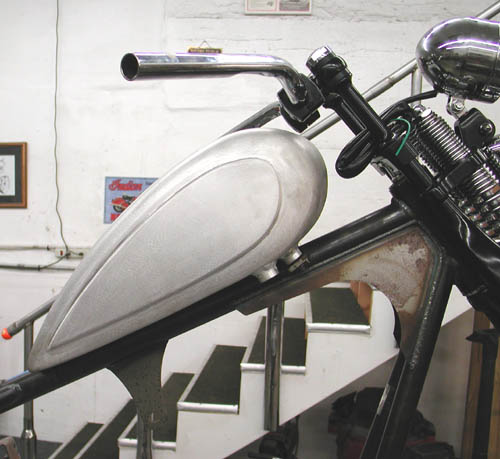
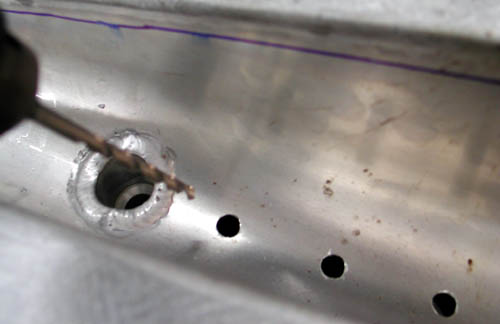
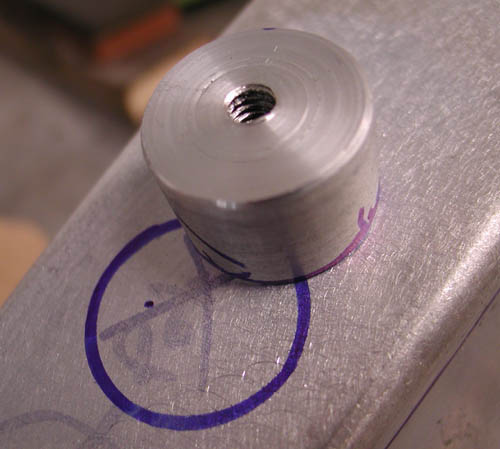
Then I moved onto the tank. I needed to create a couple of bungs for rubber mounting the rear of the tank and tap them for 1/4-20 threads. It was the first time I used our new/old lathe. This is all a new learning experience at the new Bikernet Headquarters. I grabbed a lathe that was rusting in Japanese Jay's backyard. He wasn't using it and I wanted one to cut wheel spacers. I reworked and cleaned the lathe until it was operational then the Doherty crew created a wheel spacer kit? Ah, but the lathe has a myriad of uses, like cutting bungs from a chunk of aluminum. Worked great.
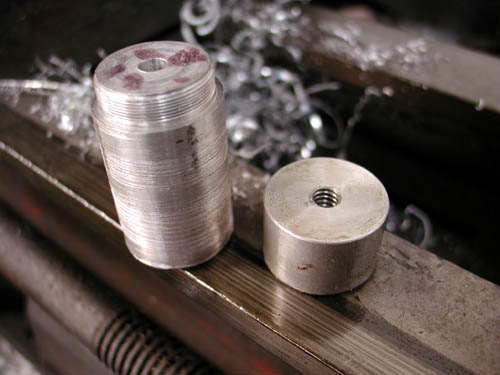
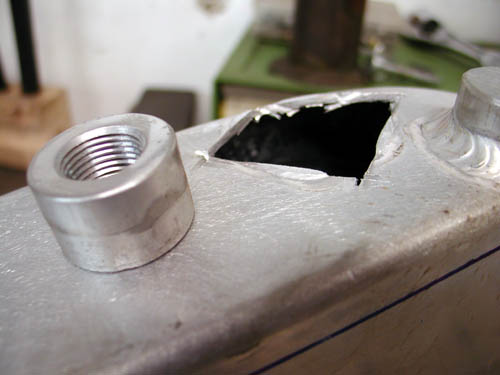
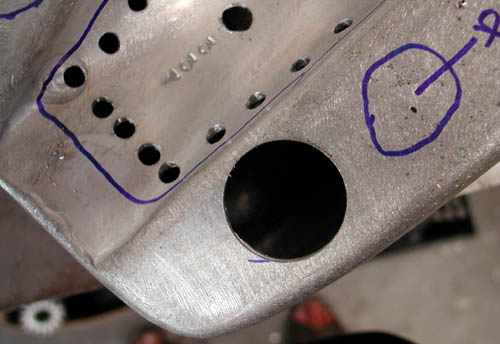
Then I tapped them using the lathe chuck. I discovered that the tank petcock bung needed moving to the rear, since the tank was mounted at an angle. I cut it out with a die grinder and returned to the lathe to machine off the welds.
Next I need to learn how to use my new/real old, milling machine. My dad was a machinist most of his life and ultimately an engineer in the oil well industry. As a teenager I worked in machine shops and picked up equipment experience between smoking joints. I swear I learned something.
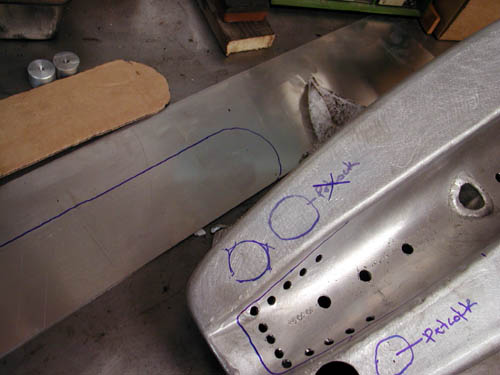
Let's see, what else. I dug through our parts bins and found the exact bracket I needed to mount the Kraft Tech oil bag. I need to cut off the existing coil and oil bag brackets and make a new front mount.
Wait a minute I'm slipping again. I dug through my bracket drawers and pulled a couple of old Jammer brackets 1/4-inch thick. I drilled 1/2-inch holes for the rubber mount grommets from Cyril Huze. I bolted them in place.
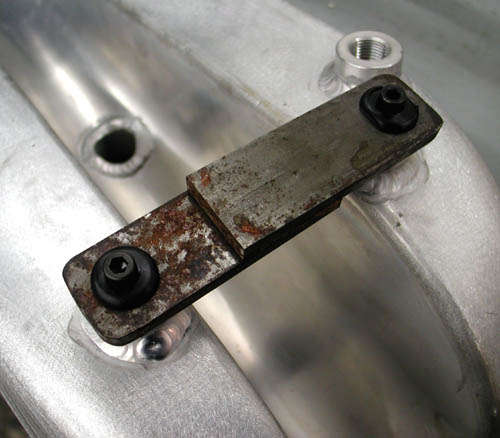
Next, I carefully measured the backbone tubing of the frame and figured the dimensions of the tabs and carefully marked and cut them, then beveled the edges for strong welds.
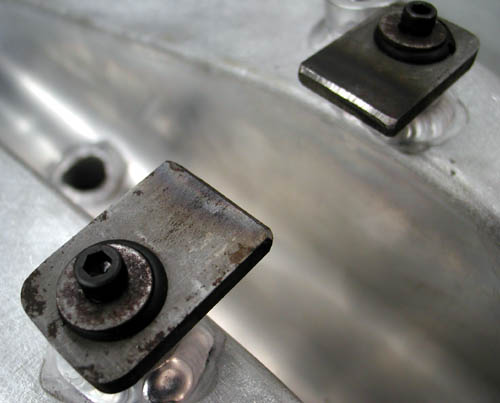
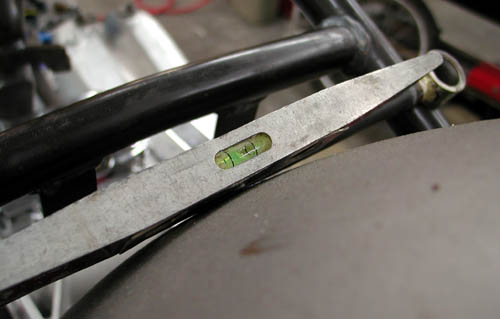
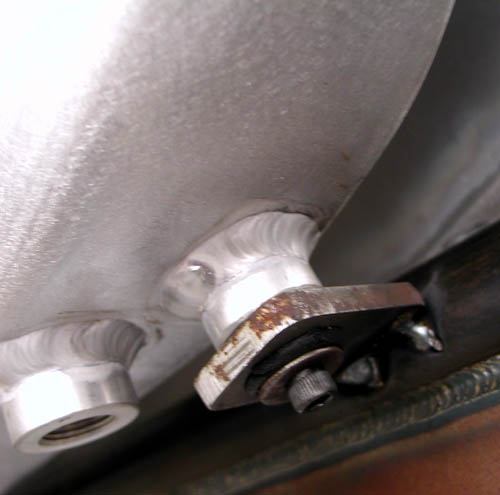
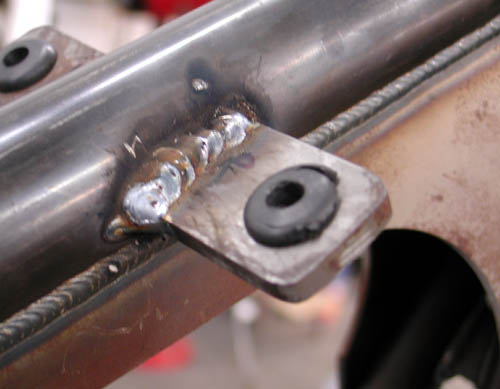
The next day under a sober sky, I refit the tank, tacked and MIG welded the tabs. Once the Bill Hall, pro-welder, welds my tank bungs in place and the tunnel is capped, I can make the final rear tabs and mount the tank semi-permanently. Is that possible?
Next, I will mount the Kraft Tech Oil bag, the rear fender and sprung seat mechanism. I'm also dealing with the rear drive. The frame was set up for belt, but more and more I like the chain notion.
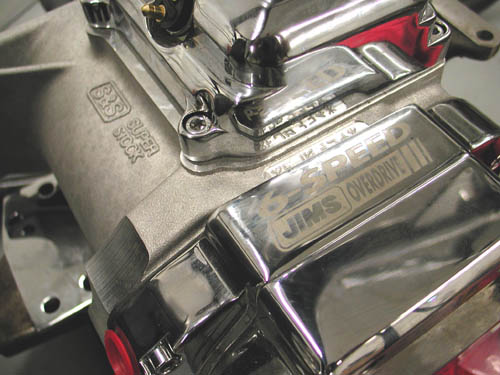
The JIMS machine tranny is set up for 4-speed applications with 6-speed gears. First, I ordered the wrong Custom Chrome tranny plate, then I was twisted about the sprocket vs. belt pulley needed to drive the bastard. I dug through old parts bins until I found gears, since it looked like a gear-driven job. Then the sprocket didn't fit. I'm still trying to figure it out.
I'm going to meet with Jim of JIMS in the next couple of days and get to the bottom of it.
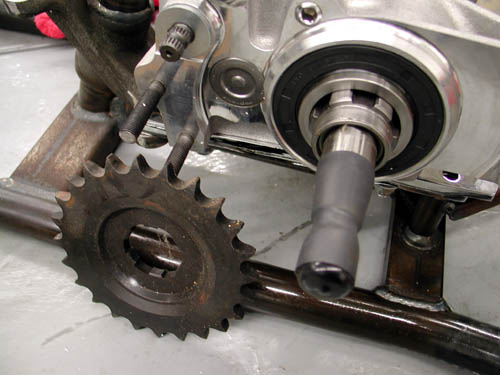
Although the frame is set up for a belt, that means if I run a chain, I'll have plenty of alignment flexibility. Hang on for my next report.
–Bandit
Doherty Machine
1030 Sandretto Dr Unit L
Prescott, AZ 86305
928-541-7744
mailto:Dohertymachine@aol.com
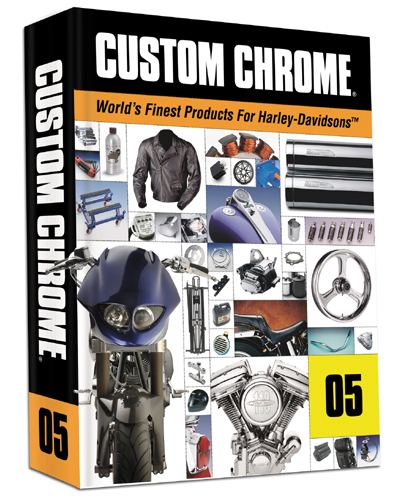
BRAND NEW CUSTOM CHROME CATALOG RELEASED–
Want the Custom Chrome's new offering for 2005. The California based distributor brings you the most comprehensive product offering in the Harley-Davidson aftermarket! At over 1,500 pages and over 25,000 part numbers, their 2005 Catalog features the new RevTech 110 Motor, Hard Core II, bikekits, frames and forks–everything from nuts & bolts to performance products. It's the Custom Bike Bible for the year. No, this is not the latest book, just click on it to find the real deal.
ONLY $9.95 + 6.95 Shipping**
** Price may have changed.
1928 Shovelhead Project Part II
By Robin Technologies |

In a dank dark corner of a dusty debris strewn shop behind the Strokers Saloon on Harry Hines Blvd in Dallas was a small stack of bike parts guarded by a massive starving pitbull with one eye and most of one ear chewed away. The beast was so vicious that it once chewed through a 1/2 inch tether cable, and ate four Avon tyres before it could be subdued and chained in place. No one had the balls to feed the animal and it ran off so many customers that a collective decision was made to relegated the dog to guarding our Shovelhead project. It was like a death sentence. The lovely Lena, the 14-year-old daughter of Rick and Tina Fairless, the owners, who was scheduled to be Bandit’s 6th wife had a fiery temper and told Bandit, in no uncertain terms that the bike would be completed until he left the other women behind and came to Texas to settle down. The Dallas crew surmised that it would never happen so the fuckin’ dog would starve to death waiting for Bandit to return to collect the fair Lena and complete his pact with the marriage counselor.
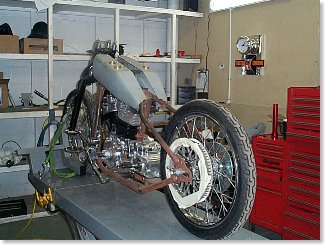
Unexpectedly during a freak Texas panhandle thunderstorm Bandit walked into the shop, carrying a turtle the size of a baby moon into and asked for the Lovely Lena. Upon presenting her with the turtle, her hardened resolve melted like a torch to a metal hanger and she swooned then demanded that her crew set to work on the project. We apologize for the long-winded explanation, but it’s important to understand all the delicate facets of this project to obtain a feel for the treacherous nature of this undertaking and the lives that hang in the balance.
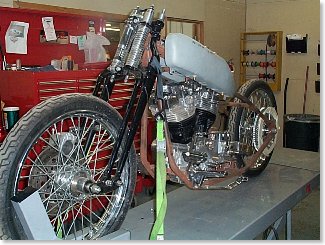
Just then the mega Dallas Easyriders store had a mass exodus of mechanics. Two were hospitalized trying to reach the parts, one died. Several were so pissed off at the shear audacity of Lena’s order that they started a competing business down the street. In reality they were so jealous of Lena’s affections for Bandit that they could no longer work and watch her dance through the shop on air. Enter Jim the transplanted fabricator from Florida who was hired before he knew what he was getting into. If you’re not from Texas, you won’t be familiar with the labor laws. Chain gangs are not exclusive to the Texas Penal system. They are a common phenomena in the work place. Jim hasn’t seen his family since going to work for the Fairless contingent. Between you and us, we have slipped Jim a note that once the project is finished we will spring him in the crate they plan to ship the bike, but that’s another story.
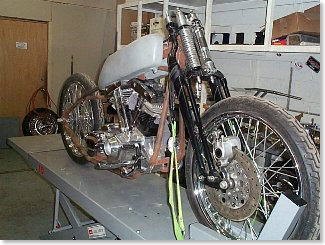
Jim has now modified the tanks for fit the Paughco rigid frame, mounted the engine and trans and front end. Randy Simpson is bending the bars for the project. Jim his building a box for under the seat for the battery since the oil will run from part of the gas tanks to the engine. If you note the belt pulley, we are now planning to run a chain for authenticity and since some other aspect of the bike forced us to go with a chain. We are still looking for the ultimate taillight to go with the project, and we hope to lower the front end enough to make the tanks more level, with Custom Cycle Engineering lower rockers. The front wheel is the stock Bad Boy 21 with an Avon tire. The rear will also be an 21-inch Avon with disc brakes. Pipes are scheduled to be reproduction stock early shovel pipes from Paughco.
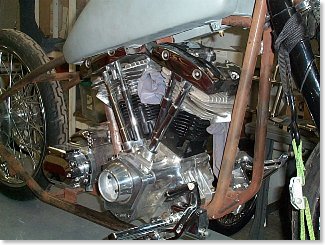
Watch as this project comes together. All bets are that the San Pedro Police bike with never even see the border of California, unless she sees the coast before the bike arrives. Stay tuned.
–Wrench
1928 Shovelhead Project Part III
By Robin Technologies |

The lovely Lena Fairless, who has threatened to marry Bandit (the sixth Mrs. Ball) and make him work for her folks at the Easyriders Dallas store, has been pushing to see that this 1928 Shovelhead project is completed in time for her wedding plans. Bandit doesn’t seem to move unless there’s a motorcycle and a woman involved. There’s just one problem in this case, which Lena is well aware of, she’s under age…
The other news on this project is that we now have a corporate sponsor, Ed Martin of Chrome Specialties, and a mentor, Chica, who builds bikes in Newport Beach, Calif. Chica built “Trick,” the old-time Sportster that Chrome Specialties is displaying at all the events it attends, such as Laughlin this month. Randy Simpson from Milwaukee Iron and Arlen Ness are also building spindly retro scoots with late-model drivelines. I spoke to Arlen the other day and he told me that a number of top builders in the country are building this style of beast for upcoming shows. Arlen is now building Sportster frames, sidecar frames and the tubs for these units. He’s sold 10 sets. Don Hotop is building aluminum tanks, so soon the parts for building these retro bikes will be even more available.
The contact stateside for the European parts we used is Fred Lange at (805) 937-4972. He has access to seats, fenders, front ends, tanks, headlights and more. Let’s see if we can pick up where we left off.
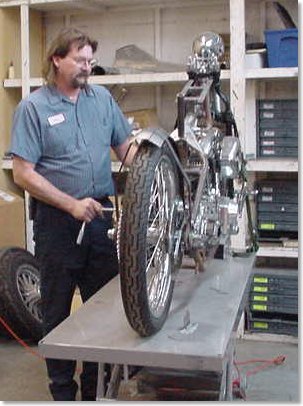
The frame is a stock rigid Panhead configuration from Paughco, with a stock, late-model Bad Boy front end. To drop the front slightly, Jim Stultz, Rick’s main fabricator/bike builder, used a KT components lowering kit to make the frame level because the newer springers are XA length. The retro tanks are sweat-brazed together and contain the oil in one half and the gas in the other. Unfortunately, the tanks did not fit the frame at all and had to be disassembled, cut and re-welded to fit. The fun part of such a round-the-town project is that it can be a true swap meet special once you have the basics in hand, and you can slip as far back into the retro world as you want. You can roll with chain or belt. You can use any old brakes you have around. Rick chose to use disc brakes and a chain, but he’s going with a jockey shift and internal throttle assembly from Chrome Specialties. The charging system will be state-of-the-art Compu-fire and the carburetor S&S. The engine and transmission were rebuilt from the ground up by JIMS machine and the engine cases are STD.
Both wheels are 21s for that spindly look. The handlebars were designed by Jim and bent by Milwaukee Iron. With the internal throttle cables, there will be a minimum of controls on the handlebars. Since the transmission was rebuilt with the notion that it would be electric start, an aluminum inner primary will be used with an old-time-looking tin outer primary that Rick picked up at a swap meet. Rick ordered a narrow Karata belt drive for the primary.
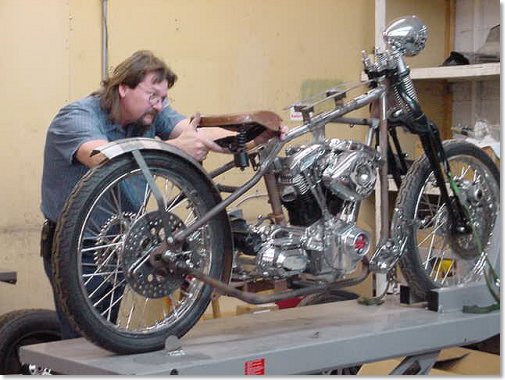
Jim sliced all the mounts off the frame except the front footpeg mounts, the engine and tranny mounts. Since the oil tank is part of the gas tanks, the only additional container would be for a battery to conceal a car-type marine ignition switch and a light/toggle switch.
“I try to fabricate components to be user friendly,” Jim said. He designed the battery box so it would only take two bolts out of the seat post and two out of the rear section and the whole pan will lift out through the top. The two sides covering the battery will meet in the middle in a flying wedge configuration, and Jim plans to build a top cap to conceal the battery from the area under the seat.
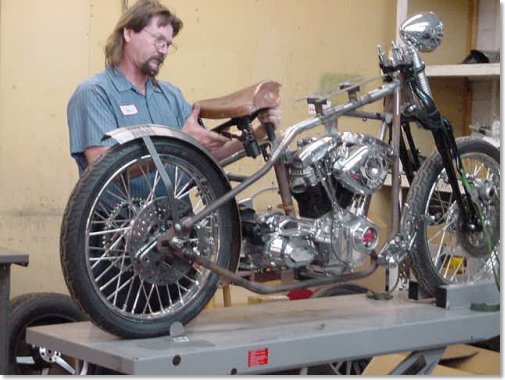
The steel gas tanks, once cleansed of the brass, were chopped and channeled to clear the rear head. The entire center of the tanks was removed to fit over the frame. Unfortunately that reduced the gas capacity to 1.5 gallons. The European threads in the cap bungs were tapped out of sync, so they had to be re-machined.
Lena teases Bandit with occasional shots from her mother’s digital camera. Next week we’ll discuss the mounting and installation of the Compu-fire ignition. Some members of the staff will be happy to see Bandit go to Texas, others, mostly the women, are bummed. He even called to see if he could ride it back to the coast and was told that it didn’t carry enough gas to get him out of town. Evidently the tank is Lena’s design.
–Wrench
Sturgis Shovel Part 3
By Robin Technologies |


We've developed a working relationship with S&S, and I was concerned about the 105-inch Shovelhead Richard Kranzler scored for my Sturgis Chop project. His motorcycle ran like a raped-ape, but the 105 tore the livin' shit out of his old school chassis. The mirrors became frisbies, the footpegs vibrated lose and ditched him at 125 mph on the freeway. The stress was more than the old swingarm frame could take.
Hot Rod engines are cool but will beat the shit out of a solid mount frame configuration. The best bet is to let them stretch out in a rubber mounted chassis. I called S&S to see what they would recommend and they suggested a smaller 93-inch configuration. James Simonelli put me in touch with Steve George, a 10-year S&S veteran, who said under his breath that they prefer not to mess with engine configurations other than they're own, but he would look mine over.
Made a lot of sense. S&S now builds a complete line of Shovelhead engines in four configurations: Two cone motor and two generator style. Each are available in 80-inch and 93-inch power configurations. Here's a description of their new units:
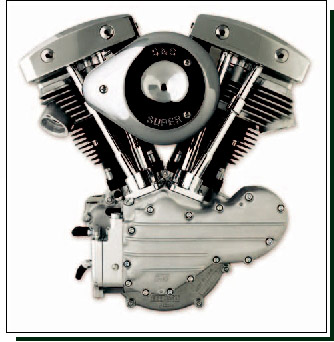
With the addition of the new S&S billet Shovelhead style rocker boxes and tappet guides, along with new pushrods and forged roller rocker arms for Shovelheads, S&S can now offer complete Shovelhead style engines. These engines will be available in 2005
S&S Shovelhead style engines feature the finest parts on the market today. Start with the bulletproof crankcases, flywheels, cylinders, and heads that they've offered for years, and finish the engine with new premium valve train components. S&S billet gear cover, tappet guides, and rocker boxes look outstanding and offer the performance level Shovel builders have come to expect.
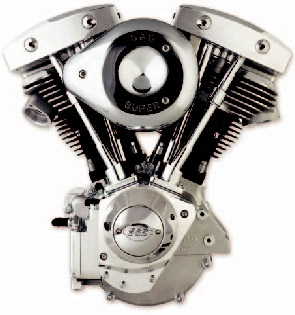
What you can't see inside the engine is just as impressive. The new S&S Shovelhead style tappet guides are designed around the quiet, dependable Evolution style tappets. Corrected tappet guide bore geometry assures correct valve timing using Evolution style cams. The unique adjustable pushrods are collapsible for easy removal and installation, but are stronger than our old style adjustable pushrods.
Inside the billet rocker covers are S&S's exclusive straight rocker shafts and the new S&S forged Shovelhead style roller rocker arms. The result is a Shovelhead engine with the kind of quiet power that some folks may just have a hard time believing.
A new addition to the S&S Shovelhead family is the 93-inch alternator/generator engine. This is the perfect engine for that “retro” chopper, but with a modern alternator charging system.
In addition, the late style sprocket shaft used in this engine allows the use of late style transmissions for additional modern functionality. So when you take your chopper out for a late-night cruise, and you want to see the road ahead as you click `er into 6th gear, this is the one.

Note:S&S Shovelhead style engines equipped with S&S tappet guides and tappets will be supplied with an Evolution style camshaft. Custom engines ordered without S&S tappet guides and tappets will be supplied with a standard Shovelhead style camshaft.
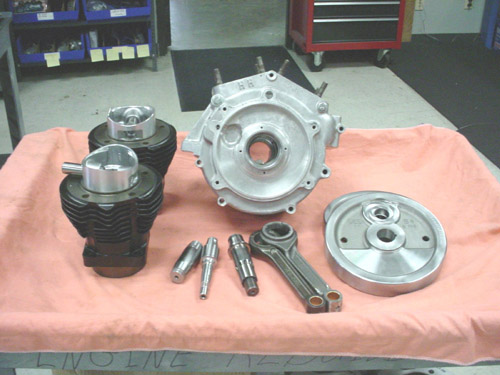
My engine was equipped with House of Horsepower cases. We used the same bore (3 5/8-inch) but S&S barrels and pistons with a 4.5-inch stroke (instead of 5-inch stroke). Stock bore is 3 7/16 and 3 1/2-inch for all 80 and 88 inch engines. This operation basically involved a S&S Sidewinder kit, including (left to right) cylinders, pistons, crank pin, connecting rods, cases and flywheels.
First Steve assembled the short block which was balanced to a 1300 bob weight for smooth operation and reliability. The S&S forged pistons are 8.2:1 compression with longer skirts for longer lasting reliability.
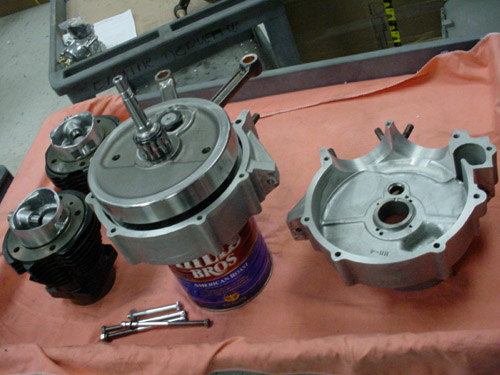
Then he assembled the wheels in the left case with fresh Timken bearings. My cases needed a ledge bored away for the longer skirted S&S barrels.
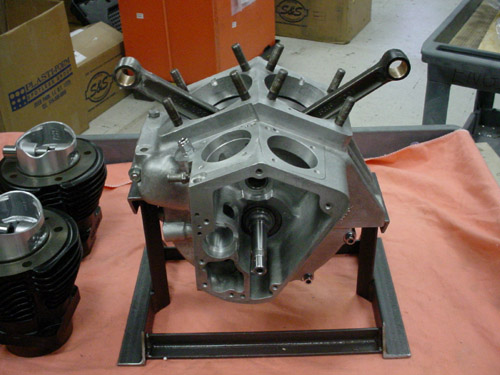
Next the other side of the case was slipped over the pinion shaft roller bearings and the lower end was complete. The flywheel weight is approximately the same as stock Evolution (lighter than Shovelhead wheel) for a balanced running engine and added reliability.
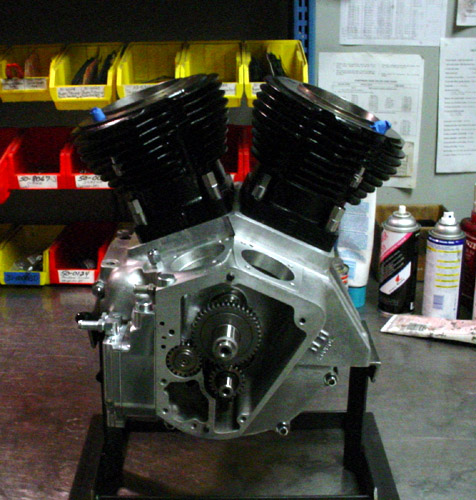
Ah, next came the pistons and barrels. I know we don't have all the details here, but at least you can see the big steps in building an engine. It's not tough but takes precision workmanship and quality components.

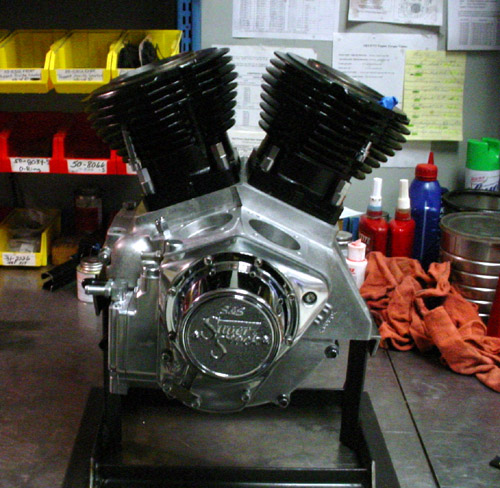
The final steps before shipping included the S&S oil pump installation and the cone cover. I'm returning a Compu-Fire ignition system to the cone in short order.

The engine is now at Phil's Speed shop. He're rebuilding the heads and will install S&S roller rockers, shafts, new Custom Chrome Black Diamond valves, new lifters (with bored-to fit lifter stools) and pushrods. Hopefully it'll be completed next week and ready to set into that Paughco frame. Then I can start bending pipes and making shit.
I've worked with Paughco for over 25 years, for quality frames and front ends, then this frame arrived and the tranny wouldn't fit. I had a 4-speed tranny plate that the JIMS trans slip right into, but the holed in the frame didn't align. I spoke to my tech guru, Frank Kaisler who contributes to Hot Bike, Street Choppers and was the editor of Hot Rod Bikes. He lives tech. Of course he pointed out that I needed a first electric start vintage plate. I had a late model, dipped, single sheet plate and the 4-speed job and neither worked. So I sat as my desk and poured a glass of jack. I had the bike buildin' blues.
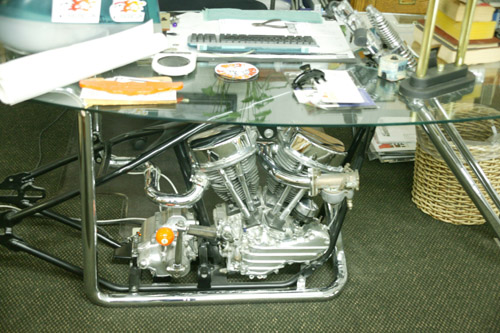
Here's the famous Bikernet Desk. I made calls about the tranny plate, unsuccessfully and slugged that amber liquid until my brow bounced off the glass top and I spied the tranny below–on the wrong plate. I couldn't believe it. All these years that desk ran with the wrong tranny plate, and it just happened to be the one I needed.
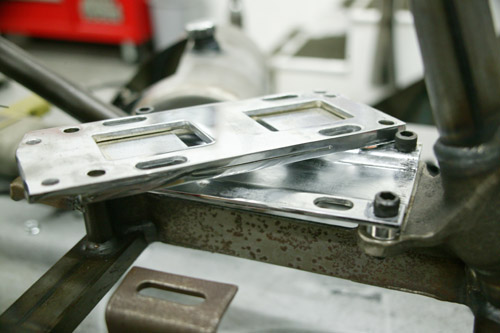
Here's both tranny plate together. The thick one with two slabs of steel is the original 4-speed job. The single, bent-in-the-center sheet with the four frame mount spacers was designed for the first electric start transmissions beginning in 1965.
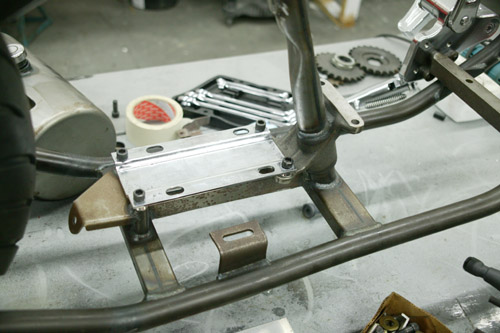
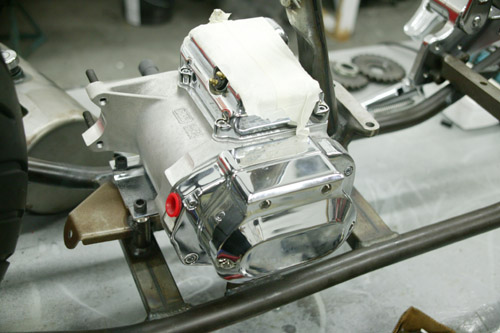
Finally the JIMS trans is in place with the proper mounting plate, and I was ready to move onto mounting the oil bag.
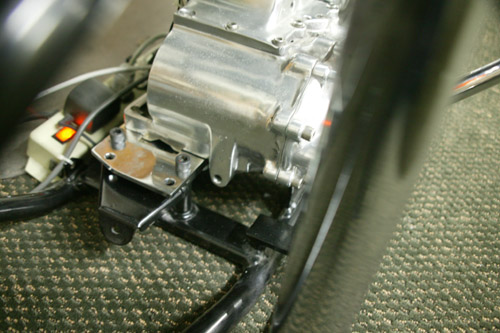
At last, after 15 years I installed the correct tranny plate into my desk. Damn, I'm embarrassed.
The rear fender is on it's way from Lucky Devil and I installed the Kraft Tech round oil bag last weekend. Movin' right along. You'll see that tech shortly. A new oil cooler/oil filter set-up is on it's way. It's a must for making the old iron last.
Sturgis Shovel Part 11
By Robin Technologies |
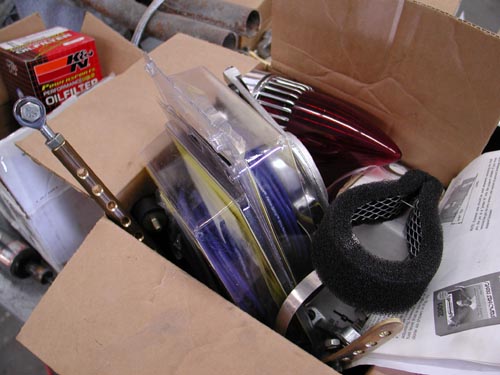
I’m not sure if I’m keeping everything in line. But this segment took us to Foremost Powder Coating in Gardena California. I was at that point when these shots were taken. I’ve had a Powder Coating Sponsor for years, Custom Powder Coating in Dallas. They’re good people and know how to handle custom work. They’ve handled jobs for Strokers Dallas, our custom for American Rider and even the 1928 Shovelhead for Bikernet.com.

Powder coating costs have dropped and it doesn’t make sense to ship a frame to Dallas. It would cost less to have it Powdered in LA than to pay for the shipping. So I looked around the area and was recommended to Foremost Powder Coating (877) We-Coat-it, 1608 W. 139th, Gardena, CA 90249. These people have their shit together and the girl who runs day-to-day operations, Esmeralda, is a delight on the eyes and to work with.
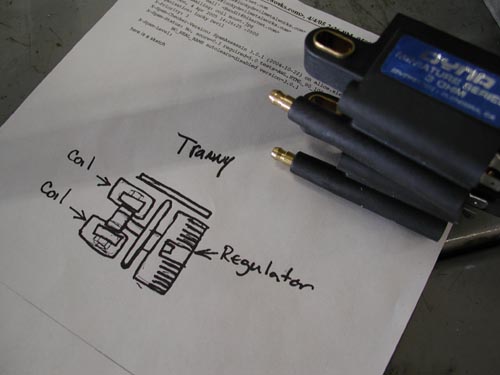
Let’s back up, though. Just before teardown for Powder I needed to think electrics. Kent from Lucky Devil Metal Works in Houston sent the above illustration for mounting the Compu-Fire voltage regulator under the tranny with the small Dyna Coils from Custom Chrome. I pondered that drawing and decided that I didn’t like the notion of putting my coils at ground level. What if I ran through a rain puddle? He’s built bikes using this technology several times and so has the guys at WCC, so it must work in most circumstances.
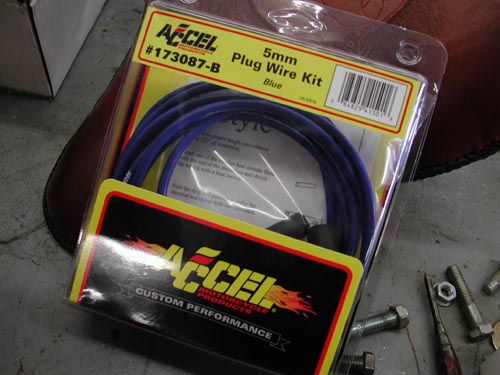
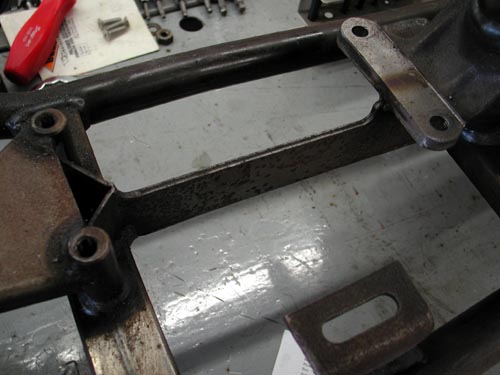
I decided that since I was going to run the Compu-Fire engine based electric starter that I had room under the oil bag for the coils. I still installed the sealed voltage regulator under the tranny on a 3/16 sheet of aluminum. But then welded brackets under the Craft Tech Oil bag to hold the two coils apart.
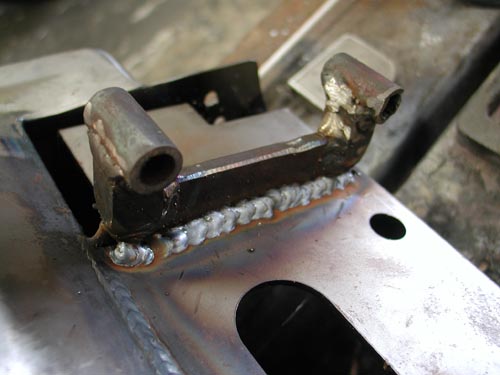
This was a delicate operation and ultimately the new Accell Sparkplug wires run right across the top of the RevTech Tranny. I also had just enough room behind the coils to house the wiring for the single-fire Compu-Fire ignition system. I thought through most every aspect of this motorcycle right up to the wiring business, then came up with a nuts notion, which I will explain during the final assembly process. It actually worked out fine with a handful of scary moments.
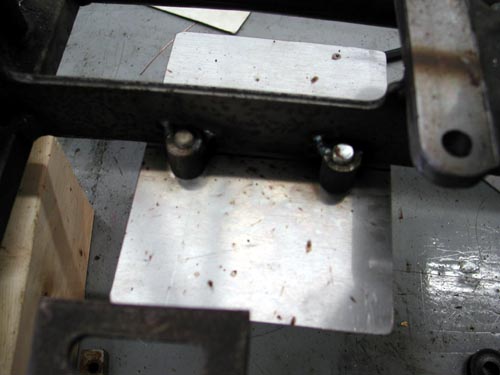
I welded four bungs that housed 3/8 fine threads to the frame with my Miller MIG welder. Ultimately I mounted the Compu-Fire voltage regulator to the pipe side (right) and it worked out fine.
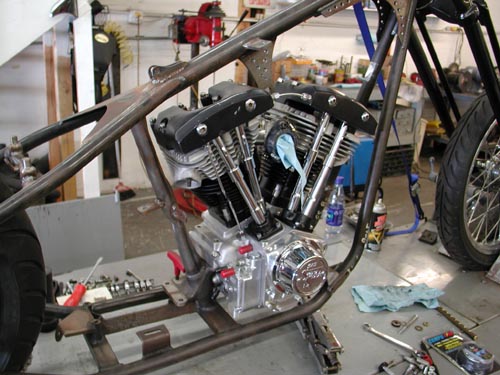
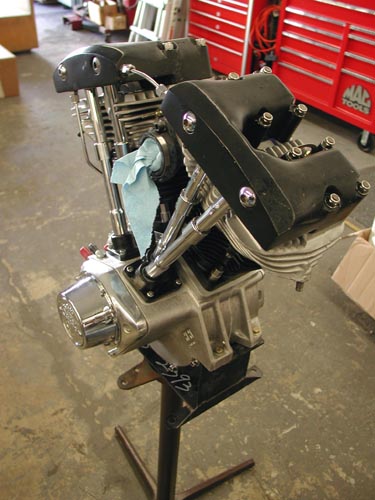
It was time to strip the Engine out of the frame, complete final welds, grind the welds and ship the parts to Foremost Powder. I needed to create a temporary engine stand to hold the S&S 93-inch Shovel in place. I used a RevTech engine stand and mounted it to a junk metal table leg. It worked perfectly and I shoved it in a corner for future use.
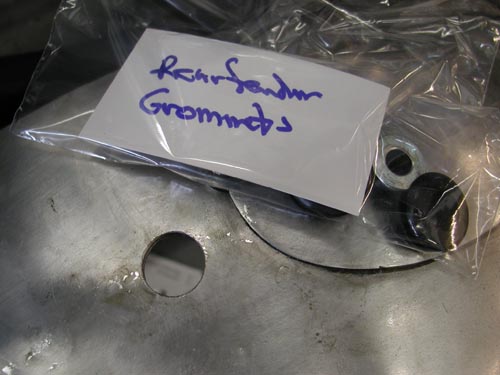
As I tore portions of the bike down I formed zip-lock bags with labels to hold the fasteners. You’d be surprised how fast you forget which spacer fit what, unless you organize. Mike Egan told me years ago that he takes photos of every part and organizes his assembly with photographs to demonstrate how components matched or were fastened. Since I try to take shots constantly I had an archive of various aspects. Hell, I just need to turn on Bikernet and look up the tech.
The next move was to finish welding any tab or bracket that had been tacked or partially welded. MIG welding is a breeze, but not as dead certain as TIG and I’m after a Lincoln TIG welder.
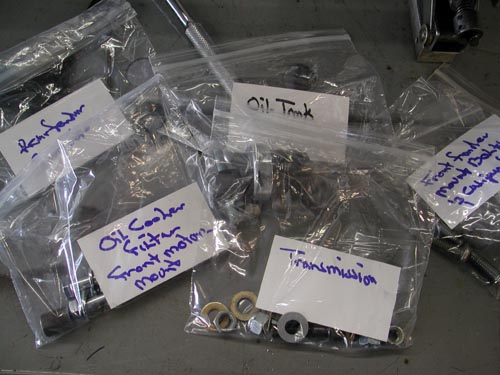
Here’s all the fasteners, grommets and spacers in bags with biz card labels. It works like a champ although I replaced some of these fasteners with stainless Allens wherever possible.
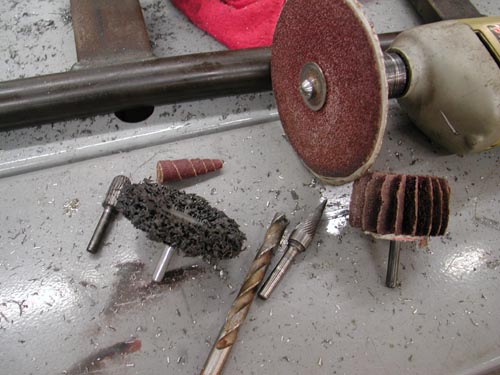
Next I dug out all my tools for grinding welds and went to work. This level takes a great deal of patience and artistic style, which I don’t have. The more time and patience, the better each weld will look. There is actually a process for bondo filling powder now, but it’s more costly. If you don’t want welds to show ask about it. If you don’t mind the look of a clean weld, just powder. I wanted the look of a machine, nothing slick.
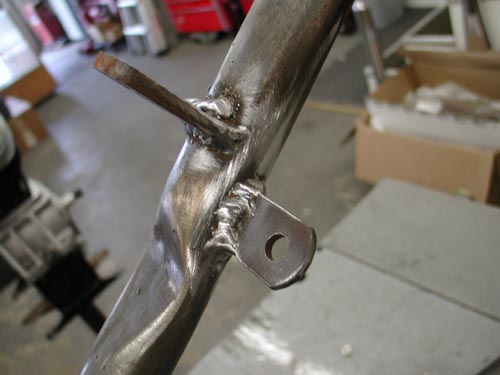
There’s one more consideration. Try to make each weld look the same as the next one for consistency. In my case that was tough. Some of my welds were decent, others sucked. I did my best, but my welds didn’t compete with the Paughco paid professional beads.
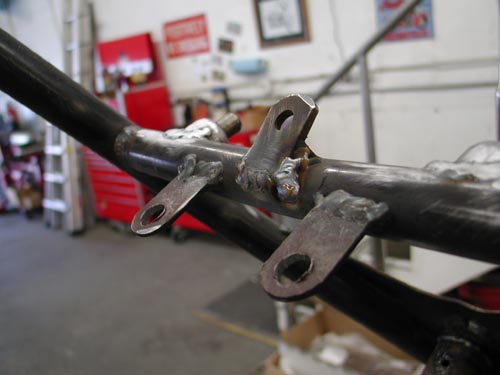
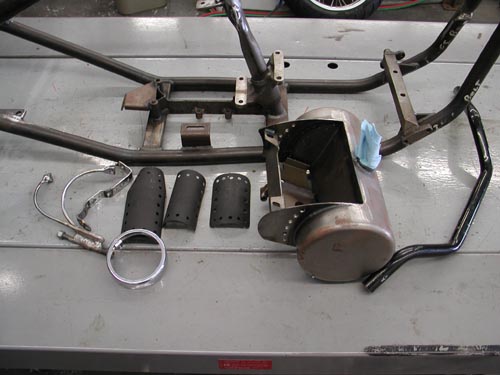
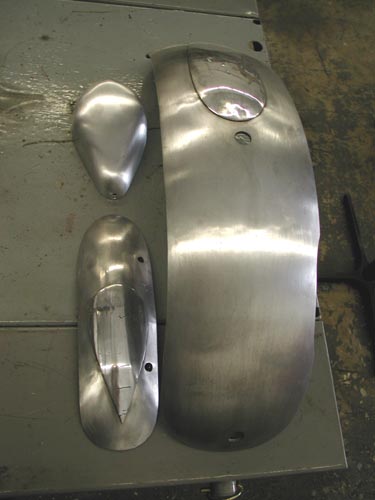
As I finished grinding and drilling holes in the frame for wiring I separated each group of powder finish parts and took a shot for the Powder guys at Foremost. It was a lifesaver to be able to hand them a shot of each group of parts since some had to be sand blasted before the finish was applied.
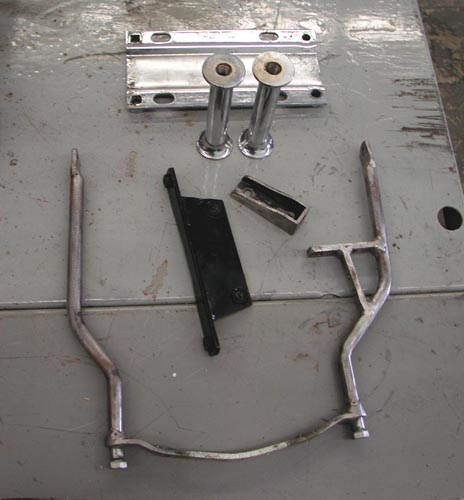
One more comment on drilling holes for wiring. This was one of the first times I drilled plenty of wiring holes. Remember Frank Kaisler’s rule? Drill the hole. Ream it out on a taper to prevent cutting your wires. Then with emery cones make sure there are no razor-sharp burrs in the tubing. Frank ran the emery paper then he’s twisted a Kleenex and shoved it in the hole. If it caught he’d sand the edges more. If not it was good to go. Let’s hit it to the next chapter, we’re burnin' daylight.

1928 Shovelhead Part IX
By Robin Technologies |

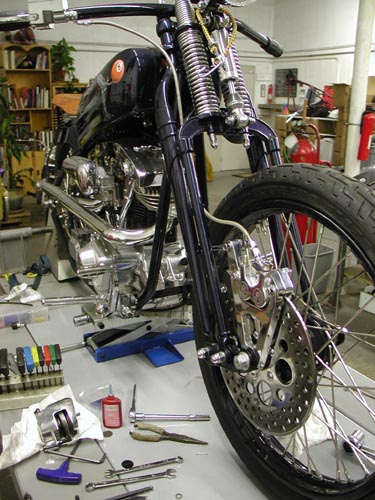
It’s time to feature the 1928Shovelhead and American Iron said theywould take it on. They’re the only bookthat accepts antique bikes. I’ve writtenabout four features for them on rare, very coolhistoric models.
No the ’28 Shovel doesn’t fallinto that catagory, but what the hell, it’sgot class. We needed to complete a couple ofdetail mods before Markus Cuff would aim alense at the blue beast. We needed matchingbrake rotors and a PM front brake system. Ipulled a front rotor from the CCI catalog andcontacted Performance Machine for theappropriate front brake caliper and springerbracket.
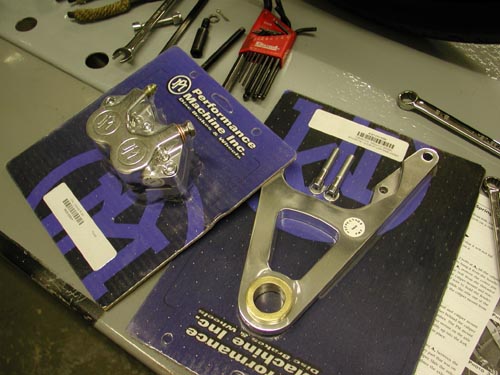
Much of the following comes directly fromthe very complete Performance Machineinstructions. They don’t mess around.There will be no doubt about the installation ofthis unit. Let’s hit it:
Before installing a caliper or rotor kit,read through these instructions completely;this will familiarize you with the way in whichthe parts fit together and the tools needed tocomplete the job.
In the course of installing these kits youwill be replacing the stock brake caliper(s)and/or rotor(s) with a high-performance brakecaliper(s) and/or rotor(s). Please pay specialattention to the section of the instructionsdealing with the centering of the caliper overthe brake rotor. Actually, I couldn’t findthis section. Generally a set of shims arepacked with calipers. Use the shims andmake sure the caliper is centered over therotor.
The brake caliper(s) used in this kit isdesigned to use DOT 5 brake fluid. Neverreuse brake fluid, don’t use brake fluidthat you are not sure is new and clean. Thisinstallation should only be attempted by amechanic with a thorough understanding ofand experience with motorcycle brakesystems.
If you plan on using the stock brakeline/hose that runs between the mastercylinder and the caliper, then you will be justswitching the line at the caliper’s banjofitting. We recommend that you do notdisconnect the line from the stock caliper untilyou have the new caliper bolted in place andare ready to bleed the brake system. This waythe brake fluid will not run completely out ofthe master cylinder before you have the newcaliper connected.
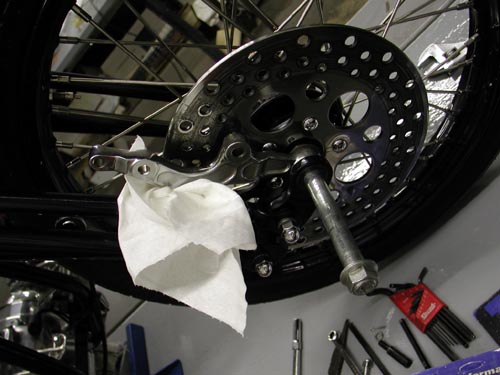
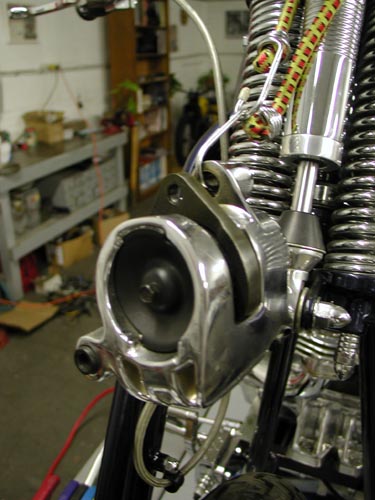
Loosen brake line and remove the twobolts, lift the caliper up off the rotor and use ashort length of wire or bungie cord to hang itfrom the handle-bars, up out of your way. Onthe 3/8‚ bolt, remove the cotter pin from therear; unscrew the lock-nut, unscrew the boltfrom the threaded bushing in the fendermount and pull it out of the caliper mount andreaction link. On ’93 and later models,use a piece of wire to hold the fender up out ofyour way. Unscrew the axle nut, slide the axleout of the fork and lower the wheel to theground. Remove the caliper mount from theaxle and the bushings and spacers. Keep thisshit around, you’re going to need it.
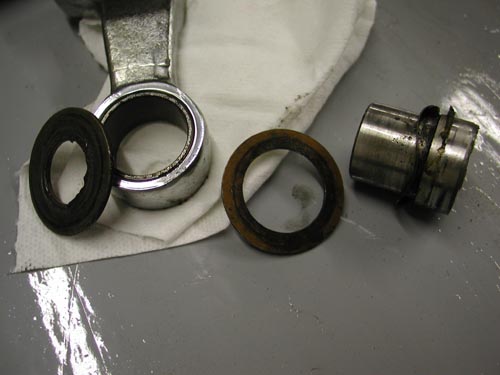
The Springer uses a combination axleseal and caliper mount bushing, with awavy-washer and bronze thrust washerbehind the caliper mount. Remove anddiscard the bronze thrust washer that goesbetween the caliper bracket and the wheel.The PM mount has this thrust washer built-in.Install the PM caliper mount on the axleseal-caliper mount bushing with the wavywasher and raise the wheel assembly up intothe fork.
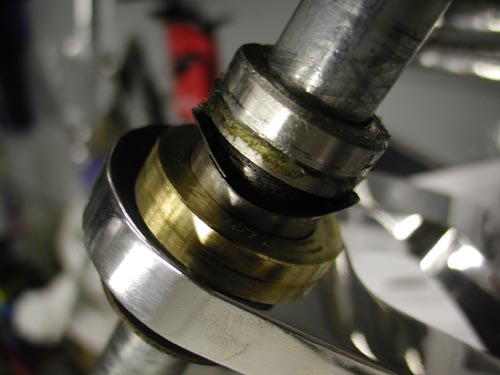
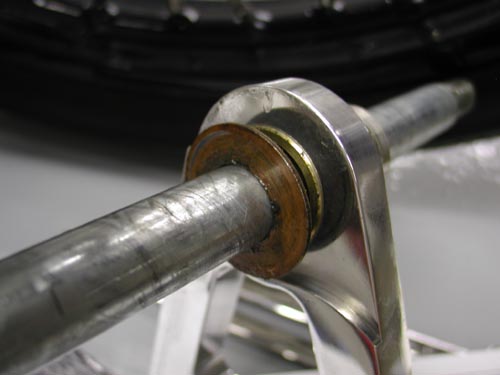
Here’s the outside brass bushing inplacebetween the rocker and the caliperbracket.
Install the stock outer caliper mount thrustwasher between the caliper mount and thelower fork rocker. This is a factory part thatwas on the fork assembly; the copper coloredside faces the caliper mount. Slide the axlethrough the fork, install the flat washer andaxle nut and tighten the axle nut to 65 ft. lbs.
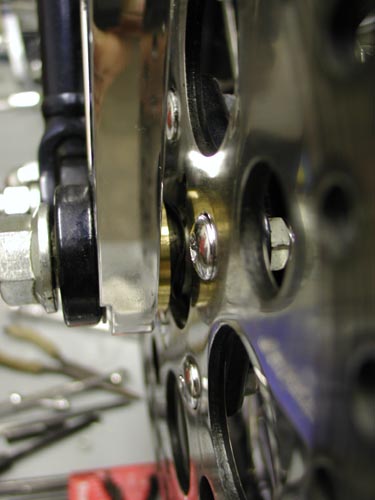
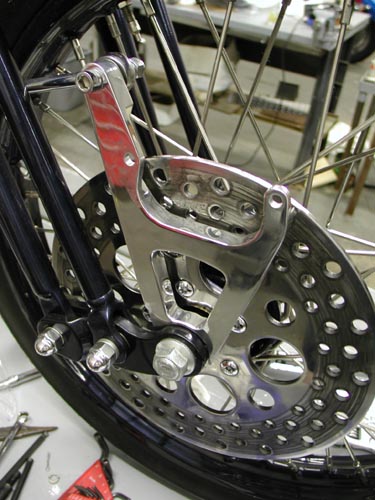
Caliper installation
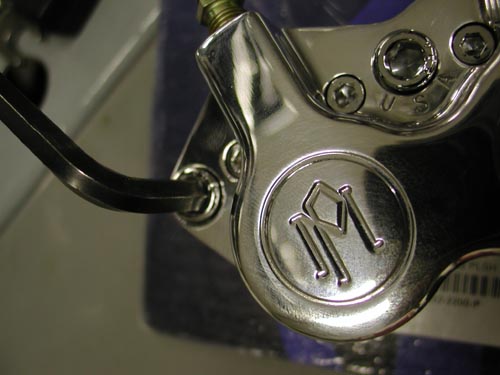
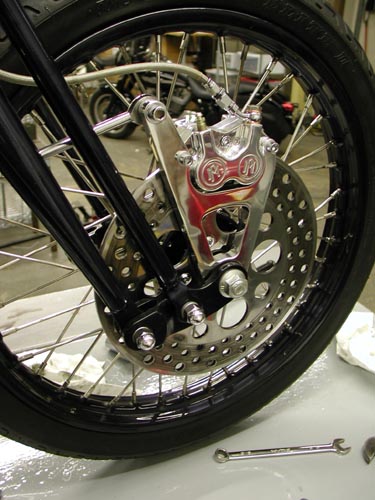
Remove the two chromed Allen end boltsfrom the Performance Machine caliper body,slip the caliper over the rotor and install the5/16 x 1 3/4-inch socket head bolts (Allens)and flat washers. Here’s where youcheck the caliper over the rotor. Step in front ofthe bike and eyeball the pads in the caliper.
Make sure the caliper is centered. Beforethe caliper is tightened down, it must becentered over the rotor; see page 3 for theproper procedure.
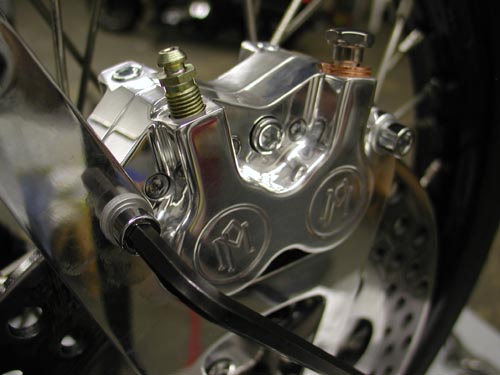
Yep, sure enough they were on pagethree. Here’s what I missed, “The centerline of the caliper is where the two caliperhalves meet. Look down from the top of thecaliper onto the rotor. If it’s offset to theoutside then you need to install mounting boltshims. Shim kit includes six shims, two each:.016, .032. .062-inch. Insert the shimsbetween the mounting boss on the bracketand the caliper body by removing themounting bolts. After the caliper is centereduse Loctite or lock washers and torque thebolts to 22 ft. lbs.”
The small print dictates that failure toproperly center calipers will impede theperformance of this fine braking equipment.They’re right. Do it right the first time.
Attaching The Brake Line
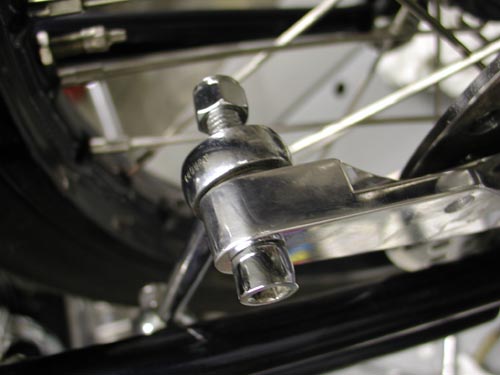
First tape handle bar master lever 1/2 wayclosed. This will prevent fluid from free flowingfrom hose. Remove the end of the brake linefrom the stock caliper.Working rapidly so thatan excessive amount of brake fluid does notrun out of the end of the brake hose, attach theend of the brake line to the new PM caliperusing the PM supplied seal washers, onewasher goes on each side of the banjo fitting.
Position the banjo fitting so that the brakehose does not rub on the frontfender or other part of the motorcycle. I had toreroute my Goodridge brake line. Had to movefast.Tighten banjo bolt to 10 ft. lbs. of torque.
Bleeding The Brake System
You will find it is easier to bleed the brakesystem if you have a helper. First, fill themaster cylinder with DOT 5 brake fluid and putthe cover back on the master cylinder. Attach ashort length of rubber hose to the bleederscrew on the brake caliper. Put the other endof the hose into a coffee can or other suitableclean catch can.
Have your helper pull inon the front brake lever or push down on therear brake pedal five times. At the end of thefifth stroke, have your helper hold the brakelever in or pedal down.
While the helper holds the lever/pedal,open the bleeder fitting on the caliper. You willneed a 1/4 box end wrench. Air and brake fluidshould come out of the end of the hose that isconnected to the bleeder fitting.
After theair and brake fluid have stopped coming out ofthe hose, close the bleeder fitting. Your helpercan now release the brake lever/pedal. Thisaction will force the air that is trapped in thebrake system out the bleeder screw. Repeatthis procedure until the brake become firm orthere’s no air in the line.
Check thefluid level in the master cylinder after eachbleeding. Don’t let the master cylinderrun dry as this will push air back into the brakesystem which will require all-night bleeding.
Front brakes can be a bear, since airdoesn’t want to flow down the forksthrough the line and out of the caliper throughthe bleeder nipple. Some guys force fluid upthrough the bleeder nipple into the system. Ifyou want to use the above system, sometimesthe caliper needs to be raised above the barsto allow the air to flow to the bleeder nipple.
I’ve discovered that with a littlepatience, bleeding is hardly necessary. Takethe cap off the master cylinder reservior andpump the handle slightly. This allows the airbubbles to rise out of the caliper, up the lineand out the master cylinder. Tap the lines acouple of times and pump the lever slightlyuntil it’s firm. Refill the reservior whenneeded until complete, top it off and call itquits.
Leave it overnight and check it again in themorning. It may take a couple of days beforeall the bubbles are gone, but it’s abreeze.
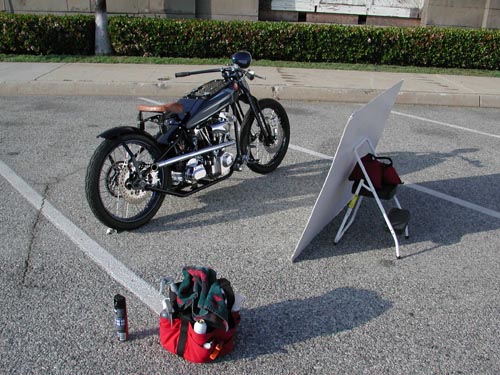
Here’s a shot of the 1928Shovelhead during the photo shoot forAmerican Iron. It looked sharp thanks to thefinal details from CCI and Performancemachine. Of course, it would be nothing but apile of parts without the talented efforts ofStrokers Dallas and painter Harold Ponteralli.Watch for the feature in American Iron, thenwe’ll post a feature on Bikernet.

Need to see the previous chapter:http://www.bikernet.com/pages/story_detail.aspx?id=9001
5-Ball Factory Racer Part 3
By Robin Technologies |


I'm in a daze this morning. Too much Quervo Gold last night and too many discussions about the sinking economy. It's a bastard when they lay off port crane operators. What does that tell you? I don't want to go there on this dank gray morning. It's warm outside, but even the dogs, Tank and Cash, feel the gray skies. They look hung-over, droopy and drained. I haven't shaved in a couple of days, need a shower and a kick-my-butt workout.
All the women left me and ran off to the mountains this weekend. I know why Sin Wu needed a break. Have you ever tried to maintain a 10,000 square-foot, old dilapidated building, clean and care for two lumbering, sloppy dogs, two house cats, and a stray that wanders through and bitches if the food supply isn't consistent with her desires? The Macaw needs to be fed and moved into and out of the sun at the end of the day and now we have a fuckin' fish.
There are also construction workers, electricians and plumbers to deal with. It's never a dull moment around here. I'm a big proponent of running off all the costly pets, who can't do except shit and care for a half dozen concrete gargoyles. At least they keep the evil spirits at bay and involve zero upkeep.
Okay, I'll get to the tech. I was on a hunt for a vintage seat and Duane Ballard stopped by with this vintage BMW seat. I used chunks of wood to hold it in place while I pondered the little Hispanic girl who works at Shamrocks, the Mexican fish market two blocks away. Since the seat was made with a number of springs incorporated in the structure, I didn't feel additional springs were necessary. I played with my options, but nothing – graceful, stylish, art deco or vintage – came to mind. Then I grabbed the springs that came with the prototype Paugho frame and voila, it all came together using the existing frame bungs, the mini-seat shocks and a slight modification to the BMW seat.
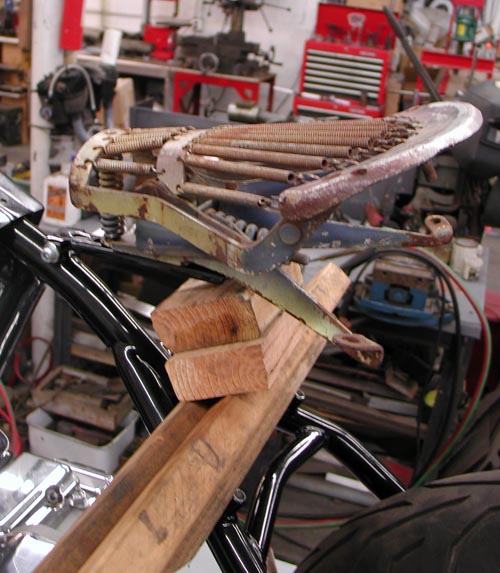
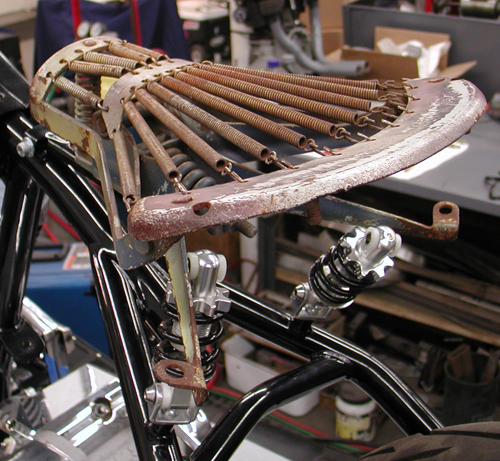
I drilled new holes in the brackets and cut about 4 inches off the arms. The front of the seat bolted directly to the Paughco seat hinge and I was good to go. Duane stopped by again, blessed my creation, and took the seat for top-notch leather upholstery action. He's the best.
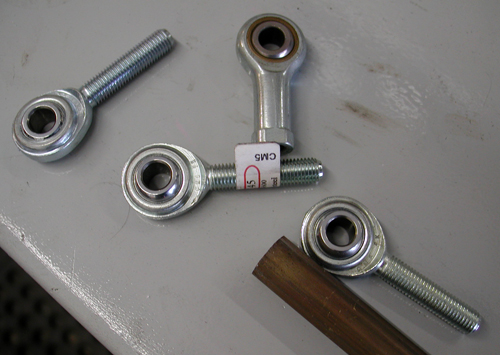
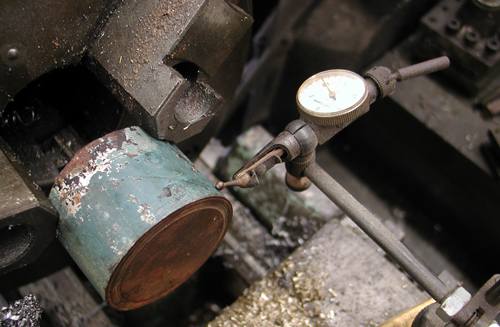
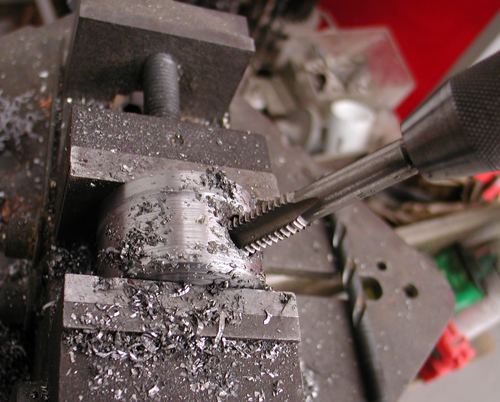
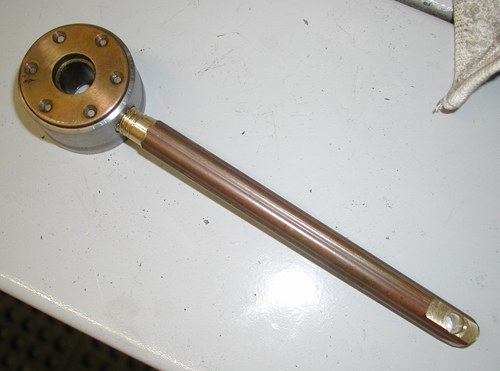
I shifted to my shift linkage system and called Jeremiah for the mathematical configuration from the system we build for his bobber. I wanted a tank shift and had several strange components, plus heavy, solid cloverleaf brass rod to use. I don't have any idea how I come up with this shit, but what the hell. It has class.
According to Jeremiah, from the pivot point down, the shift arm was about 6 inches in length, and the distance to the shift knob up was almost three times that length. That made for a vast throw and I needed to make sure I was clear, fore and aft, for shifting without smacking the bars or anything else. I checked my '48 Panhead with stock jockey shifting and the ratio was closer to two to one. In addition, jockey shifting is a different animal. There's no back and forth spring action on vintage tank-shifted bikes. The shifter banged through one gear after another from first to fourth, done deal.
That's the reason jockey-shifted bikes are best with jockey top transmissions. If you need neutral, just pop it out of any gear and you're back in neutral. Ratchet tops force you to bang through one gear after another down to the only neutral between first and second, often missing it. In our next tech, we will install a Baker 5-and-1 drum in this transmission to afford neutral at the bottom for easy reach.
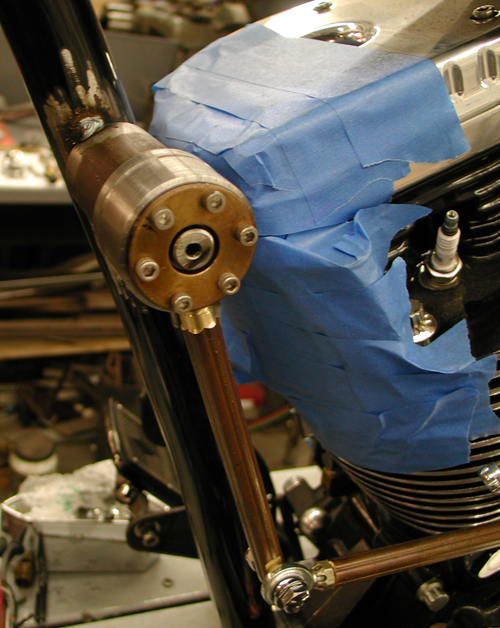
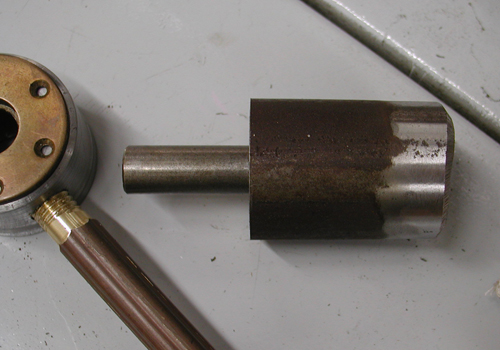
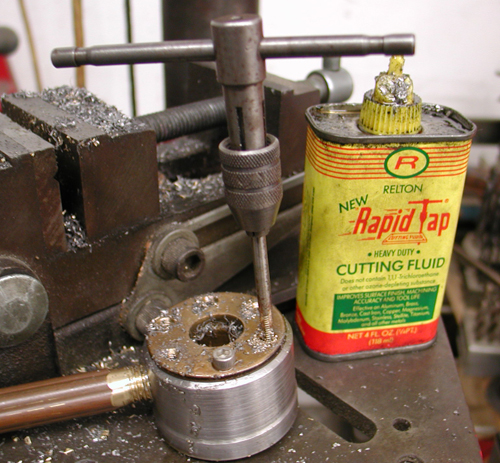
Okay, so back to the job at hand. I'm trying to use as much brass on this bike as possible, so I dug through drawers and boxes of old machined parts and trinkets and came up with these brass-bearing supports. Then I machined a piece to fit these, then the axle piece to mount to the frame. Then I had to bore and tap the pivot, drill and tap to anchor the brass bushing, drill and tap to create a pivot stop and machine and thread the brass rods, plus machine an end to fit a heim joint connection to the transmission shift linkage. I spent hours tinkering and figuring, drilling, tapping and testing, and I'm reasonable sure I have a tough, working shifting system.
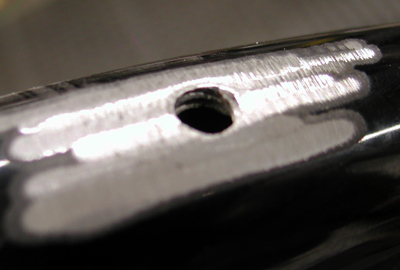
Then I shifted to the dreaded tanks. The tanks are fine, but more involved than normal one-piece, bolt-on tanks, ready with bungs for rubber mounting. Since this was a prototype Paughco Factory Racer frame, the first one of the batch, they bolted the tanks to the frame by drilling and tapping the top frame tube. Problem is, that afforded each 5/16 coarse bolt about three threads in mild steel tubing. In just a matter of time, those threads would fail, the tanks would rattle and come loose.
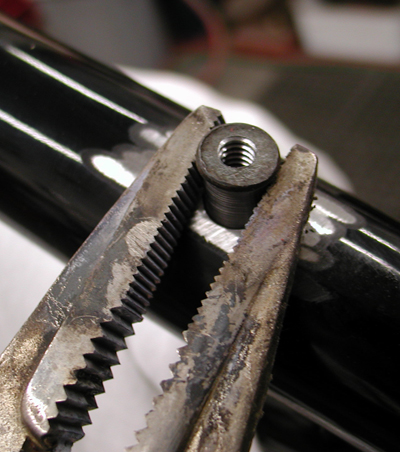
I decided I wanted to strengthen the tank mounting for the long road. I ordered some ¼-inch bungs, ¾-inch deep for a lasting hold. Later, I discovered that since the mainframe strut was 1.5 inch tubing, I could have used the 1.5-inch deep bungs from the Bung King (check their site for all available variations). I needed to re-drill the holes to a larger diameter for the bungs to slip into the frame. Adding the bungs and welding them enhanced the strength of the frame. At first, I though about machining a bung with a lip on it, but the tanks didn't have the clearance above the frame for a lip.
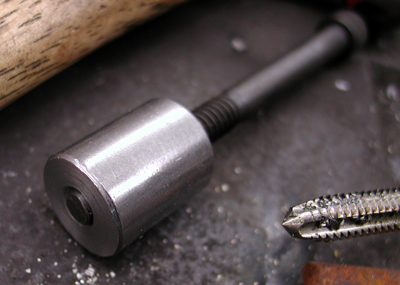


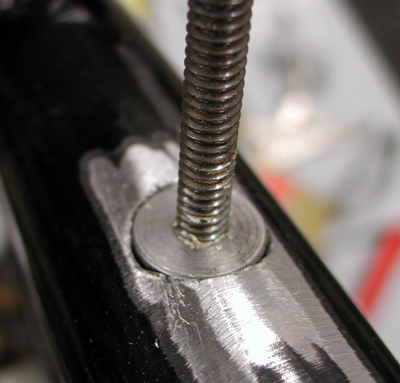
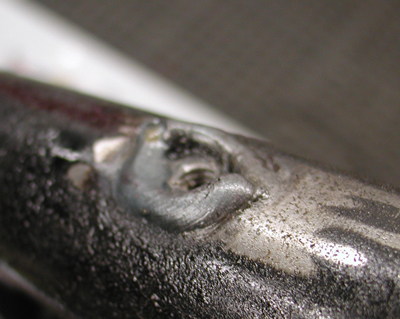
After drilling the frame holes, I tapped the bungs into the hole and as far below the surface as possible for the strongest, deepest weld. I would also need to grind off any protruding weld so the tanks would fit again. One tank protruded into the frame and rubbed at the back, so I moved it as far forward as possible for clearance, which amounted to about ¼ inch.
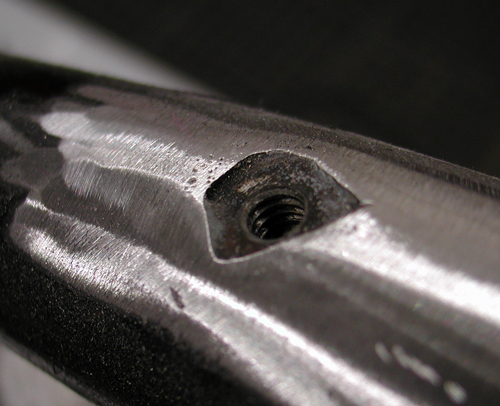
With the bungs in place, welded and ground, I grappled with the tank mounting holes. I thought I had it made, since I was dropping from 5/16-inch bolts to ¼-inch, but not so. Only one hole lined up. I grappled with these bastards for hours. Then I gas-welded the hole slots, refilled them and ground them to a reasonable size.
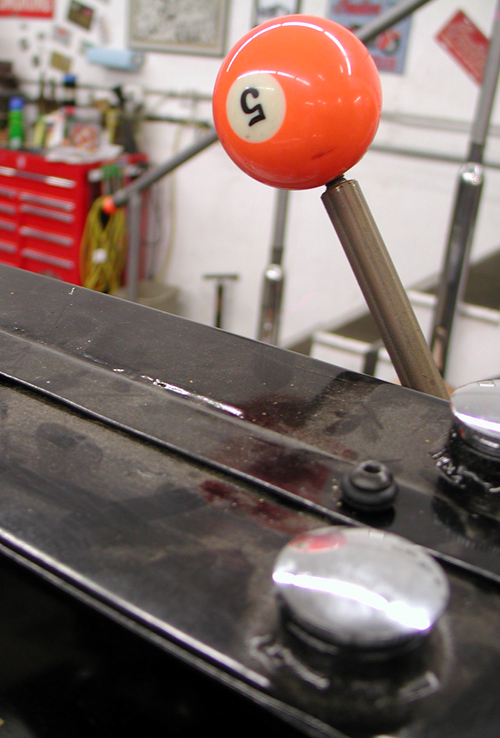
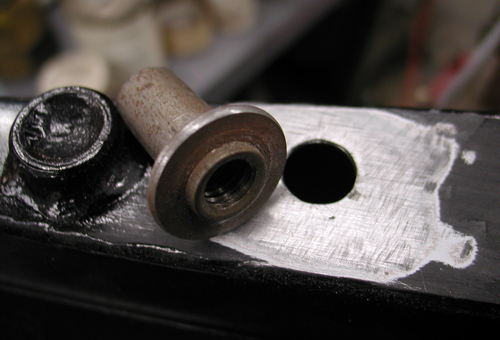
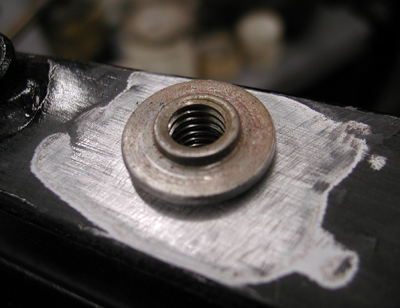
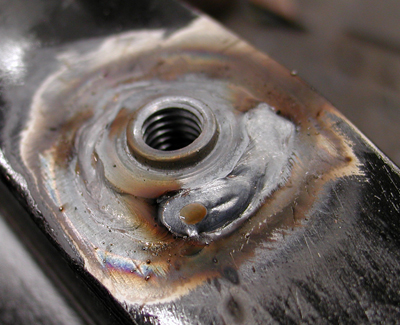
Next, I welded bungs, I believe from Lucky Devil, into the bottom of the tanks and used the Bung King’s rubber mount kits with straps and rubbers to attach it to the frame. In a sense, this was overkill, but I've experienced leaky tanks and poorly mounted tanks on my way to Sturgis a couple of times. One time, Randy Aaron from Cycle Visions saved my ass and my tank paint job. Later on, Paul Yaffe replaced my piece-of-shit Blue Flame tank with a properly rubber mounted Independent tank. So, goddamnit, this needs to be right the first time. I ran rubber mounts front and rear.
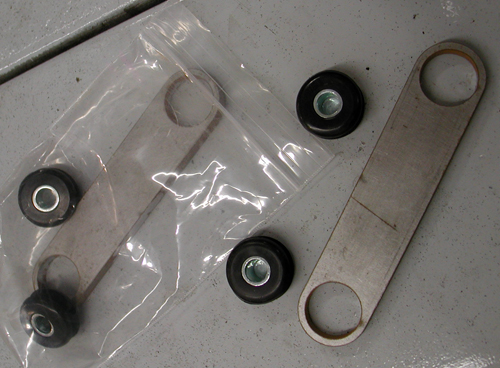
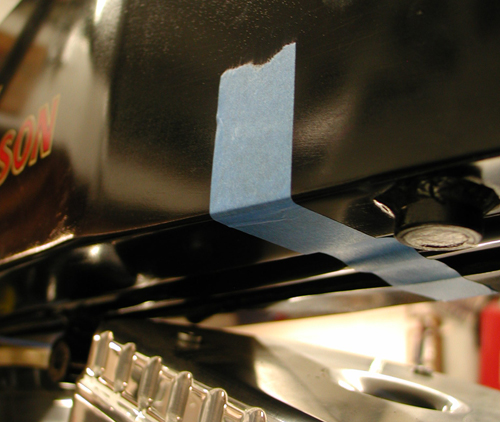
There's a trick to this operation. You need the rubbers in place to make proper measurements, cuts and tack welds. Ah but, too much heat will destroy your rubbers and sink the process. I've done it during mad welding spurts. This time I kept my Bonneville salt sprayer handy, so I could tack near the rubber insert and cool the strap before I damaged the insert. I removed the inserts before final welds.
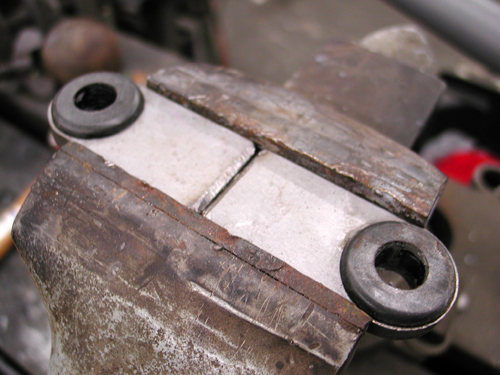
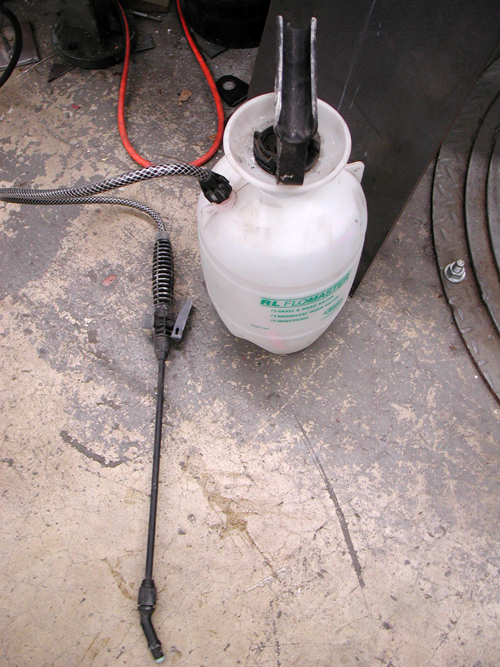


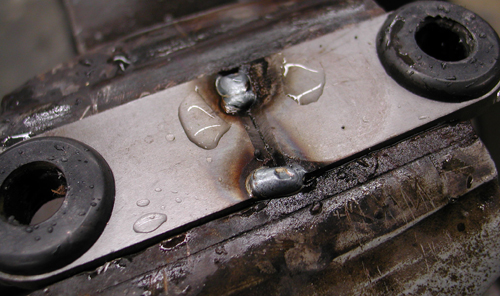
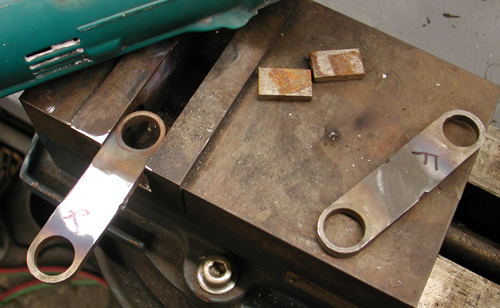
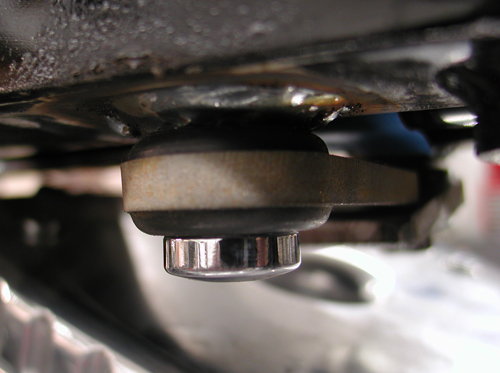
With the tanks securely mounted, I was confident, except for one aspect: capacity and turning radius. I needed to pull the bike away from the lift clamp and flop the Paughco taper-leg springer from side to side. As I suspected, it was going to hit the tanks. Over the next couple of weeks, I will operate again, slicing the tanks for turning.
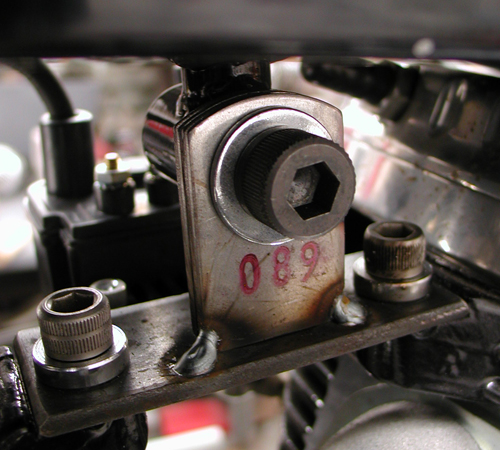
I shifted to making a top motor mount, which worked out like a champ. I made a strap from one Crazy Horse head to the other, then discovered a couple of tabs that would give me the strength and position I needed to hook up with the frame. Top motor mounts are also tricky. They need to be flexible and somewhat adjustable. I made sure the engine was positioned correctly with my BDL primary backing plate, but you never know if something might shift slightly during final assembly, and the top motor mount must be flexible and iron strong.
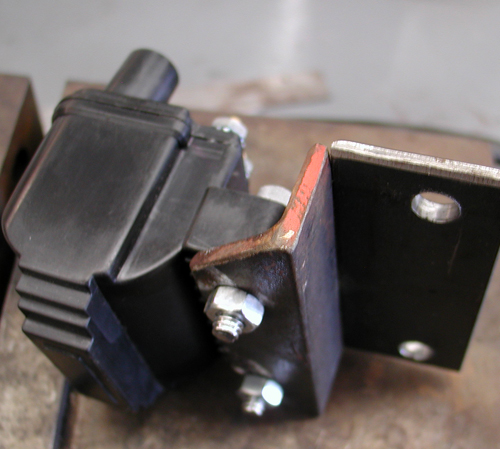
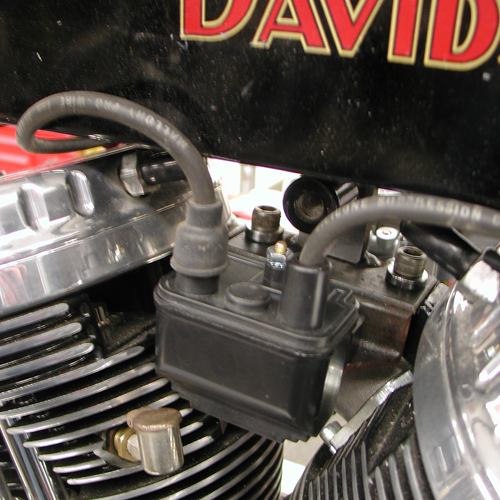
Without too much fanfare, I attached a piece of modified angle iron to the right side of the motor mount for a coil hanger. I angled it slightly so the spark plug wires wouldn’t bang or rub against the tank.
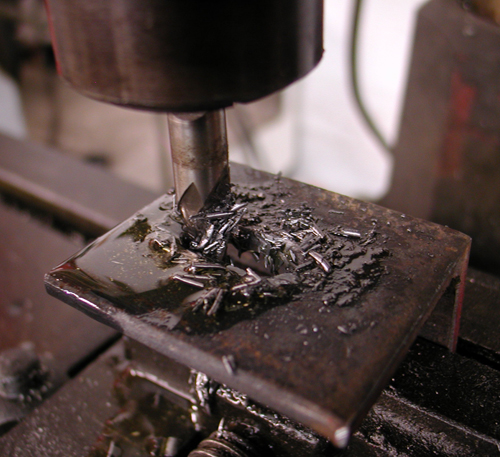
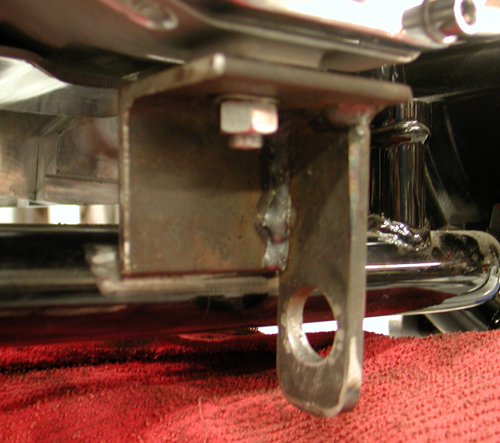
It just happened that I'm building a railing for my mom's house. She's getting feeble, in her old age and needed some additional support. That meant a trip to the local steel supply house, where I stumbled onto some small chunks of angle iron. I didn't like my original number 5 transmission mount, so I decided to remanufacture it with a heftier piece of angle iron that also reached the frame without a problem. It also allowed me a tad more positioning flexibility for the master cylinder and pedal adjustment.
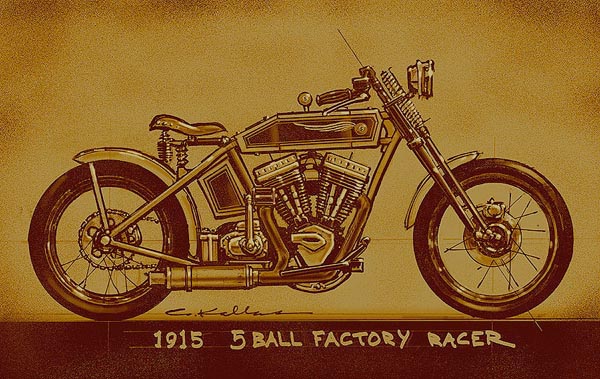
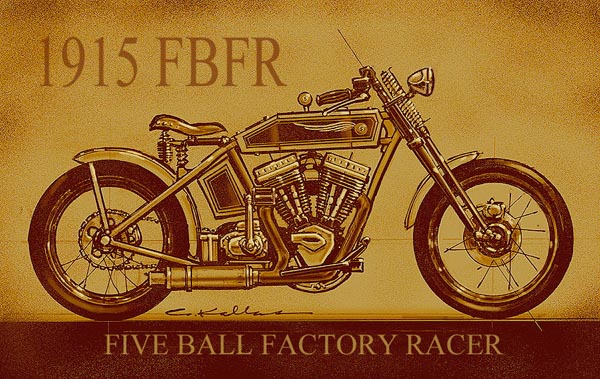
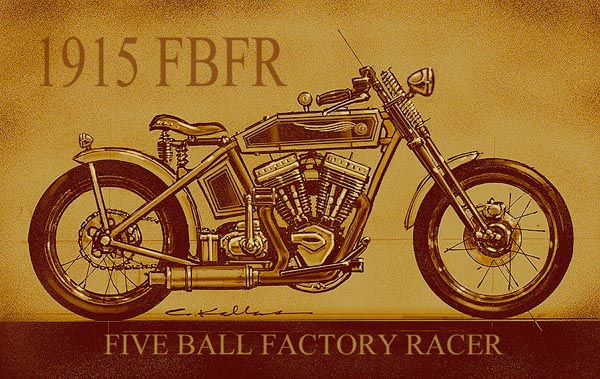
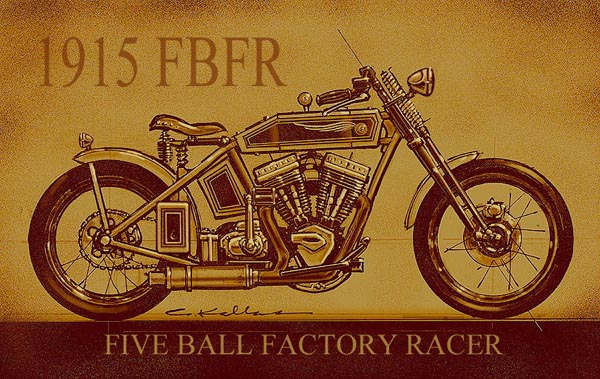
In the next segment, I'll run the progression of Dick Allen illustrations, so you can see the progress. It's as if I'm building the motorcycle, while Dick and Chris Kallas develop the visual story.
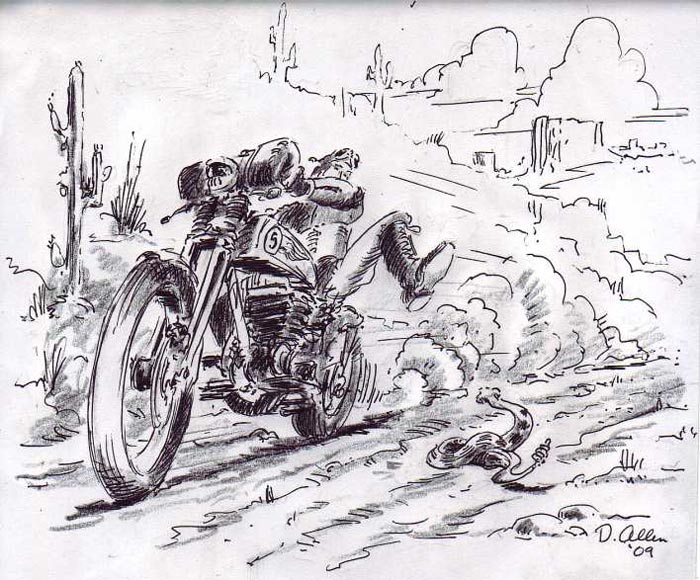
I don't know about you, but these illustrations give me hope and inspiration throughout the build process. Next, I will modify the tanks once more for enhanced Paughco Springer turning radius, then we'll mount the Phil's Speed shop ignition and wiring system to a plate I'll make that will bolt to the top of the tanks behind the gas caps.
Also mounted to same plate of steel will be a manual, vintage Sportster replacement, Bikers Choice speedo driven off the rear Black Bike wheel. Hopefully, the wheels will roll in, I'll find some 23-inch tubes and Larry Settle will mount and balance the Avon tires. I'll set up the wheels in the frame and springer, and then haul the bike to Chica in Huntington Beach. He's going to help me with fender design and mounting. In the meantime, I'll watch the inauguration unfold and stay away from tequila. There's more coming, though. I'm going to modify the trans with a 5-1 Baker drum, and build a set of exhaust with D&D bends and pieces. Hang on for the next installment.

Amazing Shrunken FXR 11: Mid Controls
By Robin Technologies |

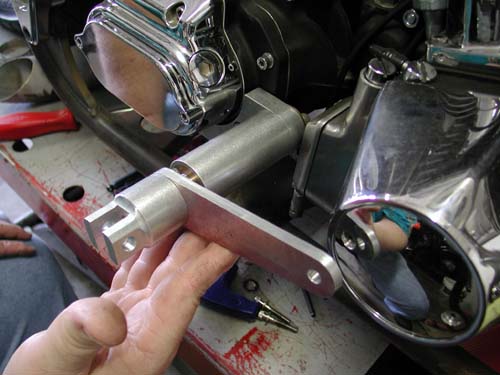
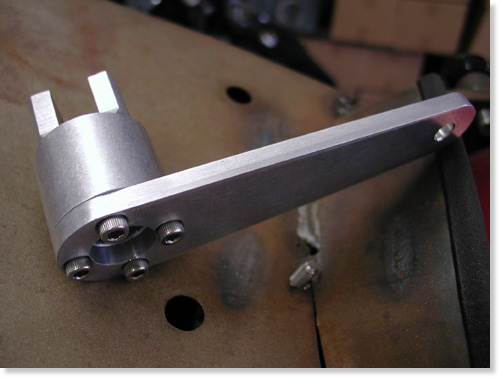
Shrunken FXR mid-controls by Giggie at Compu-Fire. Note: we need flat-headed Allens.
Giggie our master machinist from Compu-Fire rolled up to the Bikernet Headquarters last Saturday. We haven’t seen him for months due in part to his work on new starting systems for the custom market. They are dancing through the final development stages of a system configured to drive off the crank shaft of the motor with a 60- to-one ratio compared to stock 48-to-1. That will leave the area about the tranny available for custom applications or lower seat heights.
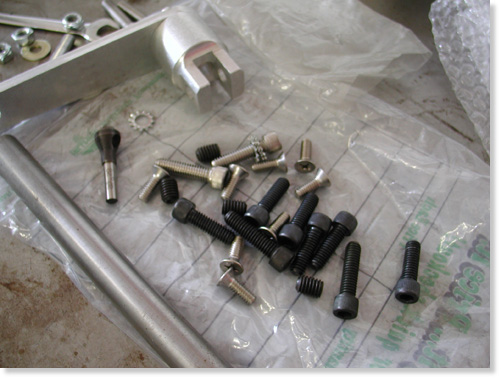
Giggie brought some wrong fasteners but lots of them and counter-sunk drilling tool.
Currently Compu-fire is soon to release a standard starting system, the Gen-2 HT, with 33 percent stronger magnets, 6-roller longer clutch (32 percent longer) with 30 percent more cranking while drawing the same amps from the battery.
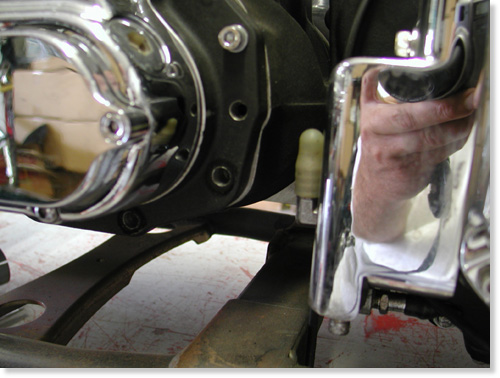
Here’s the tranny without the brake pedal components. There’s some tight tolerances going on.
I spoke to him about our cooling debate and here are some of his thoughts. “You want your oil to run at a minimum temp of 205 to eliminate water vapor or condensation that accumulates in oil,” Giggie said. “At 240 to 260 degrees petroleum based oils begin to break down, although synthetic lubricants could be good to 360 degrees. I have my doubts.”
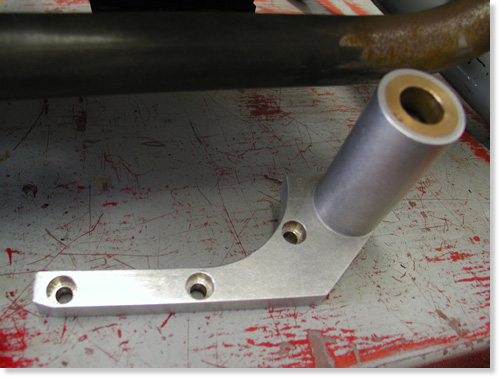
Base bracket to be bolted to the transmission.
Giggie developed an oil cooler for his FLH that kicks on at 220 degrees and off at 200. It has an in-line thermal switch continuously reading oil temp. He installed his cooler in a box with vents and two small electric fans wired to the thermal switch (to cool while idling).
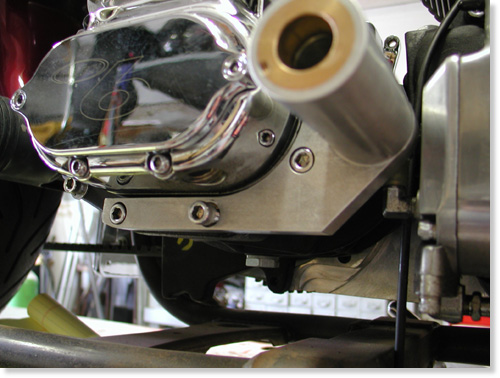
Giggie’s mounting bracket bolted in place.
Regarding our project Giggie dropped off hand machined mid-controls for shifting and rear brakes. Next, we must buy a H-D slave cylinder with remote reservoir with a built in brake switch. We will hide the reservoir behind the oil bag and design a bracket to hold the slave under the trans.
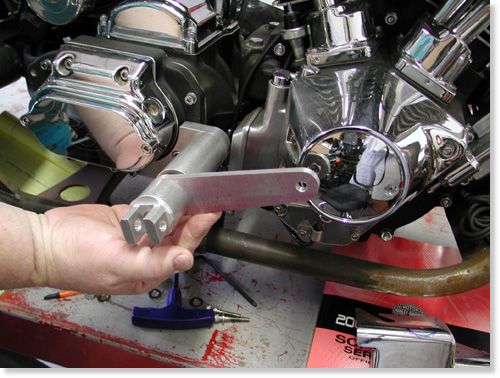
This shows the pedal and shaft in the mounting bracket.
Giggie will supply us with four more bushings to run behind the shift and brake levers, two 1/8-inch thick and two 1/2-inch thick, to allow us variable spacing away from the engine pulley or point cover on the cone.
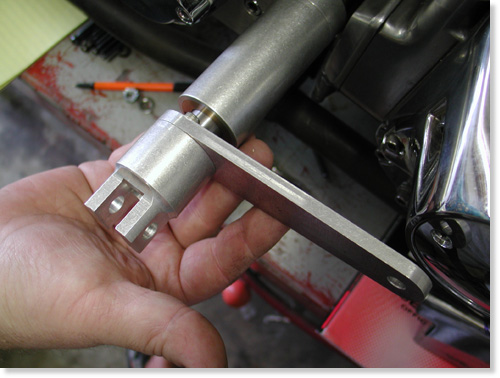
Giggie will supply two different bushing to be installed between the brake lever and the mounting sleeve. We’ll need the space to clear the point cover.
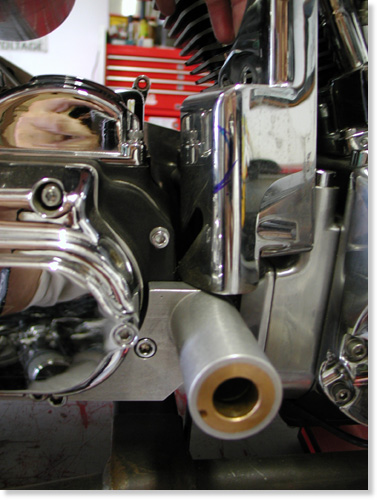
Unfortunately the sleeve hit the oil pump cover. We may be able to remove enough material or just polish the pump. The oil pump inlet fitting will also need to be turned down. It’s close.
With the bushings in hand we can develop our final linkage behind the BDL belt drive plate and Giggie’s tranny plate to connect with the slave piston.
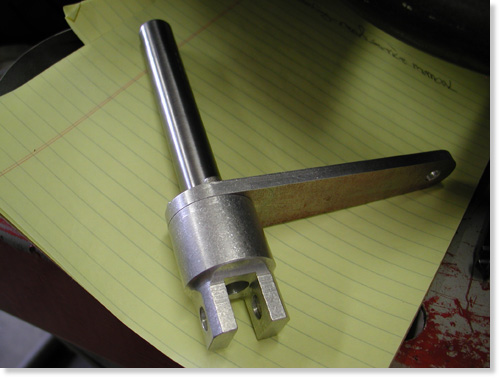
In both cases we need to cut and machine the other end of the shaft, depending on the linkage.
I’ve decided to remanufacture the exhaust system which is now a tight fit around the new brake linkage. Giggie also machined the foot peg mounts to accept any standard, pivoting foot pegs.
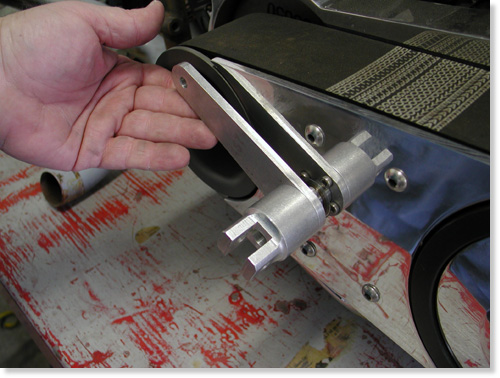
The slick new mid controls for shifting slid through bushings machined into the BDL outter and inner covers.
Next we need the bushings, slave cylinder and a day in the garage hammering and welding a new set of pipes.
–Bandit

Back To Part 10, Page 2
