
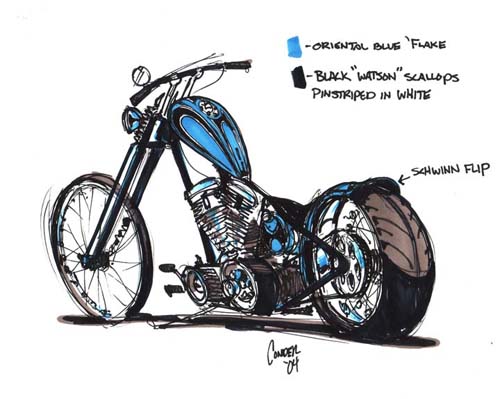
We've developed a working relationship with S&S, and I was concerned about the 105-inch Shovelhead Richard Kranzler scored for my Sturgis Chop project. His motorcycle ran like a raped-ape, but the 105 tore the livin' shit out of his old school chassis. The mirrors became frisbies, the footpegs vibrated lose and ditched him at 125 mph on the freeway. The stress was more than the old swingarm frame could take.
Hot Rod engines are cool but will beat the shit out of a solid mount frame configuration. The best bet is to let them stretch out in a rubber mounted chassis. I called S&S to see what they would recommend and they suggested a smaller 93-inch configuration. James Simonelli put me in touch with Steve George, a 10-year S&S veteran, who said under his breath that they prefer not to mess with engine configurations other than they're own, but he would look mine over.
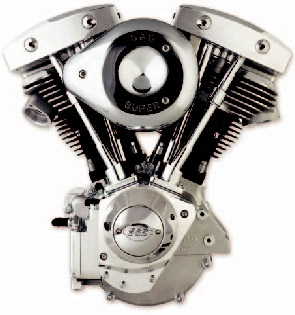
Made a lot of sense. S&S now builds a complete line of Shovelhead engines in four configurations: Two cone motor and two generator style. Each are available in 80-inch and 93-inch power configurations. Here's a description of their new units:
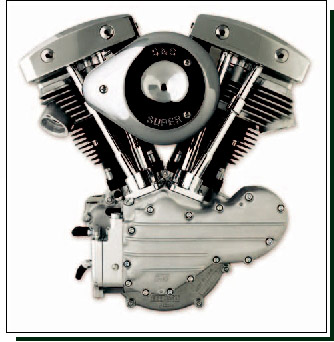
With the addition of the new S&S billet Shovelhead style rocker boxes and tappet guides, along with new pushrods and forged roller rocker arms for Shovelheads, S&S can now offer complete Shovelhead style engines. These engines will be available in 2005
S&S Shovelhead style engines feature the finest parts on the market today. Start with the bulletproof crankcases, flywheels, cylinders, and heads that they've offered for years, and finish the engine with new premium valve train components. S&S billet gear cover, tappet guides, and rocker boxes look outstanding and offer the performance level Shovel builders have come to expect.
What you can't see inside the engine is just as impressive. The new S&S Shovelhead style tappet guides are designed around the quiet, dependable Evolution style tappets. Corrected tappet guide bore geometry assures correct valve timing using Evolution style cams. The unique adjustable pushrods are collapsible for easy removal and installation, but are stronger than our old style adjustable pushrods.
Inside the billet rocker covers are S&S's exclusive straight rocker shafts and the new S&S forged Shovelhead style roller rocker arms. The result is a Shovelhead engine with the kind of quiet power that some folks may just have a hard time believing.
A new addition to the S&S Shovelhead family is the 93-inch alternator/generator engine. This is the perfect engine for that “retro” chopper, but with a modern alternator charging system.
In addition, the late style sprocket shaft used in this engine allows the use of late style transmissions for additional modern functionality. So when you take your chopper out for a late-night cruise, and you want to see the road ahead as you click `er into 6th gear, this is the one.

Note:S&S Shovelhead style engines equipped with S&S tappet guides and tappets will be supplied with an Evolution style camshaft. Custom engines ordered without S&S tappet guides and tappets will be supplied with a standard Shovelhead style camshaft.
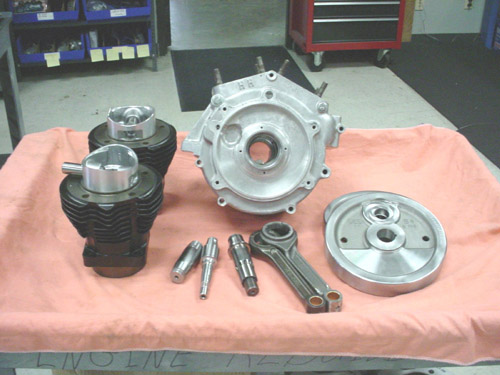
My engine was equipped with House of Horsepower cases. We used the same bore (3 5/8-inch) but S&S barrels and pistons with a 4.5-inch stroke (instead of 5-inch stroke). Stock bore is 3 7/16 and 3 1/2-inch for all 80 and 88 inch engines. This operation basically involved a S&S Sidewinder kit, including (left to right) cylinders, pistons, crank pin, connecting rods, cases and flywheels.
First Steve assembled the short block which was balanced to a 1300 bob weight for smooth operation and reliability. The S&S forged pistons are 8.2:1 compression with longer skirts for longer lasting reliability.
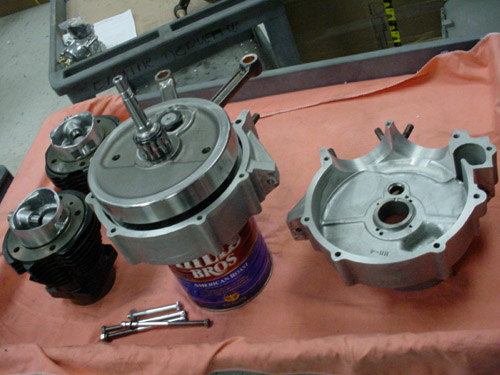
Then he assembled the wheels in the left case with fresh Timken bearings. My cases needed a ledge bored away for the longer skirted S&S barrels.
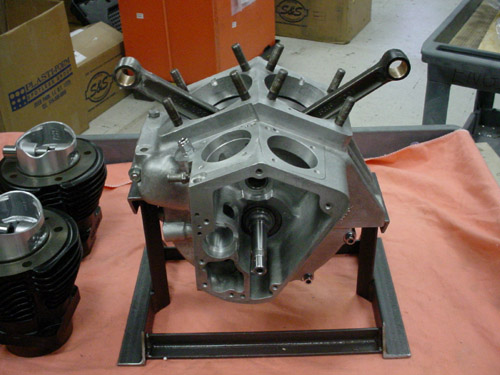
Next the other side of the case was slipped over the pinion shaft roller bearings and the lower end was complete. The flywheel weight is approximately the same as stock Evolution (lighter than Shovelhead wheel) for a balanced running engine and added reliability.
Ah, next came the pistons and barrels. I know we don't have all the details here, but at least you can see the big steps in building an engine. It's not tough but takes precision workmanship and quality components.

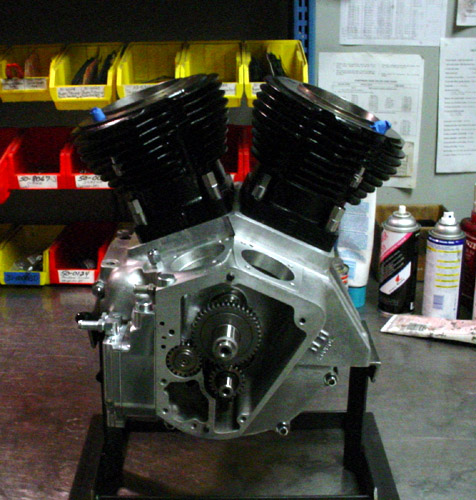
The final steps before shipping included the S&S oil pump installation and the cone cover. I'm returning a Compu-Fire ignition system to the cone in short order.

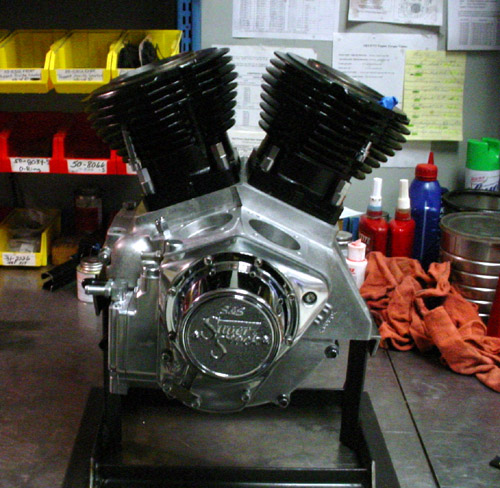
The engine is now at Phil's Speed shop. He're rebuilding the heads and will install S&S roller rockers, shafts, new Custom Chrome Black Diamond valves, new lifters (with bored-to fit lifter stools) and pushrods. Hopefully it'll be completed next week and ready to set into that Paughco frame. Then I can start bending pipes and making shit.
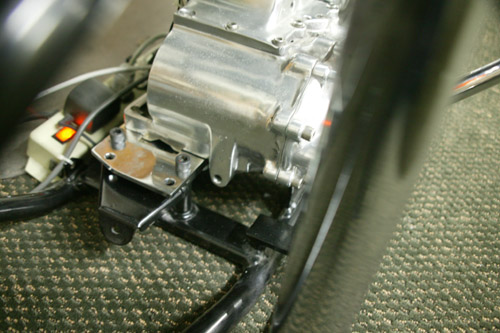
I've worked with Paughco for over 25 years, for quality frames and front ends, then this frame arrived and the tranny wouldn't fit. I had a 4-speed tranny plate that the JIMS trans slip right into, but the holed in the frame didn't align. I spoke to my tech guru, Frank Kaisler who contributes to Hot Bike, Street Choppers and was the editor of Hot Rod Bikes. He lives tech. Of course he pointed out that I needed a first electric start vintage plate. I had a late model, dipped, single sheet plate and the 4-speed job and neither worked. So I sat as my desk and poured a glass of jack. I had the bike buildin' blues.
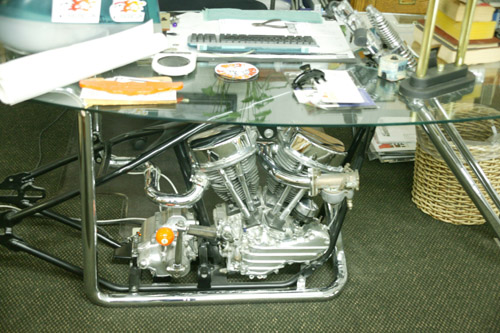
Here's the famous Bikernet Desk. I made calls about the tranny plate, unsuccessfully and slugged that amber liquid until my brow bounced off the glass top and I spied the tranny below–on the wrong plate. I couldn't believe it. All these years that desk ran with the wrong tranny plate, and it just happened to be the one I needed.
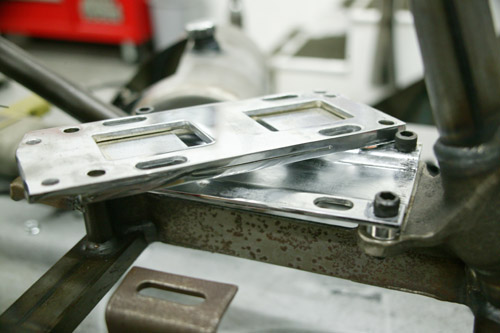
Here's both tranny plate together. The thick one with two slabs of steel is the original 4-speed job. The single, bent-in-the-center sheet with the four frame mount spacers was designed for the first electric start transmissions beginning in 1965.

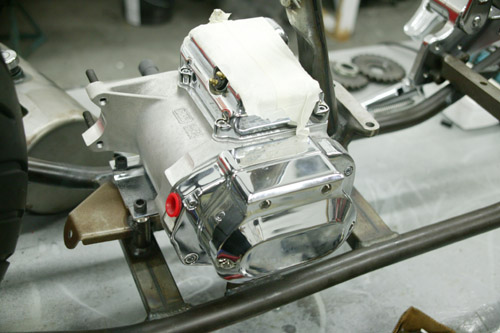
Finally the JIMS trans is in place with the proper mounting plate, and I was ready to move onto mounting the oil bag.
At last, after 15 years I installed the correct tranny plate into my desk. Damn, I'm embarrassed.
The rear fender is on it's way from Lucky Devil and I installed the Kraft Tech round oil bag last weekend. Movin' right along. You'll see that tech shortly. A new oil cooler/oil filter set-up is on it's way. It's a must for making the old iron last.