
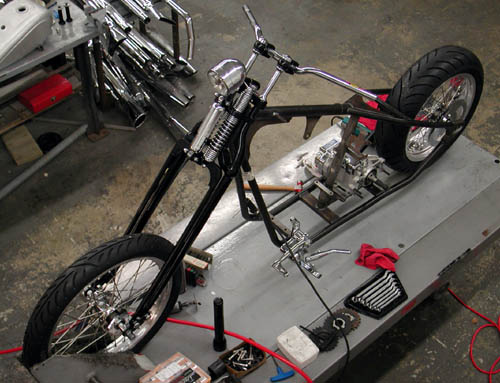


This bike might look like shit, but it should work perfectly. I'm endeavoring to keep it light, tight, narrow and right. So far so good. We've even decided to eliminate paint from the equation, except for rusty metal that may need black powder coating from Custom Powder Coating in Dallas, and the front end was powder coated black at the Paughco factory.

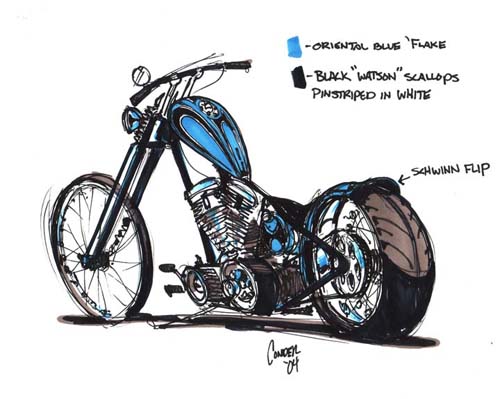
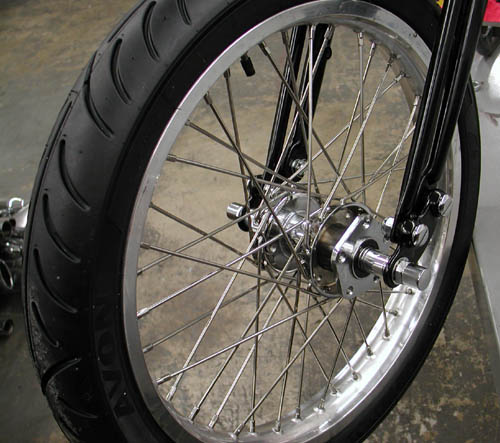
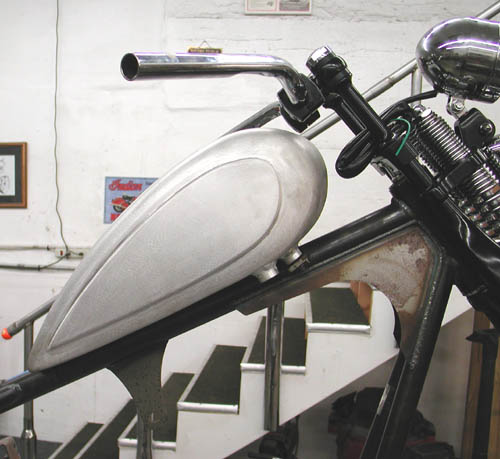
Let's jump into the shop. I was jazzed to receive my Rev Tech wheel order from Custom Chrome. I needed to mock up the frame and ship an image to Tim Conder for a concept drawing. Conder's images inspire any builder. I couldn't move on it until the Custom Chrome wheels were delivered and mated to the Avon Venom tyres. I'm also going to avoid chrome and flashy stuff as much as possible. We're running bare metal in several instances: Wheel rims, aluminum tank, brass fender rails and linkage, copper hard oil lines, and thick wall copper tubing bars. Dig this, we're going to galvanize the frame, rear fender and oil bag. The XR Sportster racing tank which is aluminum was delivered from Cyril Huze. I'm going to leave it brushed aluminum, but the capacity was a minimum 1.75 gallons. I'm mounting it high on the frame so we'll open the tunnel for additional fuel capacity and weld the area shut.
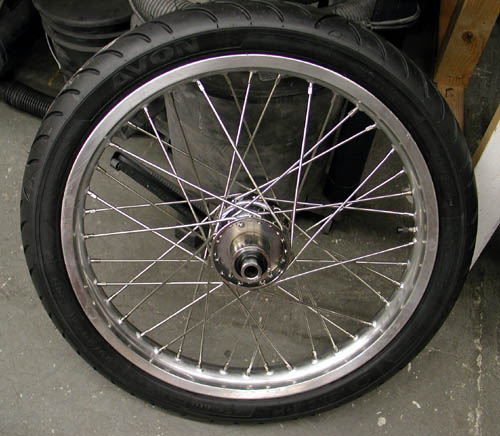
I'm jumping around. Let's get back to the Rev Tech wheels. The spokes are stainless with polished aluminum rims for a long lasting approach. Even the Paughco frame came with brushed aluminum axle plates. We're going to leave 'em alone. Cyril Huze designed a new, between the heads, coil and ignition switch mount. I ordered one without polish or chrome. It's unfortunate that we can't get wheels with Stainless hubs and eliminate chrome all together. The front is a 21 with a 18 by 5-inch rear for a 180 Avon Venom. I don't want a super wide tire. I'm specifically avoiding wide tires. I think they make choppers look like fat-assed chicks. They lose their chopper code of agility and lightness.
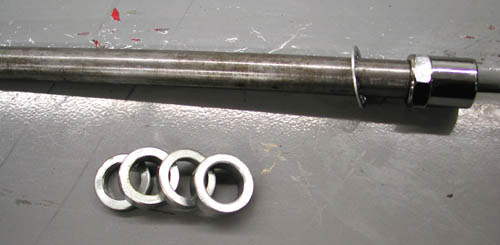
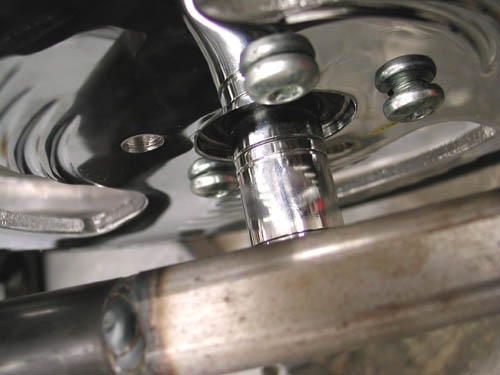
With my Doherty wheel spacer kit I was able to set up wheel spacing quick, for the time being. It's a trick working in the shop by myself and I will try to explain some operations from that perspective. We all face shop blues from time to time. Makes me kick back and rethink various operations when six hands are needed and I'm limited to one on the part and one on the arm of the drill press.
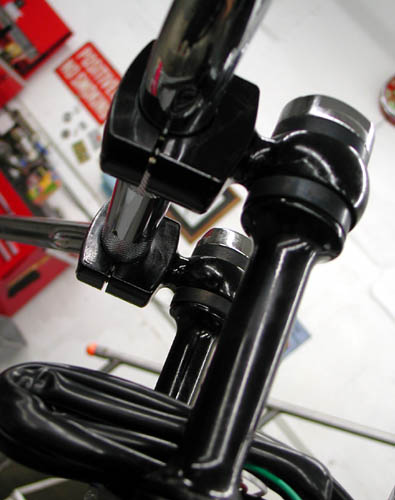
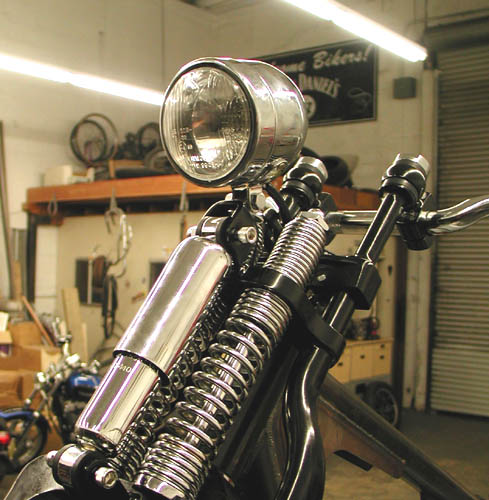
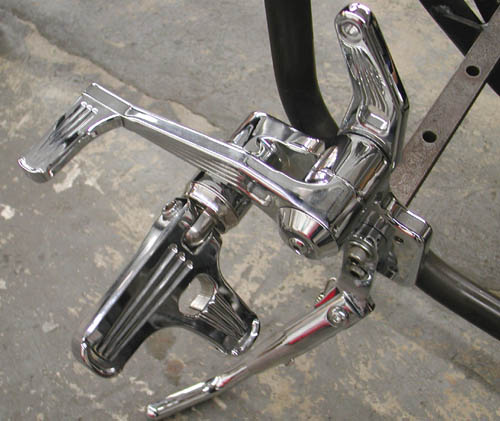
So alone one night I grappled with the installation of the CCI neck bearings (I need a JIMS tool for the races), to install the Paughco springer front end. After a trip to a local fastener store I was able to weave two studs into the rear legs of the front end for traditional, vibration dampening Custom Cycle Engineering risers. The studs needed were 1/2 inch about 2.5 inches long with 1/2-20 threads on one end and 1/2-13 on the riser end. The shop only had two different-length studs and one needed additional tapping to fit.

I use these risers on most of my bikes because of the traditional, old school appearance and the vibration element for long runs, but they take a degree of thinking since they shove the bars toward the rider (and often the tank) about 2 inches. I needed to watch for the appropriate amount of tank clearance and ultimately needed the 1-inch longer stems. Very high bars can be a problem with the leverage against the flexible rubber, but with patience, they will work fine. Since each riser is a single unit, they will flex and pivot until they're aligned and tightened down.
I installed low rise drag bars from Custom Chrome/Khrome Works. I'll see how they fit as the seat is mounted. I ordered a seat at a swapmeet this weekend, black with brass buttons by West Eagle. My plan is to bend thick-walled copper tubing and polish it for the final bars.
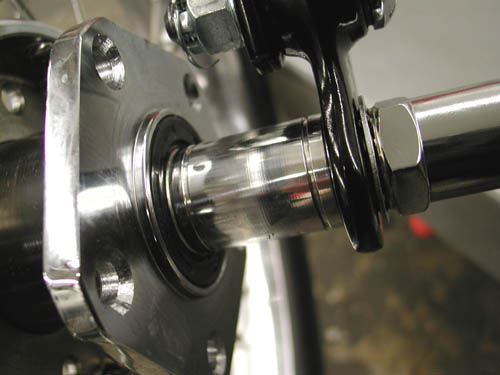

Now Imagine the first time I installed the front wheel, wrestling with the slipping front end and frame, the front wheel, the axle and the spacers simultaneously. Fortunately my 11-year-old grandson was on hand with a rubber mallet to assist. For the rear I used a crate to hold the wheel and the approximate height so I could muscle the axle and spacers through to align it with the frame. It was time for a Corona.

The engine is currently in the hands of S&S for a breast reduction from 103-inch to 93 smooth inches of reliable horse power. I'm waiting on the engine build images to share with you.
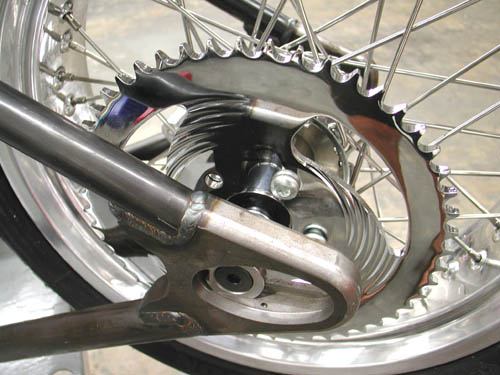
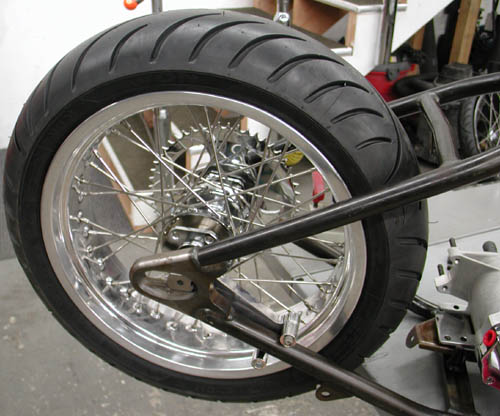
Hold on, I'm slipping the clutch again. Next I mounted the Rev Tech rear wheel with another Avon Venom within the Paughco frame. Unfortunately my Kraft Tech Fender is 9-inches wide and the tire on the 5-inch wide rim runs only 7-inches. I need about an 8-inch wide fender. I'm waiting for the shipment to arrive.
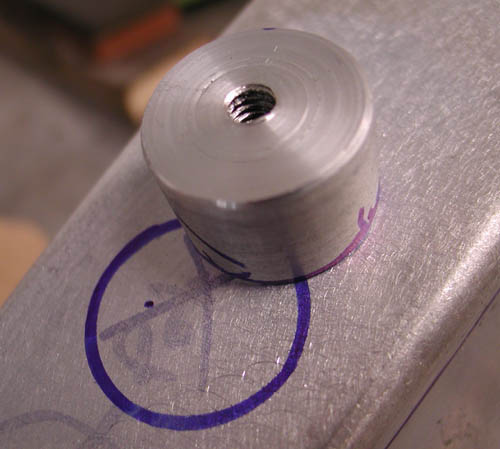
Then I moved onto the tank. I needed to create a couple of bungs for rubber mounting the rear of the tank and tap them for 1/4-20 threads. It was the first time I used our new/old lathe. This is all a new learning experience at the new Bikernet Headquarters. I grabbed a lathe that was rusting in Japanese Jay's backyard. He wasn't using it and I wanted one to cut wheel spacers. I reworked and cleaned the lathe until it was operational then the Doherty crew created a wheel spacer kit? Ah, but the lathe has a myriad of uses, like cutting bungs from a chunk of aluminum. Worked great.
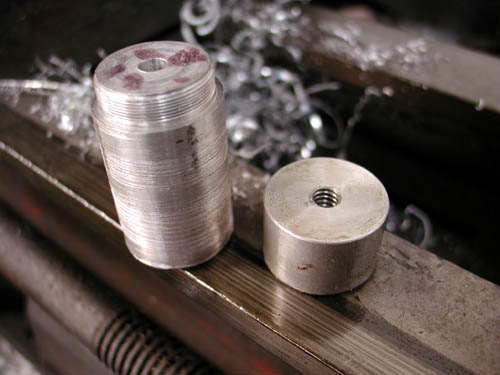
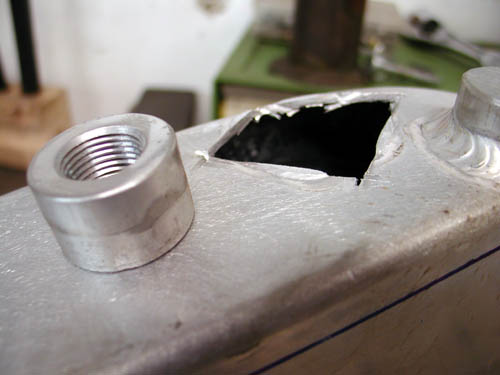
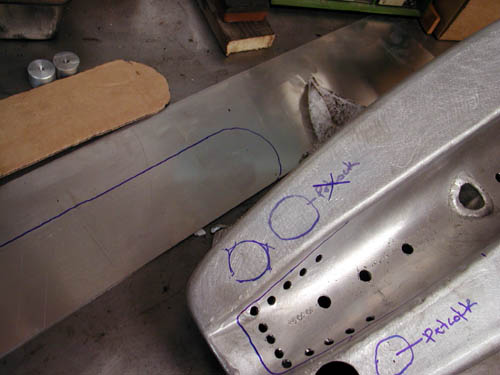
Then I tapped them using the lathe chuck. I discovered that the tank petcock bung needed moving to the rear, since the tank was mounted at an angle. I cut it out with a die grinder and returned to the lathe to machine off the welds.
Next I need to learn how to use my new/real old, milling machine. My dad was a machinist most of his life and ultimately an engineer in the oil well industry. As a teenager I worked in machine shops and picked up equipment experience between smoking joints. I swear I learned something.
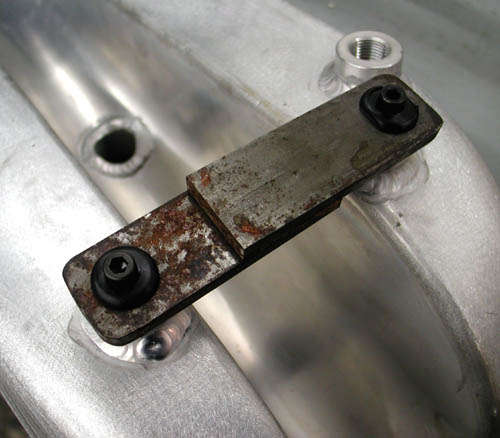
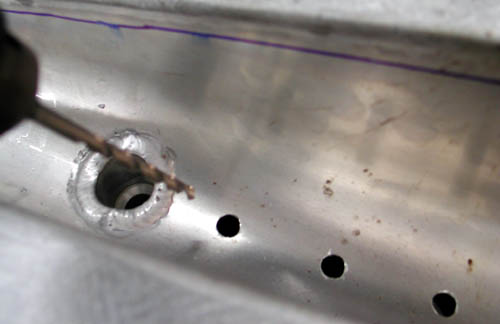
Let's see, what else. I dug through our parts bins and found the exact bracket I needed to mount the Kraft Tech oil bag. I need to cut off the existing coil and oil bag brackets and make a new front mount.
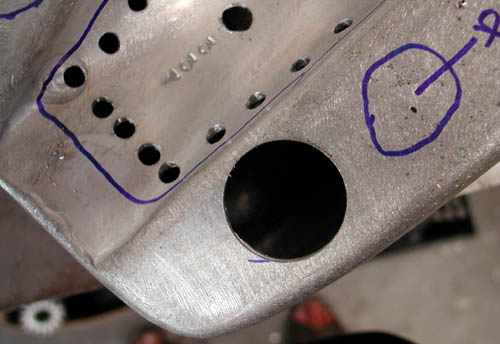
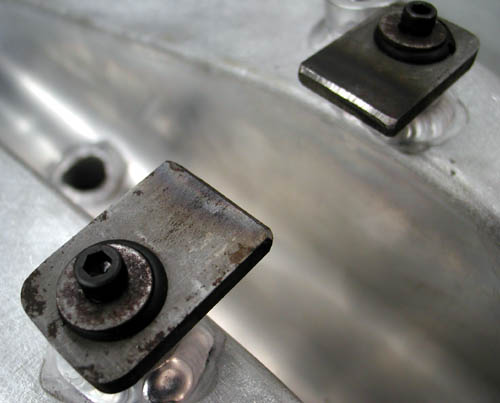
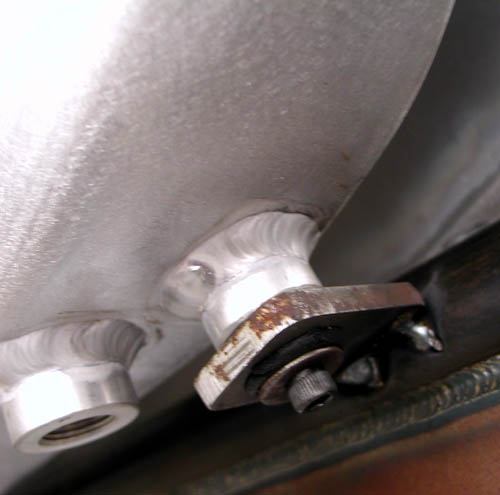
Wait a minute I'm slipping again. I dug through my bracket drawers and pulled a couple of old Jammer brackets 1/4-inch thick. I drilled 1/2-inch holes for the rubber mount grommets from Cyril Huze. I bolted them in place.
Next, I carefully measured the backbone tubing of the frame and figured the dimensions of the tabs and carefully marked and cut them, then beveled the edges for strong welds.
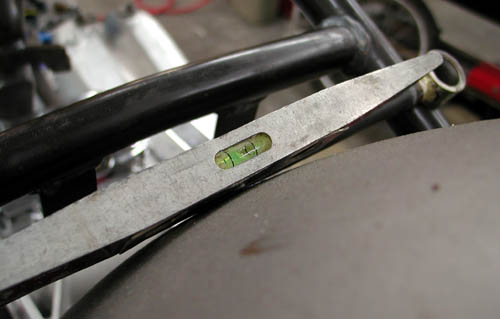
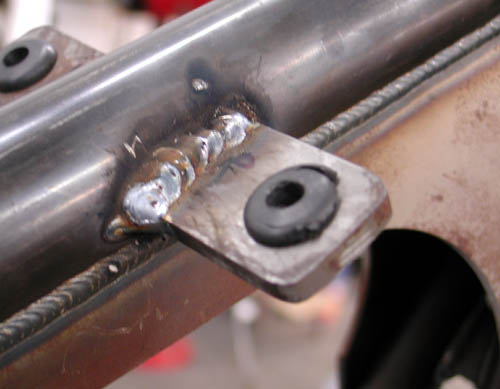
The next day under a sober sky, I refit the tank, tacked and MIG welded the tabs. Once the Bill Hall, pro-welder, welds my tank bungs in place and the tunnel is capped, I can make the final rear tabs and mount the tank semi-permanently. Is that possible?
Next, I will mount the Kraft Tech Oil bag, the rear fender and sprung seat mechanism. I'm also dealing with the rear drive. The frame was set up for belt, but more and more I like the chain notion.
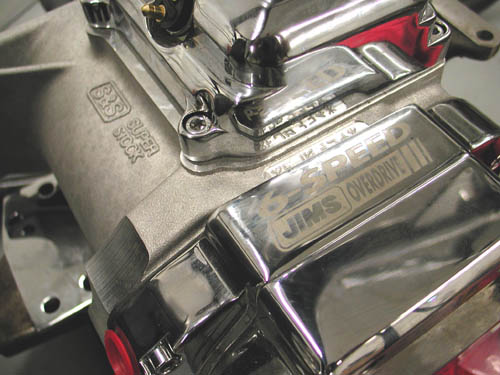
The JIMS machine tranny is set up for 4-speed applications with 6-speed gears. First, I ordered the wrong Custom Chrome tranny plate, then I was twisted about the sprocket vs. belt pulley needed to drive the bastard. I dug through old parts bins until I found gears, since it looked like a gear-driven job. Then the sprocket didn't fit. I'm still trying to figure it out.
I'm going to meet with Jim of JIMS in the next couple of days and get to the bottom of it.

Although the frame is set up for a belt, that means if I run a chain, I'll have plenty of alignment flexibility. Hang on for my next report.
–Bandit
Doherty Machine
1030 Sandretto Dr Unit L
Prescott, AZ 86305
928-541-7744
mailto:Dohertymachine@aol.com

BRAND NEW CUSTOM CHROME CATALOG RELEASED–
Want the Custom Chrome's new offering for 2005. The California based distributor brings you the most comprehensive product offering in the Harley-Davidson aftermarket! At over 1,500 pages and over 25,000 part numbers, their 2005 Catalog features the new RevTech 110 Motor, Hard Core II, bikekits, frames and forks–everything from nuts & bolts to performance products. It's the Custom Bike Bible for the year. No, this is not the latest book, just click on it to find the real deal.
ONLY $9.95 + 6.95 Shipping**
** Price may have changed.