
Here we go. I’m relunctantly behind the eight ball, or more likely the 5-Ball in this case. The bike is nearly complete and I haven't caught up with the articles. For the most part I was working at Primedia on the bike mags and didn’t have time to breath. No fucking lame excuses. Let’s hit it.
My original plan called for brass sculptures to hang this bastard together in a purely Bandit way. I messed with some odd heavy brass cloverleaf rod that was over a ½ inch in diameter. I wasn’t having my usual creative luck with bending or messing with this material. Kent from Lucky Devil Metal Works in Houston recommended that I use silicone Bronze rod and I’ve since messed with it. I shifted gears from Gargoyles and sculptures to pure mechanics. I started drilling holes is everything.
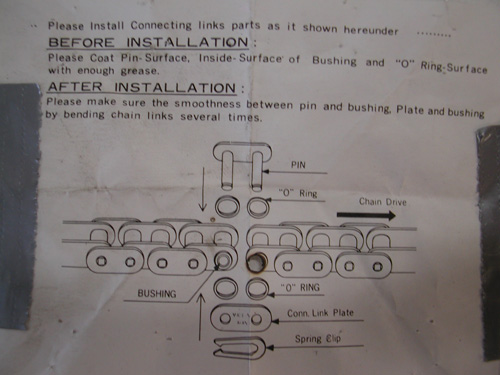
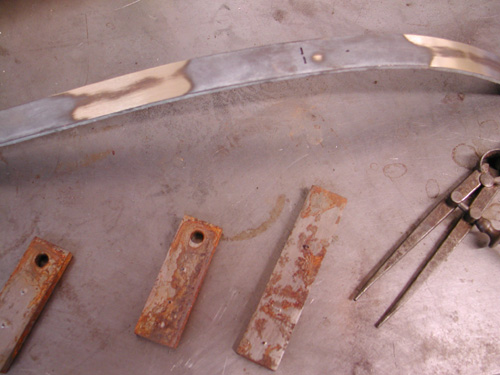
I discovered a piece of ½-inch wide strap that I thought was copper. Remember that the notion behind this mess is to use as much bare metal as possible. As it turned out the strap was brass so I gave it the Scotch Brite treatment and went to work. Before I made or positioned the rear Custom Chrome chain I needed to align the wheel, the transmission and the engine. I used my BDL inner primary and pulled the loose engine and tranny into position. Then I centered my chain axle adjuster and installed the chain using the CCI instructions (above). I have an old chain breaking tool, so I took out just enough links.
With the chain in place, aligned and adjusted the wheel using the Doherty wheel spacer kit (a life saver). I couldn't mess with the requisite chain guard until all was in the correct groove. Although the Paughco custom frame is designed for a belt, I choose the old school route and it worked out well. Lots of extra space to mess with.
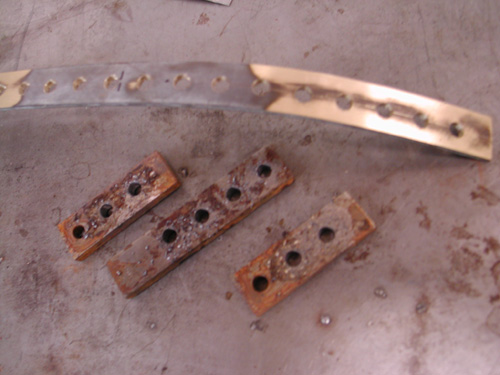
I dug through my drawers of tabs and crap that I’ve had around for 25 years. In the old days Mil Blair would call me from Jammer from time to time and tell me when it was time to shit-can scrap iron. I picked up tabs, spacers and brackets by the fist full and I’ve been moving them from place to place ever since. But damn, when you need a tab it’s bitchin to find just the right size in a drawer. Since I was going nuts with the drilling treatment, I matched the work on the frame with holes in the chain guard and counter sunk the edges for a more rounded look.
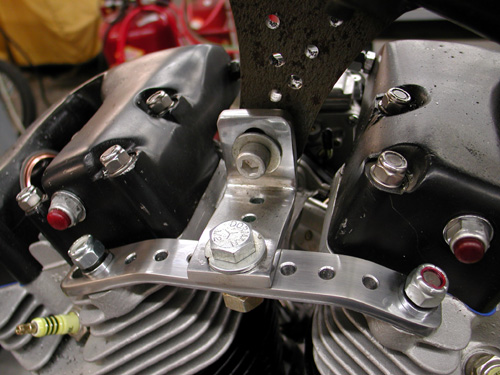
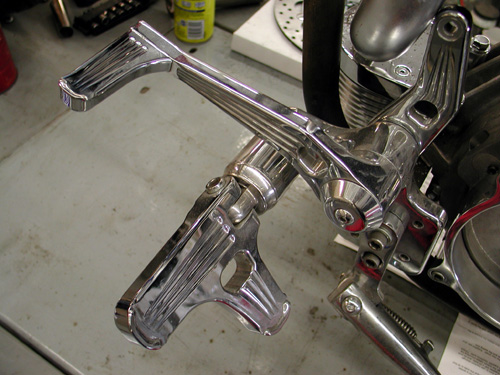
I also hit the top motor mount with a similar treatment. To give it a bit of consistency I measured from center to center on the holes and made all the holes the same diameter, 1/4-inch.

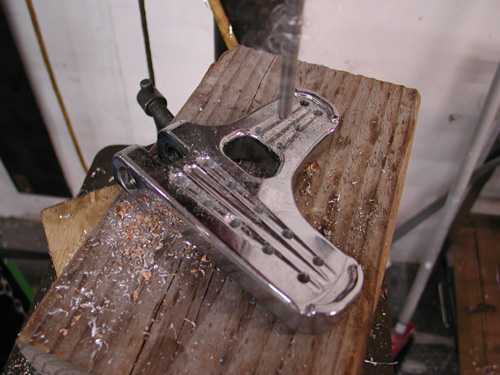
The hole deal became an obsession. I started drilling ¼-inch holes in everything including the Joker machine foot controls. I also went after Russell Mitchell’s Scotch Brite code. I swallowed hard and rubbed a piece of chrome with the coarse material and discovered that chrome reflects everything until it’s brushed with the wiry fabric. It gave it a raw material appearance and I decided that it was cool but a pain in the ass to do.
Again, I drilled the holes the same space apart, ¾ of an inch. It’s not always that easy, though. Sometimes the formula just doesn’t work. I use a pair of calipers to hold and mark the distance from hole center to center. If a hole ends up being located too close to an edge of the material, I back off and try another formula. Make sure to plan before you start drilling.
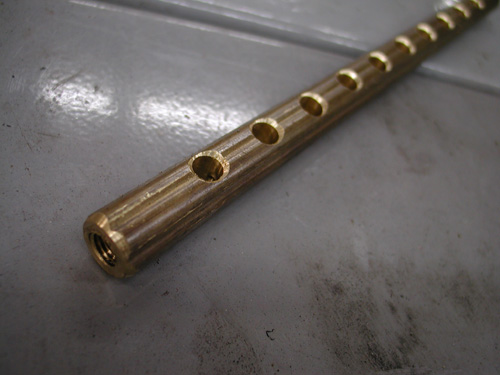
Here’s that damn brass stock. I was determined to have Brass, Copper, Stainless, Aluminum and a bare metal effect on the frame. You’ll see shortly how it worked out. I couldn’t bend that brass shit without destroying it, so I made the shift linkage out of it. I cut it off on a bench lathe and drilled and tapped the ends to 5/16 fine threads to fit the fine thread heim joints. Then I drilled the rod and countersunk the holes to remove the sharp edge.

Here’s one of the Joker Machine control sets, rubbed with Scotch Brite and drilled. They make fine controls, some of the best. You can adjust these puppies anyway you choose to fit your riding position, inseam or foot angle.


Before I leave this chapter I’ll touch on this new petcock from Spyke. It’s incredible, if it works well. It’s designed to give you every option for positioning and spigot direction. I ran into only one problem. No wrench lands to help tighten the bastard.
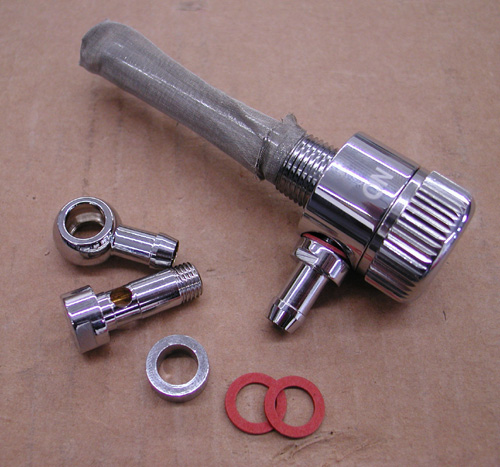
Check it out. You can run it faced in any direction and still read the switch locations and turn the knob without a lever smacking the frame and components. The spigot set allows builders to face the gas line in any direction.

I used the straight spigot and took off one of the fittings because my tank threads are female. The only problem I had was tightening it down, but I’ll get to that after the powder coating returns from Foremost Powder in Gardenia, California.
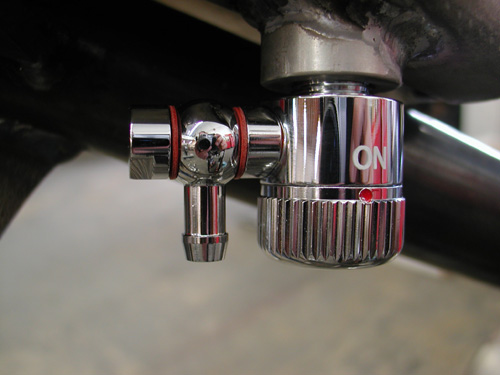
This puppy will revolutionize the industry for petcocks, if it works. I’ll let you know in a week or two.
Ride Forever,
–Bandit