Timbo’s ’64FL Panhead Part 3, Engine
By Robin Technologies |


Tear down was straight forward, first I removed the carburetor, followed by the oil pump, gear drive housing, push rods, tappet blocks, rocker covers, heads and barrels. After the barrels have been removed, place a couple of shop towels around the connecting rods to keep debris from falling into the crankcase.

I carefully cleaned all old gasket material from all the mounting surfaces. I ended up using razor blades and plastic scrapers. Be careful not to gouge any mating surfaces as you scrap. Any abrasion could create a leak if the gouge is deep enough.

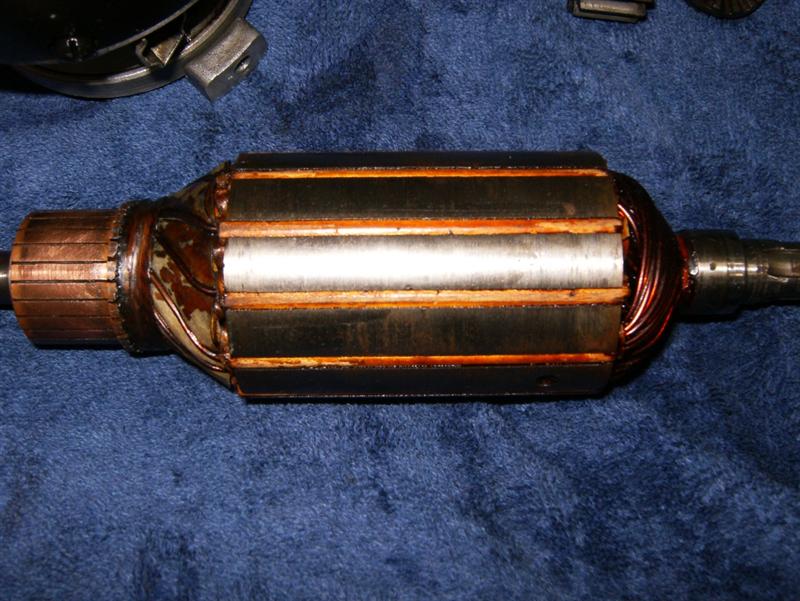

Ed from Quick Start custom builds electronic circuit breakers specifically for vintage motorcycles, and he spilled a wealth of knowledge, always willing to help in any way he can, yea ED!!!!
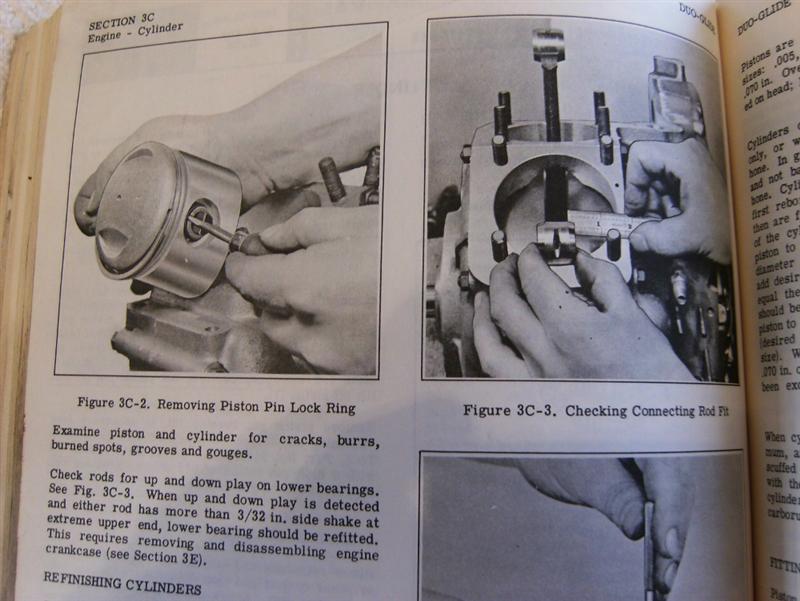


Rebuilding the oil pump was a simple task, you can get the complete kit from J&P Cycle. The gear case cover was removed and the timing marks were checked for alignment.


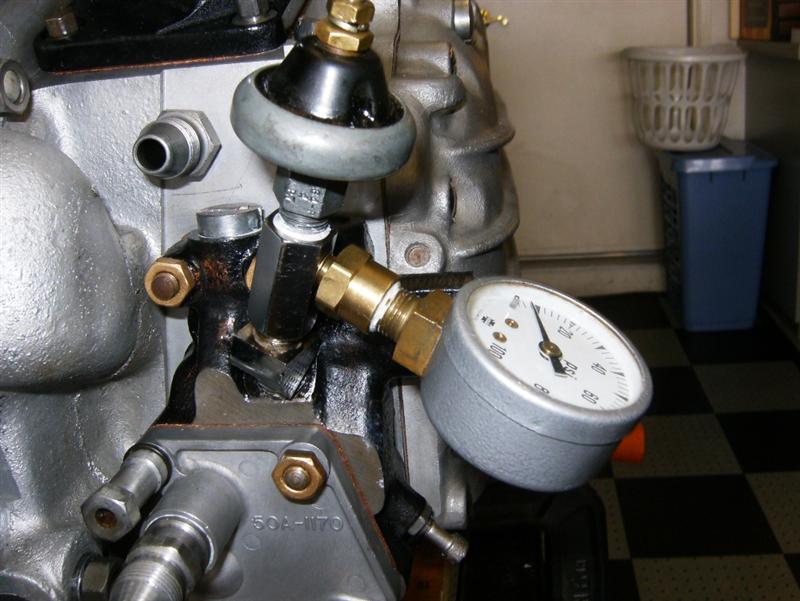

I removed the tappet blocks and tappets, cleaned them and miced them to see if they are within tolerance, they are. Be careful when reinstalling the tappets, they need to go in the same position (same hole) they came out of, with the oil passages near the rollers pointing inward (refer to manual). Failing to do this will cause the engine to seize, and we don’t need that.
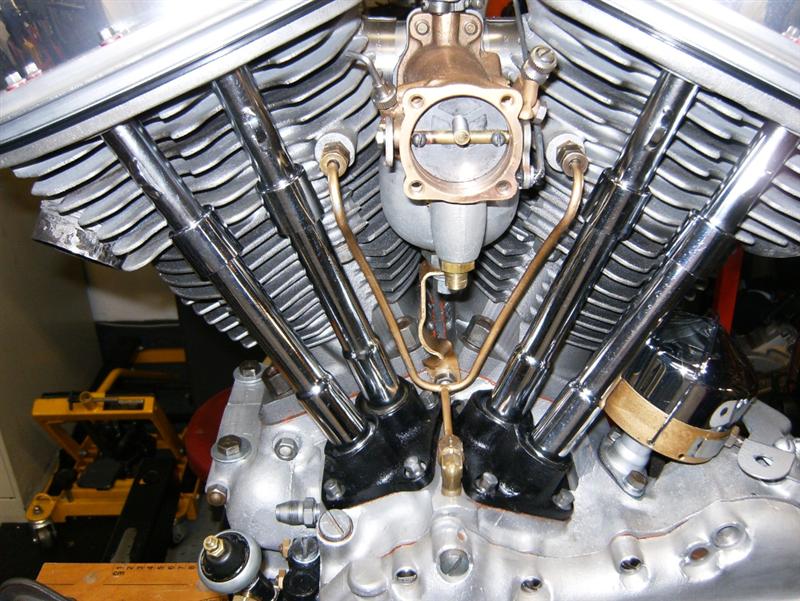

Timbo wanted the barrels to be blonde, so I had them bead blasted to remove the black Bar-B-Q paint someone had put on. In my opinion, they look way better blonde. As far as the heat transfer, I don’t think it makes much difference. Most Harley engines of today are blonde, the black is a cosmetic option. I have built aircraft engines for 20 years, and almost all are bare metal cooling fins. I coated the bare metal with clear 1500 degree heat paint, just to make sure they don’t rust up on me.

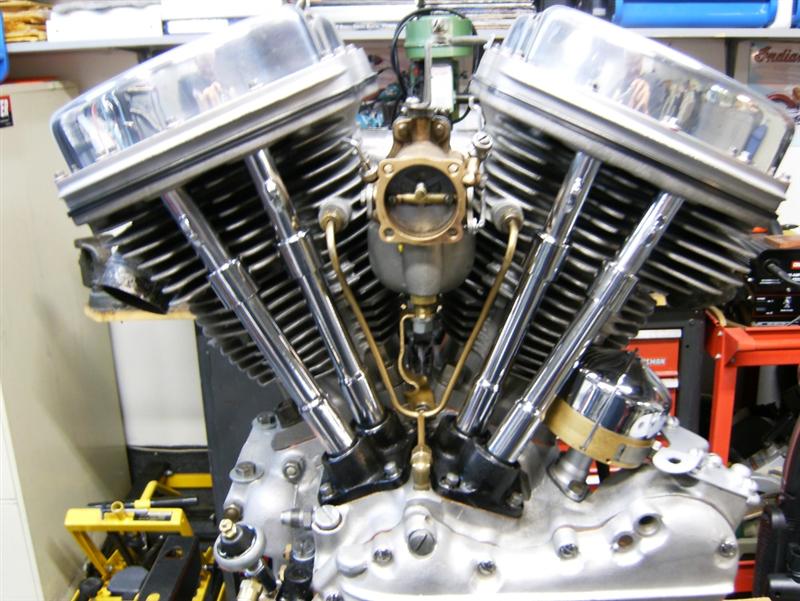


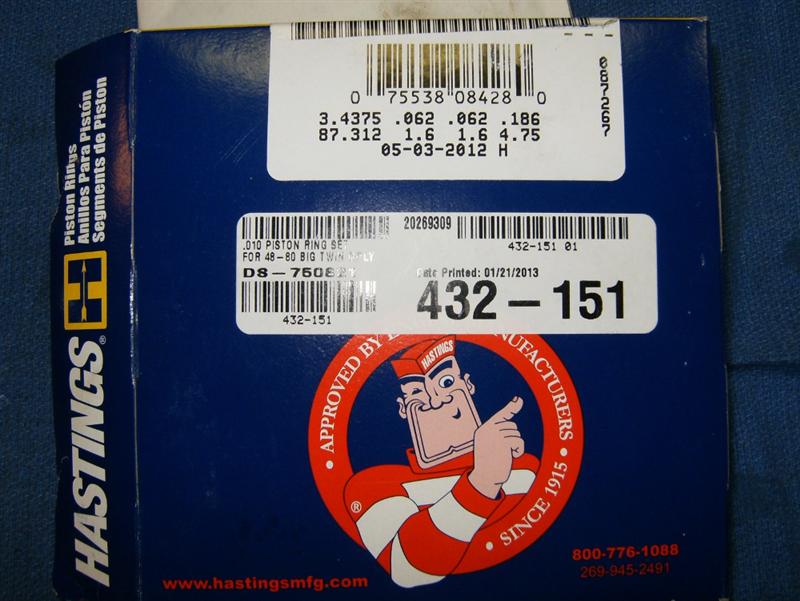
New rings installed along with the cylinders cleaned and honed. The heads looked really nice, no gunk had built up yet and the valves were lapped just to make sure. I also cleaned out all the oil passages, don’t want any debris mucking things up!!
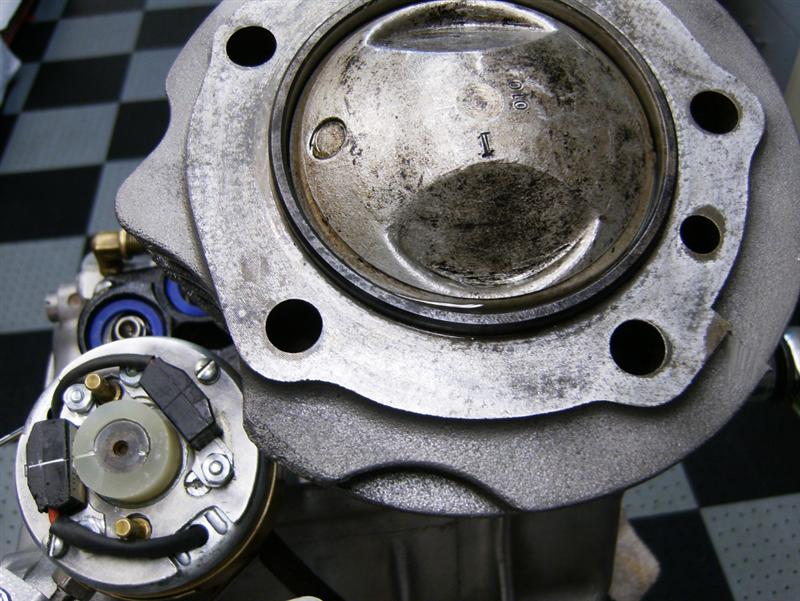

At last, the engine is complete for now. Since beginning this article, I have already installed the engine and trans in the frame, another article on the frame will follow soon.


Tail Gunner out for now!
Timbo’s ’64 FL Restoration (Part One)
By Robin Technologies |

Not too long ago, my good friend Timbo approached me with a proposition, restore his 1964 Harley FL, I agreed. Problem was, it’s in a box, literally! So after a brief discussion on exactly what we wanted to do, how much it would cost and the possible value at the end of the rainbow, I started the Hard Ride back from Hell with the old ’64. I picked up the bike, basically a roller and all the boxes of parts that came with it. As you probably expected, this will be a frame up restoration as close to factory specs as I can get it.

There will be some minor changes, which I’ll talk about as we go along. First thing was to lay it all out and take inventory to see what was missing. After some research, I found replacing parts for the ’64 surprisingly easy thanks to J&P Cycle, Biker’s Choice, and the internet. I ordered the Vintage catalog J&P Cycle puts out and started researching parts I needed to replace.

I also found a local polishing company and chrome hardware supplier (needmorechrome.com) to make life easier. Tear down was a snap. Make sure you bag or box all your parts as you go and label what they are, and in some instances what order they go in. It’s not a bad idea to take lots of photographs for future reference. Sometimes a parts manual comes in handy.


After tear down, I started the fun stuff, going through each and every part, each nut and bolt and cleaning them. Some parts and hardware will not be salvageable, so you’ll have to replace them with either new, or good condition used. I found that there is a tons of vendors on line for just about everything you need. Buying new parts from the catalog is not always the best answer, especially if you’re on a budget like I am.


So shop around, do some research, you may be able to save as much as 50% sometimes. You will also need repair manuals and a few restoration guides like the one my friend Bandit sent me for reference from Wolfgang publishing, thanks Bandit. It has been very useful so far. This is the first of many articles on this restoration project. As the months progress, I’ll try and give you a detail look at what’s involved with a full-blown restoration.
Tail Gunner out for now, see ya next month!

Mudflap Girl FXRs, Part 10, Suspension Tuning and Le Pera Seat
By Robin Technologies |
Mudflap 8: http://www.bikernet.com/pages/Mudflap_Girl_FXRs_Part_8_Wiring_World.aspx
Mudflap 9: http://www.bikernet.com/pages/Mudflap_Girl_FXRs_Build_part_9.aspx

I’ve been riding and tuning Mudflap Girl FXR for a couple of months. We finally dialed in our rear shocks, maybe. David Zelma, from Progressive taught me the ropes regarding spring pressure and travel. We will get into that. We have also been monkeying with my Spitfire Girder shocks. Again, the problem is travel.
My son’s FXR faces similar dilemmas, but hopefully we will be able to transfer knowledge from my bike to his. Fortunately, Progressive suspension is just down the street in Orange County, so David Zelma stopped by with a variety of springs. “Your shock angle is more like a Dyna Glide than an FXR,” David said, “which makes for much more severe spring rates.”

I kept trying tougher and tougher FXR or touring H-D springs and the rate of sag was too much, indicating a too-soft spring. Also, I had to mess with additional bumpers, limiting the shock travel to prevent the fender from smacking the Avon tyre. It’s a humorous dilemma, one that any sport bike rider would scoff at, since he doesn’t care if there’s a foot of air between the rear tire and the fender.
Ultimately, we ended up with 12.5-inch Progressive Dyna shocks, but my travel, with limiters, is just over ¾ of an inch, sort of the same as a lowered Softail.
“I’m not happy with this system,” David said. “I want to see more travel for a comfortable ride.”

I like the way the bike looks, and I will ride it to Mammoth Lake next weekend to hook up with the Hamsters on their long road to Sturgis from the West Coast. That’s the iron test.
Next, I looked at the front Spitfire Girder shocks and discussed it with Rick Krost, who messes with bicycle seat shocks for custom applications. He removes the stock springs and switches them for cut springer springs. They were, unfortunately, too soft for the girders. Our problems with the seat shocks were two fold. The springs were 300-pound jobs and the shocks did very little to dampen the ride. So I went on a hunt. I discovered RockShox and Fox bicycle shocks, which run over $500 a piece. Good god!

Rick supplied me with a couple of RockShox with springs rated at 500 pounds per inch. Again that’s too tough, so I tried running one shock in a position more directly in line with the girder, another Rick suggestion. With one 300-pound rated spring I received good movement, but again very limited, like just over a ½ inch of travel. I’m still on the hunt for 2 inches of travel, and fortunately the Spitfire girder affords me the ability to mess with the positioning of a shock. I found a Fox shock that could be perfect, but the cost was prohibitive. RockShox also allows me a variety of spring rates, but of course I can’t find a price on their web site.

While on the girder shock hunt, we worked with Le Pera on a seat for my son’s Mudflap Girl FXR. Christine and Bob Le Pera took over their dad’s company when he passed. Christine picked my brain for styling, and then sent me a seat pan.

First, I made a bracket to catch the supplied tongue, welded under the seat. Before final welding, I may move the frame bracket back a ½-inch. Even with the tongue extended, I’m still not perfectly happy.

With the pan in place, we marked mods and adjustments with a felt pen and started hours of grinding and fitment. Then Ray C. Wheeler hacked-out an extension to afford my son enough seat for a passenger.

We cut a chunk of like thickness sheet metal and made a cardboard template, which was transferred to the sheet of tin and cut out with cut-off wheels. We could have made smooth work of it with a plasma cutter, but the grinding would burn the clock, and warping might become an issue.

We spent hours grinding, hammering and fitting until we thought we were close. I would love to find an English wheel and make the time to take a sheet metal class. Then we tacked the pan to our extension, and worked on it some more. I didn’t want to send it back to Le Pera’s historical shop looking like shit, so we worked over the pan extensively, and then drilled additional rivet holes to match the traditional pattern of Le Pera holes.

Le Pera is the home of the chopper seat, the cool, low, stylish, bare bones butt pads. “We can’t make ‘em fast enough,” Christine said. They have also shifted to more dresser seats, and seats for tall guys are popular.

This is their 40th anniversary in the seat-making business, and their focus for this year is new products, not parties. They constantly study new fabrics, threads, and embossed products. While in Italy at a dealer show, a customer approached Christine and told her, “Le Pera is the Ferrari of custom seats.”

When I spoke to Christine, my first question was regarding my seat pan. “How did we do?”
“You did a good job,” Christine said. “According to Bob, it was easy to cover.”
After they inspected our Bikernet shop handy work, she sent the pan out for powder coating. Then they installed a tough rubber edging molded over a metal insert. The metal grabs the pan securely, and the rubber clings securely to the metal. Together they protect the cover fabric.
While the pan is prepped for padding, the Le Pera liquid foam formula spilled into the standard Silhouette foam mold and was clamped into place while it cured.
Bob Le Pera, Christine’s brother, glued the foam figure of the seat to the pan and started hand-shaving the foam. “He’s the artist,” Christine said. Once shaped, the seat was ready for the fabric cover.
Bob chose a long-lasting comfortable fabric, but the master of seat patterns, Gus, a 32-year member of the team, laid out and customized the seat template, extending the standard Silhouette pattern, which he transferred to the resilient fabric, cut out the various pattern segments, and sewed the pieces together with upholstery-grade, ultraviolet-light-resistant bonded polyester thread. The color selection is vast.
Another long-term veteran member of the Le Pera team, Rick, with 27 years under his leather belt, completed the seat. He attached the stitched cover over the hand-shaped foam, made sure all the lines were symmetrical and tacked it in place with a couple of rivets, starting at the rear with a rivet gun.
With the completed seat in hand, Rick carefully glued a protective template of carpeting on the bottom.
I asked Christine about ordering custom seats from them, and they are open to a variety or requests. It’s often best to work with a knowledgeable dealer who can give you tips and knows how to speak the lingo to the Le Pera staff. You can always e-mail the staff and hit them up for info. Try to nail down a style before you reach out. Styles range from thin, low, and sleek, to touring, or tall guy seats. Check their catalog for ideas, and once you’ve nailed the basics down, you can discuss custom stitching, inlays, fabrics, leathers, and or embossing, and of course an affordable budget.

With the seat in hand and the Spitfire forward controls mounted and dialed it, Frank’s Mudflap Girl FXR is ready for a ride. He just needs a plate, registration, and insurance documents, and we will begin the Eddie Trotta break-in routine.
Le Pera Seats
D&D Exhaust
Biker’s Choice
JIMS Machine

MetalSport
BDL/GMA
Wire Plus
Branch O’Keefe
Bennett’s Performance
Custom Cycle Engineering
Saddlemen
Bub
Progressive Suspension
Check out my road test in the next chapter: http://www.bikernet.com/pages/Mudflap_Girl_FXRs_part_11_The_First_Road_Test.aspx
Doug Coffey’s RetroMod Panhead Part 2
By Robin Technologies |

ACORN NUTS MEET THE MUDFLAP GIRL
By Robin Technologies |
|
||
Timbo’s ’64 FL Restoration (Part Two)
By Robin Technologies |

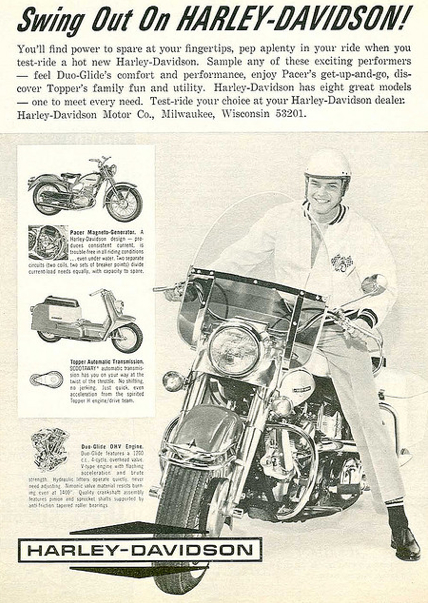
1964 was an interesting year for Harley. it was the last year of the 6-volt electrical system, and last year for the kick-start only. In 1965 they stepped up to 12-volt system and the first electric start and massive batteries started to appear. So let’s get started, I removed the primary, to my surprise it had a belt drive in it.


Someone wanted a step-up from the original chain drive, unfortunately it’s covered in oil that leaked from the main shaft seal and chain oiler that was never shut off. I might be able to save it with a healthy cleaning, we’ll talk about that later. After removing the primary drive and clutch, I thought the transmission would be a good place to start the restoration.

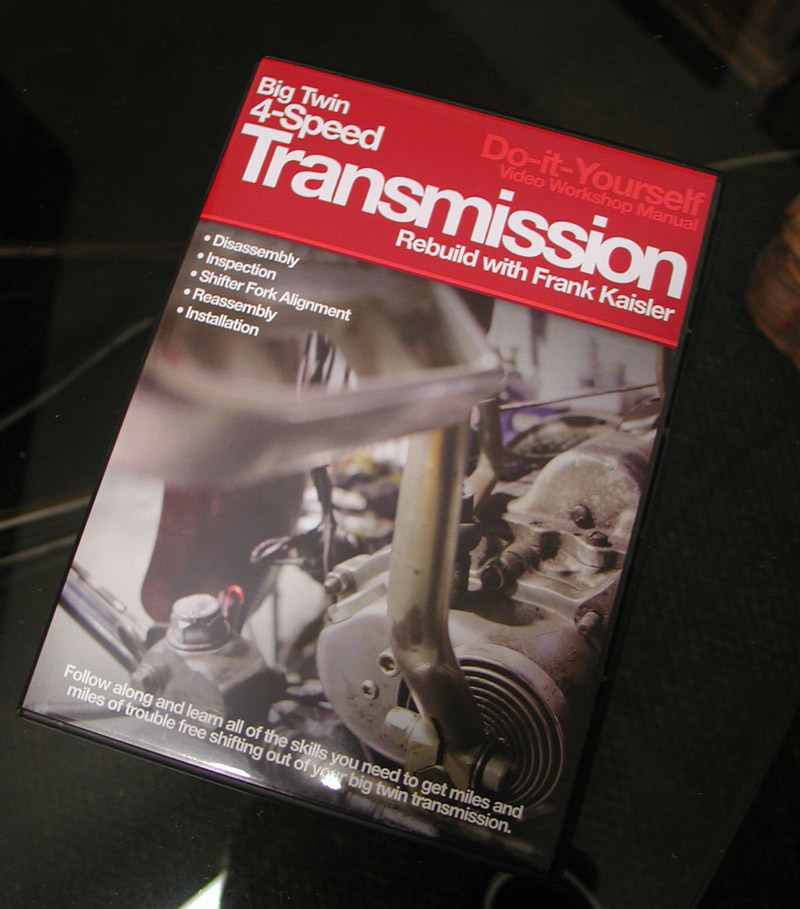
I did the research and found out all the parts I needed to rebuild the stock 4-speed transmission were available from J&P Cycle, and manufactured by JIMS. So off to the catalog I went. I ordered all the gaskets and seals I needed to rebuild it, except one, the main drive shaft seal (which was the worst one out of the bunch). According to the manual and other people I talked to, you need to invest $250 in the special tool from JIMS. It removes and installs that seal. However, I found an old friend (older than I) sorry Danny! LOL, who knew how to R&R the seal without the so called special tool, no big deal, according to him!


Be careful not to lose the gear shaft key for the sprocket. Also, there’s a small keeper key (looks like a flat L). It holds the sprocket far enough away from the seal, so it doesn’t ride on the seal. Keep it just in case. I later found out the new seal came with the keeper, but it’s better safe than sorry, if ya know what I mean.


There are some measurements you can take with feeler gauges for the shifter forks and spacers, refer to the manual.
Also you can check the timing shifter notches for alignment after the cover has been removed, also in the manual.

I actually ended up with two manuals, the original 1964 Harley service manual and a Clymer manual. Out of the two, I prefer the original service manual, it’s so easy to read and understand an idiot can follow it. Wait a minute! It’s also a good notion to pick up a parts manual for a variety of parts illustrations not found in service manuals.

For the serious rebuild the Wolfgang Panhead Restoration book, by Rick Schunk is an excellent guide. We were fortunate to have a low mileage transmission, and only a clean- up was required.

All the schematics are hand drawn in detail, very cool and definitely vintage. For the main shaft sprocket seal, I used the old school method my friend suggested, a slide hammer. Simply drill a couple of 5/32 holes in the seal, not too deep, about ¼-inch, screw in a sheet metal screw, and slam away!


It came out on the second slam of the hammer, YEAH! Installing the new one was just as simple, add a little Vaseline or WD40 to the outside of the seal and gently and evenly tap it in. I used a brass seal installer I had lying around, moving it back and forth on the seal so it doesn’t bind. Tap it down flush with the case, and your done. The JIMS tool insures that the seal is installed perfectly square into the case.
The rebuild kit came with all the gaskets and seals. There’s an O-ring seal in the kick-start shaft that rides between two brass bushings, be sure and replace it.

You can reach in with a dental pick or small screwdriver, and remove it without pounding out the bushings. The kit comes with new gasket for speedometer cable and neutral light indicator.

I polished up all the chrome it had and added a brass kick-start pedal, it looks great! Yeah, I know, not OEM pedal, but it looks cool and is pretty close to the era. I also ordered all new chrome case screws, the old ones were rusted, plus the chrome looks better anyway. I painted the inner timing cover and polished the out cap. You will find that almost all the transmission and engine cases are cadmium platted.


Lots of guys polish or chrome them, my customer wanted them to look as factory as possible. Here it is, the finished product. Not sure what I’ll tackle next, if you have any requests, let me know, I’ll be glad to accommodate. I’ll probably go right into the engine. That’s all for now, Tail Gunner out till next time.

Bikernet/Cycle Source Sweeps Build Part 5 Sponsored by Xpress
By Robin Technologies |
I’ve never had so much fun building a bike, and it’s not for me. This one-off custom, art object, long-run bobber, chopper, will be awarded to either a Cycles Source subscriber or a Bandit’s Cantina subscriber on Bikernet.com. There’s always a growing buzz around building any bike. The vibe could be associated to the deadline, like the run to Sturgis, or a Bonneville land speed record effort, or for many shops, it’s a particular customer’s dream project. In this case, Gary Maurer, and Jules, from Kustoms Inc., created the aura of the build.
Okay, it started with Prince Najar and spread to the Crazy Horse Engine Company, and Jason from Texas Frame Works. I can feel it anytime I speak with Gary at Kustoms Inc., or John White from Crazy Horse. John runs a massive construction equipment company, but when we discuss his bottle cap engines, he glows and gets pumped. Gary and Jules built hotrods for years. Much of their fabrication codes come from building record-breaking dragster. They still hold a 6.51 second record at 209 mph with a Larry Morgan 500 cubic- inch pro stock engine.
Kustoms Inc. is a talented team capable of almost anything mechanical, but it’s their level of passion for the craft and every element of the build that’s captivating. Take for instance, mounting these classic 3.5 gallon Biker’s Choice re-popped tanks.
During the initial, design Gary planned the bike around classic H-D fatbobs, and bent the backbone of the frame to match the radius of the tank tops. “It’s basically a 12mm or ½-inch roll to match these tanks,” Gary said. “The tanks are almost flat at one point, but we work around them.”
With a ring roller/radius machine containing two dies on the bottom and one on top, he pushed the 1 3/4-inch tubing down 1mm at a time, forming the radius. He rolled the backbone slightly and then compared it to the tank, and rolled it some more. If his tubing length was long enough, it would form a 20-foot diameter circle.
He selected 3.5-gallon tanks since, the exposed frame backbone spreads the tanks and gives them the appearance of larger 5-gallon tanks. “Five gallon tanks would be too large,” Gary said. “During the mounting process, we level out the 3.5-gallon gas caps, eliminating the droopy look, so they appear similar to 5-gallon tanks when finished.”
Gary constantly keeps ride-ability in mind; consequently, he vents his tanks with a tee between the tanks, which he runs near the neck to be above the tanks. “The caps don’t always do the trick,” Gary said, “and once in a while can cause a vapor-lock.”
Then Julie went to work fabricating cosmetic caps to cover the indents in the front of the tanks, the speedo portion of the tank, and the stern indents. Each chunk of metal is bent 90 degrees in the metal break. Then she uses another tool to stretch and shrink each piece until it fits the contour of the tanks perfectly.
Gary started to chuckle was we talked about the classic tanks. “I’ve never run across a set of fatbobs that matched. One is always slightly longer than the other.” Julie attempted to make up for the difference when she formed the caps at the rear of the tanks.
With each cosmetic cap fabbed and tacked into place, Gary goes to work mounting the tanks using his tab kit, duct tape and wooden slivers. “If we TIG-welded and ground the caps you couldn’t tell where they were from photographs.” First he welded two front/upper mounting bungs to the frame, and then positioned the tanks with duct tape and wood wedges to fine-tune positioning. With the tanks in a perfect location, Gary tack welded the ¼-inch thick Kustoms Inc. tab kit elements in place, and then moved to the lower front tabs.
“I usually afford a 3/16-inch gap when it comes to rubber mounting components,” Gary said. “Since the tanks don’t generally match, we use this bottom mount to correct any oddball positioning. The J-tab might not be perfectly centered in the frame, but the tanks will be positioned exactly right.”
Here’s a quick indication of Gary’s involvement in this project. He has loaded this puppy and displayed it at seven shows around the country so far, next being Mountainfest in West Virginia, July 28, then off to Sturgis. The bike can be seen at the Chop-in Block at the Broken Spoke Campground all week. Come out and sign up to win. Also the bike will be displayed at the Cycle Source Chopper Show on Friday, August 10th. Okay, so this bottom J-hook mounting arm also acts to spread the tanks slightly, so the caps stop drooping.
The final tabs run off the back of the tanks and replace the stock tabs. “I make our tabs as heavy as I can,” Gary said. “I would much rather replace a five-buck rubber insert every five years, than a $1,000 paint job and a cheap tab.”
The final bike building code of the west lesson blossomed from Gary’s rule regarding mounting anything. “I never force anything,” Gary said. “Every part fastener should finger-spin into place and set as if in a natural state, no stress.”
Next issue, Gary will modify a Bare Knuckles rear fender, and we will see the spinning process. Then Julie will mount her handmade oil tank, right after Gary modifies Jason’s frame for proper spacing.
In the meantime, make sure to put your info into the hat for a definite chance to win this one-off, hand-built custom motorcycle by some of the masters in the industry. This is an opportunity like no other. The award ceremony takes place this summer at Las Vegas Bikefest, and no, you don’t need to be in Vegas to receive your prize. Just step up and subscribe to Cycle Source, or Bandit’s Cantina on Bikernet. You help support our efforts and receive a shot at a world-class motorcycle in the process.
–Bandit


Xpress
http://mysmartcup.com/
Crazy Horse
http://www.crazyhorsemotorcycles.com/

Texas Bike Works
www.TexasBikeWorks.com

Kustoms Inc.
KustomsInc@hotmail.com

Chop Docs
www.Chopdocschoppers.com

3 Guyz
www.3Guyz.com

Accel
Accel-ignition.com

Fab Kevin
http://www.fabkevin.com/home.htm
.jpg)
Evil Engineering
www.evil-engineering.com
D&D Exhaust
http://www.danddexhaust.com/
Wire Plus
http://www.wire-plus.com/

Barnett
Barnettclutches.com

Rocking K Custom Leathers
howard.knight@montana.com
Rivera Primo
www.RiveraPrimoInc.com

Spectro Oils
www.Spectro-oils.com
Bell
www.moto@rcn.com

Metzeler Tires
www.metzelermoto.com
.jpg)
Hawg Halters

Handy Industries
www.HandyIndustries.com

Grip Ace
www.gripace.com
Biker’s Choice
www.bikerschoice.com

Aeromach
www.aeromachmfg.com

Ride Wright Wheels
www.ridewrightwheels.com

Biker Pros

Bare Knuckle Choppers
www.bareknucklechoppers.com

Rivera-Primo Brute II Install
By Robin Technologies |

We have a goofy Shovelhead in the Bikernet shop called the 1928 Shovelhead. It has 21-inch wheels front and rear in a Paughco rigid frame, but some 1928 elements were used, including the re-pop semi-flat sided tanks, the rear fender and perhaps the seat. The bike was conceived by Bandit the bastard, built by the crew at Rick Fairless’ Strokers Dallas, with the help of Randy Simpson who manufactured the handlebars.

The bike has contained a couple of hiccups and hasn’t been ridden much. Recently, one of Bandit’s friends needed a ride, so Bandit shipped this puppy to Washington. Richard Kransler installed new Avon tires and took it out for a spin. Unfortunately, the early Rivera-Primo belt, stuffed into the semi-stock inner primary, snapped and the 1984 Shovelhead was garaged. More recently, Richard concocted a deal with Bandit for a van in exchange for his Sturgis Shovel, and returned the 1928 Shovelhead to the headquarters, where the gang went to work on it.

With Richard’s info, and after consulting with Ben Kudon at Rivera-Primo, a plan was put into motion to make this wild puppy more rideable. We needed to add an oil filter, rerun the oil lines to reduce heat, fix the sumping problem, replace the primary drive, and then we discovered a loose valve seat, but we’ll get to that.


This is also a two-part tech. We first installed the Brute II Extreme Belt drive with a 1 ½-inch wide 11mm belt with electric start in the closed primary. Then we will install the most magnificent Rivera-Primo Pro Clutch. Since this is a jockey shift, it will be interesting to test both the stock clutch against a new clutch system that’s state of the art. We will forward all of our extensive reports directly to the boss and all Bikernet readers.

We discovered immediately that the front Brute II pulley was larger than the previous model, which was disappointing because it called for more clearance in the case, which weakened one of the primary fastener locations. Not a big deal, so we went to work with a pneumatic cut-off blade and emery wheels.

It’s critical to disconnect the battery, especially while working on the inside of any Shovelhead primary. It’s too easy to bump or pull on the starter solenoid, and you could lose a finger pronto. Fortunately, we have a selection of JIMS tools and pullers for this operation.

Here’s the fine print from Rivera-Primo: Primo Belt Drives are designed and engineered to correctly fit stock Harley-Davidson motorcycles. Aftermarket frames, primary covers, engine shafts, or clutch hubs may cause installation problems. Also bent frames, sagging motor mounts, worn transmission mounts, and other defects may cause shortened belt life due to incorrect pulley alignment.

If you have a stock system being replaced, here’s the dope: Remove the front pulley, chain, compensator and chain adjuster. Remove oil lines to primary and plug or clamp to prevent leakage. Cut the chain oiler hose 3 inches from the oil pump and permanently plug it. All belts must be run completely dry, without lubrication of any kind. Therefore, remove all oil from inside the primary covers.

The spacer behind the front pulley should be removed before installing the belt drive. This spacer may or may not be required to correctly align the pulleys. If a spacer is needed for alignment, various sizes are available from your local Primo-Rivera dealer (part number PX-1, is a package of various sizes).

We discovered a very tight belt. We had to carefully install the belt in the case first. Then the front pulley was installed onto the main shaft, but just slightly to afford us some flexibility with the clutch hub. We re-greased the bearing on the clutch hub and inside the clutch shell. With the handle of a plastic hammer, while prying it with a large screwdriver, we were able to drive the clutch shell over the hub with some gentle persuasion.

We tracked the belt, and installed the same spacer from the last system behind the engine pulley. With the bike jacked and the plugs pulled, we turned the engine over to test the running direction. We made sure to run the engine over in a forward direction. It’s not a bad idea to use a straight edge at first to make sure the pulleys have the proper spacing.


“Spacing the motor pulley outward will cause the belt to track towards the outer primary cover,” said Ben. “If spaced too far out, the belt will rub on the inside of the clutch shell.

Then we attempted to install the outer, aftermarket tin cover and discovered a significant problem. It rubbed against the clutch shell. So far, our inner primary clearance adjustments worked.

We were concerned about the tightness of the belt. It seemed severe to us, and to Bandit. According to the Brute II directions, the belt requires a minimum of ½-inch up and down play at the center of the belt, and up to ¾-inch. We barely encountered ¼-inch of tough play. “Free play is critical,” Ben said, but when Bandit questioned him, he muttered something about ¼-inch being okay, since the belt was so stiff.

The crew even considered replacing the system with a stock chain, to avoid issues. We took the system apart and studied each element, and investigated. I looked into a longer belt, or installing the earlier unit again, which had its benefits with the smaller engine pulley and tapered clutch shell that fit in the primary. We installed the belt again and tested the flex—still tight. We cut a hole in the tin primary, eliminated that problem and affording us tremendous venting. We live and breathe by the Optimist Creed, sort of code of the west. We are hoping once the belt settles in and warms, we will encounter additional flex and no stress on the engine and trans bearings.

“This is a much stronger, more technically advanced belt over the previous 14mm belt,” Ben assured me. We will give it a shot. Venting is a critical element. Primo recommends venting enclosed belt installations to allow cool air to circulate into and out of the primary case. This will keep heat expansion to a minimum and extend belt life.


Special Note: Big Twins from 1969 require a #16657 motor seal. Next we will install the new Pro-Clutch from Rivera Primo and test it, so we will be in and out of this primary case and reporting back on our findings.


In the meantime, we rerouted the oil lines, added an oil filter mount, and an oil pressure gauge for more capacity, cooling, and cleaner oil. We worked on the sumping problem, and then discovered that a valve seat was loose in the rear head. We pulled the heads and delivered them to Branch O’Keefe for repairs.

Our shop intern and overall handy-man, Kyle Olsen, our official Bikernet electrician, will test this bike. We are determined to make it a solid rider, and Kyle will bring us reports and handling complaints in the near future.


We modified the jockey shift and added the 5-Ball for easy shifting that’s out of the way of our thighs at stops.

And Bandit has a code, a good one. All bikes need rear chain guards, and this bike doesn’t have one. We will remedy that. Plus we have a brand new set of Nology plugs and plug wires to install. Hang on for the next report.

Mudflap Girl FXR Part 12—She meets S&S
By Robin Technologies |
Here’s the link to Mudflap Girl Part 11: http://www.bikernet.com/pages/Mudflap_Girl_FXRs_part_11_The_First_Road_Test.aspx

My son’s Mudflap Girl FXR is running and partially broken in. I even, finally, dialed in the Wire Plus Speedometer, and it’s working. I wish I knew what I was doing wrong, but that puppy works like a champ. I enjoy the tightness of the display and ease of installation. In that small cylindrical Wire Plus display, I get a speedo, a tach, trip gauge, neutral light, turn signal indicators, oil idiot light, and what else?

Okay, so it’s time to turn the Pro Street version of the Mudflap over to my son, Frank, but first we couldn’t leave the bone stock remanufactured 80-inch Evo engine alone. I reached out to S&S for a cam recommendation, and they recently built a relationship with Crane Cams.

Bruce recommended the following stock engine formula: S&S Super E carb, Crane Hi-4 ignition, S&S Cam and S&S easy-adjust pushrods, a Crane dual-fire coil, and the S&S 33-4250 breather and shim kit, for just enough pump to let this motor breathe.

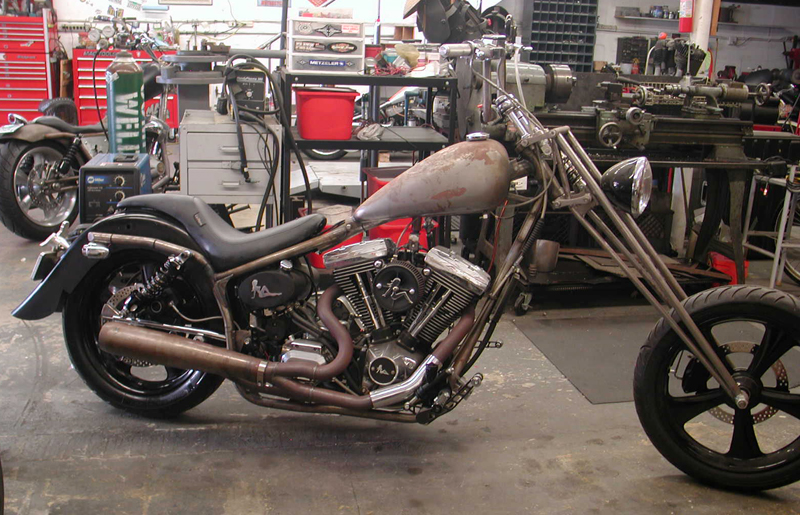
I hauled the Mudflap beast on my Kendon tilt-up combo trailer to Bennett’s Performance, a very clean shop, next to Branch O’Keefe Flowmetrics, on Signal Hill. Eric Bennett, the boss, bought the Bikernet Hearse, immediately fired his girlfriend and started to cruise the backstreets of Long Beach. He traded his bagger for a Sons of Anarchy Dyna, and is about to turn the 88-inch twin cam into a 106-inch S&S night flier. His band, the Signal Hill Billies, transformed their usual light country western twang into dark blues. What the hell did I do? We will bring you reports on his engine transformation. I could swear the all-black lowered hearse smirks at me whenever I roll into his parking lot, but we won’t go there.

I pulled up the other day to find Frank’s Mudflap Girl on a lift center stage. No sooner did I enter the shop when Eric slipped out the back. A mysterious tech sauntered out of the engine room with long gray hair. “Don’t take my picture,” he said, “and don’t mention my name in the article.”

I’ve known him a long time. He’s an experienced Bonneville racer and a multiple-tour Vietnam vet, about my age. He’s only been married once, and is still married to the same woman. “I swear,” he said, “I’ve never pulled my military issue bayonet on my wife.”
I’ve been married five times and Eric three, and he just broke up with his long-time girlfriend. Maybe the graybeard tech with his twisted grin was trying to say something.

What the hell could I say? I set the box of parts on the lift and started to blow the dust off the fresh engine. Eric gave me a new cone gasket, seal, and a Torrington cam bearing, in case the fresh engine was fitted with a poor quality INA bearing—it was. I removed the pipes. The tech removed the plugs, and we jacked up the bike. He popped the pushrod covers and broke out the bolt cutters to remove the stock pushrods without removing the rocker boxes.

“I roll the engine over so the valves are closed when I cut the pushrods,” Graybeard said, “so the valves don’t slam shut when the pushrods snap.”

Then he removed the point cover, and the crane Hi-4 ignition plate. “There needs to be a washer under the fastener holding the Crane point breaker plate,” he barked.


Unfortunately, I had installed the Crane system and breaker plate—my bad. I thought about my fifth wife. He pulled the cone cover with a rare Trock tool, since the master is no longer with us.


With a couple of JIMS magnetic, or H-D lifter tools the lifters were held out of the way while he pulled the stock cam and checked the bearing.


Sure enough, it was an INA cam bearing with about half the rollers of the high quality Torrington cam bearings.


JIMS tools makes a handy cam bearing puller, which was installed, and swiftly, perfectly yanked the stock bearing free. Eric made specific machined aluminum drivers for installing new bearings, which were carefully tapped into place. After it was installed, he reached in to make sure the bearing spun free, with no binding.


Next, he aligned the timing marks on the pinion gear and set up the new S&S breather gear.


Steel breather gears have better dimensional stability than plastic gears. Embedded particles can damage the crankcase breather gear cavity. A screen provides better protection than a slotted gear, so small particles are prevented from entering the gear cavity, where they may damage the gears and oil pump.

The S&S steel gear with welded in screen with larger diameter holes provides improved air flow/oil scavenging from the flywheel cavity. Crankcase flywheel cavity vacuum and oil scavenging are further improved by optimized breather window timing. Breather oil trap scavenging is significantly improved by increased scavenge port duration. These improvements are the result of exhaustive research using digital sampling and data acquisition equipment.
This gear was the standard size for late 1977—‘99 Harley-Davidson big twins. Breather gear kits include breather gear and steel endplay shim kit.

With the new S&S breather gear installed, he started to adjust the endplay with a .120 shim. “That’s usually the one,” he said. As it turned out, we went with .110-inch shim after he checked the fitment with a straight edge. Then he performed a similar operation with the cam to check endplay. We discovered that a .055-inch thick shim was needed in addition to the existing flat shim. He dug around and found one, and we were set to test it with another JIMS special tool.

The S&S 510V bolt-in cam works well with stock or ported heads. The improved ramp design results in low valve train noise. It’s meant for engines up to 96 inches and with compression as high as 10:1. It’s designed to pull its best results in the mid to upper rpm range, 3000 to 5000 rpm.

It was time to set the cam timing with the pinion bearing and breather gear slots. Then the mystery tech cleaned some of the case threads with a tap. “Too much Loctite,” he said. He touched all the stock ¼-20 Allens with blue Loctite and installed the cone and torqued them to 110 inch-pounds. He installed the appropriate washer in my breaker plate, and then the timing plate.


Before he removed the Crane Hi-4 ignition plate, he scribed the plate and the case so the timing would be right where I placed it when everything was put back together—that is, if I didn’t fuck it up in the beginning.

I peeled the S&S quick-adjust pushrods out of their vacuum-packed container and shortened them for ease of placement. These S&S jobs were a breeze. He checked for all the needed pushrod gaskets, and we compared the pushrod lengths to use the short ones on intake valves and the long ones for the exhaust.

“I adjust them the old school way,” he said. “I make sure one intake lifter is at the top of its cycle, and then adjust the other. Then visa-versa.” He waited 20 minutes between adjusting valves for the stock lifters to bleed down, but while he waited, we started to install the pipes. “No time to lose.” He made sure each pushrod would spin after it bled down. In each case, he took the slack out of the pushrod and then turned it out four turns or 24.5 flats. Once he tightened the pushrod lock nuts, he would take the half flat out of the adjustment.

Here’s the Quickee Pushrod Supplement from S&S: To install S&S quickee pushrods, thread the jam nut off the threads towards the ball end and screw the adjuster into the pushrod tube until the threads disengage and the pushrod can be collapsed
When installed and adjusted, S&S Quickee Pushrods must have a minimum thread engagement of .500 or half an inch (Pushrod tube to Adjuster, not including the jam nut) or severe damage to the pushrod as well as your engine may occur.
When adjustment is complete, the jam nut must have full thread engagement with the adjuster screw. If you do not have full engagement, the pushrod is not correct for the application or position.
S&S Quickee Pushrods for S&S Shovelhead and all big twin engines contain two long and two short pushrods. All Sportster model and Harley-Davidson twin Cam 88 pushrodes are the same length.
We replaced the pushrod cover clips with another JIMS tool, and I finished installing the Spitfire brake master cylinder and pedal. Once together, we turned on the gas, hit the starter and it fired right to life. Our very experienced Vietnam vet tech let her warm up, adjusted the carb and quietly returned to the engine room to work on a twin cam engine build for a customer. It’s time for my son to pick up his bike and head for a paint shop or the hills.
S&S
Bennett’s Performance
Wire Plus
JIMS
Spitfire
Mudflap Girl FXR Part 13 New Paint and More
By Robin Technologies |
Here’s the link to Part 12: http://www.bikernet.com/pages/Mudflap_Girl_FXR_Part_12She_meets_SS.aspx

Okay, so my Mudflap Girl FXR was running fine and I enjoyed every ride with the bare chassis, but I got a hair to treat the frame and powder coat some parts, but the corrosion treatment made the frame look almost black, and I didn’t want to build another black motorcycle.


I also had some tech obligations. I needed to test the new Centramatic wheel balancers. I needed to install new Spitfire rocker axles in the girders and tack weld them into place. Then the bros at Digital Dawg contacted us and told us about their new keyless ignition. Suddenly I was inspired. I had installed a marine ignition switch in the backbone of the frame, and Saddlemen carefully made me a seat that fit, but reaching in to install the key was a pain in the ass. I started to work with Bruce McKinley from Digital Dawg, and the keyless system made more and more sense.


One day, under the spicy effects from drinking RedBall Whiskey, I decided to tear the bike down to the ground, finish the final TIG welds, and then powder coat the frame and Spitfire Girder front end. I tore the whole damn thing to the ground, and then discovered that I still needed to build a front fender.


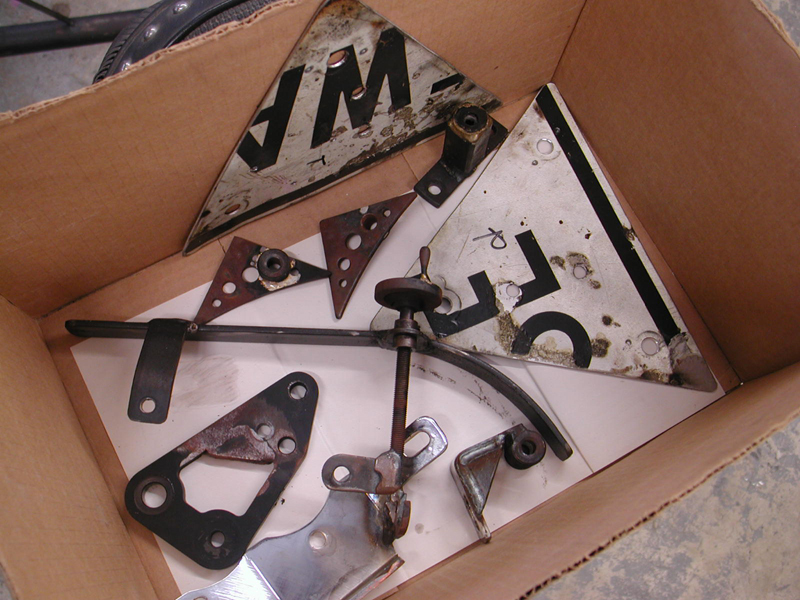
For some reason that seemed a daunting project, but ultimately I cut a slice of Bare Knuckles heavy-duty fender blank and went to work. With the help of our certified welder, and master metal fabricator, Tobey, we came up with the perfect fender.

I cut and shaped the fender brackets and tacked them into place. He performed all the final welds. Then all the parts were shipped to Worco Powder for heavy silver and asphalt satin black.
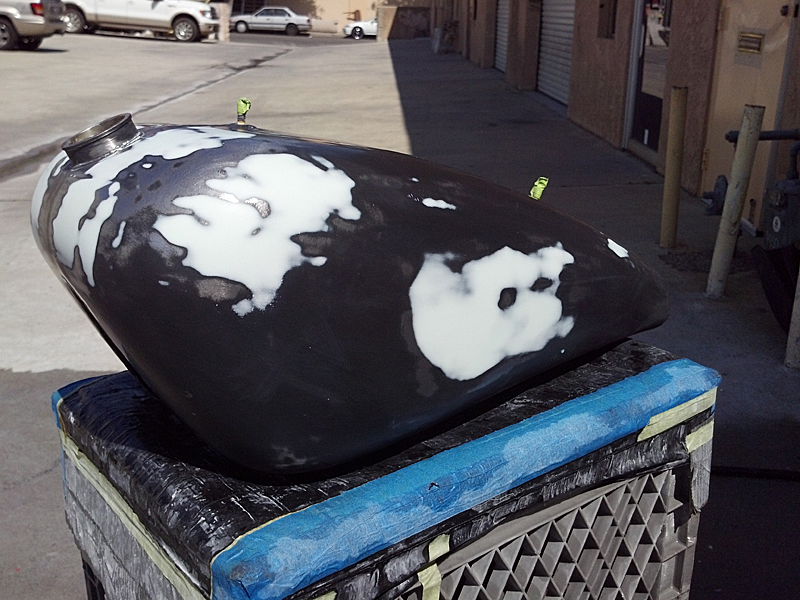

I hauled the tank to Chris Morrison in Harbor City to force the stretched Biker’s Choice flat black tank to match the powder, which he did masterfully. Then George, the Wild Brush put the final touches on all the black components with some simple matching silver pinstriping.


It was time finally, as the rainy season began to subside, to make this Girl run once more. Bruce Tessmer from S&S suggested I install a new Hi-4 single-fire ignition from Crane, along with their all powerful single-fire coil. There was nothing to it, and setting the timing was a breeze.


I pulled the plugs and the front intake pushrod tube clip. I rotated the engine over until the front intake began to close, then started to stare in the timing hole until the TDC slot appeared. I centered the slot carefully, rotated the ignition plate until the light went out, and presto, it was timed. The instructions called for an additional five degrees for electric start bikes, so I followed the instructions.


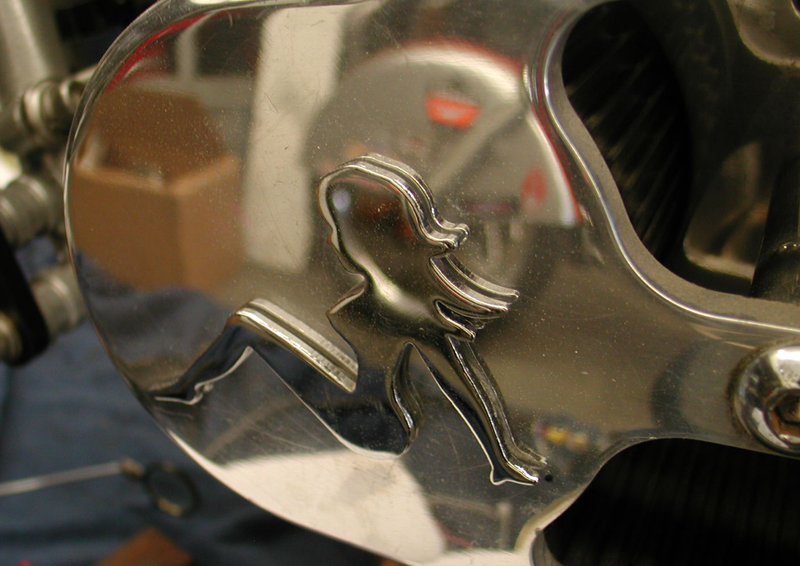
I also decided on a slight cosmetic change to the grips and pegs, and the new Contrast Cut Performance machine pegs and grips did the detail trick. I avoided chrome like the plaque, for a tough hot rod approach. I think it worked with the Metalsport Foose designed wheels and rotors.


John Reed made a comment to me about falling in love with a motorcycle, and I told him I was always in love with the bike I was building. This Mudflab Girl has touched a unique cord with me, and I’m not sure I can explain it. It’s absolutely the most comfortable, tall-guy fit bike I’ve ever built. I’ve tried to study every aspect of this machine and refine every element from the suspension to the electronics, and it’s still a work in progress. But there is something about this machine. It speaks to me, it fits, and it handles well for a chopper.

I called Bruce from Digital Dawg to discuss their keyless installation, and he informed me of a slight glitch. These systems are designed to slip neatly into any stock bike configuration, but nothing about my bike was stock. “You must have a kill switch,” Bruce said. “Most guys have a kill switch on the bars.”


He sent me a very cool kill button, and it worked perfectly to replace my old ignition switch in the backbone of the frame. This became a golden opportunity. I’ve built a lot of custom bikes, and few had kill switches. Like chain guards, kill switches are almost a Code of the West factor. If you need to kill your motor in an emergency situation, you don’t need to be hunting for that super-cool hidden ignition switch.

I followed the Digital Dawg directions and wired the system into my circuit. It works like a champ and is clean as a whistle.

Centramatic
This is one of those smoke and mirrors products that works. It’s like the guy in the seedy bar who hands you a small tainted bottle of liquid and swears that it will double your gas mileage. Don’t get me wrong, some of this shit works. Remember the guys who sold black rubber snakes or long tubes of solid rubber. If you installed them in your handlebars they would reduce vibration significantly. They may work, but they lack the obvious cool factor, and installation was a bear.


I watched the Centramatic youtube video around these puppies and was immediately impressed. I took a set of the stainless steel balancers to my local bike shop and asked if they would install them. The shop, Bennett’s Performance, is not a high-end chopper fab shop. It’s more of a performance, tough city streets, Sons of Anarchy style shop, but none of the customers would step up and install these puppies around their big buck Performance Machine custom rotors, or have them interfere with their brand new Chip Foose designed Metalsport billet wheels.


Centramatic On Board Continuous Wheel and Tire Balancers are a proven life cycle cost solution designed to smooth your ride and extend tire life with a unique “On-Board” balancing system for steer, drive and trailer axles for light duty and heavy trucks.
I actually believe Centramatic balancers would be perfect for Kendon Trailers. They manufacturer the same wheel and tire balance technology for Honda Goldwing, Harley-Davidson and Victory motorcycles.

• Increased Tire Life 35%-50%
• Reduced Vibration
• Dramatically Improved Ride
• 8%-10% Lower Tire Temp
For orders outside the United States, please call 800-523-8473 or e-mail us for shipping.
Not Sure Which Balancer Is Right For You?
To better serve you, E-mail us with the Year, Make, Model, Wheel Size, Number of Bolt Holes and Size of the Bolt Circle.
Click Here To E-mail: info@centramatic.com
The company describes the Centramatic product as a simple solution. Weights in Centramatic’s aluminum balancing ring move opposite of out-of-balance points with wheel rotation by centrifugal force, at any speed. The wheel is dynamically and statically balanced at all times. Old-fashioned lead weights are attached and can’t move or adjust to changing elements within the wheel system.
Large commercial fleets consistently see increases in tire tread life up to 50% and eliminate truck tire hopping from out-of-balance wheels. When a vehicle is retired, the Centramatic Balancer can be transferred to the new vehicle. No obsolescence here! Satisfaction is assured with a 5-year, limited, nationwide warranty and a 30-day, no-questions- asked, money-back guarantee.

Centramatic has had the privilege of having their “On-Board” balancers tested and evaluated by two of the most respected research organizations in the country: Auburn University’s National Center for Asphalt Technology (NCAT) and Speed Measurement Laboratories, Inc. (SML). At NCAT’s facilities, the effects on tire mileage and cab vibration were evaluated. Since operating temperature is critical to the endurance life of a tire, SML assessed the validity of Centramatic’s ability to decrease this debilitating condition.

By Speed Measurement Laboratories
By Auburn University Program for Advanced Vehicle Evaluation (PAVE)
Out of Balance Pounding Force, Per MPH
Balanced Wheel Diagram
Since I was in the process of tearing my Mudflap Girl FXR down for paint, I decided to give Centramatic a shot. I was concerned about only one aspect of the installation, the caliper fitment, since the stainless steel backing material was .030-.032 thick, so the rotors would move and require new caliper spacing in some cases. “Brembo brakes are more flexible than many calipers,” said Tom Nolte from Centramatic.

Other than the calipers, I ran into just one problem. My new GMA front caliper touched the outside ring of the balancer, and I needed to relieve the corner for clearance.

Other than those two issues, they simply bolted on under my Metalsport rotors and I was good to go. They are available for Victory motorcycles from 2007 to 2013. Victory bikes with ABS will need their sensors adjusted. GoldWings with ABS are good to go.


It took a couple of weeks to finish other aspects of the bike, before I could go for a test ride. My Metalsport wheels were mounted with Avon Tyres at Larry Settle’s shop and balanced, but in this case, I wouldn’t need to glue lead weights to my custom wheels. I rode the bike for a couple of thousand miles, before I tore it down. It ran fine and I worked extensively with David Zelma at Progressive Suspension, and Paul Cavallo at Spitfire on the rear suspension and the Girder front end travel.


When I finally pulled the Mudflap Girl off the lift and rolled it into the street for a test ride, I was astounded. This is a rubbermounted custom motorcycle with extreme suspension capabilities, and I was determined to make this custom bike handle very well for rides to the Badlands. I was blown away by how smooth it rode.

I faced one issue. The bike started to lean-snap or backfire through the carb. I couldn’t figure it out, so I rode it to Bennett’s Performance, and Eric adjusted the low speed jet on the CV carb, and monkeyed with the timing to no avail. Frustrated, I called S&S, Crane, and Departure Bike Works. I’m rejetting the carb right now with a new Sportster main needle, a .048 low speed jet, and a new choke cable. Hopefully, that solves the problems. I’ll let you know.

This was a Trock modified CV carb. Last night I tore it to pieces and studied every aspect while scrambling through the manual. I put it back together, and it did exactly the same damn thing. Then I replaced the new Nology spark plug wires with standard Compu-Fire jobs—did the same thing. I replaced the Crane high-power coil with my old Compu-fire single fire ignition coil—same results.


So this morning I started making more calls. I ended up on a mission to see an old CCI employee, Kip Woodring, now parts guy at California Harley-Davidson. Kip always makes the extra effort to help you find what you need. Like a dipshit, I didn’t note the jet sizes when I tore the carb apart. Of course the jets I bought were the same as in the modified jets in the Trock Modified Carb, but I still needed to replace my broken choke cable, so I wasn’t forced to manually hold the damn thing open.


The Bikernet Code of the West calls for never giving up. That line-item is right at the top of the list. A jet is nothing but a chunk of machined brass with a metered hole drilled in it, and mine needed to be larger. I dug through the official Bikernet dinky drill container, and was missing the finest of fine bits. I called the esteemed Bikernet Performance Editor, Ray C. Wheeler and he suggested a late-night run to Home Depot.


Sounded good, but I had one more option to try in the shop, my torch cleaner round files. I’ve had this set of cleaners for about 45 years. They’ve been kicked around the shop ever since I purchased my first set of Victor torches. I tried the smallest old bent and mangled tool. The non-abrasive end of the tool, just barely fit into the jet hole, but it did fit, and I started working the file back and forth until I could insert the entire body of the file through the tiny hole. I opened the hole from .019 to about .022 diameter. Chris, from Crane said the idle adjustment should be about two to three turns out. Lee Clemens confirmed three turns.

I ended up with a smooth idle at about two turns, and it quite lean-snapping. Tomorrow I ride, and we see if the fix is real. Hang on for the next episode with my grandson, and his Mudflap girl. He needs his baby to take him back and forth daily to Electric Tattoo on Balboa Island, where he works.
S&S
Bennett’s Performance
Wire Plus
JIMS
Spitfire

