Here’s the link to Mudflap Girl Part 11: http://www.bikernet.com/pages/Mudflap_Girl_FXRs_part_11_The_First_Road_Test.aspx

My son’s Mudflap Girl FXR is running and partially broken in. I even, finally, dialed in the Wire Plus Speedometer, and it’s working. I wish I knew what I was doing wrong, but that puppy works like a champ. I enjoy the tightness of the display and ease of installation. In that small cylindrical Wire Plus display, I get a speedo, a tach, trip gauge, neutral light, turn signal indicators, oil idiot light, and what else?

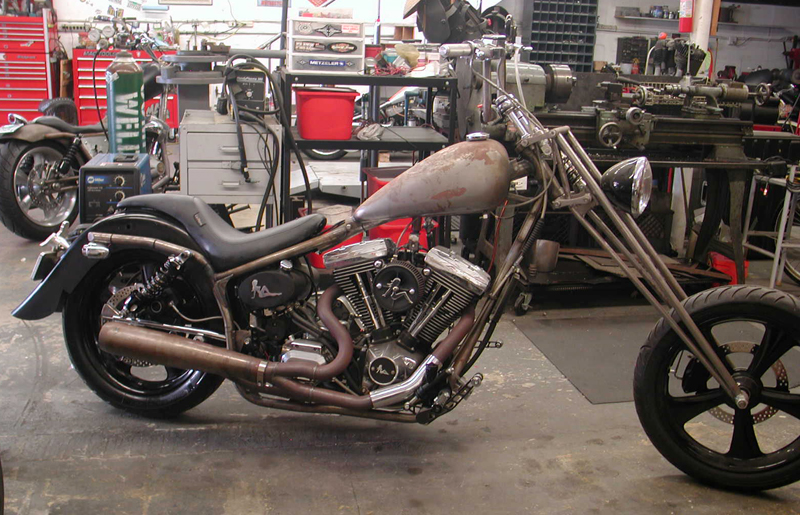
Okay, so it’s time to turn the Pro Street version of the Mudflap over to my son, Frank, but first we couldn’t leave the bone stock remanufactured 80-inch Evo engine alone. I reached out to S&S for a cam recommendation, and they recently built a relationship with Crane Cams.

Bruce recommended the following stock engine formula: S&S Super E carb, Crane Hi-4 ignition, S&S Cam and S&S easy-adjust pushrods, a Crane dual-fire coil, and the S&S 33-4250 breather and shim kit, for just enough pump to let this motor breathe.

I hauled the Mudflap beast on my Kendon tilt-up combo trailer to Bennett’s Performance, a very clean shop, next to Branch O’Keefe Flowmetrics, on Signal Hill. Eric Bennett, the boss, bought the Bikernet Hearse, immediately fired his girlfriend and started to cruise the backstreets of Long Beach. He traded his bagger for a Sons of Anarchy Dyna, and is about to turn the 88-inch twin cam into a 106-inch S&S night flier. His band, the Signal Hill Billies, transformed their usual light country western twang into dark blues. What the hell did I do? We will bring you reports on his engine transformation. I could swear the all-black lowered hearse smirks at me whenever I roll into his parking lot, but we won’t go there.

I pulled up the other day to find Frank’s Mudflap Girl on a lift center stage. No sooner did I enter the shop when Eric slipped out the back. A mysterious tech sauntered out of the engine room with long gray hair. “Don’t take my picture,” he said, “and don’t mention my name in the article.”

I’ve known him a long time. He’s an experienced Bonneville racer and a multiple-tour Vietnam vet, about my age. He’s only been married once, and is still married to the same woman. “I swear,” he said, “I’ve never pulled my military issue bayonet on my wife.”
I’ve been married five times and Eric three, and he just broke up with his long-time girlfriend. Maybe the graybeard tech with his twisted grin was trying to say something.

What the hell could I say? I set the box of parts on the lift and started to blow the dust off the fresh engine. Eric gave me a new cone gasket, seal, and a Torrington cam bearing, in case the fresh engine was fitted with a poor quality INA bearing—it was. I removed the pipes. The tech removed the plugs, and we jacked up the bike. He popped the pushrod covers and broke out the bolt cutters to remove the stock pushrods without removing the rocker boxes.

“I roll the engine over so the valves are closed when I cut the pushrods,” Graybeard said, “so the valves don’t slam shut when the pushrods snap.”

Then he removed the point cover, and the crane Hi-4 ignition plate. “There needs to be a washer under the fastener holding the Crane point breaker plate,” he barked.


Unfortunately, I had installed the Crane system and breaker plate—my bad. I thought about my fifth wife. He pulled the cone cover with a rare Trock tool, since the master is no longer with us.


With a couple of JIMS magnetic, or H-D lifter tools the lifters were held out of the way while he pulled the stock cam and checked the bearing.


Sure enough, it was an INA cam bearing with about half the rollers of the high quality Torrington cam bearings.


JIMS tools makes a handy cam bearing puller, which was installed, and swiftly, perfectly yanked the stock bearing free. Eric made specific machined aluminum drivers for installing new bearings, which were carefully tapped into place. After it was installed, he reached in to make sure the bearing spun free, with no binding.


Next, he aligned the timing marks on the pinion gear and set up the new S&S breather gear.


Steel breather gears have better dimensional stability than plastic gears. Embedded particles can damage the crankcase breather gear cavity. A screen provides better protection than a slotted gear, so small particles are prevented from entering the gear cavity, where they may damage the gears and oil pump.

The S&S steel gear with welded in screen with larger diameter holes provides improved air flow/oil scavenging from the flywheel cavity. Crankcase flywheel cavity vacuum and oil scavenging are further improved by optimized breather window timing. Breather oil trap scavenging is significantly improved by increased scavenge port duration. These improvements are the result of exhaustive research using digital sampling and data acquisition equipment.
This gear was the standard size for late 1977—‘99 Harley-Davidson big twins. Breather gear kits include breather gear and steel endplay shim kit.

With the new S&S breather gear installed, he started to adjust the endplay with a .120 shim. “That’s usually the one,” he said. As it turned out, we went with .110-inch shim after he checked the fitment with a straight edge. Then he performed a similar operation with the cam to check endplay. We discovered that a .055-inch thick shim was needed in addition to the existing flat shim. He dug around and found one, and we were set to test it with another JIMS special tool.
The S&S 510V bolt-in cam works well with stock or ported heads. The improved ramp design results in low valve train noise. It’s meant for engines up to 96 inches and with compression as high as 10:1. It’s designed to pull its best results in the mid to upper rpm range, 3000 to 5000 rpm.

It was time to set the cam timing with the pinion bearing and breather gear slots. Then the mystery tech cleaned some of the case threads with a tap. “Too much Loctite,” he said. He touched all the stock ¼-20 Allens with blue Loctite and installed the cone and torqued them to 110 inch-pounds. He installed the appropriate washer in my breaker plate, and then the timing plate.


Before he removed the Crane Hi-4 ignition plate, he scribed the plate and the case so the timing would be right where I placed it when everything was put back together—that is, if I didn’t fuck it up in the beginning.

I peeled the S&S quick-adjust pushrods out of their vacuum-packed container and shortened them for ease of placement. These S&S jobs were a breeze. He checked for all the needed pushrod gaskets, and we compared the pushrod lengths to use the short ones on intake valves and the long ones for the exhaust.

“I adjust them the old school way,” he said. “I make sure one intake lifter is at the top of its cycle, and then adjust the other. Then visa-versa.” He waited 20 minutes between adjusting valves for the stock lifters to bleed down, but while he waited, we started to install the pipes. “No time to lose.” He made sure each pushrod would spin after it bled down. In each case, he took the slack out of the pushrod and then turned it out four turns or 24.5 flats. Once he tightened the pushrod lock nuts, he would take the half flat out of the adjustment.

Here’s the Quickee Pushrod Supplement from S&S: To install S&S quickee pushrods, thread the jam nut off the threads towards the ball end and screw the adjuster into the pushrod tube until the threads disengage and the pushrod can be collapsed
When installed and adjusted, S&S Quickee Pushrods must have a minimum thread engagement of .500 or half an inch (Pushrod tube to Adjuster, not including the jam nut) or severe damage to the pushrod as well as your engine may occur.
When adjustment is complete, the jam nut must have full thread engagement with the adjuster screw. If you do not have full engagement, the pushrod is not correct for the application or position.
S&S Quickee Pushrods for S&S Shovelhead and all big twin engines contain two long and two short pushrods. All Sportster model and Harley-Davidson twin Cam 88 pushrodes are the same length.
We replaced the pushrod cover clips with another JIMS tool, and I finished installing the Spitfire brake master cylinder and pedal. Once together, we turned on the gas, hit the starter and it fired right to life. Our very experienced Vietnam vet tech let her warm up, adjusted the carb and quietly returned to the engine room to work on a twin cam engine build for a customer. It’s time for my son to pick up his bike and head for a paint shop or the hills.
S&S
Bennett’s Performance
Wire Plus
JIMS
Spitfire