5-Ball Factory Racer, Part 6
By Robin Technologies |
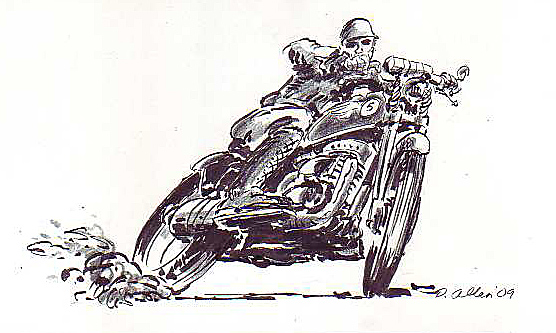
How do you feel about your computer? I could easily take my old .357 Smith and Wesson revolver and blow this sonuvabitch into the briny harbor Pacific waters. I'd set the smoking gun down, go find a job driving a trash truck, and be able to hang out with the bros and drink beer until my kidneys failed, then you could toss my carcass into the Pacific along with my IMac. Life is nuts.
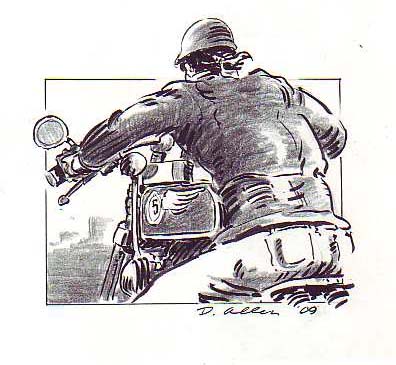
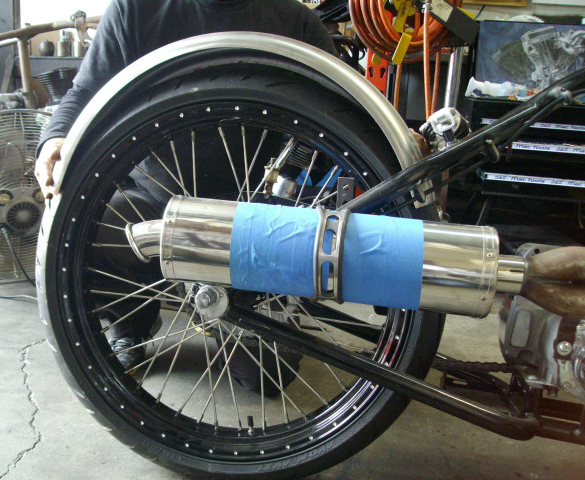
Ah, but the 5-Ball Factory Racer is coming right along. I hauled it down to Chica's for rear fender fitment, never thinking about the front fender. Should I? Chica makes his own wide ribbed fenders 5 and 6 inches wide. They're available for old tall 16-inch wheels and 18-inch wheels for an easy fitment to the tires. On my way south of Long Beach, California, I swung into Todd's Cycle. He was jammed with work. It's odd in this dour economy to see shops cookin'. Chica also was hustling to fill wheel orders, work on vintage bikes, and rebuild engines. I stopped in another shop on the edge of Long Beach, Richard Graves's car restoration facility. Damn, he does sharp work. He was working on a '50s Ariel square four.
Graves was also jammed with work, so the world ain't all doom and gloom. We just gotta provide a valuable service and be honorable businessmen, and we'll survive, goddamnit. Like Dave Rash, of D&D Exhaust says, “Motorcycles are mechanical Valiums. The world can go to shit, and the brothers take care of their motorcycles.”
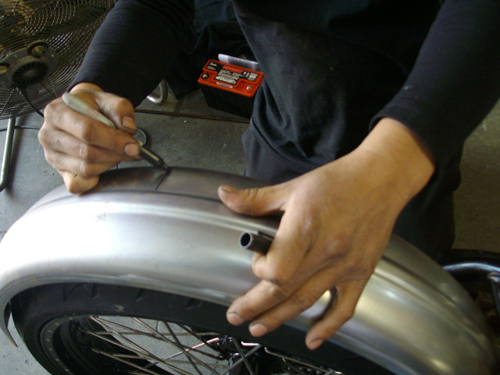
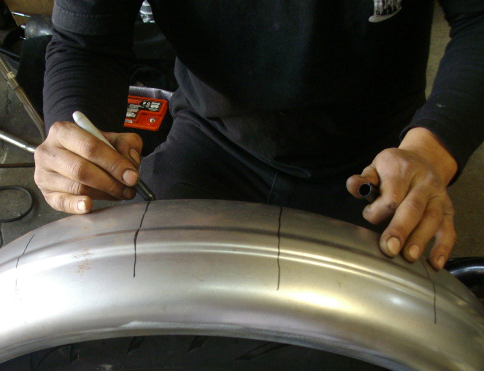
I like that notion. Chica marked my fender for stretching since his fender wouldn't wrap about a knockout Black Bike 23-inch wheel with an Avon Tyre. He indicated where the stretching would take place every 4-5 inches with a felt pen, then went to his machine. “You need to stretch it the same amount,” Chica explained, “and stagger the stretching maneuvers to prevent the fender from warping or twisting.”
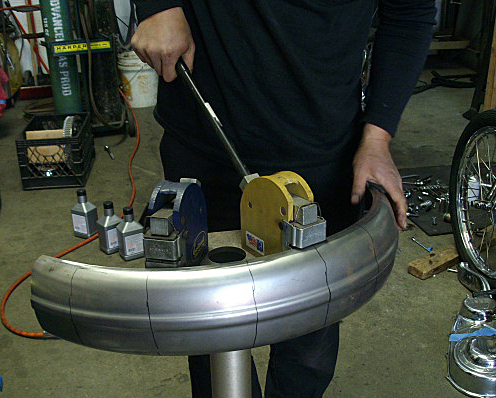
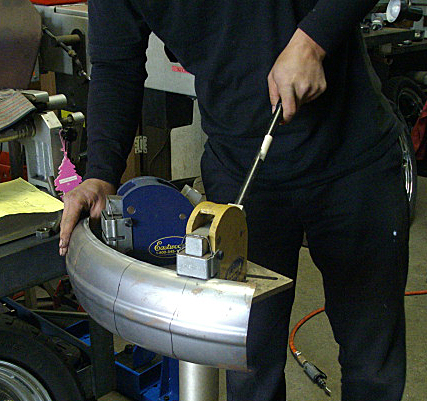
I asked Chica if his fenders needed additional support where the fender rails would be attached. He pointed out that the extreme contours and the ribs added extra structural strength. But he did recommend two fender straps over the frame cross-member.
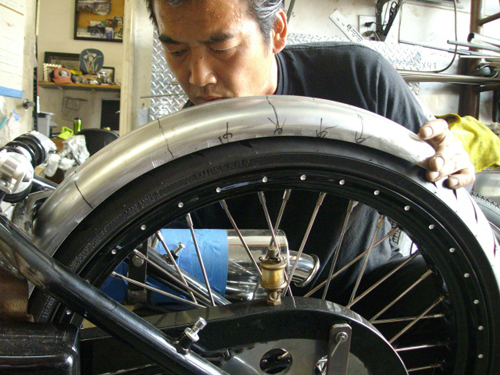
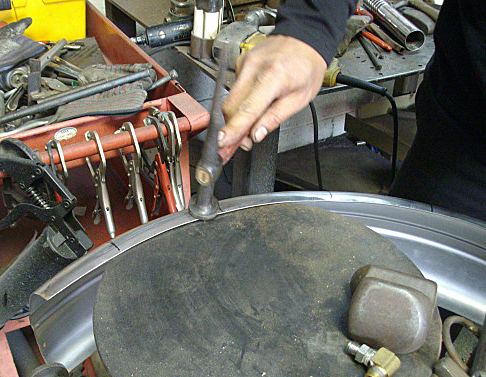
That did it, and Jeremiah and I loaded up the Racer for the return trip to the Bikernet Interplanetary Headquarters deep in the Wilmington ghetto. I started to work on the rear fender installation immediately. I bobbed it about 4 inches, but was grabbed by the rear wheel adjustment designed by Rick Krost of U.S. Choppers and manufactured by Paughco.

It's interesting, and I'm still getting the quirky hang of it. It automatically adjusts the ¾-inch axle back and forth, and up and down about ¾ inch. That element makes mounting the rear fender even more interesting. I was forced to don my patience- and-remain-flexible hat. Who knows if it's right, but I tried to work in several fender fluctuation means, so I could adjust it if necessary.
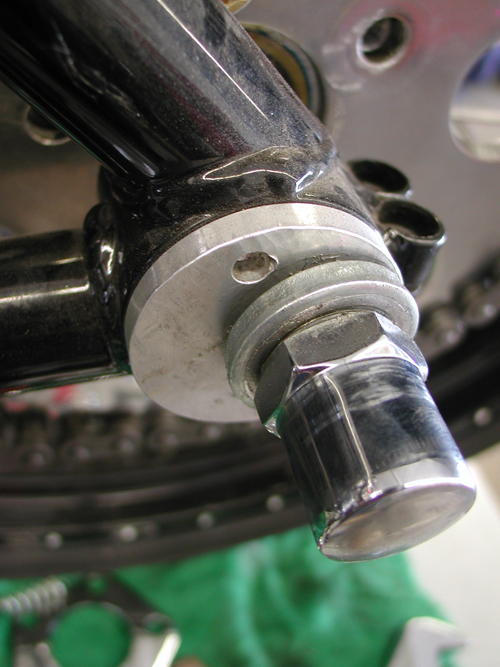
The fender was mounted with a single bolt at the bottom behind the battery case. Then, with the fender spaced evenly from the tire throughout the complete radius, I marked drilling holes for the fender straps. I drilled the holes, and the gods of stainless steel blessed my ass that day with a keen sense of accuracy. The holes and the fender straps lined up. I had to keep an eye on the axle adjustment, or the wheel was cocked right or left in the frame. “Ya gotta watch for the sweet spot,” Rick Krost said. I called him in the middle of the night to quiz him about wheel adjustment and alignment.
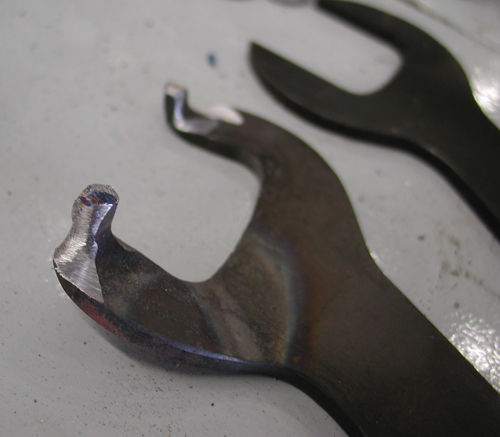
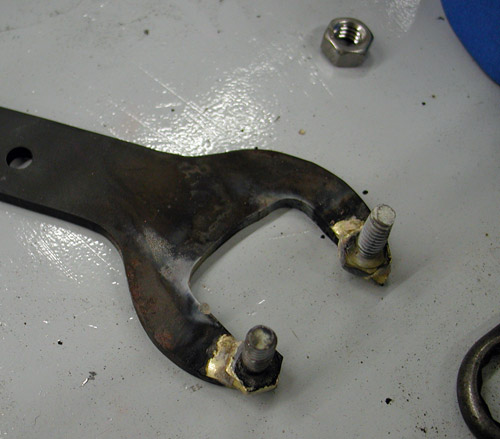
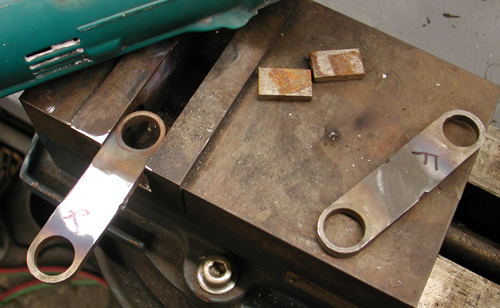
I also needed to make a spanner wrench for his axle adjusters. I was in a hurry one night and built a crappy one with some strange punched out flat open-end wrenches. I just heated, bent the tangs, and ground it to fit. It was sloppy, and ultimately, I built another one with brazed ¼-20 bolts to another wrench. It fits much better.
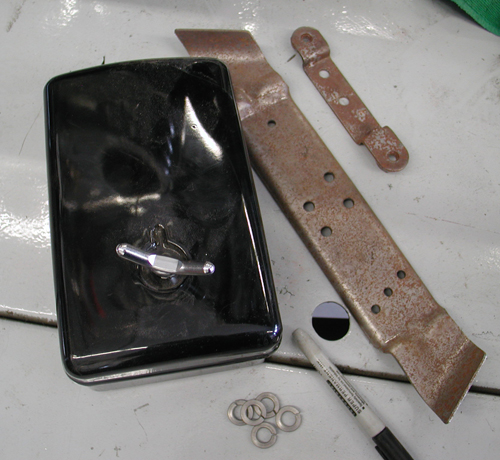
I also attached the Pauchco toolbox strap to the chain side of the bike, since the pipes would interfere on the right. It worked out perfectly for an additional installment point for the chain guard.


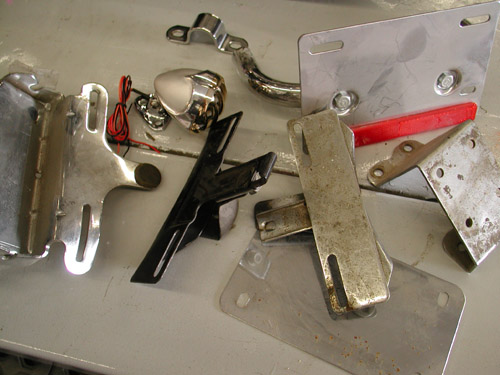
Next midnight run in the shop included grappling with mounting the Crime Scene taillight. It's a cool bastard, but I didn't have anything to mount it with. I dug through old boxes of parts, stock license plate rings, mounts, you name it, until I found an old rubber mount for license plate holders. It was already drilled for my three-point mounting taillight triangle. I found a thick license plate backing plate and went to work.
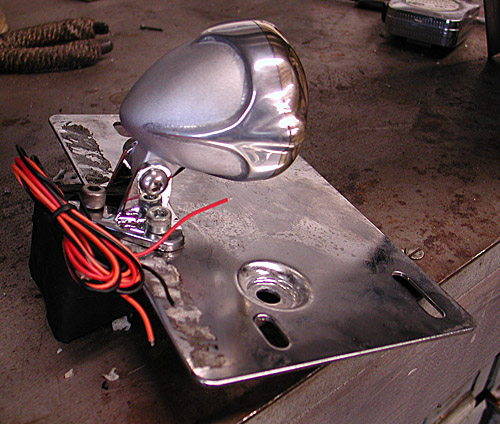
I drilled it to catch two of the Crime Scene holes and held the taillight over the license plate. I thought I had it made. I drilled the fender so the lip of the license plate will hang just slightly over it, for a proper, readable angle. Not sure I was successful. We'll see the first time I'm pulled over for speeding in Wyoming.
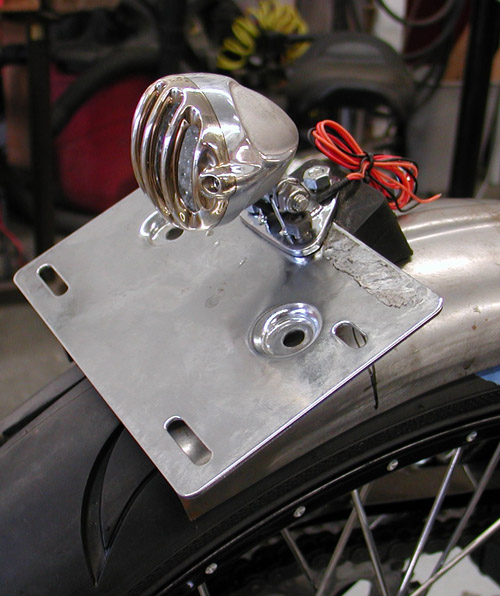
The one item I missed was the spacing for the bonaroo cool license plate ring. I'm not sure I didn't drill the holes too far into the plate, but I was thinking about strength and not bling. From that point, I moved to making fender rails. I can't do anything status quo. So I drilled corner holes in the backing plate, machined more brass, cloverleaf stock with 5/16 coarse threads and bent tabs and mounted them to the frame. Sorta crazy, but actually strong.
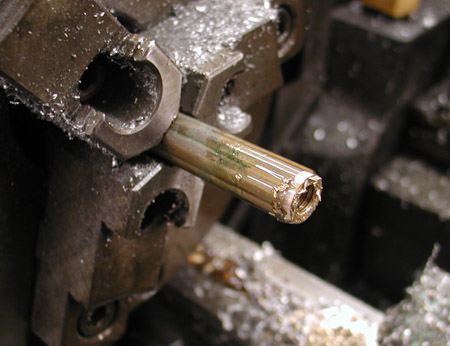
Evan at Power Plant Motorcycles on Melrose in Hollywood coached me on cutting threads in brass. “You need deep thick threads, so don't cut fine threads in brass,” Evan said. “It's soft.”
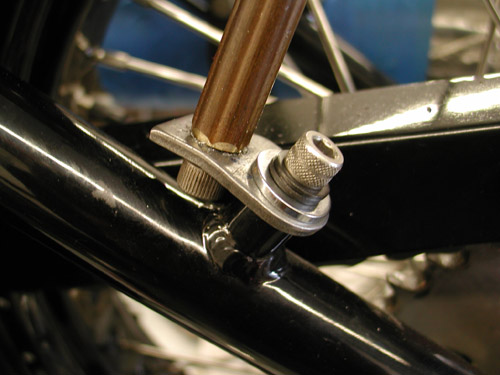
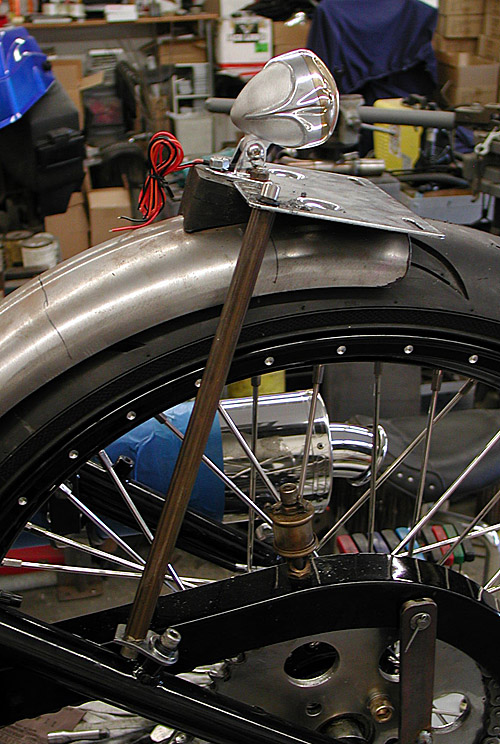
He also showed me a trick on his new antique lathe for centering cutting bits, which I'll never forget. I'll demonstrate in another tech in the near future. His shop was also busy, when I last stopped in. He builds vintage bobbers with very cool hand- made components. No CNC billet shit for Evan. Watch for his Chopper Challenge feature bike to show up on the pages of Cycle Source.
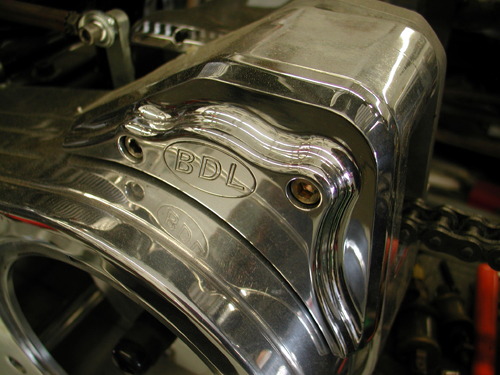
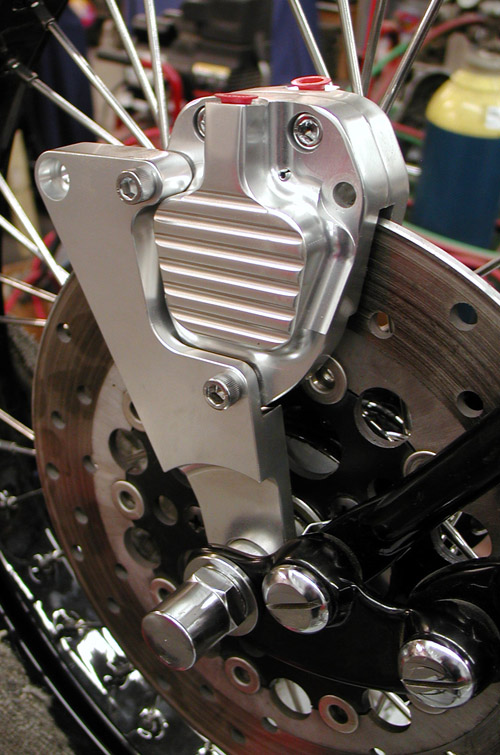
The guys at BDL helped with a super deal on a GMA front brake caliper, bracket, and hand lever. Unfortunately, they only make a springer bracket for the right side, so I modified for the left and built my linkage. Dealing with a narrow Paughco Springer and a front brake is a challenge to fit everything and center the caliper over the rotor. I still need to machine an axle spacer. I also need to deal with this billet bracket. I'm looking for some super cool art deco piece to bolt up front, like a hood ornament from an old Packard.
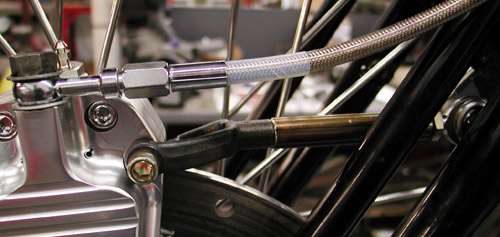
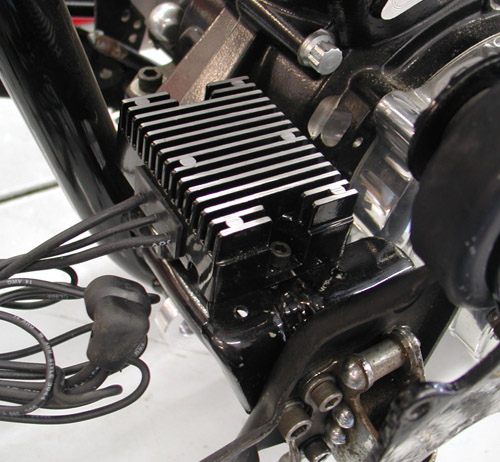
I had to deal with the suicide clutch situation. I had a vintage H-D rocker clutch system, minus the linkage and spring. I made the linkage with a spare Paughco toolbox-mounting bracket. Then while digging around, I discovered what I thought was a regulator mounting bracket. It would work perfectly for the regulator and had the space, and holes drilled for a clutch cable bracket. I went to work digging around for the perfect cable guide.
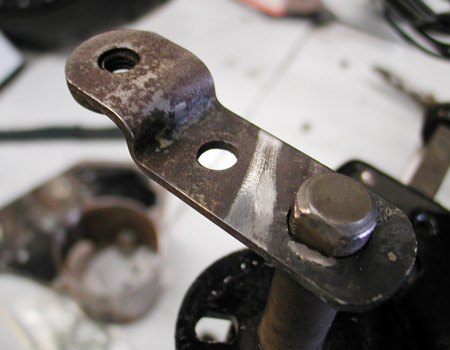
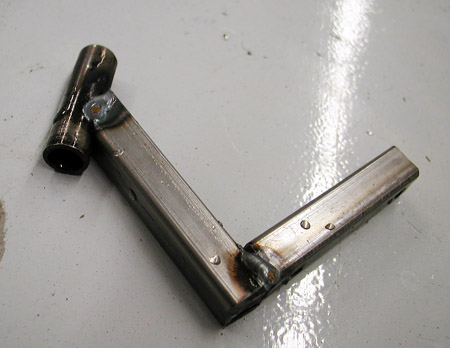
About this time, the Laughlin River Run surfaced and I rode my King into the desert. Two weeks later, I was called to duty on my Sturgis Shovelhead chopper to ride back into the desert to Cottonwood, Arizona for the Smoke Out. On the way I helped a couple broke down in the desert with a wiring problem. As we tinkered with his rigid Sportster, fulla devil tails welded everywhere like handles on wrought-iron furniture, I noticed his suicide clutch set up and his linkage and it gave me some good notions for a cable pinching system.
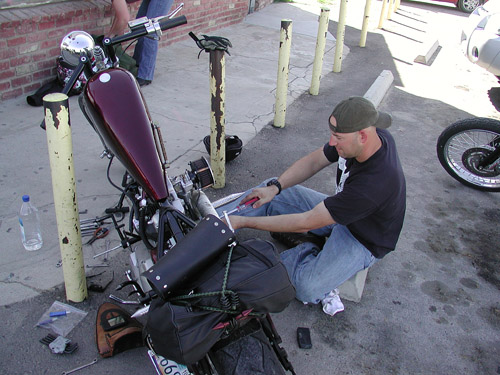
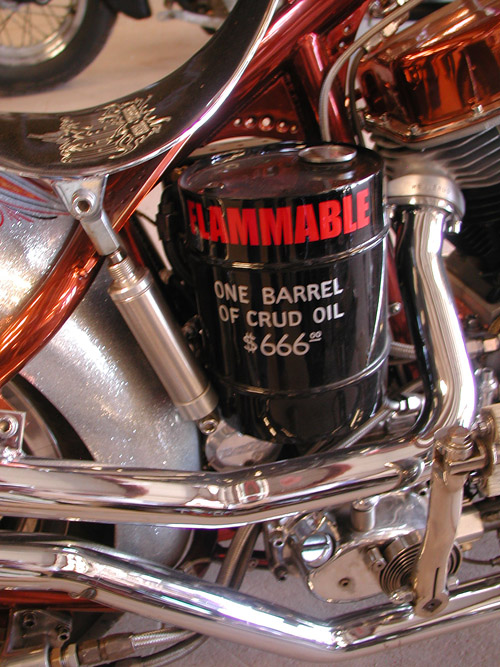


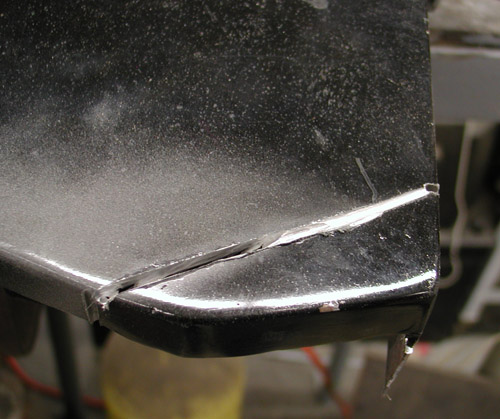
Between Laughlin and Cottonwood, I finally rolled around to cutting the front of the tanks to make room for fork stops with the Paughco narrow springer. As it stood the springer stops would smack the Factory Racer tanks, and my turning radius was shot. I went to work with a Makita cut- off saw and a plasma cutter to slice a new piece of 14-or 16-gauge steel for the replacement. The tanks were painted and that fucked with my MIG welding. Always clear the paint away from the welding area. The smoke from the heated paint messes with the pure oxygen and gas required for proper penetration. I'll work on that more with the next tank.
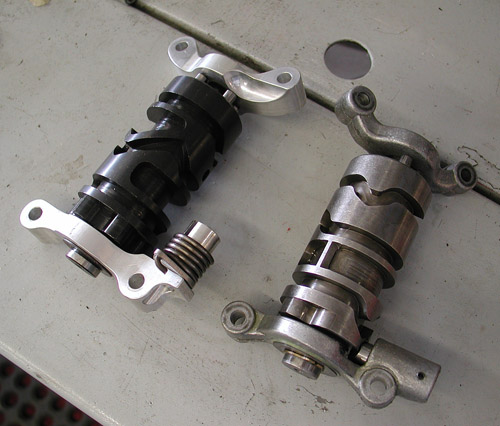
I'm getting close to making some final welds, while praying that a TIG welder will wander into my shop. But first, I needed to drop in the Baker N1 drum for 5-speeds. This is the simplest modification on earth. It's so easy even I could do it, amazing. These N1 drums… well I'll let Trish Horstman and James Simonelli tell you the facts:
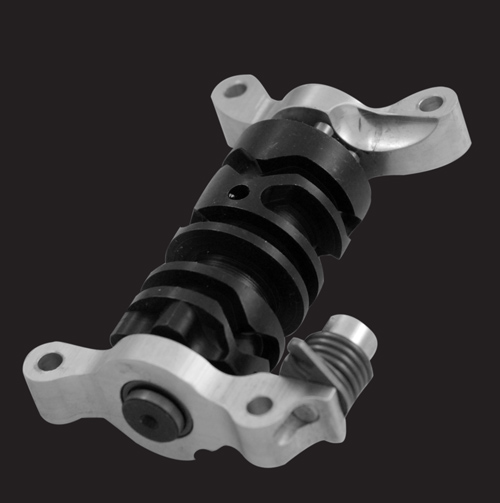
Five years ago we developed the N1 drum for drag racers and street racerswho used our 6-speed overdrive. The N1 shift pattern (Neutral-1-2-3-4-5-6) wasdesigned to prevent false neutrals during aggressive 1-2 upshifts by positioningneutral under 1st.
The jockey shift/foot clutch crowd soon discovered the benefitsof the N1 pattern. The big lever ratio of a jockey shift lever desensitizes the feelof the detents in the transmission such that finding neutral is a crapshoot withbad odds. With neutral on bottom (or all the way forward), the jockey shifter canmindlessly tap all the way down to neutral thus allowing him to put both feet onthe ground as he rolls up to the stop light.
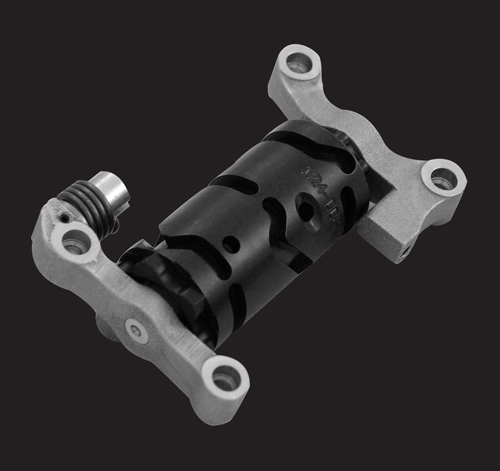
Today, a whole new crowd is realizing the benefits of the N1 pattern. Pingel’selectric shifter is slicker-than-snot and appeals to racers as well as those withrestricted movement in their left foot and left hand. Utilizing an N1 drum inconjunction with Pingel’s electric shifter makes finding neutral (with the solenoid)seamless, and yields a solenoid-actuated shift system that almost makes footshifting obsolete.
PN DESCRIPTION FITMENT
5-6QT-A N1 drum & pillow block assembly, 6-speed BAKER 6-spd overdrive except*
5-6QT-A1 N1 drum & pillow block assembly, 6-speed *Old 6-into-4 (S&S case) &Frankentranny
124-OD6RN1-A N1 drum & pillow block assembly, 6-speed RSD right-side Drive 6-speed, 2ndgeneration
124-DD6N1 N1 drum & pillow block assembly, DD6 DD6, all
2-5R-N1 N1 drum & pillow block assembly, 5-speed Single pole neutral switch 5-spds
2-5RL-N1 N1 drum & pillow block assembly, 5-speed Double pole neutral switch 5-spds
FEATURES/NOTES:
– N1 shift system option available at no additional cost with purchase of a complete transmissionor builder’s kit
– 5-speed N1 shift systems fit H-D 5-speeds and BAKER 5-speeds
– For aggressive shifting we also recommend the use of our anti-overshift ratchet pawl, PN555-56A for 5-speeds through 1999 and 555-56L for 5-speeds 2000-up. For example, this pawlmechanically prevents an unintended 1-3 up shift during an intended 1-2 upshift
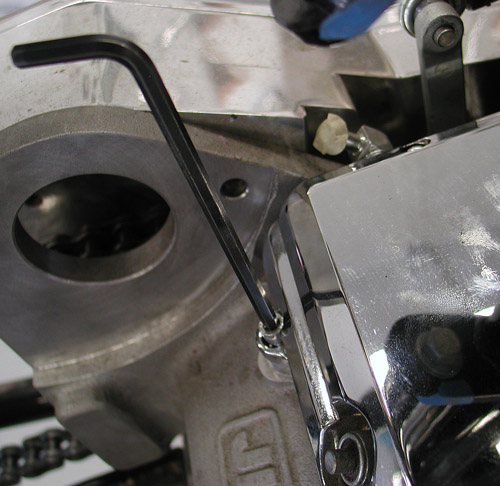
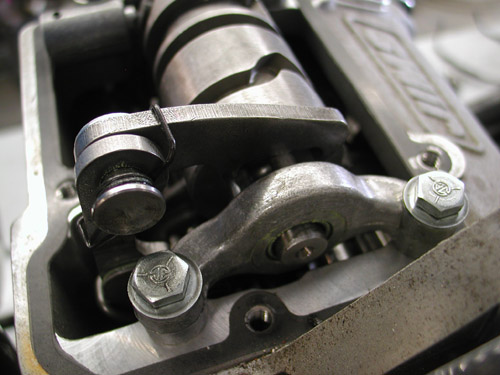
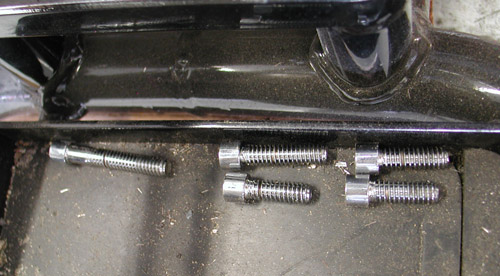
Okay, so I popped off the ¼-20 Allens off the top of the tranny cap. Since, within five fasteners there were three sizes, I placed them neatly in the battery pan to prevent mixing up the formula. The lid came right off.
Then the four 7/16 hex heads need to be removed and the drum and pillow blocks came off as a single unit. Don't forget to lift the shifting arm, and keep it up when you replace the drum.
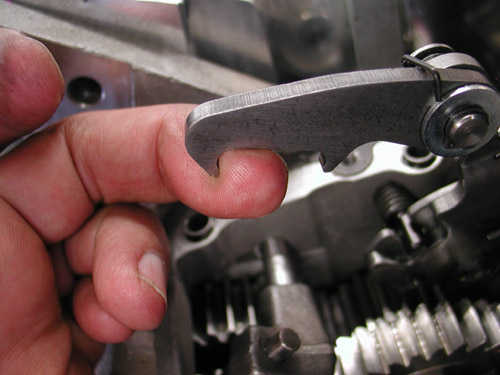
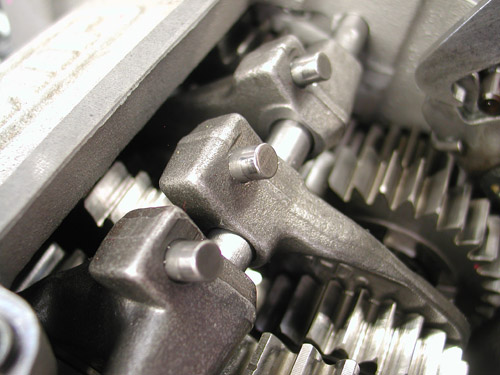
It might feel slightly snug to remove since there are guide inserts pressed into the case to hold the drum perfectly aligned. I studied the drum as I removed it and set it in exactly the same position on the bench to insure I put the new N1 drum back exactly the same way.
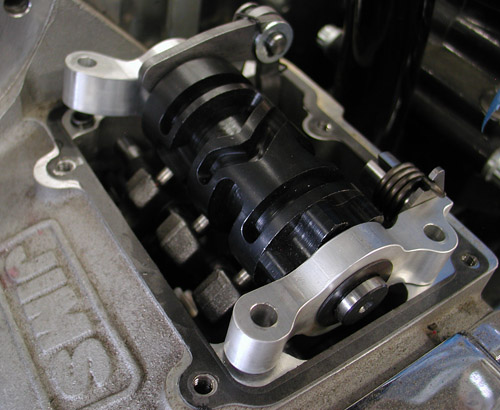
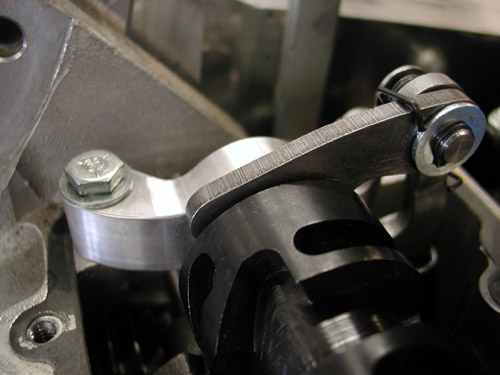
I told myself the old mechanic's rule as I replaced the drum and aligned the shifting forks: Don't force anything, jackass. I carefully aligned the shifting forks, then made sure the pillow blocks fit comfortable over the inserts before rolling the fasteners back into place and torquing them to 130 inch pound of torque or 10.8 foot pounds.
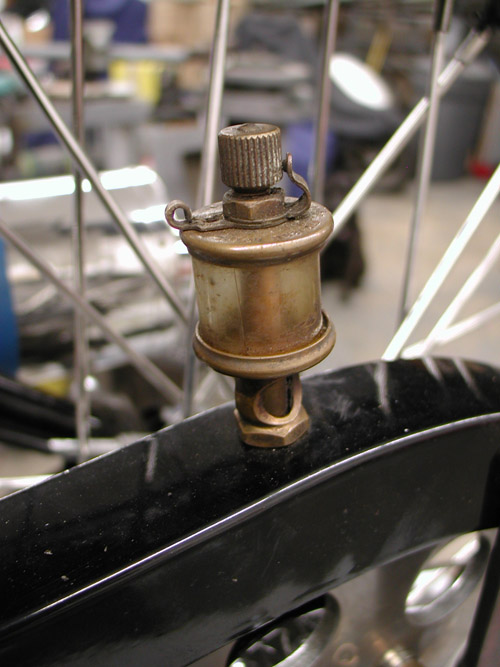
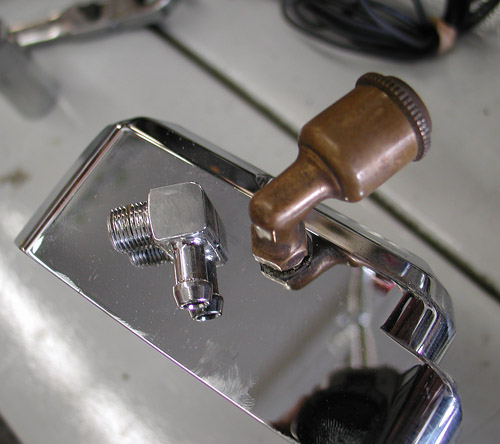
I smeared a dab of tranny oil on the lip of the transmission lid and slipped it into place, then tightened the fasteners to 130-inch pounds of torque. Oh, I forgot. I replaced the standard vent with something brass, mechanical, and vintage. What the hell. I'm going for that vintage appearance.
That's it for this installment. Next, I will install an Exile sprotor rear brake and 48-tooth sprocket. I'll finish all my welds, strip her down, and head to powder coating and paint. I have the color scheme down. It's going to be wild. I've also promised not to hit any more events between now and Sturgis for maximum shop time. We'll see if I run out of whiskey and women or not. Hang on.

5-Ball Factory Racer Part 3
By Robin Technologies |


I'm in a daze this morning. Too much Quervo Gold last night and too many discussions about the sinking economy. It's a bastard when they lay off port crane operators. What does that tell you? I don't want to go there on this dank gray morning. It's warm outside, but even the dogs, Tank and Cash, feel the gray skies. They look hung-over, droopy and drained. I haven't shaved in a couple of days, need a shower and a kick-my-butt workout.

All the women left me and ran off to the mountains this weekend. I know why Sin Wu needed a break. Have you ever tried to maintain a 10,000 square-foot, old dilapidated building, clean and care for two lumbering, sloppy dogs, two house cats, and a stray that wanders through and bitches if the food supply isn't consistent with her desires? The Macaw needs to be fed and moved into and out of the sun at the end of the day and now we have a fuckin' fish.

There are also construction workers, electricians and plumbers to deal with. It's never a dull moment around here. I'm a big proponent of running off all the costly pets, who can't do except shit and care for a half dozen concrete gargoyles. At least they keep the evil spirits at bay and involve zero upkeep.

Okay, I'll get to the tech. I was on a hunt for a vintage seat and Duane Ballard stopped by with this vintage BMW seat. I used chunks of wood to hold it in place while I pondered the little Hispanic girl who works at Shamrocks, the Mexican fish market two blocks away. Since the seat was made with a number of springs incorporated in the structure, I didn't feel additional springs were necessary. I played with my options, but nothing – graceful, stylish, art deco or vintage – came to mind. Then I grabbed the springs that came with the prototype Paugho frame and voila, it all came together using the existing frame bungs, the mini-seat shocks and a slight modification to the BMW seat.
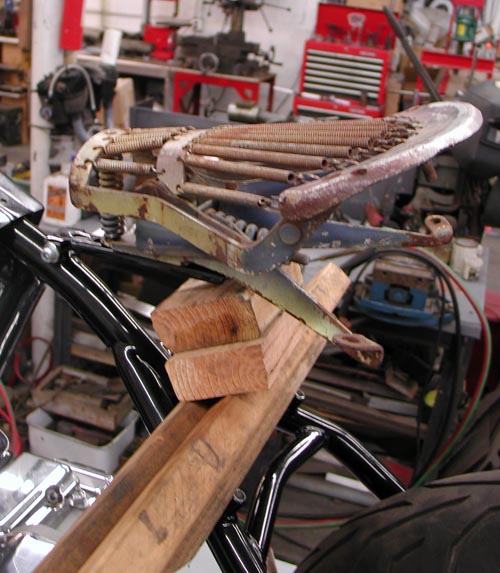
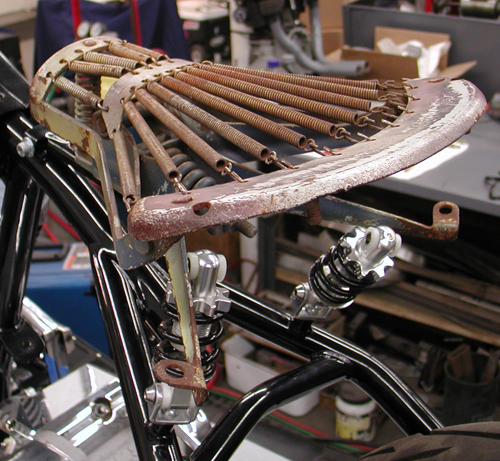
I drilled new holes in the brackets and cut about 4 inches off the arms. The front of the seat bolted directly to the Paughco seat hinge and I was good to go. Duane stopped by again, blessed my creation, and took the seat for top-notch leather upholstery action. He's the best.
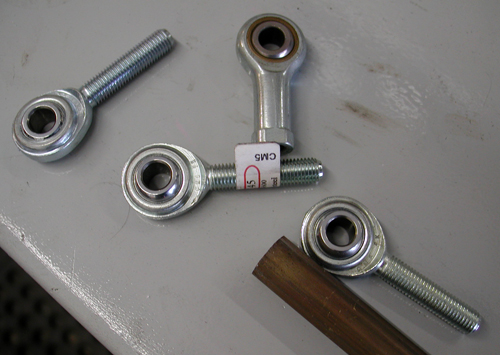
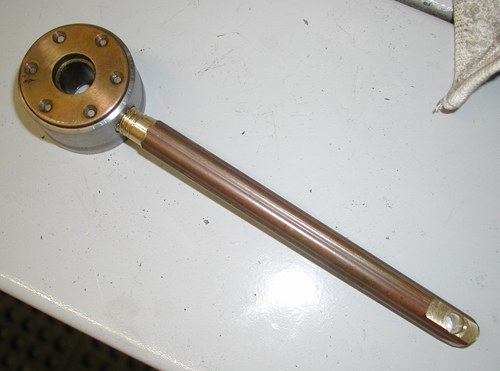
I shifted to my shift linkage system and called Jeremiah for the mathematical configuration from the system we build for his bobber. I wanted a tank shift and had several strange components, plus heavy, solid cloverleaf brass rod to use. I don't have any idea how I come up with this shit, but what the hell. It has class.
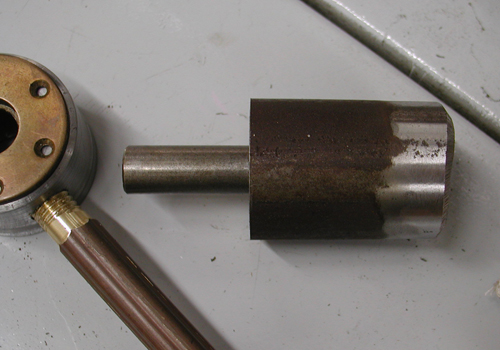
According to Jeremiah, from the pivot point down, the shift arm was about 6 inches in length, and the distance to the shift knob up was almost three times that length. That made for a vast throw and I needed to make sure I was clear, fore and aft, for shifting without smacking the bars or anything else. I checked my '48 Panhead with stock jockey shifting and the ratio was closer to two to one. In addition, jockey shifting is a different animal. There's no back and forth spring action on vintage tank-shifted bikes. The shifter banged through one gear after another from first to fourth, done deal.
That's the reason jockey-shifted bikes are best with jockey top transmissions. If you need neutral, just pop it out of any gear and you're back in neutral. Ratchet tops force you to bang through one gear after another down to the only neutral between first and second, often missing it. In our next tech, we will install a Baker 5-and-1 drum in this transmission to afford neutral at the bottom for easy reach.
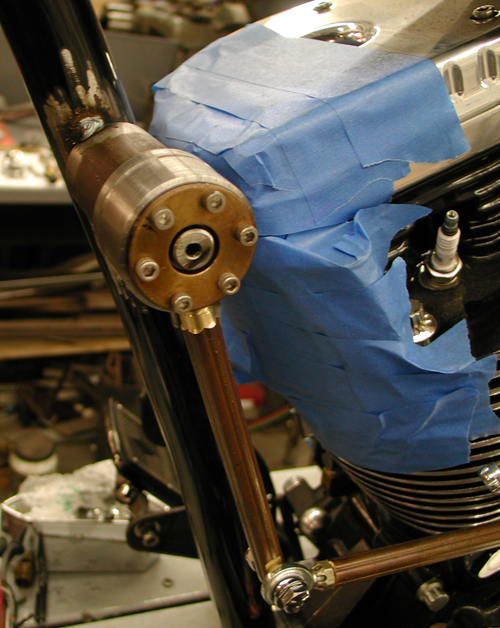
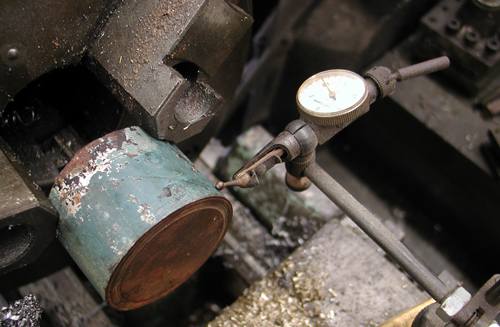
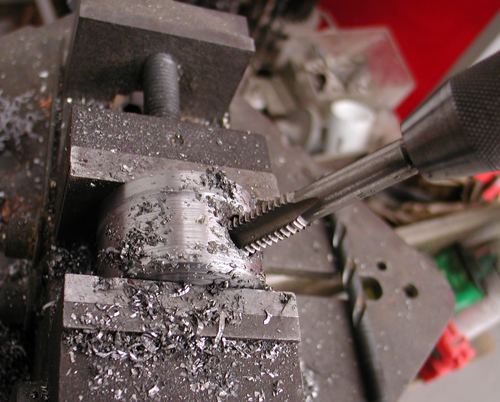
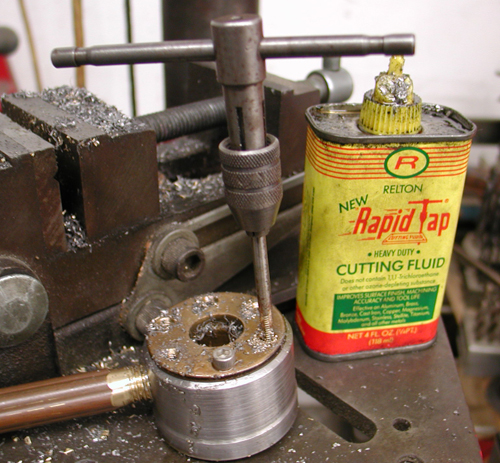
Okay, so back to the job at hand. I'm trying to use as much brass on this bike as possible, so I dug through drawers and boxes of old machined parts and trinkets and came up with these brass-bearing supports. Then I machined a piece to fit these, then the axle piece to mount to the frame. Then I had to bore and tap the pivot, drill and tap to anchor the brass bushing, drill and tap to create a pivot stop and machine and thread the brass rods, plus machine an end to fit a heim joint connection to the transmission shift linkage. I spent hours tinkering and figuring, drilling, tapping and testing, and I'm reasonable sure I have a tough, working shifting system.
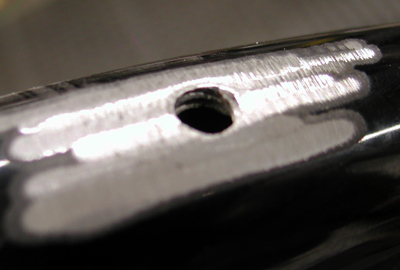
Then I shifted to the dreaded tanks. The tanks are fine, but more involved than normal one-piece, bolt-on tanks, ready with bungs for rubber mounting. Since this was a prototype Paughco Factory Racer frame, the first one of the batch, they bolted the tanks to the frame by drilling and tapping the top frame tube. Problem is, that afforded each 5/16 coarse bolt about three threads in mild steel tubing. In just a matter of time, those threads would fail, the tanks would rattle and come loose.
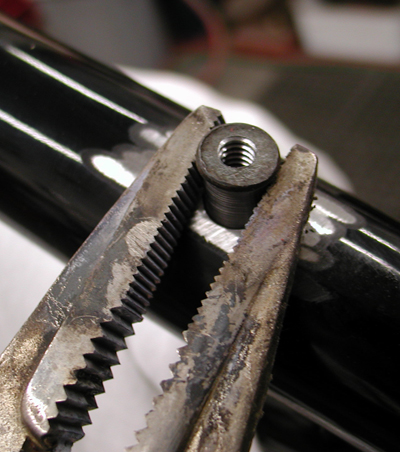
I decided I wanted to strengthen the tank mounting for the long road. I ordered some ¼-inch bungs, ¾-inch deep for a lasting hold. Later, I discovered that since the mainframe strut was 1.5 inch tubing, I could have used the 1.5-inch deep bungs from the Bung King (check their site for all available variations). I needed to re-drill the holes to a larger diameter for the bungs to slip into the frame. Adding the bungs and welding them enhanced the strength of the frame. At first, I though about machining a bung with a lip on it, but the tanks didn't have the clearance above the frame for a lip.
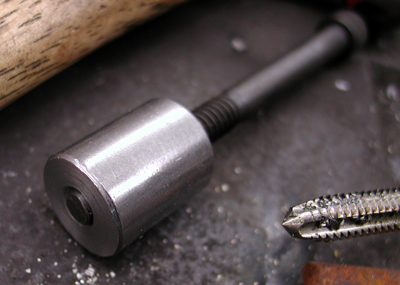


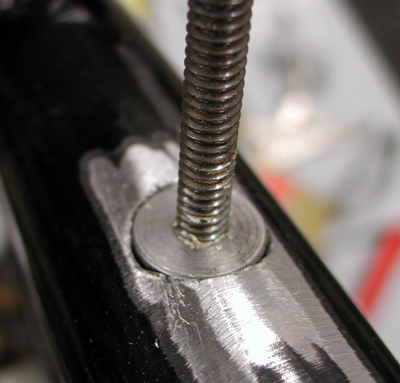
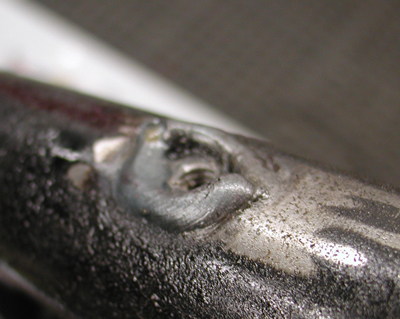
After drilling the frame holes, I tapped the bungs into the hole and as far below the surface as possible for the strongest, deepest weld. I would also need to grind off any protruding weld so the tanks would fit again. One tank protruded into the frame and rubbed at the back, so I moved it as far forward as possible for clearance, which amounted to about ¼ inch.
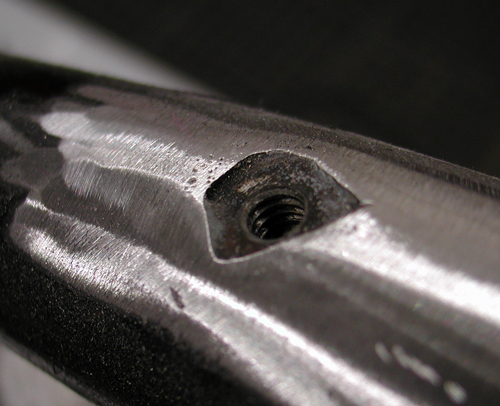
With the bungs in place, welded and ground, I grappled with the tank mounting holes. I thought I had it made, since I was dropping from 5/16-inch bolts to ¼-inch, but not so. Only one hole lined up. I grappled with these bastards for hours. Then I gas-welded the hole slots, refilled them and ground them to a reasonable size.
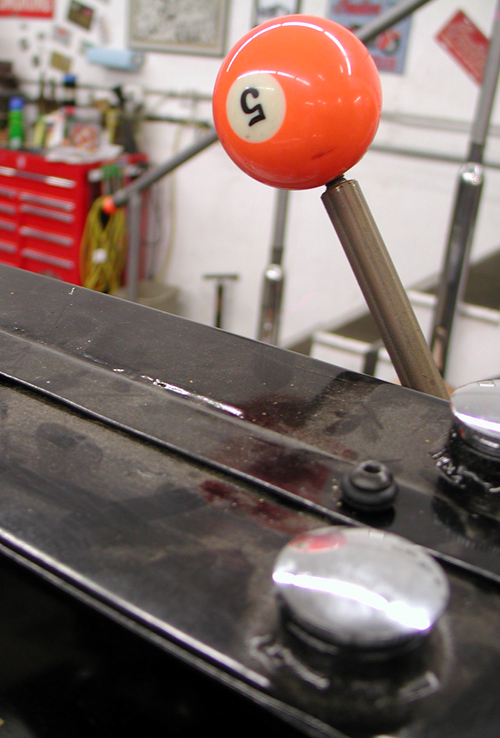
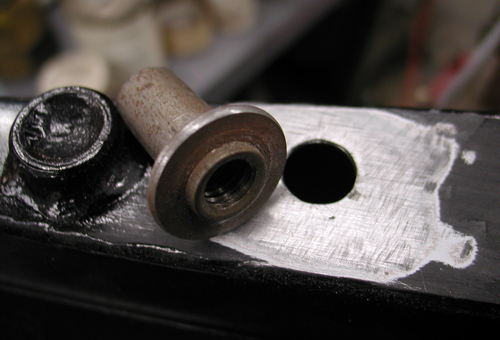
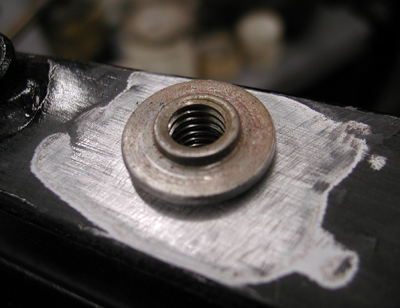
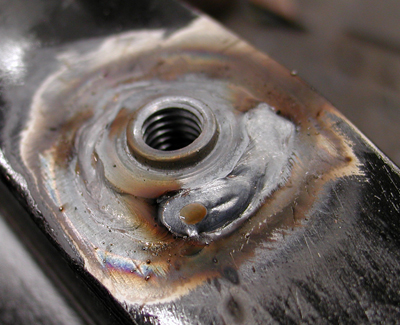
Next, I welded bungs, I believe from Lucky Devil, into the bottom of the tanks and used the Bung King’s rubber mount kits with straps and rubbers to attach it to the frame. In a sense, this was overkill, but I've experienced leaky tanks and poorly mounted tanks on my way to Sturgis a couple of times. One time, Randy Aaron from Cycle Visions saved my ass and my tank paint job. Later on, Paul Yaffe replaced my piece-of-shit Blue Flame tank with a properly rubber mounted Independent tank. So, goddamnit, this needs to be right the first time. I ran rubber mounts front and rear.
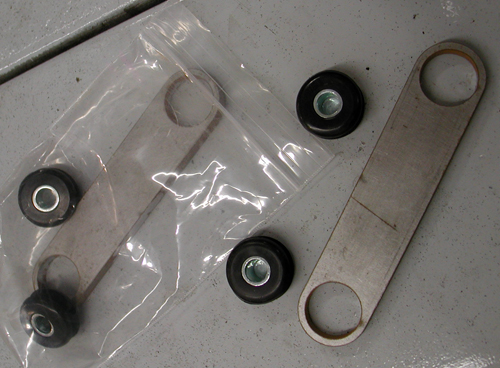
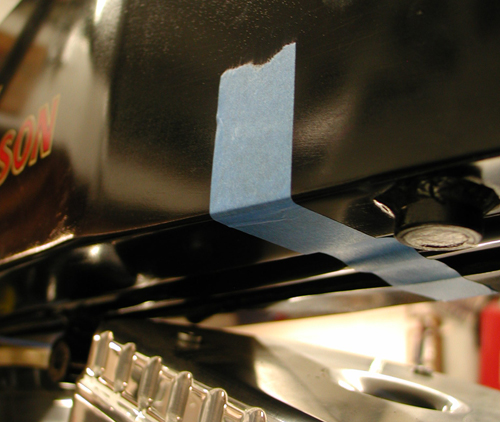
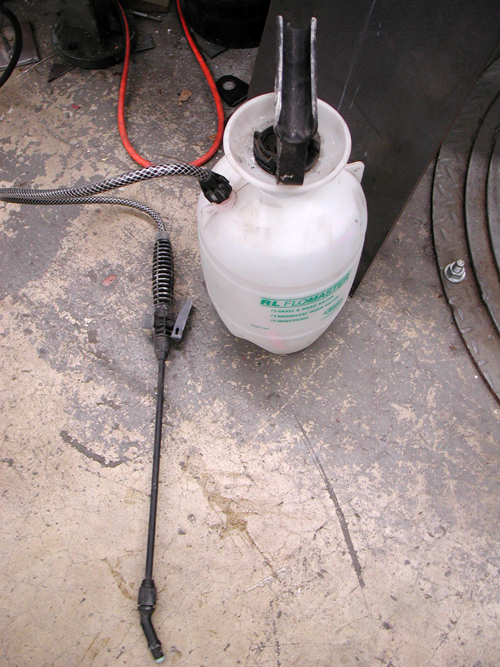
There's a trick to this operation. You need the rubbers in place to make proper measurements, cuts and tack welds. Ah but, too much heat will destroy your rubbers and sink the process. I've done it during mad welding spurts. This time I kept my Bonneville salt sprayer handy, so I could tack near the rubber insert and cool the strap before I damaged the insert. I removed the inserts before final welds.
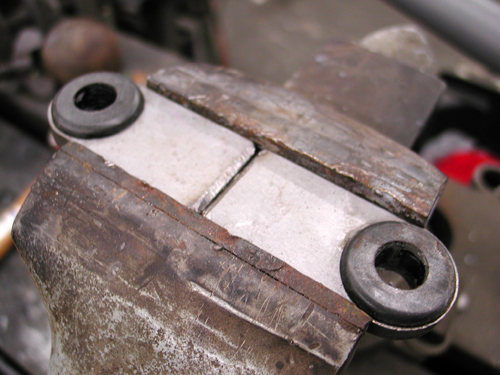


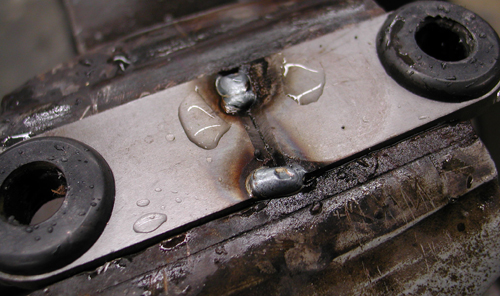
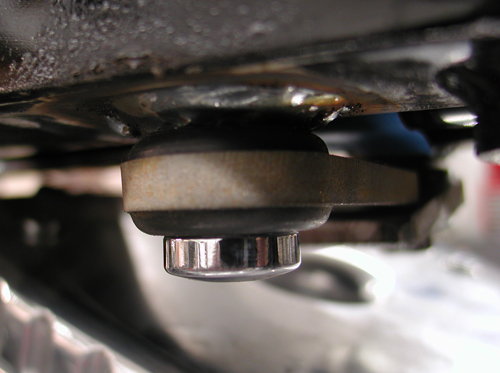
With the tanks securely mounted, I was confident, except for one aspect: capacity and turning radius. I needed to pull the bike away from the lift clamp and flop the Paughco taper-leg springer from side to side. As I suspected, it was going to hit the tanks. Over the next couple of weeks, I will operate again, slicing the tanks for turning.
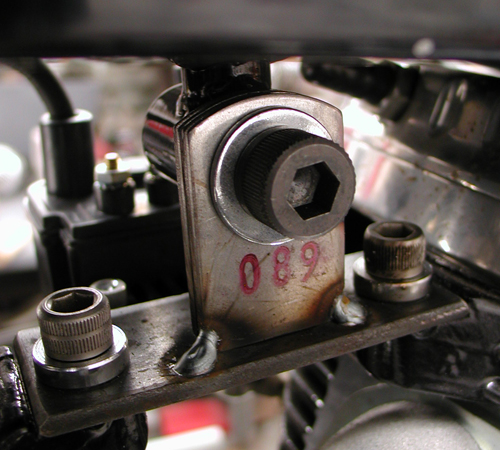
I shifted to making a top motor mount, which worked out like a champ. I made a strap from one Crazy Horse head to the other, then discovered a couple of tabs that would give me the strength and position I needed to hook up with the frame. Top motor mounts are also tricky. They need to be flexible and somewhat adjustable. I made sure the engine was positioned correctly with my BDL primary backing plate, but you never know if something might shift slightly during final assembly, and the top motor mount must be flexible and iron strong.
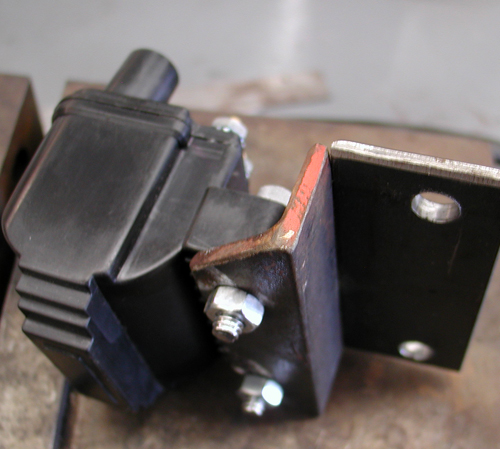
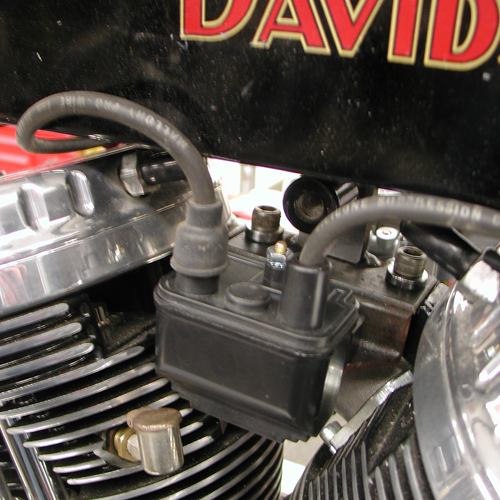
Without too much fanfare, I attached a piece of modified angle iron to the right side of the motor mount for a coil hanger. I angled it slightly so the spark plug wires wouldn’t bang or rub against the tank.
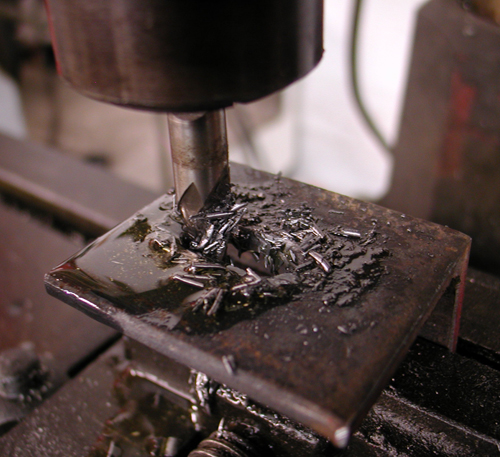
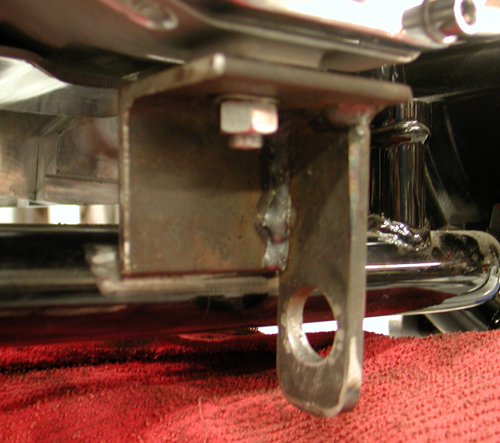
It just happened that I'm building a railing for my mom's house. She's getting feeble, in her old age and needed some additional support. That meant a trip to the local steel supply house, where I stumbled onto some small chunks of angle iron. I didn't like my original number 5 transmission mount, so I decided to remanufacture it with a heftier piece of angle iron that also reached the frame without a problem. It also allowed me a tad more positioning flexibility for the master cylinder and pedal adjustment.
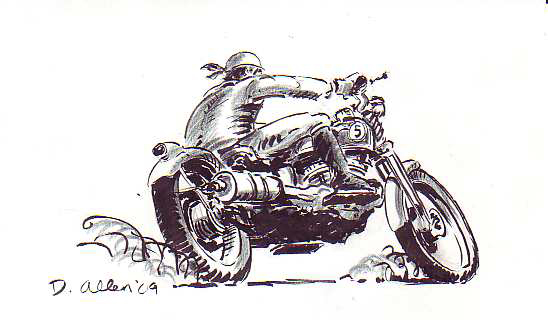
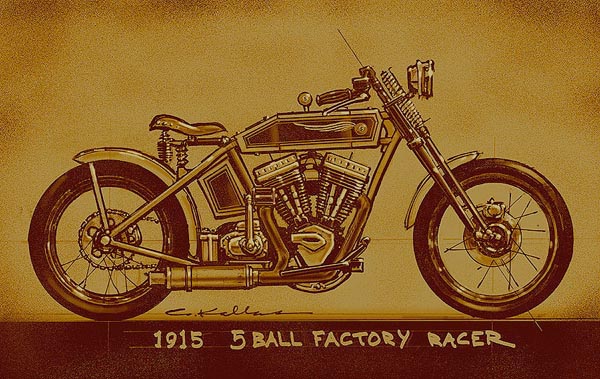
In the next segment, I'll run the progression of Dick Allen illustrations, so you can see the progress. It's as if I'm building the motorcycle, while Dick and Chris Kallas develop the visual story.
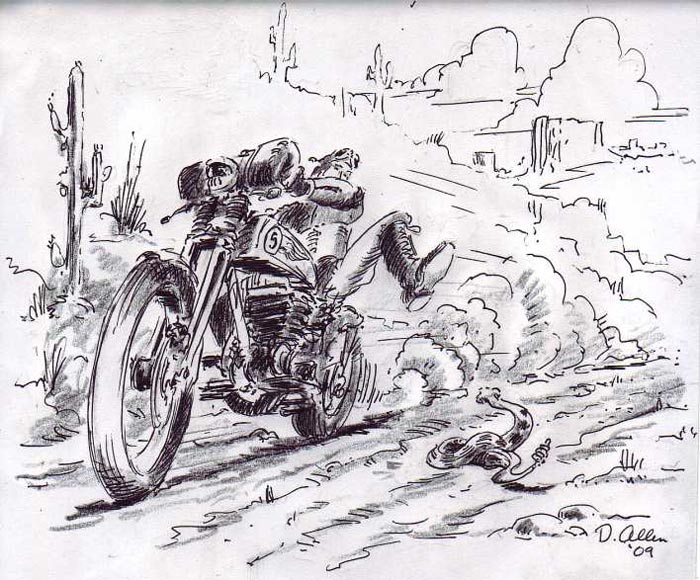
I don't know about you, but these illustrations give me hope and inspiration throughout the build process. Next, I will modify the tanks once more for enhanced Paughco Springer turning radius, then we'll mount the Phil's Speed shop ignition and wiring system to a plate I'll make that will bolt to the top of the tanks behind the gas caps.
Also mounted to same plate of steel will be a manual, vintage Sportster replacement, Bikers Choice speedo driven off the rear Black Bike wheel. Hopefully, the wheels will roll in, I'll find some 23-inch tubes and Larry Settle will mount and balance the Avon tires. I'll set up the wheels in the frame and springer, and then haul the bike to Chica in Huntington Beach. He's going to help me with fender design and mounting. In the meantime, I'll watch the inauguration unfold and stay away from tequila. There's more coming, though. I'm going to modify the trans with a 5-1 Baker drum, and build a set of exhaust with D&D bends and pieces. Hang on for the next installment.

5-Ball Factory Racer, Part 5
By Robin Technologies |


Last episode I was hit hard with life's bullshit obstacles to freedom and creative expression, but that's how it goes. I generally build at least one bike a year and each one represents a milestone of sorts. Or each one represents another year in the life and times of Bandit. I'm not unique. This notion applies to everyone and every project from building a new home, to building a boat or finishing a book. We're so damn lucky to have the freedom and resources to accomplish our goals, small and large. As you sit back and relish any accomplishment, you know it represents a moment in time–hopefully a good time.
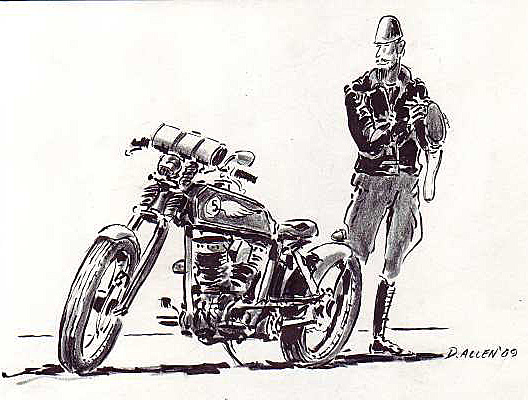
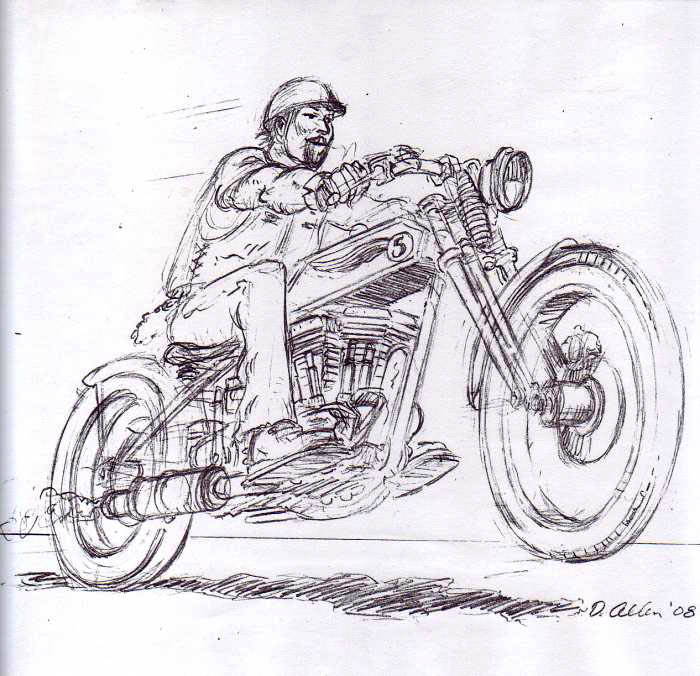
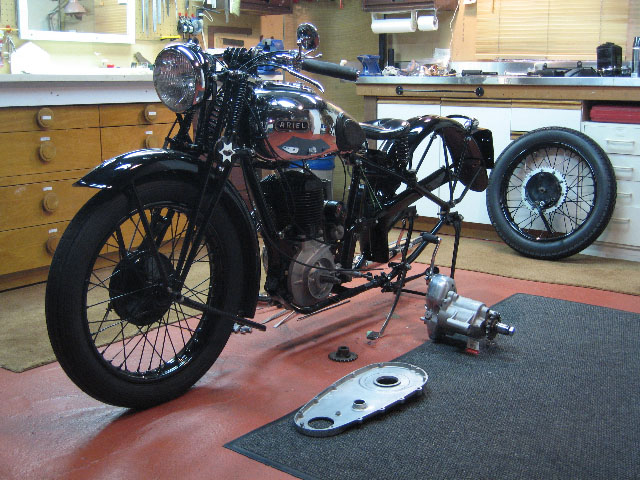
That's very kind of you to offer to runmy bio but honestly it makes me wantto take a nap just thinking about it.How about a pic instead of my stumppulling flathead single '40 Ariel? Wewere born in the same year and havebeen working together for about fifteenyears to keep my bank account drained.As the bike approaches completion itappears to be getting younger and youngerwhile I am definitely getting older and older!
So, recently we tore the March page out of the Calendar and flew into April. A running Racer by the end of April–for the Smoke Out in May, is the goal. The pipes were a major obstacle, yet Jesse James, Illusion Cycles, and Roland Sands inspired me.
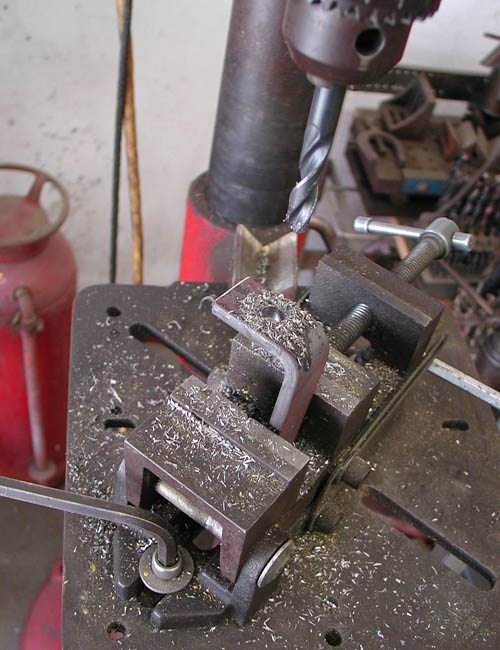
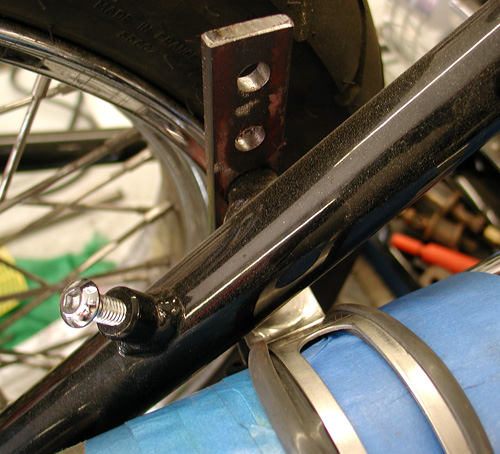
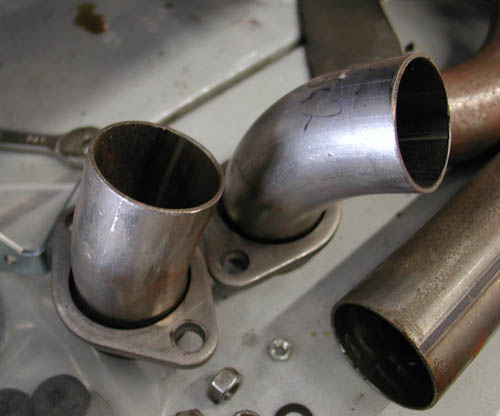
I spotted a tight shotgun system on one of Rusty Coones' Dyna Glide custom built in his Illusions shop. That's the direction I wanted to go for the racer look, not along the bottom of the frame in stock 1915 fashion. The muffler on Rusty's bike was a short/short Supertrapp developed with an exhaust guiding cone built by the Illusion team. The two-into-one pipe was designed at WCC, but I decided to give my own spin to the action for the Crazy Horse 100-inch engine.
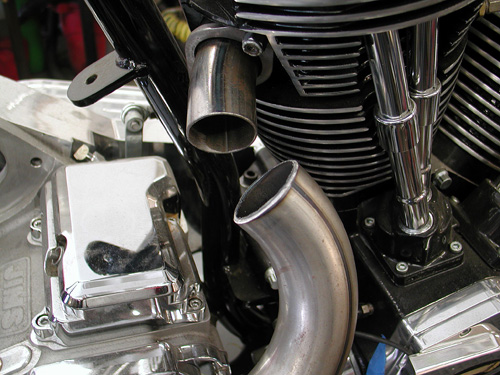
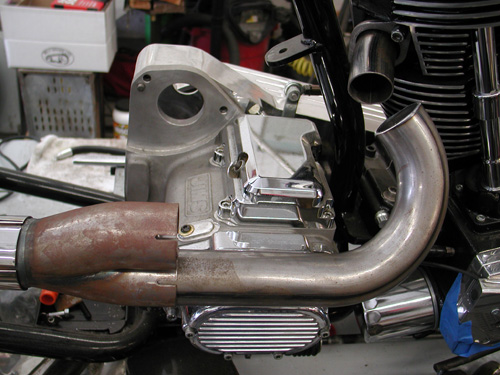
I also recently featured a bike built by Roland Sands with his own shotgun Vance and Hines system. Check it out. It also has a very short muffler system, but I had an all-stainless Scorpion sport bike muffler from the mad designer John reed.
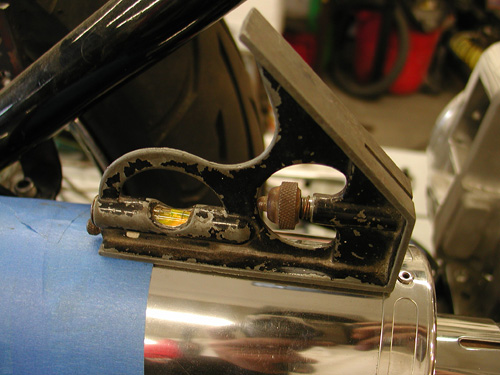
With Roland's design inspiration, I went to work. I had to make the system run tight to the bike, so ultimately I could install a Baker Drive kicker system to the JIMS 5-speed transmission. It had to run high enough not to mess with the rear axle and not too high for leg burning threats. I had one break; the Crazy Horse engine was designed with the intake manifold running out the left side of the engine. That allowed me to manufacture pipes as high as I wanted–watch the legs, damnit.
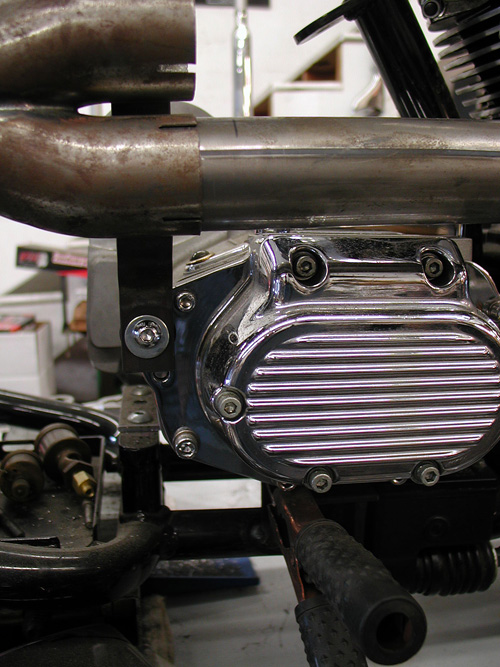
Making pipes is a tricky business. This system is teamed with lots of exhaust manufacturers, so I initiated a phone conference with D&D, and they supplied me with various ends and bends to give me a head start. Vance and Hines and WCC were involved with the design and inspirational aspects, and the Boys from Bassani stopped over for lunch and brought a hand full of bends and a chunk of muffler tubing for my speedometer mounts, a very diverse team. Plus nowadays, when you mess with pipes, the diameter fluctuates from below stock diameters to over 2-inch Bonneville racing exhaust performance demands. I took a day dealing with various sizes and ultimately decided on a 1 ¾-inch system to the two-inch muffler opening.
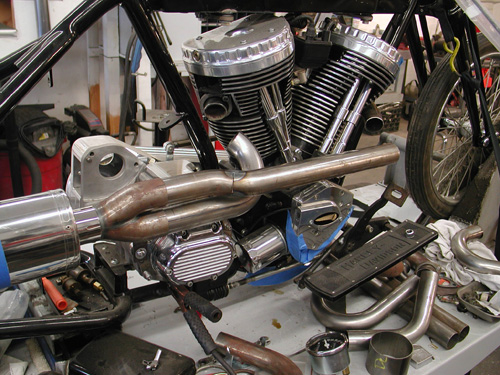
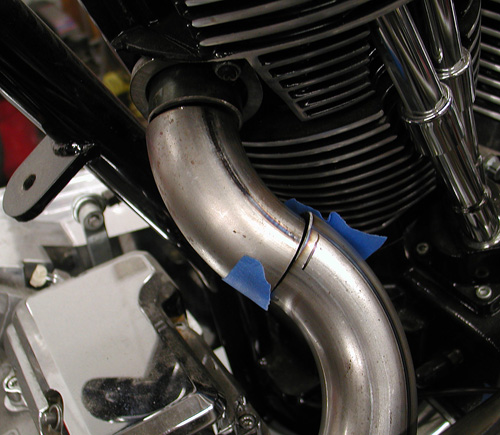
Then I had one of those calm and serene days in the shop–everything fit. It's a Zen thing, when the stars are aligned, and I drank just the correct carefully measured amount of Jack Daniels the night before. For some strange, inexplicable reason, I was tranquil with the dogs wrestling at my feet. The R&B Sirius station shop background music didn't spin any Michael Jackson tunes, and only the 4-tops and Jerry Butler lured me into a false sense of mechanical confidence. I patiently cut, ground chunks of pipes and brackets, then tacked them into place.
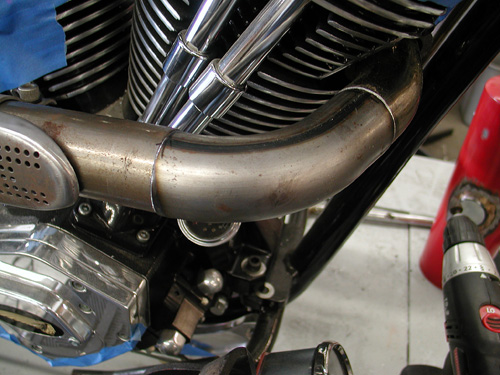
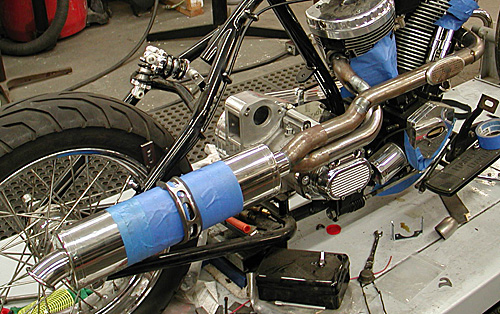
I've been making exhaust systems for about six or eight years, and each year I learn. For instance, I was through the roof to find Hooker Header alignment sleeves, only to discover they hinder performance. That meant I had to move more slowly, meticulously and make sure each segment fit perfectly. I also learned that exhaust wrap can also hinder ultimate performance, by being a heat transmitting barrier. Plus I'm still working on my MIG, pipe-segment welding skills. This year I'm going to clamp a bunch of pipe chunks together and weld them at different feed speeds and electrical settings. I'm determined to nail it down.
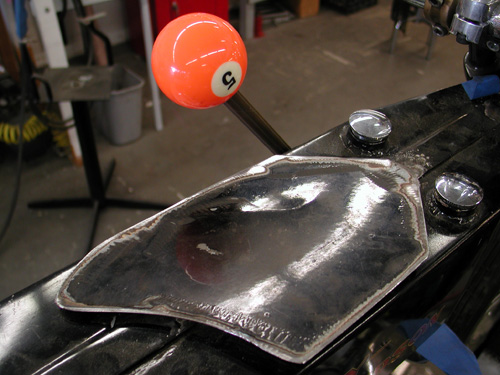
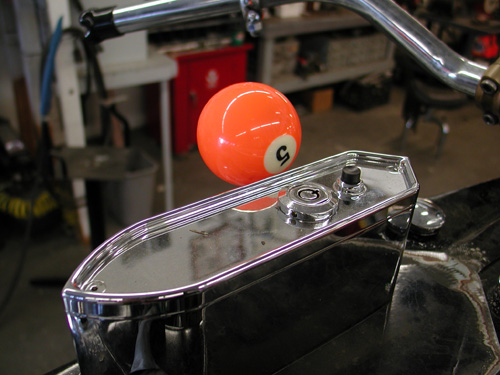


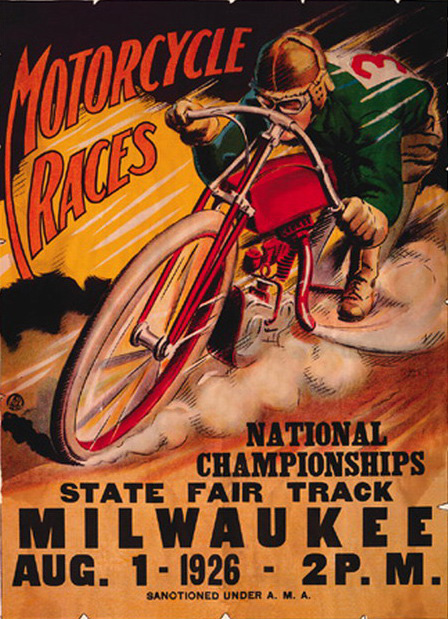
Next, I moved onto a dash plate, cut with a plasma cutter out of a chunk of 16 or 14 gauge sheet metal. My crazy thought was to install the Phil's Speed Shop ignition system onto this plate with the Bikers' Choice Speedometer. In 1915, Speedometers and the constant loss oil pumps were mounted to the top of the tanks, right out in the open, so I decided to follow suit.
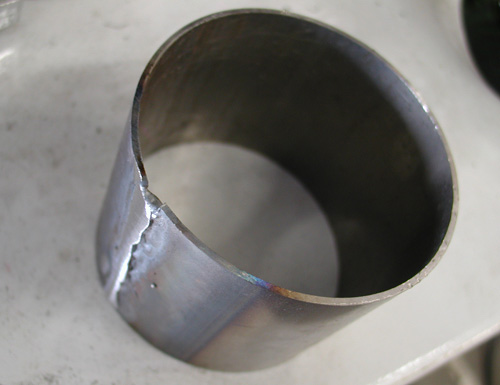
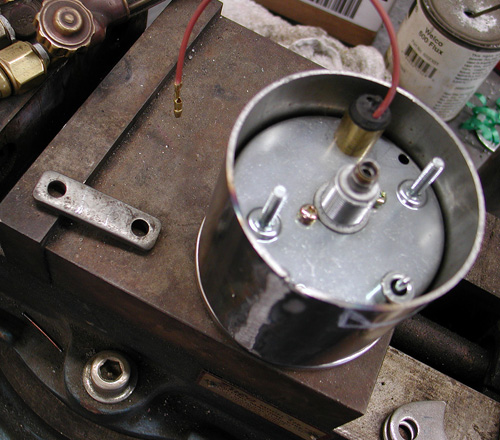
Bassini supplied the tubing for the Speedo, but I needed to be reduced the diameter a 1/2 -inch. I cut it with the Makita and pinched it down until the speedo fit in, and I could still wrap it with something to prevent vibration from beating it to death on the roads to the Badlands.
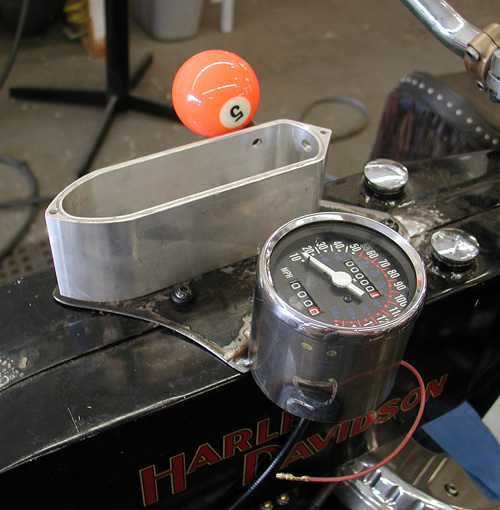

Phil's Speed Shop supplied me with a template so I could mark the holes and weld in studs to hold the ignition system down. It housed, circuit breakers, ignition switch, starter button, starter relay, neutral light and high/low beam switch.
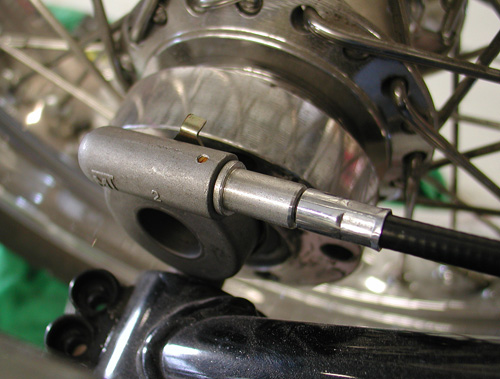
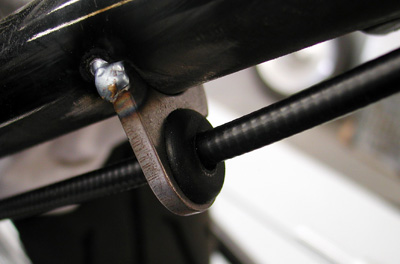
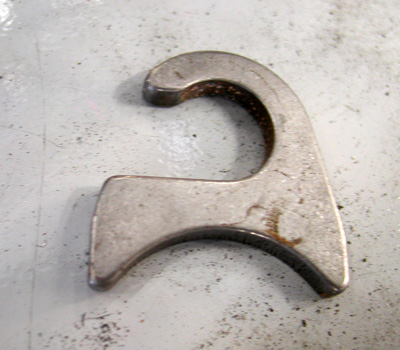
I ran the Biker's Choice speedo cable and drive off the rear wheel in 1915 fashion, but with late model components. I used LA Chop Rods cable guides and grommets tacked to the frame. I played with the plate and position for hours and hopefully got it right. I also cut a notch in the Bassani Speedo mount so I can hopefully reach the trip gauge adjuster. It's going to knat's ass close. In each perplexing case, I shot for functioning symmetrical positions, that don't interfere with other components, like turning the bars.
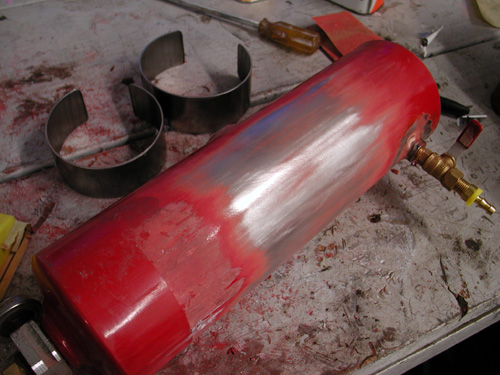
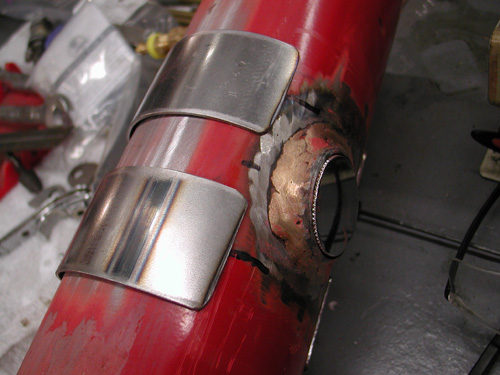
Next, I had the spare gas tank ready to rock, but needed to mount it above the bars. Talk about angst, I looked around for something to use for mounting, like other fire extinguisher clamps, then it dawned on me to use the an old set of handlebar risers, upside down. I found an old set of Jammer risers and bolted them to the bars between the DBBP bronze risers, so far so good. Then I cut them, estimating the height needed to clear the bars, but I was wrong. What happened with harbinger to my Zen aura?
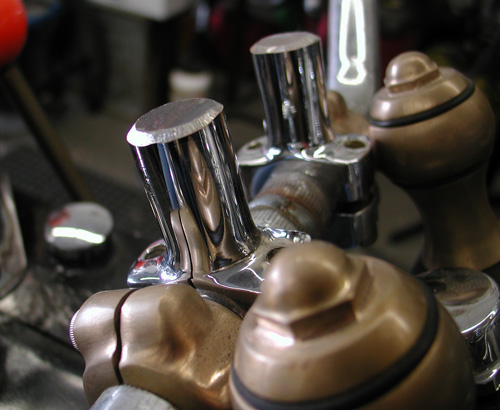
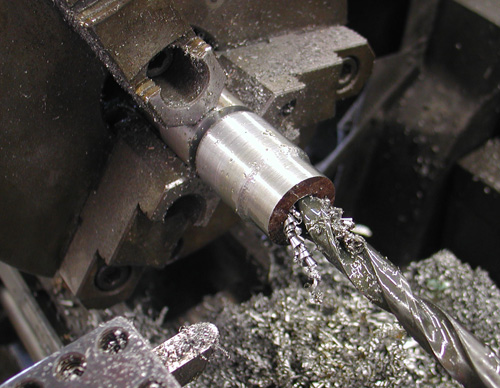
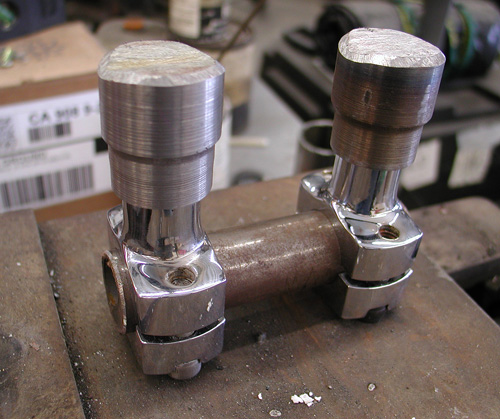
I don't know about other crazed builders, but often a glitch turns into an opportunity. I turned to my lathe to cut a couple of extensions. They widened the base for greater strength. I reached out to NICK Trumbo at Bassini exhaust for a couple of straps. My notion was to weld the brackets to the straps, so if something went wrong, it wouldn't crack the tank and create a dangerous gas leak. I've had my problems with gas leaks in the past.
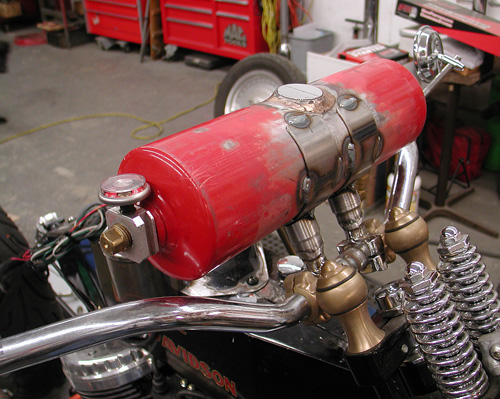
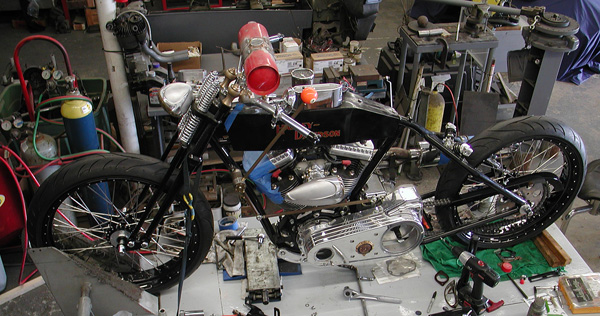
There you have it. Next, we'll mount the fantastic Black Bike Wheels (Avon Tyres), with GMA brakes from BDL, slice the Tanks for fork stops and Chica is going to build a Factory Racer ribbed fender. Rock and roll.

Amazing Shrunken FXR 15 Wiring Hell
By Robin Technologies |

This was actually one of the easiest bikes I’ve ever wired. It’s not a bad notion to sketch out a wiring diagram with consideration for the placement of the components. Think about it long and hard, then take your time. Below this mess I ran the Hardcore Choppers basic wiring diagram and tips on wiring anything.
First, there’s the regulator that bolts over the front motormount. I use Compu-Fire regulators for reliability and they are wired not to over-work the alternator. So you plug the regulator into the case for the alternator connection, run a ground strap under the frame where the rubbermount bolts and the final hot wire to the hot side of the battery, or the hot side of the ignition switch. That wire feeds the charge back to the battery. Presto, goddamnit, the charging system is complete.
I’m lazy and want the wiring system to be as easy and component free as possible. No extra lights, no turn signals, no horns, buzzers or ringdings. I use Bob McKay’s marine ignition switches for toughness, reliability and ease of wiring. They are distributed by CCI or, if not in stock, contact Bob directly (519-935-2424).
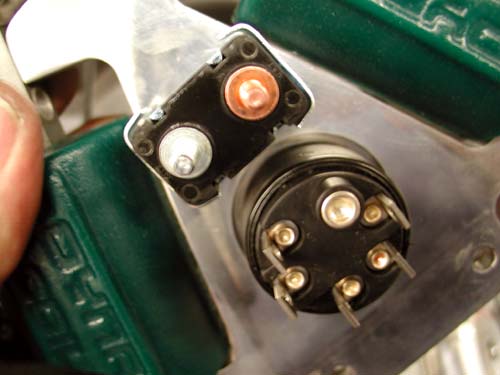
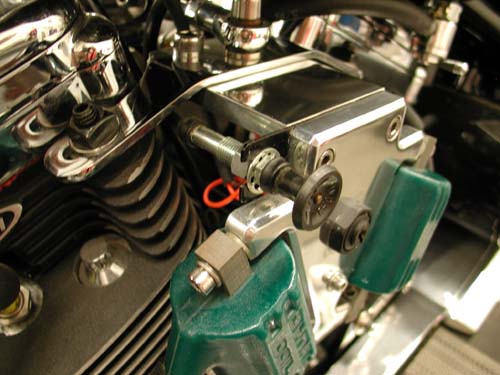
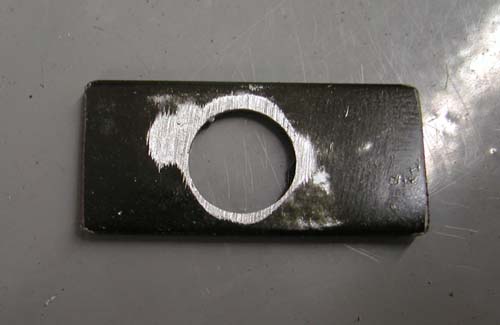
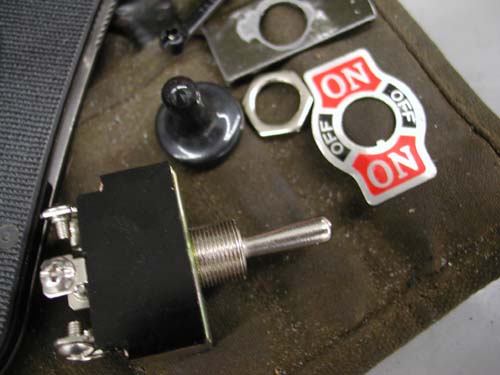

The switch is so complete so you don’t need a starter relay. All it takes is one wire to the starter, one wire from the battery and one wire to the circuit breaker. From the breaker a wire runs to the Compu-Fire single fire ignition system via the coils, one wire to the brake switch, one wire to the taillight and one wire to the highbeam switch. From the highbeam switch two wires ran to the headlight. From the Compu-Fire electronic ignition wires ran to the two Dyna Coils, front and rear and one hot wire that runs to both and the ignition circuit breaker. I ran only one 30-amp H-D circuit breaker, just a couple of inches from the ignition switch.
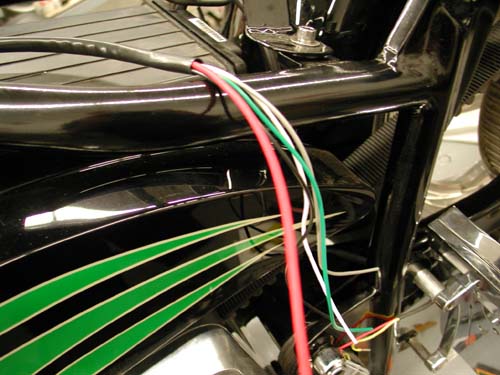
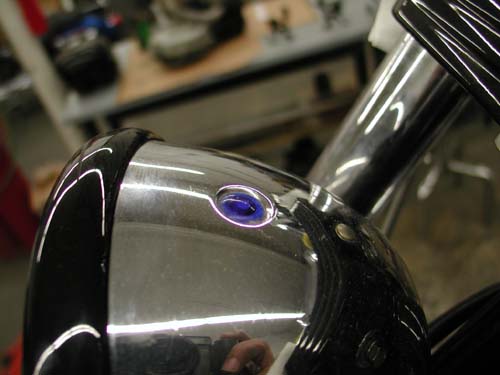
Since I don’t have space for idiot lights (there’s a highbeam indicator on the headlight), I need to run a oil pressure gauge on the engine.
I only use Terry Components brake cables for their service and flexibility. The trick was to find and place the ground straps. The Terry ground strap ran comfortably from the negative side of the battery to the 5/16 starter mounting bolt. That grounded it to the driveline, but I needed a ground from the tranny to the frame. I worked that out by bolting another strap to the sidemount license plate frame bracket (welded to the frame), by making sure the paint was shaved away. I also used the 1/4-20 Allen to support the taillight ground strap. Let’s see, have I forgotten anything?

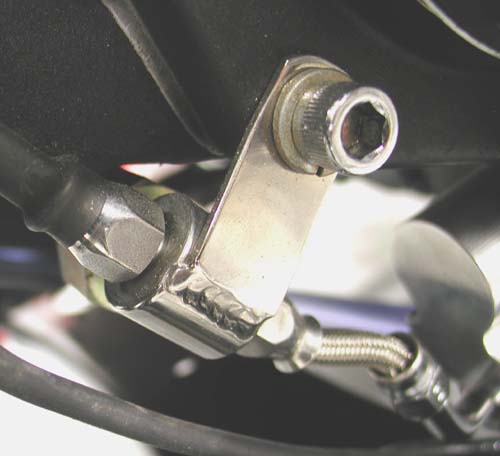
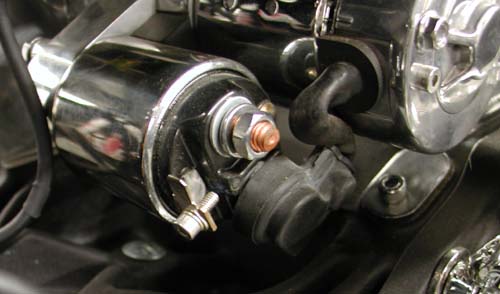
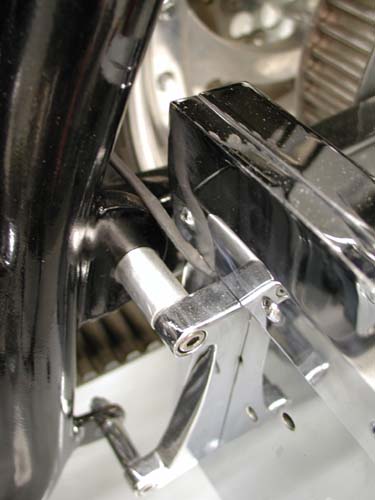

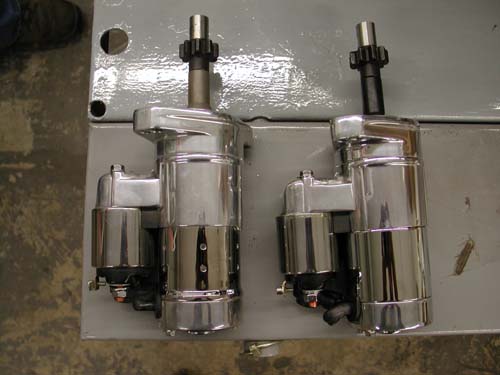
Just before we completed wiring, Giggie, from Compu-Fire, and delivered the new Compu-Fire 53700 hot starter designed to fit any big twin H-D from’90 up. All the special hardware is included and it’s rated to 2KW and was actually shorter by .150-inch for clearance dilemmas with Softail oil cans.
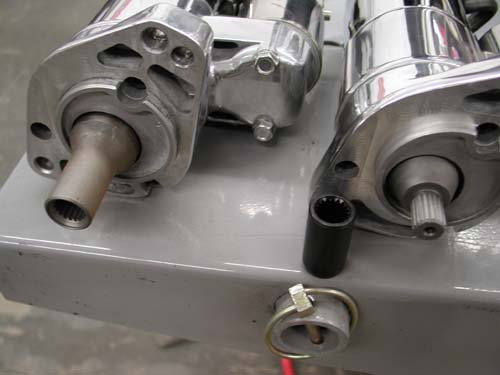
The starter roller bearings are 30 percent longer and it comes with shims to allow builders to install the starter perfectly. The Air gap between the pinion gear from the starter to the ring gear on the clutch basket needs to be between .75 and .125. If it’s too short the pinion gear can’t spin before engagement and collides with the ring gear. It needs to get a tad of momentum going. On the other hand, if the distance is too great, the starter gets up to full speed and fights engagement.
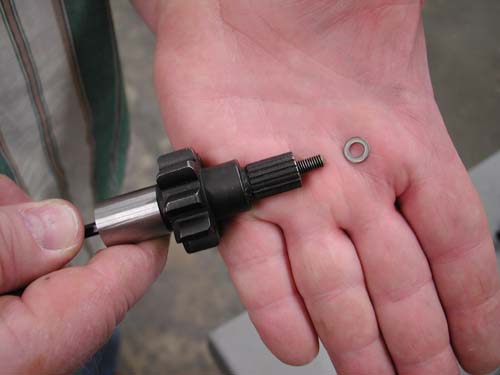
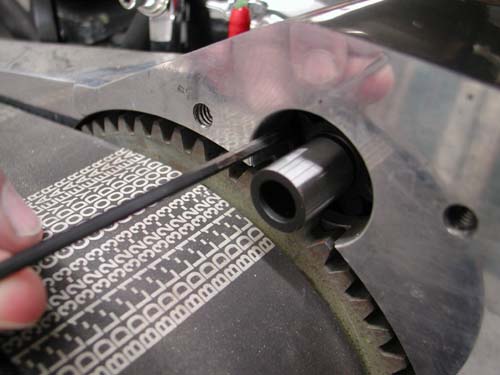
The measurement is difficult and Giggie uses a 1/8 Allen which is .125 across the flats. The shims are .026. Even the coupler on this new Compu-Fire starter is designed for lowered bike, to duck the belt.
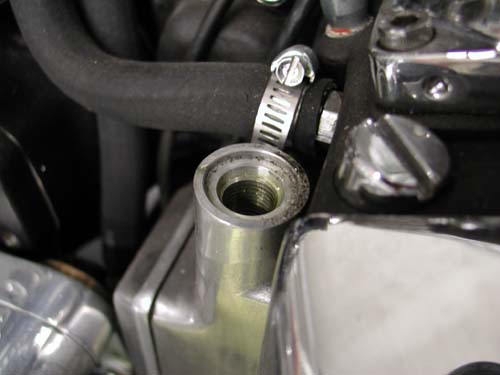
The wiring was completed and we were ready to fire the beast, but first Giggie recommended that we burp the bubbles out of the engine by removing the pump relief cap and using an Allen to pull up the valve and let bubbles pass for a pure oil lubrication.
The bastard fired right up, the Mikuni gushed gas, but as soon as it fired the Mikuni float bowl settled down.
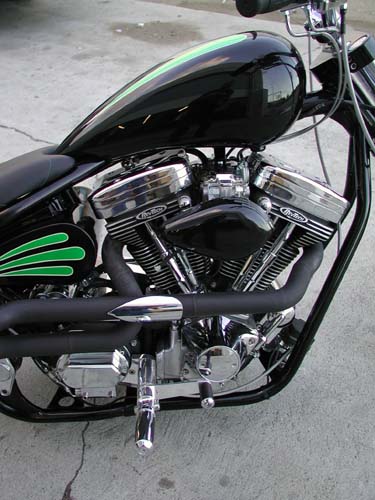

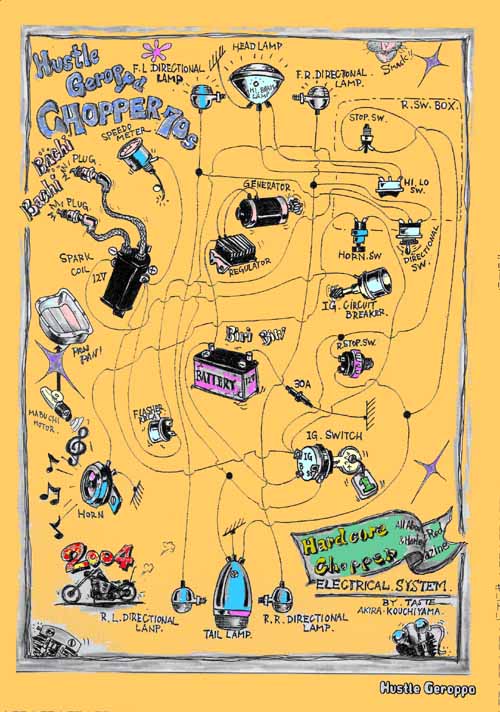
We often get calls for basic wiring diagrams. Here’s one that was taken from an old Easyriders and expanded by the wizards of Hard Core Chopper Magazine in Japan.
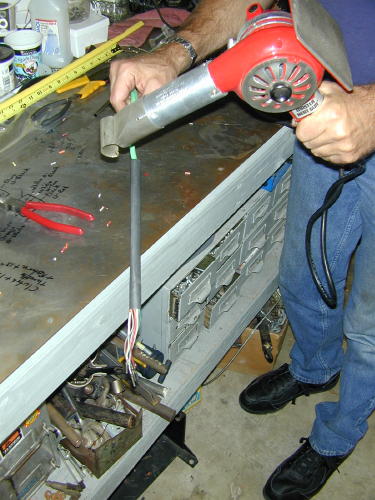
Take your time. Keep those copper strands away from sharp edges, moving stuff (like chains) and hot items. Cover everything with shrink wrap. Use extra layers of shrink wrap for more protection and stronger connections. I like to solder connections for a solid, vibration free contact, but some prefer crimping connections to avoid wicking. Watch out. Some of the littlest, coolest switches go to shit in a week under 100 mph vibration.
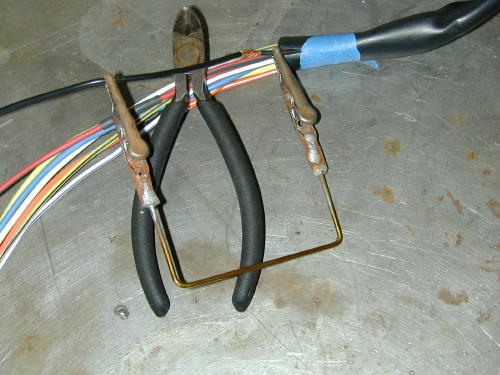
The Frank Kaisler, patent pending, wire junction tool. Send $99.99 to P.O. Box 666, Hollywood, Calif. Send only rolls of quarters.
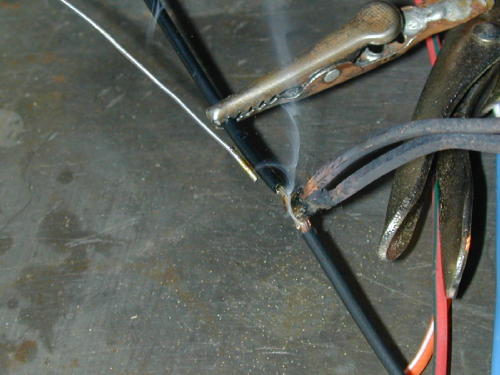
Don’t forget to work in circuit breakers and fuses. If one blows, disconnect the battery and research the problem. I like Terry battery cables for their flexibility, and they allow more amps to flow to the starter because of their low resistance.
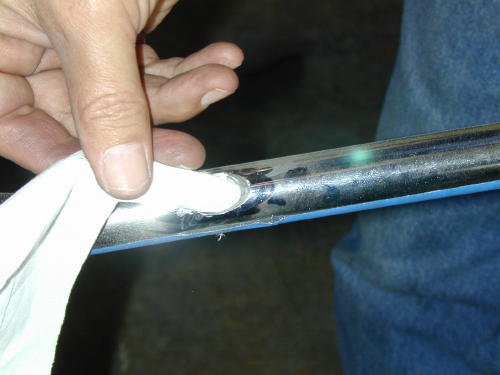
Couple more tips: Watch out, wiring around the front-end. That sucker needs to turn. Don’t run the electrical connections too tight. If you run wires through the frame, debur the openings and use extra shrink wrap to protect fragile insulation.
Bandit generally uses 16-gauge for most of the wiring, 18-gauge in the bars and 12-gauge from the battery to the ignition switch.
I called Frank Kaisler, a tech writer for decades, and before I finished reading the above he shouted across the line, “Yeah right, but you’re forgetting plenty, dipshit. Don’t forget to tell ’em about the breakers. Use a 30-amp breaker between the battery and the main electrical circuit (or the battery and the ignition switch). You can use one of the breaker lugs to attach the regulator hot line to minimize wires to the battery. Use 12 gauge wire for the main leads. Use a 15 or 20-amp breaker between the ignition switch and all the lighting connections.
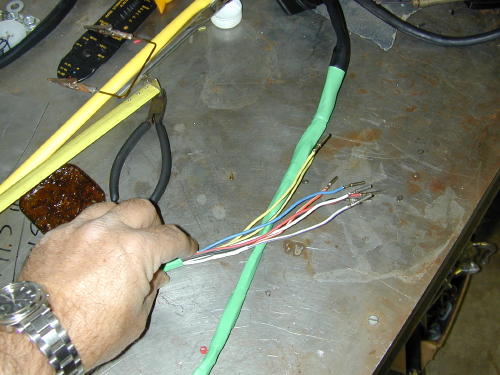
“Goddamnit, you didn’t explain wicking. Solder creeps under the insulation when it flows. The wire will flex against that soldered area and may break.”
“Yeah right, after two hundred years,” I muttered
“Shut up and listen,” Frank lit another cigarette.
“Quit smoking,” I babbled over the phone.
“The way your ride,” Frank coughed, “you won’t last another week. Let’s get back to the wires. I like to remove the plastic insulation on lugs and run shrink wrap right onto connectors, for a clean, stronger lead, and damnit, use the correct connectors. Blue for 14 and 16-gauge wires and red for 18 and 20. And make sure to use the proper ring sizes for stud connections, like the battery, circuit breakers and brake switch studs. Floppy lugs make for lousy connections.”
I was beginning to lose it. We could go on all night about wiring. He muttered something about using rubber grommets with wires that must run through sheet metal and additional ground straps from the headlight to the frame to maintain a solid ground to the front end.
“Don’t forget the final show bike detail,” He said and I remembered all the rats bikes I built in the ’70s with wires running everywhere. “Run wires down the left side of the bike. The hot looking side is always the pipe side.”
“Okay goddamnit,” I said. “I’m not writing a book. Just a handful of hints.” I sensed a lecture coming from a guy who edited bike magazines for 30 years.
“Do it right, Snake,” He coughed lighting another Marlboro, “or don’t do it at all!”
“Thank you, sir,” I said and hung up. Fuckin’ guy is worse than Bandit.
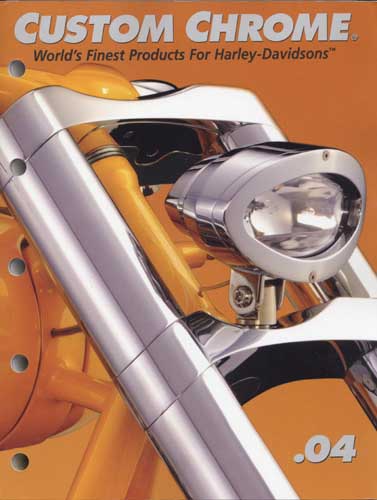
BRAND NEW CUSTOM CHROME CATALOG RELEASED–
Custom Chrome’s new offering for 2004. The California based distributor brings you the most comprehensive product offering in the Harley-Davidson aftermarket! At over 1,200 pages and over 22,000 part numbers, their 2004 Catalog features the new RevTech 110 Motor, Hard Core II, Ares bikekits and noumious frames and forks–everything from nuts & bolts to performance products. It’s the Custom Bike Bible for the year.
ONLY $9.95 + 6.95 Shipping**
Amazing Shrunken FXR 14–Getting Close
By Robin Technologies |

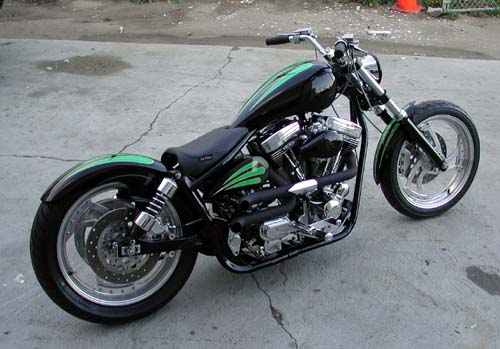
We’re getting right down to the bottom line. Harold Ponteralli, our painter called, “If I deliver the paint can you make it to the show.” I assembled bikes overnight for run deadlines in the past, so we went for it. We installed the new sheet metal, ran the oil lines and picked up a few chrome knick knacks from Long Beach Chrome. Frank was on his way to the Bikernet headquarters with a brown bag full of Goodridge hydraulic fitting. The heat was on.
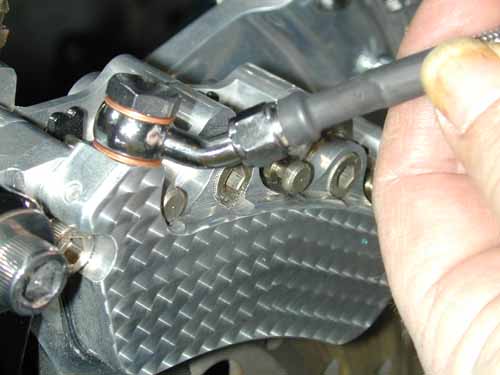
I installed the exhaust while Frank custom cut lines to fit each application perfectly. You can see how the man does it in our King tech articles using Goodridge lines, fittings and shrink wrap. For throttle cables we relied on Barnett for custom cut-to-fit lines.
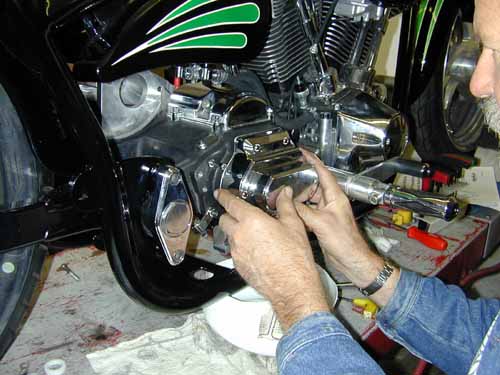
We replaced the Rev Tech 6-speed, cable tranny cover with a Joker Machine clean, chromed billet, hydraulic clutch. Why did we go hydraulic? Hell I don’t know, maybe to balance the Joker controls on the bars? The cover slid right on and we torqued it to specs (15-20 ft. lbs.).
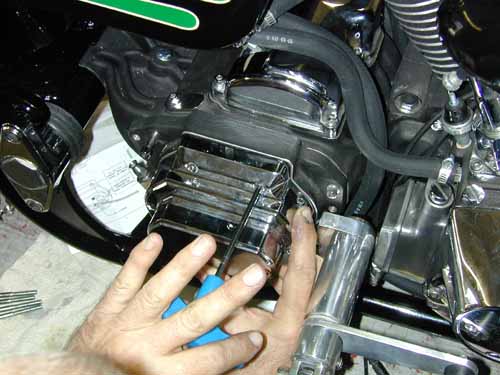
While I wrenched Frank ran a line from the Joker front brake mastercylinder to the Custom Chrome Billet-6 brake caliber. Crazy John took the calipers to a shop to have them milled smooth then engine turned for an added detail. Whatta ya tink?
Then Frank ran a hydraulic line from the H-D rear brake master cylinder (stuffed under the tranny) to the brake switch bolted to the tranny case, through a series of Goodridge fittings. Finally another line was constructed from the brake pressure switch to the rear brake caliper. We kept in mind that the wheel will be adjusted for belt tension and will flex up and down with the swingarm. There needed to be slack in the line.

Finally Frank carefully made a line that ran from the Joker handlebar controls to the Joker hydraulic tranny front. He immediately started bleeding the brake systems and they fell right in line. We watched the direction air bubbles might travel. Generally front brakes can be bled several ways. Some pump the fluid in from the caliper bleeder nipple forcing bubbles north out of the control reservoir. Sometimes, as soon as it’s filled, it’s cooked. No bleeding is necessary.
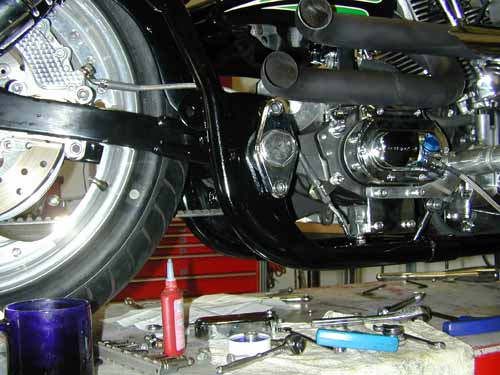
Sometimes I fill the reservoir and pump it slightly until the Dot 5 runs down the line and fills the caliper. This can take awhile, but as it sets the bubbles rise to the top and out the reservoir until it’s cooked again. We were lucky. The rear brake caliper was installed above the master cylinder and the bubbles blasted to the surface with little bleeding. Our Giggie (from Compu-Fire) designed, mid-brake lever worked like a champ with the sharp Custom Chrome pivoting pegs.
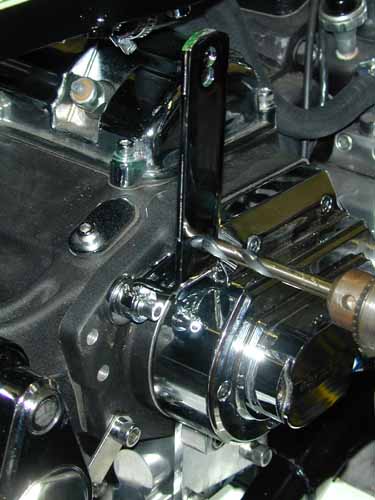
As a side note I coated the pipes with rattle-can barbecue heat flat black. What the hell, if they don’t work, I’ll mess with them again. Oh, and I tried to find a place to stash a H-D rear brake reservoir but couldn’t. I held my breath and entered a Yamaha shop and ordered a small sport bike unit. We made a bracket and stashed it under the tranny.
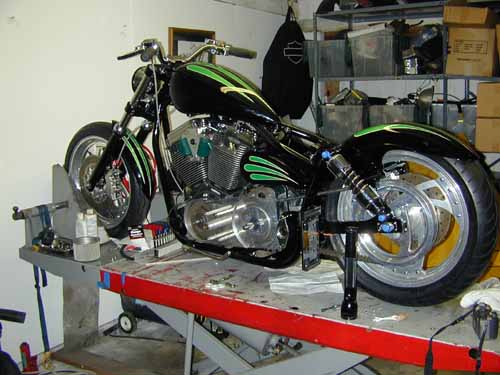
Building custom bikes is all about options, abilities, resources and a handful of rules. Check the John Covington Safety Code in Special Reports. He makes some good points. There’s also various considerations between rubbermounted bikes and rigids. For instance we designed the rear fender to hug the tire, but it moves with the swingarm which means the sonuvabitch better be strong. Also there needs to be considerable space between the seat and the rear fender for shock travel.
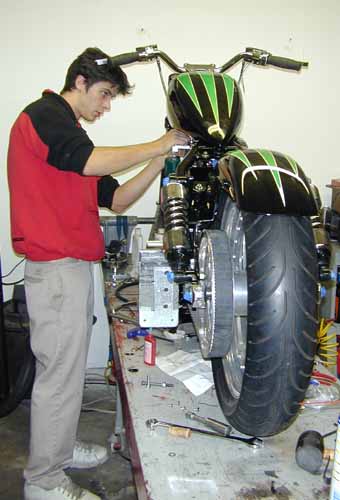
On top of style is ride consideration. I like to build bikes that will hang for a cross country run, handle slick roads and corner without dragging pipes or pegs. And it better corner. That’s what bikes are all about. Alright, I got off the tech. Kyle, the shop intern, installed the Custom Chrome petcock and gas line to the carb. He cut the line and inserted a gas filter (check the arrows for flow direction).

We loaded up the Cyril Huze oil tank with RevTech 10-50 Oil and looked for the UPS man. We waited patiently for the Le Pera styled/Bikernet seat to return to the fold stitched with emerald threads. Harold Ponteralli painted the sheet metal and want to see it in the Easyriders Pomona show. We didn’t make it. Then he jammed us about making the Pomona Roadster Show and we busted our buts. I did a couple of midnight runs installing the Custom Chrome stainless plates under the rear axle and polishing stainless fasteners. The gloss black powder arrived right on time from Dallas. The chrome sparkled and Custom Chrome delivered parts when we needed them.
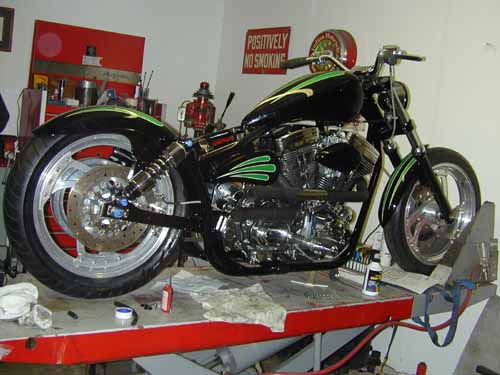
If the seat had rolled in the door, we would have wired the bastard into the wee hours and drug the scoot to the show, but nooo. Cross-eyed, we pulled the 1928 Shovel out of the headquarters, also painted by H-D Performance in Vacaville, California, detailed it and delivered it to Pomona. It was essentially built by Strokers Dallas, and sonuvabitch if they weren’t at the show with a half a dozen Stroker bikes. They took Best of Show and the Shovel took third place in the classic category. Whatta week.
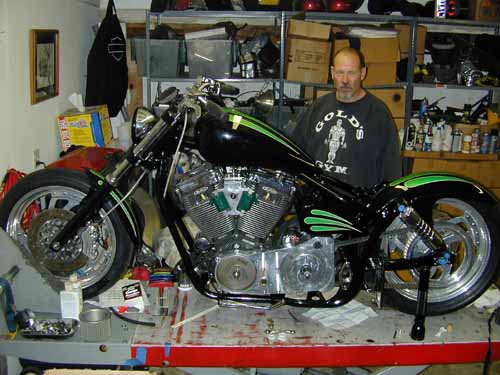
At this point we need final shifter linkage, which Frank fabricated, so we could install the BDL primary drive. Then some wire and we can fire this puppy. Hang on.


5-Ball Factory Racer Build for 2009-2
By Robin Technologies |

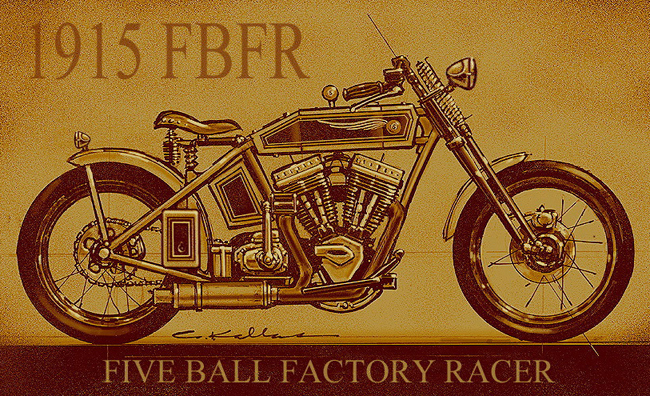
Moving right along, I overcame the Wilmington Mung and slipped back into the shop. It’s like self-induced Christmas for the homebuilder each week when UPS arrives or I score something at the bike swap meet. Ya plan, save small bags of gold and reach out to vendors to make deals, then wait.

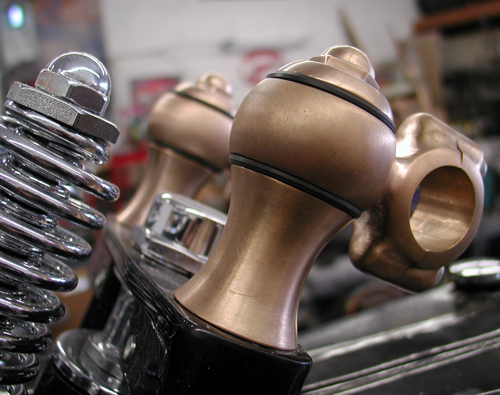
I got all pumped when the bronze risers drifted in from DPPB in Europe, and I immediately tackled the mounting and handlebars. I hit two hardware stores looking for the proper length hardened studs and the second score was doubtful, but I rolled the dice and bought them anyway. As it turned out, 3-inch ½-inch studs with coarse threads on one end and fine on the other worked perfectly.
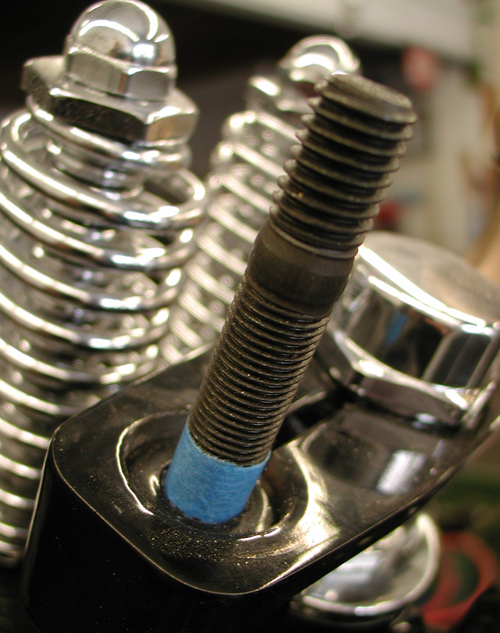
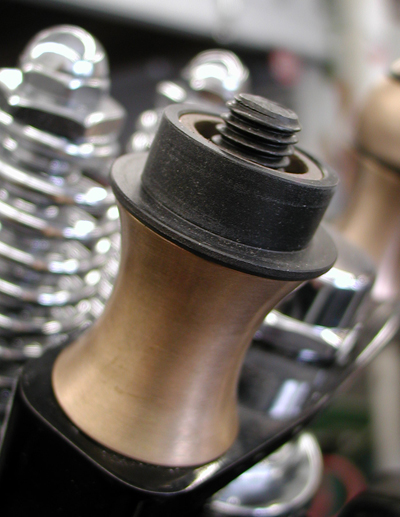
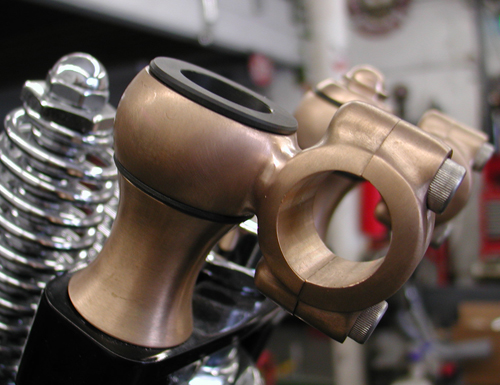
I tested the fitment by wrapping masking tape around the fine end 3/8-inch up from the bottom. I screwed them into the narrow Paughco leg, and then installed the riser components to see if I had enough length to reach the top bronze nut. I had plenty of threads, so I move the tape to 5/8 inches of securing fine threads and installed all the components. It all fit like a dream.
Then I went to work searching the shop for a set of bars that would give me the look and be reasonably comfortable. I’m shooting for that 5-Ball Factory Racer look, but a bike comfortable enough to ride to Sturgis. That’s always the acid test, and the road-test adventure. I found a set of sorta TT 1-inch bars sans the dimples, since I was going to turn them upside down. I mounted them to the risers, and then determined that I could cut almost three inches out of the center.
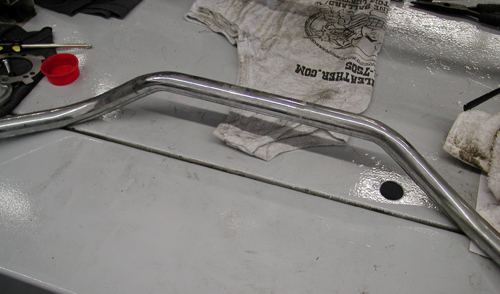
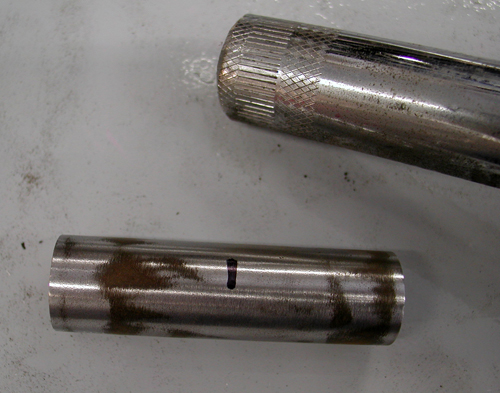
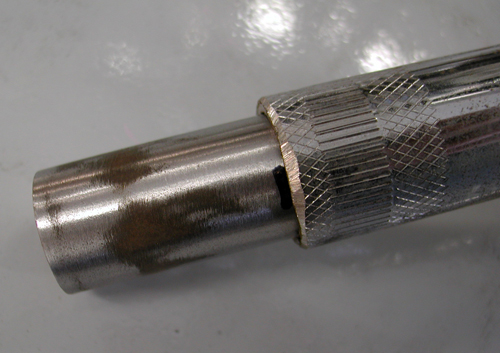
I searched the shop for a chunk of mild steel rod that would make the perfect alignment, strengthening slug for the bars. I removed the burrs from the split tubing and marked the slug center. I tapped it into place, strapped the bars down, so they were perfectly aligned, and MIG-welded them. Just having the bars and risers in place was a rush.
I finally muscled enough cash to have all my welding tanks filled. I took the opportunity to have one tank filled with pure Argon for welding stainless or aluminum. I’ve never welded aluminum, so I broke out my welding book and read the appropriate chapter. I needed twice the gas pressure and almost twice the rod speed and power.
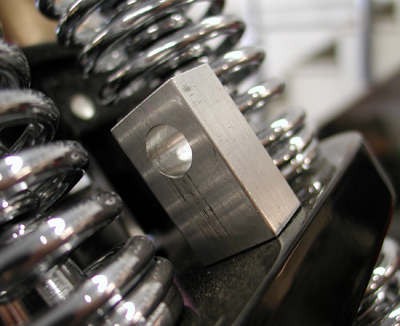

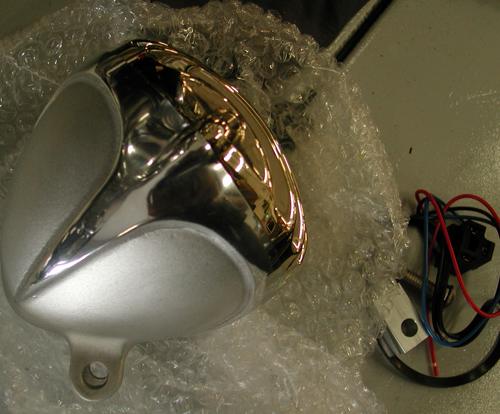
Let me back up for a second. The project was mounting the Crime Scene Rapide headlight. It was a bolt-on procedure, except for the simple aluminum-mounting bung. Once in place, it was impossible to remove the headlight-mounting fastener. I reviewed my options. The fastener would actually touch the top Paughco springs. I looked for an option and found one, but it required welding the existing square bung to the fine-threaded round spacer. I tapped the spacer for clean threads, and then proceeded to weld the two together.
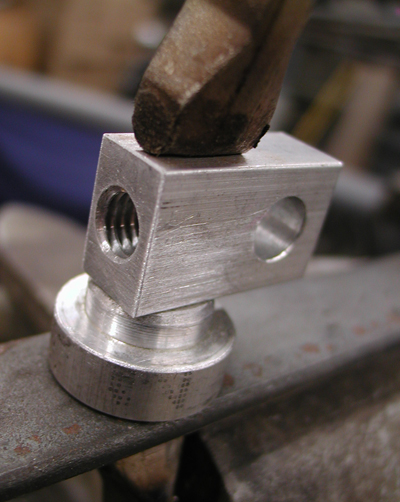


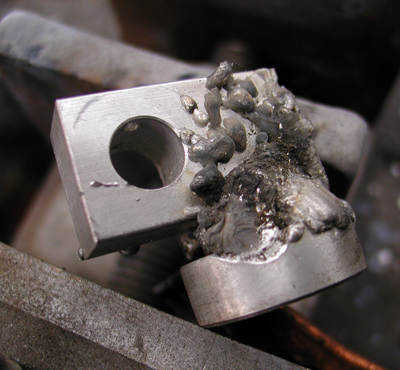
This was a trick. Aluminum must be extremely clean before welding. And since this piece was very small, it could heat up and melt like butter before one pass was completed. I also had some problems with the welder. Since aluminum heats and expands faster that steel, I needed to bore out the tip or run a larger welding tip. The tips come in various sizes, and natch, I didn’t have a slightly larger tip. So Jeremiah grabbed a micrometer and all my tiny drill bits, and started to study the sizes and attempted to drill the tips out. Interesting procedure. We broke bits and jammed them into the bronze MIG welding tips. Finally we succeeded in boring out a tip and the welding moved along.
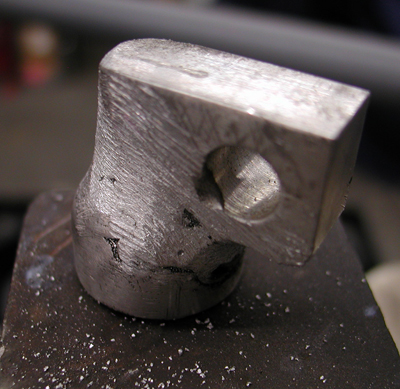
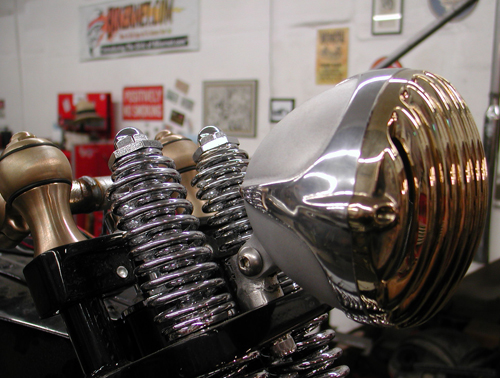
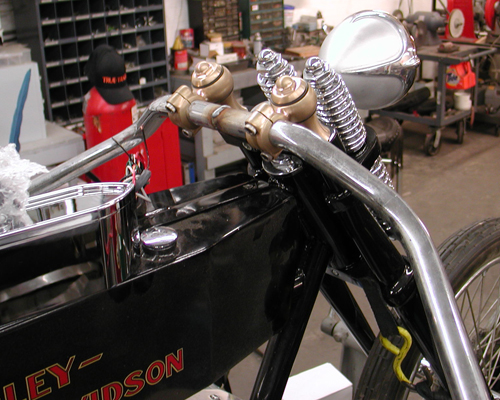
Then I took to grinding, filing, and rewelding until this headlight bracket was completed. Not bad. I need Jeremiah, the master shaper, to return and give it his final touch.
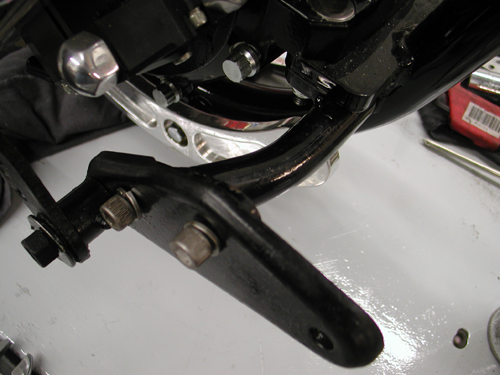
Next, I had a plan to use as many vintage H-D parts as possible. I snatched a stock 1936-1957 mechanical brake pedal and mounting plate, which also acted as the front peg or footboard mount. Paughco already made a bracket that bolts under the front motor mount. It makes the stock mounting bosses available for these components.
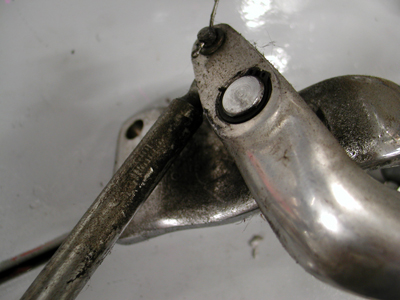
This effort placed me eyeball-to-eyeball with a couple of challenges. I needed to make the old mechanical brake pedal operate a hidden hydraulic master cylinder and somehow I had to create a mounting bracket for the rear of the footboard.
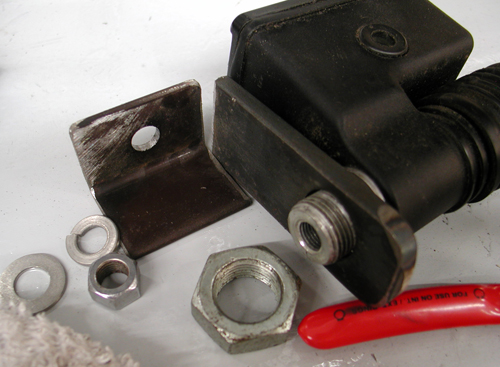
There was one more element rearing its ugly head at this point, but yet we turned it into an opportunity. There was no fifth stud mounting plate on the frame, so I started to tinker with a chunk of angle iron. Then I discovered a complete ’98 Dyna rear brake set-up with linkage and the master cylinder. Suddenly, lots of answers were available using the fifth stud-mounting placement.
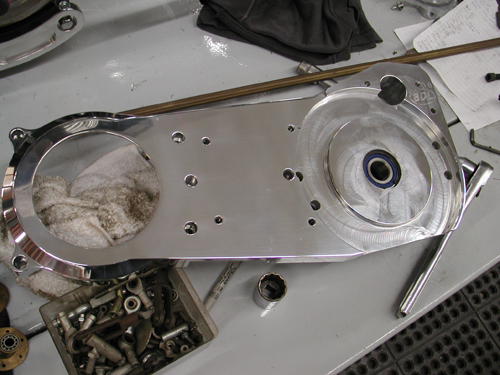
I had to stop dead in my tracks right there. I needed to make sure the transmission was aligned properly for the whole system to work. The brown Santa arrived with a new BDL Softail, 2-inch enclosed belt drive system I’d ordered just a couple of days ago. I pulled out the inner primary, loosened all the mounting bolts for the engine and trans and started my historic alignment procedure. First, I bolted down the rear of the engine and looked for any gaps at the front motor mount. It had a .020 gap. I found a shim and slipped it into place.
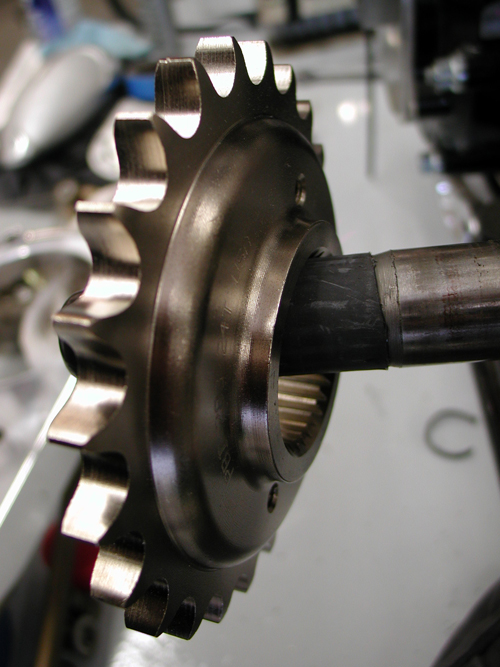
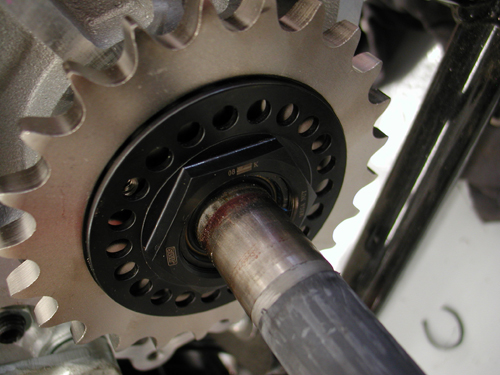
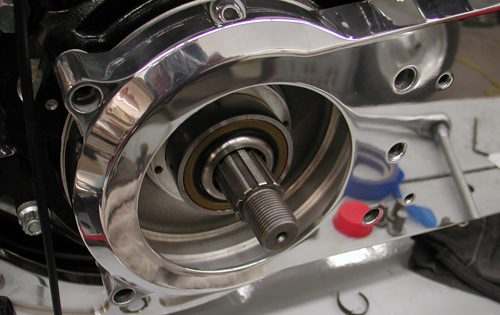
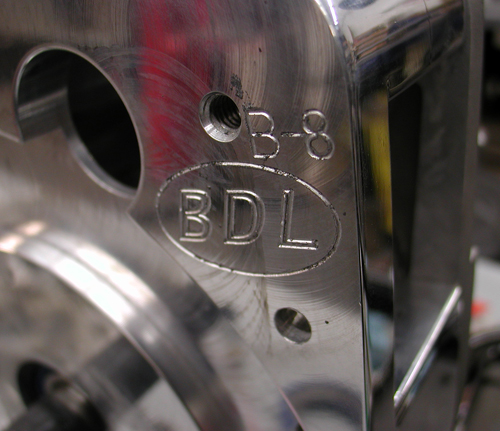
Next, I attached the BDL inner primary and pulled the JIMS tranny into alignment with the Crazy Horse V-Plus engine. Then I started on the fifth tranny stud-mounting bracket. I planned to run a kicker, and since this power plant is 100 inches strong, the additional mounting element will strengthen the entire driveline.
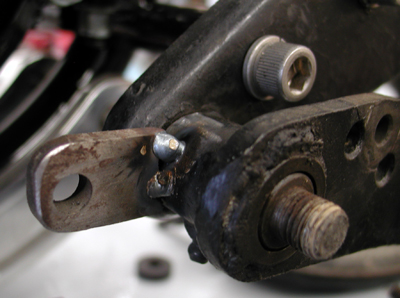



No, this system didn’t fall into place. I had oil lines to contend with and the brake pedal and master cylinder didn’t align. At first, I had a grand plan to bend the linkage rod into a jog-over to reach the tab I had welded onto the brake pedal pivot tube. That would have created more problems, specifically with the rear footboard mounting. I needed to straighten it out and machine a 2-inch offset link from the pedal over, which kept the entire system in alignment. The critical aspect will be my tab welding. There will be considerable strain on that puppy, but I think it will work.
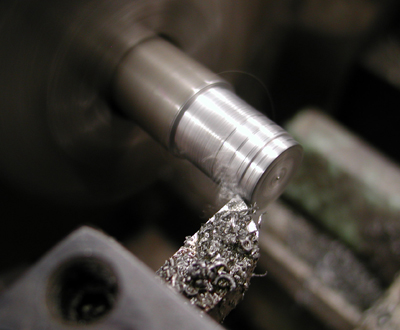
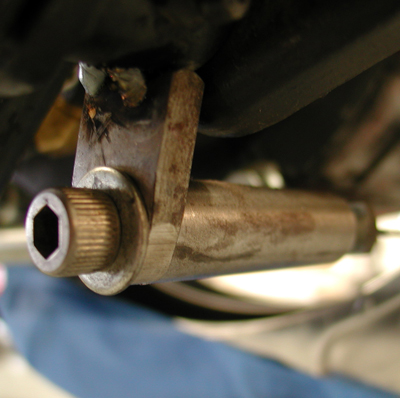
Then I ran a ½-inch rod off the top of the pedal bracket and machined a spacer that would catch an original classic footboard-mounting arm. I’m trying to tack-weld everything so I can make final adjustments or catch mistakes before it’s too late. I like welding and sometimes can’t stop myself. I tack my handiwork, step back, eyeball it, check it twice and weld the shit outta it. The next morning I discover something I forgot and I’m fucked.
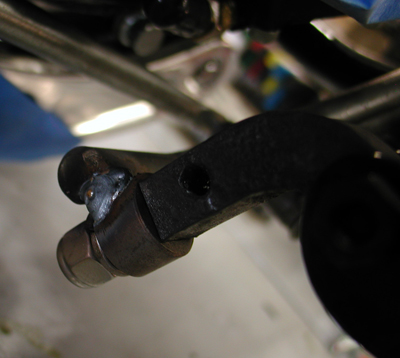
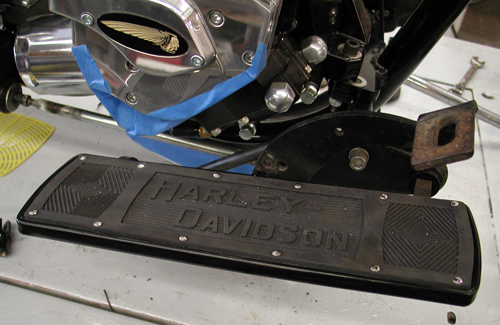
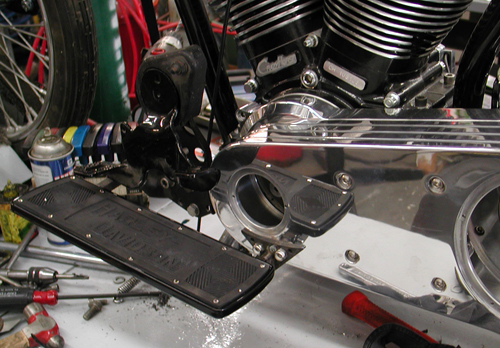
Since I was into footboards, I moved onto the left one. With the help of Sin Wu on her knees, we checked the angle of my 2003 Road King footboards and attempted to match that angle on the 5-Ball Factory Racer. Again, I used a stock mounting plate with foot clutch pedals. I’m going to make the racer a tank shift, so I bolted up the mounting plate and a vintage kicker arm and bracket, but I needed to drill and tap the Paughco bracket for the lower left 5/16 kickstand mount.
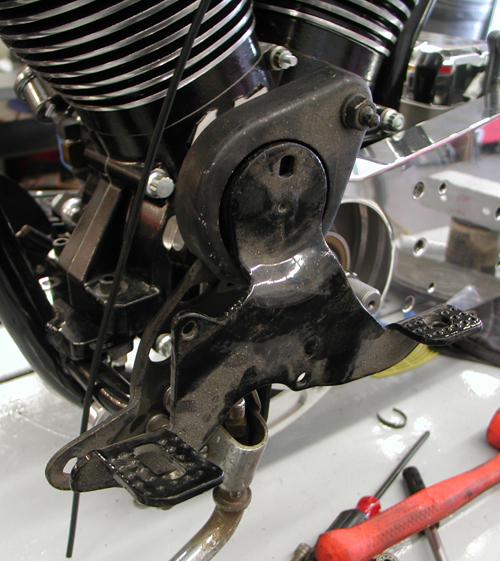
I tried to handle a few moves at once and failed. I broke off the tape in the kickstand mounting hole and I’m still pondering my options. I shifted back to floorboard mounting. I was burnin’ daylight trying to remove the tap. I mounted the front of the footboard and snugged it down at the Sin Wu estimated floorboard angle, then pondered how to mount the rear to the BDL outer primary.
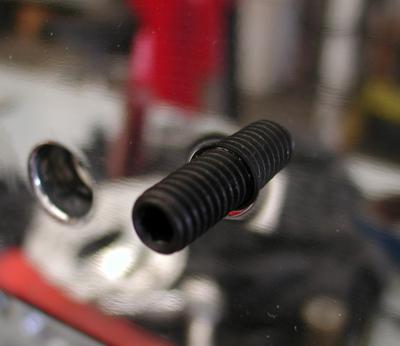
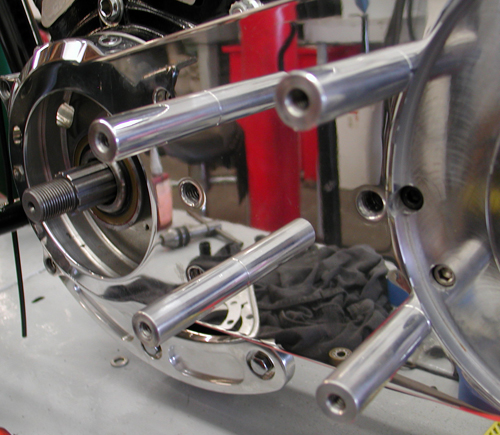
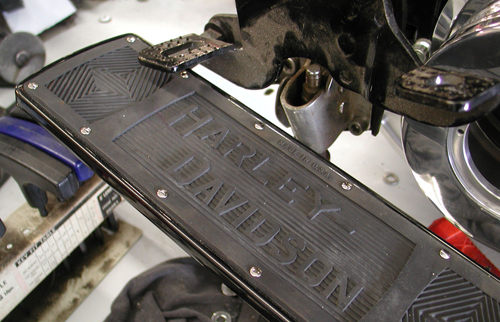
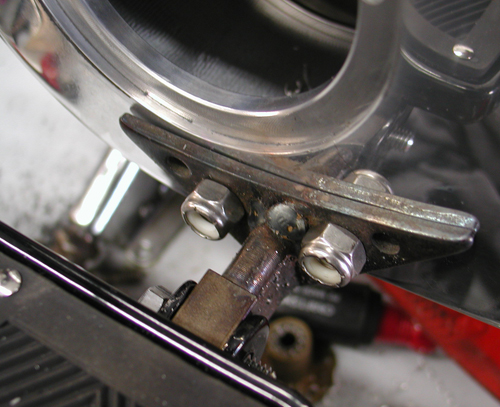
I had to insert the BDL mounting studs into the inner primary with red Loctite first, then the aluminum stud arms, and finally the cool, clean outer primary cover. This turned out to be a breeze. I took a vintage footboard mount, cut it off, and welded it to a Bandit-made bracket. It had to carry my weight, so I added a strengthening gusset to the bottom and believed I was good to go.
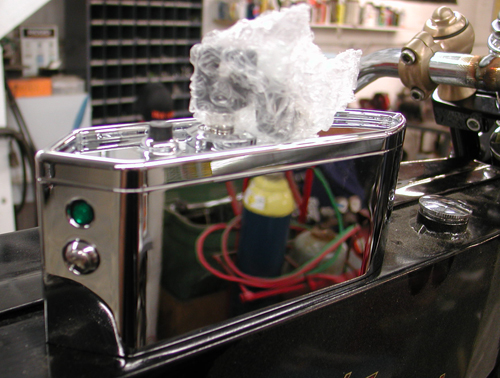
In the next segment, we will start to tackle the shift linkage system. Duane Ballard’s wife, Lisa, a contributor for the Cycle Source magazine, delivered this vintage tractor seat assembly for us to test and you’ll see our wacky test next issue. We might also start to tackle mounting the Paughco/U.S. Choppers tanks, Phil’s Shop wiring system and the Biker’s Choice Speedometer, which we hope to mount in the tradition of rear-wheel driven speedometers of the ’20s.
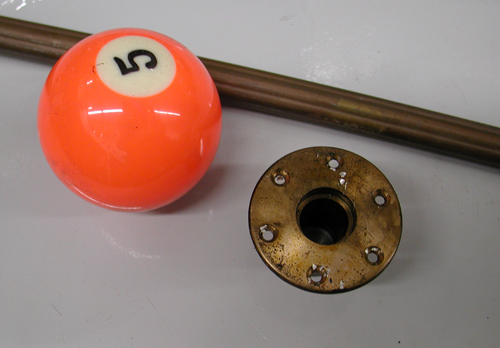
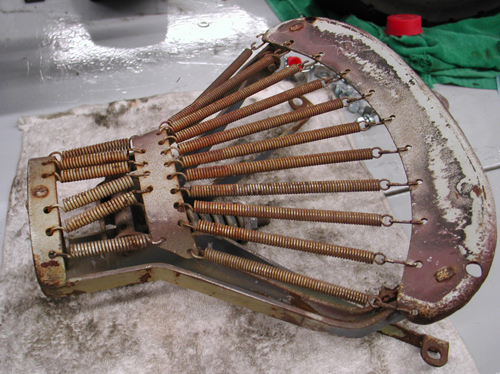
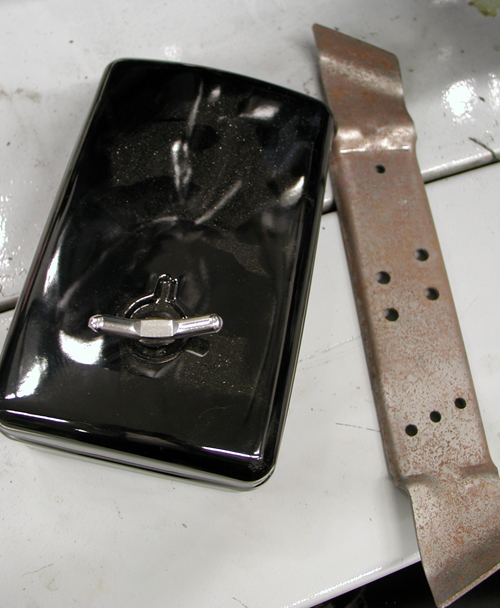
It’s all headed your way in the next couple of weeks.
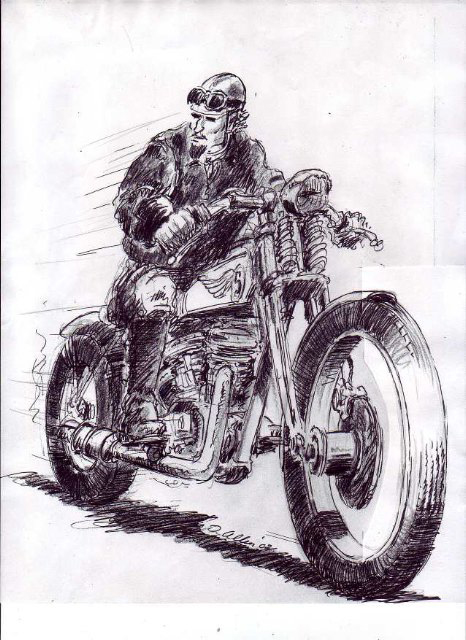

Amazing Shrunken FXR 11: Mid Controls
By Robin Technologies |

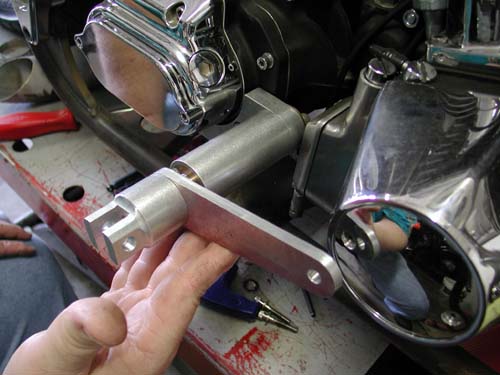
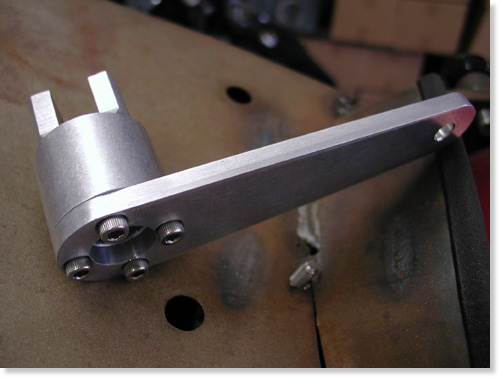
Shrunken FXR mid-controls by Giggie at Compu-Fire. Note: we need flat-headed Allens.
Giggie our master machinist from Compu-Fire rolled up to the Bikernet Headquarters last Saturday. We haven’t seen him for months due in part to his work on new starting systems for the custom market. They are dancing through the final development stages of a system configured to drive off the crank shaft of the motor with a 60- to-one ratio compared to stock 48-to-1. That will leave the area about the tranny available for custom applications or lower seat heights.
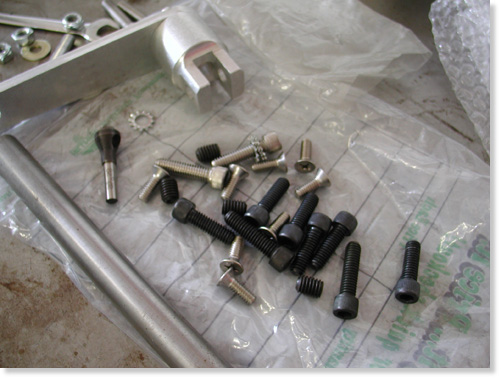
Giggie brought some wrong fasteners but lots of them and counter-sunk drilling tool.
Currently Compu-fire is soon to release a standard starting system, the Gen-2 HT, with 33 percent stronger magnets, 6-roller longer clutch (32 percent longer) with 30 percent more cranking while drawing the same amps from the battery.
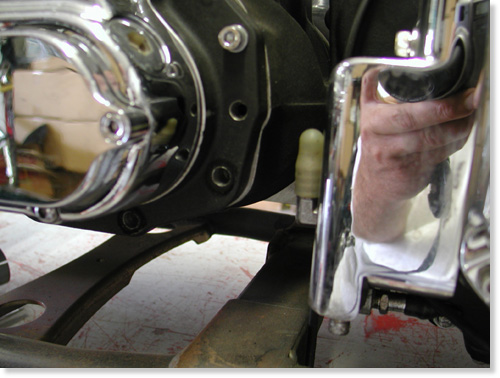
Here’s the tranny without the brake pedal components. There’s some tight tolerances going on.
I spoke to him about our cooling debate and here are some of his thoughts. “You want your oil to run at a minimum temp of 205 to eliminate water vapor or condensation that accumulates in oil,” Giggie said. “At 240 to 260 degrees petroleum based oils begin to break down, although synthetic lubricants could be good to 360 degrees. I have my doubts.”
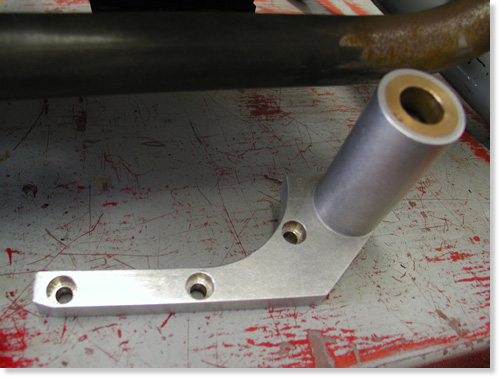
Base bracket to be bolted to the transmission.
Giggie developed an oil cooler for his FLH that kicks on at 220 degrees and off at 200. It has an in-line thermal switch continuously reading oil temp. He installed his cooler in a box with vents and two small electric fans wired to the thermal switch (to cool while idling).
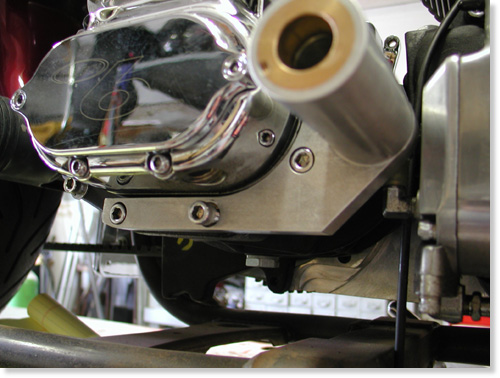
Giggie’s mounting bracket bolted in place.
Regarding our project Giggie dropped off hand machined mid-controls for shifting and rear brakes. Next, we must buy a H-D slave cylinder with remote reservoir with a built in brake switch. We will hide the reservoir behind the oil bag and design a bracket to hold the slave under the trans.
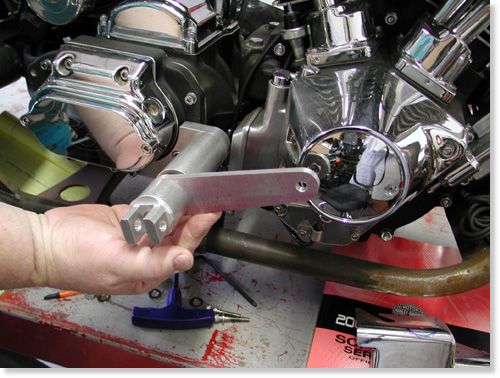
This shows the pedal and shaft in the mounting bracket.
Giggie will supply us with four more bushings to run behind the shift and brake levers, two 1/8-inch thick and two 1/2-inch thick, to allow us variable spacing away from the engine pulley or point cover on the cone.
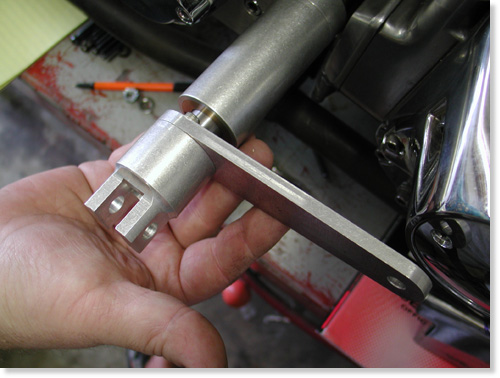
Giggie will supply two different bushing to be installed between the brake lever and the mounting sleeve. We’ll need the space to clear the point cover.
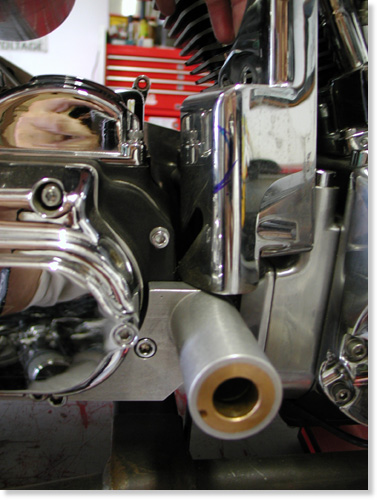
Unfortunately the sleeve hit the oil pump cover. We may be able to remove enough material or just polish the pump. The oil pump inlet fitting will also need to be turned down. It’s close.
With the bushings in hand we can develop our final linkage behind the BDL belt drive plate and Giggie’s tranny plate to connect with the slave piston.
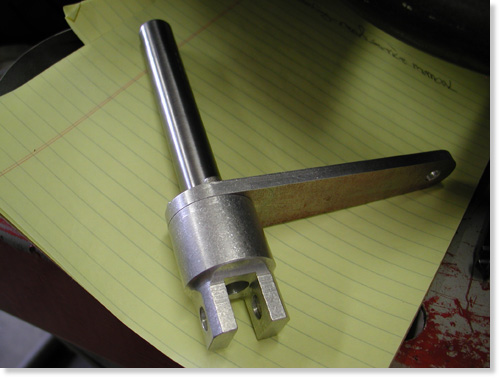
In both cases we need to cut and machine the other end of the shaft, depending on the linkage.
I’ve decided to remanufacture the exhaust system which is now a tight fit around the new brake linkage. Giggie also machined the foot peg mounts to accept any standard, pivoting foot pegs.
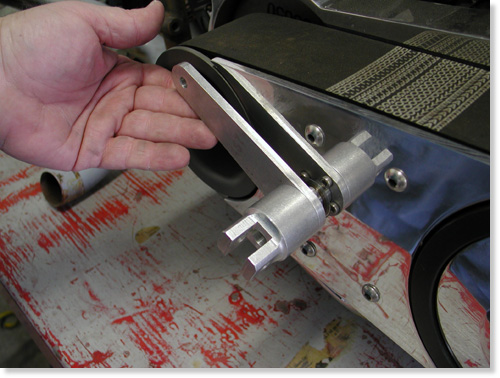
The slick new mid controls for shifting slid through bushings machined into the BDL outter and inner covers.
Next we need the bushings, slave cylinder and a day in the garage hammering and welding a new set of pipes.
–Bandit

Back To Part 10, Page 2
Mudflap Girl Part 1a
By Robin Technologies |

Back to Mudflap_Girl_Part_1_the_Concept
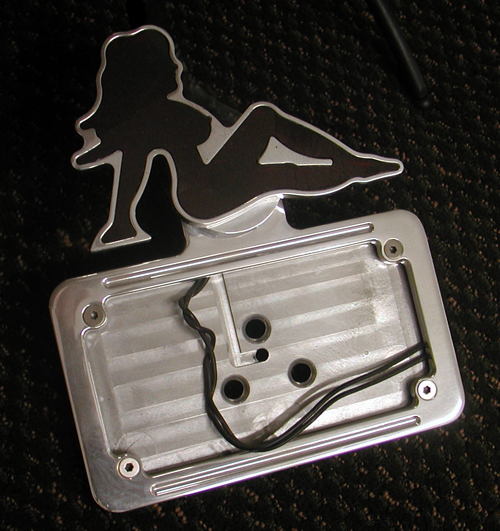
So we’ve collected a handful of mudflap girl products from Billy Lane, at Choppers Inc. , 2-wheelers in Denver, Sturgis and Daytona and Nick from New York City Choppers. Then we needed a fitting bike project, and one surfaced. Seems a Bikernet babe grew up in the San Pedro projects with eight brothers and sisters. The oldest one, and most supportive, hardest working, was Brad Olsen, a longshoreman crane operator in the LA Harbor.
Those kids grew up on the tough side of the harbor and Brad took the brunt of the hard life, became a fighter and family member defender. He worked the ports, went to school, became a tugboat captain and ultimately, a crane mechanic. For eight years he trained under Richard Bustillo, who worked with Bruce Lee, and Brad became a master and owner of his own dojo, Harbor Kick-Boxing in San Pedro.

Brad fought for his brothers and sisters, and then worked with inner-city kids to build their self-defense abilities and self esteem. Brad has owned a 1961 Panhead for 25 years and keeps it pristine. It’s his baby, but his kicking knee is damaged and he needs a long-distance touring bike with an electric starter. That’s where the mudflap girl came into play.
The project started with a salvaged 1998 Dyna Glide basket, which we tore apart. We sent the engine to Harley-Davidson for a re-man effort with the help of Fullerton, California H-D. The transmission was rough and we wanted a 6-speed for those long Mudflap Girl highways. I had a JIMS 6-speed, which I returned to the JIMS factory. We switched and twisted the Dyna Glide 5-speed transmission into a JIMS FXR, 6-speed and a Softail 5-Speed for another project (my 1915 5-Ball Factory Racer).
I’m not a big Dyna, fan so we dug out my last Quantum, Kenny Boyce styled Pro Street FXR frame and went to work finding parts. I bought a used Arlen Ness FXR swingarm from LA Chop Rods and dug out a wide Custom Chrome inverted front end with turn signals built in. The overall design element called for building a tough and reliable touring motorcycle for Brad.
Another key element for the overall package was the bags we ordered from Redneck Engineering. Once we had a set of Renegade Wheels like we used on the Assalt Weapan, mounted to new Cobra Avon Tires we were ready to begin the mock-up stage.
Of course, I used Doherty Machine wheel spacers to center the wheels and had to machine a stock axle to fit the Custom Chrome wide glide.
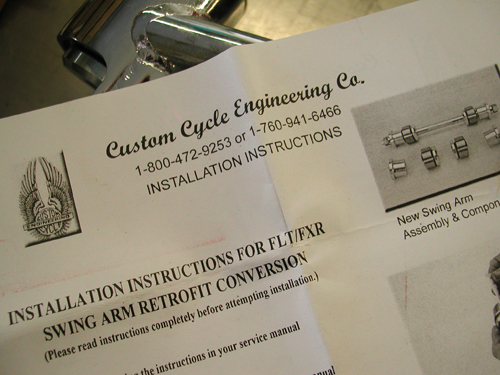
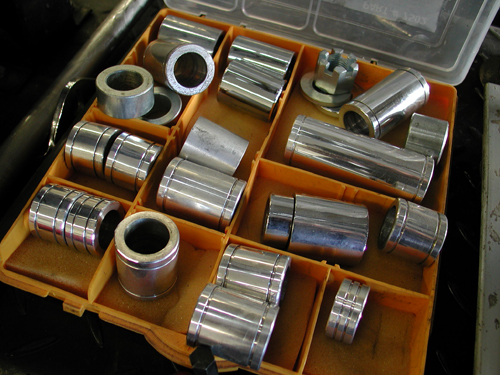
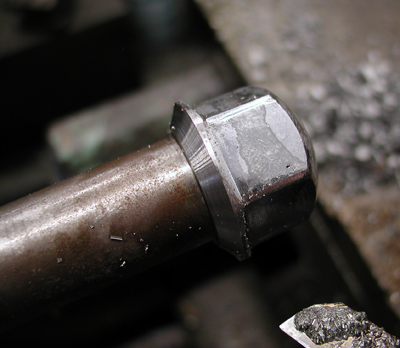
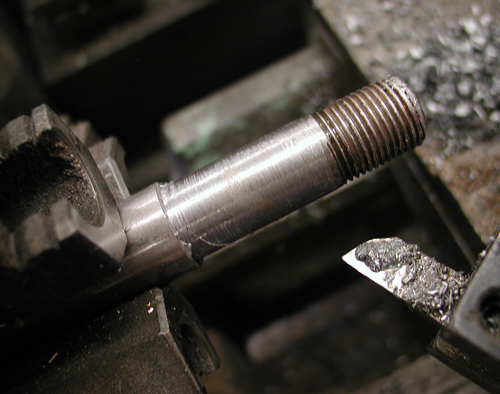
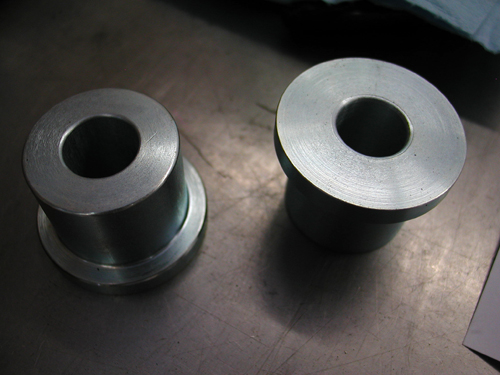
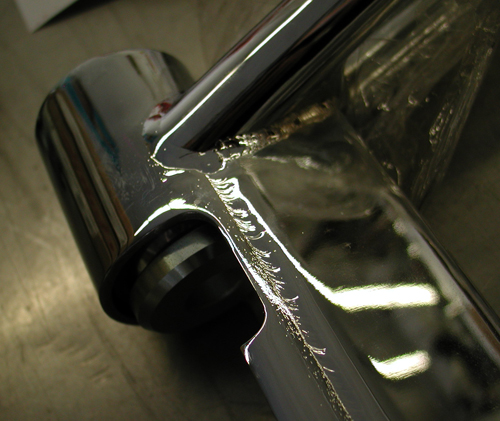
Handling is an issue with any rubber-mounted bike and we pressed in Custom Cycle Engineering swingarm bushings to tighten the ride. Plus I’m still trying to work with a tougher swingarm axle from www.Glide-Pro.com.
I spoke to a couple of builders about installing the driveline in a FXR frame and some bolt the engine and trans together, then lay them on their sides. They slip the frame over the top and install the swingarm, swingarm axle, rubber-mount biscuits and transmission to the frame. Unfortunately, I don’t care for that system. It’s against the Code of the West to lay a Harley engine on its side on the ground. Bad mojo.



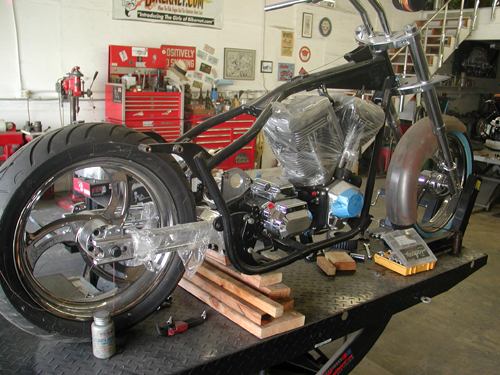
We mounted the front end and front wheel to the frame, then put a jack under the frame. Then we mounted the swingarm and transmission together in the frame with the axle. Next we installed the Renegade wheel. I moved the jack. with a chunk of wood to lift the transmission until it was level.
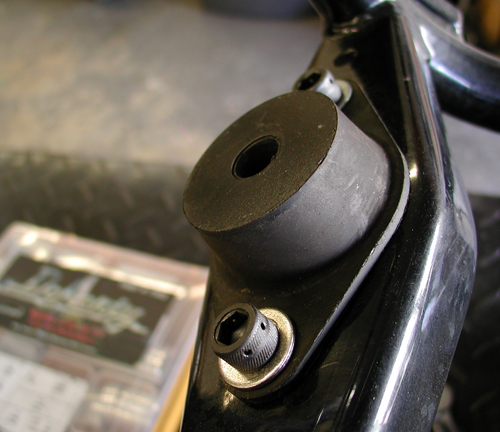
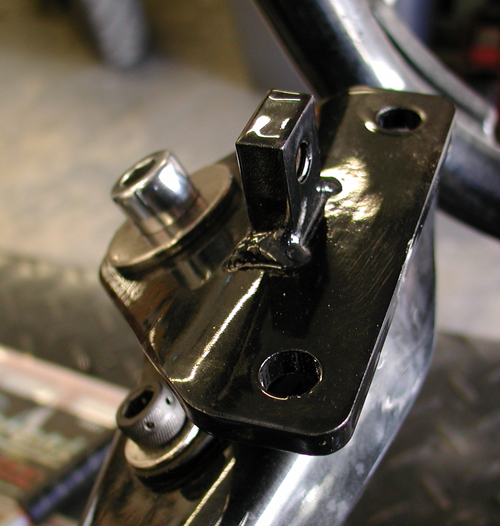
Then came the Quantum front motor mount, which was offset. We may replace it with a stock touring mount. Here’s what Rogue had to say about it:
No, they are not specific to the frames you have. They can be used with anyrubber-mount FXR frame to offset the engine 3/8ths of an inch to the left.We originally used them with the frames Kenny Boyce made for Quantum.
Looking back over some old paperwork it appears you got two blackpowder-coated Quantum frames that were made for Quantum by Kenny Boyce.
These frames were used with the front offset mounts and had the transmissiontail shaft modified by removing 3/8ths of an inch from the left side and useda spacer of the same size on the right. This moved the engine andtransmission equally to the left.

Later, Quantum used a set of offset rear swingarm end caps as opposed tomodifying the transmission. If a stock front motormount was used, no changes had to be made to the rear.
My notes say you also got a bare Quantum frame made for them by Kraftech. The mounts were usually used when using a fat tire on the rear.I had a bunch of them and figured you could use them for something. You donot have to use them!
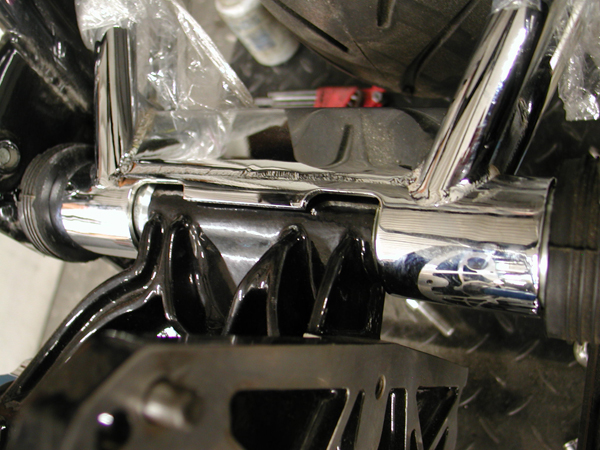
I was confused by the offset, so it’s always a smart notion to check with someone who knows. Rogue worked for Quantum back in the day. We will eliminate the offset front motormount plate as we roll forward.
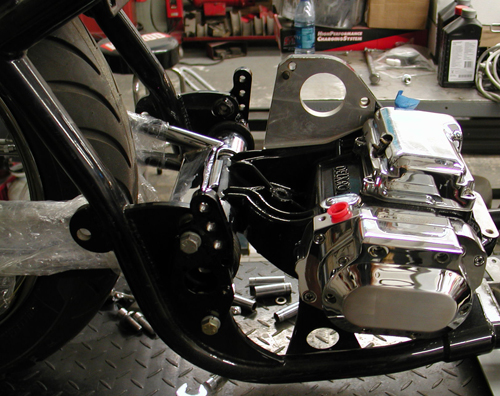
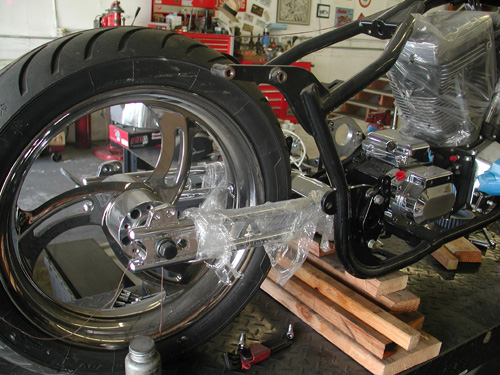
With the trans jacked level and the front rubber pad mounted loose with the front engine plate, mentioned above, snugged to the biscuit with a ½-inch bolt, we dropped the engine into place, like we would in a rigid or Softail frame.
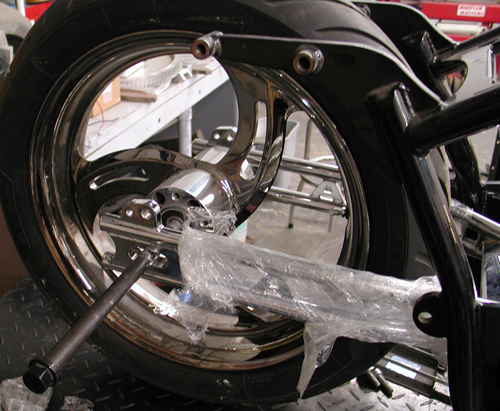
Next, we’ll replace that front motormount, shave off the existing tank mounts, start to mount a Custom Chrome gas tank and rear fender and prepare Redneck Engineering bag mounting brackets.
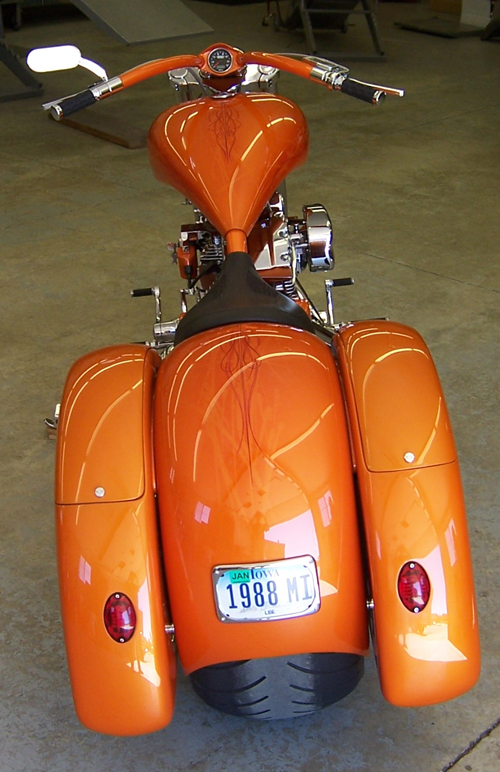
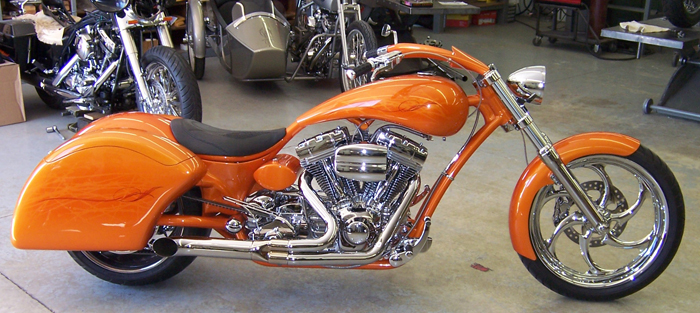
Above is a bike built by Don Hotop for his wife using Redneck Engineering bags. The fiberglass bags are designed, and come with mounting rails for Softails. We will need to cut the bags for Progressive Suspension shocks and build very sturdy basketry.
Click here for: Mudflap Girl Part 2, the Bandit Engine and Spitfire update

Sturgis Shovel Part 13
By Robin Technologies |

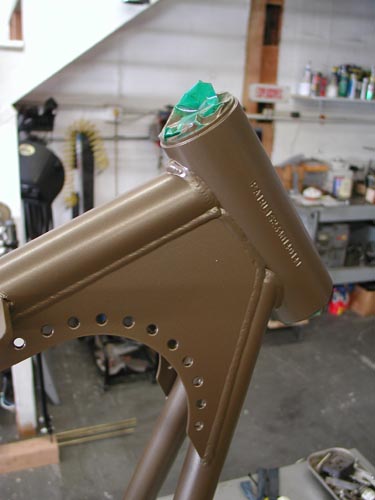
Hang on. This is the last of the scintillating segments on building the Sturgis Shovel before I write the treacherous saga of the ride. Somewhere we will publish a feature on the bike in a mag and on the site. Oh, there’s one other tech that will come to pass—hard line assembly. I’m waiting for a CD of images from John Gilbert of Bike Works mag.
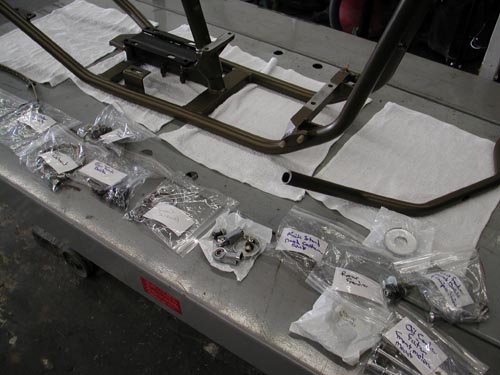
So let’s get started. I was burnin’ daylight before the Sturgis run. I saved a ton of cash going with all powder and no additional chrome or polishing. It cost me just $325 to powder all my components for lasting protection.
Throughout this article I will point out my mistakes, so you can avoid them. I did an 80 percent decent job of mocking up the bike prior to powder. That meant that 20 percent had to be dealt with after the finish was applied. Bad news. The only thing I didn’t think through or make brackets for was the ignition switch and circuit breaker brackets. That may seem minor, but wasn’t as you will discover. On the other hand it wasn’t a big deal. You be the judge. Actually, if we wired, fired and rode the bike before final teardown, it would answer all the questions. But few builders take it that far.

I was jazzed to toss the Paughco Frame on the lift covered with pads. Foremost Powder had plugged all the threaded holes and tapped off the neck bearing surfaces. They did a helluva job. I shaved motor and transmission mounts for a proper ground and installed the S&S modified 93-inch engine and JIMS trans. Then I could install the Paughco Springer without a balancing act.
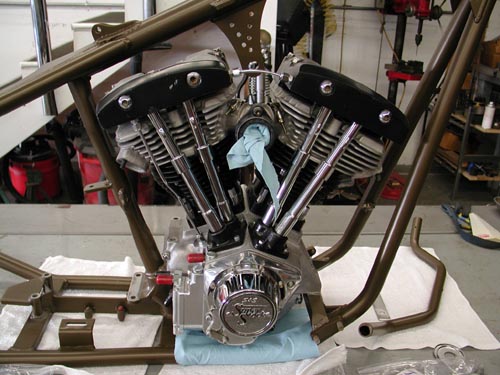
The Springer is easy to install, but takes care. I greased the bearings, slid on the dust shields and ran the whole springer through the neck. Keep in mind that installing the bearing races in the neck is not complete until the bike has been down the road. Any paint, dust or uneven race angle will mean that the bearings will seat further once on the road. Ride it for a week then lift the front end off the ground and jiggle the wheel by the axle. If there’s any movement or dangerous slop, take the bars and top tree off once more and tighten the stem nut until there’s just a hair of drag. Long front ends are more critical because of the leverage against the neck.
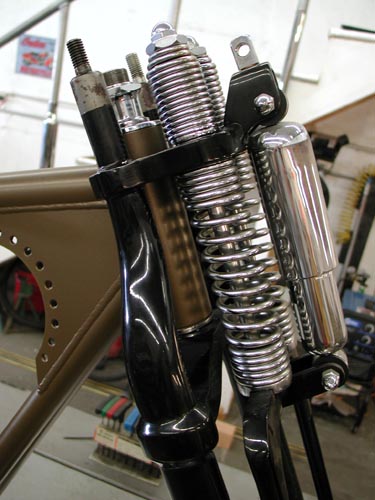
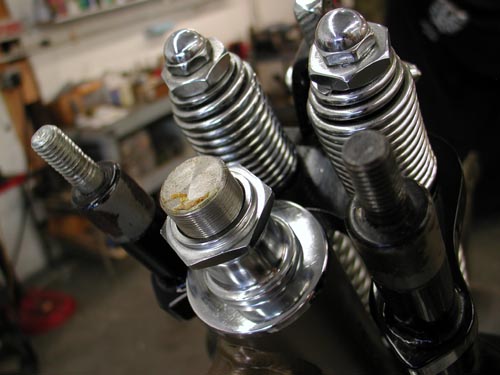
I didn’t bolt down the engine and trans hard, just the tranny plate which ultimately I had to loosen. The engine needs to be completely at ease for the BDL belt alignment so I just spun some stainless bolts into place. Then I installed the front wheel with Doherty spacers, the Brembo brake caliber and centered the wheel. Keep in mind that Brembo supplied the bracket, which is designed to replace a stock, late-model Harley springer brake system. I didn’t have the proper spacer, but a Harley shop had one and I was good to go.
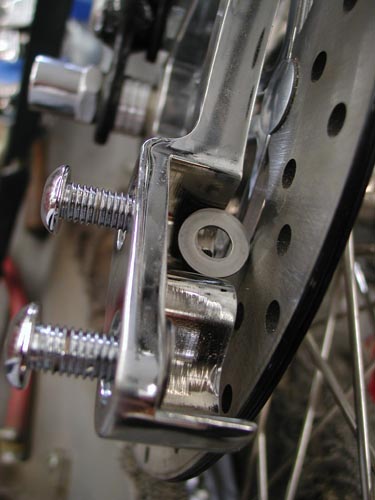
Then I installed the Brembo Caliper. They supplied me with a series of shims. I used feeler gauges to determine centering the caliper over the rotor and stacked the shims until it was set. This is an interesting bumbling, experienced manner for writing articles. I have the insight of riding experience behind images of the bike yet complete. Ultimately we removed the front fender.
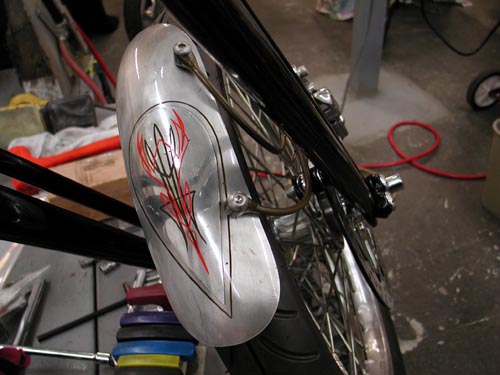
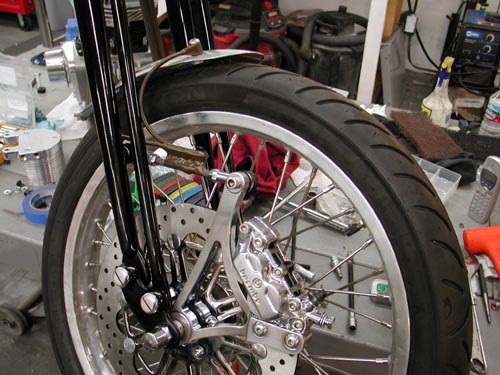
I build the front fender, single sided bracket after Kent’s, from Lucky Devils Metal Works in Houston, caliper mounted fender mounts, which work perfectly. My problem was the initial position of the caliper, too far forward. So I mounted it on the heim joint rod which didn’t work. When the bike went over a bump the front lip of the fender rode up with the caliper and the rear lip rode down with the springer touching the tire. It had to go. So I rode to Sturgis without a front fender ducking rainstorms all the way.
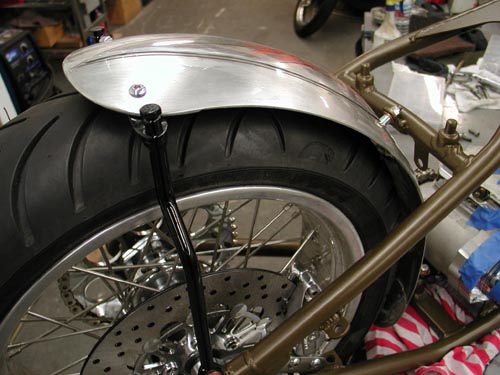
Next I installed the rear fender. Keep in mind that the rear fender, the oil tank and the rear wheel fight for the same spaces. They almost need to go together simultaneously, especially the oil bag and rear fender. Everything slipped into place with nyloc nuts, stainless Allens and red Loctite.
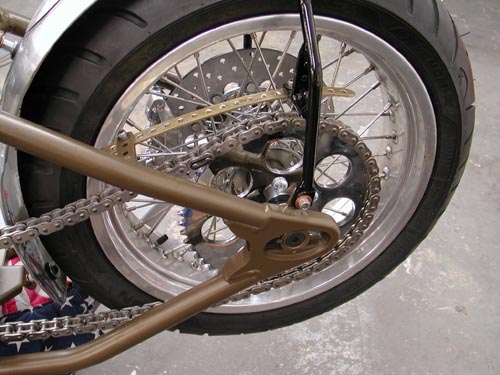
At the time I ran stock gearing with the JIMS 6-speed, until I discovered that I was faced with running a kicker. I didn’t change the rear wheel gearing from the 51-tooth, but I should have. This evening I’ll install a Custom Chrome flat (Sportster styled) 48-tooth sprocket and hope to knock the revs down seriously.

I also mounted the rear Brembo brakes and centered the caliper over the Brembo rotor. No problem. Even my Softail styled anchor bracket worked perfectly welded to the frame and tucked the caliper between the frame rails.
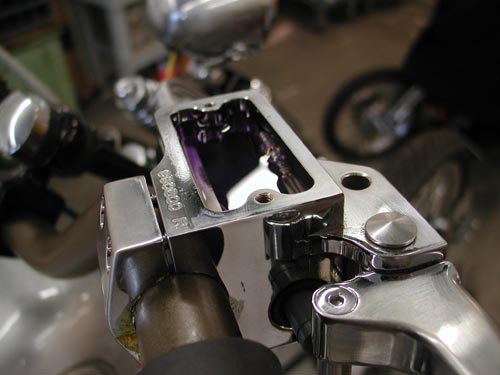
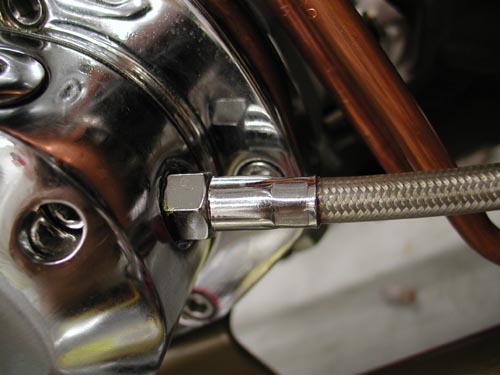
While I’m messing with brakes I’ll cover brake and clutch lines and cables. Instead of making up lines I ordered RevTech pre-assembled lines from Custom Chrome plus all the fittings washers and fasteners. Keep in mind that the front brake master cylinder uses larger master cylinder banjo bolts. They come in 10mm and 12mm. Watch out, and don’t hesitate to order a couple of extra bangos bent at different angles to make sure you’ll have what you need.

I measured my lines and clutch cable lengths a number of times then added an inch for safety. That’s where making your own lines can be helpful. Keep in mind that the front end will turn (clutch cable) and depress (front brake). You’ll need some slack. Plus you might change the angle of your handlebar levers, which will impact the position of the cables and lines. I used Tephlon tape on most fittings although some builders don’t recommend it. Since most of this stuff is chromed, I like the extra sealant.
I use only DOT 5 brake fluid in my bikes, ‘cause I can splash the shit all over the place without concern for paint damage. In many instances you can fill the master cylinder and rock, just by waiting for the bubbles to rise. Another key is to find the right pump can and fill the lines, caliper and master cylinder from the bottom up. Use a new pumper or a pump that’s dedicated to brake fluid only and attach it to your brake bleeder on the front wheel. Most of the time that works like a charm.

I’ve found that most front brakes will basically bleed themselves. Fill the master cylinder on the bars and pump it slowly allowing the bubbles to rise. Let it set overnight and most of the bubbles will rise just by pumping it with short strokes at the lever and watching the bubbles jump to the surface.
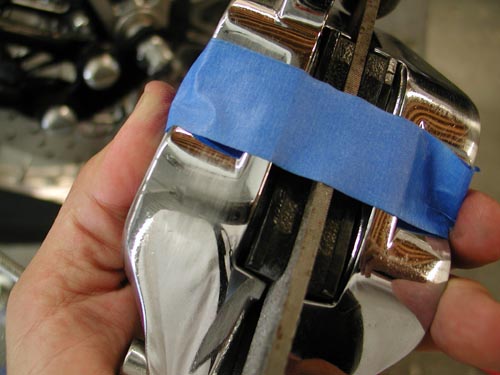
In this case I discovered that some air was trapped in the caliper, so I pulled it off the bike, taped a file (the same width of the Brembo rotor) and turned the caliper so the air could escape through the bleeder nipple. I bleed it a couple of times then returned the caliper to its rightful position. She was good to go.
The rear brake wasn’t so easy because the air couldn’t rise to the master cylinder. I bleed it from the front and the rear, and I think it still has air in the lines although the Brembo brakes worked fine. I received a lot of compliments and comments on the brakes, which I found strange. Brembo has a terrific reputation, but not on Harleys. Riders were surprised to find Brembos on a Chopper.
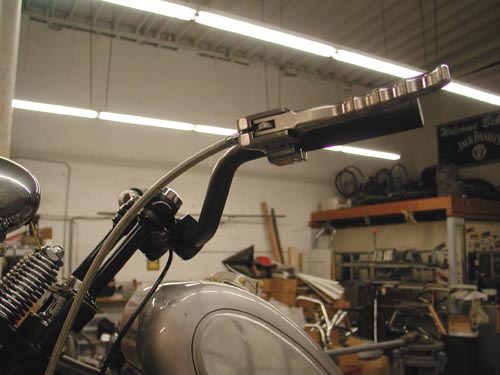
Now for the clutch cable. First I was confused about which cable style to order. I hope to put together an article on it in the near future. I picked the most common late model Evo cable and measured the length several times. Here’s the key. If you’re not replacing a stock cable you have no notion of the length. I pulled a stock cable and measured it, but I didn’t know what model it came from. I went by the length of my stock cable and found the 1990-1999 Fatboy cable length. Then I measured the extension due to the Paughco Frame, CCE risers and CCI bars. Much guess work. If I had all the bucks in the world I would have bought three cables lengths.
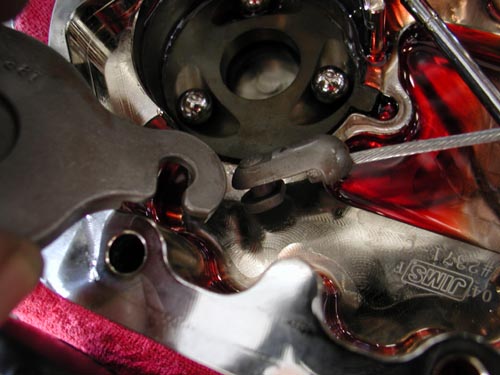
The end cap cable is the reason Baker, JIMS and RevTech transmissions come with a fresh gasket and a quart of transmission oil. They know that you’ll be forced to pull the end cap to install the cable in the ball driven throw-out bearing mechanism. It’s simple but cumbersome. Don’t loose the balls. You’ll need a massive C-clamp removal tool to pop that sucker free. Carefully lift the inner ramp and remove the cable coupling, attach the cable, which you have already screwed into the trans face cover. Return the coupling to the inner ramp by watching the puzzle face. Then put the ramp back in place and the retaining ring and bolt the face cover back into place. Don’t forget to add at least 20 ounces of Trans fluid. It will hold 24 ounces dry.
I learned something on this trip. If water gets in the trans it will act up, shift strangely. Drain the fluid and change it. Check your vent.
I ran the cable several ways to find the path that fit best, didn’t rub the frame or catch on anything. I used one Arlen Ness cable clamp to secure it and hooked the cable into the greased tephlon bushing in the Joker Machine handlebar control, then replaced the small C-clamp and I was ready for final clutch cable adjustment after the BDL primer was installed.


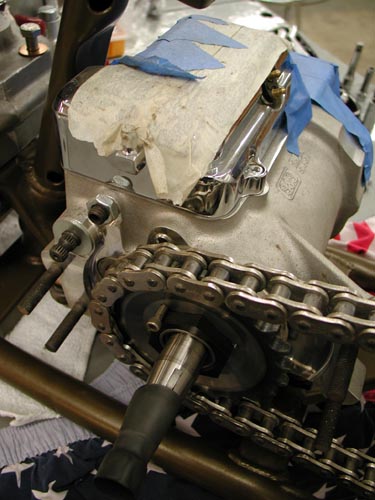
I’m going to cover the 300 BDL installation here and try to explain my shift. My plan was to run the Compu-Fire engine based electric starter system designed by Giggie before he left and took a job at Rivera. Rivera is making inner primary plates for this new system, but when I contacted them Ben Kudon’s response was hesitant. They weren’t ready. Of course I contacted our long-time sponsor BDL and initially they weren’t scheduled to make units, then I was pleased to find out they were, so I ordered one. But Sturgis crept into the picture, and suddenly I was without a starting system and coils hanging under the oil bag interfering with any new starter install.
I had a 300 BDL belt system and a starter but no place to put it. Kent from Lucky Devil shrugged his shoulders and said, “Why don’t you run a kicker?”
Sinwu ripped off her top, jiggled her tits and said, “You have one from Muller in Germany.
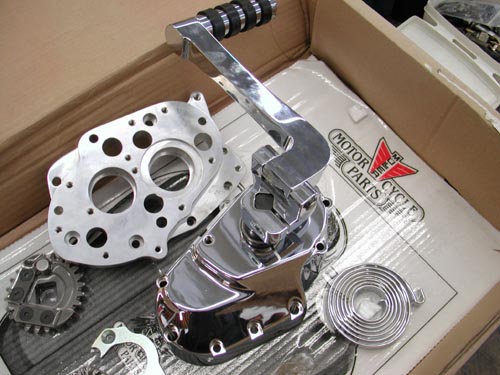
I jammed down the headquarter stairs to the shop and tore open the box. I was jazzed. This is one of the coolest kicker systems to come along. It cleared the rear exhaust pipe and the kicker arm was stylish, unique and strong. I couldn’t believe my luck.
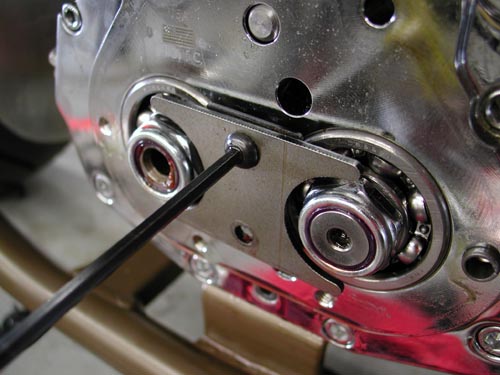
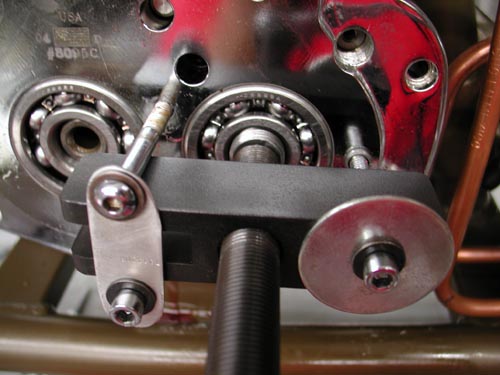
The JIMS 6-speed lined up with the BDL inner primary like a dream. All I needed was to pull the tranny face and press off the trap door, then replace the trap door and tranny cover with the Muller system. Muller even shipped a clutch ramp system that afforded smoother clutch action.
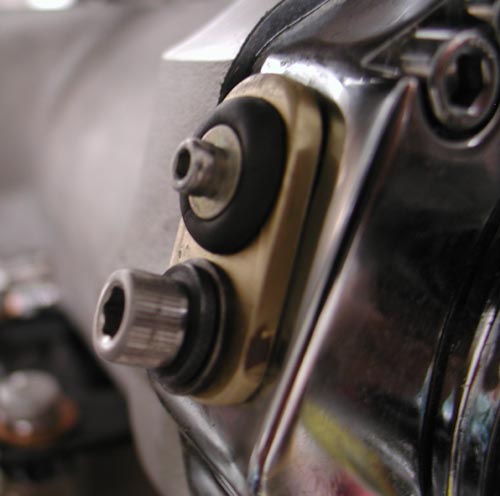
Hell, I’d even build a cool brass plug to cover the speedo-cable hole in the side of the JIMS trap door.
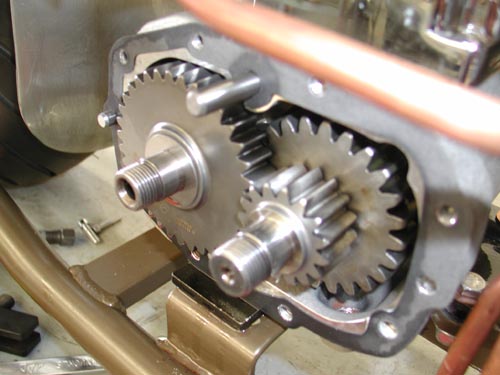
All went well until I removed the JIMS trap door to discover the 6-speed protruding gears. The door was machined to accept the gears and the 5-speed door was not. I was stuck. I contacted Muller in Germany for a 6-speed replacement door. No answer. I called JIMS and ordered the kicker they distribute for the 6-speed. It never arrived, so I called Custom Chrome. If I could order a 5-speed quick, I could use the Muller system. They responded and in three days I had a Rev Tech Replacement complete with kicker and 23-tooth chain sprocket. I yanked the 6-speed and began to install the Rev Tech 5-speed in 4-speed case with a five-year or 50,000 mile warranty.
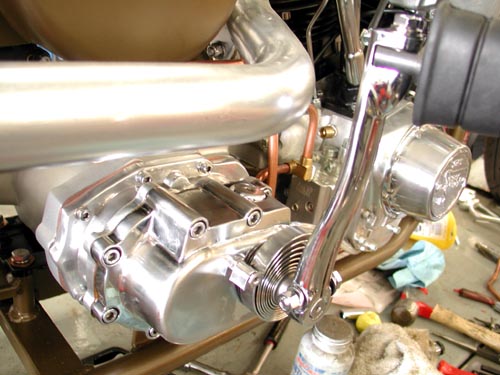
At this point I should have replaced the rear 51-tooth sprocket with a 48 or perhaps a 46, but we’ll see. I removed the kicker cover and installed the clutch cable once more, sealed the tranny and filled it with 24 ounces of fluid.
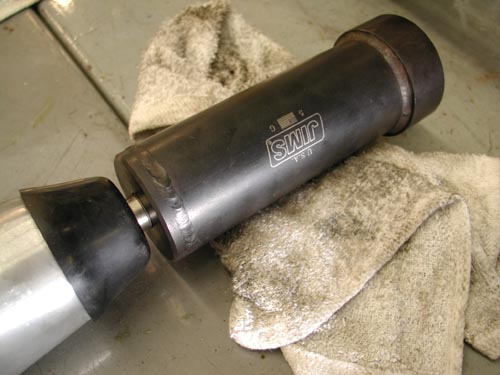
I pulled the massive, left-handed, mainshaft sprocket nut with a JIMS special tool and flopped it around backwards to afford me the clearance I needed for the RevTech chain to pass the 180 Avon tire. I locked it down with the JIMS tool and an Allen setscrew and red Loctite. She was good to go.
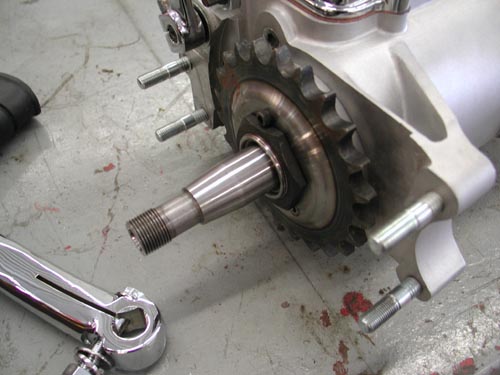
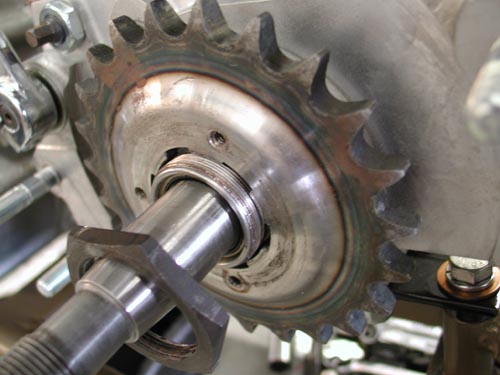

Next, I needed to set up the BDL 300 belt drive system and the Compu-Fire Charging system. I slipped in the Stator, then the small tapered washer, followed by the Compu-Fire Rotor. It’s pasted right on the rotor not to smack it with any hammers. You might knock one of the magnets loose.

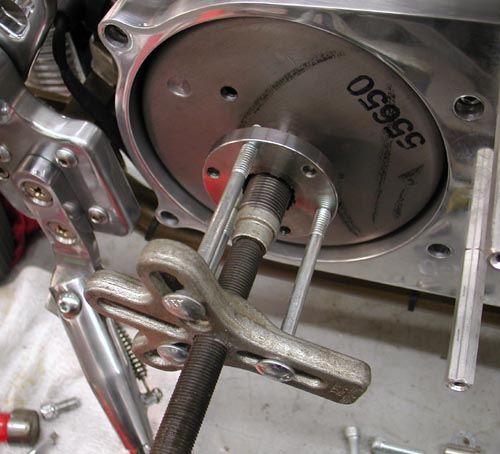
According to the rules sometimes the offset pulley mount doesn’t need the massive flat washer/spacer for proper alignment. But the first move includes installing the inner primary with the engine and tranny loose. I used never-cease on the threads of the transmission and tranny Allens to prevent damage to the threads. Take it back—first I had to remove the inner primary studs from the transmission. They were tight as hell and I used Yield and heat to set them free. Then I positioned the engine and the Trans with the primary.
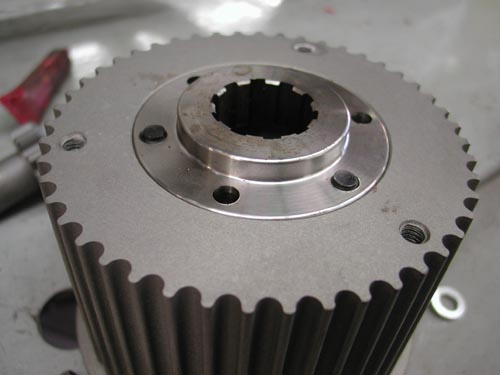
I ran into problems. Nothing wanted to line up. I called a couple of buddies for guidance. I held the engine where it was with a shim under the front motor mount. Then I bolted the primary to the engine and trans. The front of the tranny raised almost .100. I started looking for shims. Bob from BDL told me the code was to shim the tranny plate and not the tranny, so I went to work. It wasn’t a problem to scour around for the right thickness washers. Soon the transmission was aligned, the primary fit easily and there was no drag on the transmission mainshaft.
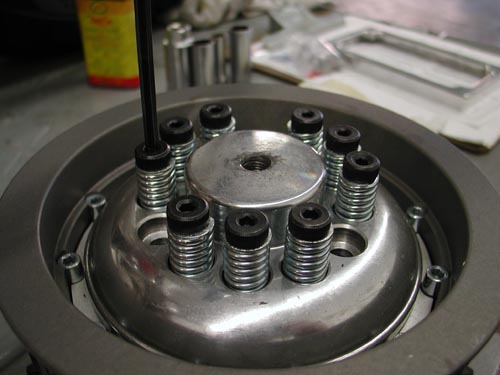
Next, I needed to check the pulley alignment. I installed the pulley using the insert then the pulley and Allens. Since I would be removing and replacing the parts, I didn’t drive the alignment pins into the insert from the rear just yet. I discovered another glitch. I needed some washers or shims behind the engine pulley for alignment. I also discovered that the mainshaft nut wasn’t bottoming out, so the rotor flopped around. That wasn’t right.

I’ve installed a dozen BDL systems without major alignment problems. It takes patience, but once it’s correct, she will last and last. This is a tapered shaft transmission and once it’s installed it doesn’t slip off without a JIMS transmission hub puller tool.
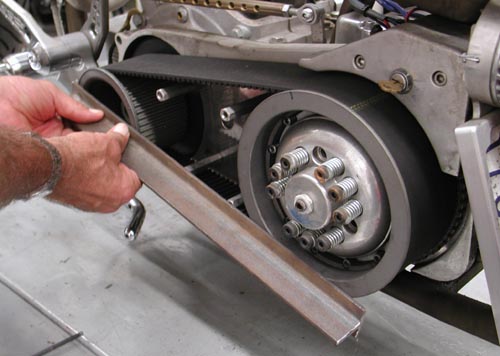
With the pulley and the clutch in place you can test alignment a couple of ways. I used a cast T-Bar across the faces of the pulleys. They need to be exact, which means shims behind the engine pulley.

I made a mad dash to Walkers Machine and bought all the goddamn shims he had. The massive washer that comes with the rotor was only .035 too large. The next item was the inset in the engine shaft nut. I had to machine it to slip over the protruding shaft. This is also an area that takes some running and retesting to make sure it doesn’t seat and settle in, out of alignment. It’s easy to spot a problem. You’ll notice rubber dust around the pulley where it’s riding against the lip.
Remember that the clutch nut is also left-handed. Then the clutch slips into place and with some tugs and working the belt gently, it goes on. If not use two chunks of wood a large bolt and a socket to gently push the pulleys apart. Once it’s run for a while it will be much easier to remove and replace.
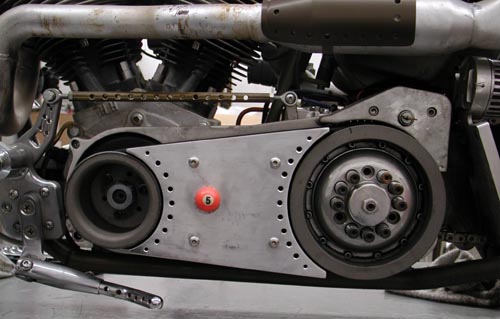

Okay, so I installed the tank, with the Spyke petcock and stripped the spigot threads. It hung for most of the ride. We’ll cover the tank more in the ride saga, so hold on. The seat was also a challenge. I slipped off, so I changed the seat, to one with a lip, then changed it back an added taller springs. That worked.
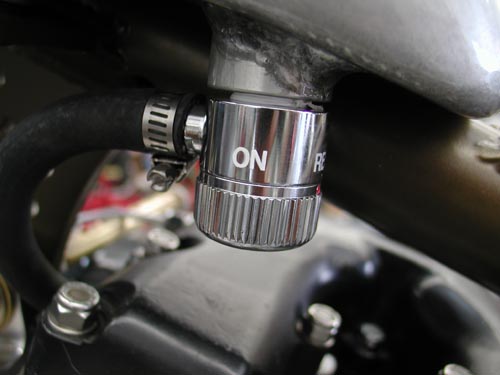
With the primary aligned I still used never-cease on the primary threads because I knew that I would remove the inner primary once more.

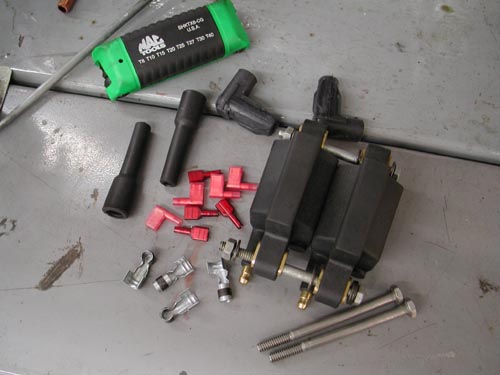
Hang on for this one. I needed to find a place for a toggle switch/ignition switch. I also had this massive aluminum starter motor boss on the inner primary that was going to waste. So I drilled out the starter shaft and installed a marine ignition switch. I glued it in place with a two stage epoxy then drowned it with liquid electrical tape, two coats. It seemed perfect except that the key sang in the wind only 1 inch above the peeling primary belt. No key rings or dice.
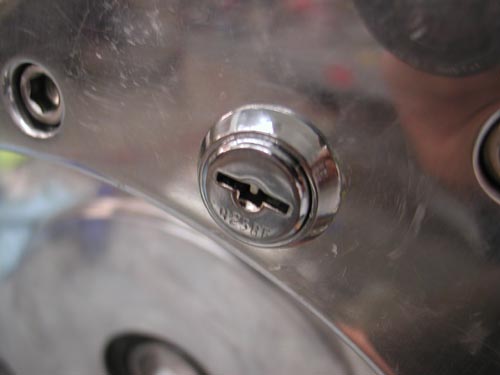
On the inside of the primary I made a brass strap that ran from one starter mounting hole to the other, holding two circuit breakers. One was a 15 amp for the lights and a 30 amp for the ignition. This became a very tight electrical area, dangerously close to the whirling CCI O-ring chain. As it turned out the circuit breakers were a hair or two from the coils. Cozy. I made a couple of wires long enough so that I could remove the primary and set it next to the bike to work on wiring issues.

The next thing I knew, under initial testing, the whipping chain chipped at the aluminum, dangerously close to the electrical. Larry Settle, of Settle MC Works loaned me a chunk of tephlon, which I carved and made a buffer, which worked perfectly to protect the chain from nearing hot wires.
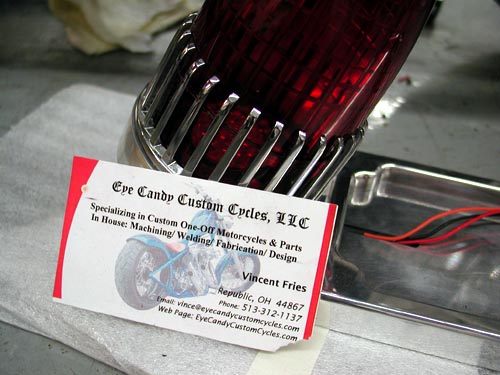
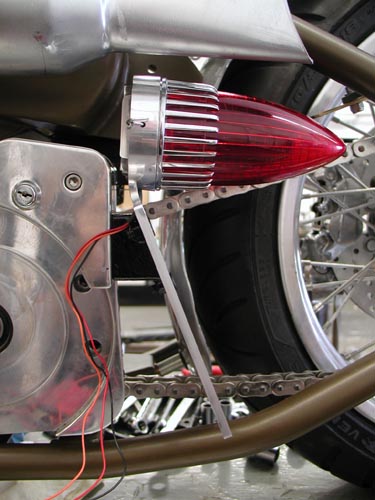
Then came the Eye Candy Custom Cycles ’59 Cadillac taillight. They also make an old Ford style light, which I prefer, but I felt the need for side visibility, especially on the right. The mounting called for the primary once more to hold the taillight/brake light. Finding the proper location was a chore. It either rode too close to the chain or the mounting called for screws through the frame or into the wiring loom. I monkeyed with it for hours and finally designed a tough mounting system that might survive. All went well, but the frame rail still blocks the light and I might move it outbound.
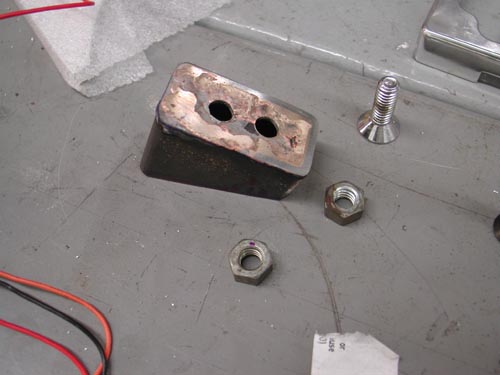
I ran the thin sparkplug wires through the frame in shrink tubing, wired the coil and the Joker machine brake switch and headlight through the hole in the frame too close to the fork stop. Even on a simple chopper an idiot can find his way into trouble.
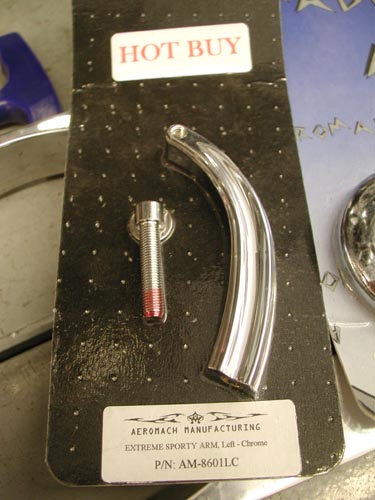
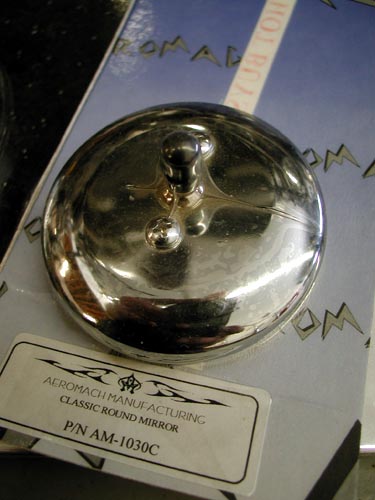
Finally I mounted the stylish Aeromach mirror on the left bar only. It came with all the hardware needed and never gave me a problem. I know I’m missing a link or two, maybe a necessary credit. Don’t hesitate to drop me a line if you need a question answered. You can reach me daily at Your Shots or drop a line to Bandit@Bikernet.com.
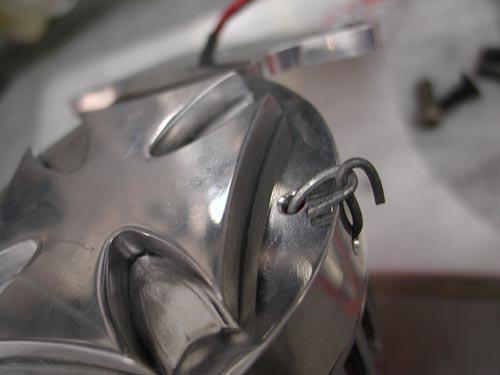
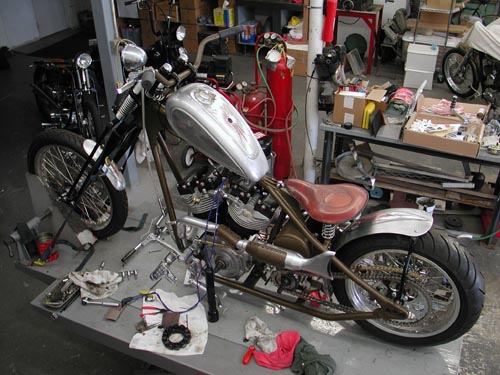
Over the next couple of days I will attempt to complete the first saga of the ride to Sturgis. I hope to launch it on Friday. In it I will dig into the problems I encountered, mistakes I made and how I fixed them. Hang On. But beyond the glitches, actually the wiring worked out fine, but I should wire in a kill switch. The bike rode well, comfortable for a rigid, started without major hassle and ran all the way to Deadwood. I can’t complain.


5-Ball Factory Racer Part 8: Baker 5-Speed Extreme Kicker Kit Install
By Robin Technologies |

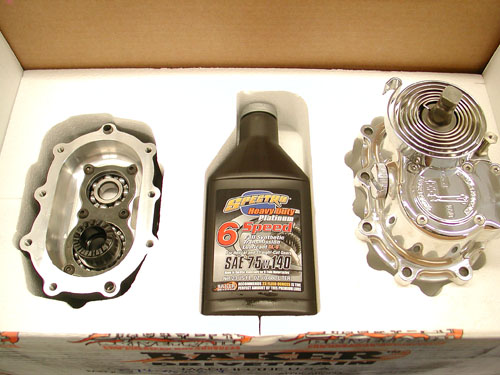
This is one of those shop quiet times installations. You want to make sure all the stars are aligned for this one. Stroll outside the shop with an icy Corona and look to the heavens for inspiration. Sturgis was looming and since this bike was all about vintage I needed a kicker system. I've installed the Muller system from Germany. I've wrestled with a custom chrome 5-Speed kicker transmission into my 1956 Shovel, a very rare motorcycle, so I'm not without some experience. But Baker took the kicker development to a new stronger level, which involved removal of the entire gear set, replacing the trap door and more. I never held an entire gear set in my nervous hands, like a man holding his newborn baby.
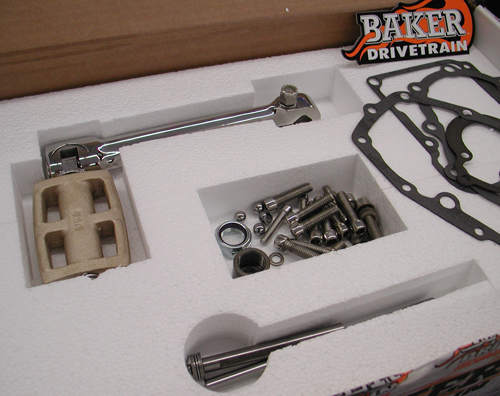
Having an inexperienced wrench write a tech tip has it's ups and downs. He could fuck up everything, but on the other hand he'll write about it, so you won't make the same bullshit mistakes. I know first hand that if you've performed the same task a dozen times, the details become second nature and usually are not documented properly. There's my Zen notion for the day, oh humble gods of Baker Drivetrains.
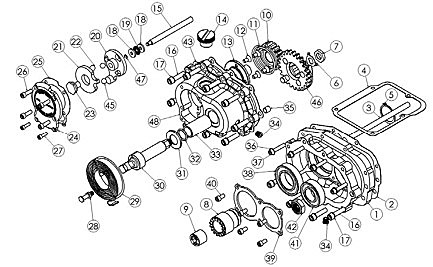
On top of Sturgis pressure, and the unknown Galaxy of emotions, my Epson Camera was acting up. It's been the best for shop techs, beyond Canon or Nikon, but that's another story. I'll scramble my thoughts between data from the Baker team of experts.
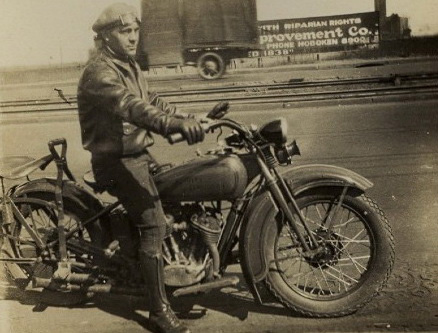
First, here's a list of the applications available for this modification:
• 1990-2006 Softails™, FLT/FLH™, and FXR™ models
• 1991-2005 Dyna™ Models
• BAKER DD5 complete and builder’s kits.
IMPOTANT NOTES TO BE CONSIDERED
• BAKER Factor 5 Kicker will not clear most stock exhaust systems due to the extended length of the transmission door and kicker. Most true duels usually fit FLT/FLH models. Rear pipes that route away from the right side of the transmission usually fit.
• The kicker arm will not clear the stock right side passenger floor board on FLT/FLH models. Installation of foot pegs or smaller footboards are required.
• Twin Cam models require installation of a cam-based ignition. See BAKER 2008-2009 Supplement for ignition alternatives or consult a BAKER sales tech.
• Fuel injected models require retrofit to carburetor.
GETTING STARTED The BAKER Factory 5 Kicker kit is designed to be easily installed by any competent mechanic or dealership technician. Having your H-D factory service manual is required for this installation as it is referred to in many sections of the instructions. While this kit is made to be as easy as possible to install there is no substitution for experience. To install the F5K kit, disassembly of the transmission down to the gearset is required. We recommend reading through these instructions, to the end, before proceeding with installation process.
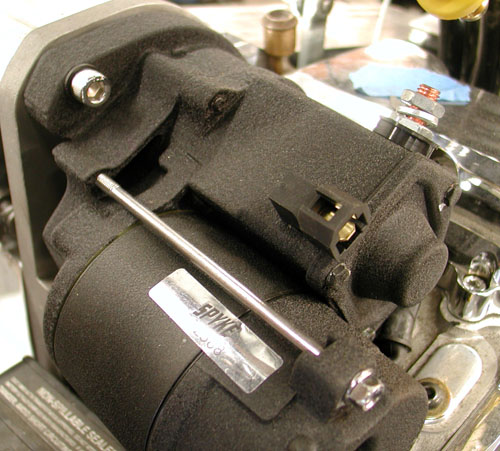
TOOLS, RESOURCES, REQUIRED PARTS
• Factory Service Manual For Your Motorcycle
• Factory Parts Manual For Your Motorcycle
• Common American sockets and open end wrenches
• ToolB-56, BAKER Inner Race Service Kit or H-D equivalent
• Hydraulic Press
• In-lbs Torque Wrench
• Brake Bleeder Pump (for hydraulic type)
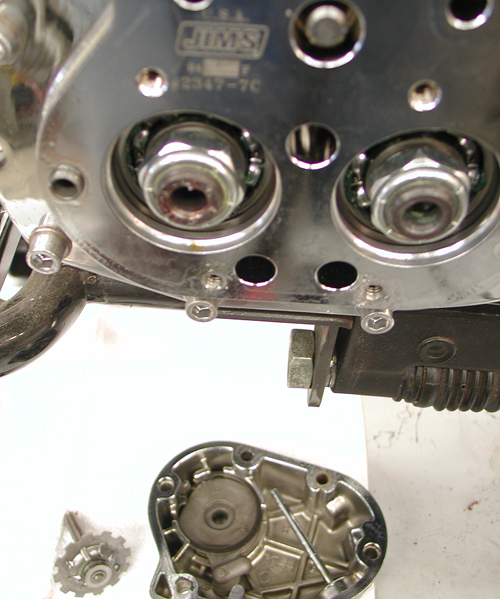
NOTES: HYDRAULIC VERSION ONLY
To complete the Installation of the hydraulic F5K, the following parts will have to be procured to complete the job:
• Hydraulic Fluid, BAKER Recommends: H-D Dot 5 Brake Fluid, PN 99902-77
• Correct length AN -3 Brake Line
• 10mm Banjo Fitting & washers for both ends of brake line
• 3/8”-24 Banjo Bolt for the side cover end of the brake line
• 11/16” Diameter Bore Hydraulic Clutch Lever Assembly or H-D
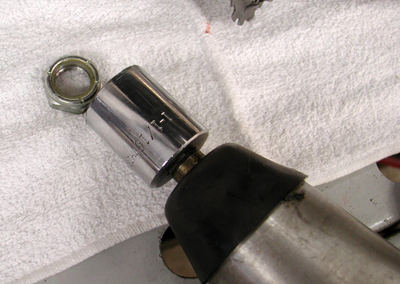
GEARSET REMOVAL
To remove your existing gearset, refer to your Factory Service Manual in section 7, Mainshaft/Countershaft removal. Follow the trap door/gearset removal procedure. Hint: with the stock side cover off, remove the nyloc jam nuts from the ends of the shafts BEFORE the trap door/gearset assembly is drawn out of the transmission case. A ½” impact gun works really keen for this task. Leave the main drive gear in the case.
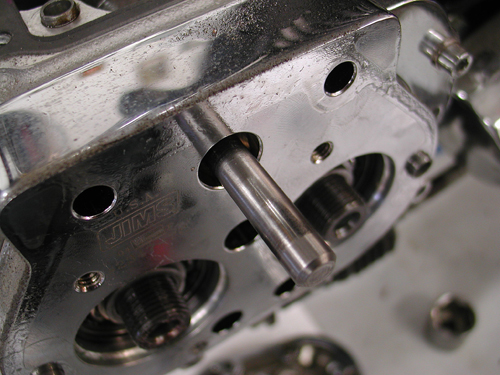
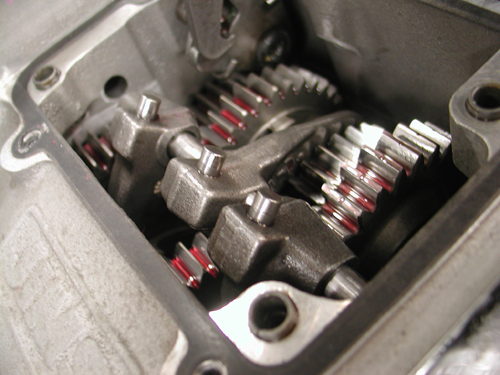


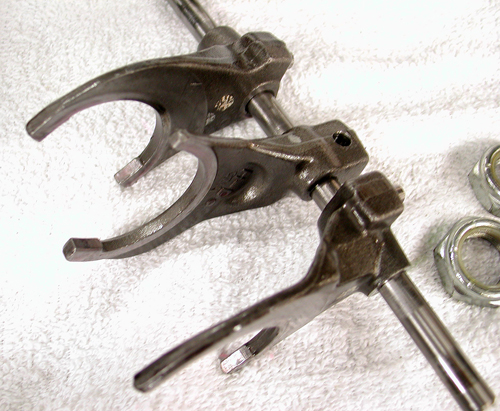
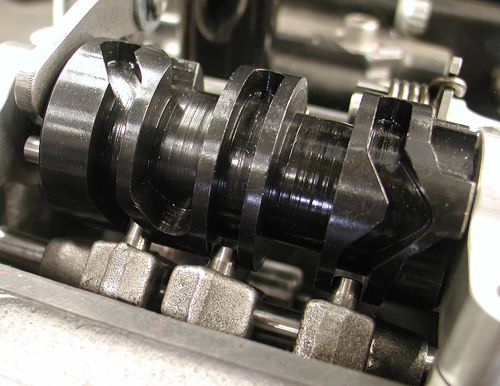
The top needed to be removed from the tranny, then the shifting drum (4 Allen bolts). With the front of the transmission removed some shifting fork shafts will slip out through the trap door in the front. Sometimes the sprocket or pulley can be removed and there's an Allen plug under the sprocket, in case the drap door doesn't have a hole in it.
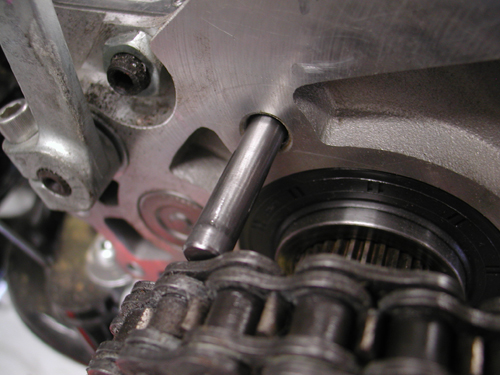
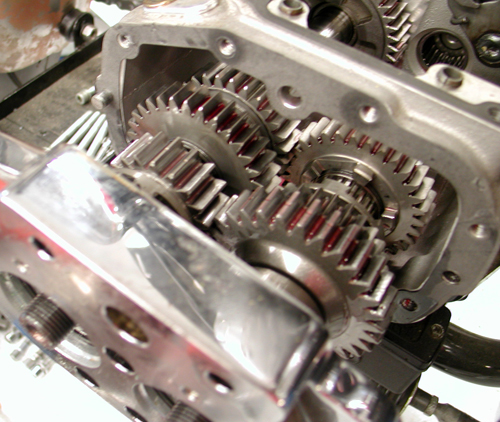

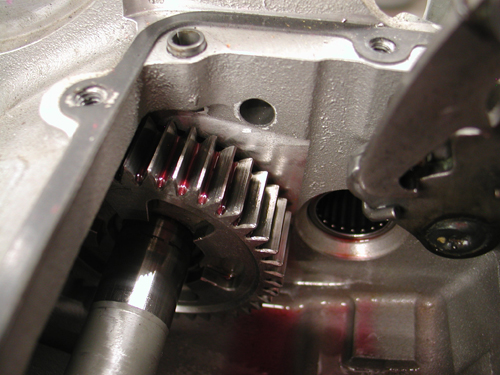
DISASSEMBLING GEARSET
Once the trap door/gearset assembly is out of the transmission case, put it on a soft towel on a clean bench. If that pesky right ‘C’ dowel is stuck in the door, remove it by tapping it through with a hammer and a punch or pulling it through with a pair of vise grips. This will allow the gasket side of the door to sit flat on the support beam of the hydraulic press.
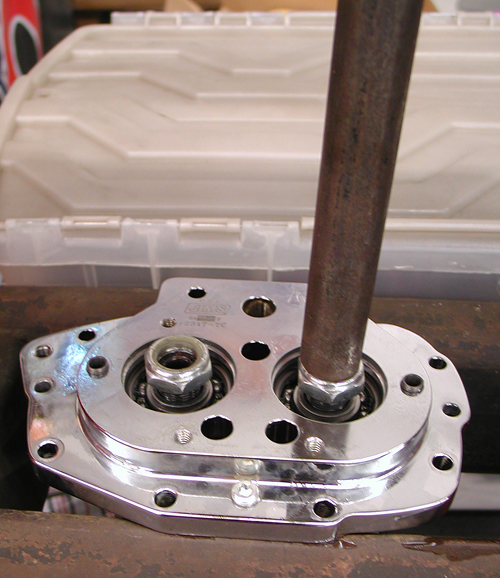
With the gearset facing down and the gasket side of the door of the support beam of the hydraulic press, press the end of the mainshaft down 1/8” and then do the same to the countershaft. Alternate pressing on the ends of both shafts (1/8” at a time) until the shafts fall out.
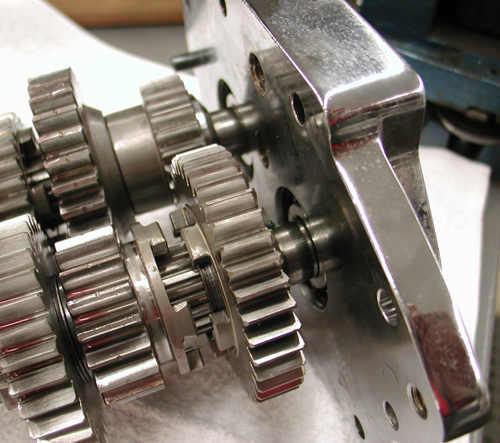
IT IS VERY HANDY TO HAVE A SECOND PERSON CATCHING THE SHAFTS AS THEY FALL OUT.
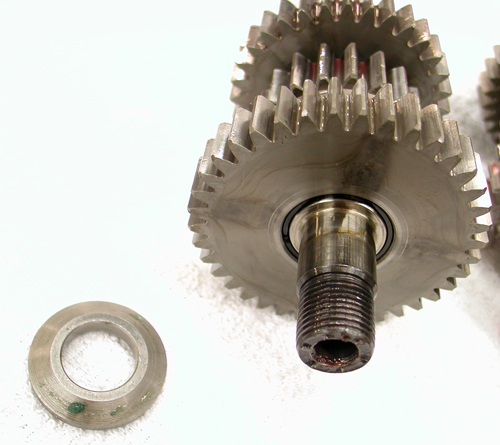
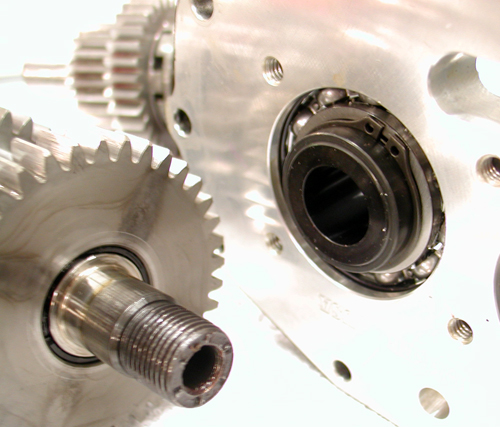
Do not allow the shafts to fall and hit the ground. Remove the conical thrust washer on the mainshaft as the ratchet hub (PN 308-5) will replace this part during the re-assembly process. Keep the stock conical thrust washer (the one without the step on the back side) on the counter shaft. Put the ‘prepared’ gear clusters on the soft towel on the bench.
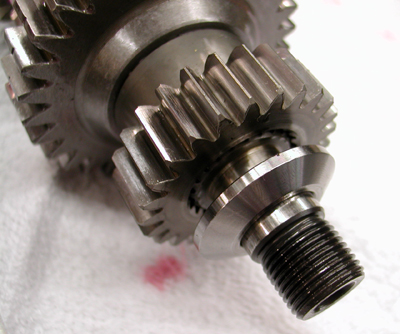


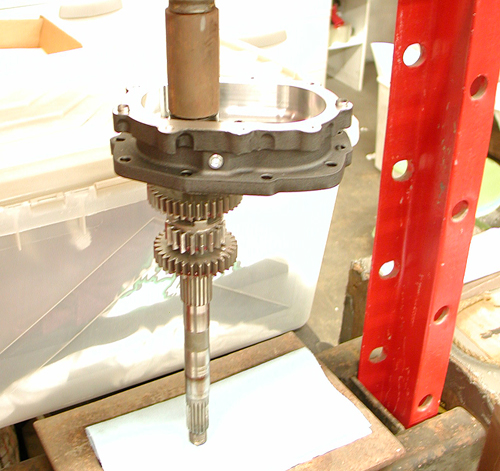
BEARING DOOR ASSEMBLY
1.) Remove the Factory 5 Kicker bearing door (PN 1-5SK(P,R,B)) assembly from the package. Clean your mainshaft and countershaft threads with lacquer thinner and dry them completely before pressing the shafts into the door.
Now take your mainshaft assembly and support it vertically in the press with the clutch end of the mainshaft at the facing down. Insure that the cage bearing is still on the cluster with first gear around it. Now take your Factory 5 Kicker bearing door (PN 1-5SK(P,R,B)) assembly and press the mainshaft into the ratchet hub (PN 308-5) while using the ratchet hub (PN 308-5) as your press point (figure 2).
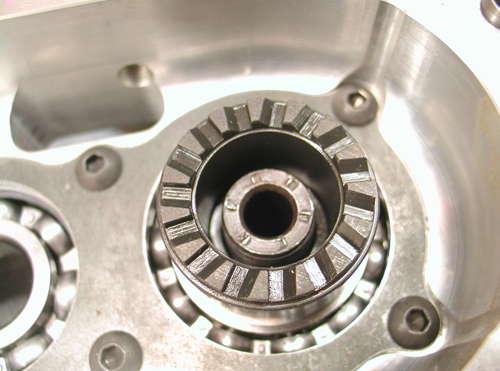
Make sure your mainshaft is perfectly vertical before pressing it in, damage to threads could incur if not vertical. Remove assembly from press. Apply thread ‘Red’ thread lock to the mainshaft retainer nut (PN RV-7050) and torque to 45-55 ft/lbs.
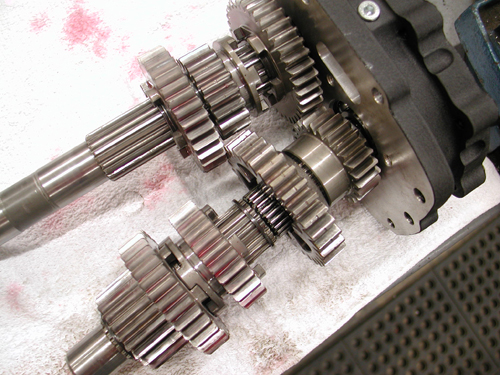
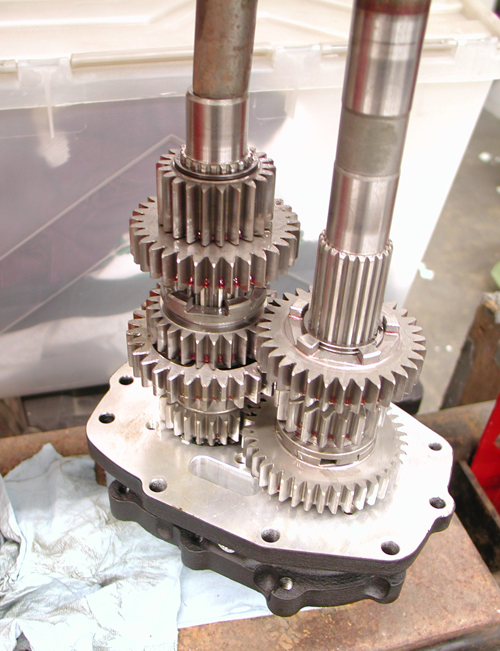
Once the mainshaft is parallel with the countershaft place the countershaft press tool on to the countershaft bearing in the assembly (see picture). Slowly press the countershaft into the bearing door making sure all the gears spin freely. Once the countershaft is seated, clean the threads with lacquer thinner and blow dry completely. Apply ‘Red’ thread lock to the countershaft retainer nut and torque to 45-55 ft/lbs. Your bearing door assembly is complete
GEARSET INSTALLATION
1.) Refer to your Factory Service Manual for proper gearset installation.
2.) You will need to use the supplied fork rod (PN 122-56K) for installation.
3.) Replace the bearing door assembly with the supplied gasket (PN 35652-79B).
4.) Once the gearset is in the transmission case. Use the four supplied 5/16-18 x 1-1/4 SHCS (PN 73496) and 5/16 washers (PN 6100) in the lower four holes of the bearing door. Using ‘Blue’ thread lock, torque the bolts to 13-16 ft/lbs. Install the four supplied.
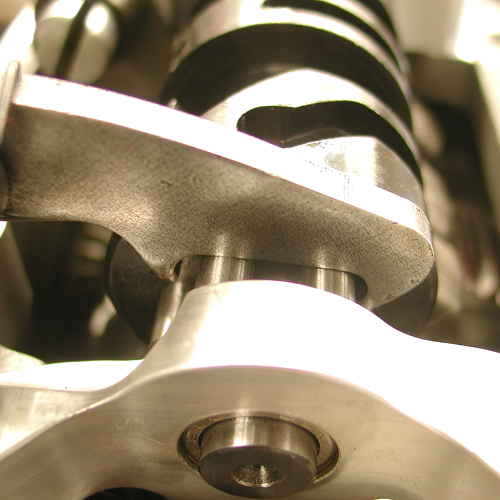
¼-20 x 1-1/4 SHCS (PN 73463) and ¼ washers (PN 609SS) in the upper four holes of the bearing door. Using ‘Blue’ thread lock, torque the bolts to 7-9 ft/lbs (84-108 in/lbs)
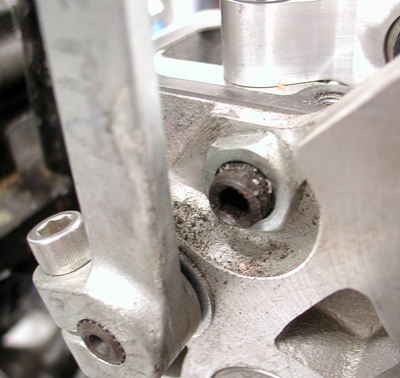
5.) Install your top cover per your Factory Service Manual using the supplied top cover gasket (PN 34904-86C)
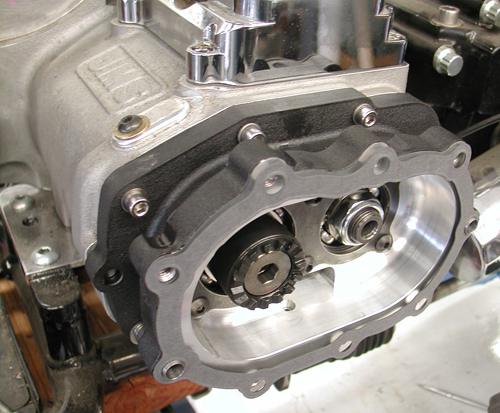
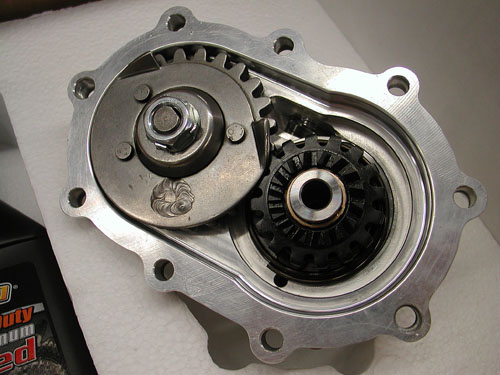
CABLE TYPE KICKER COVER INSTALLATION: PN 578-56M(P,B,R)-K Refer to your Factory Service Manual to remove your clutch cable from your side cover ball and ramp assembly.
1.) Place the side cover gasket on the two 10mm dowels (PN 16583-00) on the bearing door assembly.
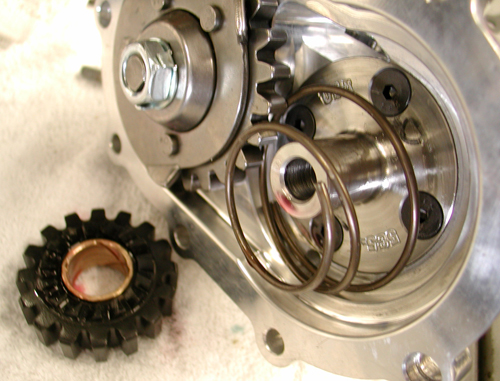
2.) While making sure the ratchet gear (PN 310-56K) is still retained by the kicker crank gear (PN 33350-56), place the side cover on to the two 10mm dowels (PN 16583-00). While holding the cover in place take the nine supplied 5/16-18 x 1 ¼ SHCS (PN 73496) with 5/16washers (PN 6100) and apply ‘blue’ thread lock to the threads. Now torque the fasteners to 13-16 ft/lbs (156-192 in/lbs).
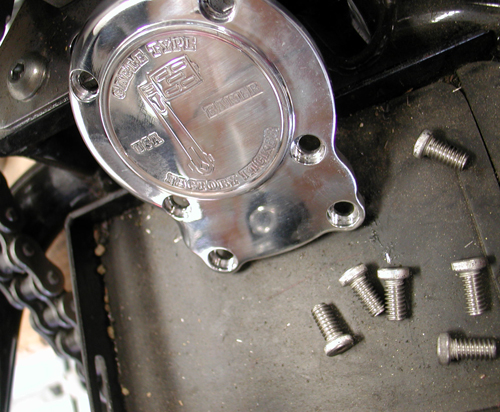
3.) Remove the six fasteners holding the ball and ramp cover on. Remove the ball and ramp cover and gasket at this time as well.
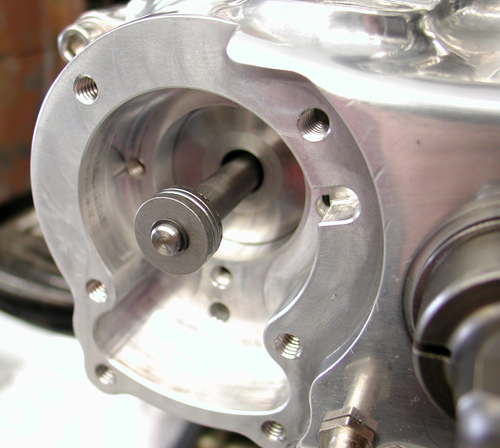
4.) Install the supplied clutch throw out rod (PN 125-5R) at this time through the pinion gear quill (PN 585-5)
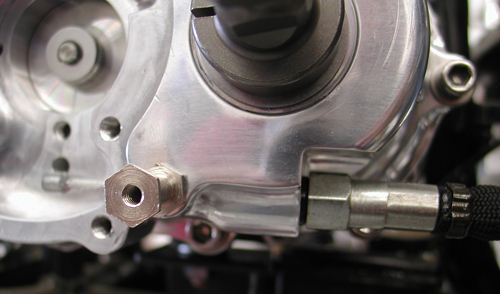
5.) Thread your clutch cable into the side cover. Loosen the clutch cable adjustment all the way so there is maximum cable exposed in the side cover.
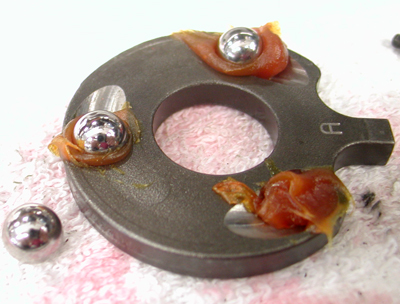
6.) With the cable fully extended in the side cover take the supplied ball and ramp assembly and slide it over the cable. Install the clutch cable ferrule
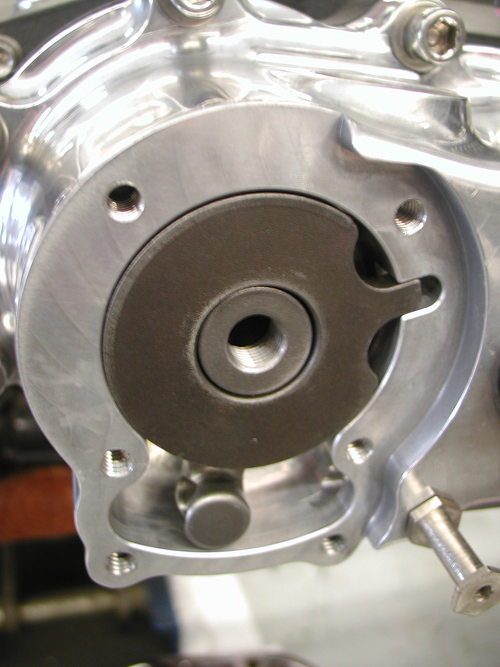
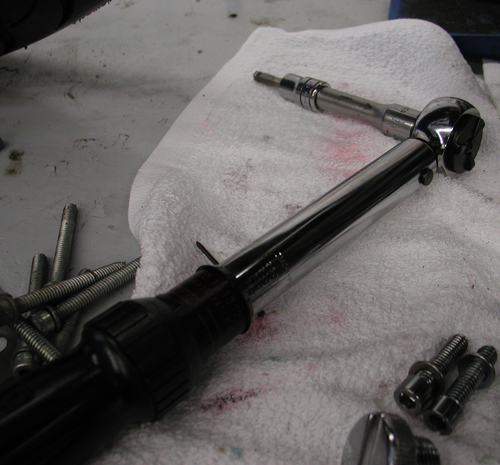
9.) Using ‘Blue’ thread lock, install the six bolts. Torque the four ¼-20 x ¾ (PN 25C50KLHS) to 7-9 ft/lbs (84-108 in/lbs). Torque the two #10-24 x 5/8 (PN 10C50KLHS) to 4-5 ft/lbs (54-60 in/lbs).
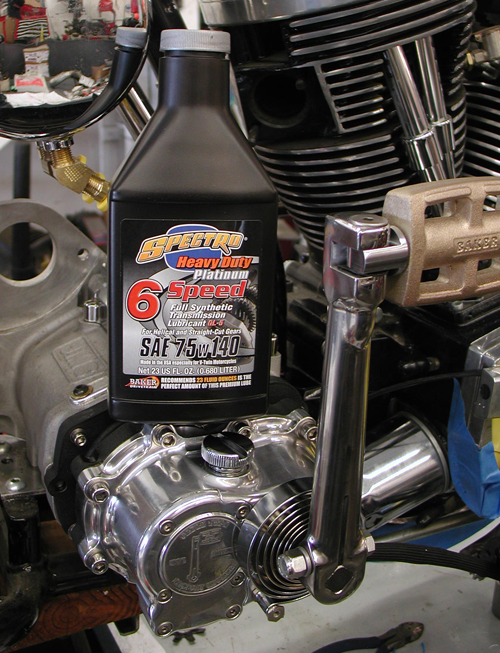
KICK ARM INSTALLATION
1) Install the kick arm on to the kicker crank gear shaft.
2) Tighten the pinch bolt on the kicker crank gear shaft so that there is no sloppy movement in the kicker arm assembly.
3) Either with your hand or leg, ‘kick’ the kick arm and run it through its motion to make sure everything is working properly.
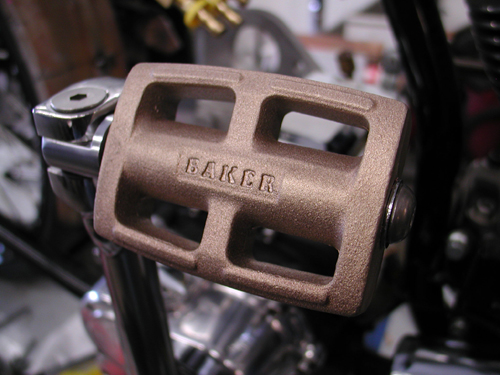
FINAL ASSEMBLY
1.) Install your primary and adjust your clutch per your Factory Service Manual at this time.
2.) With the bike vertical fill your transmission with the supplied 23oz. bottle of Spectro™ 75W140.
3.) Follow your Factory Service Manual to finish assembly on your motorcycle.
4.) Your BAKER Factory 5 Kicker installation is complete
For any installation or service questions, please contact our BAKER technical department toll free 1-877-640-2004.
Hang on for the next installment. Final assembly will begin with a BDL primary install, a Spyke alternator/regulator system, and we're getting ready to ride.
You'll see George's pinstriping, Tony's powder coating workmanship and my sloppy wiring.
–Bandit


