Sturgis Shovel Part 12
By Robin Technologies |
Hey, here’s quick bit on George The Wild Brush who handled the Pin Striping on the 2005 Sturgis Shovel project. He’s pin striped several other bikes for me in his 47 years behind the brush. Born in Hanford, California, a miserable military town, in 1944, he kicked tumbleweed while his mom worked on a base.
She moved to the safety of Southern California away from the miserable summer central Califa heat, to Long Beach then Lakewood (next door) where he went to school, but didn’t graduate.
He was warned that the fad would die so his vocation would fail. “The fad’s still rockin’,” George said. “My first car was a ’54 ford and I custom painted the driver’s side. I couldn’t afford enough paint to finish the passenger side, so I had the only cool side.”
He studied Von Dutch work, Larry Watson and George Barris. “I’ve striped refrigerators, toilet seats (new ones), and 50 and 110 Tom Gentry trans Atlantic ocean racing boats. He’s taught me a thing or two about striping. “It’s best to have the parts off the bike for the best quality art.”
It’s difficult to paint bare aluminum—“Paint won’t bond to it.” without a primer.” I worked at Gasoline alley for 15 years painting aluminum dragster bodies.
It’s also difficult to pin strip chrome—“It won’t hold up due to the lack of porosity.”
He only uses One-Shot enamel paints—“Can’t use any paint.”
With motorcycles it’s a good idea to clear over striping—“People don’t pour gasoline all over cars, but they do bikes.”
Cars don’t generally need to be cleared over striping work.
His number is (310) 488-5488 for classic pin striping and good stories.
George came to the shop just after I picked up the clear powdered aluminum sheet metal from Foremost Powder. He usually tells me what I’m going to have striped. I have a vote and initial color selection, then I best get out of the masters way.
He striped the Goodsen Air Cleaner, which was treated to my holy treatment, then brushed with Scotchbrite to remove the polished appearance.
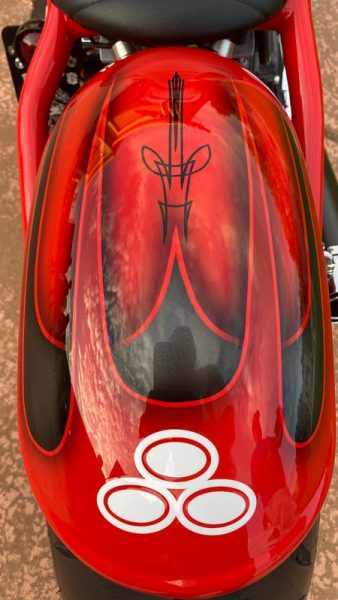
Then he striped the panel polished, highly-modified, XR750, Cyril Huze donated tank and Lucky Devil, custom made fenders. I polished the panels and brushed the rest for a two-tone effect. Not sure it worked, but George gave it a final touch.
George suggested the 5-ball addition to the center of the tank. Not the gas cap. Ultimately I filled the center-mounting hole with a small 5-Ball to commemorate our company and all the women who put up with my shit over the years. In case you don’t know the story, I’ve been married five times, that’s five misses Ball.
1928 Shovelhead Project Part II
By Robin Technologies |
In a dank dark corner of a dusty debris strewn shop behind the Strokers Saloon on Harry Hines Blvd in Dallas was a small stack of bike parts guarded by a massive starving pitbull with one eye and most of one ear chewed away. The beast was so vicious that it once chewed through a 1/2 inch tether cable, and ate four Avon tyres before it could be subdued and chained in place. No one had the balls to feed the animal and it ran off so many customers that a collective decision was made to relegated the dog to guarding our Shovelhead project. It was like a death sentence. The lovely Lena, the 14-year-old daughter of Rick and Tina Fairless, the owners, who was scheduled to be Bandit’s 6th wife had a fiery temper and told Bandit, in no uncertain terms that the bike would be completed until he left the other women behind and came to Texas to settle down. The Dallas crew surmised that it would never happen so the fuckin’ dog would starve to death waiting for Bandit to return to collect the fair Lena and complete his pact with the marriage counselor.
Unexpectedly during a freak Texas panhandle thunderstorm Bandit walked into the shop, carrying a turtle the size of a baby moon into and asked for the Lovely Lena. Upon presenting her with the turtle, her hardened resolve melted like a torch to a metal hanger and she swooned then demanded that her crew set to work on the project. We apologize for the long-winded explanation, but it’s important to understand all the delicate facets of this project to obtain a feel for the treacherous nature of this undertaking and the lives that hang in the balance.
Just then the mega Dallas Easyriders store had a mass exodus of mechanics. Two were hospitalized trying to reach the parts, one died. Several were so pissed off at the shear audacity of Lena’s order that they started a competing business down the street. In reality they were so jealous of Lena’s affections for Bandit that they could no longer work and watch her dance through the shop on air. Enter Jim the transplanted fabricator from Florida who was hired before he knew what he was getting into. If you’re not from Texas, you won’t be familiar with the labor laws. Chain gangs are not exclusive to the Texas Penal system. They are a common phenomena in the work place. Jim hasn’t seen his family since going to work for the Fairless contingent. Between you and us, we have slipped Jim a note that once the project is finished we will spring him in the crate they plan to ship the bike, but that’s another story.
Jim has now modified the tanks for fit the Paughco rigid frame, mounted the engine and trans and front end. Randy Simpson is bending the bars for the project. Jim his building a box for under the seat for the battery since the oil will run from part of the gas tanks to the engine. If you note the belt pulley, we are now planning to run a chain for authenticity and since some other aspect of the bike forced us to go with a chain. We are still looking for the ultimate taillight to go with the project, and we hope to lower the front end enough to make the tanks more level, with Custom Cycle Engineering lower rockers. The front wheel is the stock Bad Boy 21 with an Avon tire. The rear will also be an 21-inch Avon with disc brakes. Pipes are scheduled to be reproduction stock early shovel pipes from Paughco.
Watch as this project comes together. All bets are that the San Pedro Police bike with never even see the border of California, unless she sees the coast before the bike arrives. Stay tuned.
–Wrench
1928 Shovelhead Project Part III
By Robin Technologies |
The lovely Lena Fairless, who has threatened to marry Bandit (the sixth Mrs. Ball) and make him work for her folks at the Easyriders Dallas store, has been pushing to see that this 1928 Shovelhead project is completed in time for her wedding plans. Bandit doesn’t seem to move unless there’s a motorcycle and a woman involved. There’s just one problem in this case, which Lena is well aware of, she’s under age…
The other news on this project is that we now have a corporate sponsor, Ed Martin of Chrome Specialties, and a mentor, Chica, who builds bikes in Newport Beach, Calif. Chica built “Trick,” the old-time Sportster that Chrome Specialties is displaying at all the events it attends, such as Laughlin this month. Randy Simpson from Milwaukee Iron and Arlen Ness are also building spindly retro scoots with late-model drivelines. I spoke to Arlen the other day and he told me that a number of top builders in the country are building this style of beast for upcoming shows. Arlen is now building Sportster frames, sidecar frames and the tubs for these units. He’s sold 10 sets. Don Hotop is building aluminum tanks, so soon the parts for building these retro bikes will be even more available.
The contact stateside for the European parts we used is Fred Lange at (805) 937-4972. He has access to seats, fenders, front ends, tanks, headlights and more. Let’s see if we can pick up where we left off.
The frame is a stock rigid Panhead configuration from Paughco, with a stock, late-model Bad Boy front end. To drop the front slightly, Jim Stultz, Rick’s main fabricator/bike builder, used a KT components lowering kit to make the frame level because the newer springers are XA length. The retro tanks are sweat-brazed together and contain the oil in one half and the gas in the other. Unfortunately, the tanks did not fit the frame at all and had to be disassembled, cut and re-welded to fit. The fun part of such a round-the-town project is that it can be a true swap meet special once you have the basics in hand, and you can slip as far back into the retro world as you want. You can roll with chain or belt. You can use any old brakes you have around. Rick chose to use disc brakes and a chain, but he’s going with a jockey shift and internal throttle assembly from Chrome Specialties. The charging system will be state-of-the-art Compu-fire and the carburetor S&S. The engine and transmission were rebuilt from the ground up by JIMS machine and the engine cases are STD.
Both wheels are 21s for that spindly look. The handlebars were designed by Jim and bent by Milwaukee Iron. With the internal throttle cables, there will be a minimum of controls on the handlebars. Since the transmission was rebuilt with the notion that it would be electric start, an aluminum inner primary will be used with an old-time-looking tin outer primary that Rick picked up at a swap meet. Rick ordered a narrow Karata belt drive for the primary.
Jim sliced all the mounts off the frame except the front footpeg mounts, the engine and tranny mounts. Since the oil tank is part of the gas tanks, the only additional container would be for a battery to conceal a car-type marine ignition switch and a light/toggle switch.
“I try to fabricate components to be user friendly,” Jim said. He designed the battery box so it would only take two bolts out of the seat post and two out of the rear section and the whole pan will lift out through the top. The two sides covering the battery will meet in the middle in a flying wedge configuration, and Jim plans to build a top cap to conceal the battery from the area under the seat.
The steel gas tanks, once cleansed of the brass, were chopped and channeled to clear the rear head. The entire center of the tanks was removed to fit over the frame. Unfortunately that reduced the gas capacity to 1.5 gallons. The European threads in the cap bungs were tapped out of sync, so they had to be re-machined.
Lena teases Bandit with occasional shots from her mother’s digital camera. Next week we’ll discuss the mounting and installation of the Compu-fire ignition. Some members of the staff will be happy to see Bandit go to Texas, others, mostly the women, are bummed. He even called to see if he could ride it back to the coast and was told that it didn’t carry enough gas to get him out of town. Evidently the tank is Lena’s design.
–Wrench
5-Ball Factory Racer Closing in on New Cam and Ignition
By Robin Technologies |
We were fortunate to hook up with Heather New, of New-Line Engraving several years ago. Since I was about to switch out my CrazyHorse engine ignition with a Blackhawk Motorworks cone cover I needed to come up with a classic point cover for the new unit and the 5-Ball Factory Racer. It was a natural choice to send her a chunk of aluminum, or I shoulda sent a piece of brass, but oh well. Either way I knew she would bring the project to life.
Heather started engraving in a small shop in downtown Edmonton in the Early 80’s, where she took care of over 100 jewelry stores. “I was engraving everything from I.D. bracelets to wine goblets to pocket watches, and more,” said the raving redhead, “items which other engravers said could not be done, I soon learned to do!!! This was when I first met Frank.”
Frank Gurney was (and still is) the best Hand-Engraver in Canada. “He is a true artist and craftsman, and along with the Alberta Apprenticeship Program, arranged for me to be his understudy,” Heather said. “I was thrilled!!! I learned so much from Frank in those years, confidence, trouble-shooting, and above all HUMOR!!!! We spent hours working and laughing (hoy-deedle-doy!!). He taught me so many things before he eventually retired out near Victoria, B.C.”
She then moved on to the largest Jewelry stores in Canada. “I was doing all of their machine engraving, as well as custom wedding bands, and one-of-a-kind jewelry pieces,” Heather said. “They treated me like gold, and I will always be thankful for the kindness I experienced there. I relocated near Calgary, Alberta, and began working for a gigantic company with more talent than I had ever seen gathered in one place. I naturally did the engraving there, and also moved on to operating CNC machines, and hand-carving moulds used in casting.” She became a programmer, writing the programs, which would later be used by the CNC machines to cut the actual moulds.
She started New-Line Engraving in the summer of 2005. “I hand-carved an inspection cover for my good buddy ‘Chicken’ and with her over-whelming encouragement, (she cried when she saw it) I decided to branch out into custom bike carving too (after all, a derby cover is just like a signet ring, only BIGGER.”
So here’s how the short, two-week process rolled:
Cover the piece in white water-soluble paint, and transfer the artwork onto the surface
I highlight the general outline, scratching the paint leaves a more permanent mark than pencil, and you don’t rub it off as you work!
For removing large areas you can try a dermal, but they tend to vibrate too much for any fine work…I used small gravers hooked into a pin-vice to cut in between the letters,
as this cover was done mostly under a microscope.
I also use fine sandpaper, jeweler’s files, and burnishers to “round-off” curves (as seen on her legs), and give some dimension to whatever artwork you are dealing with…
Details like hair, the features in the face, and fine shading are all done with fine gravers and files.
I then add an aluminum-oxidizing agent, which blackens the entire piece. When it is re-polished, the highest surfaces will become shiny again, while the black remains in all the nooks and crannies of the background. (I only do this by hand—a buffing machine can remove hours of work in a heartbeat!!)
“If anyone out there in Cyberspace wants to give it a whirl, I am always here with support and tips,” said Heather
Sources:
NewLine Engraving: http://www.new-lineengraving.com/
Blackhawk Motorworks:
http://www.blackhawkmotorworks.com/
Compu-Fire Ignitions: http://www.compufire.com/
Custom Chrome:
S&S:
Mudflap Girl Part 1, the Concept
By Robin Technologies |
Life is nuts, or is it just me? Fortunately, we have motorcycles and women to chase. And this year became the year of the Evo, the FXR, and the mudflap girl. I’m scratching the back of my head and wondering how to kick off this build for 2011. There’s a lot on the plate this year and it’s a tad difficult to explain. First, I must fess up. I’m turning 63 this year and no more riding rigids to Sturgis, or even chasing young broads. Ah, but the adventure continues. It’s actually a blessing not to be hassled with women troubles. I’ll let my son, who just turned 37, deal with the addiction to soft curves. I’ll hide out and watch…
The solution for my missing long distance rider was an FXR, and I have one, the John Reed V-Bike that I took to Bonneville in 2006 and set a 141-mph record with a top speed over 150. Unfortunately, I have a hip problem and can’t ride mid-control bikes anymore. I even modified that puppy, but that didn’t do the trick. I love that bike. So, what the fuck was I going to do?
Okay, so I started to piece this bike together. We factory re-manufactured a ’98 Evo engine and JIMS rebuilt the transmission into a six-speed. I had a couple of Renegade Wheels and Progressive Suspension shocks. Then I had a conversation with Kenny Boyce, the man who designed the Pro-street FXR frame. He wasn’t happy with now-defunct Quantum. I also found out that some of these frames break in front of the seat area at the backbone. The project was moving forward with a Custom Chrome, super-wide, upside down front end, Aeromach risers, and we added super wide, Burly bar highbars.
I even had an aluminum mudflap girl oil tank I ordered from Nick at New York Choppers. The bike was leaning toward a pro street touring model with a set of Redneck Softail fiberglass saddlebags and a Klockwerks touring bike rear fender.
I was rolling when Kim Hottinger called and asked if I could haul my old ass out to the American Built/Spitfire manufacturing facility in Rancho Cucamonga, California. Paul Cavallo was the engineer/manufacturing guru behind Hellbound steel. As we watched the production chopper industry dry up, in the wake of a floundering economy, only the diehard survived, and I wanted to support anyone who understood the code of the west.
The brothers who love motorcycles, choppers, bobbers, and custom parts continued to jump up every morning and do what they adore, work on motorcycles. Some went from building hundreds of bikes every month to a handful, but they kept building. Paul downsized and kept rolling with his father at his side. When I saw what he was up to, I was inspired. He can build any frame, for any motorcycle configuration, so my mind went wild. We could build a Frisco’d and stretched, single-loop FXR, and I dragged an old Durfee girder out to his facility so Paul could see how the master built the originals. Imagine an FXR with a state-of-the-art girder.
Paul is a wild man when it comes to building and manufacturing anything. He re-engineered the girder and refined the looks, and added two shock mounts to incorporate a state-of-the-art front suspension. Over the next year, you’re going to witness Paul’s Spitfire abilities with features in several national magazines, and you’ll begin to see his products pop up in Custom Chrome catalogs.
The more we moved forward with this bike, the more inspired I became. This was a bike for me, maybe the bike for my old-guy riding future, now that my Road King was down the road. So I went to Paul with the deal of the century: build two of these frames and front ends. I spoke to Paul, then to my son.
There had to be a goal behind this effort. We would ride to Sturgis together. Shit started to happen fast and I ran into a TV producer who wanted to follow the build, and Leomark studios got involved.
Next, I reached out to Chris Kallas and we started to work up a concept drawing. Here’s some of the e-mail that flew back and forth.
Here’s my initial description:
Frank’s bike: classic black mag wheels from Metalsport. Klock Werks rear dresser fender on Frank’s, might bob it. Both wheels will be mild width. Mudflap girl theme on my bike and Hardball tattoo on Frank’s. Paint reversed from Frank’s bike to mine. Forward controls on my ride, Frank’s will run mid controls. Rubber pegs, grips. dog bone-style tall rubber mount risers. Shotgun pipes. One Redneck bag on the left of Frank’s bike. We also talked about a small front fender.
–Bandit
Some questions?
Black and chrome or silver Evo engine?
Your wheels? Mag or spokes, what kind?
Style/brand of headlight, tail light?
The risers are the type with rubber mount at top?
Carb/aircleaner?
Shot gun pipes, staight, no mufflers?
Style of seat?
Your fender the same not bobbed?
Brakes? Dual or single up front? What brand of rotor/caliper?
If any of these things aren’t specific yet, they could be semi generic on art.
If you can send any photos or links to of fenders, wheels, bags, brakes or controls, it would be helpful.
As for paint, just a thought.
It looks good with lots of black or aluminum, and chrome.
It also looks good with your signature orange accents or striping. Since I’m not crazy for white frames, they could both have blue frames and just flop the two-tone paint on the tanks and fenders.
— CK
Here’s the basic FXR platform showing the frame modifications.
This is with a 3″ extended swing arm.
I need to go back and recheck some measurements but it will give you a
rough idea of the stretch up front.
Is this the type of exhaust setup you were thinking of?
When you said shotgun and 2-into-1, I wasn’t sure.
— Chris K.
I think we should go with this type of exhaust, if we plan to pack passengers. I’m going to ask Dar about that swingarm, but my tendency is to extend it about 1.5 inches, not 3. The stretch looks great. Let’s fuck with those fender rails, arch them, or make them disappear and bob the fender slightly. Plus I think we will need to lower the rear at least an inch, with shorter shocks.
–Bandit
Hey, here’s my first crack at putting it all together. Overall the stance looks good. Since it’s a rough draft without much decoration, I just threw a couple
of mud flap girls on it. I thought I’d try a traditional Sportster/FX headlight with it’s rubber- mounted bulb to stay with the theme of using rubber pegs, grips, and
rubber mounted-risers…. not to mention a rubber-mounted engine, plus I like them.
The frame tube behind the shocks creates a challenge for curved fender struts. I’ve included a couple of photos of some frames so you can check out that area, plus for general interest I tried mounting the tank higher (Frisco style) but thought this looked better.
You might use a semi-later model Sporty tank (when they first started making them larger but still had a carb).
I don’t know at what angle or how Spitfire plans to deal with the secondary neck brace under the tank, so just drew it how I thought it might go.
When you said a Fantasy in Iron tear drop air cleaner I took that to mean a plain Goodson (no rib), for engraving. (We now have a Roger Goldammer air cleaner for Frank’s bike)
Since you need to run a front fender, I made it small. I like when they show most of the top of the tire.
Questions:
Who’s handlebar and foot controls do you plan on using?
How about brake calipers?
–CK
Hey, Chris,
I feel like I want more attitude. How about the tank mounted in line with the bottom of the top bar and stretched a tad at the back to more of a point? Take out the stress bar and add a gusset there with a mudflap girl cut out.
Check the news. I ran a shot of the air cleaner, but you nailed it. Did you check out the heavy green flake and silver bike? I like that theme. My bike will have a plain engine. I thought that style worked well with the plain silver, driveline. And I liked the green springer to match the frame.
We don’t need to go with green. It could be almost anything and silver, then reversed for Franks, with a silver frame, and colored sheet metal.
–Bandit
If the Redneck bags wouldn’t fit, we looked at what Bob T. runs on his fantastic RT.
Part number for bags:
’87-90 FXRS conv bags
H-D 90702-89 left
90703-89
As you can see we are flying at this effort. Don’t miss the frame build in the next segment. As it turns out Frank and I will be running the same drivelines: JIMS six-speed transmissions and Harley-Davidson Evo engines.
Sources:
1928 Shovelhead Project Part 1
By Robin Technologies |
In an effort to stay tuned with the rapidly growing and ever changing industry the staff of Bikernet began a project Shovelhead several years ago in conjunction with Randy Simpson of Milwaukee Iron and Arlen Ness. It’s been a strange road, but we’re now rolling closer to completion with the assistance of Rick Fairless of Dallas Easyriders and his ace fabricator Jim.
The project began with the purchase of a slightly destroyed Mexican Police bike from Arlen a couple of years ago. He had scored some 300 1984 Mexican cop bikes that had been ridden through several revolutions and costly rebellions. The bikes were shot at, dragged, bombed and ridden harder than any V-twins on the planet. When we first purchased the Shovel complete with police sirens and blinkers, we assumed foolishly that we would restore it to it’s original fighting condition. Arlen even hand picked our unit specifically with our goal in mind.
Well it’s one thing to dream of a restoration, but when the cast iron triple trees are broken, the frame is bent, all the sheet metal destroyed we took a step back and said, Help! We pulled the Engine and sent it to JIMS Machine for a rebuild along with the Transmission. With the cases replaced along with the barrels and heads and all the internals replaced, the engine was ready to rock once more. A similar concoction was mixed for the transmission and a couple of us dressed all in black and prepared to bury the chassis in a shallow grave in the desert outside of 29 Palms, California when the Editor of “Biker” pointed out that we had a valid pink slip. Dean, salivating, over the dying chassis took the entire unit and paid us handsomely for the paperwork. We suspect that he made a rocking chair out of the frame and wheels. During one of our weekly Bikernet meetings we discussed what to do with the Shovelhead drive train, and in the process we started discussing various options and some of the customs we respected the most. Several suggestions were thrust onto the rusting boardroom table. First Randy Simpson had volunteered to help us build an old time looking bike from the remnants of the ’84. We voted unanimously to pursue this avenue, since we had always been impressed with the workmanship and design Randy injected into his own 1928 Shovelhead projects, and he had a desire to create a simple chassis kit to build one of these puppies to market to the public. We agreed to help him promote the concept. We also all agreed that a gesture to the community of San Pedro was a necessity since several members of the staff had been arrested and the headquarters were constantly under surveillance, so we decided that Bikernet needed its own private San Pedro Police bike. How else could we crash the local parades. Randy is a persnickety builder who takes great pains to build quality parts for the market. Two years passed and he still didn’t have the frame built. He was obviously so successful with his growing line of fenders that his chassis concept was slipping onto the back burner. Arlen Ness was also taking giant strides to build a similar machine and if you picked up a recent Easyriders you would have seen the fruits of his labor in his 50/50 Shovelhead. In addition Chrome Specialties with the assistance of Chico in Southern California had recently completed a similar project around a Sportster (It’s called Trick and is featured on Bikernet right now). The competition was stiffening. Randy dropped out, and we moved ahead, and with some research we discovered that a number of reproduction parts are being built in Europe for early Harleys. Early like in 1915.
Devoted to successfully completing this project we picked up a rigid frame from Paughco. This is a standard scale Paughco Rigid for Shovelheads. From there our old part contact was Fred Lange in Santa Maria California. Fred informed us that a European group is remanufacturing 1915 springer front ends, flat track tanks, headlights, fenders and Fred was making appropriate sprung seats for these models. We were in business. We ordered the flat track tanks, the fender for a side car so it could be used for the front and the rear, a hand leathered seat and snuck out of the hills over looking Santa Barbara.
We had a Bad Boy front end, Wheels, etc. We’re in the market for some Custom Cycle Engineering lowering rockers. At that point we needed miscellaneous parts, pipes, etc., and we could get this puppy on the road. It was time to call in a favor. Rick Fairless had purchased the exclusive Bandit I Pat Kennedy Built bike from Bandit and part of the deal was parts and labor on a bike project in the future. It was time to call in that note. Then in a stroke of bad luck and good, Marty Ruthman decided to close his shop abruptly due to health problems and he had a massive sale.
–Wrench
1928 Shovelhead Project Part IV
By Robin Technologies |
One of the best aspects of building bikes nowadays is the integrity of the components. If you get the right mixture of components together and take care with the wiring and assembly, you’ll have a bike as reliable as factory stock. That’s one of the reasons Bandit has moved to using Compu-Fire electrical components on most of his bikes. First, because even he can install them, and most of all, because Compu-Fire has been building electrical components for years. The stuff doesn’t break.
Take, for instance, this charging system. The stator slips firmly in place over the engine sprocket shaft race area and Compu-Fire suggests that you use the stock fasteners with a drop of red Loctite to ensure it won’t ever come loose. Compu-Fire alternator plugs are the protruding variety from the late-model design. Carefully oil the plug and slip it into place, then replace the plastic bridge and fasten it with blue Loctite. If you have new cases, make sure there are no sharp edges on the plug opening. File if necessary. Then with the shaft seal .090 shim in place, use a wire feeler gauge to determine that you have at least .060 of clearance between the rotor and the case.
With each Compu-Fire charging kit for Shovelheads or Evolutions comes a thrust washer that goes on the outside of the rotor on chain primary systems. It may not be necessary on belt drive primaries. Mr. Gillihand from Compu-Fire recommends that you have a direct ground to the engine cases. Compu-Fire charging systems are the series type, unlike the shunt variety. The difference is that a shunt type drives the charge to ground if the battery is satisfied, causing the alternator to heat up and constantly work. The series type shuts the stator off when the battery is satisfied, which allows the unit to cool. The hot wire goes directly to the battery through a circuit breaker, or to your ignition switch on the hot side. In this case, the regulator was positioned with the coil between the tanks so the plug wire had to be extended.
That covers the basics of installation. Now here are the specs: Compu-Fire manufactures two versions of its charging kit, a 32 and 40 amp. From 1970-’75, stock charging systems were rated to 15 amps; from 1976-’80, they were 17.8 amps; between 1981 and 1988, they jumped to 22 amps; and finally, in 1989, skyrocketed to 32 amps. Now fuel injected models run 38-amp systems. So the two systems cover the lot.
We’ll get into wiring after paint and chrome. The ignition system is Power Arc. The timing module is in the nose cone and the coil is also positioned under the seat with a chunk of angle iron. This system is about as clean as you can find.
Next week we’ll hit the final sheet metal as we close in on paint and chrome, and the lovely Princess Lena, daughter of the rich and powerful Rick Fairless, king of the Strokers Ice House plantation, makes her move on the hapless Bandit. –Wrench
Mudflap Girl Part 2, the Bandit Engine and Spitfire update
By Robin Technologies |
Okay, you have the story behind this build, and Chris Kallas is refining the concept drawing. My engine arrived from the factory, and Eric Bennett immediately noticed the return address, in Viola, Wisconsin.
As it turns out, the factory hired the S&S crew to assemble their Evo line of engines. What a natural. I liked that notion all the way around the block. First, it means more American hands in my new engine. Plus, what could be better than to have the best performance engine company on the planet working with the factory on the last and most refined V-twin configuration?
For this crew, and lots of riders all over the world, the FXR Evo is the best of the best. So, for Bikernet, this became the year of the FXR and the Evo engine. I asked the factory about their Evo engine program and received the following information.
A Modicum of Harley Engine History
The first 74 cubic-inch V-Twin engine on the JD and FD models was introduced in 1921 and the 45 cubic-inch side-valve V-twin engine (later to be known as the Flathead) on the D model debuted in 1929. The Flathead engine proved so reliable that variations of it were available on Harley-Davidson motorcycles as late as 1973 (servi-car trikes).
In 1936, Harley-Davidson introduced the EL model with an overhead valve, 61-cubic-inch engine. With increased horsepower and bold styling changes, the motorcycle earned the Knucklehead nickname, due to the shape of its rocker boxes.
New features were added to the 61 and 74 overhead valve engines in 1948, including aluminum heads and hydraulic valve lifters. New one-piece, chrome-plated rocker box covers shaped like cake pans earned this engine the nickname Panhead. The engine introduced on the Electra Glide models in 1966 to replace the Panhead became known as the Shovelhead, again due to the shape of its rocker covers.
1340CC Evolution Softail Engine – Silver and Polished SPECS
Type: 4-cycle, 45 degree V-twin
Bore X Stroke: 3.498 X 4.250
Displacement: 80 cubic inches or 1340 cc
Compression: 8.5:1
Torque ratings at 3,500 rpms: Touring with fuel injection, 83 ft./lb.
Touring w/carb 77 ft./lb. @ 4000 rpm
Dyna/Softail 79/76 ft./lb.
Miles per gallon: 50 hwy/ 43 city with a touring model using a carb
55 hwy/ 43 city Dyna or Softail
Variety and sales info:
1340CC Evolution Softail Engine – Silver and Polished
Since the first single-cylinder built in 1903, engines have been the heart and soul of Harley-Davidson history. Each motor has made its unique contribution, and the V2 Evolution engine is no exception. With the Smart Start Engine Program, buying a new Evolution engine has never been easier. When replacing your Evolution motor, Smart Start offers brand-new, factory-tested engines at an unbeatable price. Choose the standard silver and polished Evolution, sinister black, the classic black and chrome or the silver and chrome finish. Either way, you won’t just be making a new start; you’ll be making a smart start.
16161-99
IN-STORE PURCHASE ONLY, Contact dealer for pricing and availability.
Fits all ’99 Softail models. Does not include carburetor, manifold or timer cover.
MSRP US $3,295.00
1340CC Evolution Softail Engine – Black and Chrome
16160-99
IN-STORE PURCHASE ONLY, Contact dealer for pricing and availability.
Fits all ’99 Softail models. Does not include carburetor, manifold or timer cover.
MSRP US $3,995.00
1340CC Evolution Softail Engine – Silver and Chrome
16177-99
IN-STORE PURCHASE ONLY, Contact dealer for pricing and availability.
Fits all ’99 Softail models. Does not include carburetor, manifold or timer cover.
MSRP US $3,495.00
When my engine arrived, I immediately hauled it in the Bikernet Hearse to Bennett’s Performance for a slight performance upgrade. I needed to let that puppy breath without messing with the reliability aspect. Sharing the same building on the edge of Signal Hill, California is the headquarters for Branch O’Keefe. John O’Keefe worked for Jerry Branch for decades and ultimately bought the business when Jerry Branch decided to retire.
We’re looking at several options for stock engines and for rebuilds. We have three touring models coming together right now, and they are all 80-inchers. One for my son, my factory motor, and Dr. Hamsters 200,000-mile Evo rebuild by Bennett’s.
I’m running the brand-new factory plain Evo engine with the Andrews EV-27 cam and Andrews chrome-moly adjustable pushrods for less flex, a new cam bearing and the Branch flowed stock heads, for 8.9:1 compression, 78 cc Branch-flowed chambers, and 75-80 horses at 2,600 rpms.
The next higher upgrade step from Branch is the EV-51 cam and additional headwork and shaved heads for a 10:1 compression and 85 horses at the same rpms. And finally, a customer can run with an EV-59 Andrews cam and 10.5:1 compression and 90-95 horses. Not bad for never taking the barrels off.
“I like rpms,” John O’Keefe said, “and the new ignitions allow these engines to burn more fuel and bring out the horses.”
The key to all this performance is the headwork set to match the cam, and John O’Keefe has studied this science for most of his life. The key is building a mid-range hot rod without sacrificing reliability.
The first move was to strip the engine and deliver my fresh factory heads to the Branch team. Eric Bennett set my beautiful, plain H-D Evo engine on his clean room bench and removed the top motormount, the top rocker box that came off with the middle ring. We noticed much improved, one-piece factory Teflon gaskets. We won’t mess with them. Then Eric removed the rockers, the pushrods, pushrod tubes and rocker boxes. We also retrieved the new base gaskets to reuse.
Then he removed the head bolts, the front head, and the rear head. I had already purchased the Andrews EV-27 cam from Branch O’Keefe, and Eric and I started to prepare for installation. He removed the point cover, ignition, and cam sensor.
He had a terrific Trock tool for removing the cone cover. It’s always a bastard to try to carve around the narrow gasket surface with a screwdriver or a knife, hoping to find opening and risk damage to the cases or create a leak by scratching the gasket surface.
“We always replace the new factory cam bearing,” Eric said, “with a full compliment Torrington bearing. The factory ran the good ones from ’55 to ’92, then they shifted to a cheapo brand. It’s also not a bad idea to replace the factory plastic breather gear with a solid JIMS unit.”
I scrambled to take notes and photographs while Eric peeled into my engine. He popped a factory set of magnetic tools into the lifter stools to hold the lifters up during cam removal. I wish I had a set of those puppies.
“It’s interesting,” Eric said. “Virtually every stock cam is .060 longer than any aftermarket cam.”
Eric pre-measures the cams and adjusts the thrust washers before replacing the cam, which you will see in the next report, when we study the Branch recipe for performance, the headwork, and modifications. He replaces the valve seats for larger valves, then ports and polished the chambers. You won’t believe the long-lasting components Branch uses.
Then we will watch Eric replace the stock cam with the Andrews unit and adjustable pushrods, and put the whole Evo puppy back together. “Don’t forget to order a top end gasket set,” Eric reminded me as the rain cut loose outside and I wondered if this winter season would ever end. I need a ride.
Then Eric grabbed a JIMS tool and a couple of wrenches and in 30 seconds pulled the cheap cam bearing from the new cases.
“I’ve seen these go south in 10,000 miles,” Eric said. “I’ll never understand why they replaced a perfectly good quality bearing with this junk.”
Just as quickly Eric took an aluminum guide and a mallet and tapped the new bearing in place, another 10 seconds passed, and we were finished.
A couple of days passed and I thought, just maybe my frames and front ends would be completed at Spitfire. On a hunch, I peeled 57 miles away from the coast in the hearse while listening to KJazz on the radio.
It was quiet as I wandered into the vast machine shop, welding shop, bike assembly area and ran into Joe Cavallo, Paul’s dad, who was hunting around the shop for Softail brake anchor brackets. He greeted me and said something about shop organization. The Spitfire and American Made business model has faced serious transformations over the last couple of years.
As I mentioned before, Paul was the partner and manufacturing arm of Hellbound Steel motorcycles. American Made manufactured fast moving products for a bunch of now defunct companies such as WCC. At one time, they were building hundreds of choppers each month, and thousands of products in a much larger facility. During the last year, they adjusted their business model and tightened their facility. They rewired their building, replumbed it with compressed air lines, and kept building products.
It’s tough to stop everything and regroup, scour through boxes of tools, base material, parts, and junk. With a skeleton crew they are still building any frame a customer needs, including big twins, rigid Sporty frames, British custom frames, and even frames for Yamaha 650s and Honda fours. They also build an entire line of forward controls, gas tanks, handlebars, girders, and glide front ends (bowling pin), pegs, oil tanks (a variety of styles), trees and taillights. Paul is the mad scientist of the group. As a kid, he manufactured exotic gun cases.
He’s the kind of guy who will catch a notion in a cup of Starbucks coffee, in the morning and by the evening, he has a new product. It’s not a one-off either. It’s fully designed and configured for multi-manufacturing.
Some of his crew have been working with Paul and his dad for decades, including Larry, who is their master motorcycle assembly guru. He knows it all. “Pull the alternator rotor off that engine before you run it,” Larry told me. “Check the wires for twists or tears.”
I made a note. Then we made our way into the frame jig area to see the FXR frame progress. The FXR fever caught on and there were at least five FXR frames in the making. The first was based on the pro-street configuration with additional gussets, the squished wishbone, for the single-loop notion and 36 degrees of rake for a 2-inch longer girder front end.
They discovered some issues with my request for a V-style frame in keeping with the stock FXR configuration. I also hoped for less rake and a shorter Frisco style girder front end style. Paul was working on my unit with a 30 or 33 degree rake, but he also started building a couple of drop seat FXR frames, including one for himself.
We are also going to try a slightly longer swingarm suggested to us by Dar, the boss of Brass Balls for his FXR configuration. He wanted to pull the rear tire out of the frame some, and I was willing to try it. They are hot after these frames, since Paul plans to ride one on the Diablo run that kicks off on May 5th in Temecula, California and rolls toward the border. Don’t know if we will make it.
The plan for now is to pick up the frames, swingarms, axles, and Spitfire girders, on Friday April 8th. Between now and then, hopefully we will wrap up the engine and bring that puppy home to the headquarters. We are trying to match up these Mudflap Girl FXRs wherever possible, but not always. We are going to run long and short dogbone risers from Custom Cycle Engineering, but we’ve ordered a new set of Raw 2-into-1 performance pipes from Bub for Frank’s FXR, and I’m running a D&D 2-into-1 system. I’m running a Frisco’d and stretched tank and he’s running something completely different. He’s running a Klockwerks rear fender and I’m running something bobbed. I’m getting seriously ahead of myself. See you in a couple of weeks with the next report.
–Bandit
Sources:
Bennett’s Performance
Branch O’Keefe
JIMS
Spitfire
Custom Cycle Engineering
D&D
Harley-Davidson
Rivera Primo Inc.
Belt Drive Unlimited
Metal Sport Wheels
5-Ball Factory Racer, Part 9 Final Assembly
By Robin Technologies |
Every custom motorcycle build is an adventure. It takes me from one crazed time in my wild life to another. Fortunately, I'm not spilling my guts about another woman I lost during a knuckle-busting build. But this build did represent turning points. I'm about to step off into my 62nd year and sign up for Social Security. It also represented our stinky economy, and for the first time I pulled the plug on riding this bike to Sturgis.
Imagine for a second, the middle of July. Days were long and hot, and the Bikernet shop boiled with activity. The Sturgis deadline was fast approaching. I needed to plan stops, hotels, food funds and a place to stay in the Badlands. Then suddenly we were forced to shift gears. Actually, we took the planning process out of gear. One day, I scrambled for the finish line; the next I coasted. I couldn't find the stress switch for a week and relieve the pressure.
Most of my parts were baking in the Tony Pisano, Worco powder-coating ovens. It took me a week to realize the Sturgis Rally would survive without me, and I could relax. I was no longer under the gun to finish this build and risk my life riding an untested motorcycle halfway across the nation. Then it dawned on my feeble brain. I had a terrific opportunity to finish this bike and test it for a year before riding into the Mojave Desert and across several Indian reservations. Plus, I could kick back and enjoy the summer, pressure- free. I bought an ice-cold six-pack of Coronas, a couple of fresh limes and grabbed a sun tan. Not bad.
Tony is a pro powder-coater of the finest order and knows what it takes to tape off motor mounting plates and plug threaded holes. He saved long days under a grinding wheel. The powder work came out supreme. This year I tried something new. I powdered even the sheet metal, then asked a pro to paint panels on the tank and a flat black stripe down the Chica rear fender. He handled that aspect in a flash. Then I turned the job over to George the Wild Brush for the 5-Ball Racing logo on the tanks and pin-striping.
George drives around Los Angeles in an old Toyota truck with a camper shell, the home of paint headquarters. He folds down the tailgate, uncovers his vast, dripping assortment of paint and goes to work. He's old school to the bone. He pinstriped the giants' drag race funny cars in the '70s.
Here's where my fuck-ups began to surface. After the tanks were powder-coated, I decided to test them for leaks. I had planned to coat them with a sealer, and received Kreem tank sealer from Bikers Choice.
Here's the quandary: You can't seal tanks and then have them powder-coated. It might all go to hell in 400 degree ovens. So I held off. Then I decided to hit a local radiator shop for the test. We discovered one small leak where I welded in a rubber-mounting bung in the bottom. I ground it clear of paint and re-welded it. No problem. The painter touched it up for me. It was on the bottom of the tank and I was good to go. I thought.
Next blunder: Instead of pressure-testing my handmade exhaust system, I decided to try another sealant available from Kreem and Bikers Choice. It's blue madness and can only be used on new pipes. I followed the directions, but it's a messy operation, and of course, I attempted this process for the first time, after I painted the pipes. What did I learn from these hiccups? Test tanks and pipes before you coat them with anything, period.
The first item to be installed was the new Paughco narrow, taper-legged springer front end. It slid right into place. If only I had four arms when I'm working in the shop alone. The front end already had the 23-inch Black Bike Wheel installed with a special Avon Tyre. I just needed to grapple with the front end, fasteners, bearings and top crown. No problem. I also installed the GMA front brake bracket and spaced the front wheel for the 14th time. It's a tight fit, and I need something art deco to mount on the front of the bracket. GMA, now owned by BDL, only builds a springer front brake bracket for the right side. I was forced to flip this one over. I could have machined the leading lip off, but I decided it could be used for some unique reflector, or quirky hood ornament. We'll see.
When I disassembled the bike, I carefully collected all the parts on this table. I also zip-locked all my fasteners and wrote their job descriptions on the back of each card. That was seriously helpful during assembly. Next, I dropped the Crazy Horse 100-inch engine in the Paughco frame, with the JIM's transmission and the Baker kicker system installed. Since the chain ran against a portion of the frame, I ordered a ½-inch 24-tooth tranny sprocket from JIMS and installed it with this special JIMS nut, designed with a built-in locking device. Unfortunately, no matter what I did, the holes wouldn't line up, so I safety wired the nut to the sprocket to prevent it from backing out.
Then I faced one of the toughest assembly jobs, installing the Spyke alternator stator plug in the right engine case. It's easy and difficult at the same time. This time, I smeared the tunnel and the plug with Never Seize and tried to push the plug through the case tunnel. I also carefully backed out the set-screw and scraped any burrs of the case edges. That didn't help, but I ultimately wrestled it into place. I'm always careful of electrical connections, wiring, proper grounds, etc. Nothing leaves us alongside the road more often than electrical problems. So, I don't like pushing and prodding charging components.
Once the stator was in place, I used self-locking fasteners from Harley-Davidson to fasten it down. Spyke is careful to supply all the proper assembly instructions, but it's always tough with aftermarket engines. Because it was somewhat of a guessing game, I installed the Spyke rotor a couple of times to make sure all the clearances were proper. Then I could move onto driveline alignment and the installation of the BDL narrow enclosed belt drive system.
I've worked with BDL components for at least 15 years. They are solid as a rock. I used the inner primary to pull the engine and transmission into alignment. I left both major components loose in the frame until I pulled it up tight with the inner primary. Don't forget the John Reed Code. I use Never Seize on all bolts rolling into soft aluminum. John warned about damaging porous aluminum threads by running hardened steel against them over and over. Never Seize allows them to glide in and out of the cases without stress or abrasion.
With the driveline aligned, I tightened down the rear engine mounts and then checked the front ones for gaps. I shimmed the front motor mount perfectly, then tightened it down.
Next, I focused on the transmission. The Paughco mounting plate was tight and the JIMS trans case was fine in the rear, but slightly elevated in the front. I dug around until I found the correct shim washers and drove them under the trans and around the front tranny studs. It's key to go through these motions for proper alignment and to save problems with the belt. It's surprising how easy the BDL system slips together if the driveline is aligned.
I followed the BDL instructions and bolted the engine shaft insert to the pulley then drove in the alignment pins and tightened down the Allen fasteners. I pulled the pressure plate pins out of the clutch and removed the clutch plates. With the clutch hub and the engine pulley holding the belt, I carefully slipped them on simultaneously. I attached the left-handed clutch nut and tightened it with an impact gun. I did the same with the engine main shaft nut. I turned over the engine and checked belt alignment and pulley alignment. I spaced out the front pulley slightly with a shim and was good to go.
BDL TECHNICIAN NOTE:I received a call from BDL, “You fucked up, Bandit,” Dan said. He pointed out how I didn't mention using Loctite on the transmission mainshaft splines when I installed the clutch basket. “That's more important than many folks realize,” he said. Vibration from the spines can tear up the basket splines and ultimately the clutch plates.
I generally don't Loctite the mainshaft splines until the bike is tried and true, encase I need to remove the clutch. “Harbor Freight sells a cheap vintage steering wheel puller,” Dan said. “They work like a champ for pulling BDL clutches. If a hub is too tight a little heat does the trick, melts the Loctite.”
With the clutch back in place and all the elements tightened down I installed the Spyke starter and pinion shaft. Giggie, who just passed away the other day, told me years ago, how to check the spacing. To keep the starter strong and not fuck with the ring gear, the starter gear should rest about 0.150 back from the ring gear. Too close and it doesn't have the space to begin turning and jams against the ring gear. Too far receded and it won't make good solid teeth contact.
With the primary almost buttoned up, I moved to the LA Chop Rods new-fangled internal throttle installation. Internal throttles are cool but precarious. If a bike stumbles and falls over, the first damage is generally to the bars. It's easy to replace an external throttle or a grip. But what the hell. We're not building a bike to fall down.
About this time, the Sturgis event hit the summer calendar, and folks arrived from Australia for the ride. Doc from Heavy Duty Magazine, in Australia, picked up a Victory for the run. Nicole Brosing, an Australian tattoo artist, flew to the coast, rented the same Road King she rode last year, grabbed her girlfriend and split north to San Francisco then east to the Badlands.
I wrenched in the shop, drank Coronas, smiled and caught a sun tan. Gard Hollinger from LA Chop rods slapped extra engineering into his internal throttle system. His instructions were detailed, but I was still nervous as I attempted to determine the proper length. It's always a sharp notion to take the bike off the lift so the bars can rotate for testing the overall length. It's actually a breeze to install, although I honed out the bars slightly, for an easy slip. Gard devised the cable lock-down with a brass sleeve to prevent damage to the internal cable and afford a solid grip for the set screw. This throttle, with extra bearings, is smooth as silk.
Then I turned to the classic spark plug wires from Low Brow. This is a cool system and adds class to any ride. They come in a kit form with all the elements needed, except a roll of solder, flux, and a gun. It was a simple operation, but I actually mounted the coil a tad on the tight side to the underside of the tank. Fortunately it all fit. Make sure to slip the boots onto the wires before you solder the brass fittings into place. Lowbrow attaches the other ends before shipment.
I simply attached the spark plug wire to the spark plugs, ran the lines out of harm's way to the coil, added an inch for safety, cut the wires, trimmed them back for soldering, and crimped and soldered the fittings into place. Frank Kaisler told me to make sure to wipe all the flux off after soldering. So I did as Commander Kaisler instructed. He uses alcohol or solvent to clean the area, preventing future corrosion.
I took a day off to help Nyla's brother, Brad, build some diesel motor mounts for their 32-foot Cho Lee motor sailing vessel. They were smack in the middle of a complete restoration. It's a beautiful boat. I've sailed it to Catalina Island several times, when it belonged to an old friend of mine. Another deadline loomed. Less than a week away, the Easyriders Bike Show would rock the Broken Spoke Saloon in Sturgis. Bikernet sponsors the Panhead Class each year and I needed to create the trophy. Panhead Billy won the award. When I can reach him, we will feature his classic rat pan.
I shifted to the wiring. I used Phil's Speed Shop wiring system. It's designed for lots of custom applications and makes wiring a breeze. He includes instructions and a wiring diagram. The billet chromed box includes the ignition switch, the high-low beam switch, circuit breakers, starter relay, neutral light and starter button. I just ran the wires, used my Frank Kaisler soldering tool and ran the wires through the old H-D soaked canvas loom. I know that's not the correct term for it, but it's a close description.
I ran into one problem that held me up for weeks. I like the CrazyHorse bottle cap engines. They offer three ignition alternatives. First, the original Thunderheart unit, an adjustable timing Thunderheart, and finally a cone motor system. Unfortunately, they don't tell you enough about the stock system. I thought it was like a Compu-Fire system in the cone. It's a one piece unit. I reached out to other Crazy Horse engine builders who told me I needed a Thunderheart ignition module. So, I ordered the system from Thunderheart, but when it arrived it didn't jive with any wiring diagram I received from Thunderheart or Crazy Horse. It was a riot. Every time I received a wiring diagram or a box from Thunderheart, I thought I was good to go. Then some goddamn thing wouldn’t match, and everyone had split to the Badlands. I paced the garage waiting for answers.
The Thunderheart tech guru sobered up after a week in the Broken Spoke swimming pool, doing belly shots with the lovely waitresses. He dropped me a simple e-mail: “There's only three wires goddamnit, black for ground, red for ignition and green to the coil. Go for a ride.”
That solved that mysterious issue and I moved on. Three more puzzling obstacles surfaced. I cleaned the Paughco oil tank with solvent and small nuts and bolts. I counted the fasteners before I slipped them into the tank. It was sorta rusty, and I didn't want to roll without cleaning it. I poured a cup of oil in it and flushed it out. I hooked up the oil lines, and Crazy Horse sent me very specific instructions, but this will blow your mind. I couldn't figure out venting. I'll get back to that.
I hooked up my gas lines. I filled the tanks and one leaked. I threatened to fire myself on the spot and another challenge surfaced. The pinhole at the front of the tank, where I cut away a section to allow for fork stops, stuck out like a sore thumb. It was obvious, but we didn't spot it during testing. I called Jim Murillo, a professional painter and cried for assistance.
“Don't use Kreem, it peels,” he said. “Use Casewell two-part Phenol Lovolac System.”
I ordered some and their customer service was supreme for a small $36 order. Some companies get it, when it comes to taking care of customers. This is where tank seals become terrifying. I needed to kick my ass into the middle of tomorrow. Make sure your tanks are sealed before any finish is applied, including powder coating. I suppose I was over confident. What the hell.
The directions called for cleaning the tanks with lacquer thinner, nuts and bolts, sand, you name it. I tried the lacquer thinner and immediately fucked with George's pinstriping. I called him, panicked and drank whiskey heavily. Fortunately a Bikernet reader shipped me a fresh bottle of Bulliet Whiskey, and Dusty, one of the 5-Ball Racing Team Salt Flat members, hand-stripped several pounds of walnuts and shipped them out.
Incredible. I let the tank dry thoroughly, made up a small portion of the Casewell sealrant and poured it into the tank. I knew where the hole was, and fortunately it rested in an easy-to-reach corner. I tilted the tank in the sun and returned to the whiskey. George saved my ass once more.
With the tanks fixed and returned to the bike, all was well, and I put a key to the Phil's ignition switch for the first time. Here's another quirk. Crazy Horse doesn't tell you how to time your new 100-inch engine. It times itself. The bike didn't whine, growl, spit or cough. It fired immediately to life and purred. I checked the oil pressure, perfect. Then I unscrewed the cap off the oil bag to make sure the lubricant returned to the oil bag properly. Yep, it was returning, but the cap popped off into my hand. I wondered about venting. Everything was fine except for pressure in the oil bag.
Again, I started a research project. The Crazy Horse installation material didn't mention a crankcase vent and I searched the engine. There are two 3/8-inch spigots between the heads, as if for a cross-over oil line. As it turns out they are designed as vents. I found out from Dar at Brass Balls that they just run a line under their gas tanks. I pulled one end, no oil flow. It had to be the vent, so I improvised and used another old machinery oil fitting to hold a screen to prevent crap from strolling back into the precious engine.
That solved that issue. I was ready to rock, but my seat hadn't arrived from Duane Ballard. It was a wild old sprung BMW seat he scored. When it finally arrived, it didn't fit. It was too high and too far back. I was faced with another quandary. If I moved the bars, I could barely place my boots on the footboards. I scratched my beard, looked at the box of walnuts, and then it dawned on me. Glenn Priddle, a leather seat master, who studied under classic saddle makers, made me a seat a couple of years ago for the 10th Anniversary of Bikernet. It was a wide, classic solo seat. I dug it out, dusted it off and it fit like a glove, dropped the seat height 2 inches and move the seat position forward 3 inches. It actually fit the frame better than the old classic from Duane. I dodged another bullet.
Every year when I build a bike, my mantra includes a solid, tough, rideable, unique bike that will last. But each year the unique project throws a few curveballs. It's part of my Zen education. Life is not meant for perfection. We need challenges to test our endurance levels and help us through the tough spots, find answers or solutions and persevere. Often my predicaments are caused by a lack of experience. For instance, if I ever use a Crazy Horse engine again, I'll know all the quirks and set-up issues.
Now, let's see if I can ride it for any distance. I would love to ride it to the Badlands next year or to Arizona for our Too Broke for Sturgis Run.
We'll see what happens next, as I take her through the Eddie Trotta break-in routine. Eddie starts a bike for the first time, let's her run and checks her over. Then he takes it out for a one-block jaunt, and checks it over again. Then he ventures forth for one mile and returns for another inspection, then 5 miles, then 25, then 50 and she's ready for a cross-country blast. Hang on!
5-Ball Factory Racer Part 3
By Robin Technologies |
I'm in a daze this morning. Too much Quervo Gold last night and too many discussions about the sinking economy. It's a bastard when they lay off port crane operators. What does that tell you? I don't want to go there on this dank gray morning. It's warm outside, but even the dogs, Tank and Cash, feel the gray skies. They look hung-over, droopy and drained. I haven't shaved in a couple of days, need a shower and a kick-my-butt workout.
All the women left me and ran off to the mountains this weekend. I know why Sin Wu needed a break. Have you ever tried to maintain a 10,000 square-foot, old dilapidated building, clean and care for two lumbering, sloppy dogs, two house cats, and a stray that wanders through and bitches if the food supply isn't consistent with her desires? The Macaw needs to be fed and moved into and out of the sun at the end of the day and now we have a fuckin' fish.
There are also construction workers, electricians and plumbers to deal with. It's never a dull moment around here. I'm a big proponent of running off all the costly pets, who can't do except shit and care for a half dozen concrete gargoyles. At least they keep the evil spirits at bay and involve zero upkeep.
Okay, I'll get to the tech. I was on a hunt for a vintage seat and Duane Ballard stopped by with this vintage BMW seat. I used chunks of wood to hold it in place while I pondered the little Hispanic girl who works at Shamrocks, the Mexican fish market two blocks away. Since the seat was made with a number of springs incorporated in the structure, I didn't feel additional springs were necessary. I played with my options, but nothing – graceful, stylish, art deco or vintage – came to mind. Then I grabbed the springs that came with the prototype Paugho frame and voila, it all came together using the existing frame bungs, the mini-seat shocks and a slight modification to the BMW seat.
I drilled new holes in the brackets and cut about 4 inches off the arms. The front of the seat bolted directly to the Paughco seat hinge and I was good to go. Duane stopped by again, blessed my creation, and took the seat for top-notch leather upholstery action. He's the best.
I shifted to my shift linkage system and called Jeremiah for the mathematical configuration from the system we build for his bobber. I wanted a tank shift and had several strange components, plus heavy, solid cloverleaf brass rod to use. I don't have any idea how I come up with this shit, but what the hell. It has class.
According to Jeremiah, from the pivot point down, the shift arm was about 6 inches in length, and the distance to the shift knob up was almost three times that length. That made for a vast throw and I needed to make sure I was clear, fore and aft, for shifting without smacking the bars or anything else. I checked my '48 Panhead with stock jockey shifting and the ratio was closer to two to one. In addition, jockey shifting is a different animal. There's no back and forth spring action on vintage tank-shifted bikes. The shifter banged through one gear after another from first to fourth, done deal.
That's the reason jockey-shifted bikes are best with jockey top transmissions. If you need neutral, just pop it out of any gear and you're back in neutral. Ratchet tops force you to bang through one gear after another down to the only neutral between first and second, often missing it. In our next tech, we will install a Baker 5-and-1 drum in this transmission to afford neutral at the bottom for easy reach.
Okay, so back to the job at hand. I'm trying to use as much brass on this bike as possible, so I dug through drawers and boxes of old machined parts and trinkets and came up with these brass-bearing supports. Then I machined a piece to fit these, then the axle piece to mount to the frame. Then I had to bore and tap the pivot, drill and tap to anchor the brass bushing, drill and tap to create a pivot stop and machine and thread the brass rods, plus machine an end to fit a heim joint connection to the transmission shift linkage. I spent hours tinkering and figuring, drilling, tapping and testing, and I'm reasonable sure I have a tough, working shifting system.
Then I shifted to the dreaded tanks. The tanks are fine, but more involved than normal one-piece, bolt-on tanks, ready with bungs for rubber mounting. Since this was a prototype Paughco Factory Racer frame, the first one of the batch, they bolted the tanks to the frame by drilling and tapping the top frame tube. Problem is, that afforded each 5/16 coarse bolt about three threads in mild steel tubing. In just a matter of time, those threads would fail, the tanks would rattle and come loose.
I decided I wanted to strengthen the tank mounting for the long road. I ordered some ¼-inch bungs, ¾-inch deep for a lasting hold. Later, I discovered that since the mainframe strut was 1.5 inch tubing, I could have used the 1.5-inch deep bungs from the Bung King (check their site for all available variations). I needed to re-drill the holes to a larger diameter for the bungs to slip into the frame. Adding the bungs and welding them enhanced the strength of the frame. At first, I though about machining a bung with a lip on it, but the tanks didn't have the clearance above the frame for a lip.
After drilling the frame holes, I tapped the bungs into the hole and as far below the surface as possible for the strongest, deepest weld. I would also need to grind off any protruding weld so the tanks would fit again. One tank protruded into the frame and rubbed at the back, so I moved it as far forward as possible for clearance, which amounted to about ¼ inch.
With the bungs in place, welded and ground, I grappled with the tank mounting holes. I thought I had it made, since I was dropping from 5/16-inch bolts to ¼-inch, but not so. Only one hole lined up. I grappled with these bastards for hours. Then I gas-welded the hole slots, refilled them and ground them to a reasonable size.
Next, I welded bungs, I believe from Lucky Devil, into the bottom of the tanks and used the Bung King’s rubber mount kits with straps and rubbers to attach it to the frame. In a sense, this was overkill, but I've experienced leaky tanks and poorly mounted tanks on my way to Sturgis a couple of times. One time, Randy Aaron from Cycle Visions saved my ass and my tank paint job. Later on, Paul Yaffe replaced my piece-of-shit Blue Flame tank with a properly rubber mounted Independent tank. So, goddamnit, this needs to be right the first time. I ran rubber mounts front and rear.
There's a trick to this operation. You need the rubbers in place to make proper measurements, cuts and tack welds. Ah but, too much heat will destroy your rubbers and sink the process. I've done it during mad welding spurts. This time I kept my Bonneville salt sprayer handy, so I could tack near the rubber insert and cool the strap before I damaged the insert. I removed the inserts before final welds.
With the tanks securely mounted, I was confident, except for one aspect: capacity and turning radius. I needed to pull the bike away from the lift clamp and flop the Paughco taper-leg springer from side to side. As I suspected, it was going to hit the tanks. Over the next couple of weeks, I will operate again, slicing the tanks for turning.
I shifted to making a top motor mount, which worked out like a champ. I made a strap from one Crazy Horse head to the other, then discovered a couple of tabs that would give me the strength and position I needed to hook up with the frame. Top motor mounts are also tricky. They need to be flexible and somewhat adjustable. I made sure the engine was positioned correctly with my BDL primary backing plate, but you never know if something might shift slightly during final assembly, and the top motor mount must be flexible and iron strong.
Without too much fanfare, I attached a piece of modified angle iron to the right side of the motor mount for a coil hanger. I angled it slightly so the spark plug wires wouldn’t bang or rub against the tank.
It just happened that I'm building a railing for my mom's house. She's getting feeble, in her old age and needed some additional support. That meant a trip to the local steel supply house, where I stumbled onto some small chunks of angle iron. I didn't like my original number 5 transmission mount, so I decided to remanufacture it with a heftier piece of angle iron that also reached the frame without a problem. It also allowed me a tad more positioning flexibility for the master cylinder and pedal adjustment.
In the next segment, I'll run the progression of Dick Allen illustrations, so you can see the progress. It's as if I'm building the motorcycle, while Dick and Chris Kallas develop the visual story.
I don't know about you, but these illustrations give me hope and inspiration throughout the build process. Next, I will modify the tanks once more for enhanced Paughco Springer turning radius, then we'll mount the Phil's Speed shop ignition and wiring system to a plate I'll make that will bolt to the top of the tanks behind the gas caps.
Also mounted to same plate of steel will be a manual, vintage Sportster replacement, Bikers Choice speedo driven off the rear Black Bike wheel. Hopefully, the wheels will roll in, I'll find some 23-inch tubes and Larry Settle will mount and balance the Avon tires. I'll set up the wheels in the frame and springer, and then haul the bike to Chica in Huntington Beach. He's going to help me with fender design and mounting. In the meantime, I'll watch the inauguration unfold and stay away from tequila. There's more coming, though. I'm going to modify the trans with a 5-1 Baker drum, and build a set of exhaust with D&D bends and pieces. Hang on for the next installment.