Sturgis Shovel Part 5
By Robin Technologies |

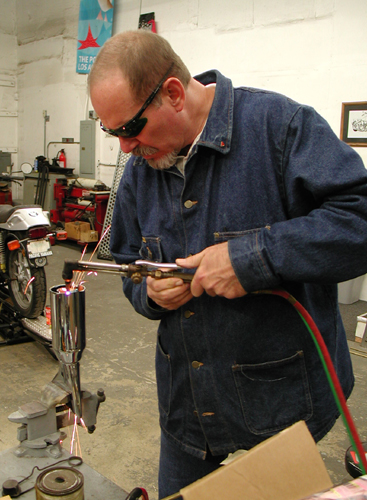
Helluva weekend. Anytime there's lots of motorcycle carnage,sex, whiskey and writing, I'm all for it. Maybe it's Valentines Daycreeping up. Make a note. Here's the deal on the Sturgis Shovelhead. Sincethe engine was in and mounted I went to work on the exhaust system,then seat mounting, position and played with the bars. I made a runto a local steel joint, because I had a notion that I doubt will worknow, but I'm still investigatin'.
Let's hit the highlights. I'm fortunate to have a young,talented fabricator/builder who I'm sharing ideas and resources with.Kent from Lucky Devil Metal Works in Houston is on the phone dailyfor tips and knowledge sharing. It's damn healthy to have someone whois in the trenches daily to assist. In fact I had a couple ofcrucial metallurgy question that morning, but let's hit what Iaccomplished.
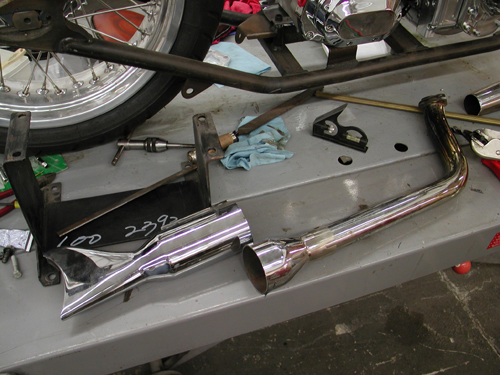
A crucial aspect of building any bike is planning. That'snot to say all my eggs are in a row. We'll see, but the more you canaccommodate, the less redo's will be necessary. Also, don't throwanything away. That junk part might be a critical bracket tomorrow. Idug through my partially organized pipe bin and found a set of oldglass pack, shorty muffler, shot gun pipes. I could use the rear one.I decided, since noise issues are a concern and performance issue area constant priority, I would build a set of shorty mufflers withBandit tuned baffles.

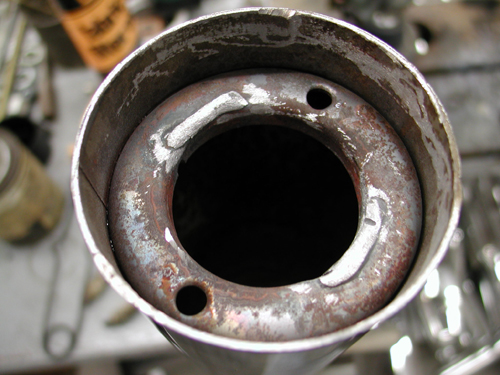
Then I spotted the fishtips in the pile and myconsideration changed. I dug further. Kenny Price from Samson allowedme to dig through his warranty bin when I was looking for stanchionsfor my Bikernet office railing. I remembered touring mufflers withfish tips, I kept digging.
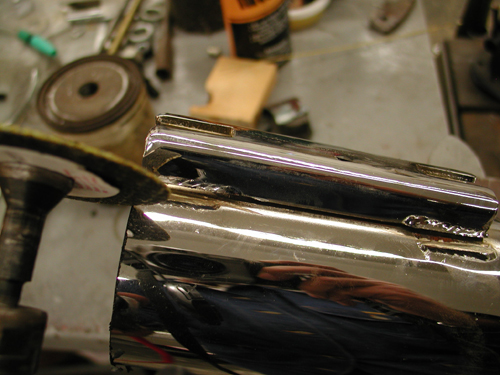
Sure enough I had a set and in quick movesI sliced them into chunks. You know me, I'm a gambler. I cut themwith no methodology in mind past the size and looks, but I came uplucky. Samson designed a baffle system with a cone at the front toguide exhaust pulses into the baffle and it seems to be working fortouring applications. I cut off that portion and discarded themajority of the baffle. But there was still 2 inches of baffle and astandard donut in the rear of the muffler. That's where fate movedit's evil hand over Richard Kimball again. Or in other words I rolledthe dice.
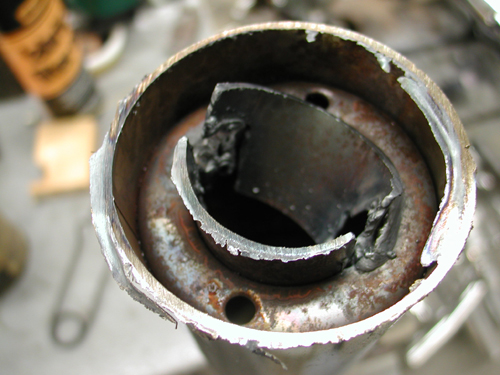
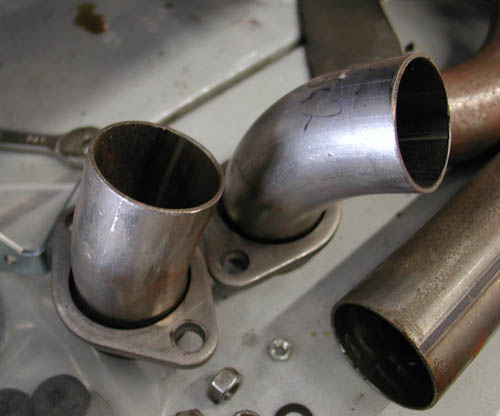
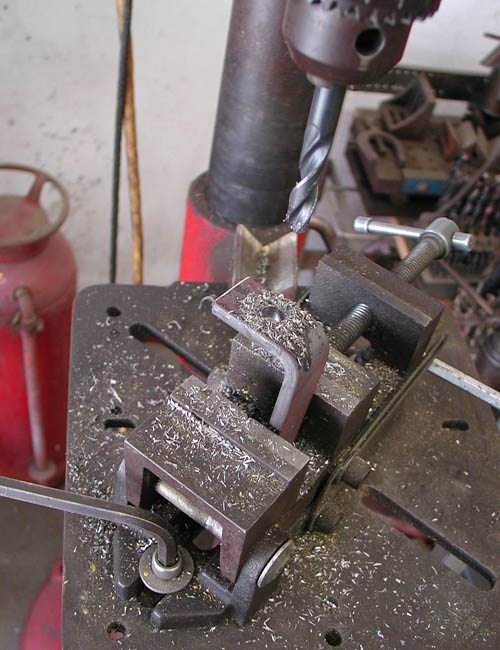
I spoke to Kendall Johnson recently and he told me aboutperformance stepped exhaust systems and reversion cones used to tunesystems at the rear of the pipe. I couldn't make this donut move upand back, but I had the makings of a reversion cone at the stern.With a torch I cut out the remaining baffle, then after speaking withthe HOT BIKE staff member, Craig Murrow, for a reversion cone descriptionI knockout out the remaining baffle, then with various cutting andgrinding cones I formed and smooth departure for the exhaust pulses.Then I had to remove the old touring mounts with a die-grinder andthey were ready to weld.
The rear pipe was comparatively easy since the pipe wasalready made except for the muffler and brackets. Shovelheads arenotorious for louse exhaust manifold connections and tearing out thesingle stud, so I wanted to mount them in the front and rear for asolid, secure connection. The only port for the connection at thefront was the oil bag. That was a bad choice and I'll run a bracket off the seat post before all is said and etched in stone.
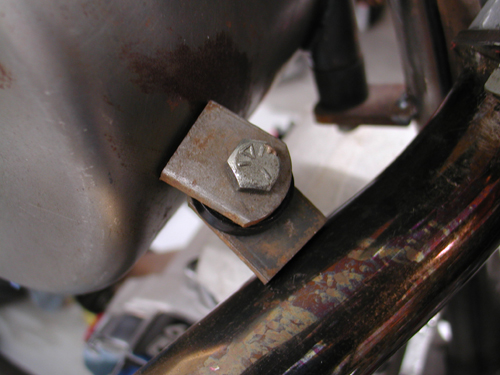
I had to make sure the pipe could be removed with the tabs onthe bottom, then I spaced the tabs apart with a heat sink material. Imay use Teflon, then the notion that the oil bag is rubbermountedfloated to the surface. What bearing would that have on thiscoupling? Hell the frame will vibrate like a mad dog. I'm stillquestioning that link, but we'll see, maybe a spring between the tabs? The final decision was the seat post bracket to come.
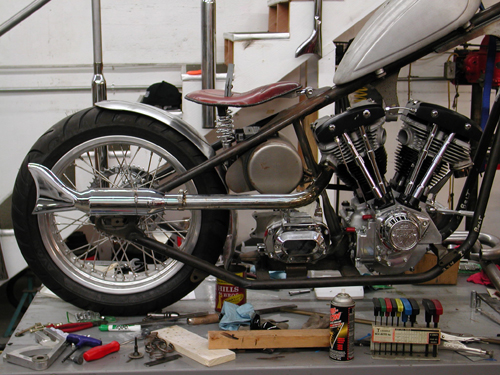
There was one other pipe design consideration–the length.I try to keep the pipes somewhat equal and between 32 and 38 inches.Buster's Sportster runs sharp and crisp with his hand-made 38-inchesfrom the Bikernet Headquarters, as seen in Street Chopper. So Idesigned this pipe to be 38-inches and not protrude past the tire. Mygoal was to make the front pipe curve out the other side and be ofequal length.
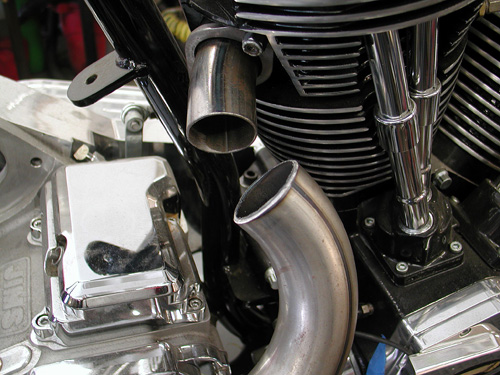
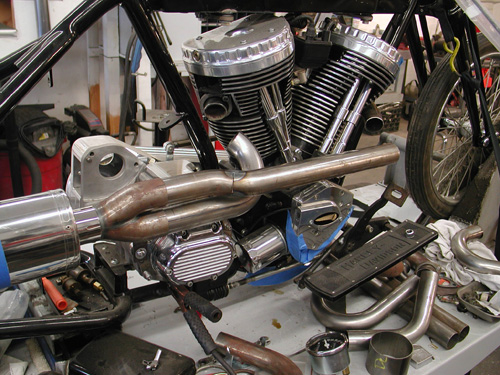
At the end of Friday night, one pipe was complete, toolswere scattered all over the shop and I had a couple of Hooker Headerchunks of 1 3/4 pipes segments cut and was fooling with the frontheader. The front was tricky as hell. I wanted to scoop out the leftside of the bike, which added length. I also had a bitchin Rohm Engineering oil filter/cooler system that mounts to the front motormounts and aims the filter at the ground for ease of removal anddraining. The pipe had to clear it significantly. This puppy was alifesaver. I planned to run an oil cooler (Shovelheads run hot) andfilter, for a lasting driveline and more oil capacity. My originalplan called for old school mounting on either side of the oil bag.This eliminated all of that and the plumbing for two elements, the cooler and the filter, wasreduced to one hot looking job in front of the engine for maximum cooling.
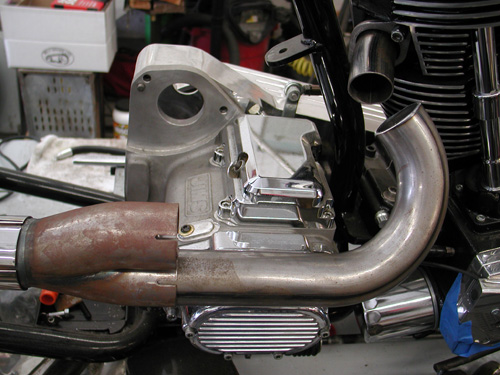
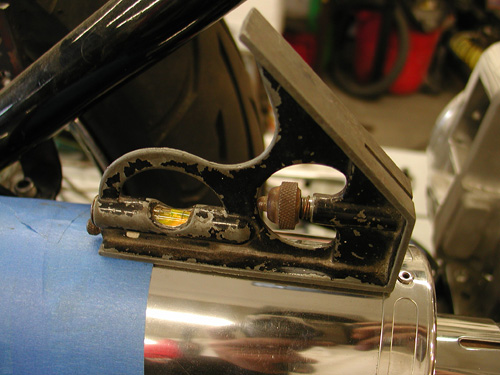
I spentall day long on Saturday, dodging the phone and working in thegarage. I had all the tools and materials I needed, even two new setsof welding glasses, which came in damn handy. The trick was to lineup the pipes, make all the right decisions, hope for the best andtack 'em. I did and with a level I constantly compared the pipe tothe top of the lift. The spacing worked out fine.
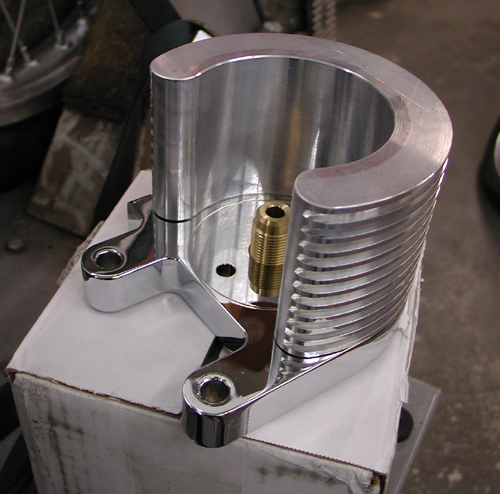
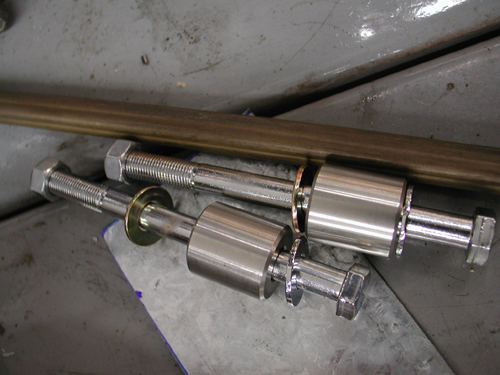
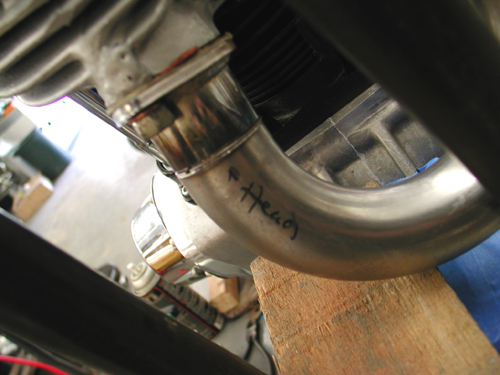
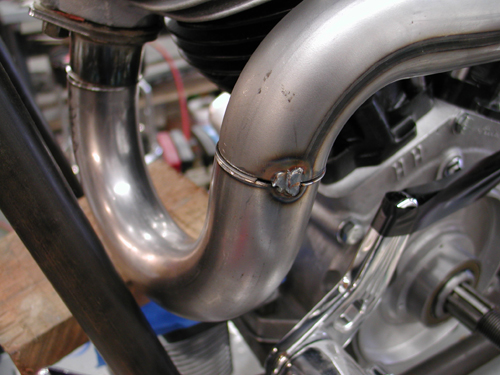
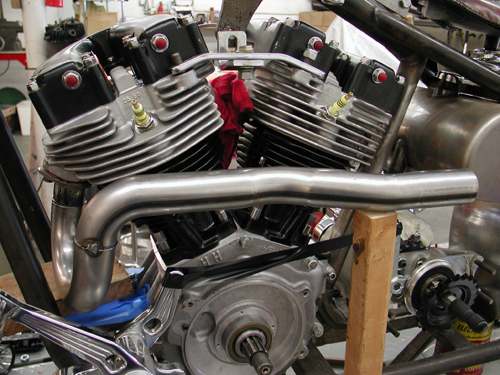
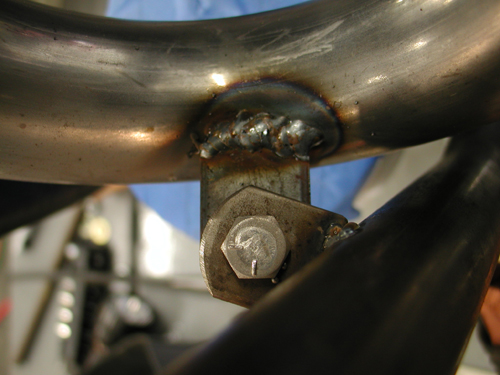
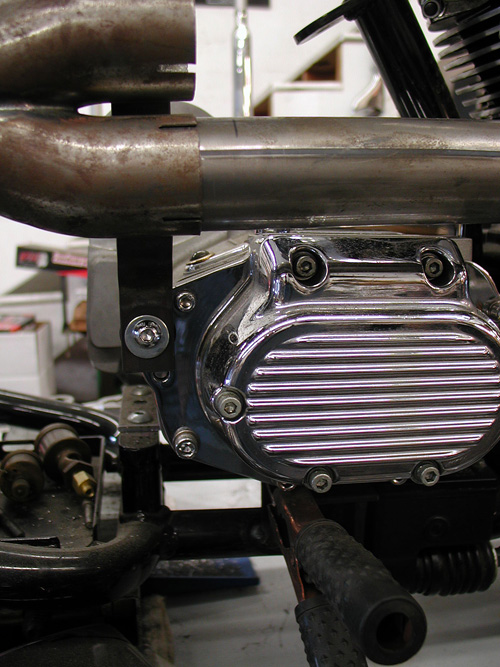
I cleared the top of the Rohm bitchin' oil cooler/filter mounthopefully by enough to allow the pipe slip down and out of the head (I was recommended to use a CCI Filter part number 270126).I tacked the tab with a spacer between the two for some jiggle room.And I made damn sure that the pipe tab was below the frame tab. Atthe back, the muffler was fabricated the same as the other one with aslight exception.
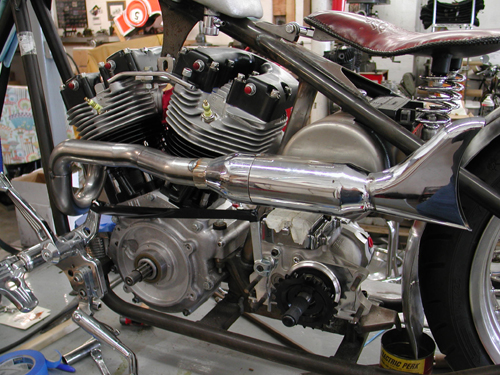
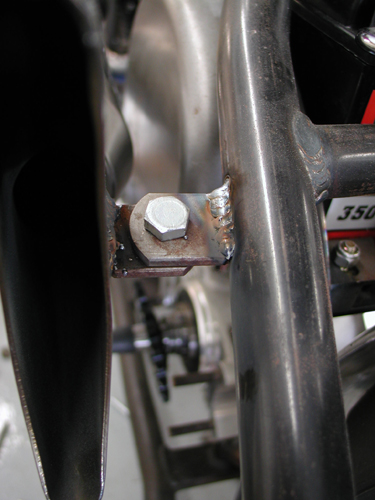
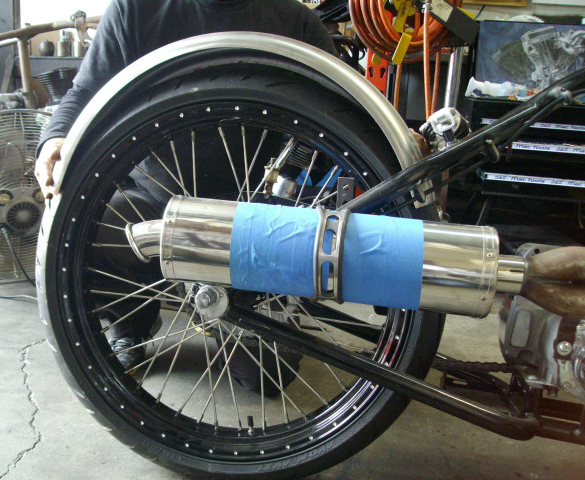
I shaped the reversion cone the same, cut off thetouring mounts and ground the tabs. Then I used a couple of V-blocksto hold it perfectly in line for tacking the halves together. Then Isliced off the crush tabs on the front of the Samson tapered muffler.They were wider and different than the other side, so I cut them off.You'll notice the difference, if you check both side.
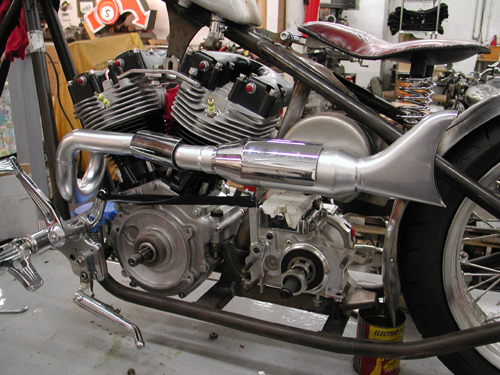
The front parts of the pipe were Hooter elements and theyare smooth mandrel bent segments. I used another one for joggedstraight piece between the muffler and the head. I took the 13/4-inch exhaust to my Muffler Master bender and bent it slightly oneway, then reversed the sucka and bent it the other way. It fit like adream and looped out enough to pass the oil bag. I used Hooker headeralignment sleeves to hold the front pieces in perfect alignment. Donedeal, I tacked them, constantly comparing the level with the lift,the pipes then the muffler. After the tacking was secure, another tabwelded to the frame, avoiding the oil bag (a Lucky Devil concern,since the oil bag is rubbermounted), then all elements wererechecked, I removed both pipes and MIG welded them as complete aspossible.

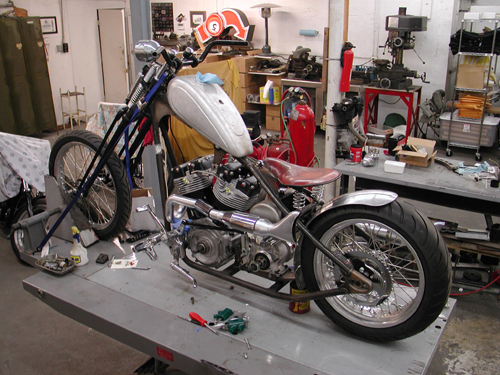
I find that MIG welding is a pain and blows holes in pipes easily.I also discovered that after I MIG weld a pipe I can flow the weldeasily with a torch and smooth out all the welds, fix holes and fillgaps. I actually found a piece of old steel rod, not much bigger thana piece of wire. I usually use old coat hanger, but it pops andwheezes from the paint coating.

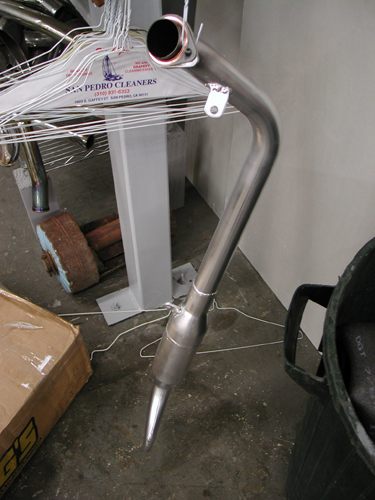

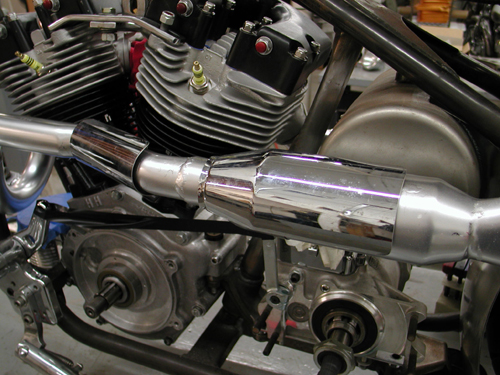
After the pipes were welded, flowedand checked twice, I ground all the surfaces with an emery disc andpainted them with whatever barbecue heat paint I had laying around.The lovely Layla is currently on her way back from Home Depot withsome flat black heat paint. We'll see how that works.
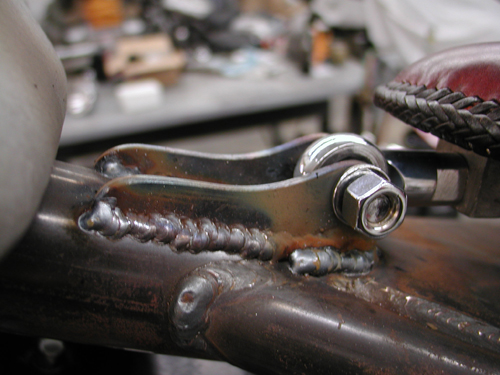
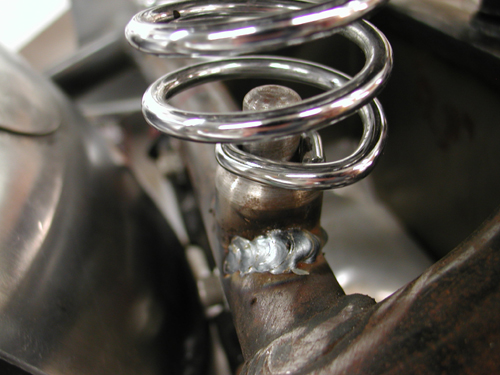
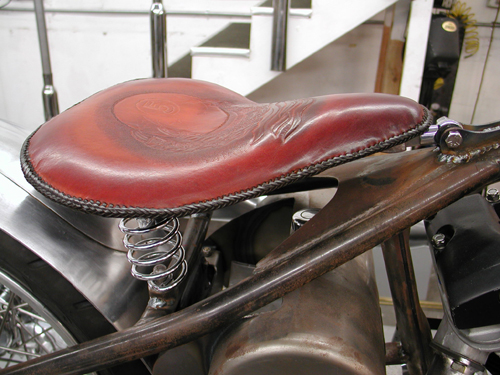
Kent from Devil hand fabricated the seat pan, brackets andbungs. I set them up and welded the parts in place. Then it was timeto roll the bike off the lift and see how she fit and where I mightneed heat shields. I discovered a couple of things. Yes, the scootwould require left side heat shields and nothing on the right. I alsotested my notion to sculpt claws out of brass, unsuccessfully.
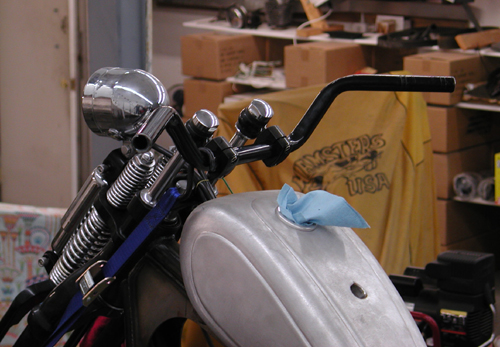
I also found that the existing bars wouldn't cut it. Igrabbed the old '48 Panhead TT-bars, narrowed them by 4 inches, and Isorta like them.
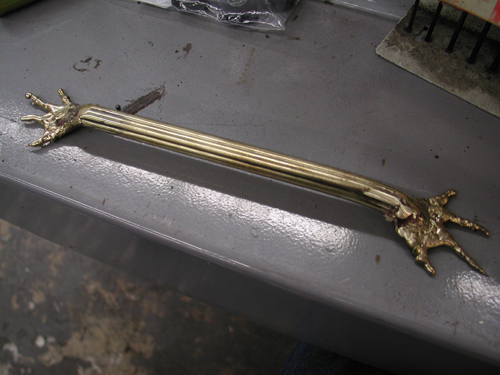
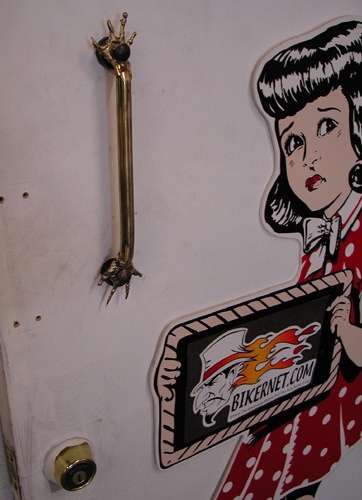
Okay, so I grappled with the sculpting business fora couple of hours and discovered that I can't control the brass likeI can steel. I spoke to Kent from Lucky Devil and he recommended thatI try TIG Silicon Bronze rod. I'll try that next week. In themeantime, my first brass sculpting attempt ended up on the shop door.Let's get the hell out of here.
Ride forever,
–Bandit

Sturgis Shovel Part 8
By Robin Technologies |
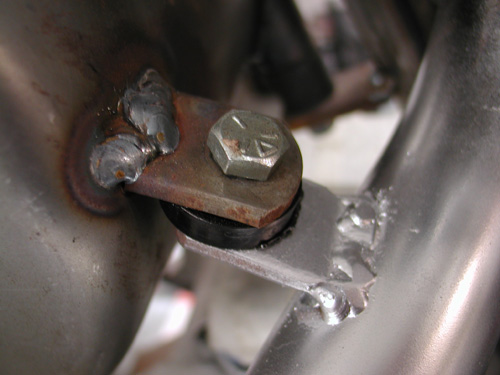
My first move began with a correction. I removed the exhaust pipe tab welded to the oil bag. The oilcan is rubber mounted, the exhaust pipe generated severe heat and the pipe system needs to be solidly mounted. It had to go. Actually Kent from Lucky Devil Metal Works in Houston tried not to mention the false move, but his frown gave it away. Or was it that question? “Is your rear pipe really mounted to the fuckin’ oil bag,” Kent said tentatively?
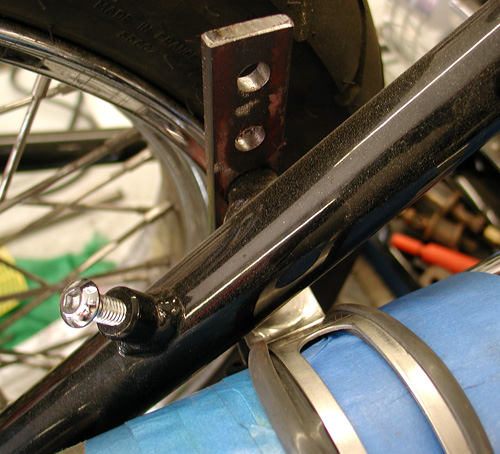
I discovered that the pipe exits the head close to the seat post and worked on a pipe connection there. There are a couple of rules in making pipes that I need to abide by. I needed to remove the pipe once in awhile, so I needed the pipe tab to be on the outside of the frame tab. Often mounting required slack, so I dug around for 1/16-inch washers to run between the tabs. That way when the fasteners are removed there’s some slack to pull the pipe free.
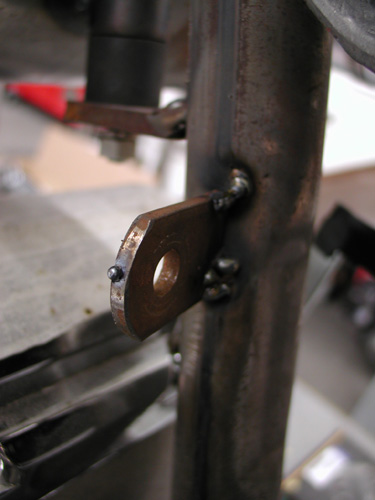
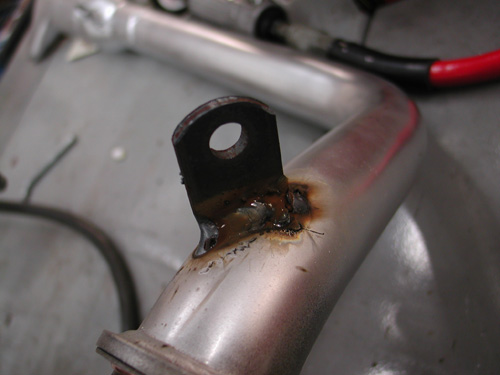
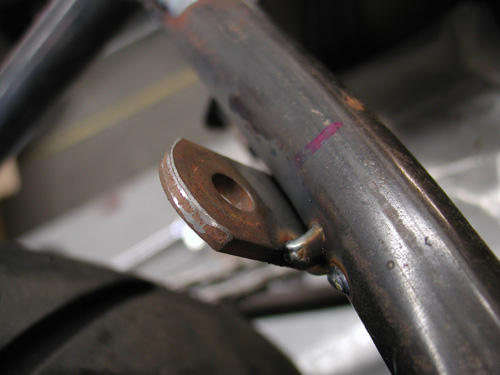
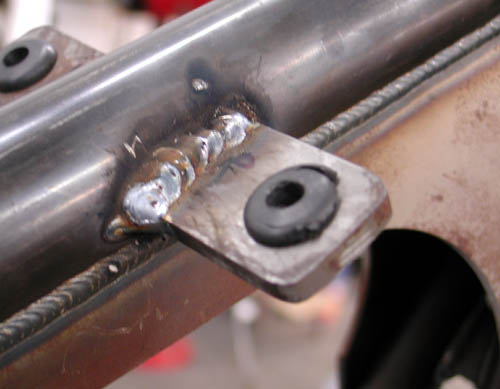
I worked with the pipe fully in place then tacked the seat post tab. Below is the tab tacked to the pipe. Then the tab welded in my shitty MIG welding fashion. I should slow down and clean the base metals more. I generally grind a bevel into the tabs for greater weld penetration. The welds are strong, just not handsome.
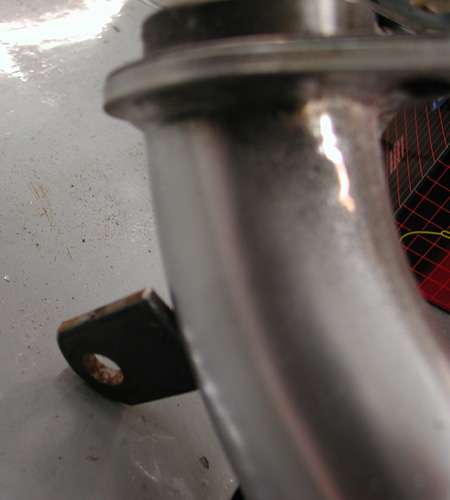

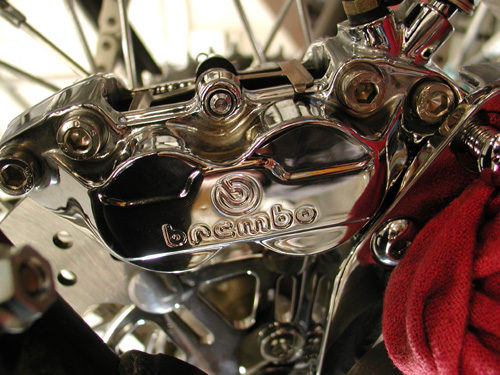
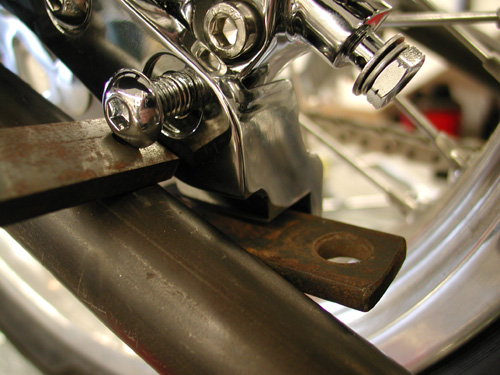
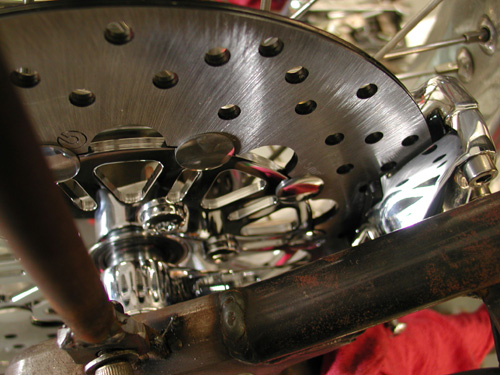
Next I needed to attach the Lucky Devil rear fender, align the rear wheel and cut the chain to fit. But first I needed to center the wheel in the frame, sorta. The custom Paughco frame is designed and manufactured to hold a belt pulley and a 180 Avon Tyre. That prevented me from measuring between the frame rails. I needed a straight line down the center of the frame backbone. It’s not incredibly accurate but close to draw a fabic or nylon line down the tube. Then with Doherty space kit and the seal spacers that came with the Custom Chrome aluminum and stainless spoke wheels, plus the Brembo brake caliper bracket, I aligned the wheel.
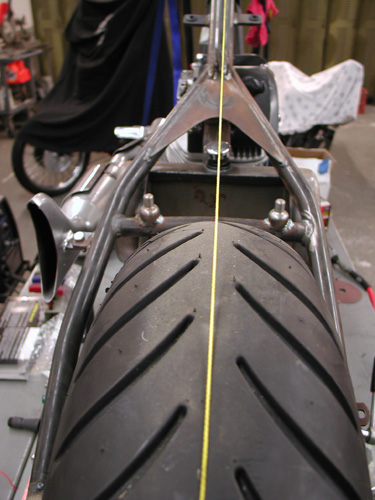

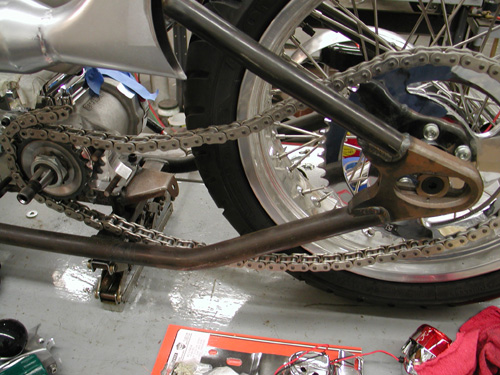
Before I cut the Rev Tech chain I installed the BDL Belt inner primary and pulled the engine and transmission into place which determined exact spacing. I know I covered this aspect somewhat a couple of chapters ago. There’s been some heavy drinking in the meantime, so if I lose track, it’s on Jack.
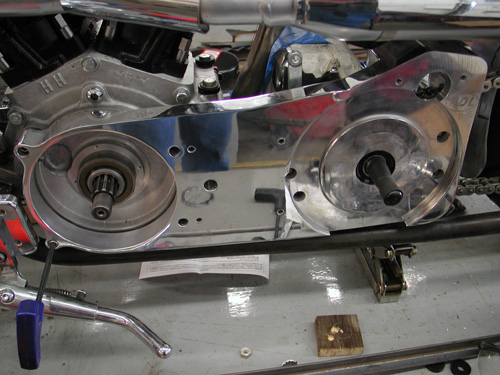
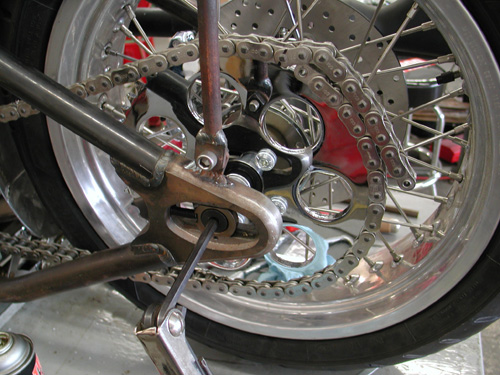
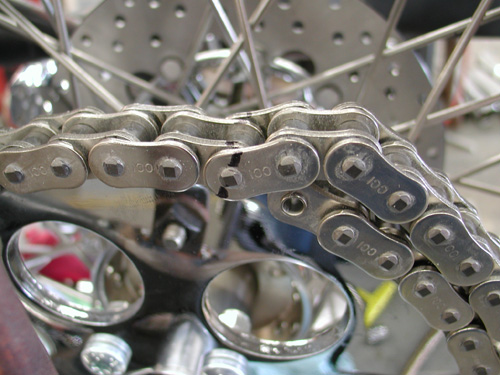

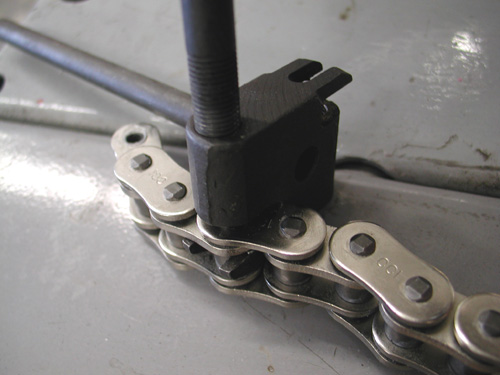
I centered the wheel in the chain adjustment slot to give me slack either way. Then I finally cut the chain with a JIMS tool.
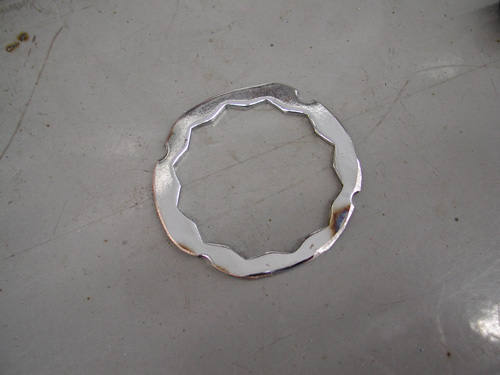
I spoke to a couple of guys about sprockets and was told that this contraption will hold a sprocket nut from coming loose better than simply Allen screws in the Custom Chrome sprocket. I may use it or not. Haven’t decided yet.

The reason this is altered is that it’s for a pulley and a different era. Add that to the fact that I flopped the dished sprocket over to space the chain away from the tire. That aspect worked perfectly.
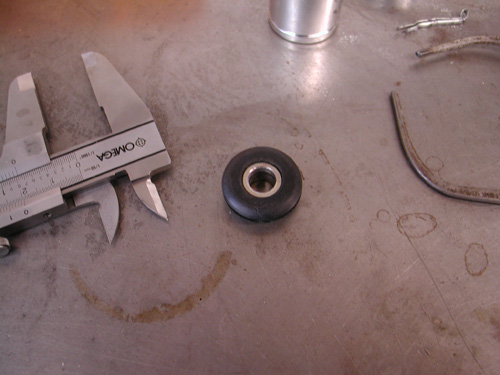
I decided that since the tank was rubber mounted and aluminum won’t flex as well as steel that I would attempt to rubber mount aspects of rear Luck Devil fender. Kent designed and handmade the fenders to match aspects of the XR 750 tank.
Cyril Huze sent me several grommets to work from and this pair are from some late model Sportster application. I measured the O.D. on the center portion and discovered that I needed ½-inch holes in the fender which I drilled after I had mocked up the fender in place, ground a clearance strip for the chain and stood back several times. Arlen Ness once told me that he used a chain wrapped over a tire to space a fender. I needed enough space for fasteners under the fender and some chain adjustment slack either way.
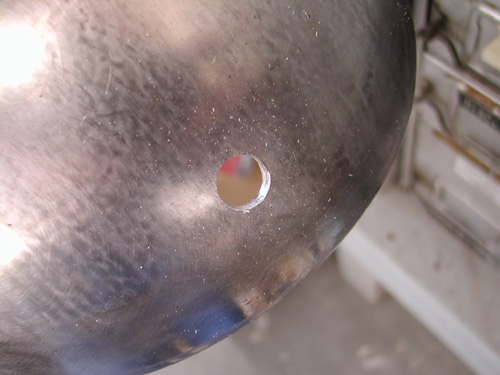
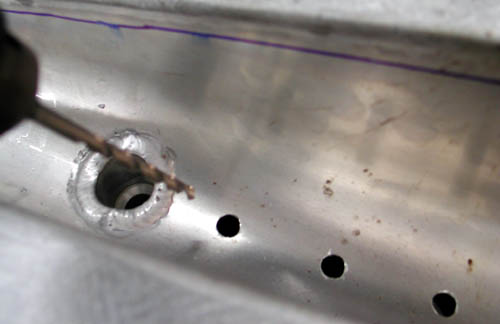
I moved the fender up and back, and side-to-side several times before making any hole-drilling marks. I was a nervous wreck. Ya don’t mess with the Devil’s fender. I finally drilled a half-inch hole, and smoothed the edges, in the bottom of the fender then at the crossover tube. I worked in the rubber with a dab of oil and bolted the bottom stainless bolt in place.
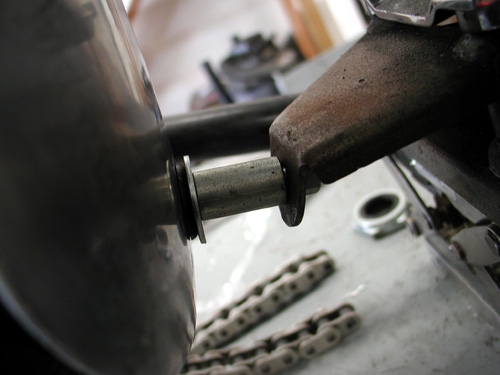
The Sportster grommets have metal inserts, which make them easier to install. With a couple of spacers in place the fastener held the center tab for tacking.
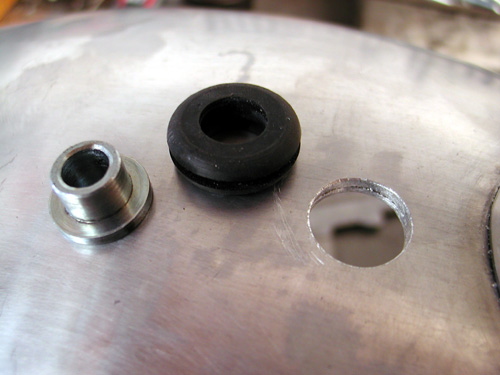
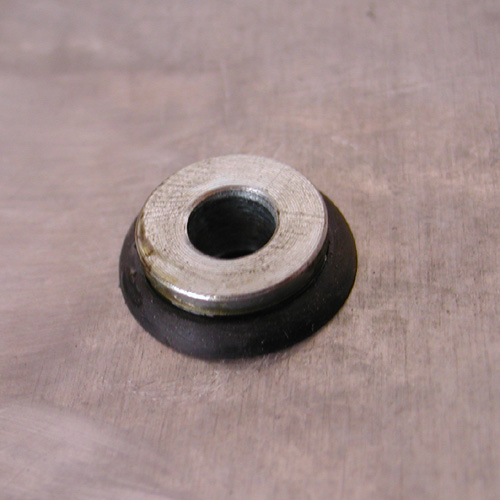
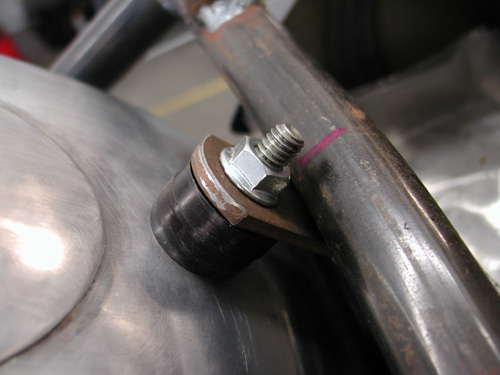
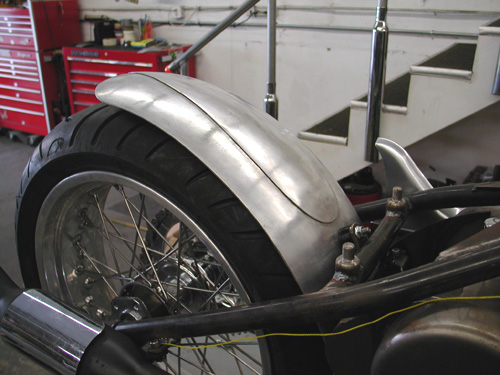
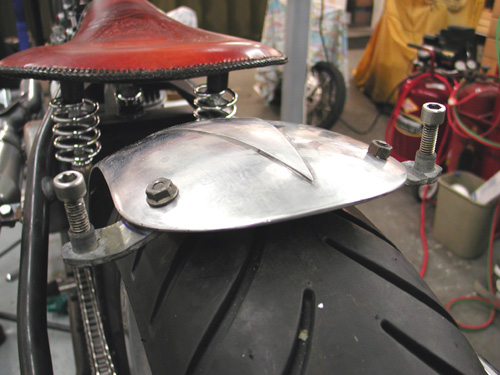
Here’s where it got tricky. I’ve been bending metal with a torch for years. Never improved my technique. Just the other day, a month after I built this fender rail system, I bought a small strap or tube-bending tool. Wish I had it when I went after this project.

First I built the fender strap out of a piece of exhaust pipe bracket. It came with two 3/8-inch coarse tapped inserts in each end. My plan was to build a fender rail system with tubing so I could adapt a couple of running lights on the tips. I carefully bent and drilled the strap and fender.
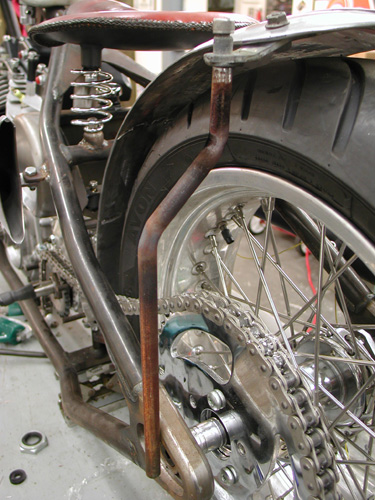
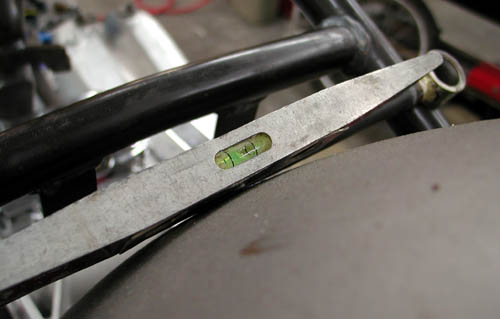
Then I bent the tubing fender rails to fit over the chain and tacked tab to the Paughco frame. One item I often attempt to use is a level. I’ll level the frame from side to side, then strive to keep all the other elements level. It helps.
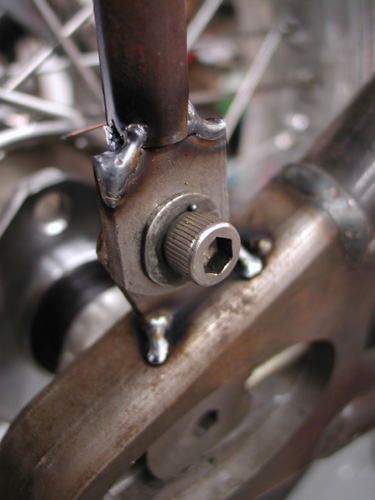
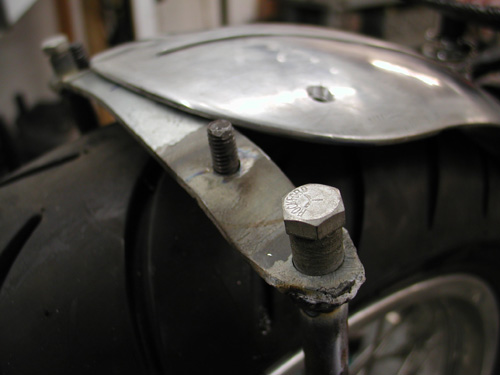
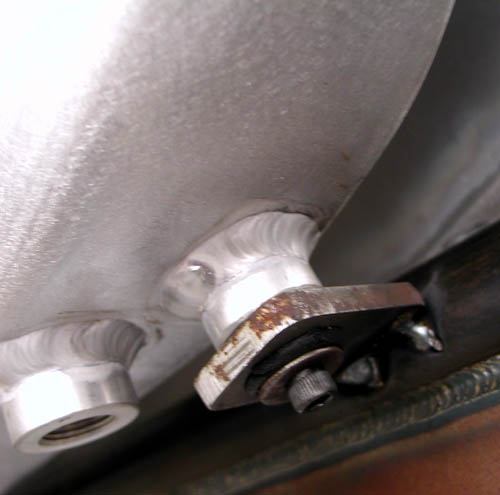
Here’s a perfect example. As I finished my welding chores, I got on a roll. I thought– wouldn’t it be cool to weld the fender bolts in place from the bottom. They would never come loose. Note the angle. There was no way they would ever return through their mounting locations. I was forced to grind them off and clean the holes.
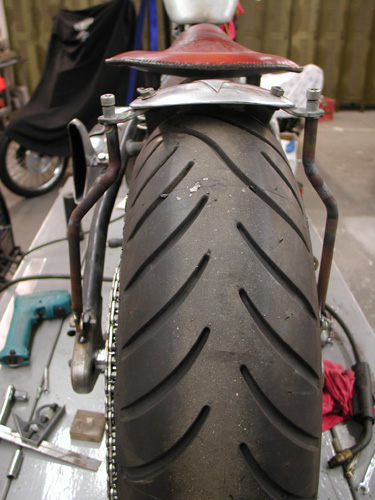
Here’s the finished fender rail system. I drilled holes in the frame and the rails to run wires. I still haven’t found the perfect running light style that rocks my boat and will afford me enough room to use the proper fasteners. Hang on!
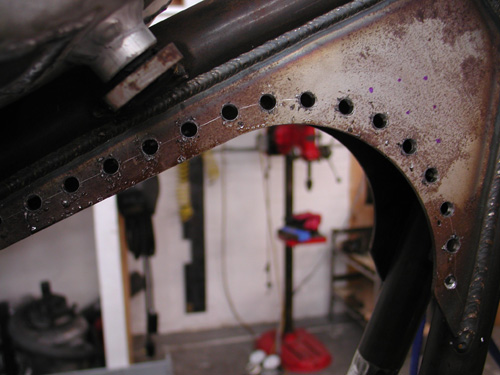

Sturgis Shovel Part 2
By Robin Technologies |
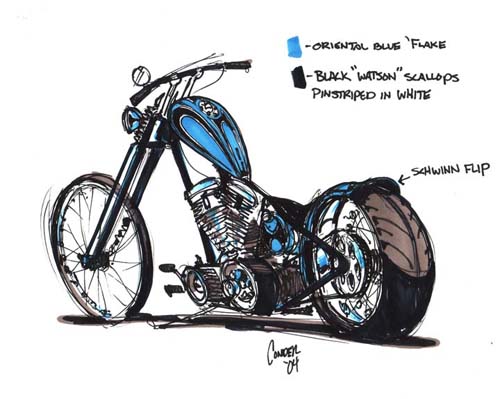

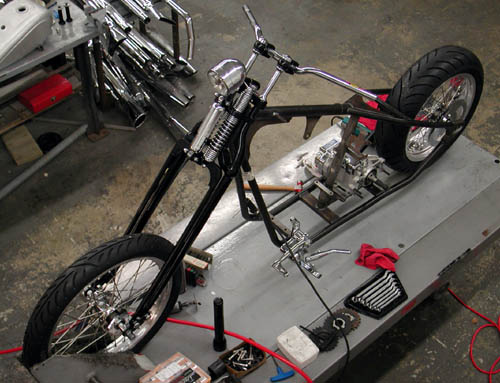

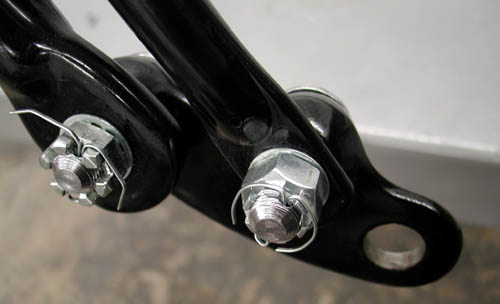
This bike might look like shit, but it should work perfectly. I'm endeavoring to keep it light, tight, narrow and right. So far so good. We've even decided to eliminate paint from the equation, except for rusty metal that may need black powder coating from Custom Powder Coating in Dallas, and the front end was powder coated black at the Paughco factory.

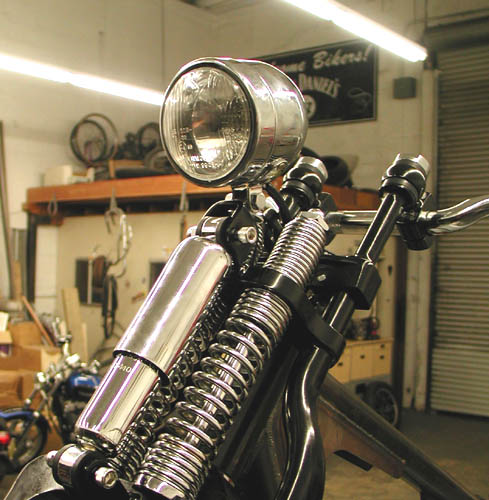
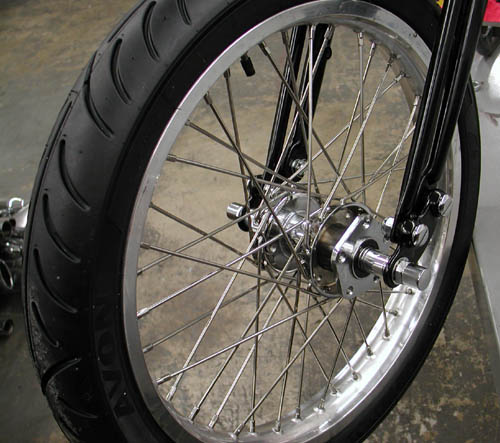
Let's jump into the shop. I was jazzed to receive my Rev Tech wheel order from Custom Chrome. I needed to mock up the frame and ship an image to Tim Conder for a concept drawing. Conder's images inspire any builder. I couldn't move on it until the Custom Chrome wheels were delivered and mated to the Avon Venom tyres. I'm also going to avoid chrome and flashy stuff as much as possible. We're running bare metal in several instances: Wheel rims, aluminum tank, brass fender rails and linkage, copper hard oil lines, and thick wall copper tubing bars. Dig this, we're going to galvanize the frame, rear fender and oil bag. The XR Sportster racing tank which is aluminum was delivered from Cyril Huze. I'm going to leave it brushed aluminum, but the capacity was a minimum 1.75 gallons. I'm mounting it high on the frame so we'll open the tunnel for additional fuel capacity and weld the area shut.
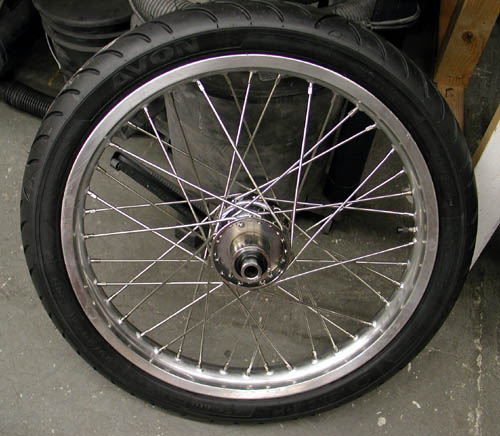
I'm jumping around. Let's get back to the Rev Tech wheels. The spokes are stainless with polished aluminum rims for a long lasting approach. Even the Paughco frame came with brushed aluminum axle plates. We're going to leave 'em alone. Cyril Huze designed a new, between the heads, coil and ignition switch mount. I ordered one without polish or chrome. It's unfortunate that we can't get wheels with Stainless hubs and eliminate chrome all together. The front is a 21 with a 18 by 5-inch rear for a 180 Avon Venom. I don't want a super wide tire. I'm specifically avoiding wide tires. I think they make choppers look like fat-assed chicks. They lose their chopper code of agility and lightness.
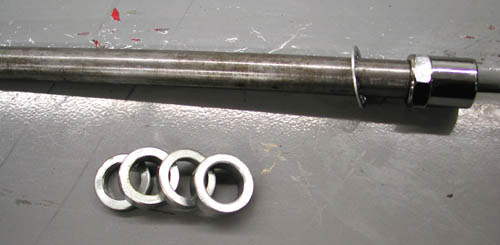
With my Doherty wheel spacer kit I was able to set up wheel spacing quick, for the time being. It's a trick working in the shop by myself and I will try to explain some operations from that perspective. We all face shop blues from time to time. Makes me kick back and rethink various operations when six hands are needed and I'm limited to one on the part and one on the arm of the drill press.
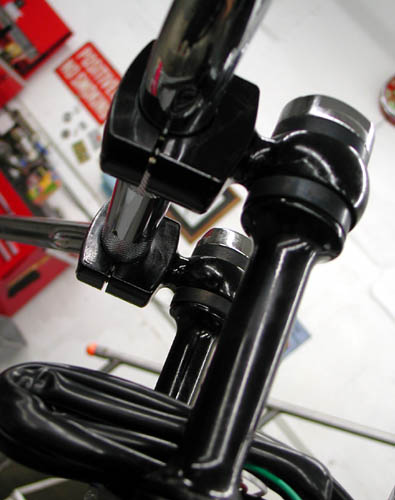
So alone one night I grappled with the installation of the CCI neck bearings (I need a JIMS tool for the races), to install the Paughco springer front end. After a trip to a local fastener store I was able to weave two studs into the rear legs of the front end for traditional, vibration dampening Custom Cycle Engineering risers. The studs needed were 1/2 inch about 2.5 inches long with 1/2-20 threads on one end and 1/2-13 on the riser end. The shop only had two different-length studs and one needed additional tapping to fit.
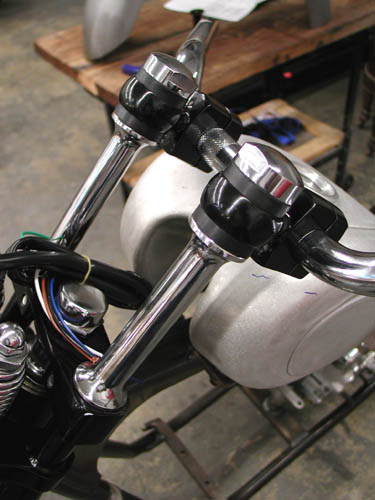

I use these risers on most of my bikes because of the traditional, old school appearance and the vibration element for long runs, but they take a degree of thinking since they shove the bars toward the rider (and often the tank) about 2 inches. I needed to watch for the appropriate amount of tank clearance and ultimately needed the 1-inch longer stems. Very high bars can be a problem with the leverage against the flexible rubber, but with patience, they will work fine. Since each riser is a single unit, they will flex and pivot until they're aligned and tightened down.
I installed low rise drag bars from Custom Chrome/Khrome Works. I'll see how they fit as the seat is mounted. I ordered a seat at a swapmeet this weekend, black with brass buttons by West Eagle. My plan is to bend thick-walled copper tubing and polish it for the final bars.
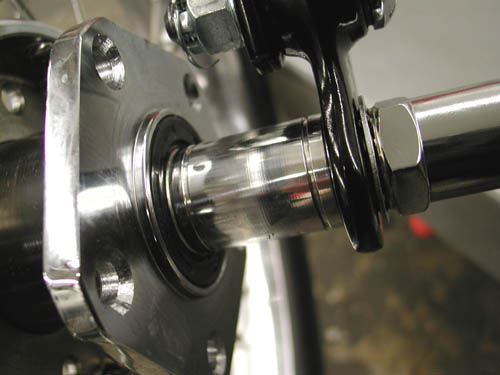

Now Imagine the first time I installed the front wheel, wrestling with the slipping front end and frame, the front wheel, the axle and the spacers simultaneously. Fortunately my 11-year-old grandson was on hand with a rubber mallet to assist. For the rear I used a crate to hold the wheel and the approximate height so I could muscle the axle and spacers through to align it with the frame. It was time for a Corona.

The engine is currently in the hands of S&S for a breast reduction from 103-inch to 93 smooth inches of reliable horse power. I'm waiting on the engine build images to share with you.
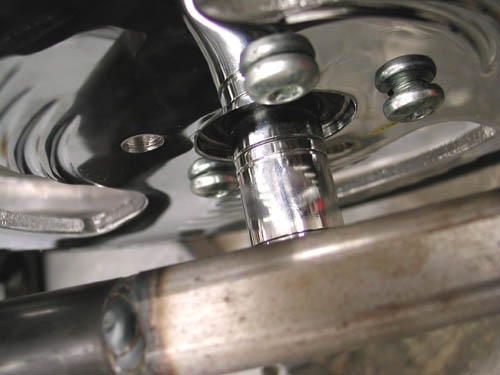
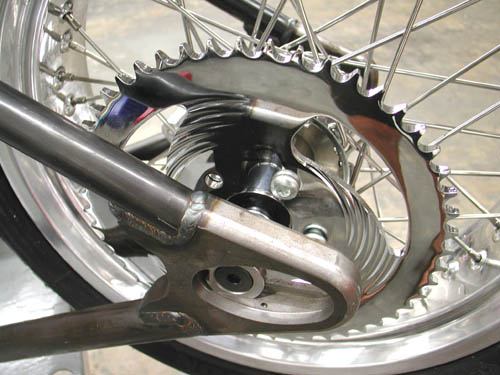
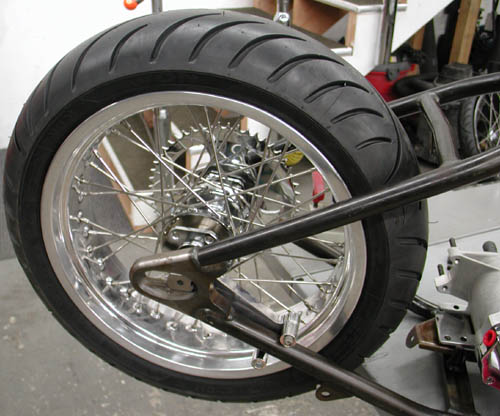
Hold on, I'm slipping the clutch again. Next I mounted the Rev Tech rear wheel with another Avon Venom within the Paughco frame. Unfortunately my Kraft Tech Fender is 9-inches wide and the tire on the 5-inch wide rim runs only 7-inches. I need about an 8-inch wide fender. I'm waiting for the shipment to arrive.
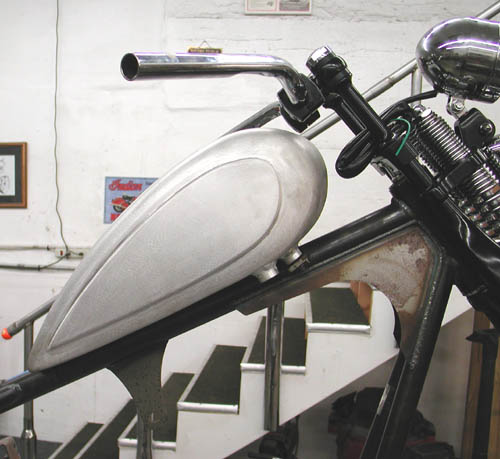
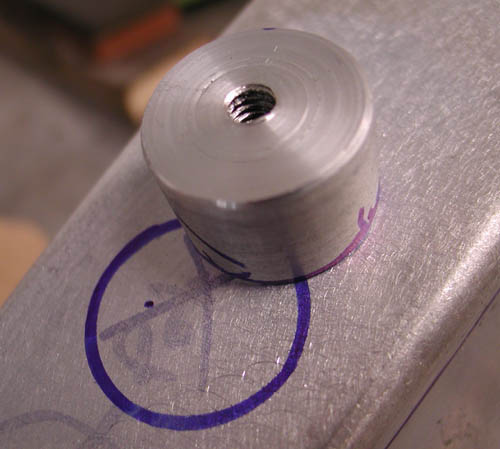
Then I moved onto the tank. I needed to create a couple of bungs for rubber mounting the rear of the tank and tap them for 1/4-20 threads. It was the first time I used our new/old lathe. This is all a new learning experience at the new Bikernet Headquarters. I grabbed a lathe that was rusting in Japanese Jay's backyard. He wasn't using it and I wanted one to cut wheel spacers. I reworked and cleaned the lathe until it was operational then the Doherty crew created a wheel spacer kit? Ah, but the lathe has a myriad of uses, like cutting bungs from a chunk of aluminum. Worked great.
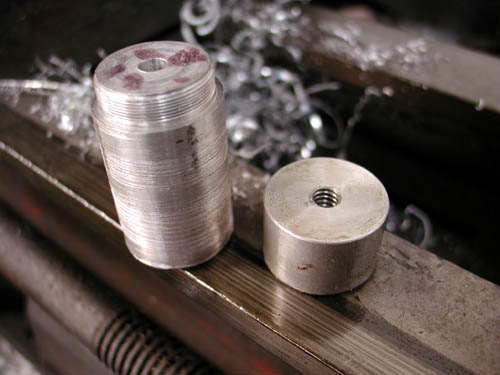
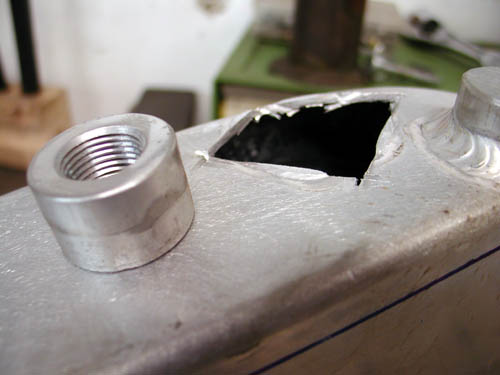
Then I tapped them using the lathe chuck. I discovered that the tank petcock bung needed moving to the rear, since the tank was mounted at an angle. I cut it out with a die grinder and returned to the lathe to machine off the welds.
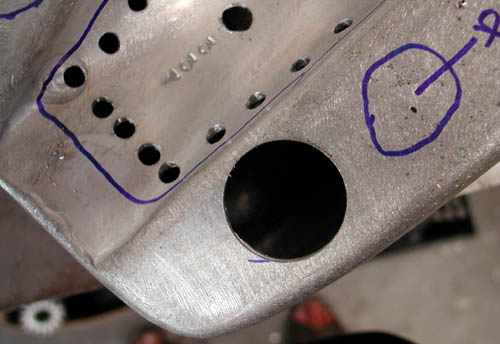
Next I need to learn how to use my new/real old, milling machine. My dad was a machinist most of his life and ultimately an engineer in the oil well industry. As a teenager I worked in machine shops and picked up equipment experience between smoking joints. I swear I learned something.
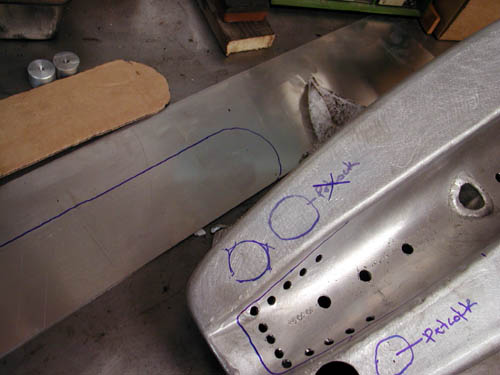
Let's see, what else. I dug through our parts bins and found the exact bracket I needed to mount the Kraft Tech oil bag. I need to cut off the existing coil and oil bag brackets and make a new front mount.
Wait a minute I'm slipping again. I dug through my bracket drawers and pulled a couple of old Jammer brackets 1/4-inch thick. I drilled 1/2-inch holes for the rubber mount grommets from Cyril Huze. I bolted them in place.
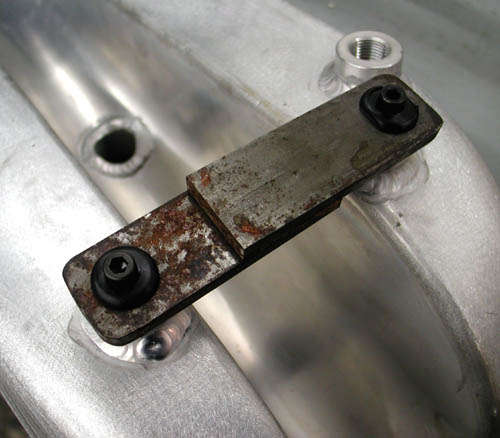
Next, I carefully measured the backbone tubing of the frame and figured the dimensions of the tabs and carefully marked and cut them, then beveled the edges for strong welds.
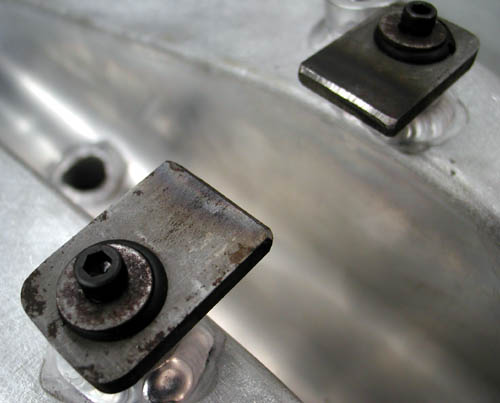
The next day under a sober sky, I refit the tank, tacked and MIG welded the tabs. Once the Bill Hall, pro-welder, welds my tank bungs in place and the tunnel is capped, I can make the final rear tabs and mount the tank semi-permanently. Is that possible?
Next, I will mount the Kraft Tech Oil bag, the rear fender and sprung seat mechanism. I'm also dealing with the rear drive. The frame was set up for belt, but more and more I like the chain notion.
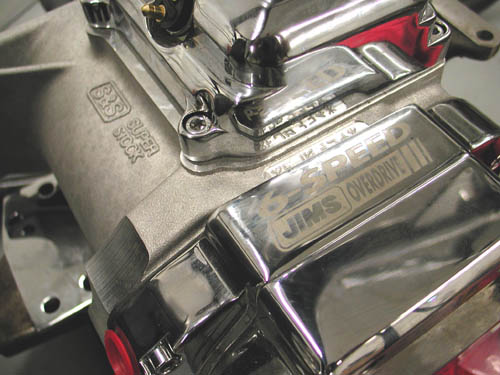
The JIMS machine tranny is set up for 4-speed applications with 6-speed gears. First, I ordered the wrong Custom Chrome tranny plate, then I was twisted about the sprocket vs. belt pulley needed to drive the bastard. I dug through old parts bins until I found gears, since it looked like a gear-driven job. Then the sprocket didn't fit. I'm still trying to figure it out.
I'm going to meet with Jim of JIMS in the next couple of days and get to the bottom of it.
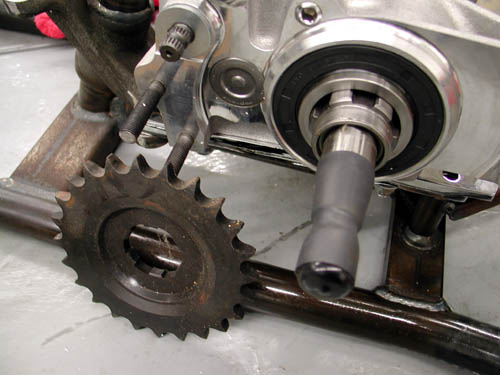
Although the frame is set up for a belt, that means if I run a chain, I'll have plenty of alignment flexibility. Hang on for my next report.
–Bandit
Doherty Machine
1030 Sandretto Dr Unit L
Prescott, AZ 86305
928-541-7744
mailto:Dohertymachine@aol.com
BRAND NEW CUSTOM CHROME CATALOG RELEASED–
Want the Custom Chrome's new offering for 2005. The California based distributor brings you the most comprehensive product offering in the Harley-Davidson aftermarket! At over 1,500 pages and over 25,000 part numbers, their 2005 Catalog features the new RevTech 110 Motor, Hard Core II, bikekits, frames and forks–everything from nuts & bolts to performance products. It's the Custom Bike Bible for the year. No, this is not the latest book, just click on it to find the real deal.
ONLY $9.95 + 6.95 Shipping**
** Price may have changed.
Sturgis Shovel Part 4
By Robin Technologies |


Here's an update on the Shovelhead. I picked up the engine from Phil's Speed Shop in Anaheim. He rebuilt the battered heads and lifter stools, installed new JIMS lifters, S&S roller rockers and CCI Black Diamond Valves. He welded and repaired cracks and exhaust manifold threads. Old used Shovelheads can be fragile.

I installed studs with a mixture of liquid metal and red Loctite. I don't like screwing anything steel in and out of aluminum. It wears on the threads and stresses the weaker material. Besides, from the extreme heat expansion and contraction the threads always feel loose. So I packed 'em with liquid metal to tighten the fit and added the red Loctite to keep them from coming loose. We'll see.


I dug through my junk drawers and discovered another top motormount stud. I treated it the same as the exhaust manifold studs for a tight lasting fit, I hope. I've decided to fab shotgun pipes. The front out the left and the rear out the right and attempt to keep the lengths the same. I would like to work in some shorty mufflers for performance and sound reduction, but a couple of fish-tips caught my eye that sultry morning.

I tinkered with the studs while Layla headed to Home Depot to grab some stainless steel bolts, that I could polish, and use for the motormounts. She was going to call me from the Fastener bin. I didn't hear from here for a half-hour so I dialed her number. She forgot and was rolling up to the Bikernet gate. So I dug around through drawers to find usable bolts for the time being. That's why the spacers show up on the rear mount–it's temporary.


The old code called for bolting the rear motor mounts down first, so that if any spacing was needed to the front, it would show up. It did and I found a piece of almost 1/16-inch aluminum plate that fit perfectly. I cut it, drilled, polished the edges and slipped it into place. We'll see if it works with the BDL inner primary belt drive plate.


That caused another dilemma to surface. The engine is a late '70s Shovel with a early electric start, JIMS four-speed transmission case and plate. According to Kent at Lucky Devil, there's another variable lurking. I'm still having a problem finding the correct chain sprocket. As you can see this CCI job is meant for even earlier transmissions. Then I need a BDL system that will fit the engine, transmission and line up. Hold on for that one.

Sturgis Shovel Part 6
By Robin Technologies |

Here we go. I’m relunctantly behind the eight ball, or more likely the 5-Ball in this case. The bike is nearly complete and I haven't caught up with the articles. For the most part I was working at Primedia on the bike mags and didn’t have time to breath. No fucking lame excuses. Let’s hit it.
My original plan called for brass sculptures to hang this bastard together in a purely Bandit way. I messed with some odd heavy brass cloverleaf rod that was over a ½ inch in diameter. I wasn’t having my usual creative luck with bending or messing with this material. Kent from Lucky Devil Metal Works in Houston recommended that I use silicone Bronze rod and I’ve since messed with it. I shifted gears from Gargoyles and sculptures to pure mechanics. I started drilling holes is everything.
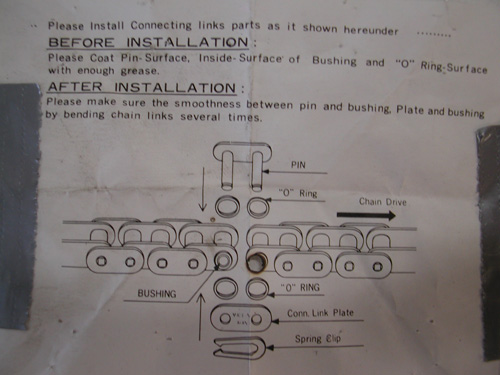
I discovered a piece of ½-inch wide strap that I thought was copper. Remember that the notion behind this mess is to use as much bare metal as possible. As it turned out the strap was brass so I gave it the Scotch Brite treatment and went to work. Before I made or positioned the rear Custom Chrome chain I needed to align the wheel, the transmission and the engine. I used my BDL inner primary and pulled the loose engine and tranny into position. Then I centered my chain axle adjuster and installed the chain using the CCI instructions (above). I have an old chain breaking tool, so I took out just enough links.
With the chain in place, aligned and adjusted the wheel using the Doherty wheel spacer kit (a life saver). I couldn't mess with the requisite chain guard until all was in the correct groove. Although the Paughco custom frame is designed for a belt, I choose the old school route and it worked out well. Lots of extra space to mess with.
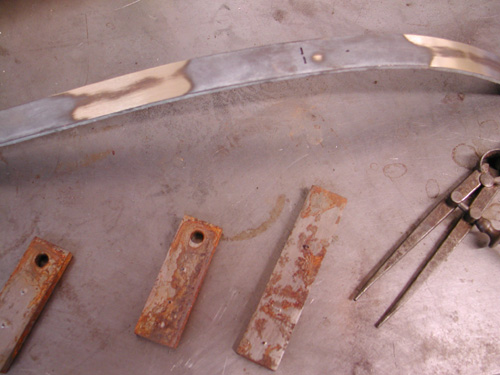
I dug through my drawers of tabs and crap that I’ve had around for 25 years. In the old days Mil Blair would call me from Jammer from time to time and tell me when it was time to shit-can scrap iron. I picked up tabs, spacers and brackets by the fist full and I’ve been moving them from place to place ever since. But damn, when you need a tab it’s bitchin to find just the right size in a drawer. Since I was going nuts with the drilling treatment, I matched the work on the frame with holes in the chain guard and counter sunk the edges for a more rounded look.
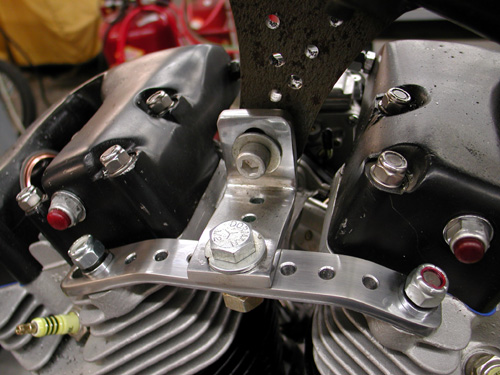
I also hit the top motor mount with a similar treatment. To give it a bit of consistency I measured from center to center on the holes and made all the holes the same diameter, 1/4-inch.

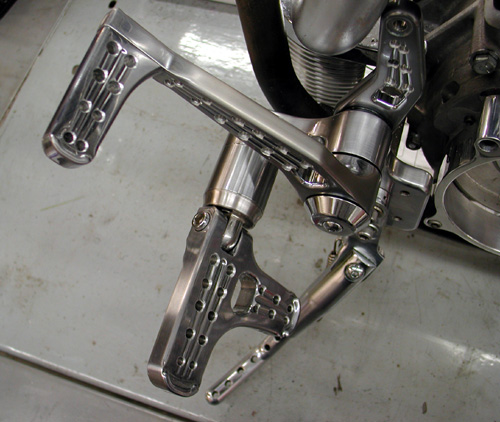
The hole deal became an obsession. I started drilling ¼-inch holes in everything including the Joker machine foot controls. I also went after Russell Mitchell’s Scotch Brite code. I swallowed hard and rubbed a piece of chrome with the coarse material and discovered that chrome reflects everything until it’s brushed with the wiry fabric. It gave it a raw material appearance and I decided that it was cool but a pain in the ass to do.
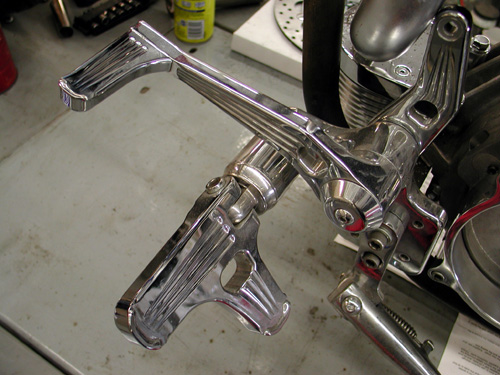
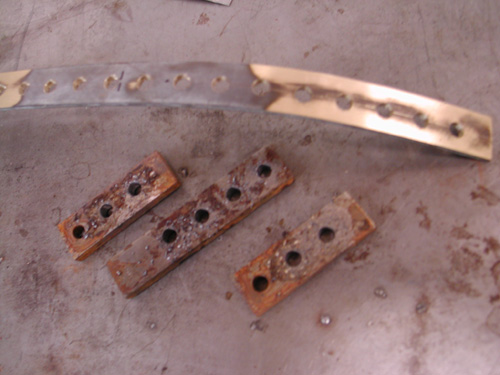
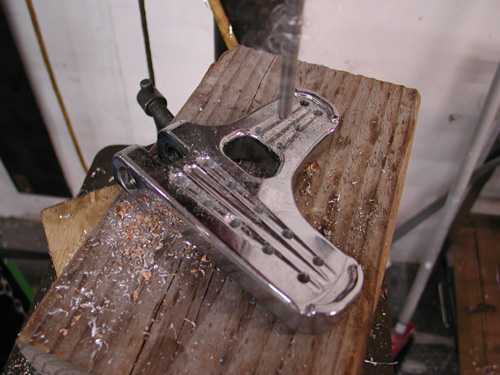
Again, I drilled the holes the same space apart, ¾ of an inch. It’s not always that easy, though. Sometimes the formula just doesn’t work. I use a pair of calipers to hold and mark the distance from hole center to center. If a hole ends up being located too close to an edge of the material, I back off and try another formula. Make sure to plan before you start drilling.
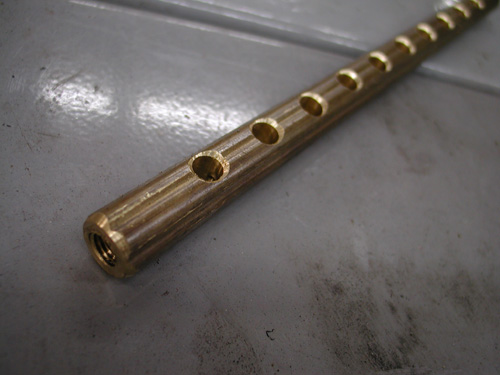
Here’s that damn brass stock. I was determined to have Brass, Copper, Stainless, Aluminum and a bare metal effect on the frame. You’ll see shortly how it worked out. I couldn’t bend that brass shit without destroying it, so I made the shift linkage out of it. I cut it off on a bench lathe and drilled and tapped the ends to 5/16 fine threads to fit the fine thread heim joints. Then I drilled the rod and countersunk the holes to remove the sharp edge.

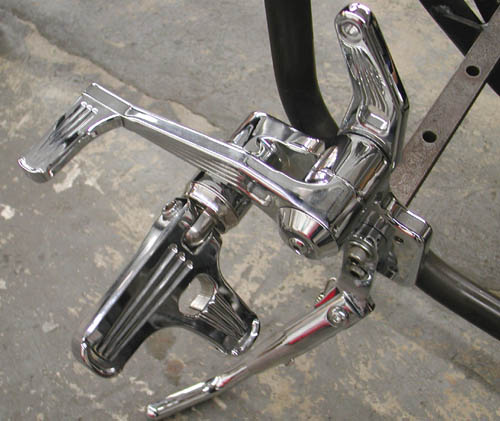
Here’s one of the Joker Machine control sets, rubbed with Scotch Brite and drilled. They make fine controls, some of the best. You can adjust these puppies anyway you choose to fit your riding position, inseam or foot angle.

Before I leave this chapter I’ll touch on this new petcock from Spyke. It’s incredible, if it works well. It’s designed to give you every option for positioning and spigot direction. I ran into only one problem. No wrench lands to help tighten the bastard.
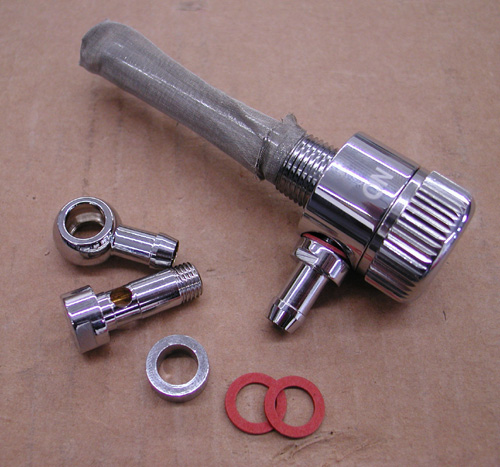
Check it out. You can run it faced in any direction and still read the switch locations and turn the knob without a lever smacking the frame and components. The spigot set allows builders to face the gas line in any direction.

I used the straight spigot and took off one of the fittings because my tank threads are female. The only problem I had was tightening it down, but I’ll get to that after the powder coating returns from Foremost Powder in Gardenia, California.
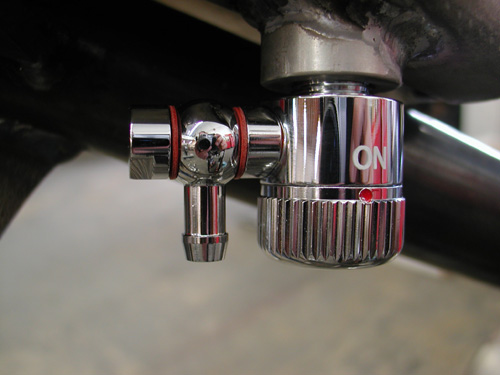
This puppy will revolutionize the industry for petcocks, if it works. I’ll let you know in a week or two.
Ride Forever,
–Bandit
5-Ball Factory Racer Part 3
By Robin Technologies |


I'm in a daze this morning. Too much Quervo Gold last night and too many discussions about the sinking economy. It's a bastard when they lay off port crane operators. What does that tell you? I don't want to go there on this dank gray morning. It's warm outside, but even the dogs, Tank and Cash, feel the gray skies. They look hung-over, droopy and drained. I haven't shaved in a couple of days, need a shower and a kick-my-butt workout.
All the women left me and ran off to the mountains this weekend. I know why Sin Wu needed a break. Have you ever tried to maintain a 10,000 square-foot, old dilapidated building, clean and care for two lumbering, sloppy dogs, two house cats, and a stray that wanders through and bitches if the food supply isn't consistent with her desires? The Macaw needs to be fed and moved into and out of the sun at the end of the day and now we have a fuckin' fish.

There are also construction workers, electricians and plumbers to deal with. It's never a dull moment around here. I'm a big proponent of running off all the costly pets, who can't do except shit and care for a half dozen concrete gargoyles. At least they keep the evil spirits at bay and involve zero upkeep.

Okay, I'll get to the tech. I was on a hunt for a vintage seat and Duane Ballard stopped by with this vintage BMW seat. I used chunks of wood to hold it in place while I pondered the little Hispanic girl who works at Shamrocks, the Mexican fish market two blocks away. Since the seat was made with a number of springs incorporated in the structure, I didn't feel additional springs were necessary. I played with my options, but nothing – graceful, stylish, art deco or vintage – came to mind. Then I grabbed the springs that came with the prototype Paugho frame and voila, it all came together using the existing frame bungs, the mini-seat shocks and a slight modification to the BMW seat.
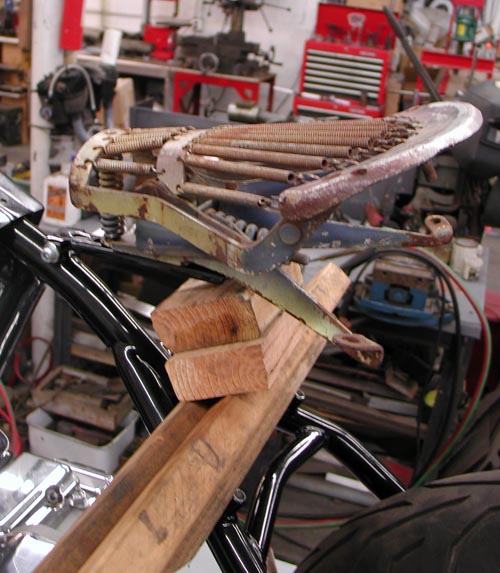
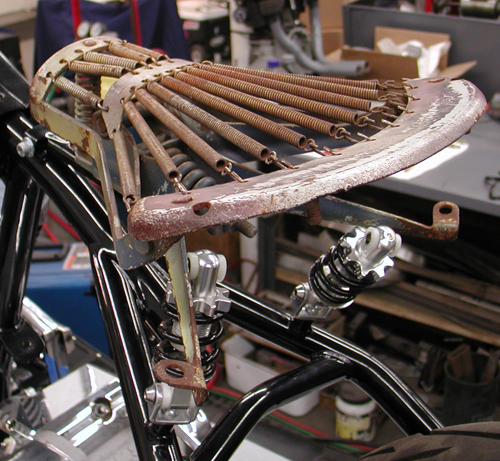
I drilled new holes in the brackets and cut about 4 inches off the arms. The front of the seat bolted directly to the Paughco seat hinge and I was good to go. Duane stopped by again, blessed my creation, and took the seat for top-notch leather upholstery action. He's the best.
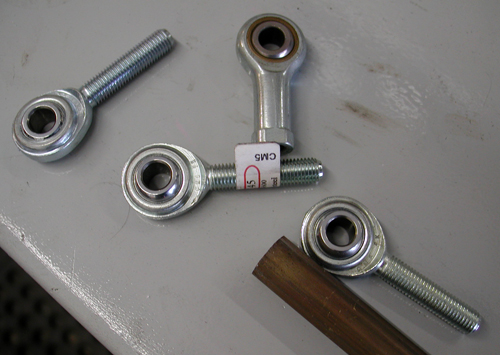
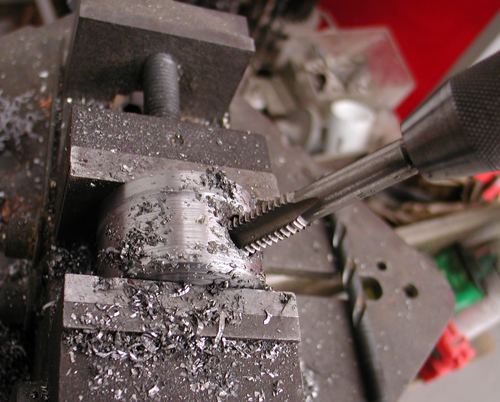
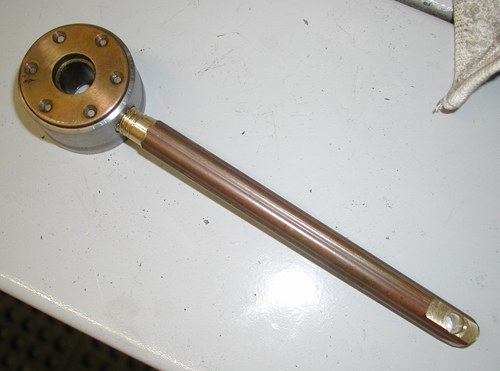
I shifted to my shift linkage system and called Jeremiah for the mathematical configuration from the system we build for his bobber. I wanted a tank shift and had several strange components, plus heavy, solid cloverleaf brass rod to use. I don't have any idea how I come up with this shit, but what the hell. It has class.
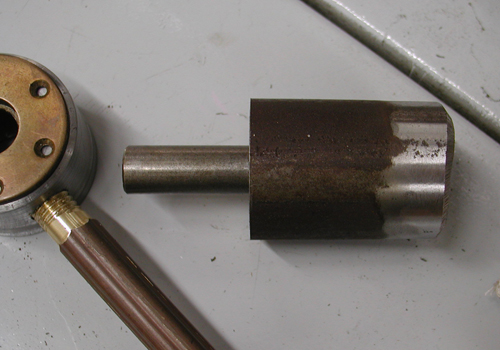
According to Jeremiah, from the pivot point down, the shift arm was about 6 inches in length, and the distance to the shift knob up was almost three times that length. That made for a vast throw and I needed to make sure I was clear, fore and aft, for shifting without smacking the bars or anything else. I checked my '48 Panhead with stock jockey shifting and the ratio was closer to two to one. In addition, jockey shifting is a different animal. There's no back and forth spring action on vintage tank-shifted bikes. The shifter banged through one gear after another from first to fourth, done deal.
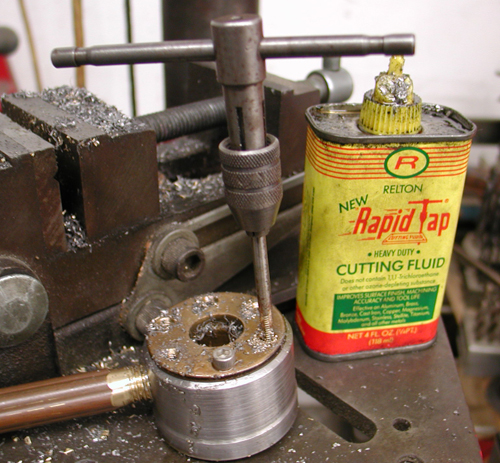
That's the reason jockey-shifted bikes are best with jockey top transmissions. If you need neutral, just pop it out of any gear and you're back in neutral. Ratchet tops force you to bang through one gear after another down to the only neutral between first and second, often missing it. In our next tech, we will install a Baker 5-and-1 drum in this transmission to afford neutral at the bottom for easy reach.
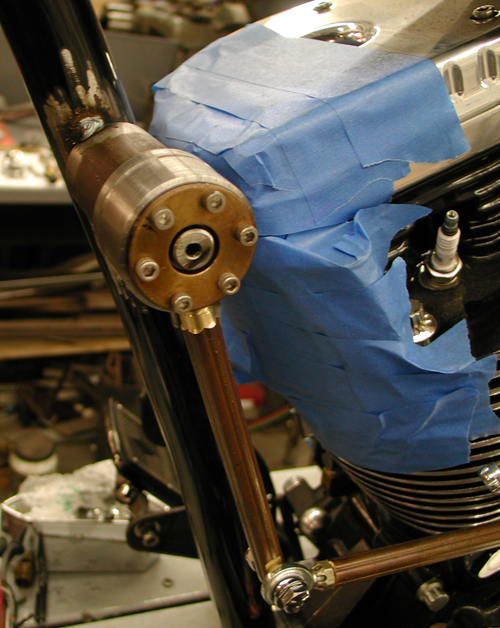
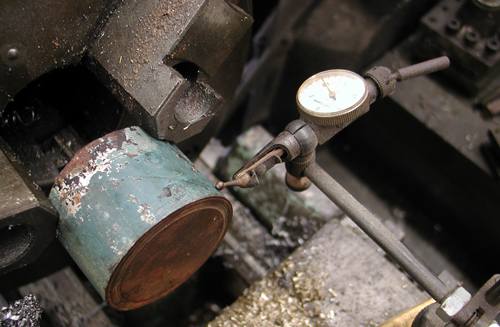
Okay, so back to the job at hand. I'm trying to use as much brass on this bike as possible, so I dug through drawers and boxes of old machined parts and trinkets and came up with these brass-bearing supports. Then I machined a piece to fit these, then the axle piece to mount to the frame. Then I had to bore and tap the pivot, drill and tap to anchor the brass bushing, drill and tap to create a pivot stop and machine and thread the brass rods, plus machine an end to fit a heim joint connection to the transmission shift linkage. I spent hours tinkering and figuring, drilling, tapping and testing, and I'm reasonable sure I have a tough, working shifting system.
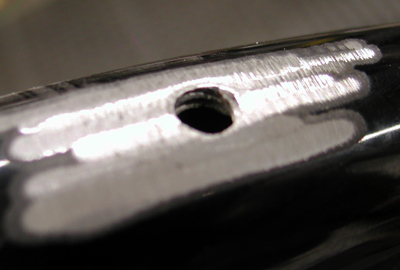
Then I shifted to the dreaded tanks. The tanks are fine, but more involved than normal one-piece, bolt-on tanks, ready with bungs for rubber mounting. Since this was a prototype Paughco Factory Racer frame, the first one of the batch, they bolted the tanks to the frame by drilling and tapping the top frame tube. Problem is, that afforded each 5/16 coarse bolt about three threads in mild steel tubing. In just a matter of time, those threads would fail, the tanks would rattle and come loose.
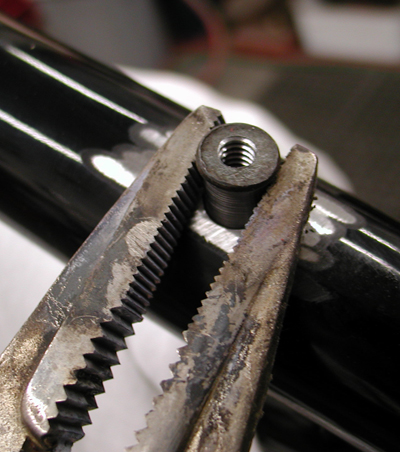
I decided I wanted to strengthen the tank mounting for the long road. I ordered some ¼-inch bungs, ¾-inch deep for a lasting hold. Later, I discovered that since the mainframe strut was 1.5 inch tubing, I could have used the 1.5-inch deep bungs from the Bung King (check their site for all available variations). I needed to re-drill the holes to a larger diameter for the bungs to slip into the frame. Adding the bungs and welding them enhanced the strength of the frame. At first, I though about machining a bung with a lip on it, but the tanks didn't have the clearance above the frame for a lip.
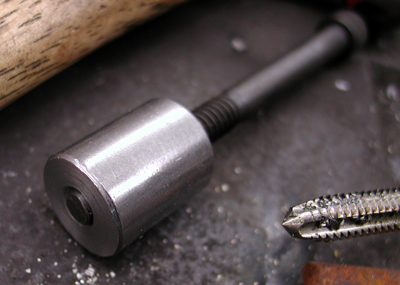


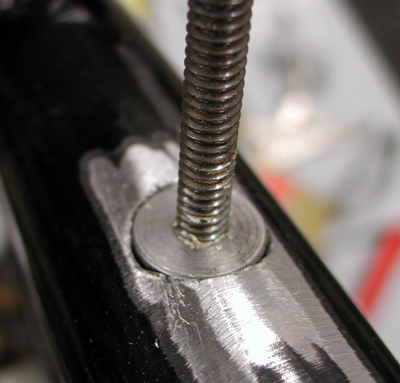
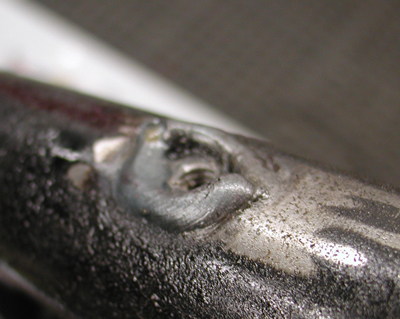
After drilling the frame holes, I tapped the bungs into the hole and as far below the surface as possible for the strongest, deepest weld. I would also need to grind off any protruding weld so the tanks would fit again. One tank protruded into the frame and rubbed at the back, so I moved it as far forward as possible for clearance, which amounted to about ¼ inch.
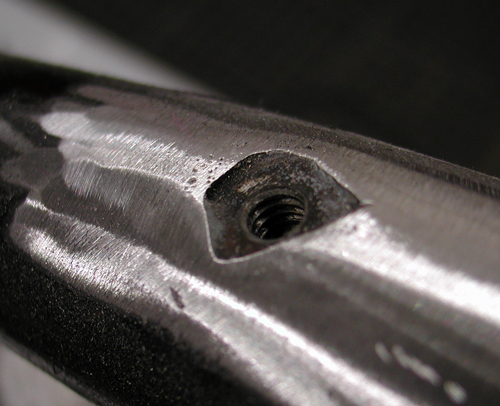
With the bungs in place, welded and ground, I grappled with the tank mounting holes. I thought I had it made, since I was dropping from 5/16-inch bolts to ¼-inch, but not so. Only one hole lined up. I grappled with these bastards for hours. Then I gas-welded the hole slots, refilled them and ground them to a reasonable size.
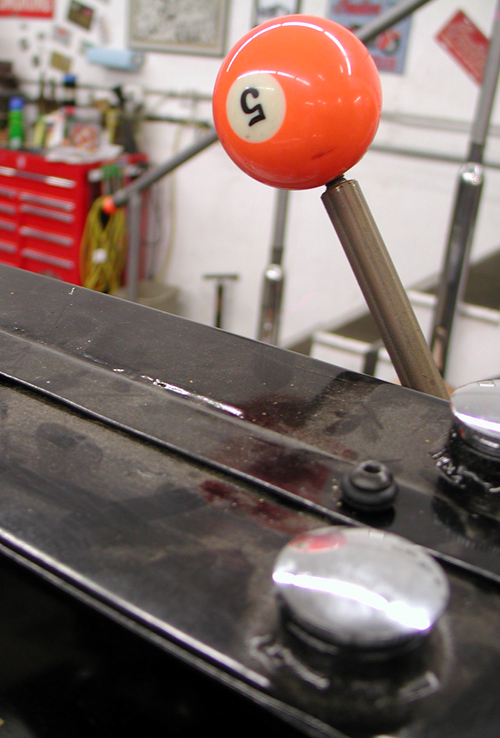
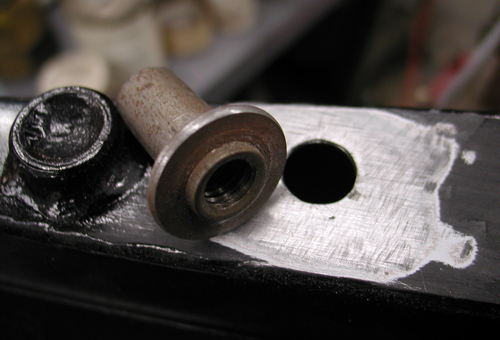
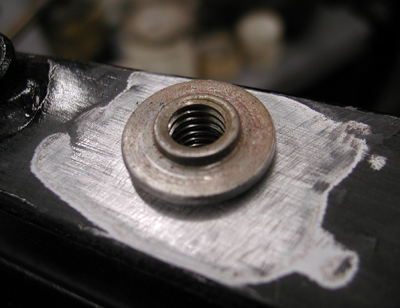
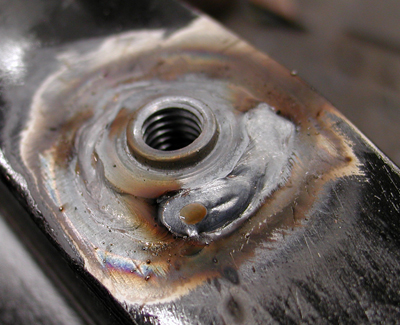
Next, I welded bungs, I believe from Lucky Devil, into the bottom of the tanks and used the Bung King’s rubber mount kits with straps and rubbers to attach it to the frame. In a sense, this was overkill, but I've experienced leaky tanks and poorly mounted tanks on my way to Sturgis a couple of times. One time, Randy Aaron from Cycle Visions saved my ass and my tank paint job. Later on, Paul Yaffe replaced my piece-of-shit Blue Flame tank with a properly rubber mounted Independent tank. So, goddamnit, this needs to be right the first time. I ran rubber mounts front and rear.
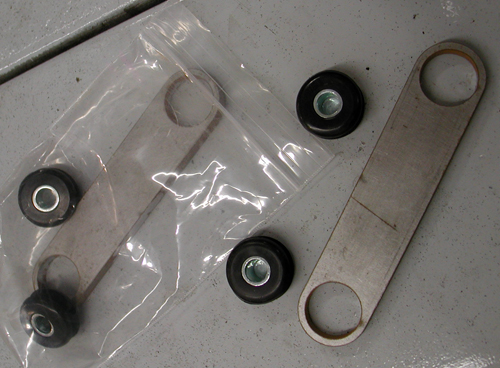
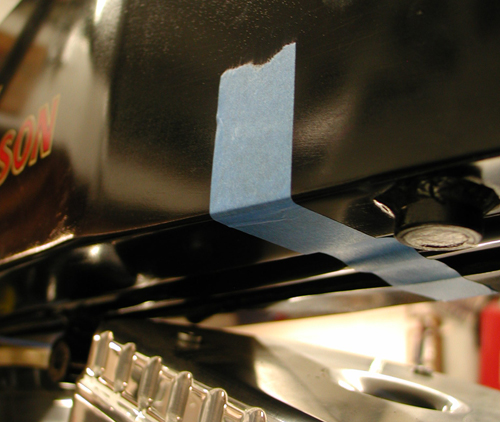
There's a trick to this operation. You need the rubbers in place to make proper measurements, cuts and tack welds. Ah but, too much heat will destroy your rubbers and sink the process. I've done it during mad welding spurts. This time I kept my Bonneville salt sprayer handy, so I could tack near the rubber insert and cool the strap before I damaged the insert. I removed the inserts before final welds.
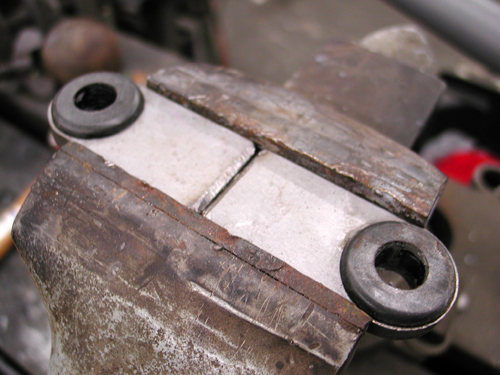
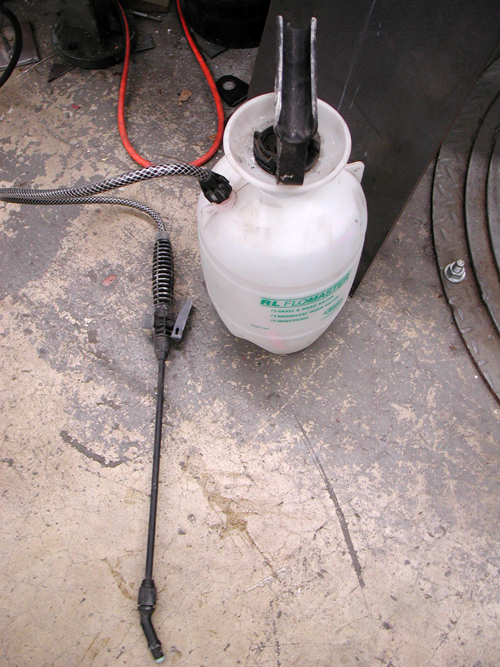


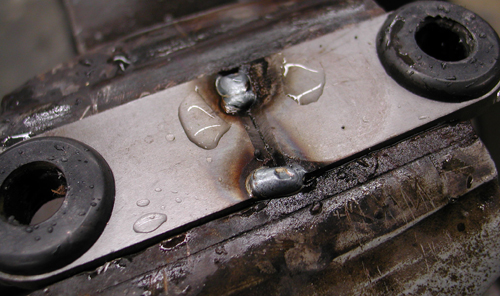
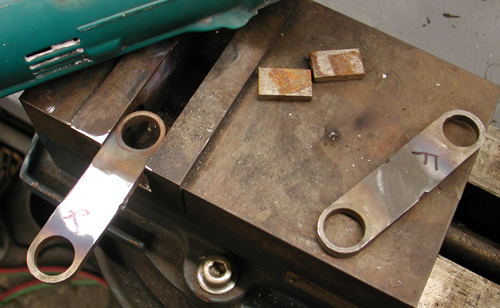
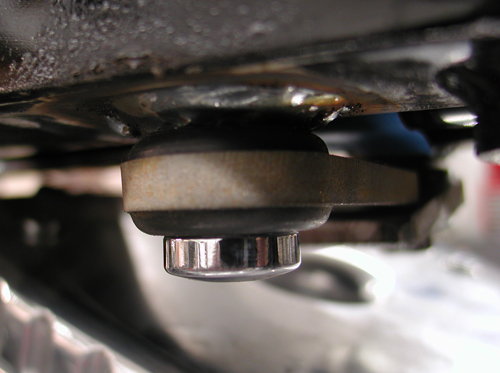
With the tanks securely mounted, I was confident, except for one aspect: capacity and turning radius. I needed to pull the bike away from the lift clamp and flop the Paughco taper-leg springer from side to side. As I suspected, it was going to hit the tanks. Over the next couple of weeks, I will operate again, slicing the tanks for turning.
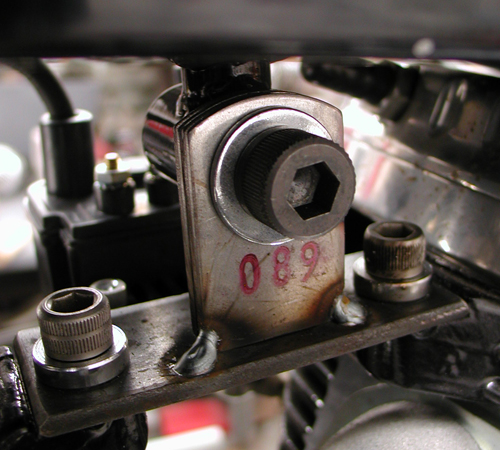
I shifted to making a top motor mount, which worked out like a champ. I made a strap from one Crazy Horse head to the other, then discovered a couple of tabs that would give me the strength and position I needed to hook up with the frame. Top motor mounts are also tricky. They need to be flexible and somewhat adjustable. I made sure the engine was positioned correctly with my BDL primary backing plate, but you never know if something might shift slightly during final assembly, and the top motor mount must be flexible and iron strong.
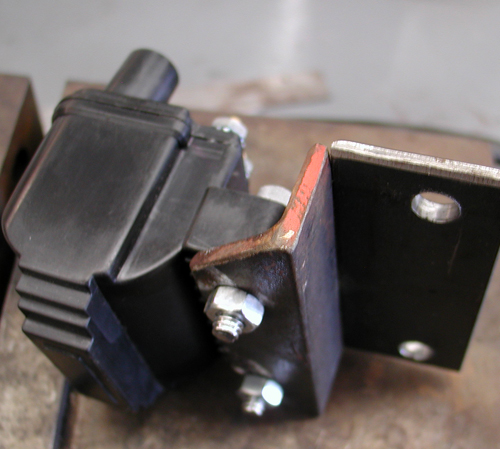
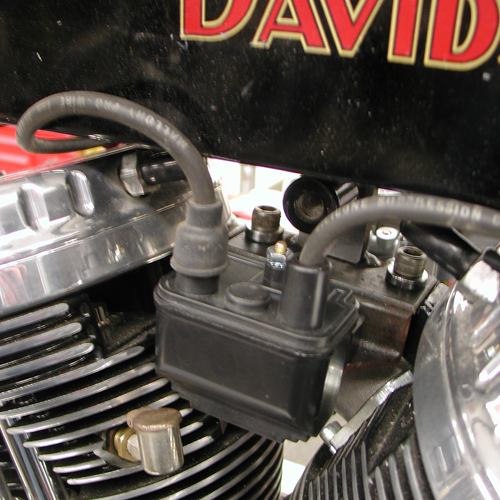
Without too much fanfare, I attached a piece of modified angle iron to the right side of the motor mount for a coil hanger. I angled it slightly so the spark plug wires wouldn’t bang or rub against the tank.
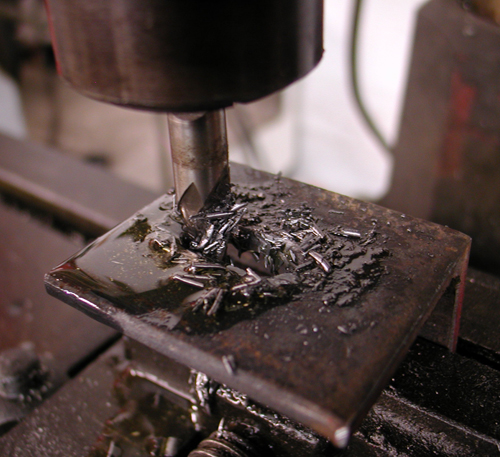
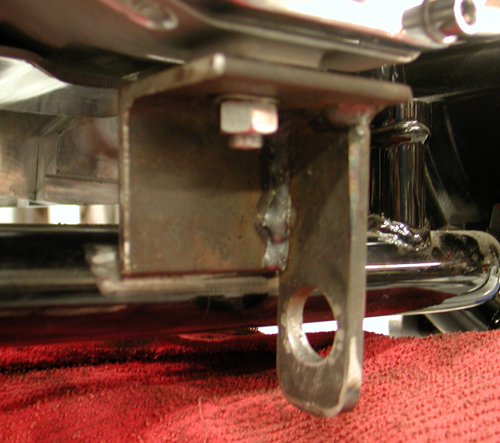
It just happened that I'm building a railing for my mom's house. She's getting feeble, in her old age and needed some additional support. That meant a trip to the local steel supply house, where I stumbled onto some small chunks of angle iron. I didn't like my original number 5 transmission mount, so I decided to remanufacture it with a heftier piece of angle iron that also reached the frame without a problem. It also allowed me a tad more positioning flexibility for the master cylinder and pedal adjustment.
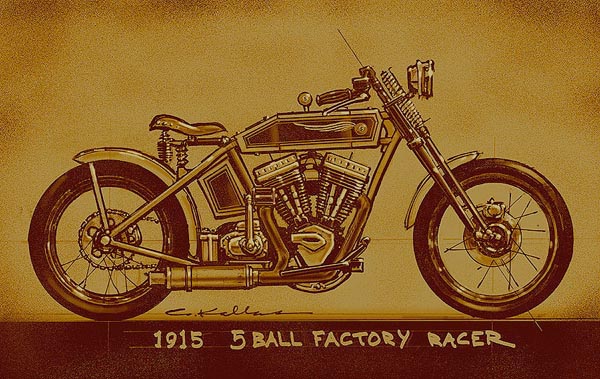
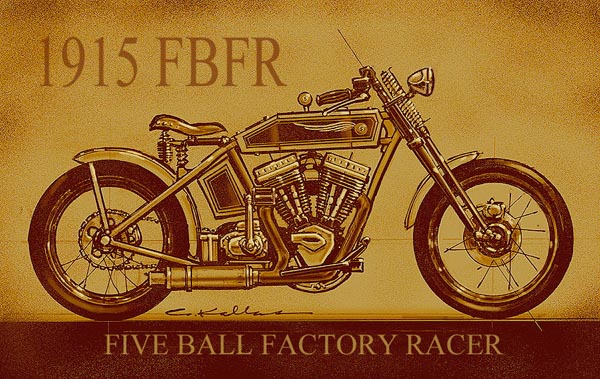
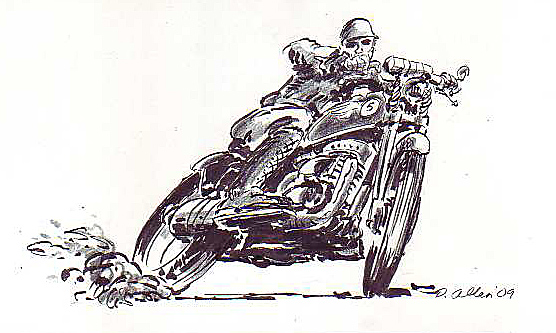
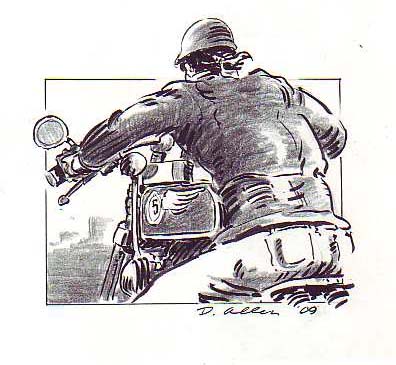
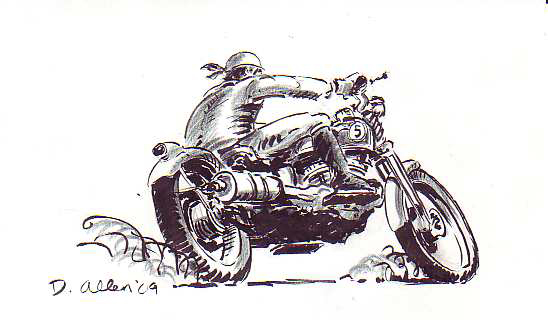
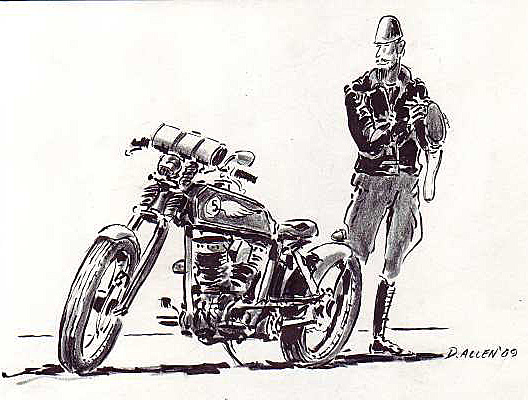
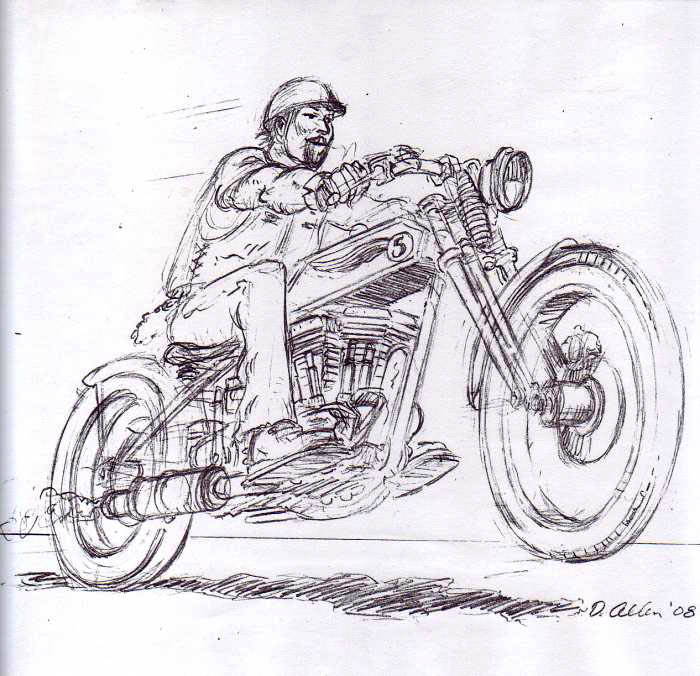
In the next segment, I'll run the progression of Dick Allen illustrations, so you can see the progress. It's as if I'm building the motorcycle, while Dick and Chris Kallas develop the visual story.
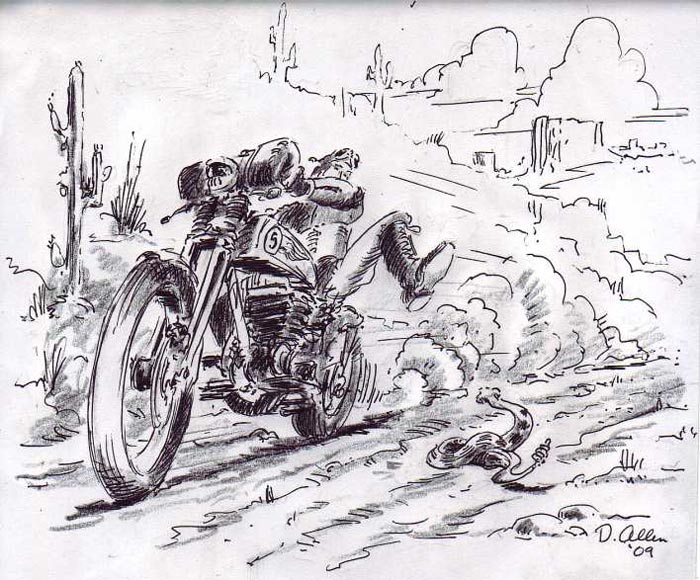
I don't know about you, but these illustrations give me hope and inspiration throughout the build process. Next, I will modify the tanks once more for enhanced Paughco Springer turning radius, then we'll mount the Phil's Speed shop ignition and wiring system to a plate I'll make that will bolt to the top of the tanks behind the gas caps.
Also mounted to same plate of steel will be a manual, vintage Sportster replacement, Bikers Choice speedo driven off the rear Black Bike wheel. Hopefully, the wheels will roll in, I'll find some 23-inch tubes and Larry Settle will mount and balance the Avon tires. I'll set up the wheels in the frame and springer, and then haul the bike to Chica in Huntington Beach. He's going to help me with fender design and mounting. In the meantime, I'll watch the inauguration unfold and stay away from tequila. There's more coming, though. I'm going to modify the trans with a 5-1 Baker drum, and build a set of exhaust with D&D bends and pieces. Hang on for the next installment.

5-Ball Factory Racer, Part 6
By Robin Technologies |
How do you feel about your computer? I could easily take my old .357 Smith and Wesson revolver and blow this sonuvabitch into the briny harbor Pacific waters. I'd set the smoking gun down, go find a job driving a trash truck, and be able to hang out with the bros and drink beer until my kidneys failed, then you could toss my carcass into the Pacific along with my IMac. Life is nuts.
Ah, but the 5-Ball Factory Racer is coming right along. I hauled it down to Chica's for rear fender fitment, never thinking about the front fender. Should I? Chica makes his own wide ribbed fenders 5 and 6 inches wide. They're available for old tall 16-inch wheels and 18-inch wheels for an easy fitment to the tires. On my way south of Long Beach, California, I swung into Todd's Cycle. He was jammed with work. It's odd in this dour economy to see shops cookin'. Chica also was hustling to fill wheel orders, work on vintage bikes, and rebuild engines. I stopped in another shop on the edge of Long Beach, Richard Graves's car restoration facility. Damn, he does sharp work. He was working on a '50s Ariel square four.
Graves was also jammed with work, so the world ain't all doom and gloom. We just gotta provide a valuable service and be honorable businessmen, and we'll survive, goddamnit. Like Dave Rash, of D&D Exhaust says, “Motorcycles are mechanical Valiums. The world can go to shit, and the brothers take care of their motorcycles.”
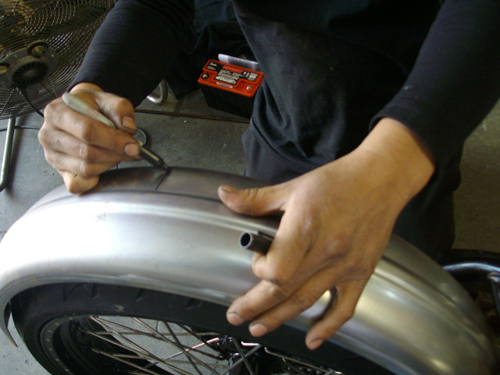
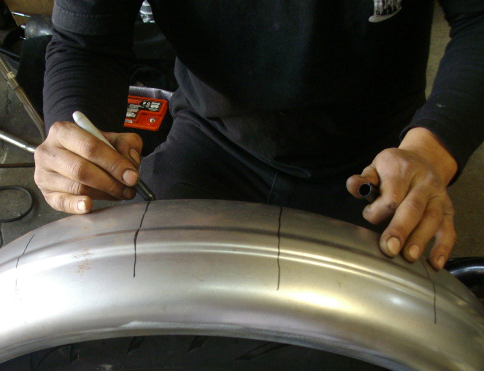
I like that notion. Chica marked my fender for stretching since his fender wouldn't wrap about a knockout Black Bike 23-inch wheel with an Avon Tyre. He indicated where the stretching would take place every 4-5 inches with a felt pen, then went to his machine. “You need to stretch it the same amount,” Chica explained, “and stagger the stretching maneuvers to prevent the fender from warping or twisting.”
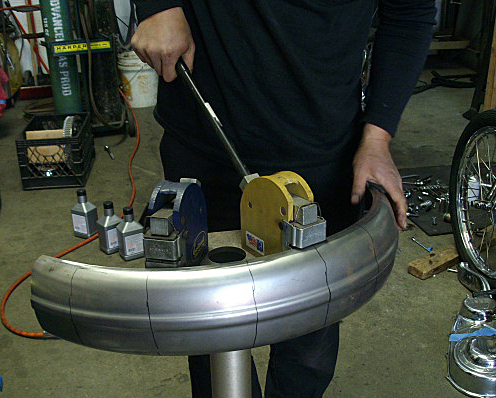
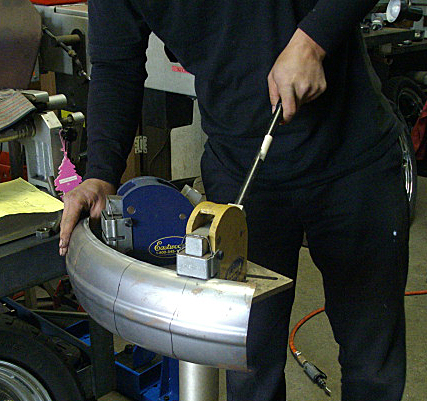
I asked Chica if his fenders needed additional support where the fender rails would be attached. He pointed out that the extreme contours and the ribs added extra structural strength. But he did recommend two fender straps over the frame cross-member.
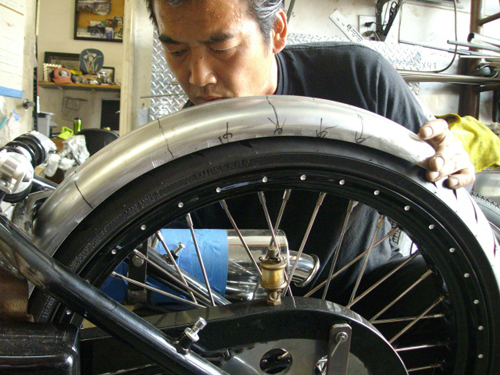
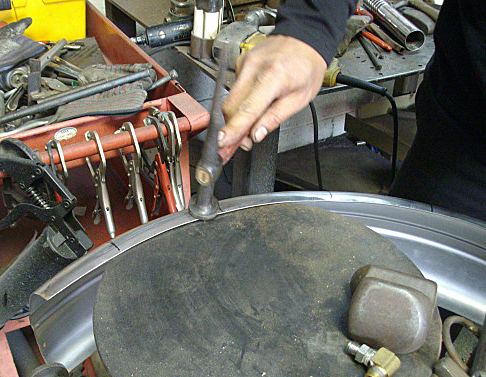
That did it, and Jeremiah and I loaded up the Racer for the return trip to the Bikernet Interplanetary Headquarters deep in the Wilmington ghetto. I started to work on the rear fender installation immediately. I bobbed it about 4 inches, but was grabbed by the rear wheel adjustment designed by Rick Krost of U.S. Choppers and manufactured by Paughco.

It's interesting, and I'm still getting the quirky hang of it. It automatically adjusts the ¾-inch axle back and forth, and up and down about ¾ inch. That element makes mounting the rear fender even more interesting. I was forced to don my patience- and-remain-flexible hat. Who knows if it's right, but I tried to work in several fender fluctuation means, so I could adjust it if necessary.
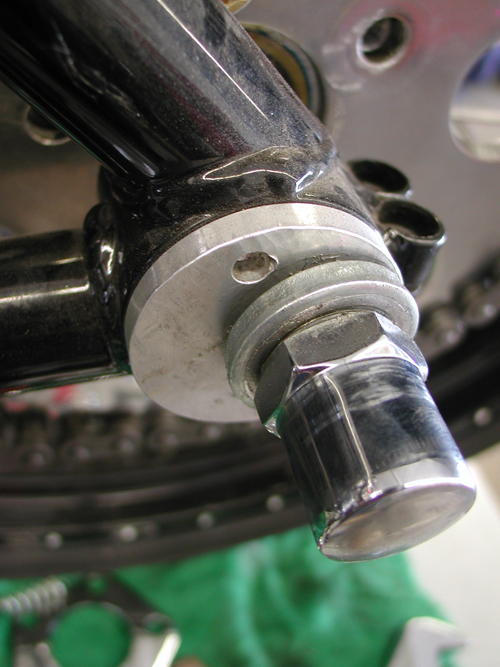
The fender was mounted with a single bolt at the bottom behind the battery case. Then, with the fender spaced evenly from the tire throughout the complete radius, I marked drilling holes for the fender straps. I drilled the holes, and the gods of stainless steel blessed my ass that day with a keen sense of accuracy. The holes and the fender straps lined up. I had to keep an eye on the axle adjustment, or the wheel was cocked right or left in the frame. “Ya gotta watch for the sweet spot,” Rick Krost said. I called him in the middle of the night to quiz him about wheel adjustment and alignment.
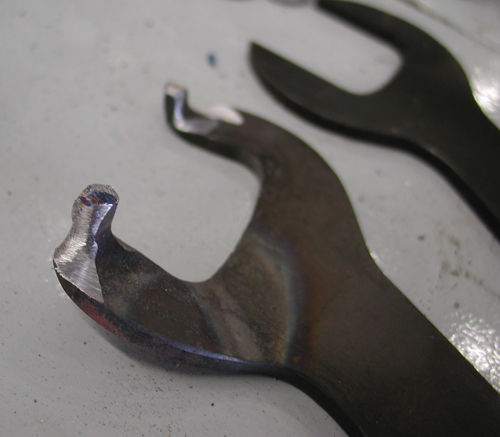
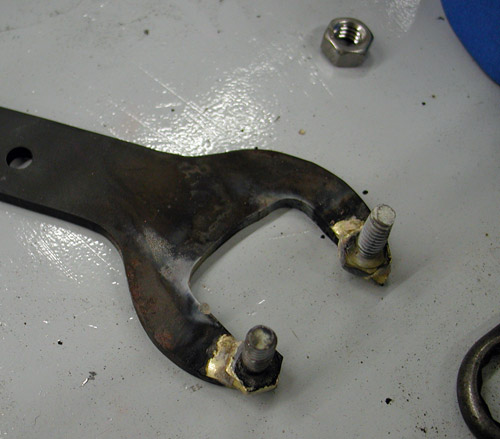
I also needed to make a spanner wrench for his axle adjusters. I was in a hurry one night and built a crappy one with some strange punched out flat open-end wrenches. I just heated, bent the tangs, and ground it to fit. It was sloppy, and ultimately, I built another one with brazed ¼-20 bolts to another wrench. It fits much better.
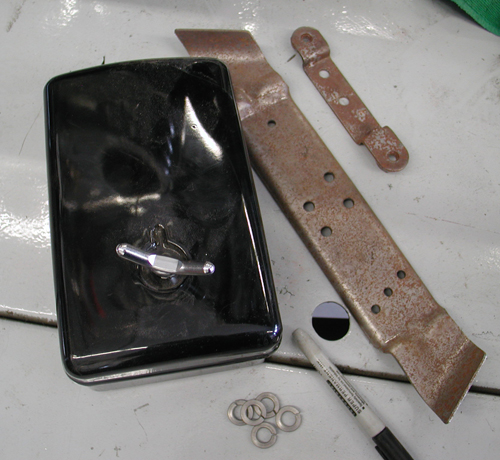
I also attached the Pauchco toolbox strap to the chain side of the bike, since the pipes would interfere on the right. It worked out perfectly for an additional installment point for the chain guard.


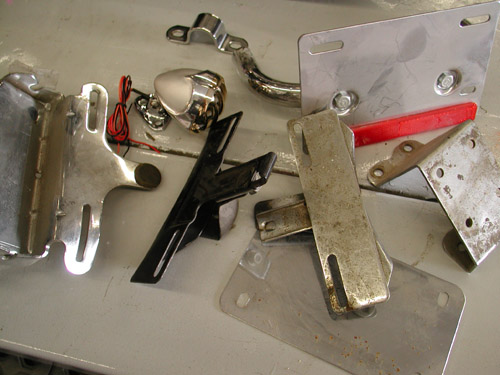
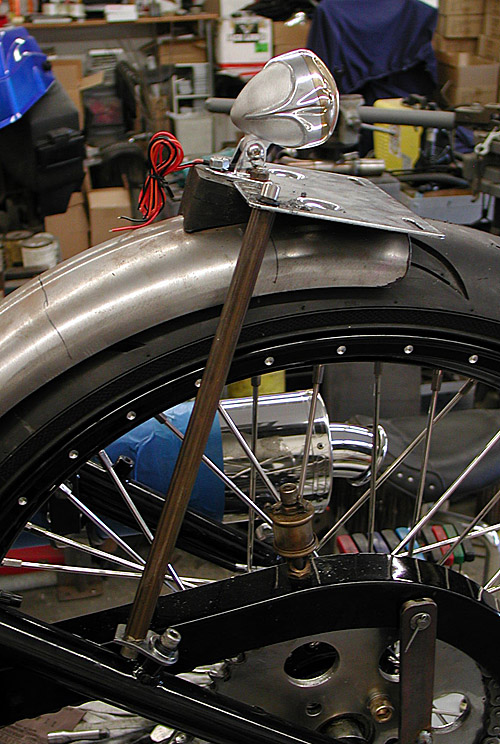
Next midnight run in the shop included grappling with mounting the Crime Scene taillight. It's a cool bastard, but I didn't have anything to mount it with. I dug through old boxes of parts, stock license plate rings, mounts, you name it, until I found an old rubber mount for license plate holders. It was already drilled for my three-point mounting taillight triangle. I found a thick license plate backing plate and went to work.
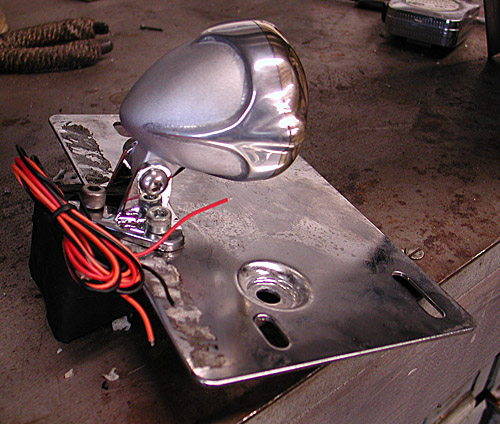
I drilled it to catch two of the Crime Scene holes and held the taillight over the license plate. I thought I had it made. I drilled the fender so the lip of the license plate will hang just slightly over it, for a proper, readable angle. Not sure I was successful. We'll see the first time I'm pulled over for speeding in Wyoming.
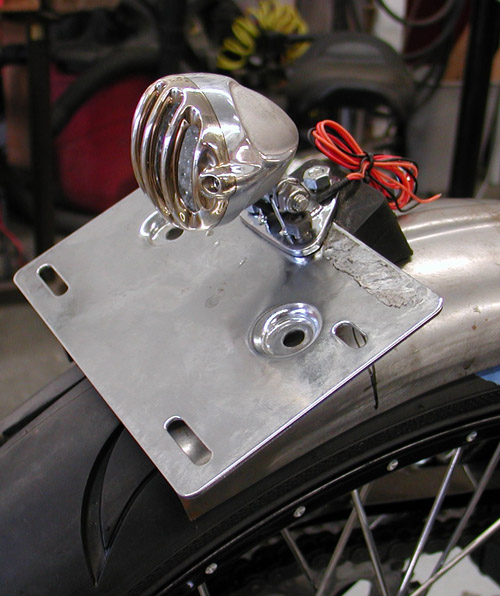
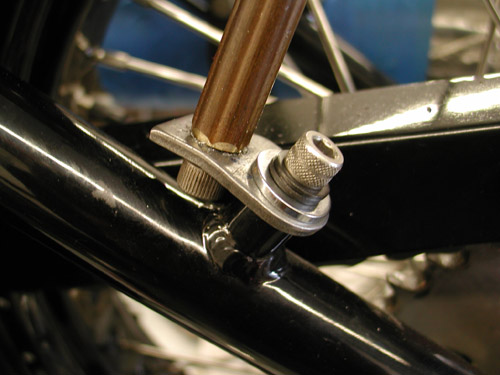
The one item I missed was the spacing for the bonaroo cool license plate ring. I'm not sure I didn't drill the holes too far into the plate, but I was thinking about strength and not bling. From that point, I moved to making fender rails. I can't do anything status quo. So I drilled corner holes in the backing plate, machined more brass, cloverleaf stock with 5/16 coarse threads and bent tabs and mounted them to the frame. Sorta crazy, but actually strong.
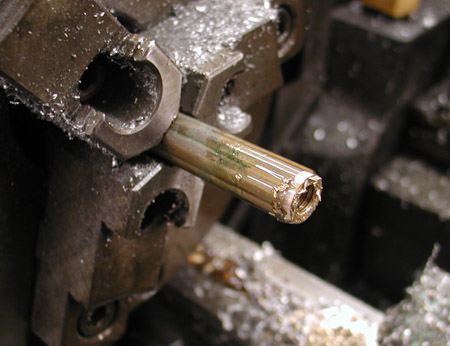
Evan at Power Plant Motorcycles on Melrose in Hollywood coached me on cutting threads in brass. “You need deep thick threads, so don't cut fine threads in brass,” Evan said. “It's soft.”
He also showed me a trick on his new antique lathe for centering cutting bits, which I'll never forget. I'll demonstrate in another tech in the near future. His shop was also busy, when I last stopped in. He builds vintage bobbers with very cool hand- made components. No CNC billet shit for Evan. Watch for his Chopper Challenge feature bike to show up on the pages of Cycle Source.
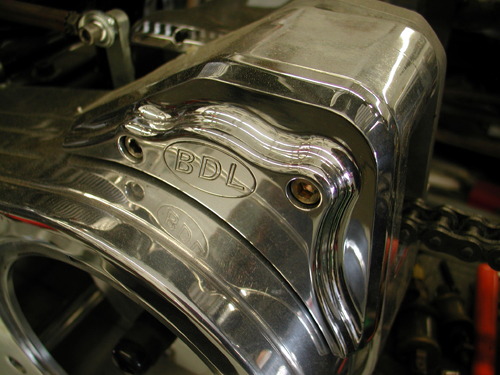
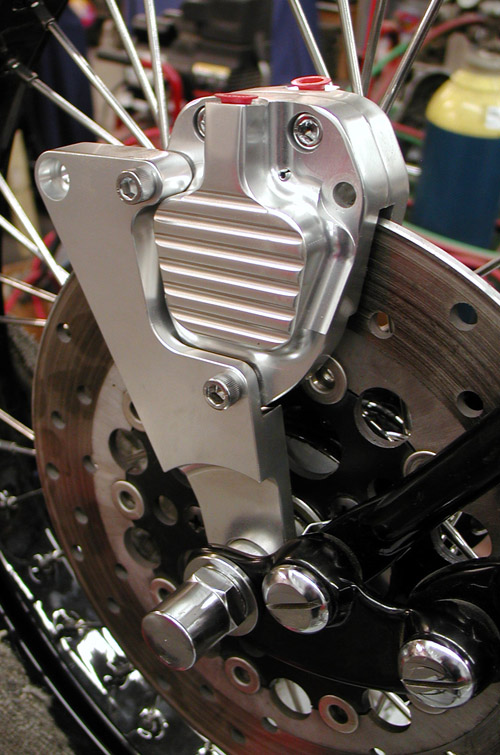
The guys at BDL helped with a super deal on a GMA front brake caliper, bracket, and hand lever. Unfortunately, they only make a springer bracket for the right side, so I modified for the left and built my linkage. Dealing with a narrow Paughco Springer and a front brake is a challenge to fit everything and center the caliper over the rotor. I still need to machine an axle spacer. I also need to deal with this billet bracket. I'm looking for some super cool art deco piece to bolt up front, like a hood ornament from an old Packard.
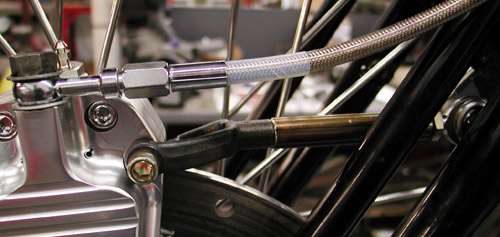
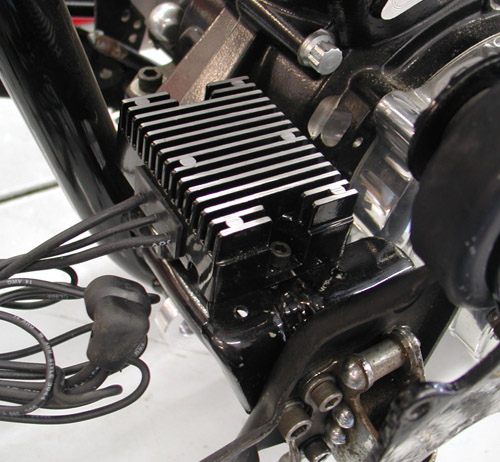
I had to deal with the suicide clutch situation. I had a vintage H-D rocker clutch system, minus the linkage and spring. I made the linkage with a spare Paughco toolbox-mounting bracket. Then while digging around, I discovered what I thought was a regulator mounting bracket. It would work perfectly for the regulator and had the space, and holes drilled for a clutch cable bracket. I went to work digging around for the perfect cable guide.
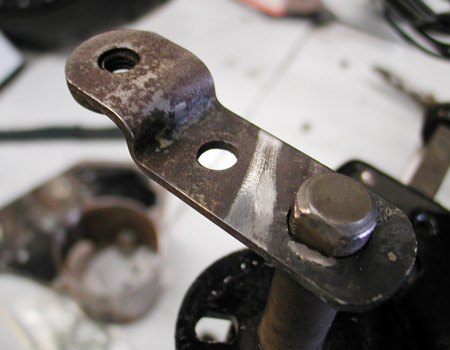
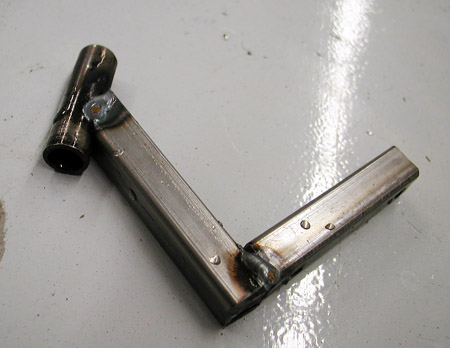
About this time, the Laughlin River Run surfaced and I rode my King into the desert. Two weeks later, I was called to duty on my Sturgis Shovelhead chopper to ride back into the desert to Cottonwood, Arizona for the Smoke Out. On the way I helped a couple broke down in the desert with a wiring problem. As we tinkered with his rigid Sportster, fulla devil tails welded everywhere like handles on wrought-iron furniture, I noticed his suicide clutch set up and his linkage and it gave me some good notions for a cable pinching system.
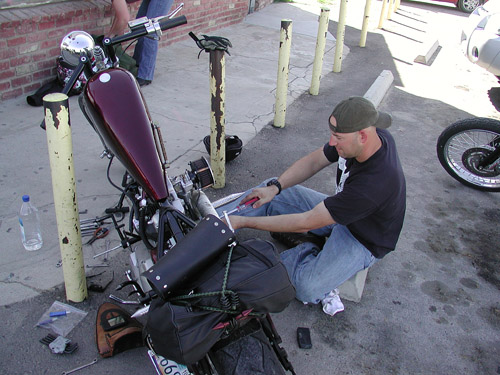


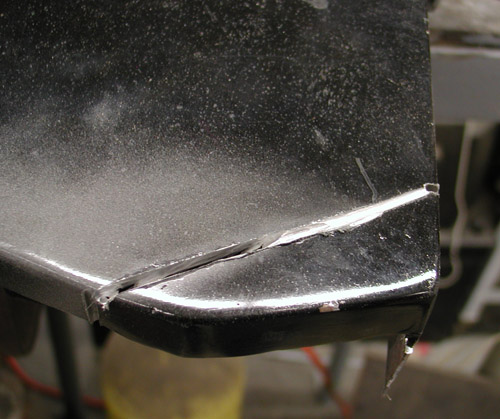
Between Laughlin and Cottonwood, I finally rolled around to cutting the front of the tanks to make room for fork stops with the Paughco narrow springer. As it stood the springer stops would smack the Factory Racer tanks, and my turning radius was shot. I went to work with a Makita cut- off saw and a plasma cutter to slice a new piece of 14-or 16-gauge steel for the replacement. The tanks were painted and that fucked with my MIG welding. Always clear the paint away from the welding area. The smoke from the heated paint messes with the pure oxygen and gas required for proper penetration. I'll work on that more with the next tank.
I'm getting close to making some final welds, while praying that a TIG welder will wander into my shop. But first, I needed to drop in the Baker N1 drum for 5-speeds. This is the simplest modification on earth. It's so easy even I could do it, amazing. These N1 drums… well I'll let Trish Horstman and James Simonelli tell you the facts:
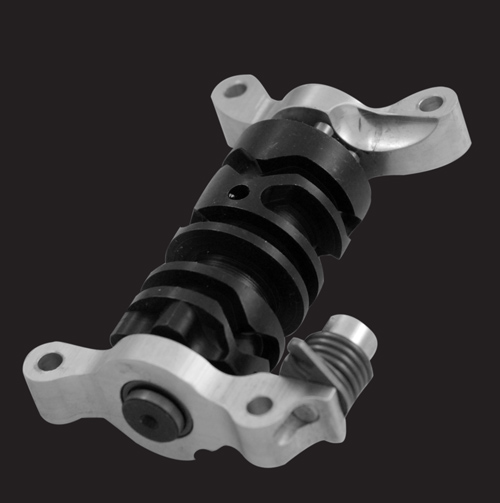
Five years ago we developed the N1 drum for drag racers and street racerswho used our 6-speed overdrive. The N1 shift pattern (Neutral-1-2-3-4-5-6) wasdesigned to prevent false neutrals during aggressive 1-2 upshifts by positioningneutral under 1st.
The jockey shift/foot clutch crowd soon discovered the benefitsof the N1 pattern. The big lever ratio of a jockey shift lever desensitizes the feelof the detents in the transmission such that finding neutral is a crapshoot withbad odds. With neutral on bottom (or all the way forward), the jockey shifter canmindlessly tap all the way down to neutral thus allowing him to put both feet onthe ground as he rolls up to the stop light.
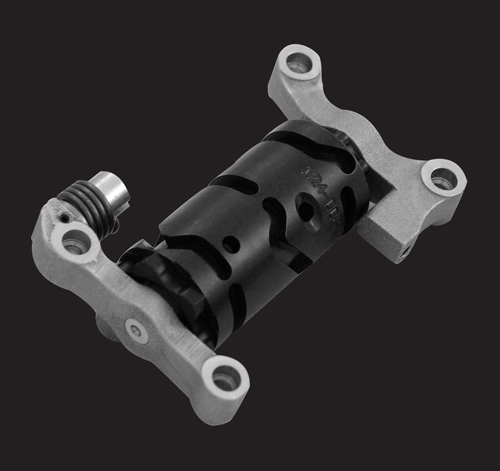
Today, a whole new crowd is realizing the benefits of the N1 pattern. Pingel’selectric shifter is slicker-than-snot and appeals to racers as well as those withrestricted movement in their left foot and left hand. Utilizing an N1 drum inconjunction with Pingel’s electric shifter makes finding neutral (with the solenoid)seamless, and yields a solenoid-actuated shift system that almost makes footshifting obsolete.
PN DESCRIPTION FITMENT
5-6QT-A N1 drum & pillow block assembly, 6-speed BAKER 6-spd overdrive except*
5-6QT-A1 N1 drum & pillow block assembly, 6-speed *Old 6-into-4 (S&S case) &Frankentranny
124-OD6RN1-A N1 drum & pillow block assembly, 6-speed RSD right-side Drive 6-speed, 2ndgeneration
124-DD6N1 N1 drum & pillow block assembly, DD6 DD6, all
2-5R-N1 N1 drum & pillow block assembly, 5-speed Single pole neutral switch 5-spds
2-5RL-N1 N1 drum & pillow block assembly, 5-speed Double pole neutral switch 5-spds
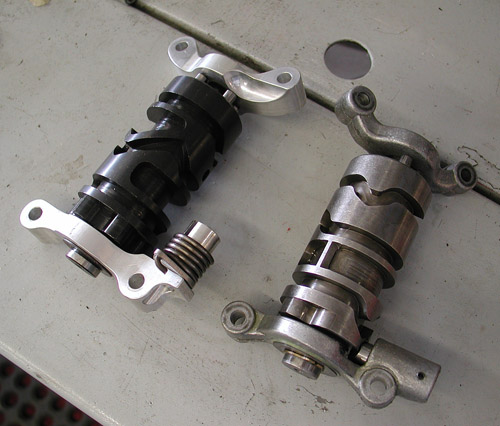
FEATURES/NOTES:
– N1 shift system option available at no additional cost with purchase of a complete transmissionor builder’s kit
– 5-speed N1 shift systems fit H-D 5-speeds and BAKER 5-speeds
– For aggressive shifting we also recommend the use of our anti-overshift ratchet pawl, PN555-56A for 5-speeds through 1999 and 555-56L for 5-speeds 2000-up. For example, this pawlmechanically prevents an unintended 1-3 up shift during an intended 1-2 upshift
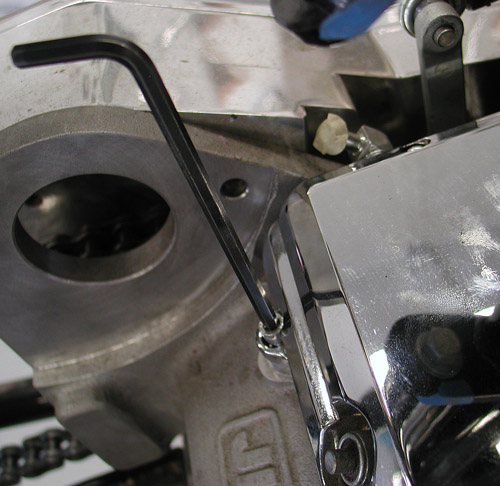
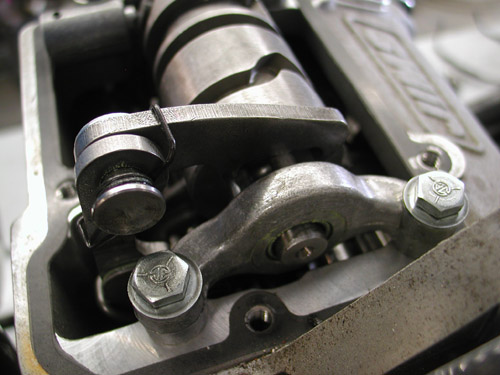
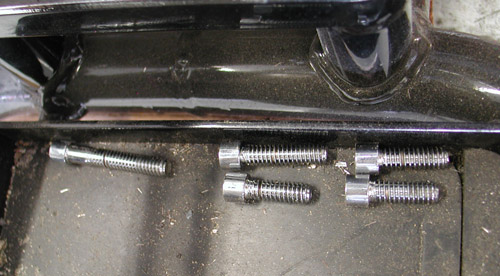
Okay, so I popped off the ¼-20 Allens off the top of the tranny cap. Since, within five fasteners there were three sizes, I placed them neatly in the battery pan to prevent mixing up the formula. The lid came right off.
Then the four 7/16 hex heads need to be removed and the drum and pillow blocks came off as a single unit. Don't forget to lift the shifting arm, and keep it up when you replace the drum.
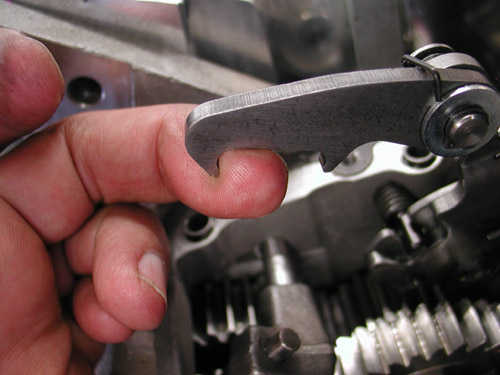
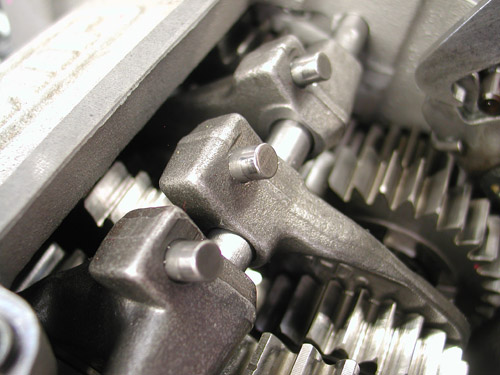
It might feel slightly snug to remove since there are guide inserts pressed into the case to hold the drum perfectly aligned. I studied the drum as I removed it and set it in exactly the same position on the bench to insure I put the new N1 drum back exactly the same way.
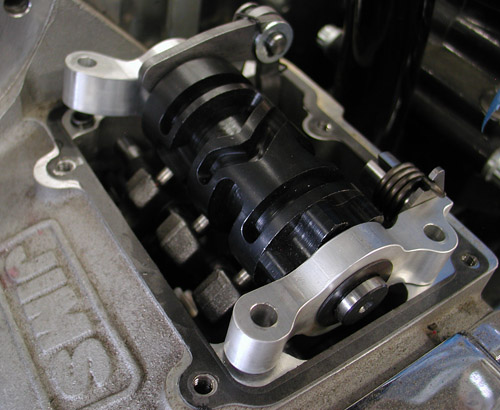
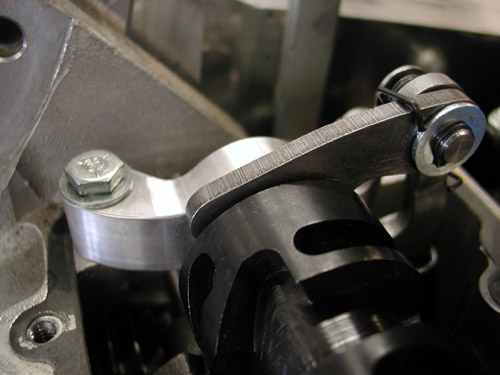
I told myself the old mechanic's rule as I replaced the drum and aligned the shifting forks: Don't force anything, jackass. I carefully aligned the shifting forks, then made sure the pillow blocks fit comfortable over the inserts before rolling the fasteners back into place and torquing them to 130 inch pound of torque or 10.8 foot pounds.
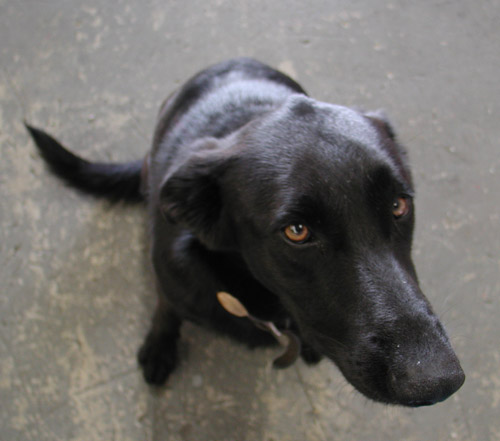
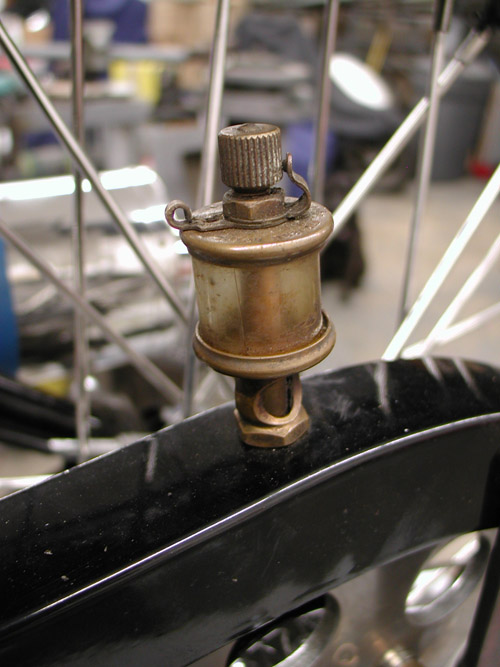
I smeared a dab of tranny oil on the lip of the transmission lid and slipped it into place, then tightened the fasteners to 130-inch pounds of torque. Oh, I forgot. I replaced the standard vent with something brass, mechanical, and vintage. What the hell. I'm going for that vintage appearance.
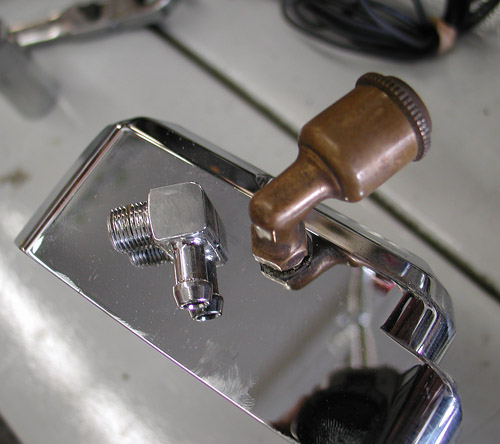
That's it for this installment. Next, I will install an Exile sprotor rear brake and 48-tooth sprocket. I'll finish all my welds, strip her down, and head to powder coating and paint. I have the color scheme down. It's going to be wild. I've also promised not to hit any more events between now and Sturgis for maximum shop time. We'll see if I run out of whiskey and women or not. Hang on.

5-Ball Factory Racer, Part 5
By Robin Technologies |


Last episode I was hit hard with life's bullshit obstacles to freedom and creative expression, but that's how it goes. I generally build at least one bike a year and each one represents a milestone of sorts. Or each one represents another year in the life and times of Bandit. I'm not unique. This notion applies to everyone and every project from building a new home, to building a boat or finishing a book. We're so damn lucky to have the freedom and resources to accomplish our goals, small and large. As you sit back and relish any accomplishment, you know it represents a moment in time–hopefully a good time.
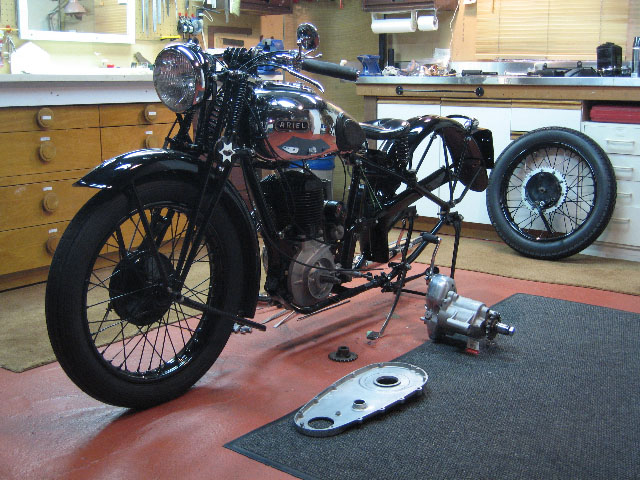
That's very kind of you to offer to runmy bio but honestly it makes me wantto take a nap just thinking about it.How about a pic instead of my stumppulling flathead single '40 Ariel? Wewere born in the same year and havebeen working together for about fifteenyears to keep my bank account drained.As the bike approaches completion itappears to be getting younger and youngerwhile I am definitely getting older and older!
So, recently we tore the March page out of the Calendar and flew into April. A running Racer by the end of April–for the Smoke Out in May, is the goal. The pipes were a major obstacle, yet Jesse James, Illusion Cycles, and Roland Sands inspired me.
I spotted a tight shotgun system on one of Rusty Coones' Dyna Glide custom built in his Illusions shop. That's the direction I wanted to go for the racer look, not along the bottom of the frame in stock 1915 fashion. The muffler on Rusty's bike was a short/short Supertrapp developed with an exhaust guiding cone built by the Illusion team. The two-into-one pipe was designed at WCC, but I decided to give my own spin to the action for the Crazy Horse 100-inch engine.
I also recently featured a bike built by Roland Sands with his own shotgun Vance and Hines system. Check it out. It also has a very short muffler system, but I had an all-stainless Scorpion sport bike muffler from the mad designer John reed.
With Roland's design inspiration, I went to work. I had to make the system run tight to the bike, so ultimately I could install a Baker Drive kicker system to the JIMS 5-speed transmission. It had to run high enough not to mess with the rear axle and not too high for leg burning threats. I had one break; the Crazy Horse engine was designed with the intake manifold running out the left side of the engine. That allowed me to manufacture pipes as high as I wanted–watch the legs, damnit.
Making pipes is a tricky business. This system is teamed with lots of exhaust manufacturers, so I initiated a phone conference with D&D, and they supplied me with various ends and bends to give me a head start. Vance and Hines and WCC were involved with the design and inspirational aspects, and the Boys from Bassani stopped over for lunch and brought a hand full of bends and a chunk of muffler tubing for my speedometer mounts, a very diverse team. Plus nowadays, when you mess with pipes, the diameter fluctuates from below stock diameters to over 2-inch Bonneville racing exhaust performance demands. I took a day dealing with various sizes and ultimately decided on a 1 ¾-inch system to the two-inch muffler opening.
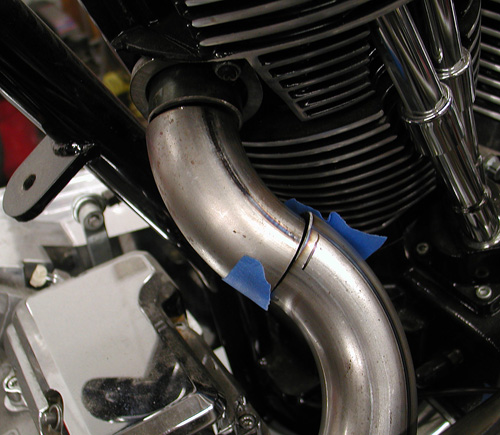
Then I had one of those calm and serene days in the shop–everything fit. It's a Zen thing, when the stars are aligned, and I drank just the correct carefully measured amount of Jack Daniels the night before. For some strange, inexplicable reason, I was tranquil with the dogs wrestling at my feet. The R&B Sirius station shop background music didn't spin any Michael Jackson tunes, and only the 4-tops and Jerry Butler lured me into a false sense of mechanical confidence. I patiently cut, ground chunks of pipes and brackets, then tacked them into place.
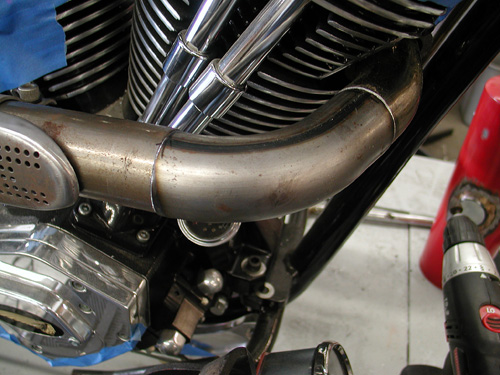
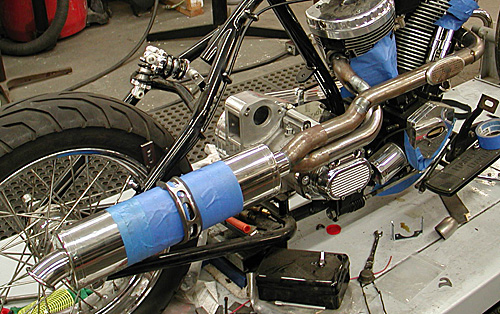
I've been making exhaust systems for about six or eight years, and each year I learn. For instance, I was through the roof to find Hooker Header alignment sleeves, only to discover they hinder performance. That meant I had to move more slowly, meticulously and make sure each segment fit perfectly. I also learned that exhaust wrap can also hinder ultimate performance, by being a heat transmitting barrier. Plus I'm still working on my MIG, pipe-segment welding skills. This year I'm going to clamp a bunch of pipe chunks together and weld them at different feed speeds and electrical settings. I'm determined to nail it down.
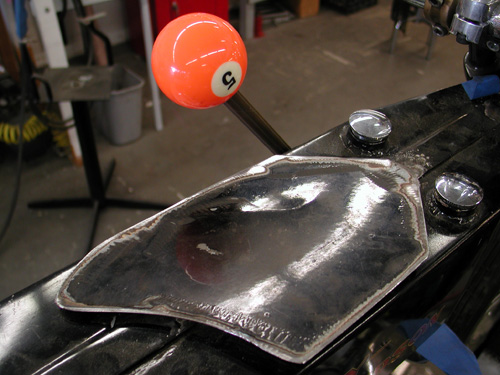
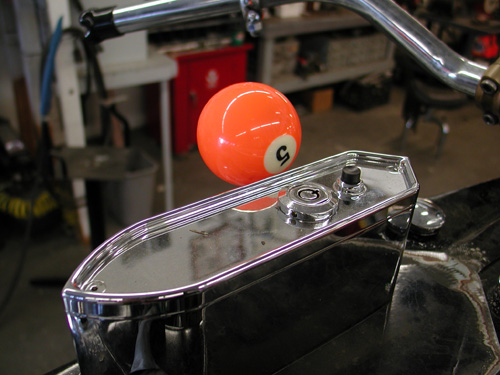


Next, I moved onto a dash plate, cut with a plasma cutter out of a chunk of 16 or 14 gauge sheet metal. My crazy thought was to install the Phil's Speed Shop ignition system onto this plate with the Bikers' Choice Speedometer. In 1915, Speedometers and the constant loss oil pumps were mounted to the top of the tanks, right out in the open, so I decided to follow suit.
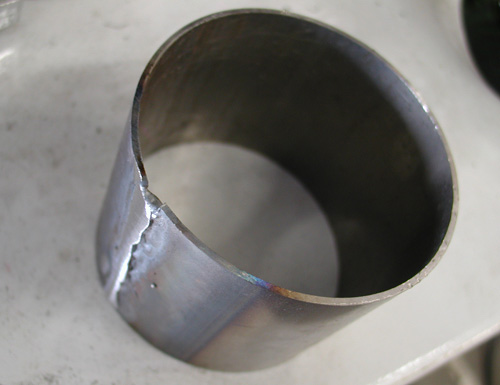
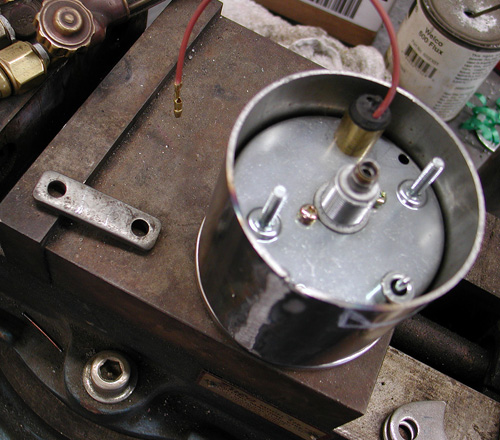
Bassini supplied the tubing for the Speedo, but I needed to be reduced the diameter a 1/2 -inch. I cut it with the Makita and pinched it down until the speedo fit in, and I could still wrap it with something to prevent vibration from beating it to death on the roads to the Badlands.
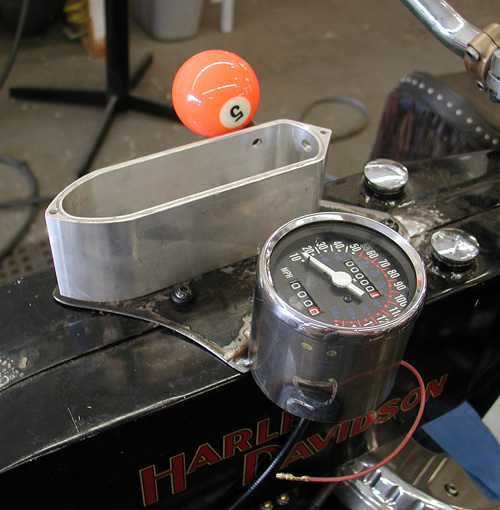

Phil's Speed Shop supplied me with a template so I could mark the holes and weld in studs to hold the ignition system down. It housed, circuit breakers, ignition switch, starter button, starter relay, neutral light and high/low beam switch.
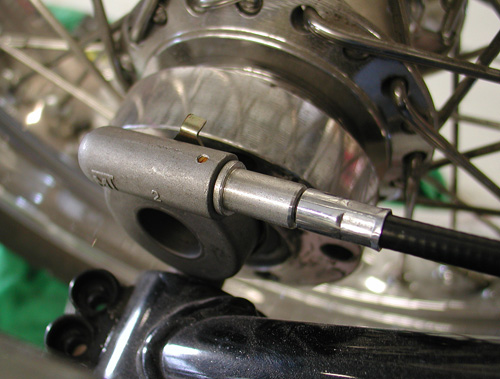
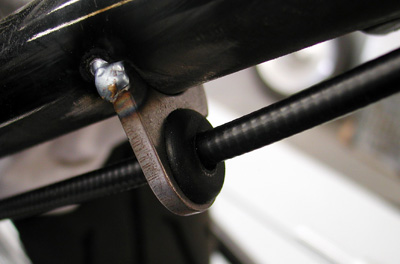
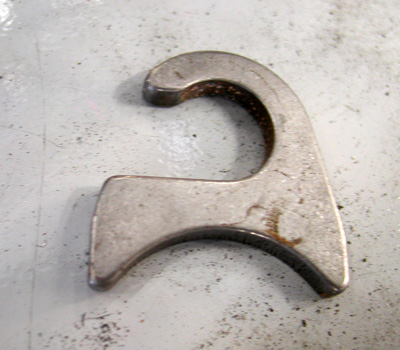
I ran the Biker's Choice speedo cable and drive off the rear wheel in 1915 fashion, but with late model components. I used LA Chop Rods cable guides and grommets tacked to the frame. I played with the plate and position for hours and hopefully got it right. I also cut a notch in the Bassani Speedo mount so I can hopefully reach the trip gauge adjuster. It's going to knat's ass close. In each perplexing case, I shot for functioning symmetrical positions, that don't interfere with other components, like turning the bars.
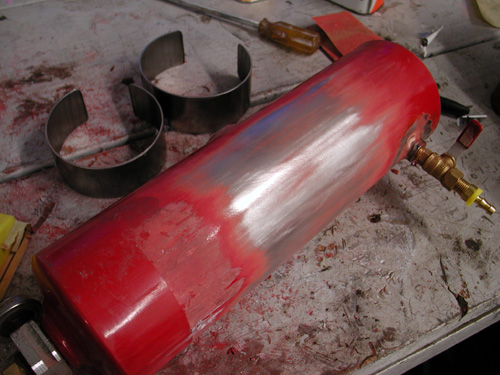
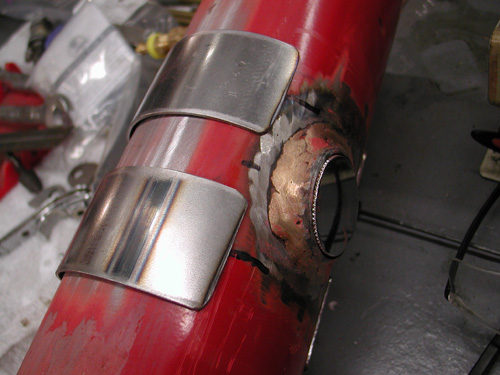
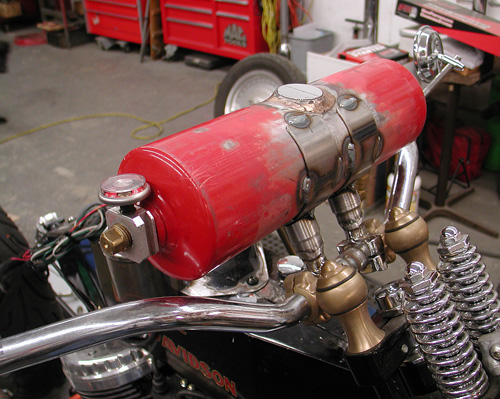
Next, I had the spare gas tank ready to rock, but needed to mount it above the bars. Talk about angst, I looked around for something to use for mounting, like other fire extinguisher clamps, then it dawned on me to use the an old set of handlebar risers, upside down. I found an old set of Jammer risers and bolted them to the bars between the DBBP bronze risers, so far so good. Then I cut them, estimating the height needed to clear the bars, but I was wrong. What happened with harbinger to my Zen aura?
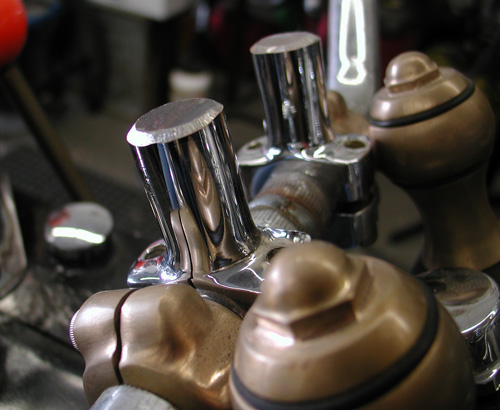
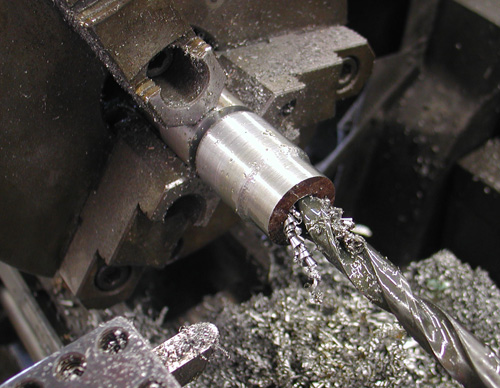
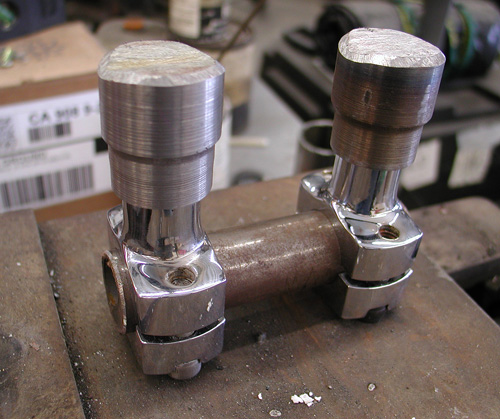
I don't know about other crazed builders, but often a glitch turns into an opportunity. I turned to my lathe to cut a couple of extensions. They widened the base for greater strength. I reached out to NICK Trumbo at Bassini exhaust for a couple of straps. My notion was to weld the brackets to the straps, so if something went wrong, it wouldn't crack the tank and create a dangerous gas leak. I've had my problems with gas leaks in the past.
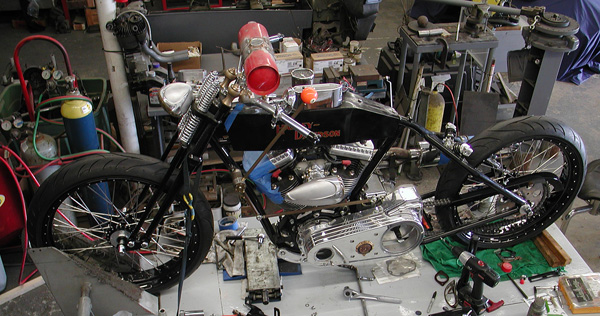
There you have it. Next, we'll mount the fantastic Black Bike Wheels (Avon Tyres), with GMA brakes from BDL, slice the Tanks for fork stops and Chica is going to build a Factory Racer ribbed fender. Rock and roll.

5-Ball Factory Racer, Part 9 Final Assembly
By Robin Technologies |

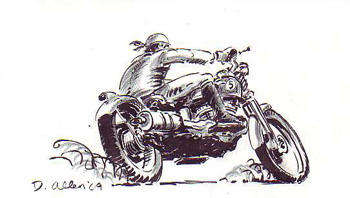
Every custom motorcycle build is an adventure. It takes me from one crazed time in my wild life to another. Fortunately, I'm not spilling my guts about another woman I lost during a knuckle-busting build. But this build did represent turning points. I'm about to step off into my 62nd year and sign up for Social Security. It also represented our stinky economy, and for the first time I pulled the plug on riding this bike to Sturgis.
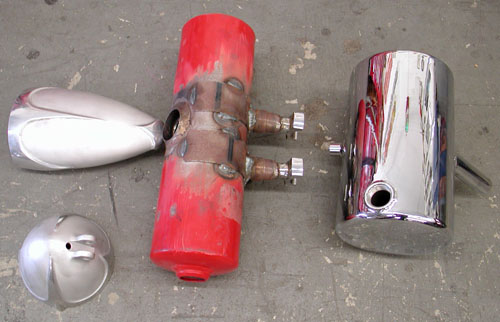
Imagine for a second, the middle of July. Days were long and hot, and the Bikernet shop boiled with activity. The Sturgis deadline was fast approaching. I needed to plan stops, hotels, food funds and a place to stay in the Badlands. Then suddenly we were forced to shift gears. Actually, we took the planning process out of gear. One day, I scrambled for the finish line; the next I coasted. I couldn't find the stress switch for a week and relieve the pressure.
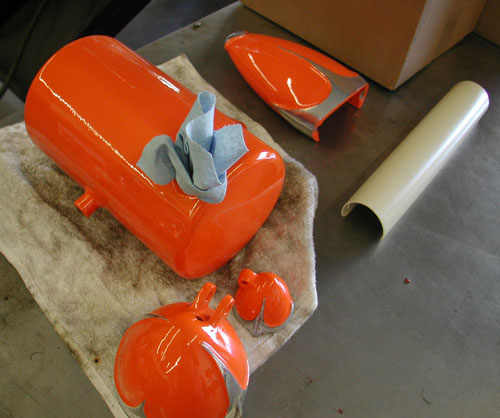
Most of my parts were baking in the Tony Pisano, Worco powder-coating ovens. It took me a week to realize the Sturgis Rally would survive without me, and I could relax. I was no longer under the gun to finish this build and risk my life riding an untested motorcycle halfway across the nation. Then it dawned on my feeble brain. I had a terrific opportunity to finish this bike and test it for a year before riding into the Mojave Desert and across several Indian reservations. Plus, I could kick back and enjoy the summer, pressure- free. I bought an ice-cold six-pack of Coronas, a couple of fresh limes and grabbed a sun tan. Not bad.
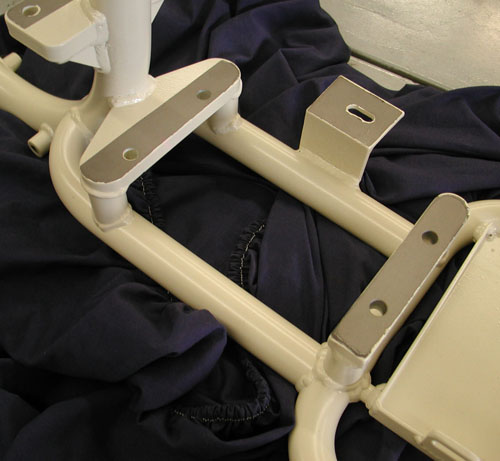
Tony is a pro powder-coater of the finest order and knows what it takes to tape off motor mounting plates and plug threaded holes. He saved long days under a grinding wheel. The powder work came out supreme. This year I tried something new. I powdered even the sheet metal, then asked a pro to paint panels on the tank and a flat black stripe down the Chica rear fender. He handled that aspect in a flash. Then I turned the job over to George the Wild Brush for the 5-Ball Racing logo on the tanks and pin-striping.
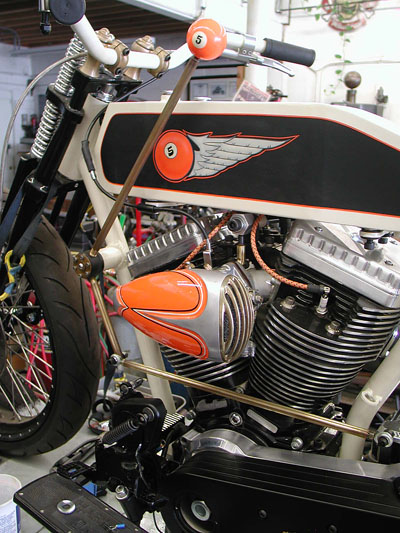
George drives around Los Angeles in an old Toyota truck with a camper shell, the home of paint headquarters. He folds down the tailgate, uncovers his vast, dripping assortment of paint and goes to work. He's old school to the bone. He pinstriped the giants' drag race funny cars in the '70s.
Here's where my fuck-ups began to surface. After the tanks were powder-coated, I decided to test them for leaks. I had planned to coat them with a sealer, and received Kreem tank sealer from Bikers Choice.
Here's the quandary: You can't seal tanks and then have them powder-coated. It might all go to hell in 400 degree ovens. So I held off. Then I decided to hit a local radiator shop for the test. We discovered one small leak where I welded in a rubber-mounting bung in the bottom. I ground it clear of paint and re-welded it. No problem. The painter touched it up for me. It was on the bottom of the tank and I was good to go. I thought.
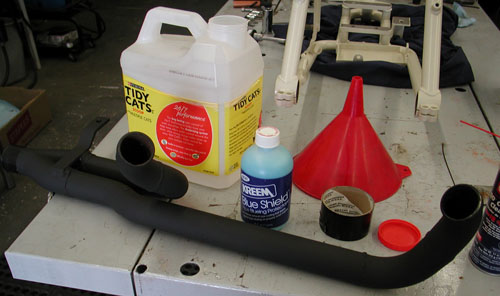
Next blunder: Instead of pressure-testing my handmade exhaust system, I decided to try another sealant available from Kreem and Bikers Choice. It's blue madness and can only be used on new pipes. I followed the directions, but it's a messy operation, and of course, I attempted this process for the first time, after I painted the pipes. What did I learn from these hiccups? Test tanks and pipes before you coat them with anything, period.
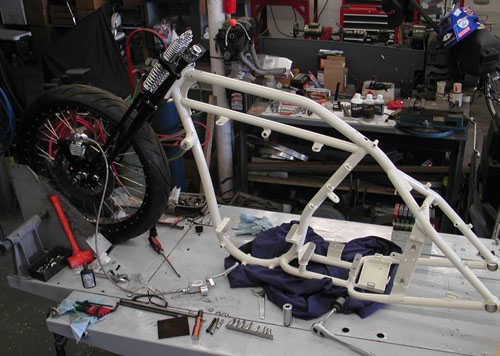
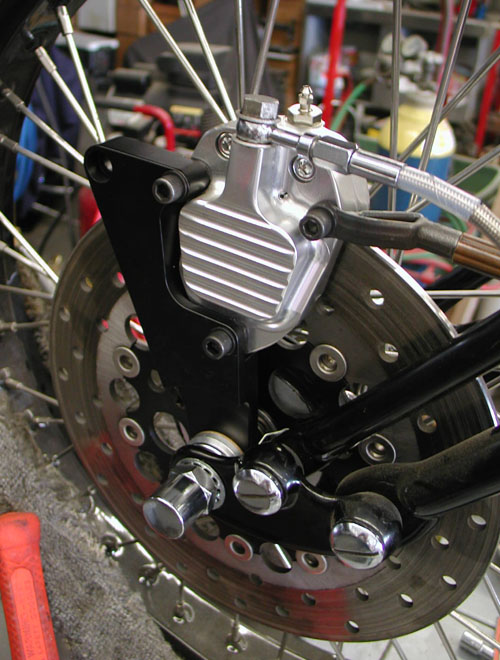
The first item to be installed was the new Paughco narrow, taper-legged springer front end. It slid right into place. If only I had four arms when I'm working in the shop alone. The front end already had the 23-inch Black Bike Wheel installed with a special Avon Tyre. I just needed to grapple with the front end, fasteners, bearings and top crown. No problem. I also installed the GMA front brake bracket and spaced the front wheel for the 14th time. It's a tight fit, and I need something art deco to mount on the front of the bracket. GMA, now owned by BDL, only builds a springer front brake bracket for the right side. I was forced to flip this one over. I could have machined the leading lip off, but I decided it could be used for some unique reflector, or quirky hood ornament. We'll see.
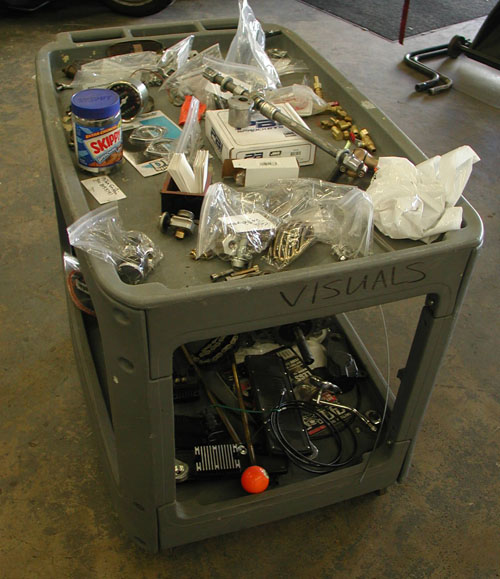
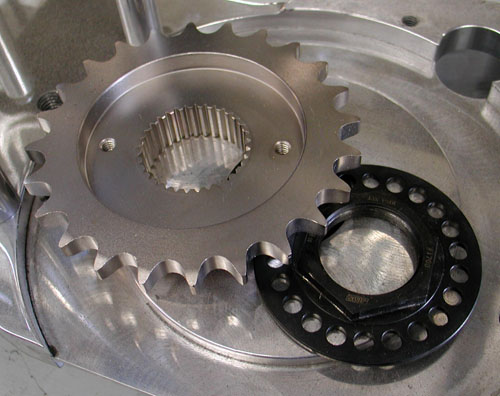
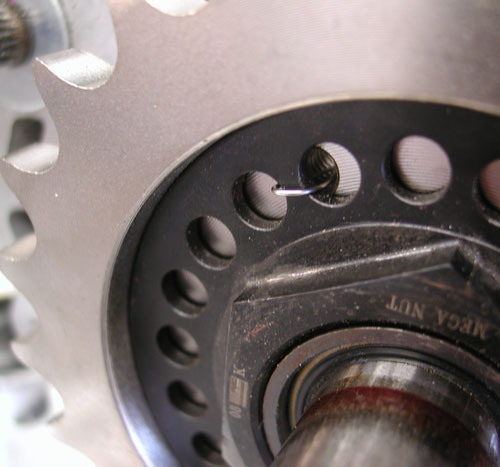
When I disassembled the bike, I carefully collected all the parts on this table. I also zip-locked all my fasteners and wrote their job descriptions on the back of each card. That was seriously helpful during assembly. Next, I dropped the Crazy Horse 100-inch engine in the Paughco frame, with the JIM's transmission and the Baker kicker system installed. Since the chain ran against a portion of the frame, I ordered a ½-inch 24-tooth tranny sprocket from JIMS and installed it with this special JIMS nut, designed with a built-in locking device. Unfortunately, no matter what I did, the holes wouldn't line up, so I safety wired the nut to the sprocket to prevent it from backing out.
Then I faced one of the toughest assembly jobs, installing the Spyke alternator stator plug in the right engine case. It's easy and difficult at the same time. This time, I smeared the tunnel and the plug with Never Seize and tried to push the plug through the case tunnel. I also carefully backed out the set-screw and scraped any burrs of the case edges. That didn't help, but I ultimately wrestled it into place. I'm always careful of electrical connections, wiring, proper grounds, etc. Nothing leaves us alongside the road more often than electrical problems. So, I don't like pushing and prodding charging components.
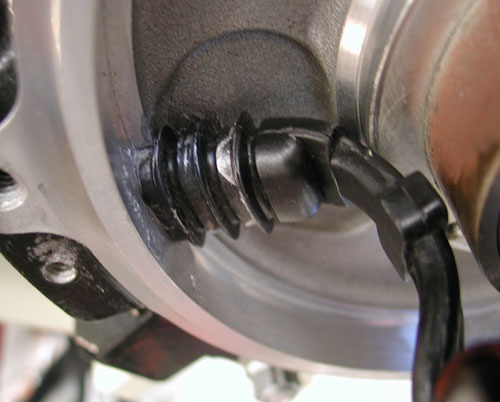
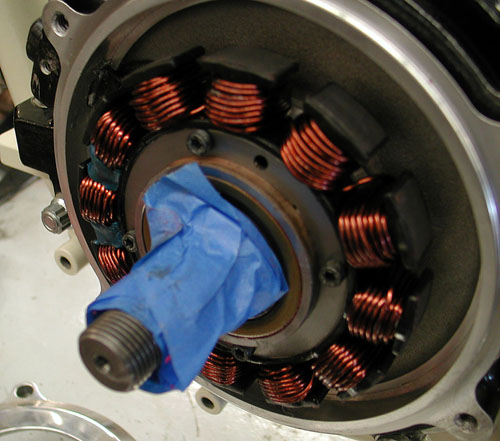


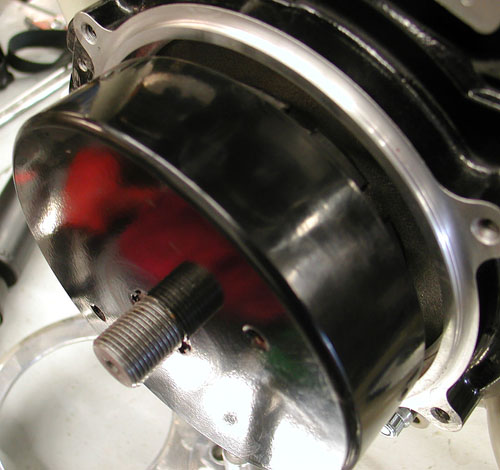
Once the stator was in place, I used self-locking fasteners from Harley-Davidson to fasten it down. Spyke is careful to supply all the proper assembly instructions, but it's always tough with aftermarket engines. Because it was somewhat of a guessing game, I installed the Spyke rotor a couple of times to make sure all the clearances were proper. Then I could move onto driveline alignment and the installation of the BDL narrow enclosed belt drive system.
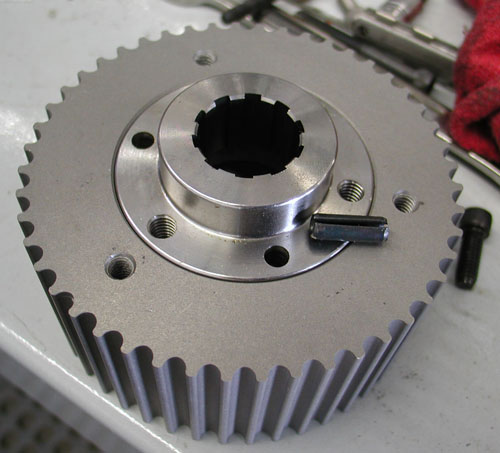
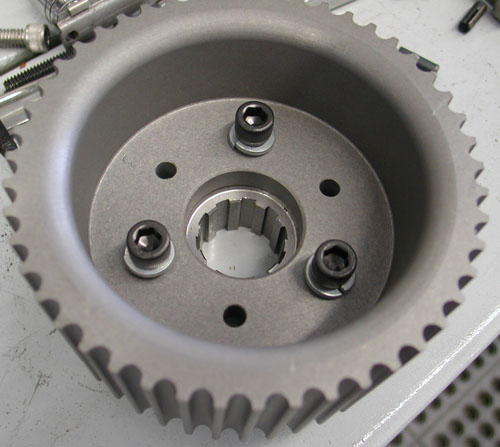
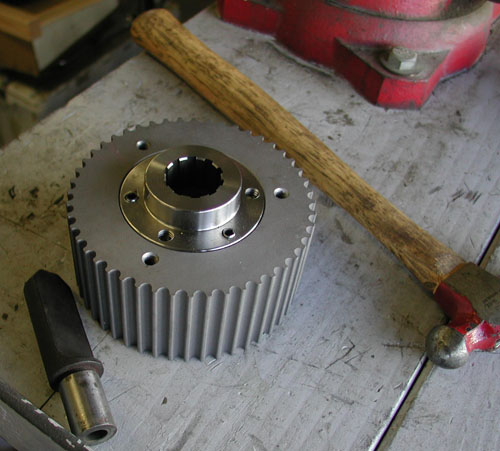
I've worked with BDL components for at least 15 years. They are solid as a rock. I used the inner primary to pull the engine and transmission into alignment. I left both major components loose in the frame until I pulled it up tight with the inner primary. Don't forget the John Reed Code. I use Never Seize on all bolts rolling into soft aluminum. John warned about damaging porous aluminum threads by running hardened steel against them over and over. Never Seize allows them to glide in and out of the cases without stress or abrasion.
With the driveline aligned, I tightened down the rear engine mounts and then checked the front ones for gaps. I shimmed the front motor mount perfectly, then tightened it down.
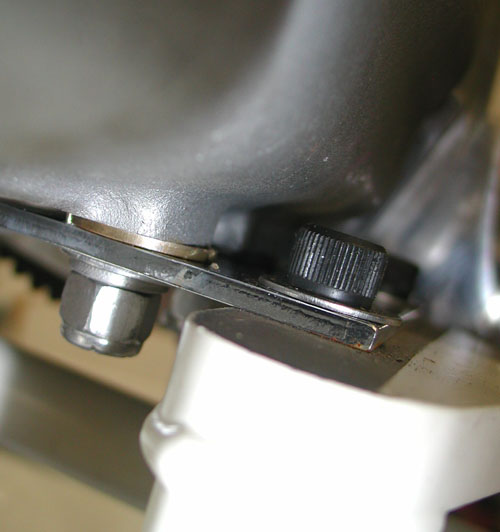
Next, I focused on the transmission. The Paughco mounting plate was tight and the JIMS trans case was fine in the rear, but slightly elevated in the front. I dug around until I found the correct shim washers and drove them under the trans and around the front tranny studs. It's key to go through these motions for proper alignment and to save problems with the belt. It's surprising how easy the BDL system slips together if the driveline is aligned.
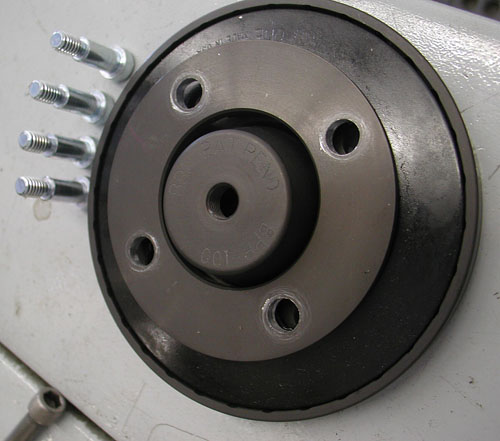
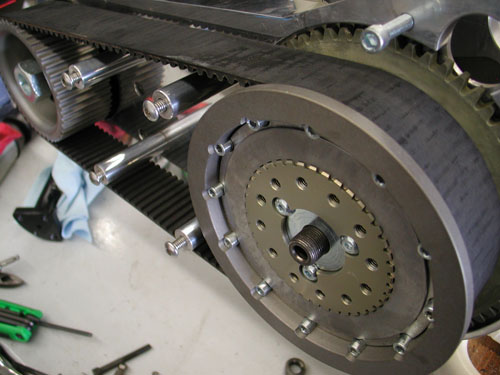
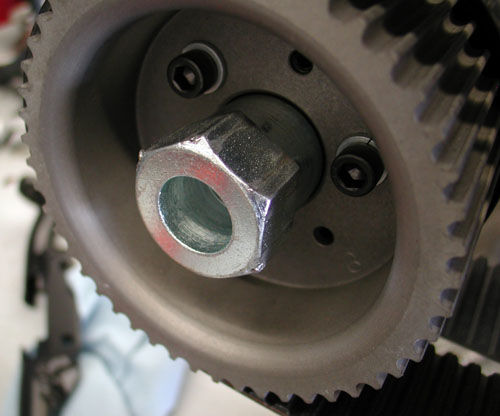
I followed the BDL instructions and bolted the engine shaft insert to the pulley then drove in the alignment pins and tightened down the Allen fasteners. I pulled the pressure plate pins out of the clutch and removed the clutch plates. With the clutch hub and the engine pulley holding the belt, I carefully slipped them on simultaneously. I attached the left-handed clutch nut and tightened it with an impact gun. I did the same with the engine main shaft nut. I turned over the engine and checked belt alignment and pulley alignment. I spaced out the front pulley slightly with a shim and was good to go.
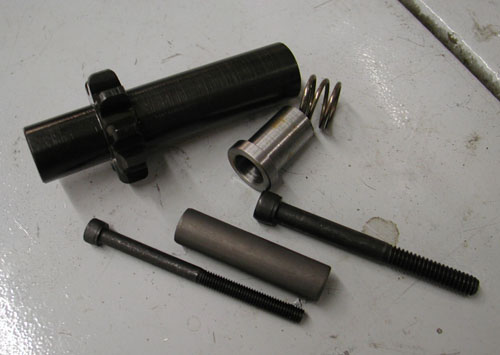
BDL TECHNICIAN NOTE:I received a call from BDL, “You fucked up, Bandit,” Dan said. He pointed out how I didn't mention using Loctite on the transmission mainshaft splines when I installed the clutch basket. “That's more important than many folks realize,” he said. Vibration from the spines can tear up the basket splines and ultimately the clutch plates.
I generally don't Loctite the mainshaft splines until the bike is tried and true, encase I need to remove the clutch. “Harbor Freight sells a cheap vintage steering wheel puller,” Dan said. “They work like a champ for pulling BDL clutches. If a hub is too tight a little heat does the trick, melts the Loctite.”
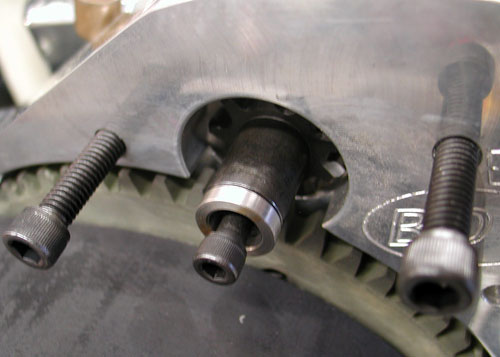
With the clutch back in place and all the elements tightened down I installed the Spyke starter and pinion shaft. Giggie, who just passed away the other day, told me years ago, how to check the spacing. To keep the starter strong and not fuck with the ring gear, the starter gear should rest about 0.150 back from the ring gear. Too close and it doesn't have the space to begin turning and jams against the ring gear. Too far receded and it won't make good solid teeth contact.
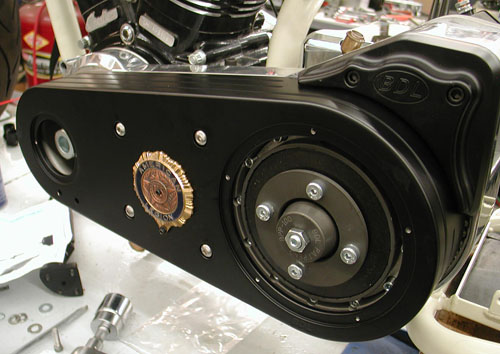
With the primary almost buttoned up, I moved to the LA Chop Rods new-fangled internal throttle installation. Internal throttles are cool but precarious. If a bike stumbles and falls over, the first damage is generally to the bars. It's easy to replace an external throttle or a grip. But what the hell. We're not building a bike to fall down.
About this time, the Sturgis event hit the summer calendar, and folks arrived from Australia for the ride. Doc from Heavy Duty Magazine, in Australia, picked up a Victory for the run. Nicole Brosing, an Australian tattoo artist, flew to the coast, rented the same Road King she rode last year, grabbed her girlfriend and split north to San Francisco then east to the Badlands.
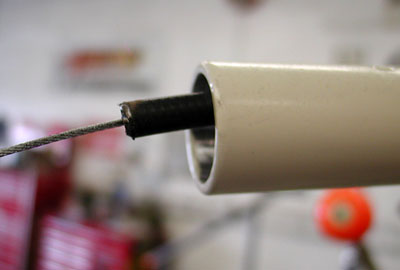
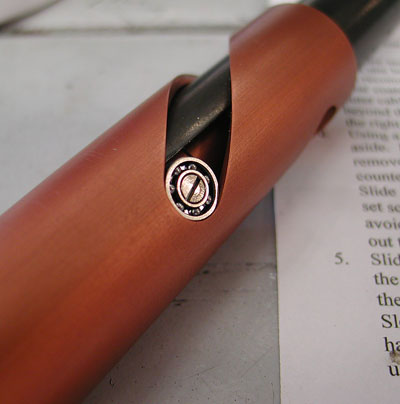
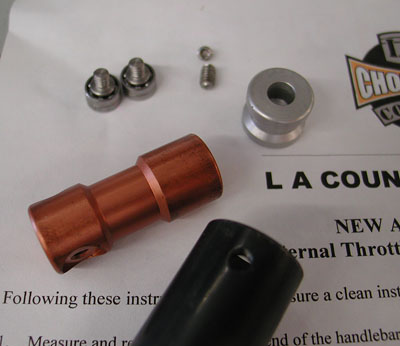


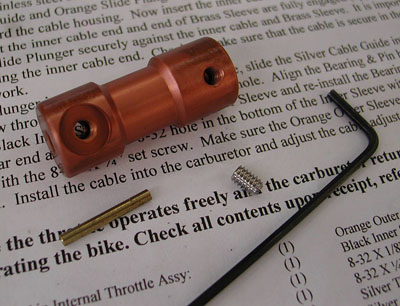
I wrenched in the shop, drank Coronas, smiled and caught a sun tan. Gard Hollinger from LA Chop rods slapped extra engineering into his internal throttle system. His instructions were detailed, but I was still nervous as I attempted to determine the proper length. It's always a sharp notion to take the bike off the lift so the bars can rotate for testing the overall length. It's actually a breeze to install, although I honed out the bars slightly, for an easy slip. Gard devised the cable lock-down with a brass sleeve to prevent damage to the internal cable and afford a solid grip for the set screw. This throttle, with extra bearings, is smooth as silk.
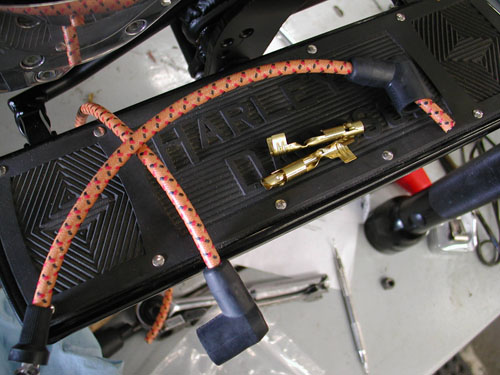
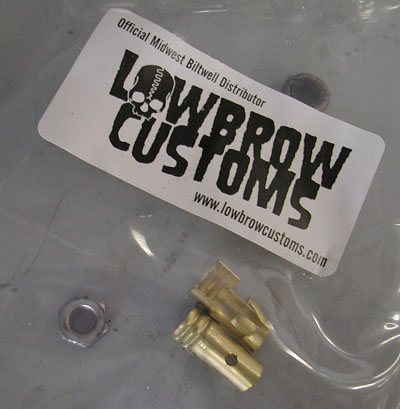
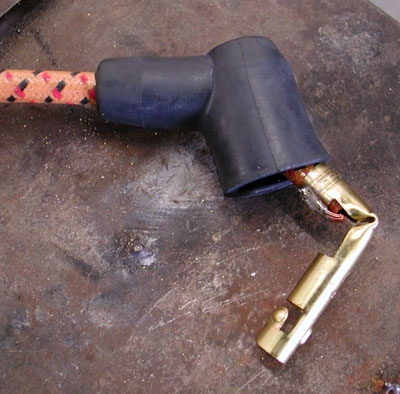
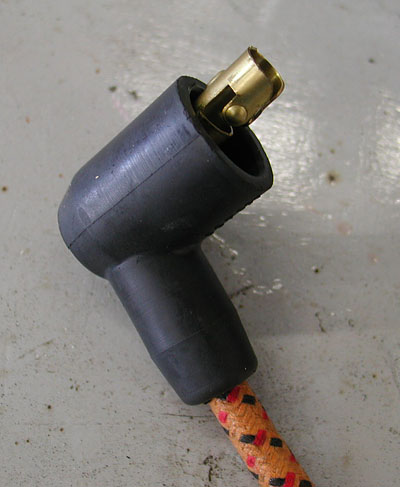
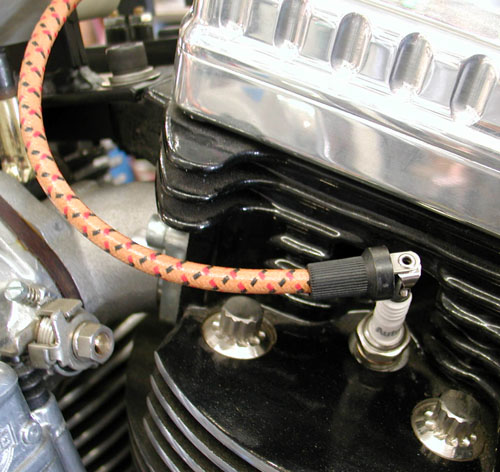
Then I turned to the classic spark plug wires from Low Brow. This is a cool system and adds class to any ride. They come in a kit form with all the elements needed, except a roll of solder, flux, and a gun. It was a simple operation, but I actually mounted the coil a tad on the tight side to the underside of the tank. Fortunately it all fit. Make sure to slip the boots onto the wires before you solder the brass fittings into place. Lowbrow attaches the other ends before shipment.
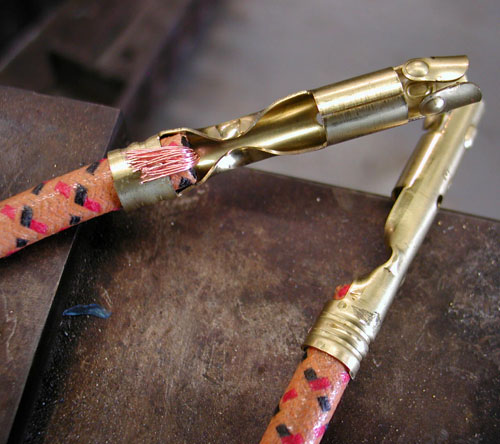
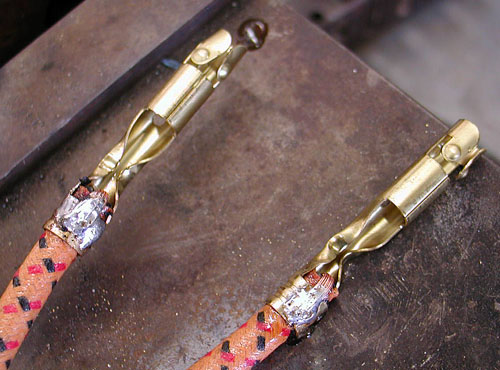
I simply attached the spark plug wire to the spark plugs, ran the lines out of harm's way to the coil, added an inch for safety, cut the wires, trimmed them back for soldering, and crimped and soldered the fittings into place. Frank Kaisler told me to make sure to wipe all the flux off after soldering. So I did as Commander Kaisler instructed. He uses alcohol or solvent to clean the area, preventing future corrosion.
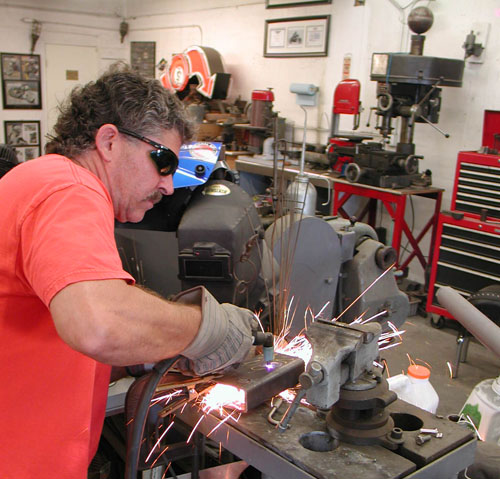
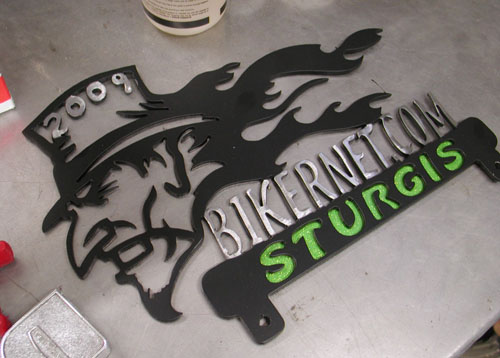
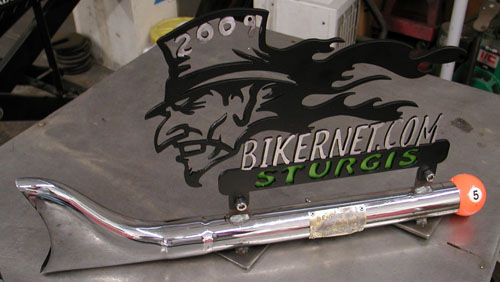
I took a day off to help Nyla's brother, Brad, build some diesel motor mounts for their 32-foot Cho Lee motor sailing vessel. They were smack in the middle of a complete restoration. It's a beautiful boat. I've sailed it to Catalina Island several times, when it belonged to an old friend of mine. Another deadline loomed. Less than a week away, the Easyriders Bike Show would rock the Broken Spoke Saloon in Sturgis. Bikernet sponsors the Panhead Class each year and I needed to create the trophy. Panhead Billy won the award. When I can reach him, we will feature his classic rat pan.



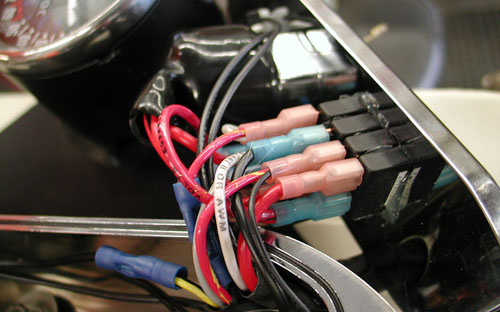
I shifted to the wiring. I used Phil's Speed Shop wiring system. It's designed for lots of custom applications and makes wiring a breeze. He includes instructions and a wiring diagram. The billet chromed box includes the ignition switch, the high-low beam switch, circuit breakers, starter relay, neutral light and starter button. I just ran the wires, used my Frank Kaisler soldering tool and ran the wires through the old H-D soaked canvas loom. I know that's not the correct term for it, but it's a close description.
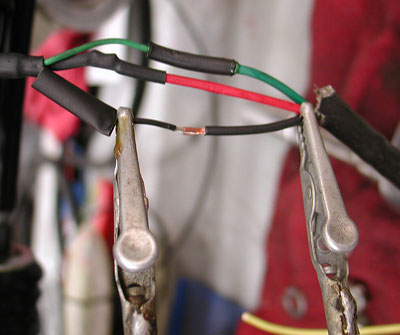
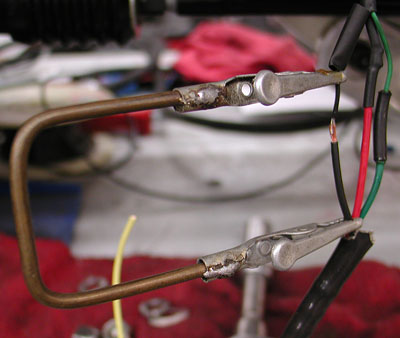
I ran into one problem that held me up for weeks. I like the CrazyHorse bottle cap engines. They offer three ignition alternatives. First, the original Thunderheart unit, an adjustable timing Thunderheart, and finally a cone motor system. Unfortunately, they don't tell you enough about the stock system. I thought it was like a Compu-Fire system in the cone. It's a one piece unit. I reached out to other Crazy Horse engine builders who told me I needed a Thunderheart ignition module. So, I ordered the system from Thunderheart, but when it arrived it didn't jive with any wiring diagram I received from Thunderheart or Crazy Horse. It was a riot. Every time I received a wiring diagram or a box from Thunderheart, I thought I was good to go. Then some goddamn thing wouldn’t match, and everyone had split to the Badlands. I paced the garage waiting for answers.
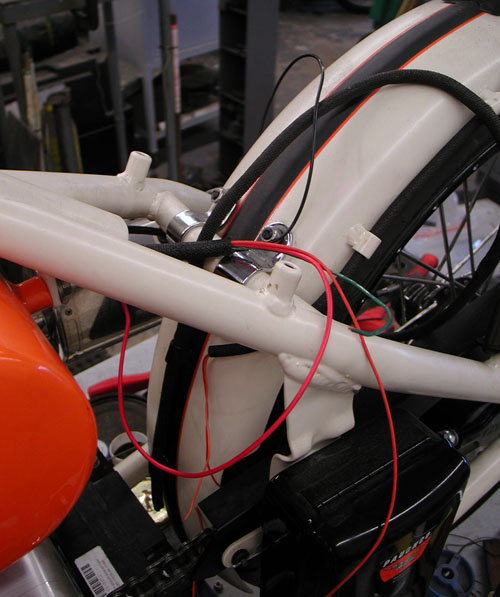
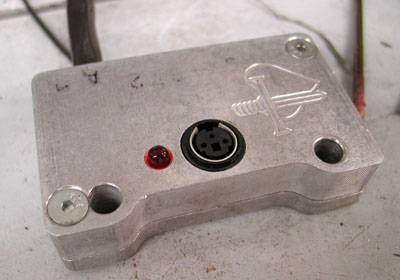
The Thunderheart tech guru sobered up after a week in the Broken Spoke swimming pool, doing belly shots with the lovely waitresses. He dropped me a simple e-mail: “There's only three wires goddamnit, black for ground, red for ignition and green to the coil. Go for a ride.”
That solved that mysterious issue and I moved on. Three more puzzling obstacles surfaced. I cleaned the Paughco oil tank with solvent and small nuts and bolts. I counted the fasteners before I slipped them into the tank. It was sorta rusty, and I didn't want to roll without cleaning it. I poured a cup of oil in it and flushed it out. I hooked up the oil lines, and Crazy Horse sent me very specific instructions, but this will blow your mind. I couldn't figure out venting. I'll get back to that.
I hooked up my gas lines. I filled the tanks and one leaked. I threatened to fire myself on the spot and another challenge surfaced. The pinhole at the front of the tank, where I cut away a section to allow for fork stops, stuck out like a sore thumb. It was obvious, but we didn't spot it during testing. I called Jim Murillo, a professional painter and cried for assistance.
“Don't use Kreem, it peels,” he said. “Use Casewell two-part Phenol Lovolac System.”
I ordered some and their customer service was supreme for a small $36 order. Some companies get it, when it comes to taking care of customers. This is where tank seals become terrifying. I needed to kick my ass into the middle of tomorrow. Make sure your tanks are sealed before any finish is applied, including powder coating. I suppose I was over confident. What the hell.
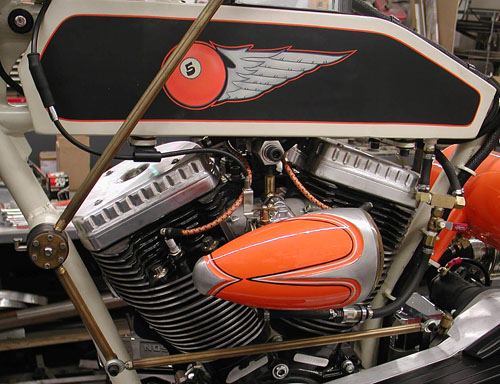
The directions called for cleaning the tanks with lacquer thinner, nuts and bolts, sand, you name it. I tried the lacquer thinner and immediately fucked with George's pinstriping. I called him, panicked and drank whiskey heavily. Fortunately a Bikernet reader shipped me a fresh bottle of Bulliet Whiskey, and Dusty, one of the 5-Ball Racing Team Salt Flat members, hand-stripped several pounds of walnuts and shipped them out.
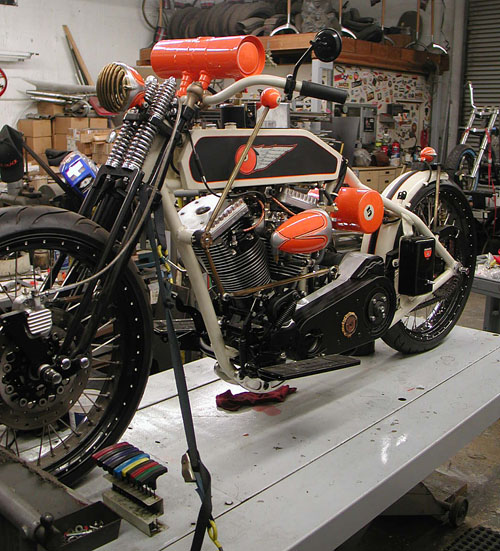
Incredible. I let the tank dry thoroughly, made up a small portion of the Casewell sealrant and poured it into the tank. I knew where the hole was, and fortunately it rested in an easy-to-reach corner. I tilted the tank in the sun and returned to the whiskey. George saved my ass once more.
With the tanks fixed and returned to the bike, all was well, and I put a key to the Phil's ignition switch for the first time. Here's another quirk. Crazy Horse doesn't tell you how to time your new 100-inch engine. It times itself. The bike didn't whine, growl, spit or cough. It fired immediately to life and purred. I checked the oil pressure, perfect. Then I unscrewed the cap off the oil bag to make sure the lubricant returned to the oil bag properly. Yep, it was returning, but the cap popped off into my hand. I wondered about venting. Everything was fine except for pressure in the oil bag.
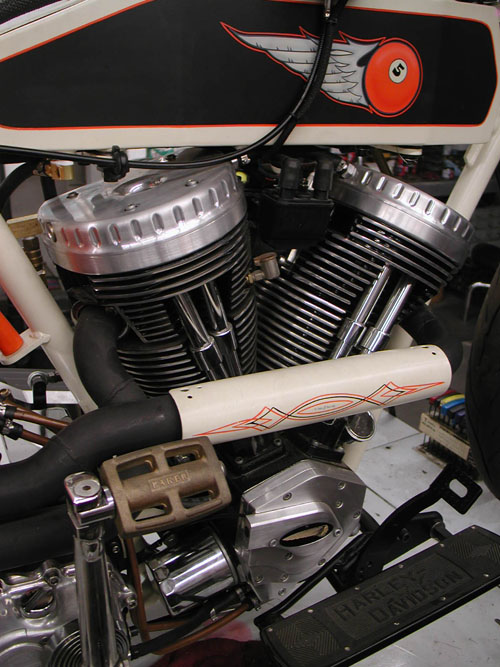
Again, I started a research project. The Crazy Horse installation material didn't mention a crankcase vent and I searched the engine. There are two 3/8-inch spigots between the heads, as if for a cross-over oil line. As it turns out they are designed as vents. I found out from Dar at Brass Balls that they just run a line under their gas tanks. I pulled one end, no oil flow. It had to be the vent, so I improvised and used another old machinery oil fitting to hold a screen to prevent crap from strolling back into the precious engine.
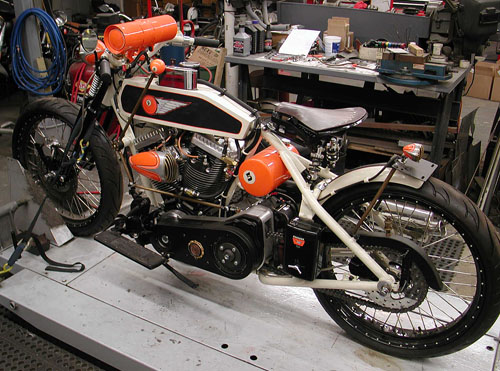
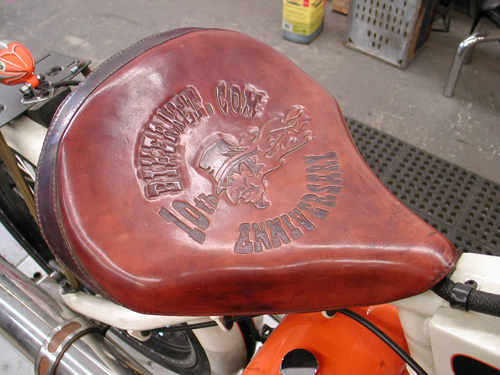
That solved that issue. I was ready to rock, but my seat hadn't arrived from Duane Ballard. It was a wild old sprung BMW seat he scored. When it finally arrived, it didn't fit. It was too high and too far back. I was faced with another quandary. If I moved the bars, I could barely place my boots on the footboards. I scratched my beard, looked at the box of walnuts, and then it dawned on me. Glenn Priddle, a leather seat master, who studied under classic saddle makers, made me a seat a couple of years ago for the 10th Anniversary of Bikernet. It was a wide, classic solo seat. I dug it out, dusted it off and it fit like a glove, dropped the seat height 2 inches and move the seat position forward 3 inches. It actually fit the frame better than the old classic from Duane. I dodged another bullet.
Every year when I build a bike, my mantra includes a solid, tough, rideable, unique bike that will last. But each year the unique project throws a few curveballs. It's part of my Zen education. Life is not meant for perfection. We need challenges to test our endurance levels and help us through the tough spots, find answers or solutions and persevere. Often my predicaments are caused by a lack of experience. For instance, if I ever use a Crazy Horse engine again, I'll know all the quirks and set-up issues.

Now, let's see if I can ride it for any distance. I would love to ride it to the Badlands next year or to Arizona for our Too Broke for Sturgis Run.
We'll see what happens next, as I take her through the Eddie Trotta break-in routine. Eddie starts a bike for the first time, let's her run and checks her over. Then he takes it out for a one-block jaunt, and checks it over again. Then he ventures forth for one mile and returns for another inspection, then 5 miles, then 25, then 50 and she's ready for a cross-country blast. Hang on!



Bandit 2006 Sturgis Shovel
By Robin Technologies |

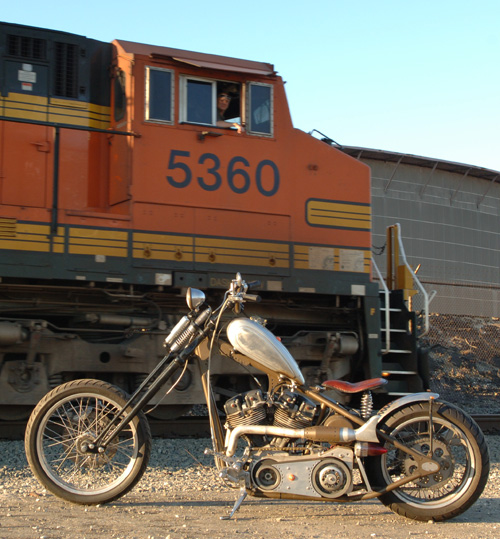
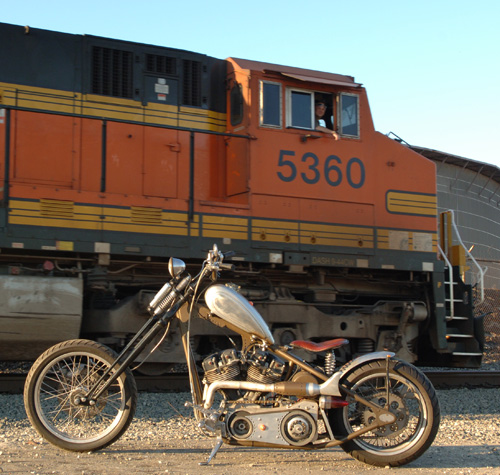
Editor's Note: You've seen the “American Iron” feature. Chris Maida, the editor, asked us to reshoot it, but we kept the original shots near the Wilmington, Califa, Port of Los Angeles rail road tracks. Just happened that a train rolled past in the middle of the shoot. Enjoy.–Bandit
I just did the Old School bit and rode this bike to Sturgis on our Bikernet.com 2005 run from the West Coast.
I cottoned to the pure machine marquee. I didn’t plan to paint it at all, unless absolutely necessary. I wanted to leave most components unblemished metals and incorporate as many iron types (for color) into the mix as possible. I wanted this mess to contain brass, copper, aluminum, steel, and stainless. Of course the steel corrosion dilemma dictated that we use some powder coating for a protective seal. The front end came in black to avoid chrome, so I supplemented the bike with a few additional black pieces, but the frame and some others were powdered to mimic a copper patina. Some aluminum parts were clear coated to prevent complete dulling and afford an acceptable pin striping surface. Some brushwork was applied.

It started with a Shovel engine that a brother gave me with a title. I loaned him a bike when he was down. Due to family illness he was forced to sell everything. There’s nothing better than an engine with a title. I took it from there and ordered a Paughco classic frame to fit me and handle like a midnight dream. Too many choppers today look good but don’t handle worth a damn. I wanted a bike to fit, handle well on freeways, yet be light in city traffic and parking lots. I spoke to Ron Paugh at Paughco and they built me a 4-inch up, 3-inch out, 35-degree raked rigid, wide enough to handle a 180 tire.
I don’t care for wide tire, fat-assed, beachball monsters. I decided to set my limit at 180 and run an O-ring chain for the traditional look. I stuck with a Paughco front end to top off the chassis. It’s one of their new tapered leg springers, 9-inches over with three degrees of rake in the trees. It worked out to be almost 5 inches of trail and handled as light as a dirt bike.
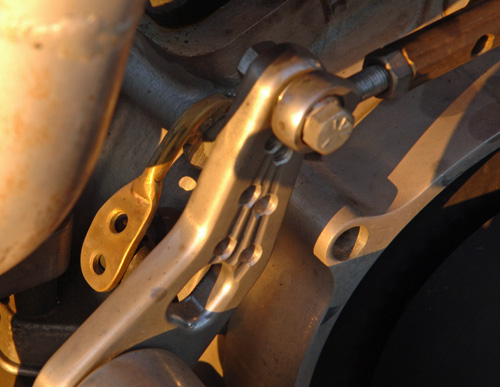
The engine had early stock heads, House of Horsepower cases and was a 105-inch stroker, too much for a rigid chassis. I wanted this bike to last, be a beater, but not be a dog. I contacted friends at S&S and they suggested 93 inches of street power for a balanced, reliable drive train. The stroke was reduced to 4.5 inch with 3 5/8 inch bore. The bike is fast but not a vibrating monster. I also spoke to Lee Chaffin at Mikuni and he suggested a 42mm, flat slide, Mikuni carb. “It will give you sharp throttle response,” he said. If I planned to run the Shovel on the salt flats he would have suggested a 45 mm venturi.
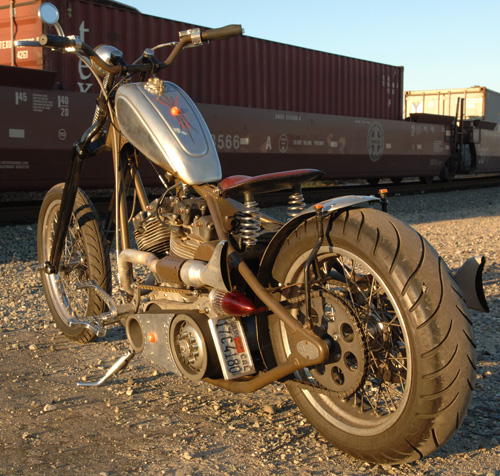
I have a couple of codes when it comes to building choppers. I like to keep them as simple as possible. On the other hand I like an oil cooler and filter to keep the drive train alive. I came across a system that bolted to the front motormount and doubled as a cooler while holding a spin-on filter (Rohm billet oil cooler mount). It was perfect. Other chopper codes include having enough taillight to prevent being run-over and enough gas to take you 100 miles before you hit reserve, or you’re looking for gas stations constantly. In this case I nearly broke the code a couple of times.
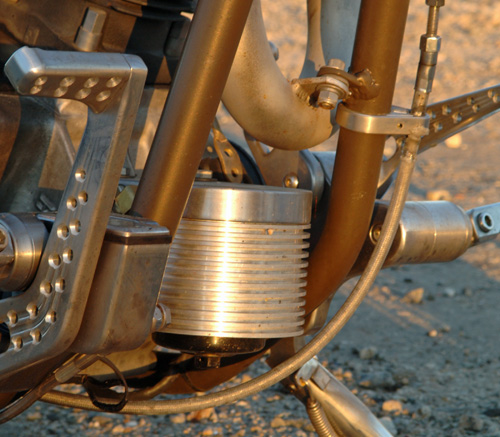
The Sportster gas tank originated on the verge of being beneath the acceptable fuel capacity, 1.75 gallons. It was an old Aluminum XR 750 race tank that we heavily modified. Get this: Some aluminum tanks are against the code, they’re too weak, notorious leakers. I broke the unwritten rule because it was a factory tank—cool right? Not so. “They broke during flat track races,” Berry Wardlaw, the Boss of Accurate Engineering, said at dinner in Deadwood, South Dakota, after I welded it twice on the way to Sturgis. “They ain’t worth the powder to blow ‘em to hell.”
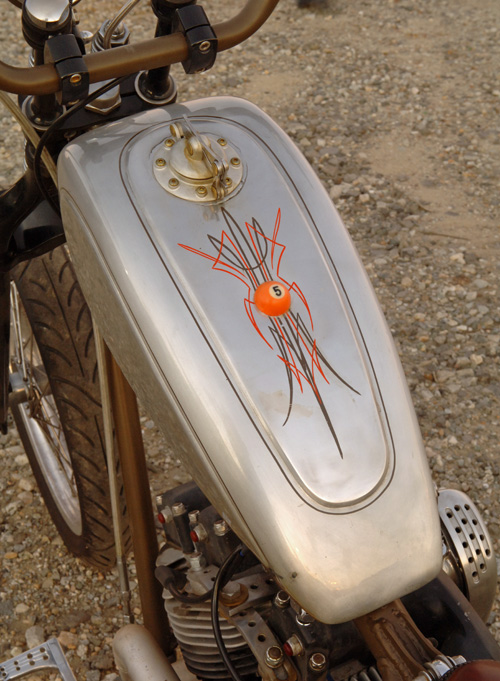
I put more work into that tank than the Martin Brothers pour into a set of one-off artistic sheet metal. First I added additional rubber mounted bungs to the base of the tank for added support, since I didn’t on the last Sturgis rigid. It broke twice. Because the tank would reside on a severe angle we moved the petcock to the rear, also for more fuel capacity. We drilled the tunnel and welded in a plate to allow the entire center section to augment petrol storage. Then I installed a Crime Scene speedster cap for an old school hot rod appearance.

Kent from lucky Devil Metal Works in Houston supported the aluminum theme by hand fabricating an aluminum fender to match the tank, front and rear. We scrapped the front job.
Back to the code. Remember the taillights, so a semi will at least recognize that it’s a motorcycle under his rip-roaring wheels. This is a tough one for me. I like the minimalist approach, but endeavor for some level of survival. The crew at Eye Candy Custom Cycles (.com) developed this hot looking, side-mount ’59 Cadillac taillight. I thought it was the cat’s paw and that I could mount it to glow through to both sides. I installed it to the BDL inner primary, so close and tight to the frame that no one could see it. I broke the code.
I also grappled with some elements of the wiring, but it worked out fine—that’s another story. I’ve been tinkering with bikes for 30 years, yet learned a tremendous amount with this build.
The bike continued to roll together like a dream with the Kraft Tech oil bag, hard copper oil lines, the Lucky Devil sprung seat and 5-speed Rev Tech Transmission. The wheels were Custom Chrome aluminum rims, stainless spokes and chromed steel hubs. This was the first time I ever used Brembo brakes, no problem and I’ve worked with Joker Machine controls for the last five years.
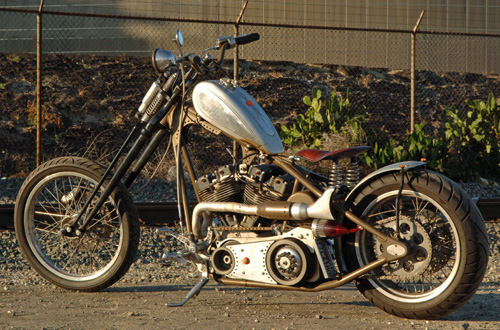
Let’s focus on mistakes I made, so you won’t make them in the future. The hard lines were cool, but I could have installed rubber hose and been finished in a half hour. Plus, since the Kraft Tech, round oil bag, was rubber mounted and the hard lines solid, the street vibration fucked with them and they cracked. I needed vibration resistant furrels. Let’s stick with the oil bag. It’s cool, solid and bolted right up, but battery choice is critical. There was very little space between the battery terminals and the frame. Ultimately, a Bikernet babe was called to the front, to stitch a rubber protective cushion to prevent shorts. That’s too close for everyday comfort.
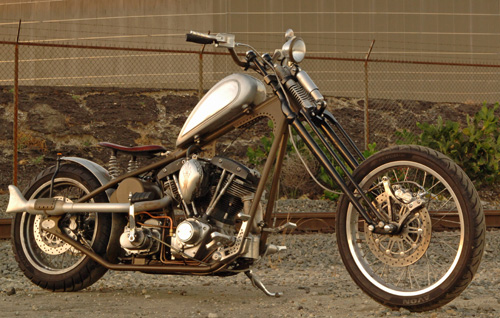
I broke in the bike using the Eddie Trotta formula for success, but missed one element, high-speed interstate travel. If I had put a few miles on the bike at 80 mph, which is against the break-in code, of 55 or less, I would have noticed the severe gearing. That’s where I went wrong. I started with a JIMS 6-speed and stock gearing. Then I discovered that the new Starter system from Compufire, that runs off the engine, wouldn’t be available for Sturgis, so I had to punt. I mounted the Dyna coils under the oil tank, which prevented a standard Compu-fire starter from being installed quick. A kicker was the answer. It fit with my hand made exhaust system using modified Samson mufflers, but I was forced to shift back to a Rev Tech 5-Speed transmission, because I needed the kicker. I should have considered a gear change at that point, but didn’t.

So what happened on the 1500-mile trek to the Badlands? The bike ran like a raped ape, strong and true. The handling was superb, everything remained in place except for the bullshit running lights I attempted to use for more visibility. They vibrated, spun, popped the bulbs and tore at the wires running through the fender rails. The ragged glitch in the road was the gearing. I ultimately replaced the running lights with these no-count reflectors and a H-D teardrop turnsignal under the right muffler.

The bike clocked 300 miles before I left town. Another 200 miles down the road toward Arizona, it had the mileage numbers to afford me enough break-in miles to drop the hammer and let her fly. At 90 mph I peeled past big rigs on Interstate10 heading out of the vast Los Angeles plague of concrete and stucco homes reaching dangerously close to the Arizona border. Crossing the state line, into the helmet-free state, I felt relieved to experience 100 degrees in the open desert flying toward Phoenix, another blight of concrete and southwestern architecture. I sensed the buzz in the frame and handlebar grips through Custom Cycle Engineering rubber mounted risers. The Shovel was over-revving and I needed that 6th gear release from extensive vibration, but I kept pushing for the love of speed, a light 520-pound, 93-inch chopper can deliver. She sliced the open road like a high-speed rotary knife through French bread.


I was beginning to buzz my feet off the Joker Machine pegs and adjusted them at the next stop. Rubber inserts on rigid pegs are mandatory, but I flaunted that rule with impunity. Just 60 miles out of Phoenix with the temps cresting 104 degrees and our group, of a half dozen, barreling along at over 90, the Sturgis Shovel quit, pure dead in the fast lane. I reached for the plug wires, then the ignition key that hovered less than a ½-inch from the whirling BDL belt drive. Better not go there, I thought as I signaled to lean right into the slow lane then onto the rough texture of the emergency lane where my baby came to a stop. That’s when I noticed the terrible, over-flowing gas leak at the back of the tank, all over the rear head.
As if the devil knew, one more mile and I would burst into flames in the middle of the searing desert. He flipped my ignition off. I never found an electrical problem or mechanical woe. She turned herself off because the vibration had taken its toll on the aluminum tank.

The next morning I was back on the road after Nick and Charlie at Custom Performance, (Turbo builders for Harleys, in Phoenix), had my tank rewelded and Nick recommended larger, softer rubber mounts. We were back on the road, where I took care of the beast for the rest of the run to Sturgis (kept my speed down), or until I could change the gearing. As it turned out, as I pulled into Deadwood, gas dripped onto that rear plug again. Bad news. There are codes and builders who know which ones can be broken—none. You can check the entire Sturgis Shovel Project build in our Bikernet Tech Department. The tank was repaired in Rapid City, but just two weeks ago I was forced to have it welded for the third time in Los Angeles. When will I learn?
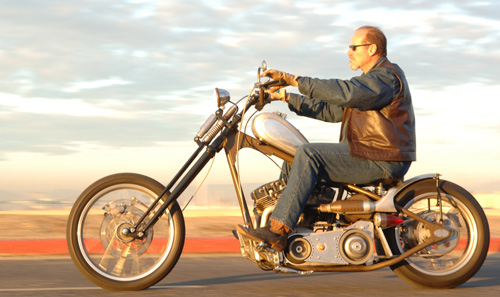
Ride Forever,
–Bandit
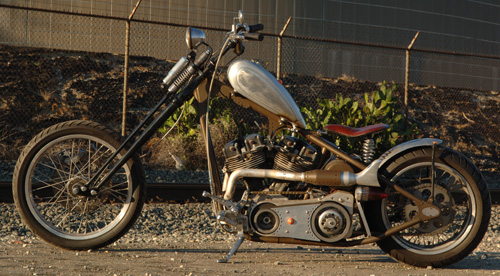
Owner: K. Randall “Bandit” Ball
Home: Wilmington, California
Builder: Bikernet.com
Year/model: 1956 Sturgis Shovel
Time to Build: 9 months
Color: Shit brown
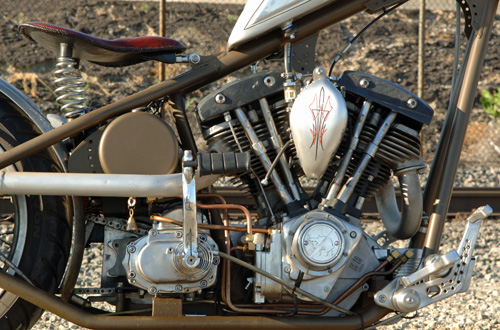
Engine/Transmission
Year/Model: 2005 S&S
Builder: Richard Kransler, Phil’s Speed Shop, and S&S
Displacement: 93 inches
Cases: House of Horsepower
Flywheels: S&S side-winder
Balancing: S&S, 1300 Bob weight
Connecting rods: S&S
Cylinders: S&S with longer skirts
Pistons: S&S forged, 8.2:1 compression
Heads: 1966 Shovelhead by Phil’s Speed
Cam: S&S
Valves: Black Diamond
Rockers: S&S rollers
Lifters: Custom Chrome
Pushrods: Custom Chrome
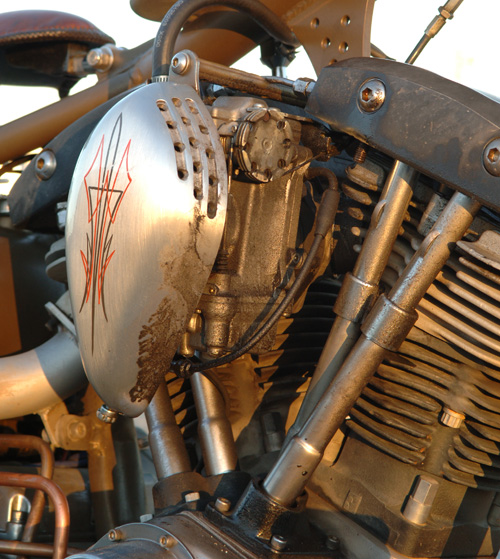
Carb: 42 mm Mikuni
Air Cleaner: Fantasy in Iron
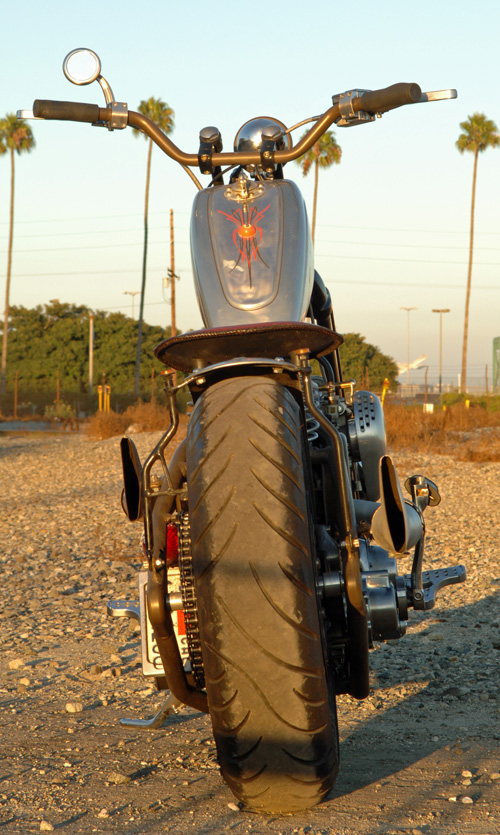
Exhaust: Bandit and Samson
Ignition: Compu-fire, single fire
Charging: Compu-fire
Oil Pump: S&S
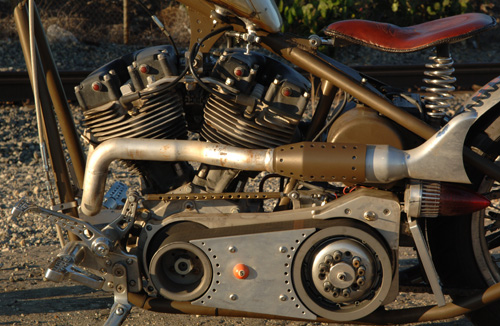
Transmission
Year/model: 2005 Rev Tech, 5-speed with kicker
Case: Rev Tech
Gears: Rev Tech
Clutch: BDL
Primary Drive: BDL open belt
Kick Starter: Rev Tech
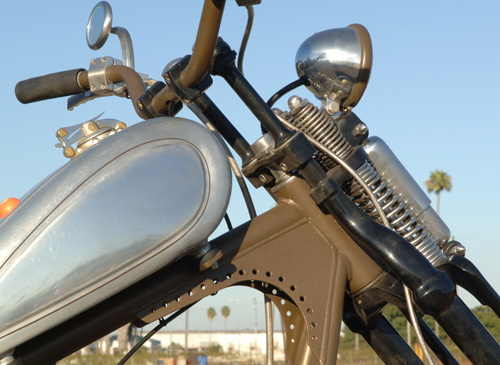
Chassis
Frame: Paughco Chopper
Rake: 35 degrees
Stretch: 3-out, 4-up
Front Forks: Paughco tapered-leg springer
Swingarm: none
Rear shocks: nope
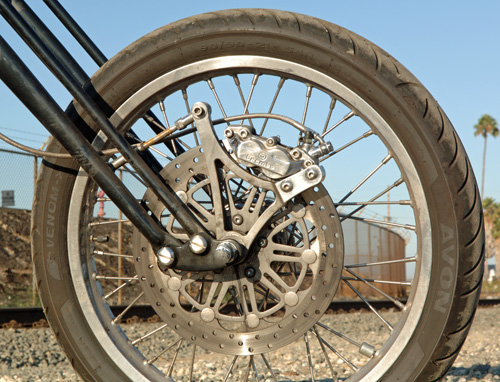
Front Wheel: 21-inch Custom Chrome
Rear Wheel: 18-inch Custom Chrome
Front Brake: Brembo Caliper and Springer Bracket
Rear Brake: Brembo Caliper and Softail Bracket
Front Tire: 21 Avon
Rear Tire: 18/180 Avon Venom
Rear Fender: Kent Weeks
Fender struts: Bandit
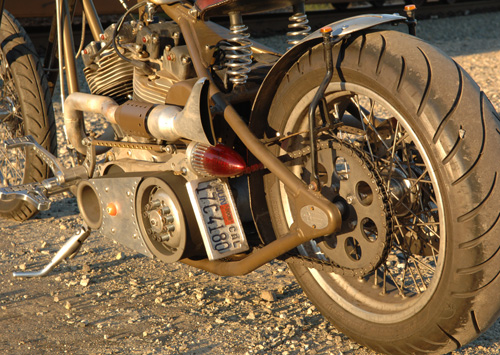
Headlight: Custom Chrome
Taillight: Eye Candy Custom Cycles
Fuel Tank: Aluminum 750 XR
Oil Tank: Kraft Tech
Handlebars: Custom Chrome narrowed
Risers: Custom Cycle Engineering dog bones
Seat: Lucky Devil Metal Works
License Bracket: Eye Candy Custom Cycles
Handlebar controls: Joker Machine
Foot Controls: Joker Machine
