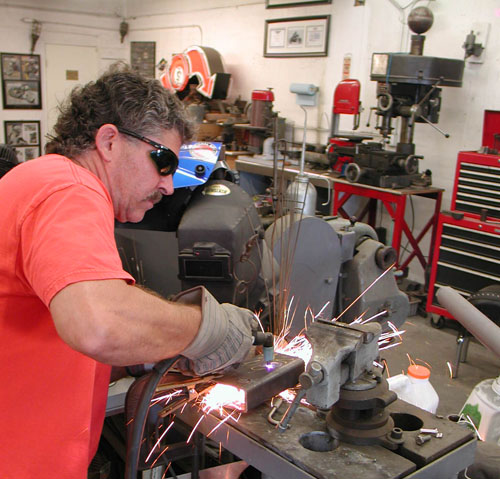
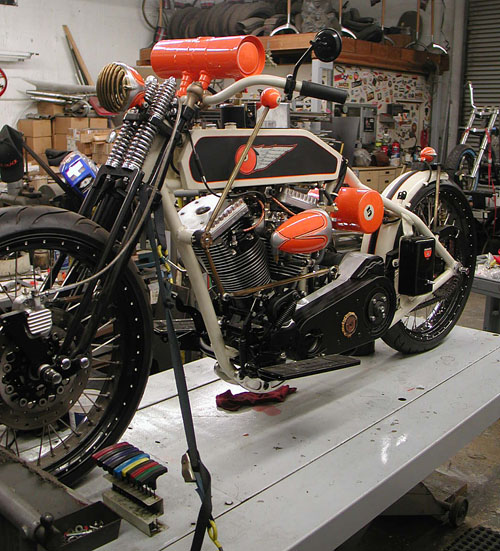
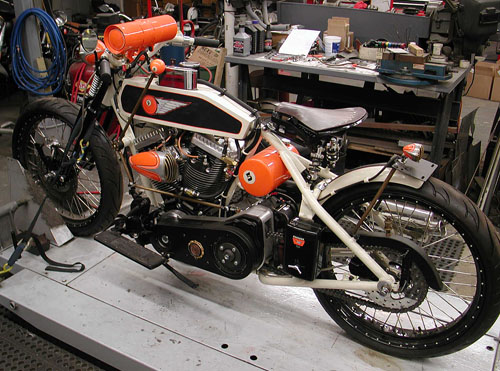
Every custom motorcycle build is an adventure. It takes me from one crazed time in my wild life to another. Fortunately, I'm not spilling my guts about another woman I lost during a knuckle-busting build. But this build did represent turning points. I'm about to step off into my 62nd year and sign up for Social Security. It also represented our stinky economy, and for the first time I pulled the plug on riding this bike to Sturgis.
Imagine for a second, the middle of July. Days were long and hot, and the Bikernet shop boiled with activity. The Sturgis deadline was fast approaching. I needed to plan stops, hotels, food funds and a place to stay in the Badlands. Then suddenly we were forced to shift gears. Actually, we took the planning process out of gear. One day, I scrambled for the finish line; the next I coasted. I couldn't find the stress switch for a week and relieve the pressure.
Most of my parts were baking in the Tony Pisano, Worco powder-coating ovens. It took me a week to realize the Sturgis Rally would survive without me, and I could relax. I was no longer under the gun to finish this build and risk my life riding an untested motorcycle halfway across the nation. Then it dawned on my feeble brain. I had a terrific opportunity to finish this bike and test it for a year before riding into the Mojave Desert and across several Indian reservations. Plus, I could kick back and enjoy the summer, pressure- free. I bought an ice-cold six-pack of Coronas, a couple of fresh limes and grabbed a sun tan. Not bad.
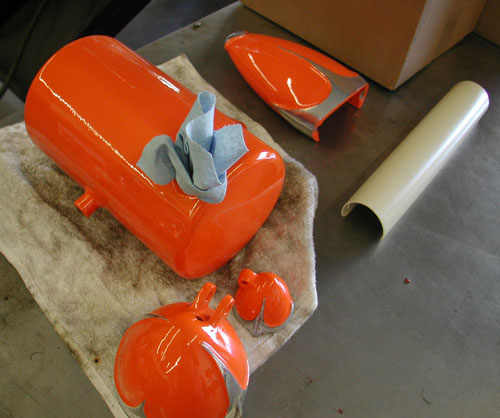
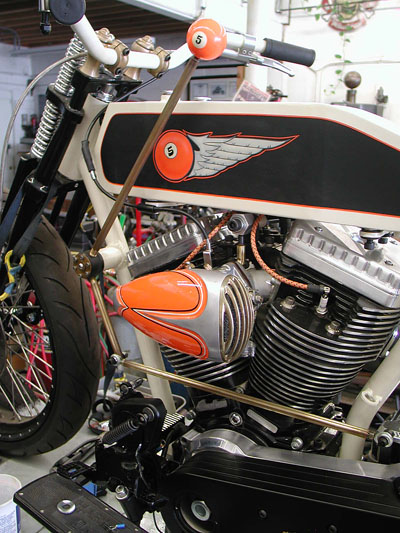
Tony is a pro powder-coater of the finest order and knows what it takes to tape off motor mounting plates and plug threaded holes. He saved long days under a grinding wheel. The powder work came out supreme. This year I tried something new. I powdered even the sheet metal, then asked a pro to paint panels on the tank and a flat black stripe down the Chica rear fender. He handled that aspect in a flash. Then I turned the job over to George the Wild Brush for the 5-Ball Racing logo on the tanks and pin-striping.
George drives around Los Angeles in an old Toyota truck with a camper shell, the home of paint headquarters. He folds down the tailgate, uncovers his vast, dripping assortment of paint and goes to work. He's old school to the bone. He pinstriped the giants' drag race funny cars in the '70s.
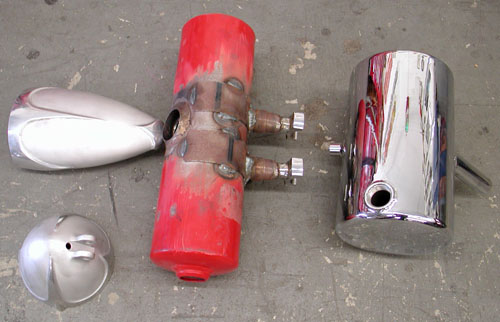
Here's where my fuck-ups began to surface. After the tanks were powder-coated, I decided to test them for leaks. I had planned to coat them with a sealer, and received Kreem tank sealer from Bikers Choice.
Here's the quandary: You can't seal tanks and then have them powder-coated. It might all go to hell in 400 degree ovens. So I held off. Then I decided to hit a local radiator shop for the test. We discovered one small leak where I welded in a rubber-mounting bung in the bottom. I ground it clear of paint and re-welded it. No problem. The painter touched it up for me. It was on the bottom of the tank and I was good to go. I thought.

Next blunder: Instead of pressure-testing my handmade exhaust system, I decided to try another sealant available from Kreem and Bikers Choice. It's blue madness and can only be used on new pipes. I followed the directions, but it's a messy operation, and of course, I attempted this process for the first time, after I painted the pipes. What did I learn from these hiccups? Test tanks and pipes before you coat them with anything, period.
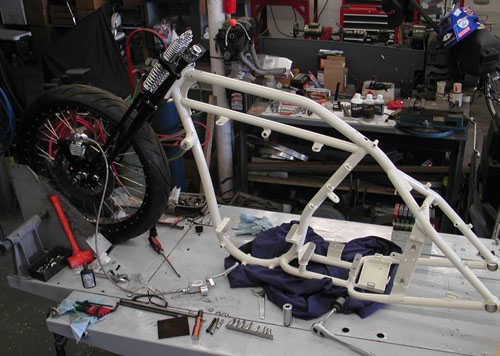
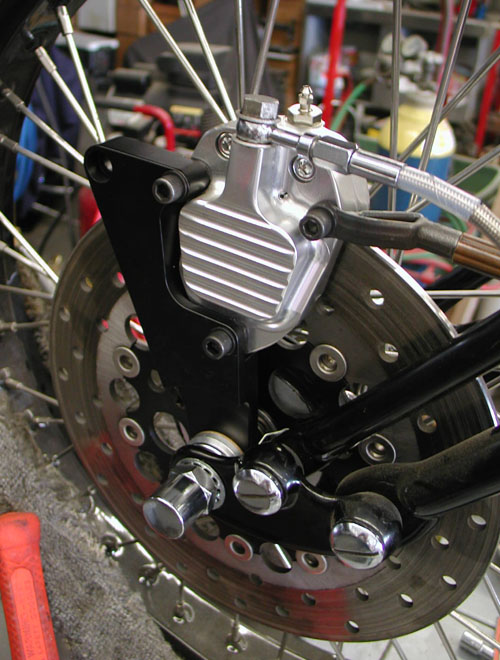
The first item to be installed was the new Paughco narrow, taper-legged springer front end. It slid right into place. If only I had four arms when I'm working in the shop alone. The front end already had the 23-inch Black Bike Wheel installed with a special Avon Tyre. I just needed to grapple with the front end, fasteners, bearings and top crown. No problem. I also installed the GMA front brake bracket and spaced the front wheel for the 14th time. It's a tight fit, and I need something art deco to mount on the front of the bracket. GMA, now owned by BDL, only builds a springer front brake bracket for the right side. I was forced to flip this one over. I could have machined the leading lip off, but I decided it could be used for some unique reflector, or quirky hood ornament. We'll see.
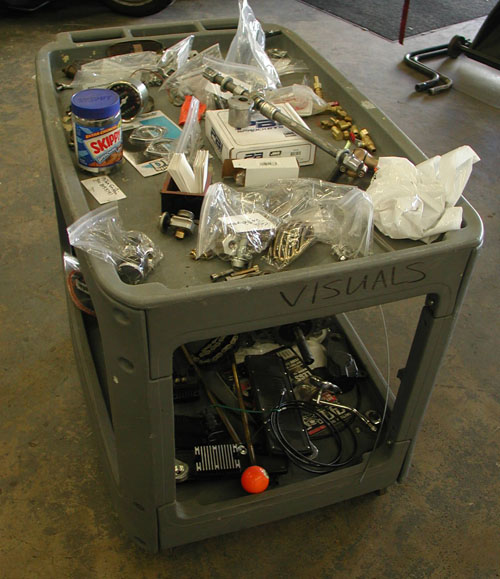
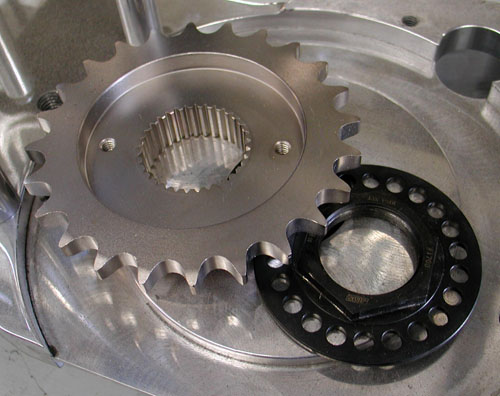
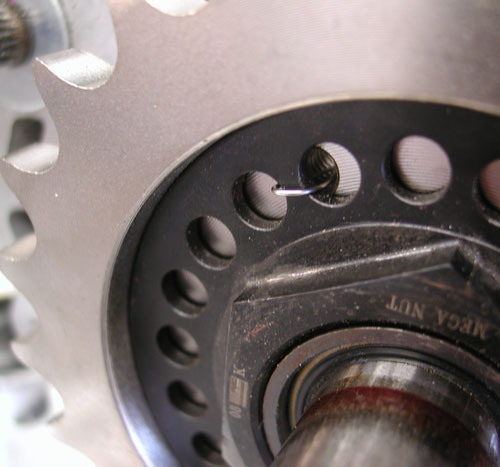
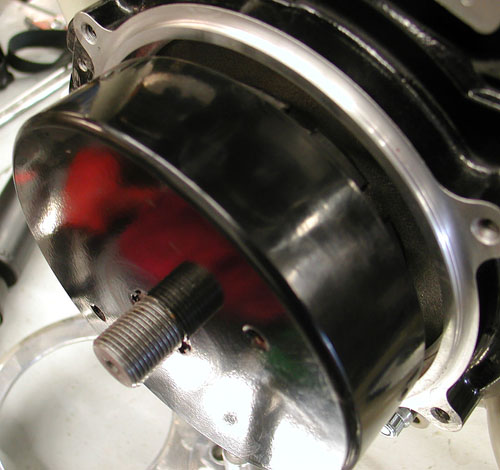
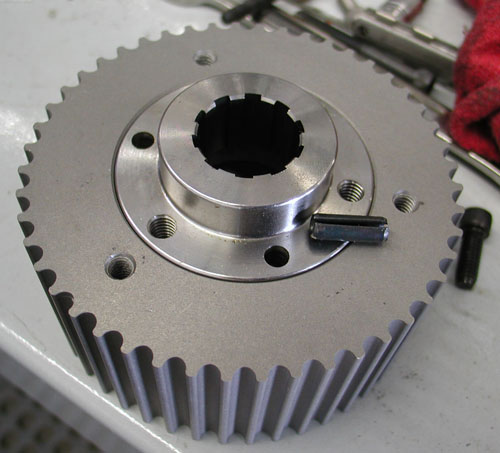
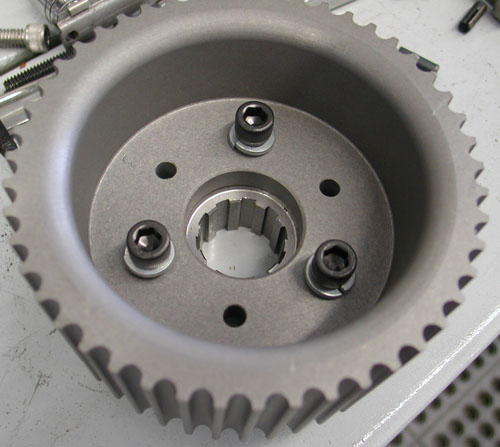
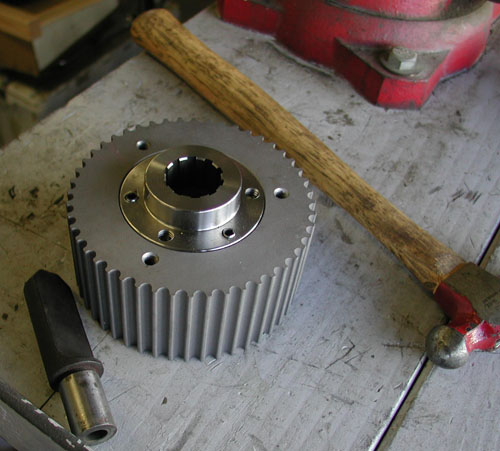
When I disassembled the bike, I carefully collected all the parts on this table. I also zip-locked all my fasteners and wrote their job descriptions on the back of each card. That was seriously helpful during assembly. Next, I dropped the Crazy Horse 100-inch engine in the Paughco frame, with the JIM's transmission and the Baker kicker system installed. Since the chain ran against a portion of the frame, I ordered a ½-inch 24-tooth tranny sprocket from JIMS and installed it with this special JIMS nut, designed with a built-in locking device. Unfortunately, no matter what I did, the holes wouldn't line up, so I safety wired the nut to the sprocket to prevent it from backing out.
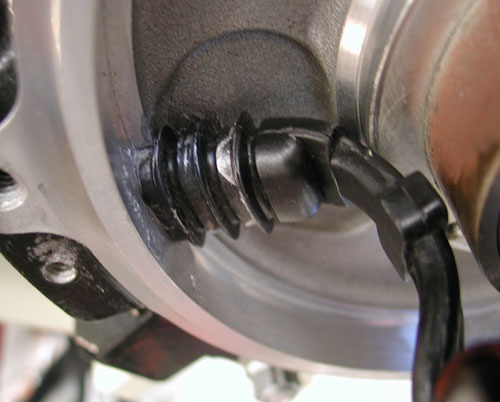
Then I faced one of the toughest assembly jobs, installing the Spyke alternator stator plug in the right engine case. It's easy and difficult at the same time. This time, I smeared the tunnel and the plug with Never Seize and tried to push the plug through the case tunnel. I also carefully backed out the set-screw and scraped any burrs of the case edges. That didn't help, but I ultimately wrestled it into place. I'm always careful of electrical connections, wiring, proper grounds, etc. Nothing leaves us alongside the road more often than electrical problems. So, I don't like pushing and prodding charging components.
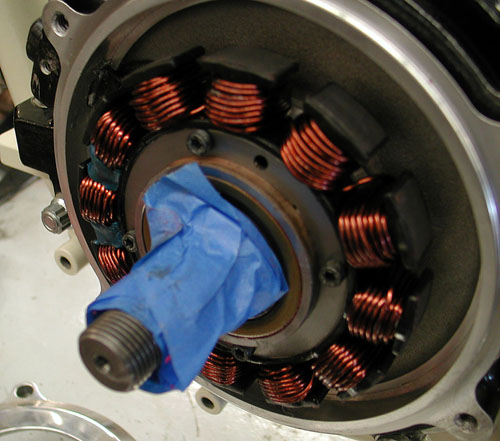

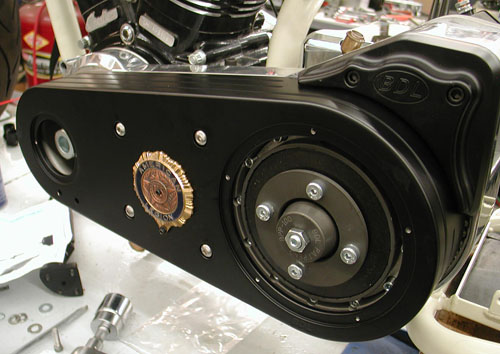
Once the stator was in place, I used self-locking fasteners from Harley-Davidson to fasten it down. Spyke is careful to supply all the proper assembly instructions, but it's always tough with aftermarket engines. Because it was somewhat of a guessing game, I installed the Spyke rotor a couple of times to make sure all the clearances were proper. Then I could move onto driveline alignment and the installation of the BDL narrow enclosed belt drive system.
I've worked with BDL components for at least 15 years. They are solid as a rock. I used the inner primary to pull the engine and transmission into alignment. I left both major components loose in the frame until I pulled it up tight with the inner primary. Don't forget the John Reed Code. I use Never Seize on all bolts rolling into soft aluminum. John warned about damaging porous aluminum threads by running hardened steel against them over and over. Never Seize allows them to glide in and out of the cases without stress or abrasion.
With the driveline aligned, I tightened down the rear engine mounts and then checked the front ones for gaps. I shimmed the front motor mount perfectly, then tightened it down.
Next, I focused on the transmission. The Paughco mounting plate was tight and the JIMS trans case was fine in the rear, but slightly elevated in the front. I dug around until I found the correct shim washers and drove them under the trans and around the front tranny studs. It's key to go through these motions for proper alignment and to save problems with the belt. It's surprising how easy the BDL system slips together if the driveline is aligned.

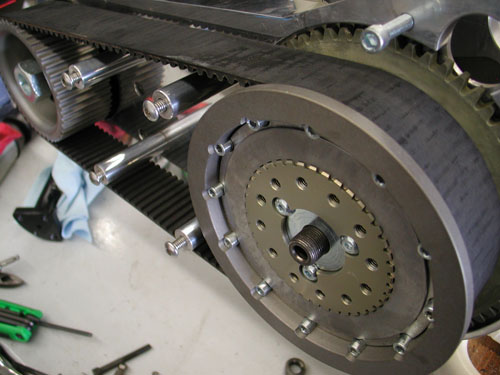
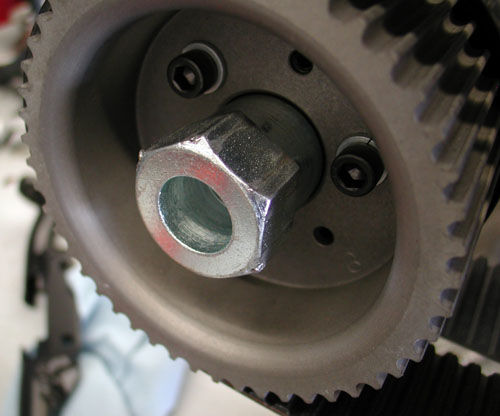
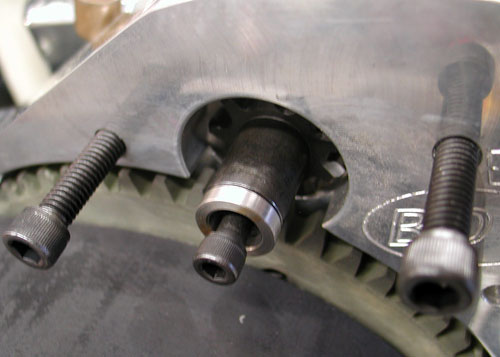
I followed the BDL instructions and bolted the engine shaft insert to the pulley then drove in the alignment pins and tightened down the Allen fasteners. I pulled the pressure plate pins out of the clutch and removed the clutch plates. With the clutch hub and the engine pulley holding the belt, I carefully slipped them on simultaneously. I attached the left-handed clutch nut and tightened it with an impact gun. I did the same with the engine main shaft nut. I turned over the engine and checked belt alignment and pulley alignment. I spaced out the front pulley slightly with a shim and was good to go.
BDL TECHNICIAN NOTE:I received a call from BDL, “You fucked up, Bandit,” Dan said. He pointed out how I didn't mention using Loctite on the transmission mainshaft splines when I installed the clutch basket. “That's more important than many folks realize,” he said. Vibration from the spines can tear up the basket splines and ultimately the clutch plates.
I generally don't Loctite the mainshaft splines until the bike is tried and true, encase I need to remove the clutch. “Harbor Freight sells a cheap vintage steering wheel puller,” Dan said. “They work like a champ for pulling BDL clutches. If a hub is too tight a little heat does the trick, melts the Loctite.”
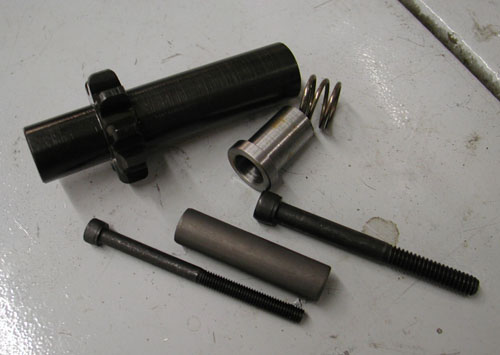
With the clutch back in place and all the elements tightened down I installed the Spyke starter and pinion shaft. Giggie, who just passed away the other day, told me years ago, how to check the spacing. To keep the starter strong and not fuck with the ring gear, the starter gear should rest about 0.150 back from the ring gear. Too close and it doesn't have the space to begin turning and jams against the ring gear. Too far receded and it won't make good solid teeth contact.
With the primary almost buttoned up, I moved to the LA Chop Rods new-fangled internal throttle installation. Internal throttles are cool but precarious. If a bike stumbles and falls over, the first damage is generally to the bars. It's easy to replace an external throttle or a grip. But what the hell. We're not building a bike to fall down.

About this time, the Sturgis event hit the summer calendar, and folks arrived from Australia for the ride. Doc from Heavy Duty Magazine, in Australia, picked up a Victory for the run. Nicole Brosing, an Australian tattoo artist, flew to the coast, rented the same Road King she rode last year, grabbed her girlfriend and split north to San Francisco then east to the Badlands.
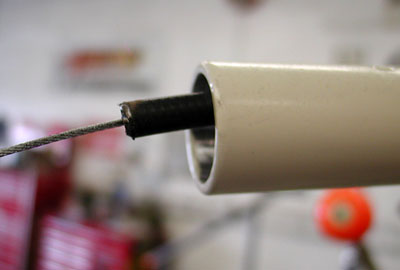
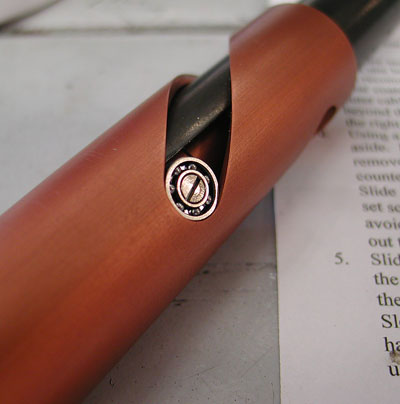
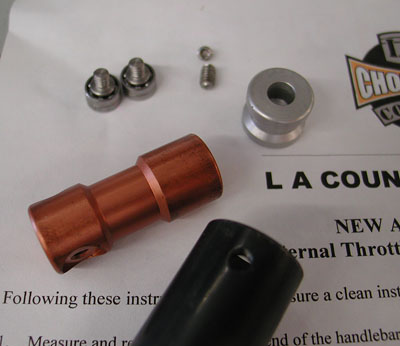


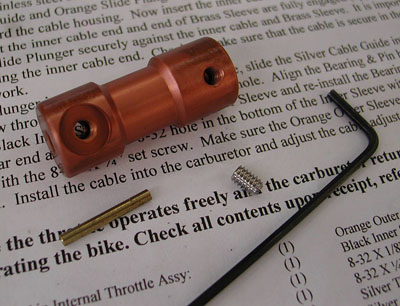
I wrenched in the shop, drank Coronas, smiled and caught a sun tan. Gard Hollinger from LA Chop rods slapped extra engineering into his internal throttle system. His instructions were detailed, but I was still nervous as I attempted to determine the proper length. It's always a sharp notion to take the bike off the lift so the bars can rotate for testing the overall length. It's actually a breeze to install, although I honed out the bars slightly, for an easy slip. Gard devised the cable lock-down with a brass sleeve to prevent damage to the internal cable and afford a solid grip for the set screw. This throttle, with extra bearings, is smooth as silk.
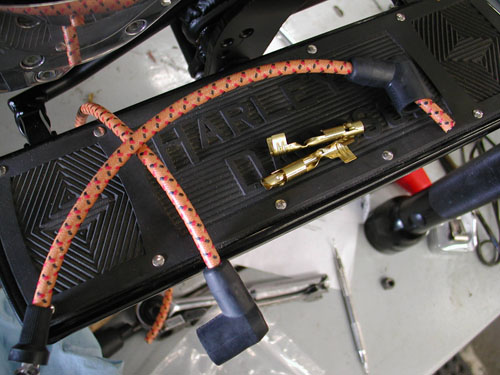
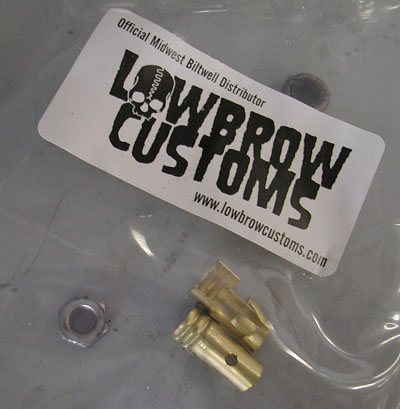
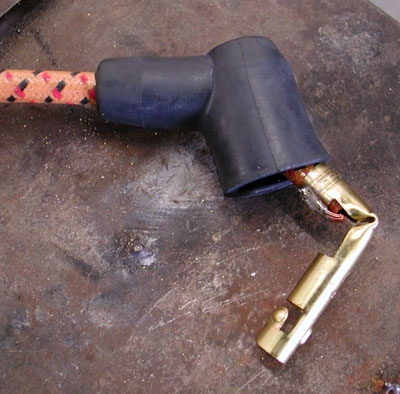
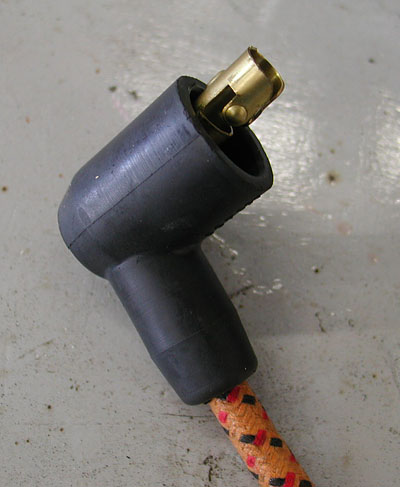
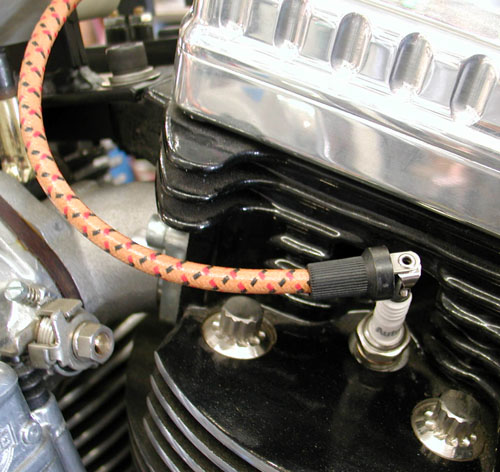
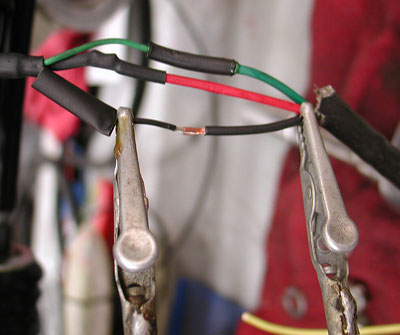
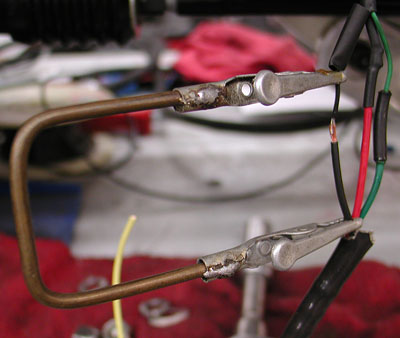
Then I turned to the classic spark plug wires from Low Brow. This is a cool system and adds class to any ride. They come in a kit form with all the elements needed, except a roll of solder, flux, and a gun. It was a simple operation, but I actually mounted the coil a tad on the tight side to the underside of the tank. Fortunately it all fit. Make sure to slip the boots onto the wires before you solder the brass fittings into place. Lowbrow attaches the other ends before shipment.
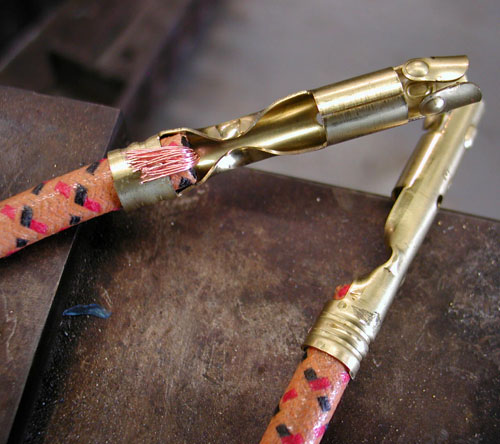
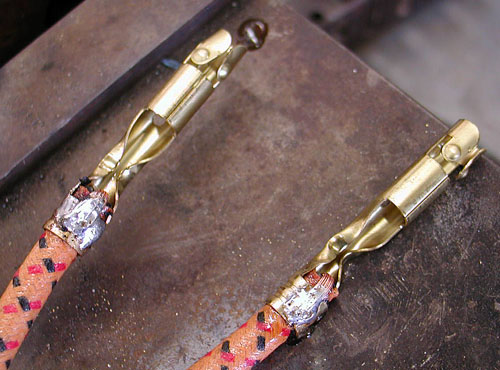
I simply attached the spark plug wire to the spark plugs, ran the lines out of harm's way to the coil, added an inch for safety, cut the wires, trimmed them back for soldering, and crimped and soldered the fittings into place. Frank Kaisler told me to make sure to wipe all the flux off after soldering. So I did as Commander Kaisler instructed. He uses alcohol or solvent to clean the area, preventing future corrosion.
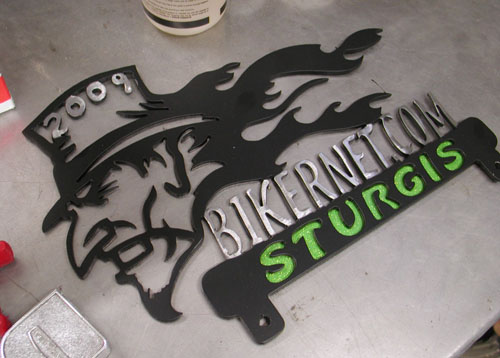
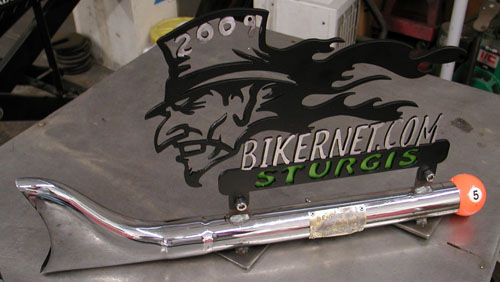
I took a day off to help Nyla's brother, Brad, build some diesel motor mounts for their 32-foot Cho Lee motor sailing vessel. They were smack in the middle of a complete restoration. It's a beautiful boat. I've sailed it to Catalina Island several times, when it belonged to an old friend of mine. Another deadline loomed. Less than a week away, the Easyriders Bike Show would rock the Broken Spoke Saloon in Sturgis. Bikernet sponsors the Panhead Class each year and I needed to create the trophy. Panhead Billy won the award. When I can reach him, we will feature his classic rat pan.


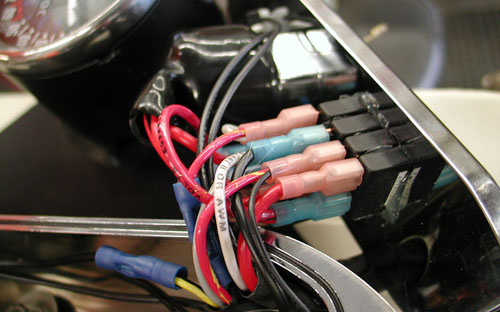
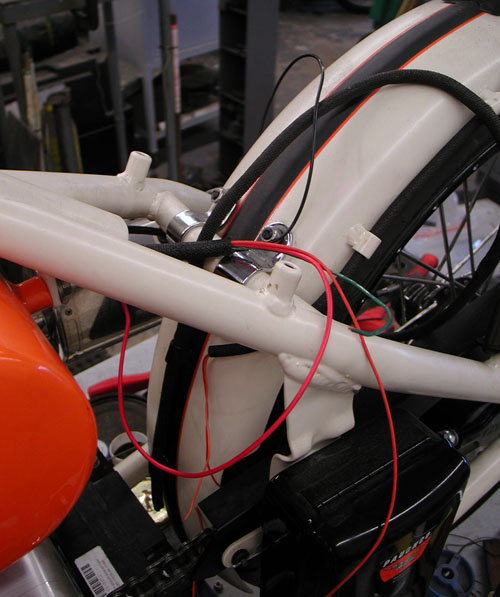
I shifted to the wiring. I used Phil's Speed Shop wiring system. It's designed for lots of custom applications and makes wiring a breeze. He includes instructions and a wiring diagram. The billet chromed box includes the ignition switch, the high-low beam switch, circuit breakers, starter relay, neutral light and starter button. I just ran the wires, used my Frank Kaisler soldering tool and ran the wires through the old H-D soaked canvas loom. I know that's not the correct term for it, but it's a close description.
I ran into one problem that held me up for weeks. I like the CrazyHorse bottle cap engines. They offer three ignition alternatives. First, the original Thunderheart unit, an adjustable timing Thunderheart, and finally a cone motor system. Unfortunately, they don't tell you enough about the stock system. I thought it was like a Compu-Fire system in the cone. It's a one piece unit. I reached out to other Crazy Horse engine builders who told me I needed a Thunderheart ignition module. So, I ordered the system from Thunderheart, but when it arrived it didn't jive with any wiring diagram I received from Thunderheart or Crazy Horse. It was a riot. Every time I received a wiring diagram or a box from Thunderheart, I thought I was good to go. Then some goddamn thing wouldn’t match, and everyone had split to the Badlands. I paced the garage waiting for answers.
The Thunderheart tech guru sobered up after a week in the Broken Spoke swimming pool, doing belly shots with the lovely waitresses. He dropped me a simple e-mail: “There's only three wires goddamnit, black for ground, red for ignition and green to the coil. Go for a ride.”
That solved that mysterious issue and I moved on. Three more puzzling obstacles surfaced. I cleaned the Paughco oil tank with solvent and small nuts and bolts. I counted the fasteners before I slipped them into the tank. It was sorta rusty, and I didn't want to roll without cleaning it. I poured a cup of oil in it and flushed it out. I hooked up the oil lines, and Crazy Horse sent me very specific instructions, but this will blow your mind. I couldn't figure out venting. I'll get back to that.
I hooked up my gas lines. I filled the tanks and one leaked. I threatened to fire myself on the spot and another challenge surfaced. The pinhole at the front of the tank, where I cut away a section to allow for fork stops, stuck out like a sore thumb. It was obvious, but we didn't spot it during testing. I called Jim Murillo, a professional painter and cried for assistance.
“Don't use Kreem, it peels,” he said. “Use Casewell two-part Phenol Lovolac System.”
I ordered some and their customer service was supreme for a small $36 order. Some companies get it, when it comes to taking care of customers. This is where tank seals become terrifying. I needed to kick my ass into the middle of tomorrow. Make sure your tanks are sealed before any finish is applied, including powder coating. I suppose I was over confident. What the hell.
The directions called for cleaning the tanks with lacquer thinner, nuts and bolts, sand, you name it. I tried the lacquer thinner and immediately fucked with George's pinstriping. I called him, panicked and drank whiskey heavily. Fortunately a Bikernet reader shipped me a fresh bottle of Bulliet Whiskey, and Dusty, one of the 5-Ball Racing Team Salt Flat members, hand-stripped several pounds of walnuts and shipped them out.

Incredible. I let the tank dry thoroughly, made up a small portion of the Casewell sealrant and poured it into the tank. I knew where the hole was, and fortunately it rested in an easy-to-reach corner. I tilted the tank in the sun and returned to the whiskey. George saved my ass once more.
With the tanks fixed and returned to the bike, all was well, and I put a key to the Phil's ignition switch for the first time. Here's another quirk. Crazy Horse doesn't tell you how to time your new 100-inch engine. It times itself. The bike didn't whine, growl, spit or cough. It fired immediately to life and purred. I checked the oil pressure, perfect. Then I unscrewed the cap off the oil bag to make sure the lubricant returned to the oil bag properly. Yep, it was returning, but the cap popped off into my hand. I wondered about venting. Everything was fine except for pressure in the oil bag.
Again, I started a research project. The Crazy Horse installation material didn't mention a crankcase vent and I searched the engine. There are two 3/8-inch spigots between the heads, as if for a cross-over oil line. As it turns out they are designed as vents. I found out from Dar at Brass Balls that they just run a line under their gas tanks. I pulled one end, no oil flow. It had to be the vent, so I improvised and used another old machinery oil fitting to hold a screen to prevent crap from strolling back into the precious engine.

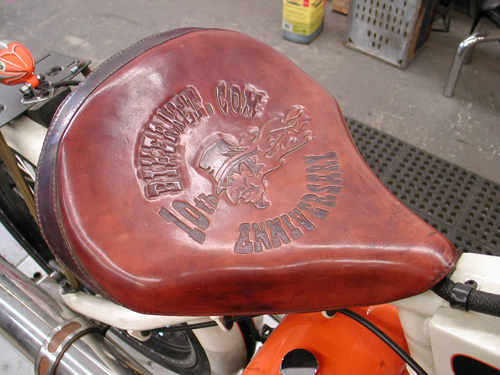
That solved that issue. I was ready to rock, but my seat hadn't arrived from Duane Ballard. It was a wild old sprung BMW seat he scored. When it finally arrived, it didn't fit. It was too high and too far back. I was faced with another quandary. If I moved the bars, I could barely place my boots on the footboards. I scratched my beard, looked at the box of walnuts, and then it dawned on me. Glenn Priddle, a leather seat master, who studied under classic saddle makers, made me a seat a couple of years ago for the 10th Anniversary of Bikernet. It was a wide, classic solo seat. I dug it out, dusted it off and it fit like a glove, dropped the seat height 2 inches and move the seat position forward 3 inches. It actually fit the frame better than the old classic from Duane. I dodged another bullet.
Every year when I build a bike, my mantra includes a solid, tough, rideable, unique bike that will last. But each year the unique project throws a few curveballs. It's part of my Zen education. Life is not meant for perfection. We need challenges to test our endurance levels and help us through the tough spots, find answers or solutions and persevere. Often my predicaments are caused by a lack of experience. For instance, if I ever use a Crazy Horse engine again, I'll know all the quirks and set-up issues.

Now, let's see if I can ride it for any distance. I would love to ride it to the Badlands next year or to Arizona for our Too Broke for Sturgis Run.

We'll see what happens next, as I take her through the Eddie Trotta break-in routine. Eddie starts a bike for the first time, let's her run and checks her over. Then he takes it out for a one-block jaunt, and checks it over again. Then he ventures forth for one mile and returns for another inspection, then 5 miles, then 25, then 50 and she's ready for a cross-country blast. Hang on!