5-Ball Factory Racer, Part 4
By Robin Technologies |


We experienced an incredible month of hiccups and grievances. My computer crashed immediately after I spent a long weekend in Primm, Nevada, locked in a hotel room, rewriting my first Chance book. I lost it all. Then I'm attacked with the vertigo venom and laid out like a sick puppy, terrified that my life as a motorcyclist was over. Then the nasty tenants who rented our 1-bedroom apartment disappeared during the worst economic downturn in our history, we lost that income and needed to pour a minimum of eight grand into that puppy to make it rentable once more. Good god, plus we were burnin' daylight and needed to shovel a new paying tenant into place.
There's my excuse for not working on the 5-Ball Factory Racer more. I hate doom and gloom. Hell, there's no time for that shit. “No time to lose” is one of my codes. I'll rewrite the book over the next couple of weeks, and it will be even better. The apartment will be completed this weekend with finished hardwood floors, completely new kitchen, bathroom, all new paint, a new laundry room and more. New tenants are moving in tomorrow. And Vertigo is like a mystery movie. I was down three days then back at the computer and firing away, just don't ask me to walk a straight line. Plus, the mystery, as to the source or cause is still in full swing. I'll let you know what I find out. I gotta quit snorting paint fumes.
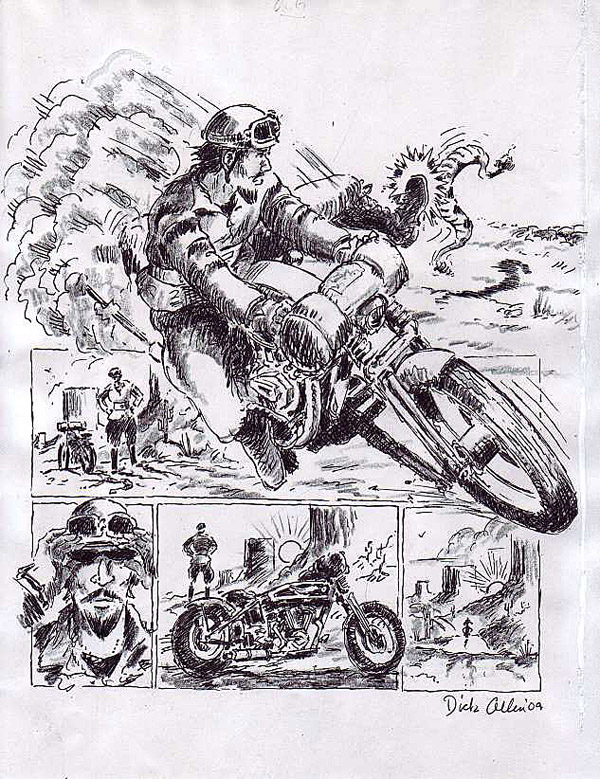
In the meantime, there's 5-Ball Factory Racer progress to report. Since the plan was to build a comfortable vintage looking speedster and ride it to Sturgis, we need enough fuel capacity to fly me across the desert and not leave me in the sand, baking with lonely tarantulas.
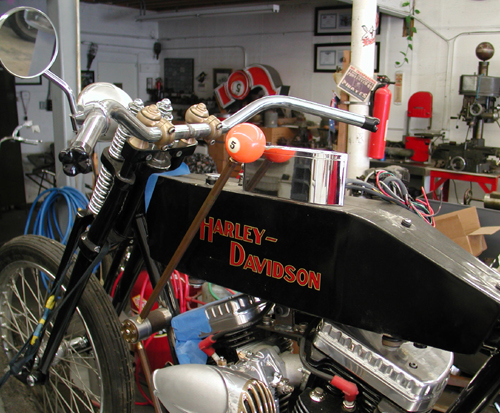
These flat-sided tanks designed by Rick Krost and built by Paughco are in keeping with a 1915 Harley-Davidson board track racer. We measured the capacity of the long narrow tanks, during installation. They come in at exactly 2 gallons–not bad. On the other-hand not comfortable touring levels. Then it dawned on me in my dizzy state. Mike Pullin, the man who created the Run for Breath, as a tribute to his son Justin and Asthma Charities, builds a cool custom/vintage oil tank using antique fire extinguisher bodies. I gave him a call
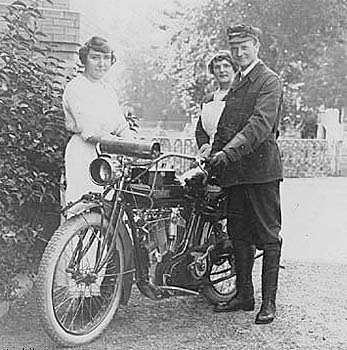
The notion was to build and mount a back-up or reserve tank on the handlebars in keeping with the Prestone acetylene headlight tanks from used from 1910 until the '20s. Harleys didn't discover the use of electric lights until 1916. Before, they had carbide chips, systems like coal miners had on their helmets. Carbide chips became carbide generators and were followed in 1910 or '11 by pressurized acetylene tanks, similar to welding. A small hose fed two nozzles inside the headlight case. The rider had to open the face of the headlight, turn the nozzles on, until he heard the hiss of gas or smelled it, and then physically light the flame to create the light reflecting off the mirror in the back for forward illumination. I asked antique bike expert, Don Whalen of Sierra Madre Motorcycle Company, if these systems worked worth a hill of beans. “It was best to plan rides around full moons,” Don said.
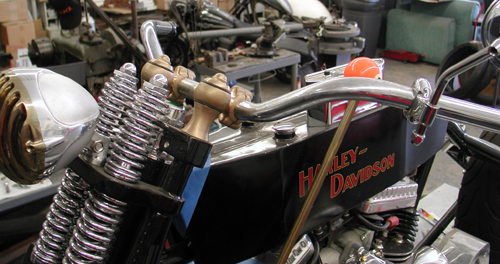
So the notion flourished. I could back up my narrow tank fuel capacity by adding a fire extinguisher full of fuel on the handlebars, and Mike was the master. He makes these generally for chopper riders looking for a cool oil bag. If you happen to have a vintage fire bottle hanging around, send it to Mike. He'll build a vertical or horizontal oil tank out of it, or you can buy bungs from the Bung King, Todd's Cycle, or The Parts Dude and make the bastard your-self. Here's where Mike, the Stealth Man takes over:
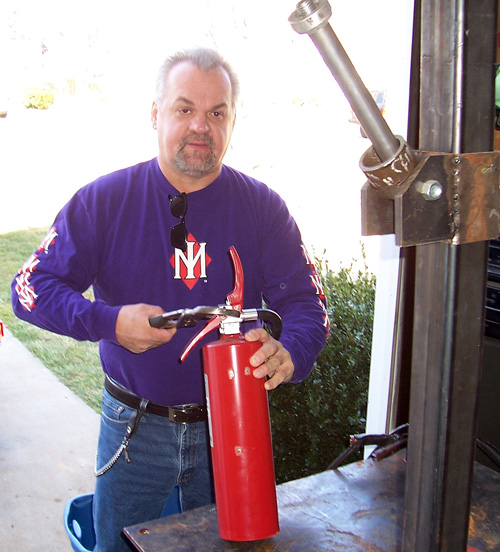
The first step in fabricating the tank was ordering the parts. I ordered all the parts from “The Parts Dude.” The extinguisher itself came from a local hardware store.

Then Chopper John and I had some fun and emptied the contents of the tank and then cleaned the inside with water.
The next step included removing the handle.
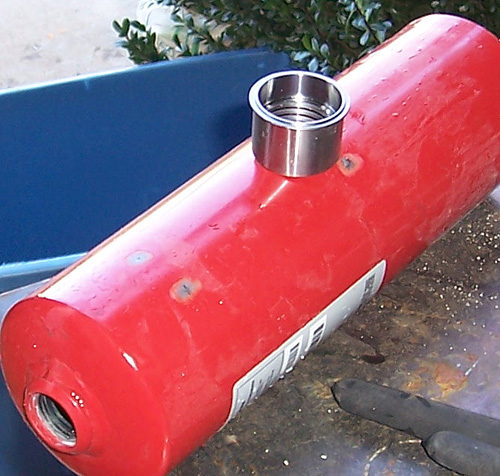
Then we measured for the center of the tank, where the filler cap would be located. Then we decided where we would position the petcock. This is key, depending on the bars.
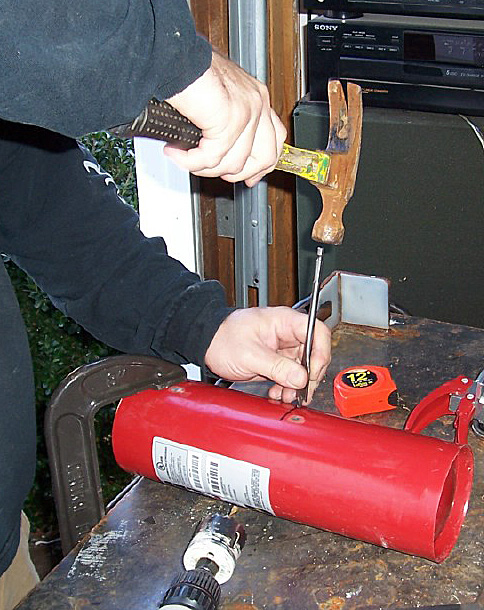


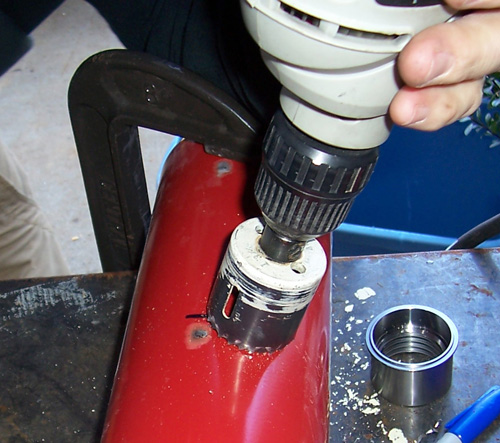
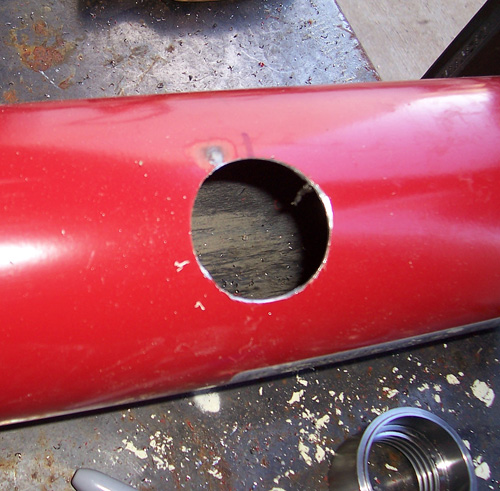
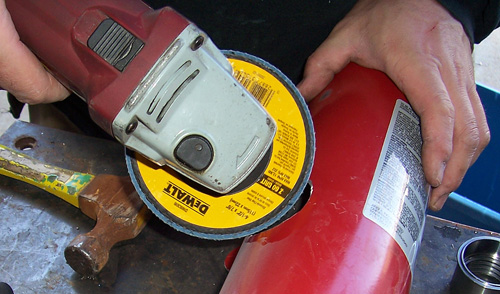
After this was done, we proceeded to drill and cut the holes for the filler cap bung and the petcock bung. I ended up using ¼-inch pipe thread petcock bung.
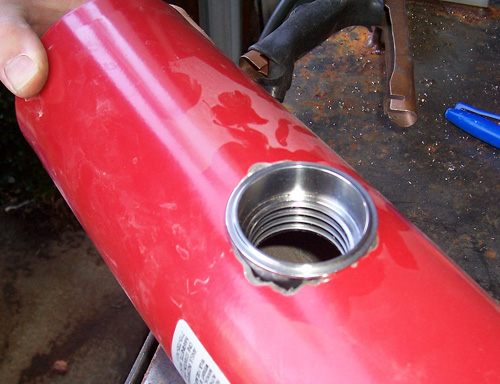
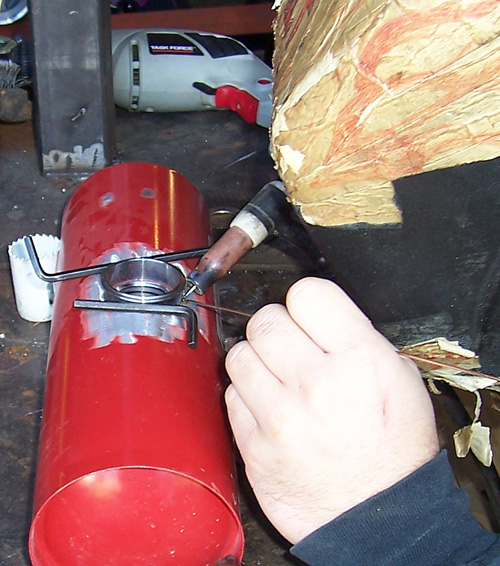
Once this was done, we welded the filler cap bung and the petcock bung in place.
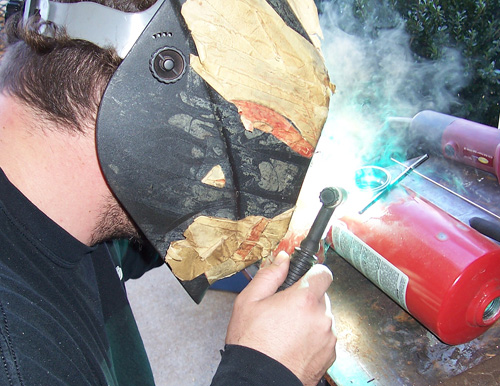
We ground all the welds and checked for leaks.
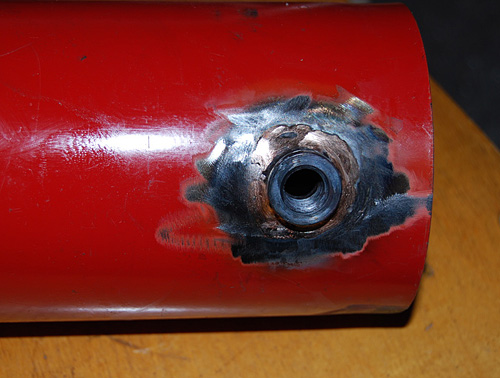
Chopper John and myself had a great time making the tank. It was the first time we had teamed up on a project since Stealth Bike Works closed. I don't know if I was the first to use fire extinguishers for tanks of any sort, but I know I was the first around the South Carolina area!
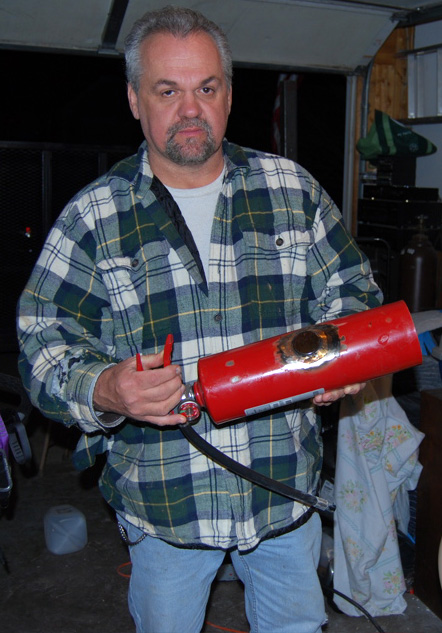
The tank is finished. Came out cool! All you have to do is seal where the handle threads are, with Teflon tape or Teflon paste. You may want to have the tank sealed or use that Kreem stuff. I really don't like the Kreem stuff. I used to go to a radiator shop to have it sealed but they closed. I am sure you have people who can do that.
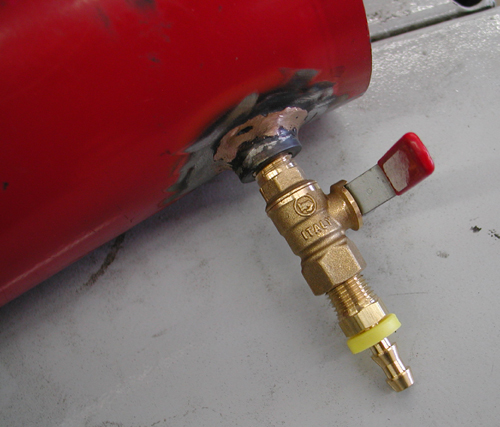
There you have it. We already found a petcock and I'm working on handle/valve end. As it turned out, the vintage jobs from the '20 had pressure gauges, so the rider knew how much acetylene was left for the night ride home. Since this fire extinguisher came equipped with a pressure gauge, we are going to attempt to keep it. Then I need to create a steel cradle and weld it to the bars.
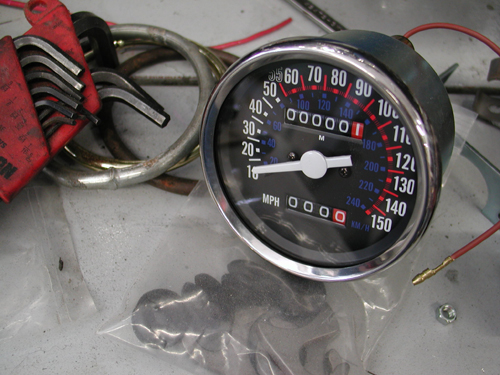
Next, you'll see us mount the vintage Sportster Speedo and I'm going to pick up the Black Bike Wheels next week and run a manual cable drive off the rear wheel with LA Chop Rod bungs.
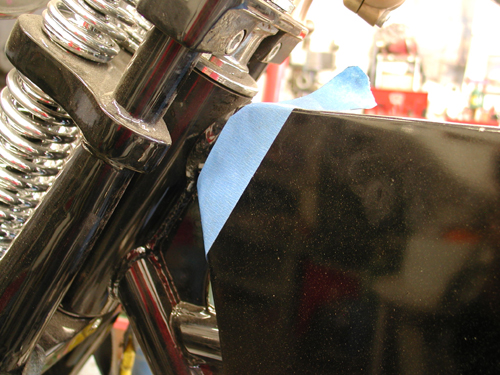
Just when we were confident that the fuel capacity neared 3 gallons, we discovered a handling glitch. The fork stops were under the front of the gas tank. We couldn't live with it. The new narrow tapered leg Paughco springer would smack the tank and hinder turning. So next, we'll slice the front of the tank, decrease fuel capacity a tad, but enhance turning. Check back in a couple of weeks for more major renovations, if I don't stumble and fall off a cliff.

1928 Shovelhead Part IX
By Robin Technologies |

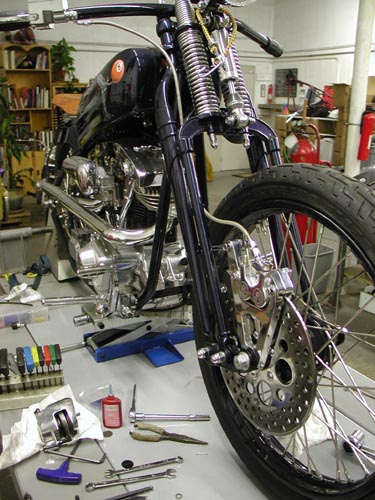
It’s time to feature the 1928Shovelhead and American Iron said theywould take it on. They’re the only bookthat accepts antique bikes. I’ve writtenabout four features for them on rare, very coolhistoric models.
No the ’28 Shovel doesn’t fallinto that catagory, but what the hell, it’sgot class. We needed to complete a couple ofdetail mods before Markus Cuff would aim alense at the blue beast. We needed matchingbrake rotors and a PM front brake system. Ipulled a front rotor from the CCI catalog andcontacted Performance Machine for theappropriate front brake caliper and springerbracket.
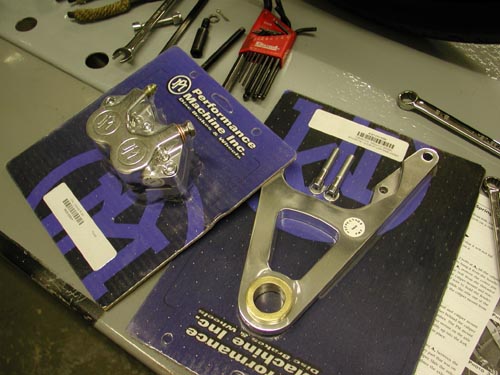
Much of the following comes directly fromthe very complete Performance Machineinstructions. They don’t mess around.There will be no doubt about the installation ofthis unit. Let’s hit it:
Before installing a caliper or rotor kit,read through these instructions completely;this will familiarize you with the way in whichthe parts fit together and the tools needed tocomplete the job.
In the course of installing these kits youwill be replacing the stock brake caliper(s)and/or rotor(s) with a high-performance brakecaliper(s) and/or rotor(s). Please pay specialattention to the section of the instructionsdealing with the centering of the caliper overthe brake rotor. Actually, I couldn’t findthis section. Generally a set of shims arepacked with calipers. Use the shims andmake sure the caliper is centered over therotor.
The brake caliper(s) used in this kit isdesigned to use DOT 5 brake fluid. Neverreuse brake fluid, don’t use brake fluidthat you are not sure is new and clean. Thisinstallation should only be attempted by amechanic with a thorough understanding ofand experience with motorcycle brakesystems.
If you plan on using the stock brakeline/hose that runs between the mastercylinder and the caliper, then you will be justswitching the line at the caliper’s banjofitting. We recommend that you do notdisconnect the line from the stock caliper untilyou have the new caliper bolted in place andare ready to bleed the brake system. This waythe brake fluid will not run completely out ofthe master cylinder before you have the newcaliper connected.
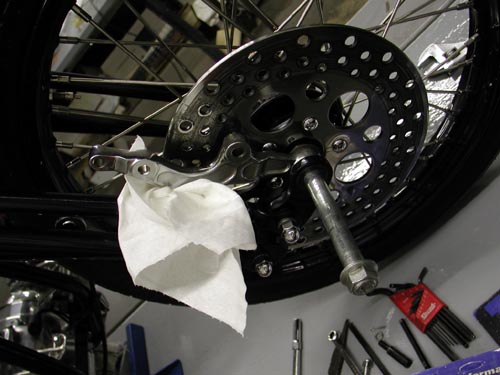
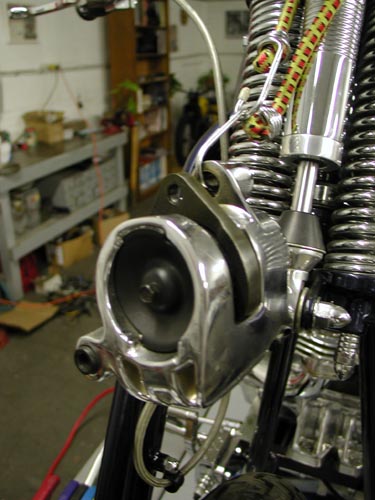
Loosen brake line and remove the twobolts, lift the caliper up off the rotor and use ashort length of wire or bungie cord to hang itfrom the handle-bars, up out of your way. Onthe 3/8‚ bolt, remove the cotter pin from therear; unscrew the lock-nut, unscrew the boltfrom the threaded bushing in the fendermount and pull it out of the caliper mount andreaction link. On ’93 and later models,use a piece of wire to hold the fender up out ofyour way. Unscrew the axle nut, slide the axleout of the fork and lower the wheel to theground. Remove the caliper mount from theaxle and the bushings and spacers. Keep thisshit around, you’re going to need it.
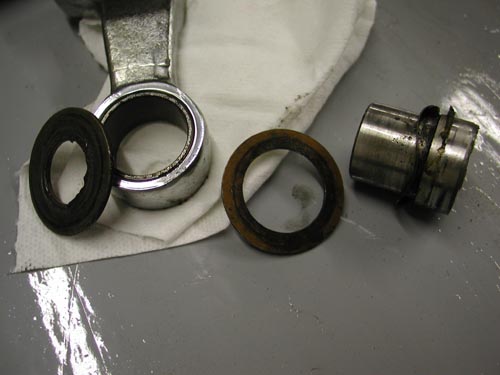
The Springer uses a combination axleseal and caliper mount bushing, with awavy-washer and bronze thrust washerbehind the caliper mount. Remove anddiscard the bronze thrust washer that goesbetween the caliper bracket and the wheel.The PM mount has this thrust washer built-in.Install the PM caliper mount on the axleseal-caliper mount bushing with the wavywasher and raise the wheel assembly up intothe fork.
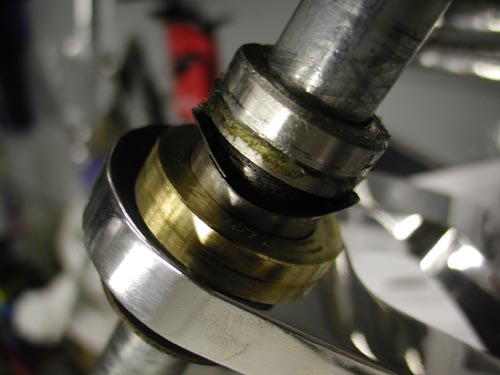
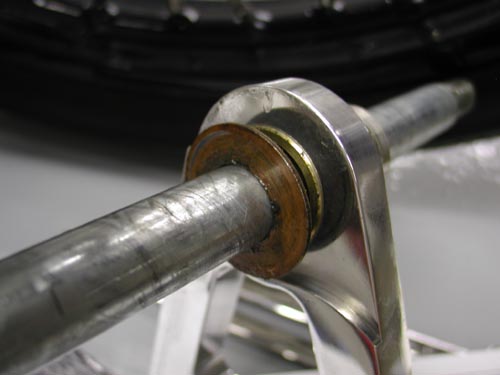
Here’s the outside brass bushing inplacebetween the rocker and the caliperbracket.
Install the stock outer caliper mount thrustwasher between the caliper mount and thelower fork rocker. This is a factory part thatwas on the fork assembly; the copper coloredside faces the caliper mount. Slide the axlethrough the fork, install the flat washer andaxle nut and tighten the axle nut to 65 ft. lbs.
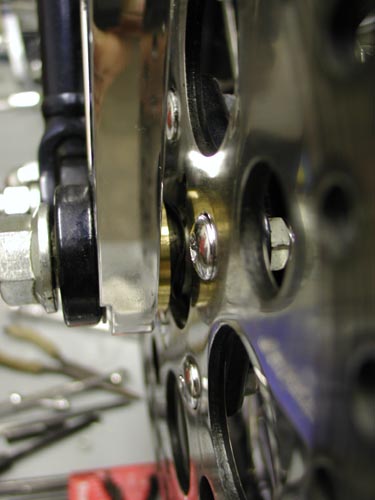
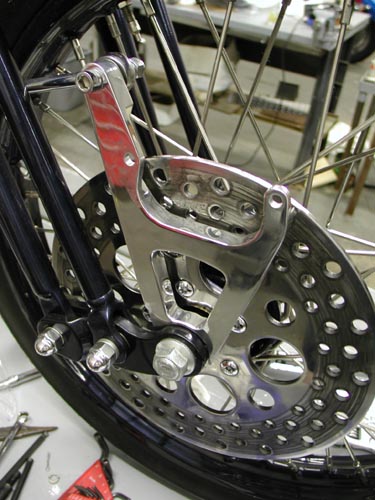
Caliper installation
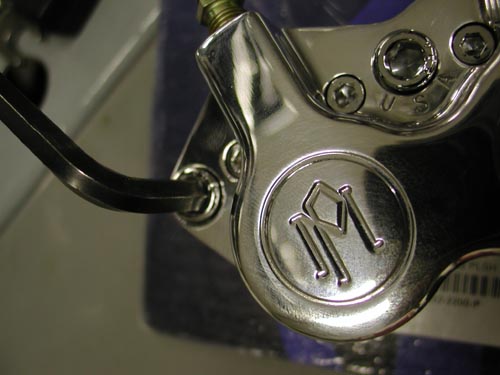
Remove the two chromed Allen end boltsfrom the Performance Machine caliper body,slip the caliper over the rotor and install the5/16 x 1 3/4-inch socket head bolts (Allens)and flat washers. Here’s where youcheck the caliper over the rotor. Step in front ofthe bike and eyeball the pads in the caliper.
Make sure the caliper is centered. Beforethe caliper is tightened down, it must becentered over the rotor; see page 3 for theproper procedure.
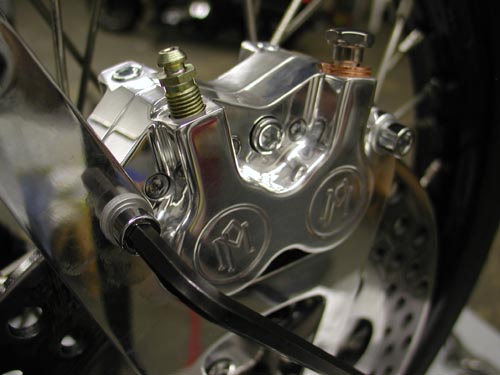
Yep, sure enough they were on pagethree. Here’s what I missed, “The centerline of the caliper is where the two caliperhalves meet. Look down from the top of thecaliper onto the rotor. If it’s offset to theoutside then you need to install mounting boltshims. Shim kit includes six shims, two each:.016, .032. .062-inch. Insert the shimsbetween the mounting boss on the bracketand the caliper body by removing themounting bolts. After the caliper is centereduse Loctite or lock washers and torque thebolts to 22 ft. lbs.”
The small print dictates that failure toproperly center calipers will impede theperformance of this fine braking equipment.They’re right. Do it right the first time.
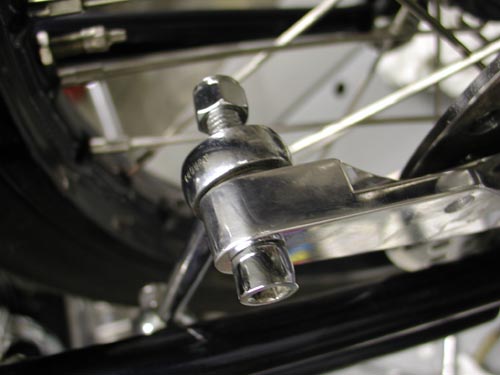
Attaching The Brake Line
First tape handle bar master lever 1/2 wayclosed. This will prevent fluid from free flowingfrom hose. Remove the end of the brake linefrom the stock caliper.Working rapidly so thatan excessive amount of brake fluid does notrun out of the end of the brake hose, attach theend of the brake line to the new PM caliperusing the PM supplied seal washers, onewasher goes on each side of the banjo fitting.
Position the banjo fitting so that the brakehose does not rub on the frontfender or other part of the motorcycle. I had toreroute my Goodridge brake line. Had to movefast.Tighten banjo bolt to 10 ft. lbs. of torque.
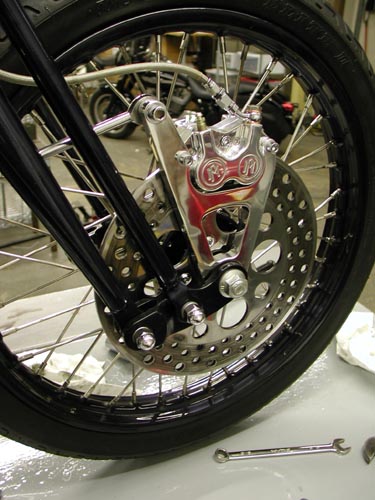
Bleeding The Brake System
You will find it is easier to bleed the brakesystem if you have a helper. First, fill themaster cylinder with DOT 5 brake fluid and putthe cover back on the master cylinder. Attach ashort length of rubber hose to the bleederscrew on the brake caliper. Put the other endof the hose into a coffee can or other suitableclean catch can.
Have your helper pull inon the front brake lever or push down on therear brake pedal five times. At the end of thefifth stroke, have your helper hold the brakelever in or pedal down.
While the helper holds the lever/pedal,open the bleeder fitting on the caliper. You willneed a 1/4 box end wrench. Air and brake fluidshould come out of the end of the hose that isconnected to the bleeder fitting.
After theair and brake fluid have stopped coming out ofthe hose, close the bleeder fitting. Your helpercan now release the brake lever/pedal. Thisaction will force the air that is trapped in thebrake system out the bleeder screw. Repeatthis procedure until the brake become firm orthere’s no air in the line.
Check thefluid level in the master cylinder after eachbleeding. Don’t let the master cylinderrun dry as this will push air back into the brakesystem which will require all-night bleeding.
Front brakes can be a bear, since airdoesn’t want to flow down the forksthrough the line and out of the caliper throughthe bleeder nipple. Some guys force fluid upthrough the bleeder nipple into the system. Ifyou want to use the above system, sometimesthe caliper needs to be raised above the barsto allow the air to flow to the bleeder nipple.
I’ve discovered that with a littlepatience, bleeding is hardly necessary. Takethe cap off the master cylinder reservior andpump the handle slightly. This allows the airbubbles to rise out of the caliper, up the lineand out the master cylinder. Tap the lines acouple of times and pump the lever slightlyuntil it’s firm. Refill the reservior whenneeded until complete, top it off and call itquits.
Leave it overnight and check it again in themorning. It may take a couple of days beforeall the bubbles are gone, but it’s abreeze.
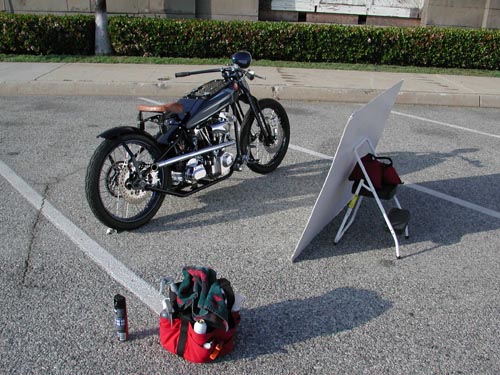
Here’s a shot of the 1928Shovelhead during the photo shoot forAmerican Iron. It looked sharp thanks to thefinal details from CCI and Performancemachine. Of course, it would be nothing but apile of parts without the talented efforts ofStrokers Dallas and painter Harold Ponteralli.Watch for the feature in American Iron, thenwe’ll post a feature on Bikernet.

Need to see the previous chapter:http://www.bikernet.com/pages/story_detail.aspx?id=9001
Amazing Shrunken FXR 11: Mid Controls
By Robin Technologies |

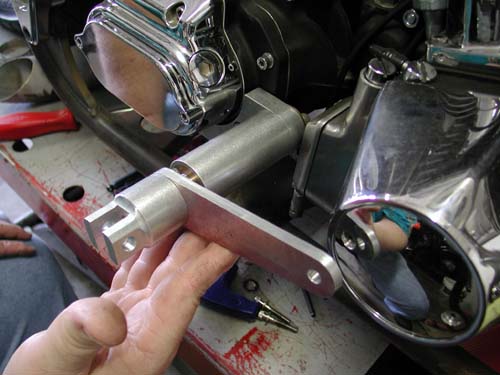
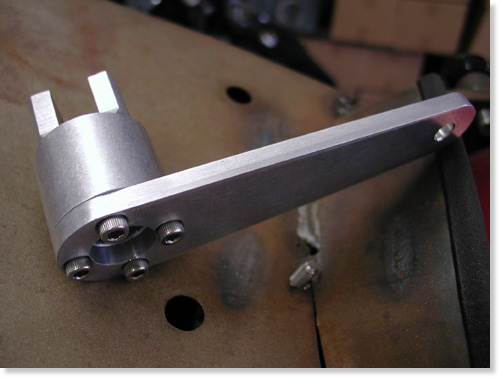
Shrunken FXR mid-controls by Giggie at Compu-Fire. Note: we need flat-headed Allens.
Giggie our master machinist from Compu-Fire rolled up to the Bikernet Headquarters last Saturday. We haven’t seen him for months due in part to his work on new starting systems for the custom market. They are dancing through the final development stages of a system configured to drive off the crank shaft of the motor with a 60- to-one ratio compared to stock 48-to-1. That will leave the area about the tranny available for custom applications or lower seat heights.
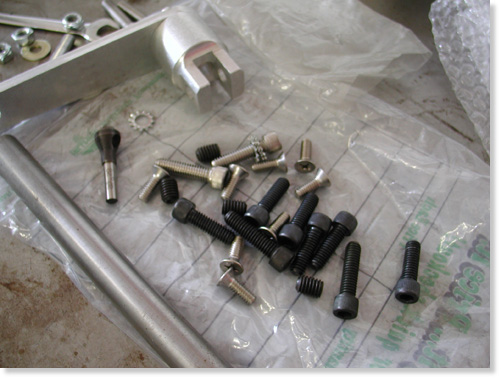
Giggie brought some wrong fasteners but lots of them and counter-sunk drilling tool.
Currently Compu-fire is soon to release a standard starting system, the Gen-2 HT, with 33 percent stronger magnets, 6-roller longer clutch (32 percent longer) with 30 percent more cranking while drawing the same amps from the battery.
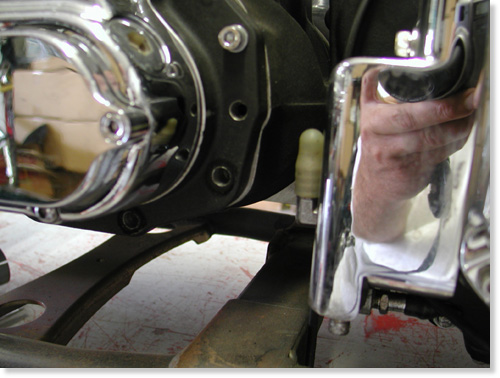
Here’s the tranny without the brake pedal components. There’s some tight tolerances going on.
I spoke to him about our cooling debate and here are some of his thoughts. “You want your oil to run at a minimum temp of 205 to eliminate water vapor or condensation that accumulates in oil,” Giggie said. “At 240 to 260 degrees petroleum based oils begin to break down, although synthetic lubricants could be good to 360 degrees. I have my doubts.”
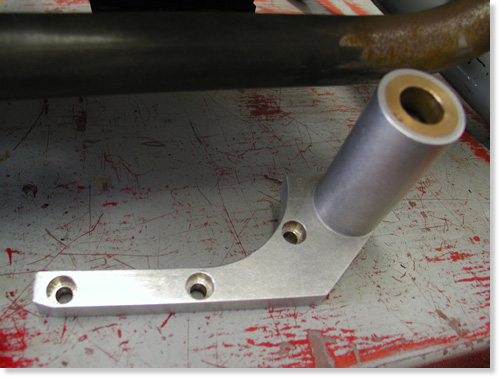
Base bracket to be bolted to the transmission.
Giggie developed an oil cooler for his FLH that kicks on at 220 degrees and off at 200. It has an in-line thermal switch continuously reading oil temp. He installed his cooler in a box with vents and two small electric fans wired to the thermal switch (to cool while idling).
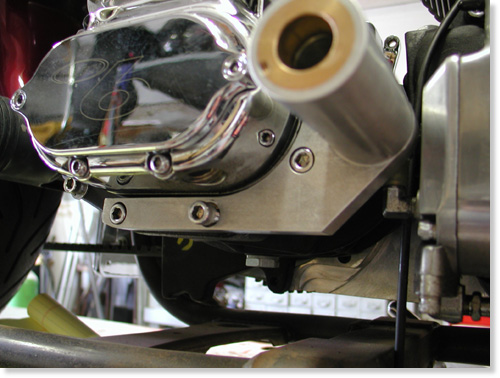
Giggie’s mounting bracket bolted in place.
Regarding our project Giggie dropped off hand machined mid-controls for shifting and rear brakes. Next, we must buy a H-D slave cylinder with remote reservoir with a built in brake switch. We will hide the reservoir behind the oil bag and design a bracket to hold the slave under the trans.
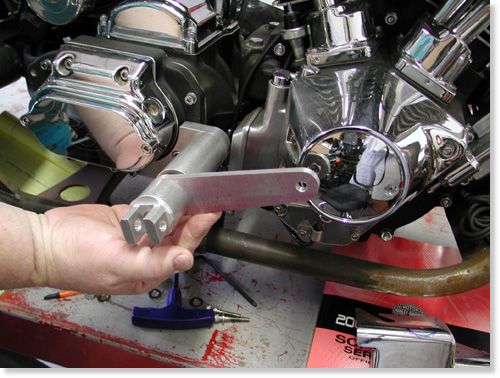
This shows the pedal and shaft in the mounting bracket.
Giggie will supply us with four more bushings to run behind the shift and brake levers, two 1/8-inch thick and two 1/2-inch thick, to allow us variable spacing away from the engine pulley or point cover on the cone.
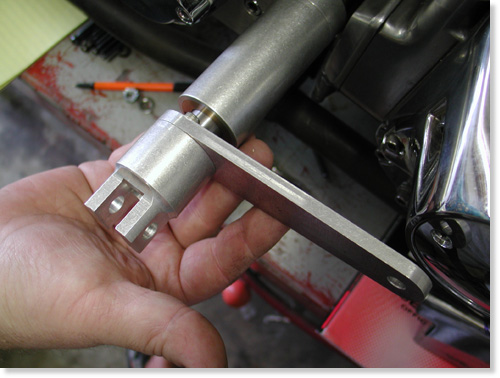
Giggie will supply two different bushing to be installed between the brake lever and the mounting sleeve. We’ll need the space to clear the point cover.
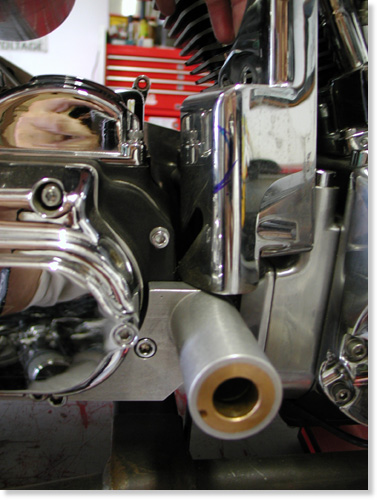
Unfortunately the sleeve hit the oil pump cover. We may be able to remove enough material or just polish the pump. The oil pump inlet fitting will also need to be turned down. It’s close.
With the bushings in hand we can develop our final linkage behind the BDL belt drive plate and Giggie’s tranny plate to connect with the slave piston.
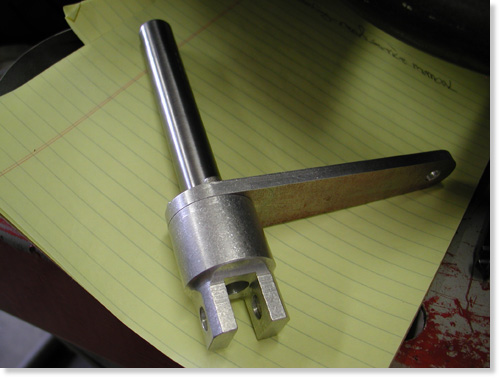
In both cases we need to cut and machine the other end of the shaft, depending on the linkage.
I’ve decided to remanufacture the exhaust system which is now a tight fit around the new brake linkage. Giggie also machined the foot peg mounts to accept any standard, pivoting foot pegs.
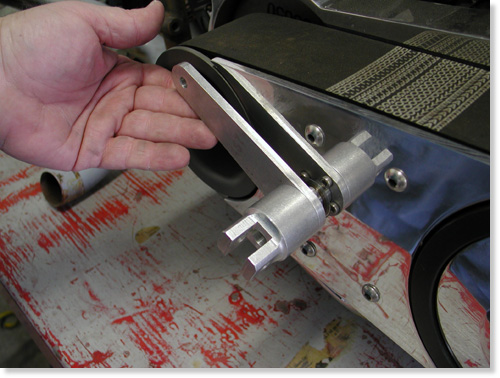
The slick new mid controls for shifting slid through bushings machined into the BDL outter and inner covers.
Next we need the bushings, slave cylinder and a day in the garage hammering and welding a new set of pipes.
–Bandit

Back To Part 10, Page 2
Amazing Shrunken FXR 14–Getting Close
By Robin Technologies |

We’re getting right down to the bottom line. Harold Ponteralli, our painter called, “If I deliver the paint can you make it to the show.” I assembled bikes overnight for run deadlines in the past, so we went for it. We installed the new sheet metal, ran the oil lines and picked up a few chrome knick knacks from Long Beach Chrome. Frank was on his way to the Bikernet headquarters with a brown bag full of Goodridge hydraulic fitting. The heat was on.
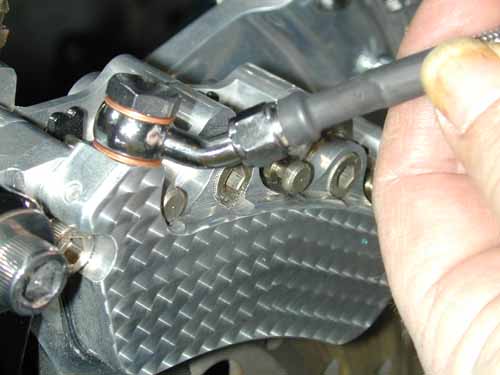
I installed the exhaust while Frank custom cut lines to fit each application perfectly. You can see how the man does it in our King tech articles using Goodridge lines, fittings and shrink wrap. For throttle cables we relied on Barnett for custom cut-to-fit lines.
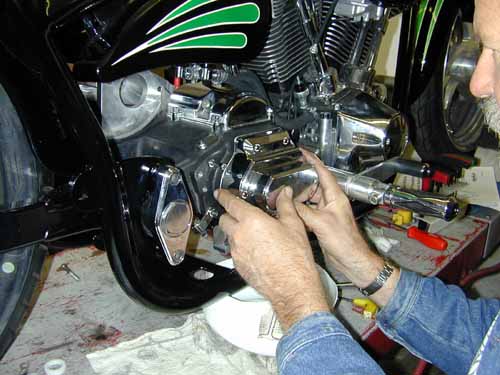
We replaced the Rev Tech 6-speed, cable tranny cover with a Joker Machine clean, chromed billet, hydraulic clutch. Why did we go hydraulic? Hell I don’t know, maybe to balance the Joker controls on the bars? The cover slid right on and we torqued it to specs (15-20 ft. lbs.).
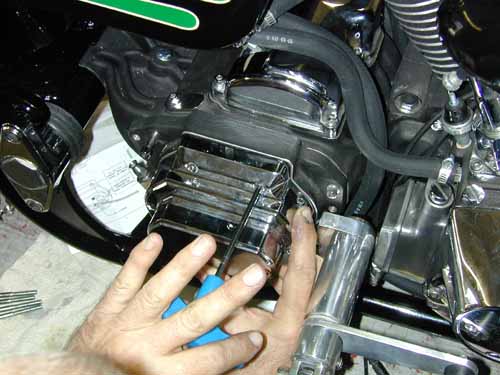
While I wrenched Frank ran a line from the Joker front brake mastercylinder to the Custom Chrome Billet-6 brake caliber. Crazy John took the calipers to a shop to have them milled smooth then engine turned for an added detail. Whatta ya tink?
Then Frank ran a hydraulic line from the H-D rear brake master cylinder (stuffed under the tranny) to the brake switch bolted to the tranny case, through a series of Goodridge fittings. Finally another line was constructed from the brake pressure switch to the rear brake caliper. We kept in mind that the wheel will be adjusted for belt tension and will flex up and down with the swingarm. There needed to be slack in the line.

Finally Frank carefully made a line that ran from the Joker handlebar controls to the Joker hydraulic tranny front. He immediately started bleeding the brake systems and they fell right in line. We watched the direction air bubbles might travel. Generally front brakes can be bled several ways. Some pump the fluid in from the caliper bleeder nipple forcing bubbles north out of the control reservoir. Sometimes, as soon as it’s filled, it’s cooked. No bleeding is necessary.
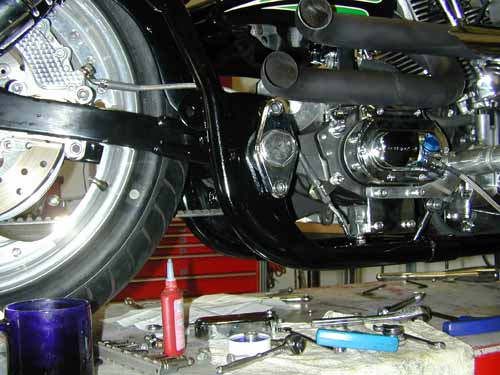
Sometimes I fill the reservoir and pump it slightly until the Dot 5 runs down the line and fills the caliper. This can take awhile, but as it sets the bubbles rise to the top and out the reservoir until it’s cooked again. We were lucky. The rear brake caliper was installed above the master cylinder and the bubbles blasted to the surface with little bleeding. Our Giggie (from Compu-Fire) designed, mid-brake lever worked like a champ with the sharp Custom Chrome pivoting pegs.
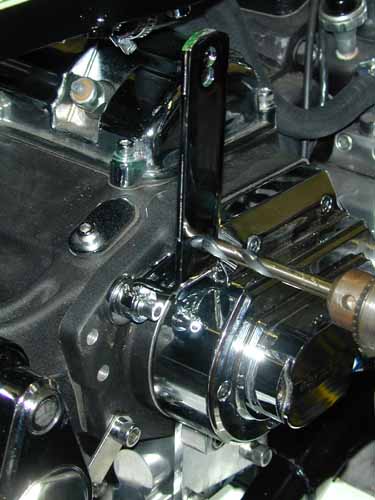
As a side note I coated the pipes with rattle-can barbecue heat flat black. What the hell, if they don’t work, I’ll mess with them again. Oh, and I tried to find a place to stash a H-D rear brake reservoir but couldn’t. I held my breath and entered a Yamaha shop and ordered a small sport bike unit. We made a bracket and stashed it under the tranny.
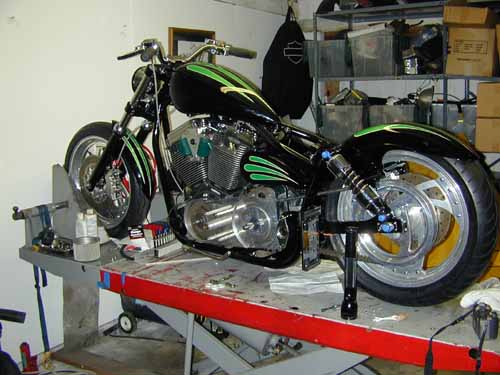
Building custom bikes is all about options, abilities, resources and a handful of rules. Check the John Covington Safety Code in Special Reports. He makes some good points. There’s also various considerations between rubbermounted bikes and rigids. For instance we designed the rear fender to hug the tire, but it moves with the swingarm which means the sonuvabitch better be strong. Also there needs to be considerable space between the seat and the rear fender for shock travel.
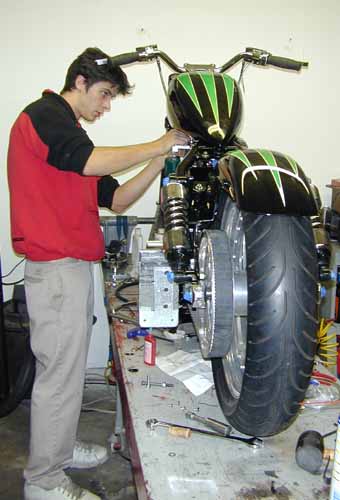
On top of style is ride consideration. I like to build bikes that will hang for a cross country run, handle slick roads and corner without dragging pipes or pegs. And it better corner. That’s what bikes are all about. Alright, I got off the tech. Kyle, the shop intern, installed the Custom Chrome petcock and gas line to the carb. He cut the line and inserted a gas filter (check the arrows for flow direction).

We loaded up the Cyril Huze oil tank with RevTech 10-50 Oil and looked for the UPS man. We waited patiently for the Le Pera styled/Bikernet seat to return to the fold stitched with emerald threads. Harold Ponteralli painted the sheet metal and want to see it in the Easyriders Pomona show. We didn’t make it. Then he jammed us about making the Pomona Roadster Show and we busted our buts. I did a couple of midnight runs installing the Custom Chrome stainless plates under the rear axle and polishing stainless fasteners. The gloss black powder arrived right on time from Dallas. The chrome sparkled and Custom Chrome delivered parts when we needed them.
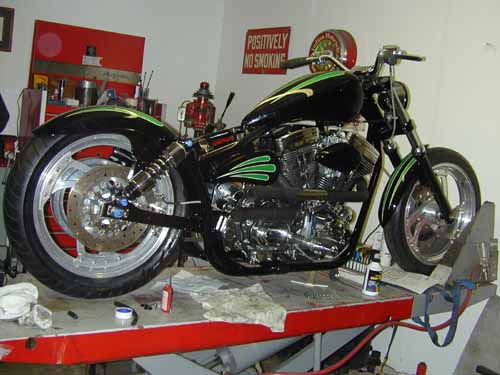
If the seat had rolled in the door, we would have wired the bastard into the wee hours and drug the scoot to the show, but nooo. Cross-eyed, we pulled the 1928 Shovel out of the headquarters, also painted by H-D Performance in Vacaville, California, detailed it and delivered it to Pomona. It was essentially built by Strokers Dallas, and sonuvabitch if they weren’t at the show with a half a dozen Stroker bikes. They took Best of Show and the Shovel took third place in the classic category. Whatta week.
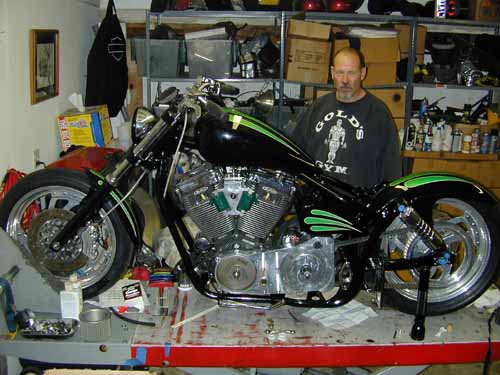
At this point we need final shifter linkage, which Frank fabricated, so we could install the BDL primary drive. Then some wire and we can fire this puppy. Hang on.


Amazing Shrunken FXR 15 Wiring Hell
By Robin Technologies |

This was actually one of the easiest bikes I’ve ever wired. It’s not a bad notion to sketch out a wiring diagram with consideration for the placement of the components. Think about it long and hard, then take your time. Below this mess I ran the Hardcore Choppers basic wiring diagram and tips on wiring anything.
First, there’s the regulator that bolts over the front motormount. I use Compu-Fire regulators for reliability and they are wired not to over-work the alternator. So you plug the regulator into the case for the alternator connection, run a ground strap under the frame where the rubbermount bolts and the final hot wire to the hot side of the battery, or the hot side of the ignition switch. That wire feeds the charge back to the battery. Presto, goddamnit, the charging system is complete.
I’m lazy and want the wiring system to be as easy and component free as possible. No extra lights, no turn signals, no horns, buzzers or ringdings. I use Bob McKay’s marine ignition switches for toughness, reliability and ease of wiring. They are distributed by CCI or, if not in stock, contact Bob directly (519-935-2424).
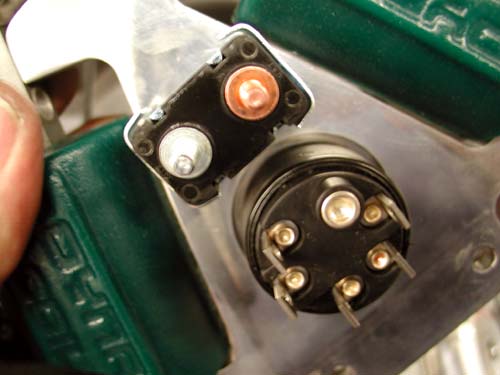
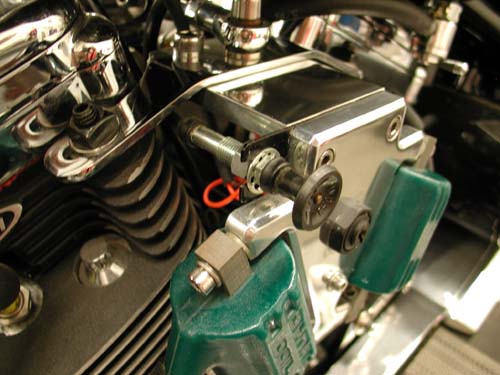
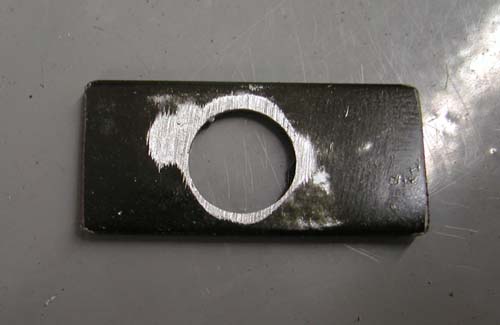
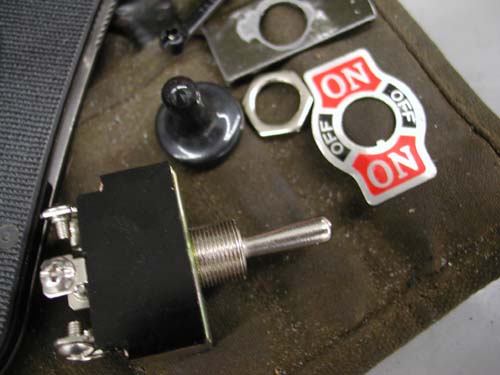

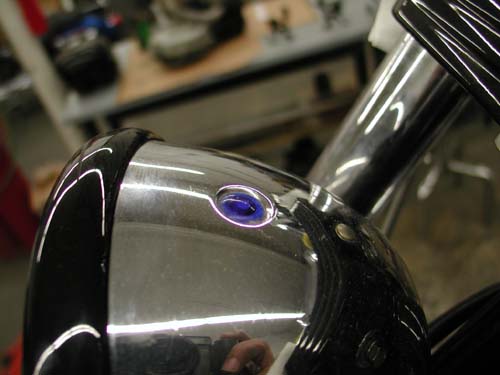
The switch is so complete so you don’t need a starter relay. All it takes is one wire to the starter, one wire from the battery and one wire to the circuit breaker. From the breaker a wire runs to the Compu-Fire single fire ignition system via the coils, one wire to the brake switch, one wire to the taillight and one wire to the highbeam switch. From the highbeam switch two wires ran to the headlight. From the Compu-Fire electronic ignition wires ran to the two Dyna Coils, front and rear and one hot wire that runs to both and the ignition circuit breaker. I ran only one 30-amp H-D circuit breaker, just a couple of inches from the ignition switch.
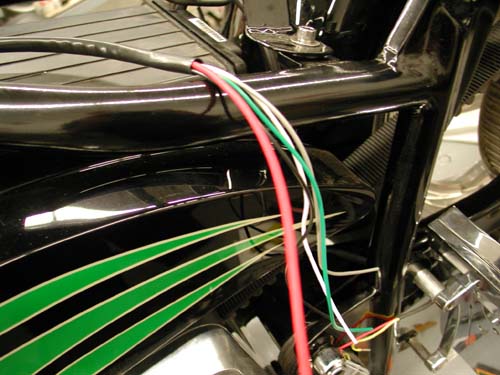
Since I don’t have space for idiot lights (there’s a highbeam indicator on the headlight), I need to run a oil pressure gauge on the engine.
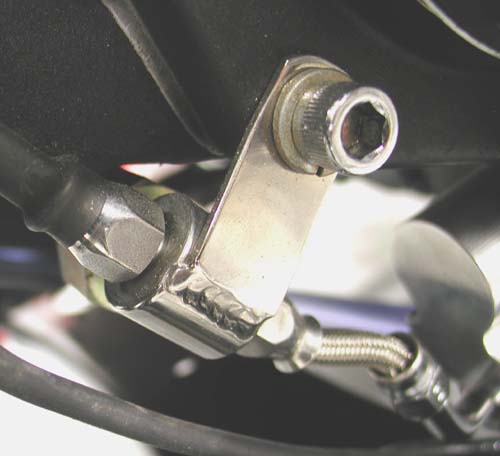
I only use Terry Components brake cables for their service and flexibility. The trick was to find and place the ground straps. The Terry ground strap ran comfortably from the negative side of the battery to the 5/16 starter mounting bolt. That grounded it to the driveline, but I needed a ground from the tranny to the frame. I worked that out by bolting another strap to the sidemount license plate frame bracket (welded to the frame), by making sure the paint was shaved away. I also used the 1/4-20 Allen to support the taillight ground strap. Let’s see, have I forgotten anything?

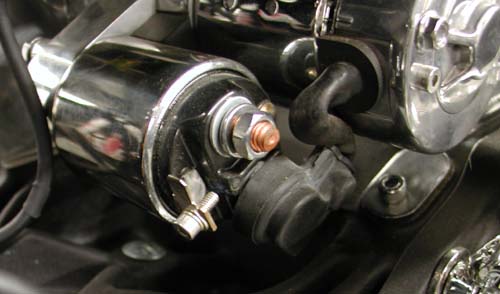
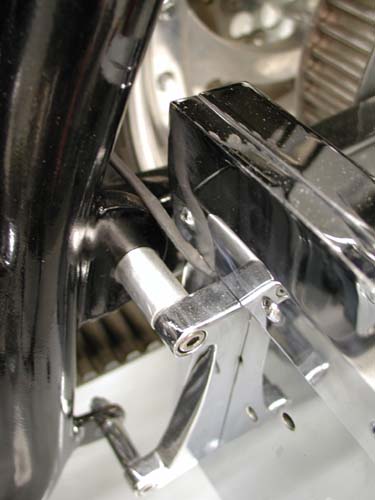

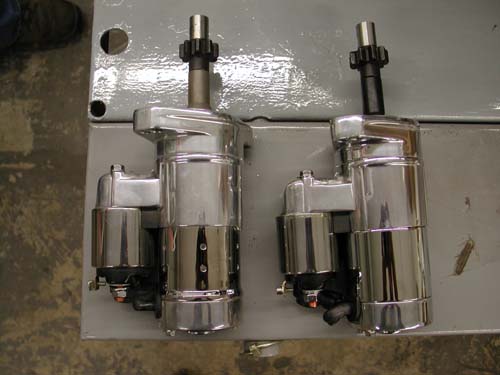
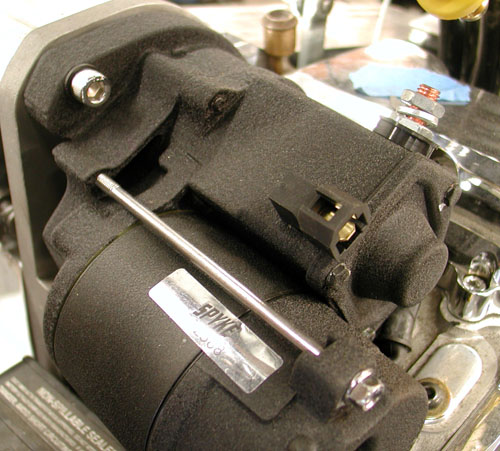
Just before we completed wiring, Giggie, from Compu-Fire, and delivered the new Compu-Fire 53700 hot starter designed to fit any big twin H-D from’90 up. All the special hardware is included and it’s rated to 2KW and was actually shorter by .150-inch for clearance dilemmas with Softail oil cans.
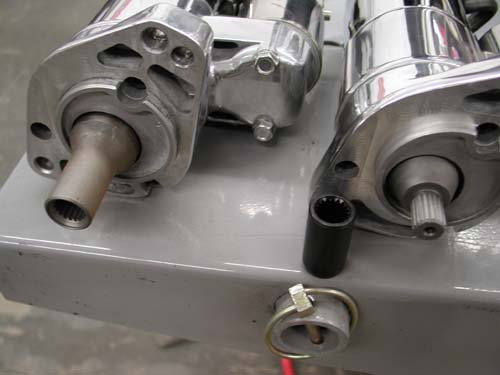
The starter roller bearings are 30 percent longer and it comes with shims to allow builders to install the starter perfectly. The Air gap between the pinion gear from the starter to the ring gear on the clutch basket needs to be between .75 and .125. If it’s too short the pinion gear can’t spin before engagement and collides with the ring gear. It needs to get a tad of momentum going. On the other hand, if the distance is too great, the starter gets up to full speed and fights engagement.
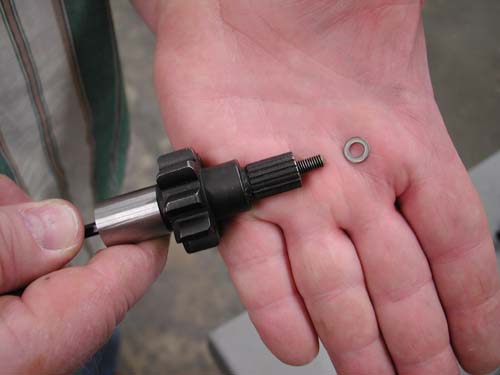
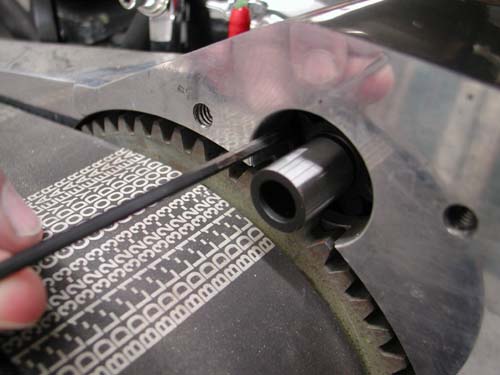
The measurement is difficult and Giggie uses a 1/8 Allen which is .125 across the flats. The shims are .026. Even the coupler on this new Compu-Fire starter is designed for lowered bike, to duck the belt.
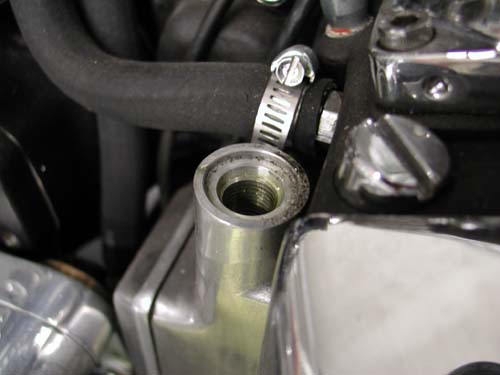
The wiring was completed and we were ready to fire the beast, but first Giggie recommended that we burp the bubbles out of the engine by removing the pump relief cap and using an Allen to pull up the valve and let bubbles pass for a pure oil lubrication.
The bastard fired right up, the Mikuni gushed gas, but as soon as it fired the Mikuni float bowl settled down.
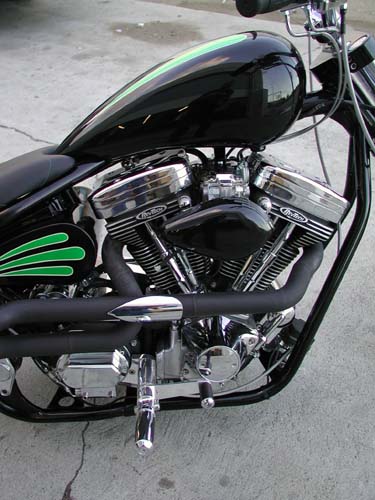

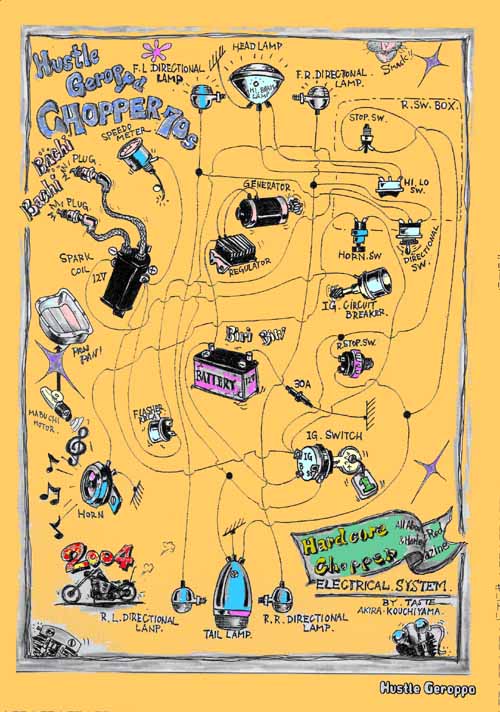
We often get calls for basic wiring diagrams. Here’s one that was taken from an old Easyriders and expanded by the wizards of Hard Core Chopper Magazine in Japan.
Take your time. Keep those copper strands away from sharp edges, moving stuff (like chains) and hot items. Cover everything with shrink wrap. Use extra layers of shrink wrap for more protection and stronger connections. I like to solder connections for a solid, vibration free contact, but some prefer crimping connections to avoid wicking. Watch out. Some of the littlest, coolest switches go to shit in a week under 100 mph vibration.
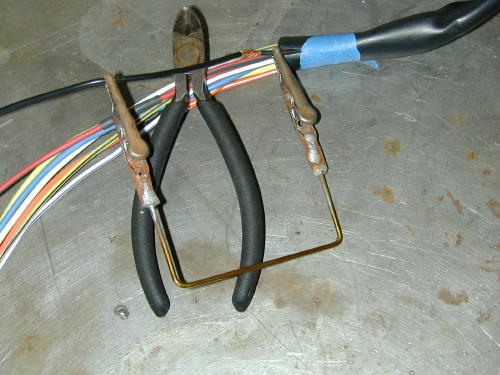
The Frank Kaisler, patent pending, wire junction tool. Send $99.99 to P.O. Box 666, Hollywood, Calif. Send only rolls of quarters.
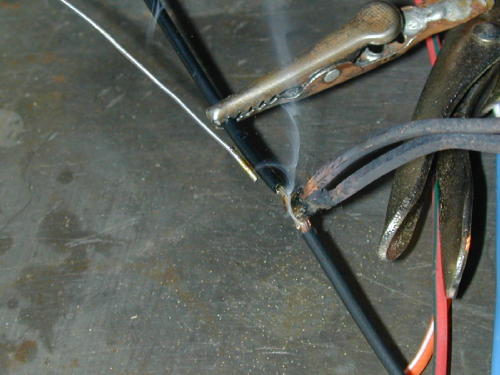
Don’t forget to work in circuit breakers and fuses. If one blows, disconnect the battery and research the problem. I like Terry battery cables for their flexibility, and they allow more amps to flow to the starter because of their low resistance.
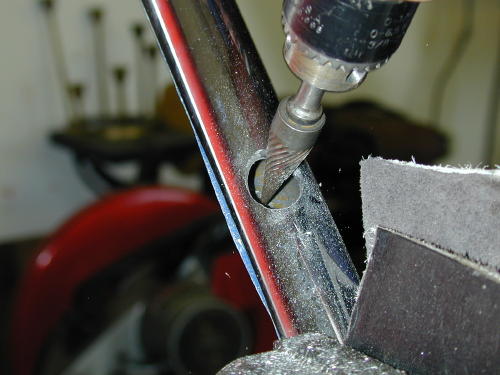
Couple more tips: Watch out, wiring around the front-end. That sucker needs to turn. Don’t run the electrical connections too tight. If you run wires through the frame, debur the openings and use extra shrink wrap to protect fragile insulation.
Bandit generally uses 16-gauge for most of the wiring, 18-gauge in the bars and 12-gauge from the battery to the ignition switch.
I called Frank Kaisler, a tech writer for decades, and before I finished reading the above he shouted across the line, “Yeah right, but you’re forgetting plenty, dipshit. Don’t forget to tell ’em about the breakers. Use a 30-amp breaker between the battery and the main electrical circuit (or the battery and the ignition switch). You can use one of the breaker lugs to attach the regulator hot line to minimize wires to the battery. Use 12 gauge wire for the main leads. Use a 15 or 20-amp breaker between the ignition switch and all the lighting connections.
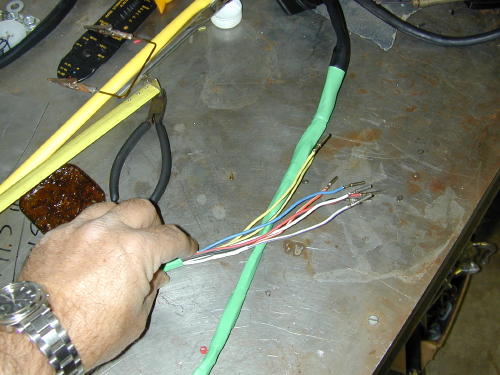
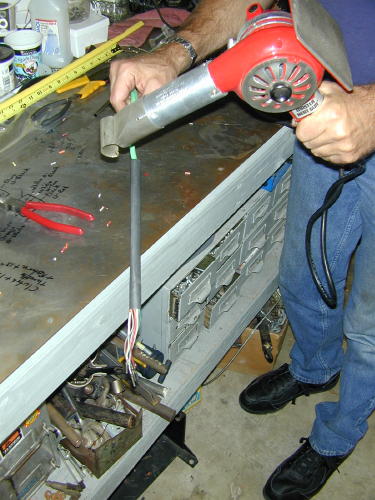
“Goddamnit, you didn’t explain wicking. Solder creeps under the insulation when it flows. The wire will flex against that soldered area and may break.”
“Yeah right, after two hundred years,” I muttered
“Shut up and listen,” Frank lit another cigarette.
“Quit smoking,” I babbled over the phone.
“The way your ride,” Frank coughed, “you won’t last another week. Let’s get back to the wires. I like to remove the plastic insulation on lugs and run shrink wrap right onto connectors, for a clean, stronger lead, and damnit, use the correct connectors. Blue for 14 and 16-gauge wires and red for 18 and 20. And make sure to use the proper ring sizes for stud connections, like the battery, circuit breakers and brake switch studs. Floppy lugs make for lousy connections.”
I was beginning to lose it. We could go on all night about wiring. He muttered something about using rubber grommets with wires that must run through sheet metal and additional ground straps from the headlight to the frame to maintain a solid ground to the front end.
“Don’t forget the final show bike detail,” He said and I remembered all the rats bikes I built in the ’70s with wires running everywhere. “Run wires down the left side of the bike. The hot looking side is always the pipe side.”
“Okay goddamnit,” I said. “I’m not writing a book. Just a handful of hints.” I sensed a lecture coming from a guy who edited bike magazines for 30 years.
“Do it right, Snake,” He coughed lighting another Marlboro, “or don’t do it at all!”
“Thank you, sir,” I said and hung up. Fuckin’ guy is worse than Bandit.
BRAND NEW CUSTOM CHROME CATALOG RELEASED–
Custom Chrome’s new offering for 2004. The California based distributor brings you the most comprehensive product offering in the Harley-Davidson aftermarket! At over 1,200 pages and over 22,000 part numbers, their 2004 Catalog features the new RevTech 110 Motor, Hard Core II, Ares bikekits and noumious frames and forks–everything from nuts & bolts to performance products. It’s the Custom Bike Bible for the year.
ONLY $9.95 + 6.95 Shipping**
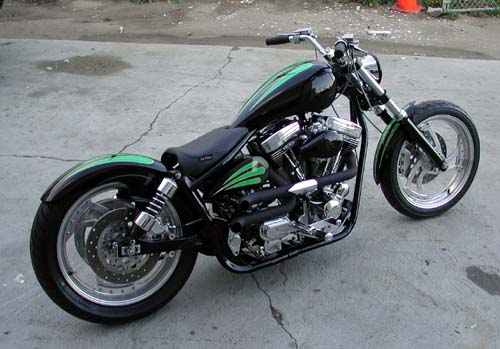
5-Ball Factory Racer Part 8: Baker 5-Speed Extreme Kicker Kit Install
By Robin Technologies |

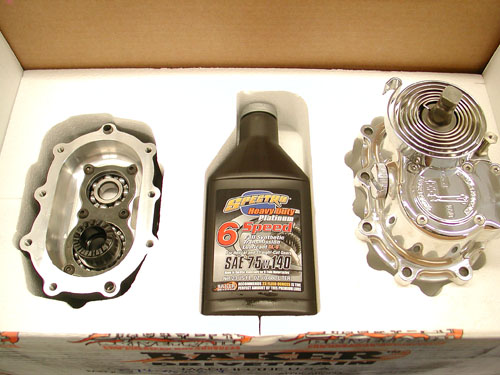
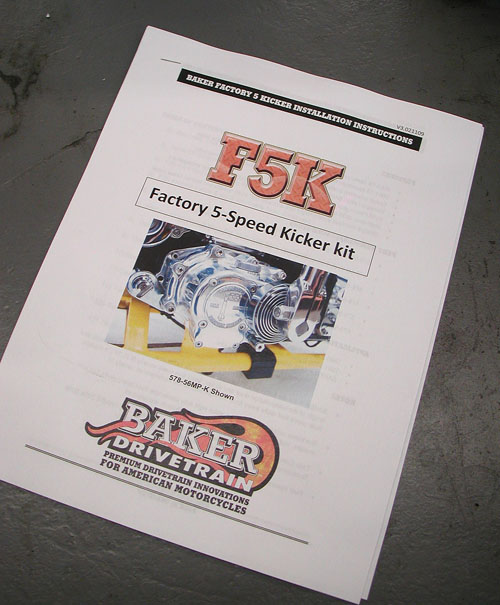
This is one of those shop quiet times installations. You want to make sure all the stars are aligned for this one. Stroll outside the shop with an icy Corona and look to the heavens for inspiration. Sturgis was looming and since this bike was all about vintage I needed a kicker system. I've installed the Muller system from Germany. I've wrestled with a custom chrome 5-Speed kicker transmission into my 1956 Shovel, a very rare motorcycle, so I'm not without some experience. But Baker took the kicker development to a new stronger level, which involved removal of the entire gear set, replacing the trap door and more. I never held an entire gear set in my nervous hands, like a man holding his newborn baby.
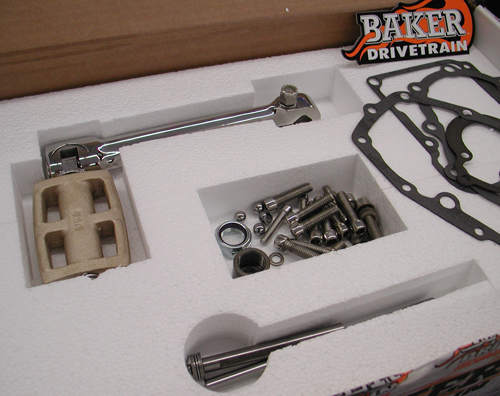
Having an inexperienced wrench write a tech tip has it's ups and downs. He could fuck up everything, but on the other hand he'll write about it, so you won't make the same bullshit mistakes. I know first hand that if you've performed the same task a dozen times, the details become second nature and usually are not documented properly. There's my Zen notion for the day, oh humble gods of Baker Drivetrains.
On top of Sturgis pressure, and the unknown Galaxy of emotions, my Epson Camera was acting up. It's been the best for shop techs, beyond Canon or Nikon, but that's another story. I'll scramble my thoughts between data from the Baker team of experts.
First, here's a list of the applications available for this modification:
• 1990-2006 Softails™, FLT/FLH™, and FXR™ models
• 1991-2005 Dyna™ Models
• BAKER DD5 complete and builder’s kits.
IMPOTANT NOTES TO BE CONSIDERED
• BAKER Factor 5 Kicker will not clear most stock exhaust systems due to the extended length of the transmission door and kicker. Most true duels usually fit FLT/FLH models. Rear pipes that route away from the right side of the transmission usually fit.
• The kicker arm will not clear the stock right side passenger floor board on FLT/FLH models. Installation of foot pegs or smaller footboards are required.
• Twin Cam models require installation of a cam-based ignition. See BAKER 2008-2009 Supplement for ignition alternatives or consult a BAKER sales tech.
• Fuel injected models require retrofit to carburetor.
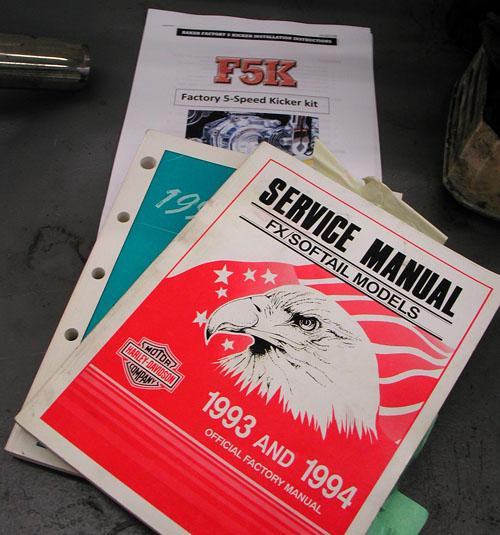
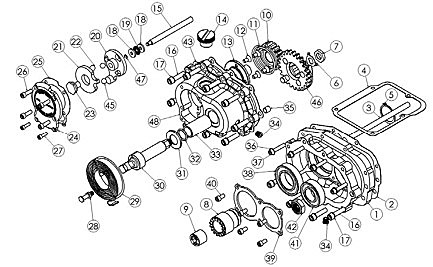
GETTING STARTED The BAKER Factory 5 Kicker kit is designed to be easily installed by any competent mechanic or dealership technician. Having your H-D factory service manual is required for this installation as it is referred to in many sections of the instructions. While this kit is made to be as easy as possible to install there is no substitution for experience. To install the F5K kit, disassembly of the transmission down to the gearset is required. We recommend reading through these instructions, to the end, before proceeding with installation process.
TOOLS, RESOURCES, REQUIRED PARTS
• Factory Service Manual For Your Motorcycle
• Factory Parts Manual For Your Motorcycle
• Common American sockets and open end wrenches
• ToolB-56, BAKER Inner Race Service Kit or H-D equivalent
• Hydraulic Press
• In-lbs Torque Wrench
• Brake Bleeder Pump (for hydraulic type)
NOTES: HYDRAULIC VERSION ONLY
To complete the Installation of the hydraulic F5K, the following parts will have to be procured to complete the job:
• Hydraulic Fluid, BAKER Recommends: H-D Dot 5 Brake Fluid, PN 99902-77
• Correct length AN -3 Brake Line
• 10mm Banjo Fitting & washers for both ends of brake line
• 3/8”-24 Banjo Bolt for the side cover end of the brake line
• 11/16” Diameter Bore Hydraulic Clutch Lever Assembly or H-D
GEARSET REMOVAL
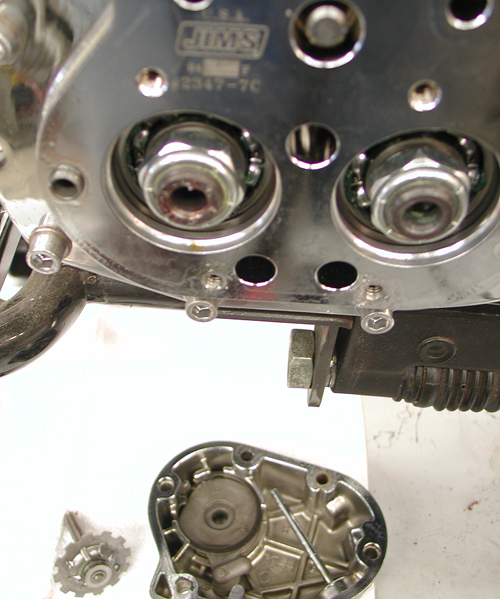
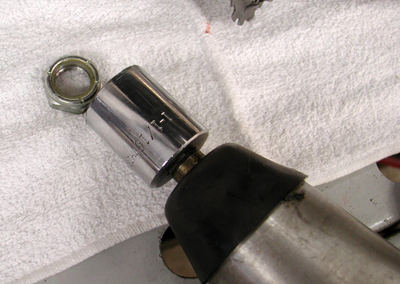
To remove your existing gearset, refer to your Factory Service Manual in section 7, Mainshaft/Countershaft removal. Follow the trap door/gearset removal procedure. Hint: with the stock side cover off, remove the nyloc jam nuts from the ends of the shafts BEFORE the trap door/gearset assembly is drawn out of the transmission case. A ½” impact gun works really keen for this task. Leave the main drive gear in the case.
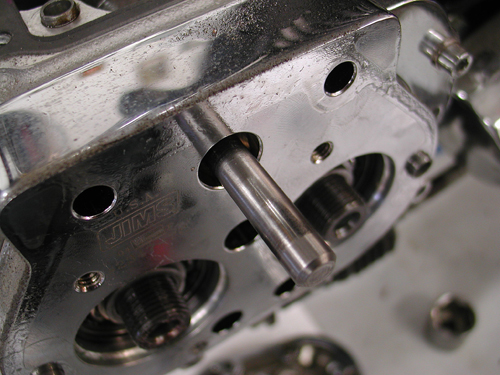
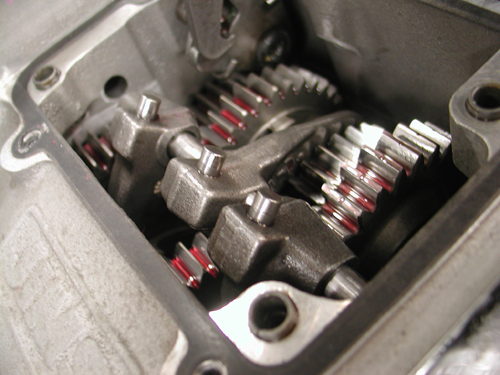


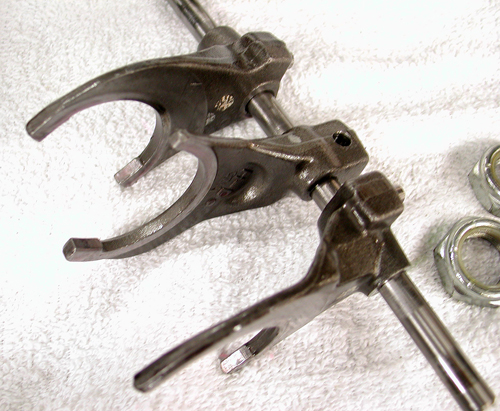
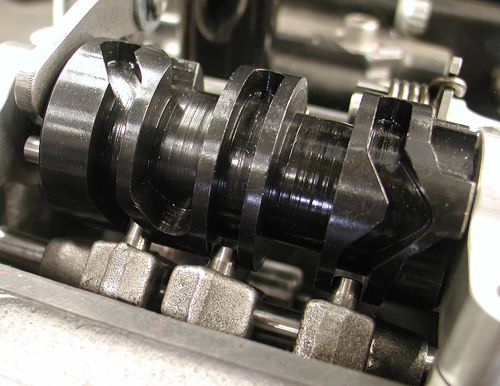
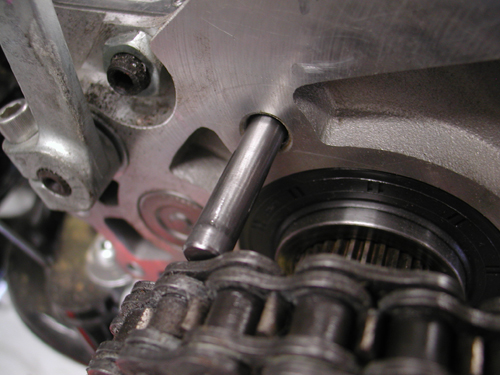
The top needed to be removed from the tranny, then the shifting drum (4 Allen bolts). With the front of the transmission removed some shifting fork shafts will slip out through the trap door in the front. Sometimes the sprocket or pulley can be removed and there's an Allen plug under the sprocket, in case the drap door doesn't have a hole in it.
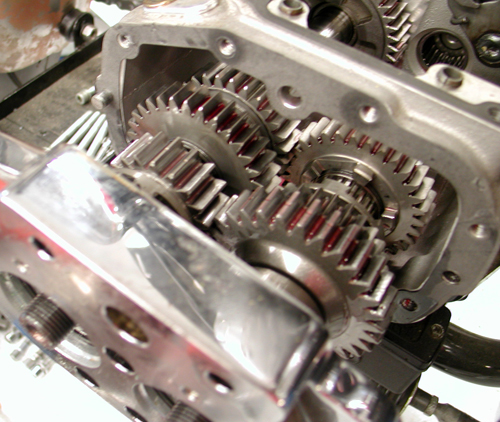

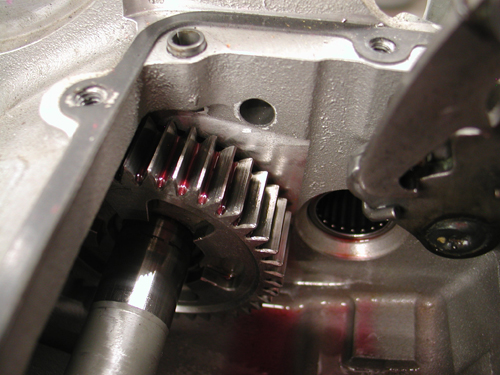
DISASSEMBLING GEARSET
Once the trap door/gearset assembly is out of the transmission case, put it on a soft towel on a clean bench. If that pesky right ‘C’ dowel is stuck in the door, remove it by tapping it through with a hammer and a punch or pulling it through with a pair of vise grips. This will allow the gasket side of the door to sit flat on the support beam of the hydraulic press.
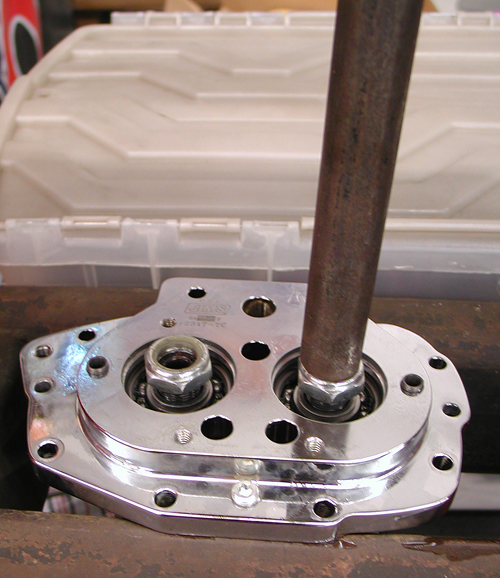
With the gearset facing down and the gasket side of the door of the support beam of the hydraulic press, press the end of the mainshaft down 1/8” and then do the same to the countershaft. Alternate pressing on the ends of both shafts (1/8” at a time) until the shafts fall out.
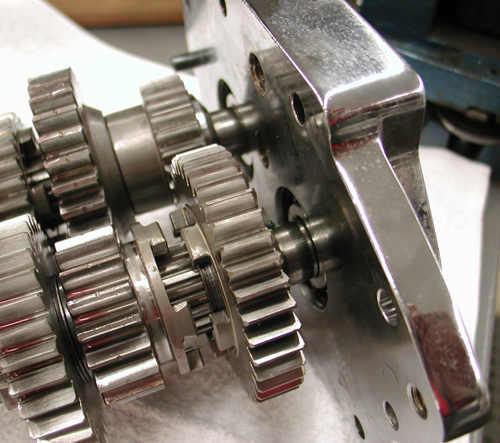
IT IS VERY HANDY TO HAVE A SECOND PERSON CATCHING THE SHAFTS AS THEY FALL OUT.
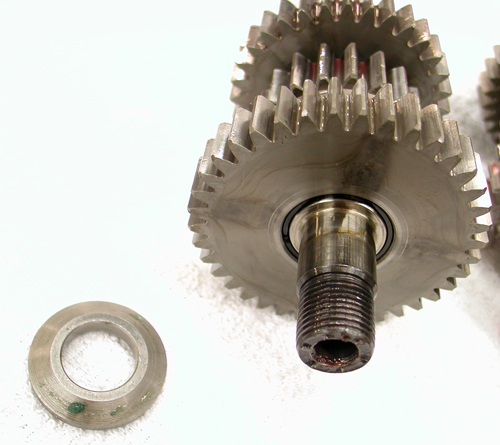
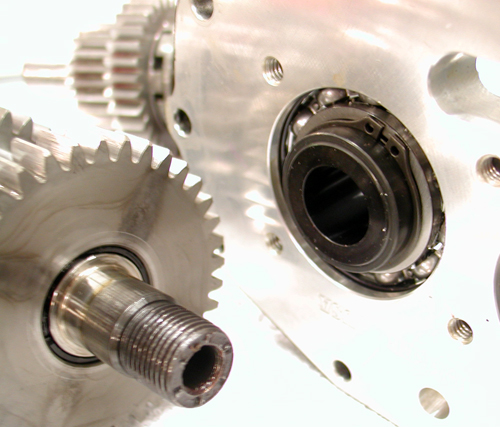
Do not allow the shafts to fall and hit the ground. Remove the conical thrust washer on the mainshaft as the ratchet hub (PN 308-5) will replace this part during the re-assembly process. Keep the stock conical thrust washer (the one without the step on the back side) on the counter shaft. Put the ‘prepared’ gear clusters on the soft towel on the bench.
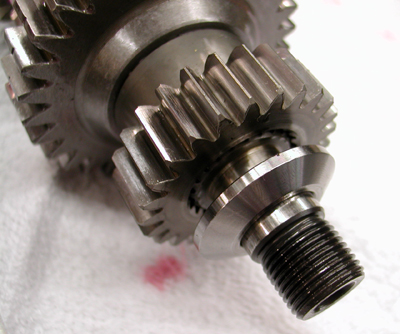


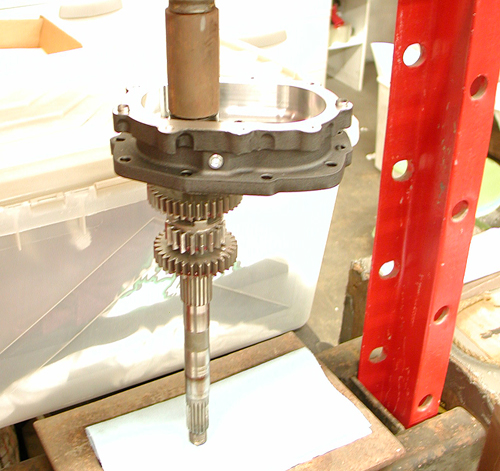
BEARING DOOR ASSEMBLY
1.) Remove the Factory 5 Kicker bearing door (PN 1-5SK(P,R,B)) assembly from the package. Clean your mainshaft and countershaft threads with lacquer thinner and dry them completely before pressing the shafts into the door.
Now take your mainshaft assembly and support it vertically in the press with the clutch end of the mainshaft at the facing down. Insure that the cage bearing is still on the cluster with first gear around it. Now take your Factory 5 Kicker bearing door (PN 1-5SK(P,R,B)) assembly and press the mainshaft into the ratchet hub (PN 308-5) while using the ratchet hub (PN 308-5) as your press point (figure 2).
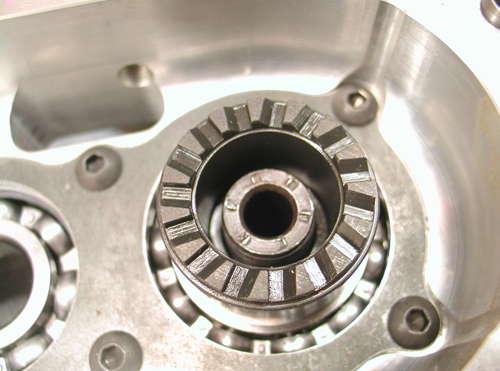
Make sure your mainshaft is perfectly vertical before pressing it in, damage to threads could incur if not vertical. Remove assembly from press. Apply thread ‘Red’ thread lock to the mainshaft retainer nut (PN RV-7050) and torque to 45-55 ft/lbs.
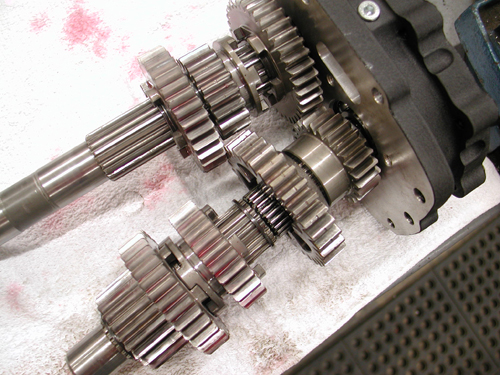
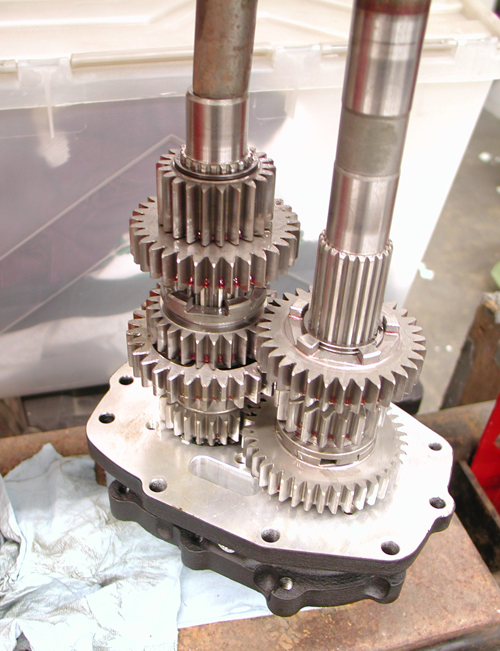
Once the mainshaft is parallel with the countershaft place the countershaft press tool on to the countershaft bearing in the assembly (see picture). Slowly press the countershaft into the bearing door making sure all the gears spin freely. Once the countershaft is seated, clean the threads with lacquer thinner and blow dry completely. Apply ‘Red’ thread lock to the countershaft retainer nut and torque to 45-55 ft/lbs. Your bearing door assembly is complete
GEARSET INSTALLATION
1.) Refer to your Factory Service Manual for proper gearset installation.
2.) You will need to use the supplied fork rod (PN 122-56K) for installation.
3.) Replace the bearing door assembly with the supplied gasket (PN 35652-79B).
4.) Once the gearset is in the transmission case. Use the four supplied 5/16-18 x 1-1/4 SHCS (PN 73496) and 5/16 washers (PN 6100) in the lower four holes of the bearing door. Using ‘Blue’ thread lock, torque the bolts to 13-16 ft/lbs. Install the four supplied.
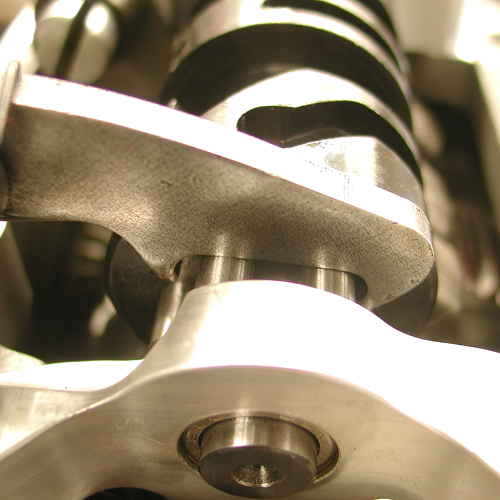
¼-20 x 1-1/4 SHCS (PN 73463) and ¼ washers (PN 609SS) in the upper four holes of the bearing door. Using ‘Blue’ thread lock, torque the bolts to 7-9 ft/lbs (84-108 in/lbs)
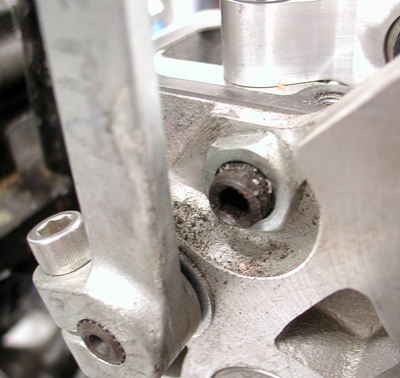
5.) Install your top cover per your Factory Service Manual using the supplied top cover gasket (PN 34904-86C)
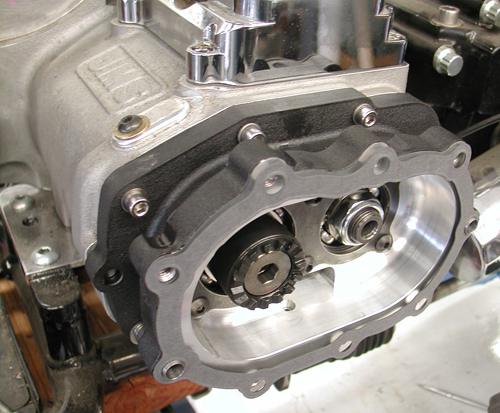
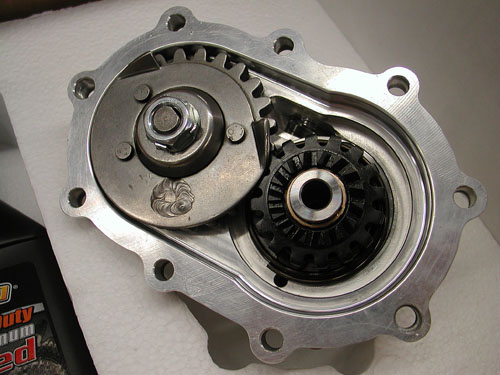
CABLE TYPE KICKER COVER INSTALLATION: PN 578-56M(P,B,R)-K Refer to your Factory Service Manual to remove your clutch cable from your side cover ball and ramp assembly.
1.) Place the side cover gasket on the two 10mm dowels (PN 16583-00) on the bearing door assembly.
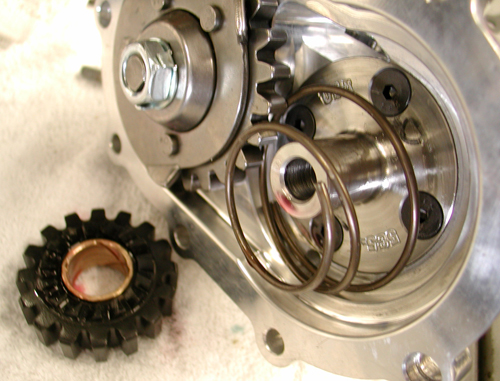
2.) While making sure the ratchet gear (PN 310-56K) is still retained by the kicker crank gear (PN 33350-56), place the side cover on to the two 10mm dowels (PN 16583-00). While holding the cover in place take the nine supplied 5/16-18 x 1 ¼ SHCS (PN 73496) with 5/16washers (PN 6100) and apply ‘blue’ thread lock to the threads. Now torque the fasteners to 13-16 ft/lbs (156-192 in/lbs).
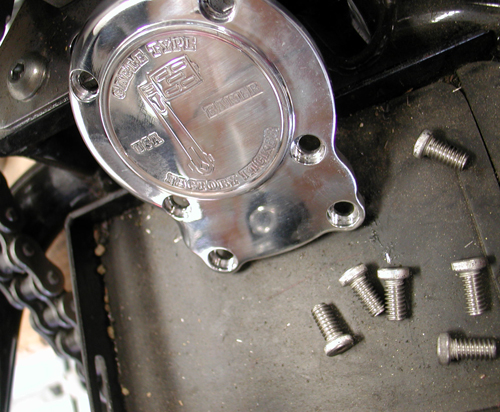
3.) Remove the six fasteners holding the ball and ramp cover on. Remove the ball and ramp cover and gasket at this time as well.
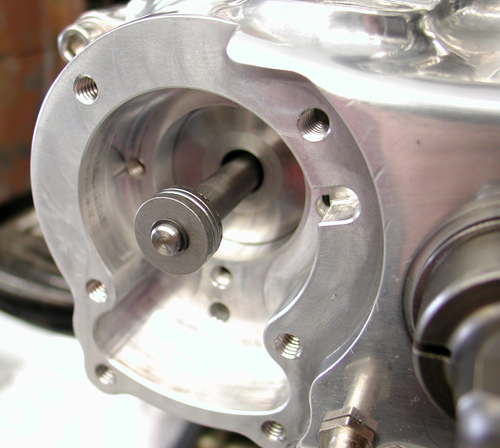
4.) Install the supplied clutch throw out rod (PN 125-5R) at this time through the pinion gear quill (PN 585-5)
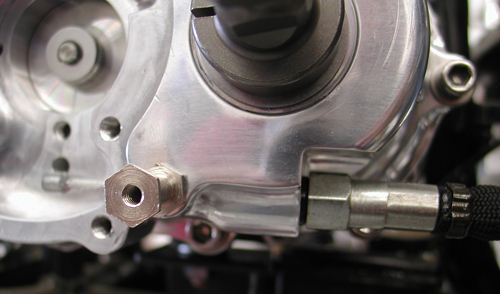
5.) Thread your clutch cable into the side cover. Loosen the clutch cable adjustment all the way so there is maximum cable exposed in the side cover.
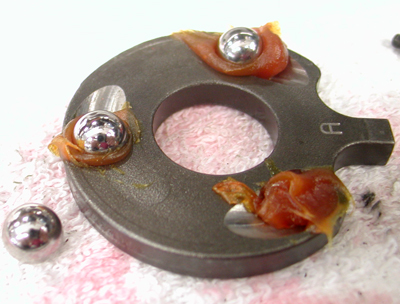
6.) With the cable fully extended in the side cover take the supplied ball and ramp assembly and slide it over the cable. Install the clutch cable ferrule
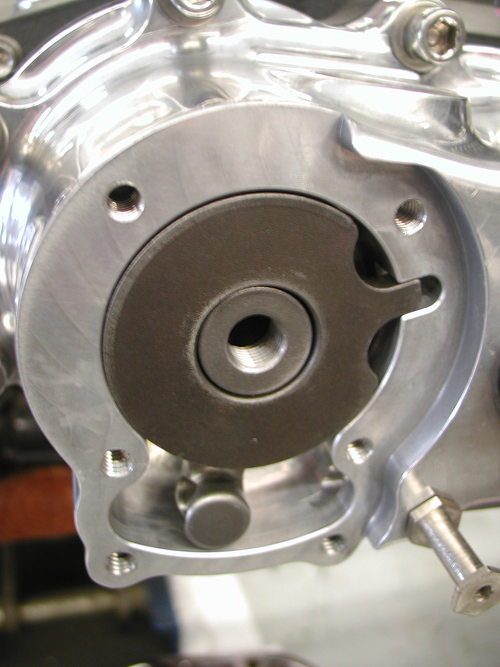
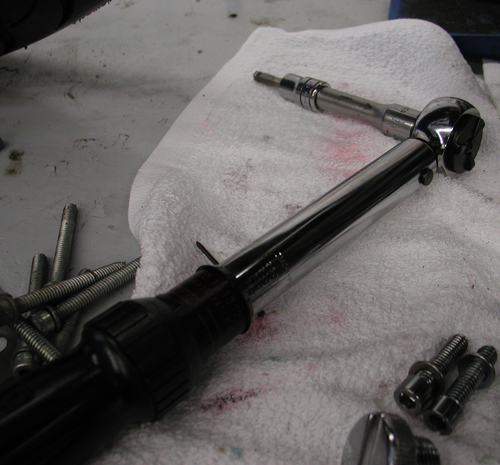
9.) Using ‘Blue’ thread lock, install the six bolts. Torque the four ¼-20 x ¾ (PN 25C50KLHS) to 7-9 ft/lbs (84-108 in/lbs). Torque the two #10-24 x 5/8 (PN 10C50KLHS) to 4-5 ft/lbs (54-60 in/lbs).
KICK ARM INSTALLATION
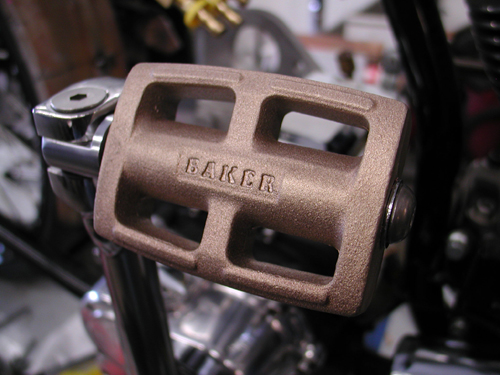
1) Install the kick arm on to the kicker crank gear shaft.
2) Tighten the pinch bolt on the kicker crank gear shaft so that there is no sloppy movement in the kicker arm assembly.
3) Either with your hand or leg, ‘kick’ the kick arm and run it through its motion to make sure everything is working properly.
FINAL ASSEMBLY
1.) Install your primary and adjust your clutch per your Factory Service Manual at this time.
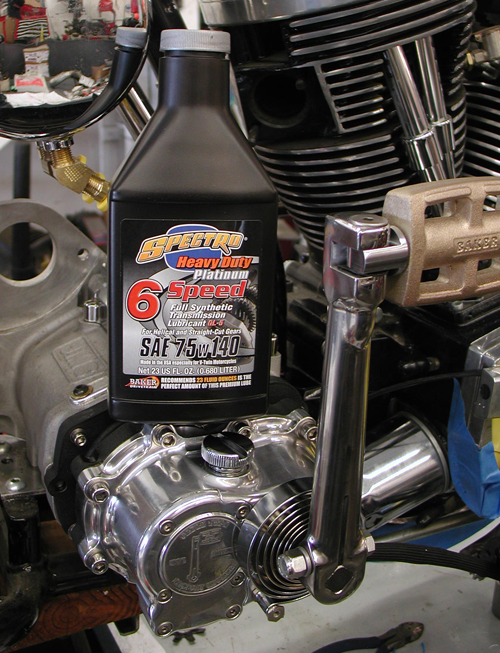
2.) With the bike vertical fill your transmission with the supplied 23oz. bottle of Spectro™ 75W140.
3.) Follow your Factory Service Manual to finish assembly on your motorcycle.
4.) Your BAKER Factory 5 Kicker installation is complete
For any installation or service questions, please contact our BAKER technical department toll free 1-877-640-2004.
Hang on for the next installment. Final assembly will begin with a BDL primary install, a Spyke alternator/regulator system, and we're getting ready to ride.
You'll see George's pinstriping, Tony's powder coating workmanship and my sloppy wiring.
–Bandit


Sturgis Shovel Part 13
By Robin Technologies |

Hang on. This is the last of the scintillating segments on building the Sturgis Shovel before I write the treacherous saga of the ride. Somewhere we will publish a feature on the bike in a mag and on the site. Oh, there’s one other tech that will come to pass—hard line assembly. I’m waiting for a CD of images from John Gilbert of Bike Works mag.
So let’s get started. I was burnin’ daylight before the Sturgis run. I saved a ton of cash going with all powder and no additional chrome or polishing. It cost me just $325 to powder all my components for lasting protection.
Throughout this article I will point out my mistakes, so you can avoid them. I did an 80 percent decent job of mocking up the bike prior to powder. That meant that 20 percent had to be dealt with after the finish was applied. Bad news. The only thing I didn’t think through or make brackets for was the ignition switch and circuit breaker brackets. That may seem minor, but wasn’t as you will discover. On the other hand it wasn’t a big deal. You be the judge. Actually, if we wired, fired and rode the bike before final teardown, it would answer all the questions. But few builders take it that far.

I was jazzed to toss the Paughco Frame on the lift covered with pads. Foremost Powder had plugged all the threaded holes and tapped off the neck bearing surfaces. They did a helluva job. I shaved motor and transmission mounts for a proper ground and installed the S&S modified 93-inch engine and JIMS trans. Then I could install the Paughco Springer without a balancing act.
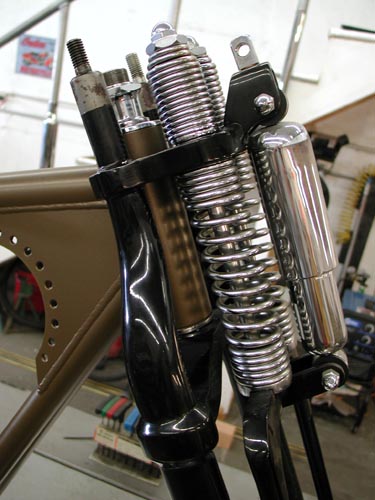
The Springer is easy to install, but takes care. I greased the bearings, slid on the dust shields and ran the whole springer through the neck. Keep in mind that installing the bearing races in the neck is not complete until the bike has been down the road. Any paint, dust or uneven race angle will mean that the bearings will seat further once on the road. Ride it for a week then lift the front end off the ground and jiggle the wheel by the axle. If there’s any movement or dangerous slop, take the bars and top tree off once more and tighten the stem nut until there’s just a hair of drag. Long front ends are more critical because of the leverage against the neck.
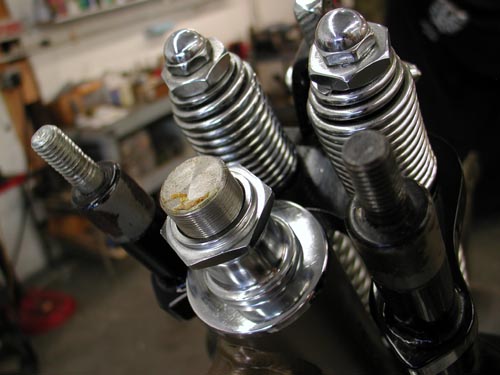
I didn’t bolt down the engine and trans hard, just the tranny plate which ultimately I had to loosen. The engine needs to be completely at ease for the BDL belt alignment so I just spun some stainless bolts into place. Then I installed the front wheel with Doherty spacers, the Brembo brake caliber and centered the wheel. Keep in mind that Brembo supplied the bracket, which is designed to replace a stock, late-model Harley springer brake system. I didn’t have the proper spacer, but a Harley shop had one and I was good to go.
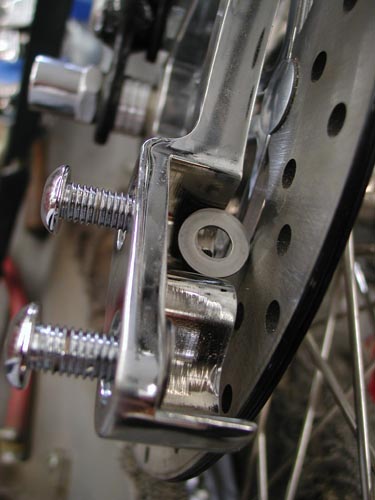
Then I installed the Brembo Caliper. They supplied me with a series of shims. I used feeler gauges to determine centering the caliper over the rotor and stacked the shims until it was set. This is an interesting bumbling, experienced manner for writing articles. I have the insight of riding experience behind images of the bike yet complete. Ultimately we removed the front fender.
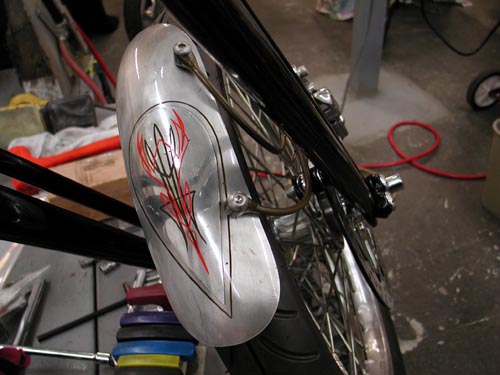
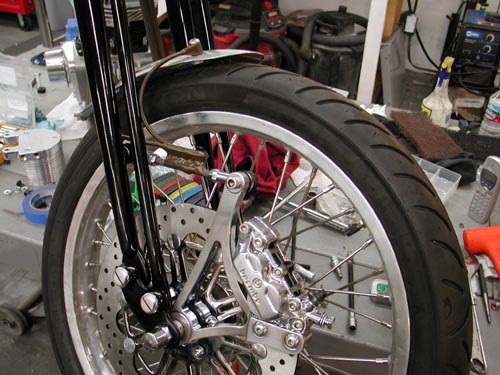
I build the front fender, single sided bracket after Kent’s, from Lucky Devils Metal Works in Houston, caliper mounted fender mounts, which work perfectly. My problem was the initial position of the caliper, too far forward. So I mounted it on the heim joint rod which didn’t work. When the bike went over a bump the front lip of the fender rode up with the caliper and the rear lip rode down with the springer touching the tire. It had to go. So I rode to Sturgis without a front fender ducking rainstorms all the way.
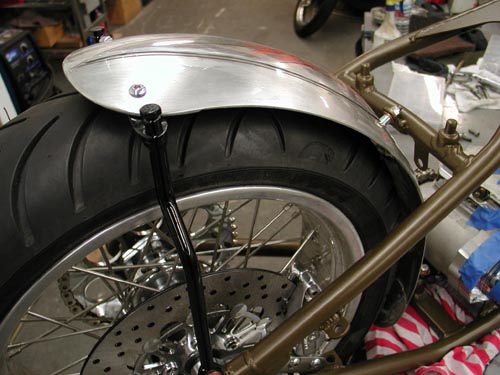
Next I installed the rear fender. Keep in mind that the rear fender, the oil tank and the rear wheel fight for the same spaces. They almost need to go together simultaneously, especially the oil bag and rear fender. Everything slipped into place with nyloc nuts, stainless Allens and red Loctite.
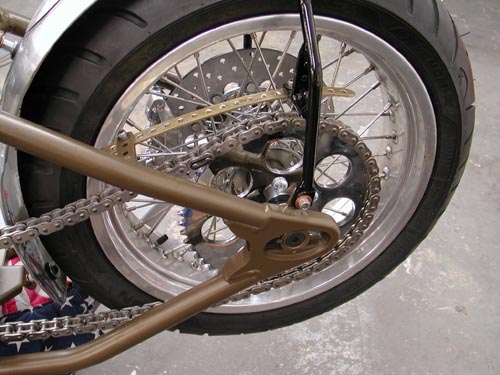
At the time I ran stock gearing with the JIMS 6-speed, until I discovered that I was faced with running a kicker. I didn’t change the rear wheel gearing from the 51-tooth, but I should have. This evening I’ll install a Custom Chrome flat (Sportster styled) 48-tooth sprocket and hope to knock the revs down seriously.

I also mounted the rear Brembo brakes and centered the caliper over the Brembo rotor. No problem. Even my Softail styled anchor bracket worked perfectly welded to the frame and tucked the caliper between the frame rails.
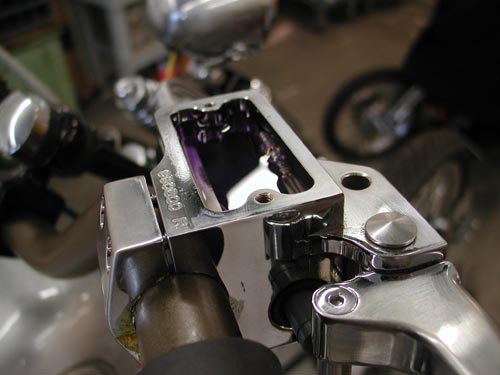
While I’m messing with brakes I’ll cover brake and clutch lines and cables. Instead of making up lines I ordered RevTech pre-assembled lines from Custom Chrome plus all the fittings washers and fasteners. Keep in mind that the front brake master cylinder uses larger master cylinder banjo bolts. They come in 10mm and 12mm. Watch out, and don’t hesitate to order a couple of extra bangos bent at different angles to make sure you’ll have what you need.

I measured my lines and clutch cable lengths a number of times then added an inch for safety. That’s where making your own lines can be helpful. Keep in mind that the front end will turn (clutch cable) and depress (front brake). You’ll need some slack. Plus you might change the angle of your handlebar levers, which will impact the position of the cables and lines. I used Tephlon tape on most fittings although some builders don’t recommend it. Since most of this stuff is chromed, I like the extra sealant.
I use only DOT 5 brake fluid in my bikes, ‘cause I can splash the shit all over the place without concern for paint damage. In many instances you can fill the master cylinder and rock, just by waiting for the bubbles to rise. Another key is to find the right pump can and fill the lines, caliper and master cylinder from the bottom up. Use a new pumper or a pump that’s dedicated to brake fluid only and attach it to your brake bleeder on the front wheel. Most of the time that works like a charm.

I’ve found that most front brakes will basically bleed themselves. Fill the master cylinder on the bars and pump it slowly allowing the bubbles to rise. Let it set overnight and most of the bubbles will rise just by pumping it with short strokes at the lever and watching the bubbles jump to the surface.
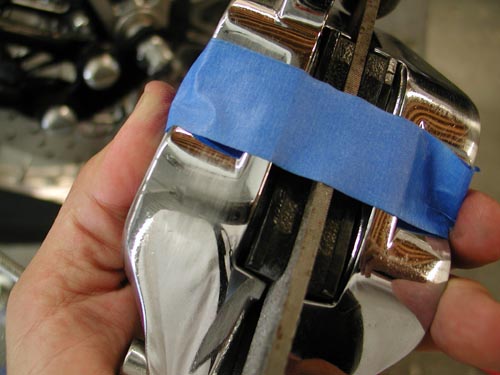
In this case I discovered that some air was trapped in the caliper, so I pulled it off the bike, taped a file (the same width of the Brembo rotor) and turned the caliper so the air could escape through the bleeder nipple. I bleed it a couple of times then returned the caliper to its rightful position. She was good to go.
The rear brake wasn’t so easy because the air couldn’t rise to the master cylinder. I bleed it from the front and the rear, and I think it still has air in the lines although the Brembo brakes worked fine. I received a lot of compliments and comments on the brakes, which I found strange. Brembo has a terrific reputation, but not on Harleys. Riders were surprised to find Brembos on a Chopper.
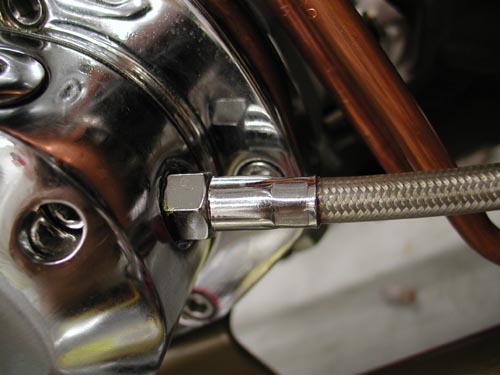
Now for the clutch cable. First I was confused about which cable style to order. I hope to put together an article on it in the near future. I picked the most common late model Evo cable and measured the length several times. Here’s the key. If you’re not replacing a stock cable you have no notion of the length. I pulled a stock cable and measured it, but I didn’t know what model it came from. I went by the length of my stock cable and found the 1990-1999 Fatboy cable length. Then I measured the extension due to the Paughco Frame, CCE risers and CCI bars. Much guess work. If I had all the bucks in the world I would have bought three cables lengths.
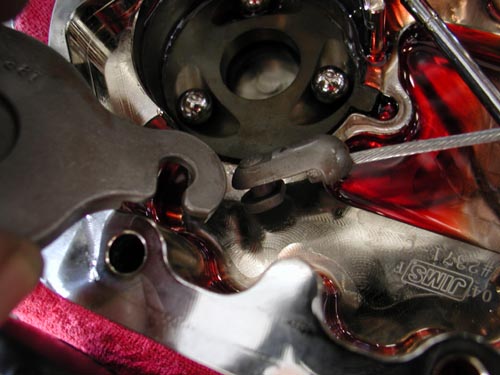
The end cap cable is the reason Baker, JIMS and RevTech transmissions come with a fresh gasket and a quart of transmission oil. They know that you’ll be forced to pull the end cap to install the cable in the ball driven throw-out bearing mechanism. It’s simple but cumbersome. Don’t loose the balls. You’ll need a massive C-clamp removal tool to pop that sucker free. Carefully lift the inner ramp and remove the cable coupling, attach the cable, which you have already screwed into the trans face cover. Return the coupling to the inner ramp by watching the puzzle face. Then put the ramp back in place and the retaining ring and bolt the face cover back into place. Don’t forget to add at least 20 ounces of Trans fluid. It will hold 24 ounces dry.
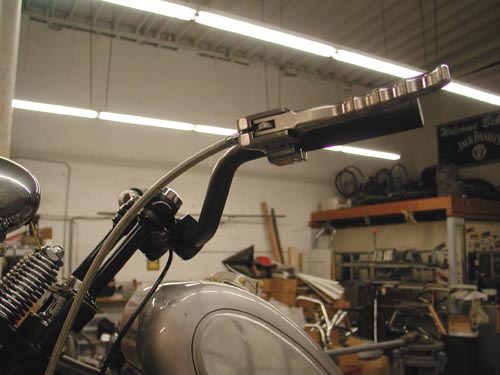
I learned something on this trip. If water gets in the trans it will act up, shift strangely. Drain the fluid and change it. Check your vent.
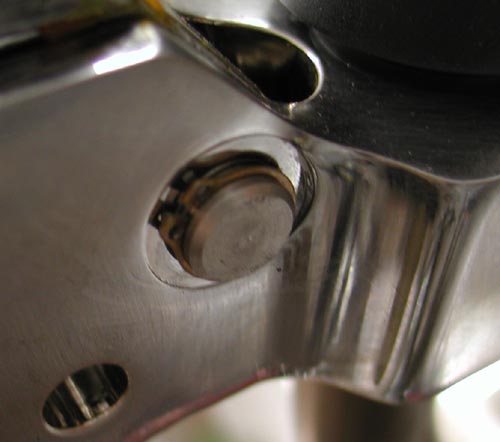
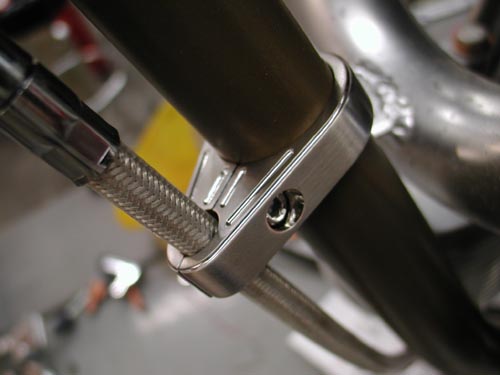
I ran the cable several ways to find the path that fit best, didn’t rub the frame or catch on anything. I used one Arlen Ness cable clamp to secure it and hooked the cable into the greased tephlon bushing in the Joker Machine handlebar control, then replaced the small C-clamp and I was ready for final clutch cable adjustment after the BDL primer was installed.


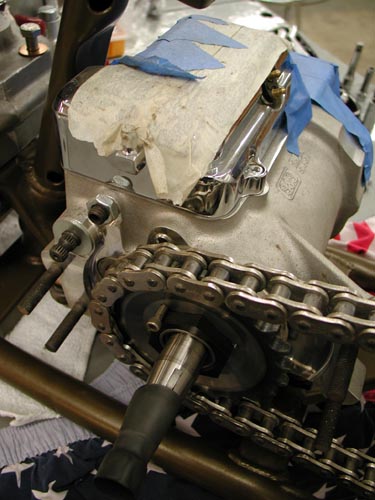
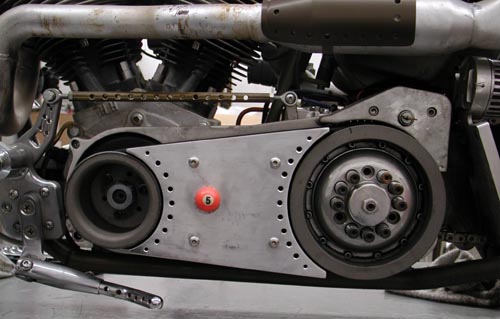
I’m going to cover the 300 BDL installation here and try to explain my shift. My plan was to run the Compu-Fire engine based electric starter system designed by Giggie before he left and took a job at Rivera. Rivera is making inner primary plates for this new system, but when I contacted them Ben Kudon’s response was hesitant. They weren’t ready. Of course I contacted our long-time sponsor BDL and initially they weren’t scheduled to make units, then I was pleased to find out they were, so I ordered one. But Sturgis crept into the picture, and suddenly I was without a starting system and coils hanging under the oil bag interfering with any new starter install.
I had a 300 BDL belt system and a starter but no place to put it. Kent from Lucky Devil shrugged his shoulders and said, “Why don’t you run a kicker?”
Sinwu ripped off her top, jiggled her tits and said, “You have one from Muller in Germany.
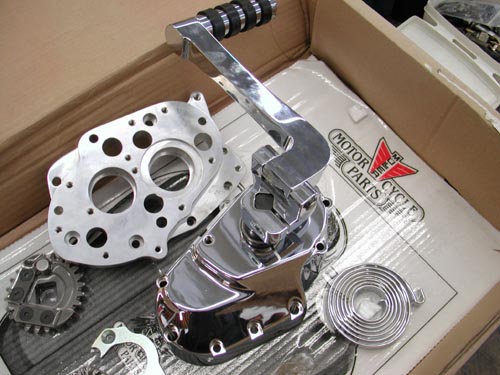
I jammed down the headquarter stairs to the shop and tore open the box. I was jazzed. This is one of the coolest kicker systems to come along. It cleared the rear exhaust pipe and the kicker arm was stylish, unique and strong. I couldn’t believe my luck.
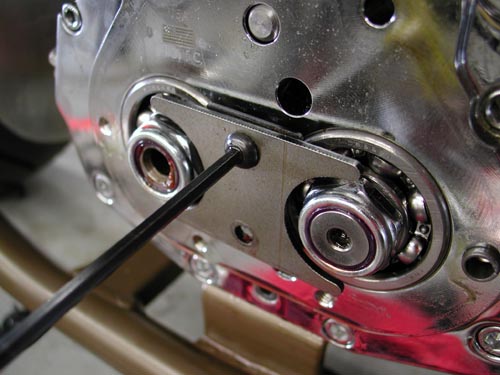
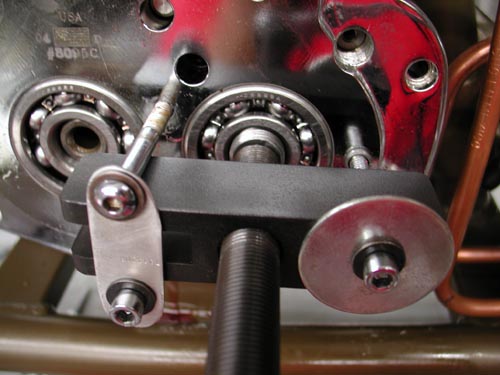
The JIMS 6-speed lined up with the BDL inner primary like a dream. All I needed was to pull the tranny face and press off the trap door, then replace the trap door and tranny cover with the Muller system. Muller even shipped a clutch ramp system that afforded smoother clutch action.
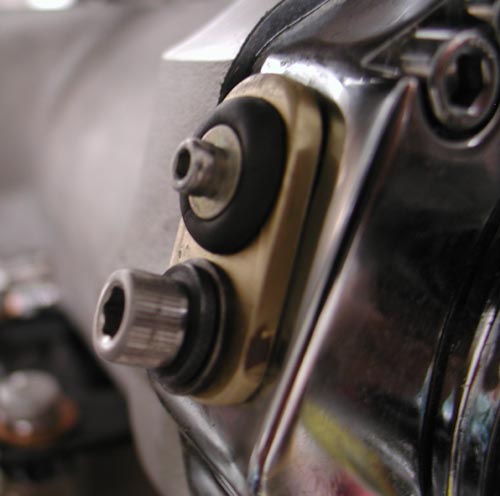
Hell, I’d even build a cool brass plug to cover the speedo-cable hole in the side of the JIMS trap door.
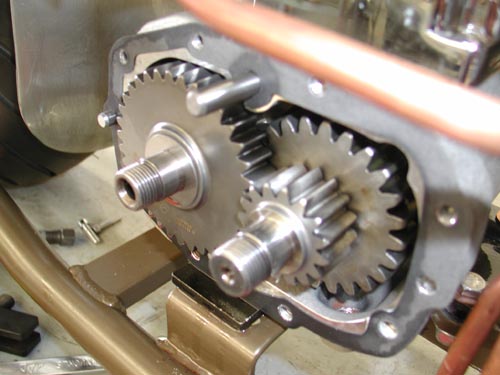
All went well until I removed the JIMS trap door to discover the 6-speed protruding gears. The door was machined to accept the gears and the 5-speed door was not. I was stuck. I contacted Muller in Germany for a 6-speed replacement door. No answer. I called JIMS and ordered the kicker they distribute for the 6-speed. It never arrived, so I called Custom Chrome. If I could order a 5-speed quick, I could use the Muller system. They responded and in three days I had a Rev Tech Replacement complete with kicker and 23-tooth chain sprocket. I yanked the 6-speed and began to install the Rev Tech 5-speed in 4-speed case with a five-year or 50,000 mile warranty.
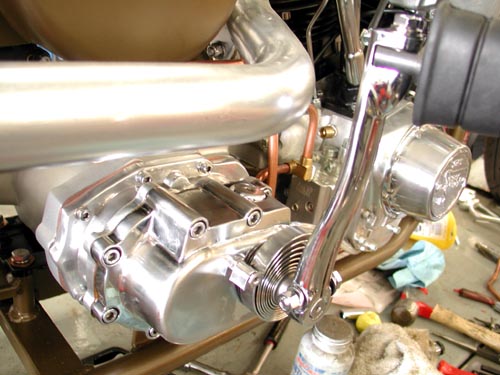
At this point I should have replaced the rear 51-tooth sprocket with a 48 or perhaps a 46, but we’ll see. I removed the kicker cover and installed the clutch cable once more, sealed the tranny and filled it with 24 ounces of fluid.
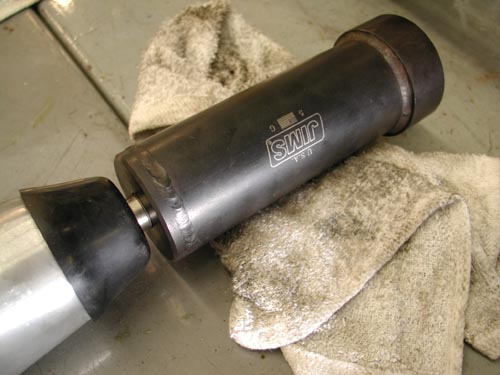
I pulled the massive, left-handed, mainshaft sprocket nut with a JIMS special tool and flopped it around backwards to afford me the clearance I needed for the RevTech chain to pass the 180 Avon tire. I locked it down with the JIMS tool and an Allen setscrew and red Loctite. She was good to go.
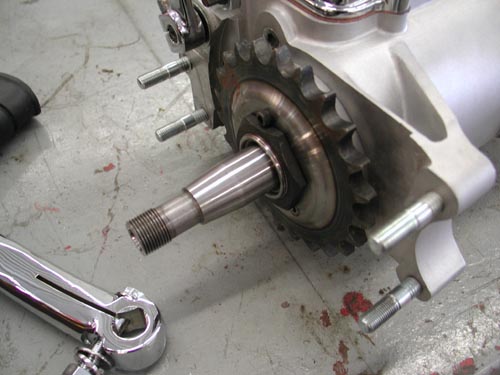
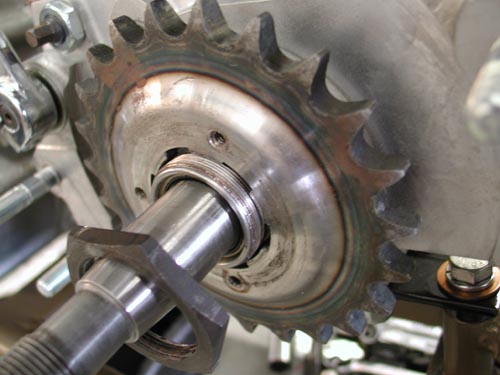

Next, I needed to set up the BDL 300 belt drive system and the Compu-Fire Charging system. I slipped in the Stator, then the small tapered washer, followed by the Compu-Fire Rotor. It’s pasted right on the rotor not to smack it with any hammers. You might knock one of the magnets loose.

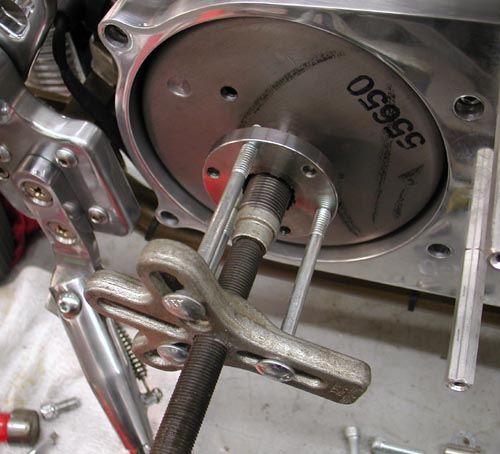
According to the rules sometimes the offset pulley mount doesn’t need the massive flat washer/spacer for proper alignment. But the first move includes installing the inner primary with the engine and tranny loose. I used never-cease on the threads of the transmission and tranny Allens to prevent damage to the threads. Take it back—first I had to remove the inner primary studs from the transmission. They were tight as hell and I used Yield and heat to set them free. Then I positioned the engine and the Trans with the primary.
I ran into problems. Nothing wanted to line up. I called a couple of buddies for guidance. I held the engine where it was with a shim under the front motor mount. Then I bolted the primary to the engine and trans. The front of the tranny raised almost .100. I started looking for shims. Bob from BDL told me the code was to shim the tranny plate and not the tranny, so I went to work. It wasn’t a problem to scour around for the right thickness washers. Soon the transmission was aligned, the primary fit easily and there was no drag on the transmission mainshaft.
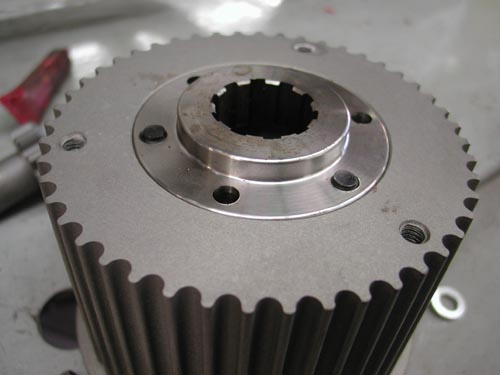
Next, I needed to check the pulley alignment. I installed the pulley using the insert then the pulley and Allens. Since I would be removing and replacing the parts, I didn’t drive the alignment pins into the insert from the rear just yet. I discovered another glitch. I needed some washers or shims behind the engine pulley for alignment. I also discovered that the mainshaft nut wasn’t bottoming out, so the rotor flopped around. That wasn’t right.

I’ve installed a dozen BDL systems without major alignment problems. It takes patience, but once it’s correct, she will last and last. This is a tapered shaft transmission and once it’s installed it doesn’t slip off without a JIMS transmission hub puller tool.
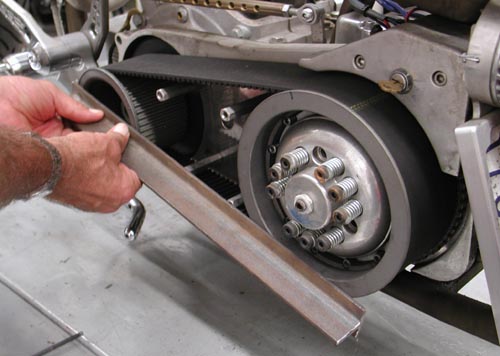
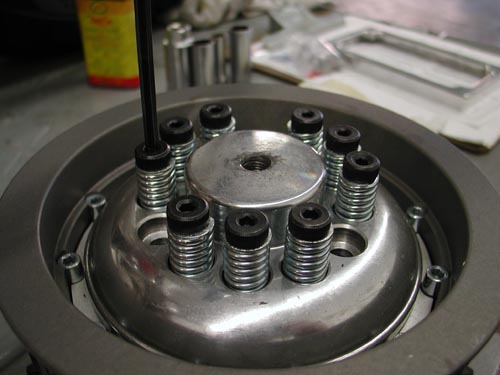
With the pulley and the clutch in place you can test alignment a couple of ways. I used a cast T-Bar across the faces of the pulleys. They need to be exact, which means shims behind the engine pulley.

I made a mad dash to Walkers Machine and bought all the goddamn shims he had. The massive washer that comes with the rotor was only .035 too large. The next item was the inset in the engine shaft nut. I had to machine it to slip over the protruding shaft. This is also an area that takes some running and retesting to make sure it doesn’t seat and settle in, out of alignment. It’s easy to spot a problem. You’ll notice rubber dust around the pulley where it’s riding against the lip.
Remember that the clutch nut is also left-handed. Then the clutch slips into place and with some tugs and working the belt gently, it goes on. If not use two chunks of wood a large bolt and a socket to gently push the pulleys apart. Once it’s run for a while it will be much easier to remove and replace.

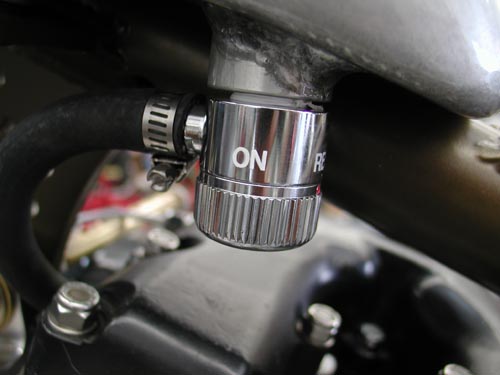
Okay, so I installed the tank, with the Spyke petcock and stripped the spigot threads. It hung for most of the ride. We’ll cover the tank more in the ride saga, so hold on. The seat was also a challenge. I slipped off, so I changed the seat, to one with a lip, then changed it back an added taller springs. That worked.
With the primary aligned I still used never-cease on the primary threads because I knew that I would remove the inner primary once more.

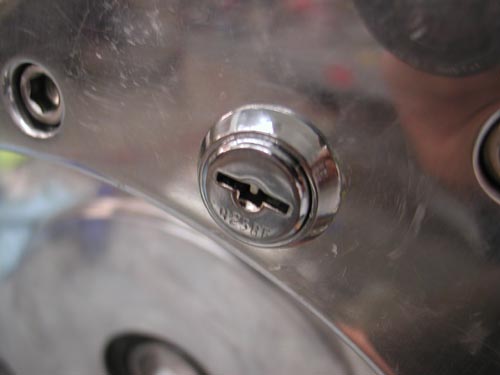
Hang on for this one. I needed to find a place for a toggle switch/ignition switch. I also had this massive aluminum starter motor boss on the inner primary that was going to waste. So I drilled out the starter shaft and installed a marine ignition switch. I glued it in place with a two stage epoxy then drowned it with liquid electrical tape, two coats. It seemed perfect except that the key sang in the wind only 1 inch above the peeling primary belt. No key rings or dice.
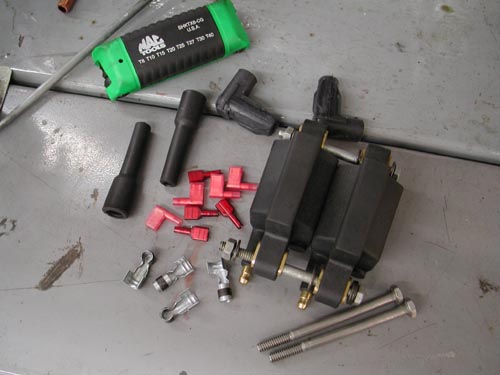
On the inside of the primary I made a brass strap that ran from one starter mounting hole to the other, holding two circuit breakers. One was a 15 amp for the lights and a 30 amp for the ignition. This became a very tight electrical area, dangerously close to the whirling CCI O-ring chain. As it turned out the circuit breakers were a hair or two from the coils. Cozy. I made a couple of wires long enough so that I could remove the primary and set it next to the bike to work on wiring issues.

The next thing I knew, under initial testing, the whipping chain chipped at the aluminum, dangerously close to the electrical. Larry Settle, of Settle MC Works loaned me a chunk of tephlon, which I carved and made a buffer, which worked perfectly to protect the chain from nearing hot wires.
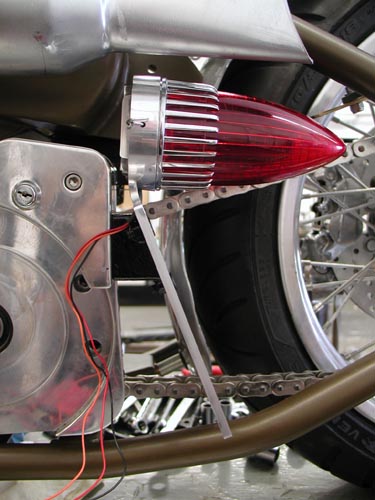
Then came the Eye Candy Custom Cycles ’59 Cadillac taillight. They also make an old Ford style light, which I prefer, but I felt the need for side visibility, especially on the right. The mounting called for the primary once more to hold the taillight/brake light. Finding the proper location was a chore. It either rode too close to the chain or the mounting called for screws through the frame or into the wiring loom. I monkeyed with it for hours and finally designed a tough mounting system that might survive. All went well, but the frame rail still blocks the light and I might move it outbound.
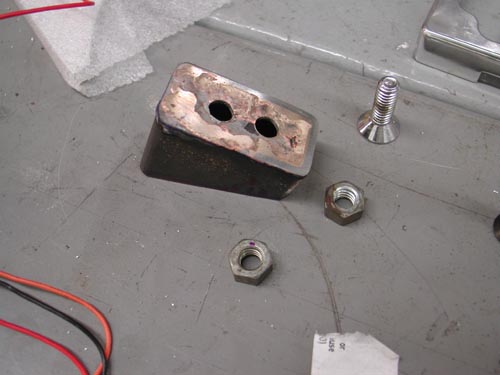
I ran the thin sparkplug wires through the frame in shrink tubing, wired the coil and the Joker machine brake switch and headlight through the hole in the frame too close to the fork stop. Even on a simple chopper an idiot can find his way into trouble.
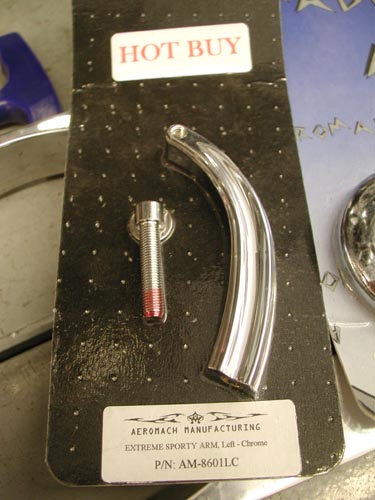
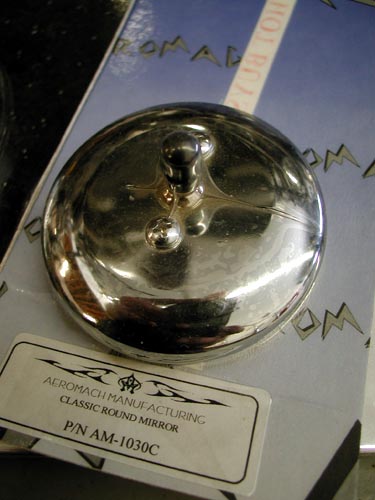
Finally I mounted the stylish Aeromach mirror on the left bar only. It came with all the hardware needed and never gave me a problem. I know I’m missing a link or two, maybe a necessary credit. Don’t hesitate to drop me a line if you need a question answered. You can reach me daily at Your Shots or drop a line to Bandit@Bikernet.com.
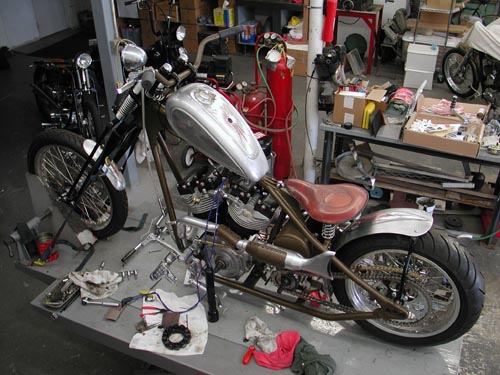
Over the next couple of days I will attempt to complete the first saga of the ride to Sturgis. I hope to launch it on Friday. In it I will dig into the problems I encountered, mistakes I made and how I fixed them. Hang On. But beyond the glitches, actually the wiring worked out fine, but I should wire in a kill switch. The bike rode well, comfortable for a rigid, started without major hassle and ran all the way to Deadwood. I can’t complain.


Amazing Shrunken FXR 12: Tools And Linkage
By Robin Technologies |

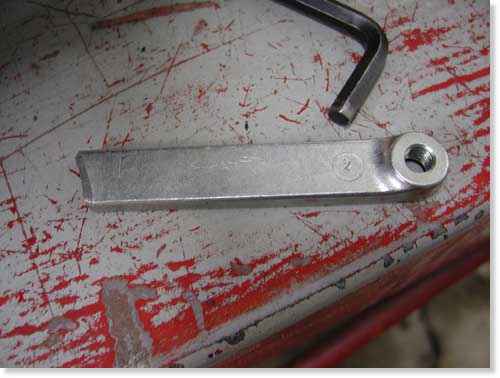
The stock tranny linkage cut to work as our brake linkage.
A week ago I worked on the brake controls with some success. After fabricating a mastercylinder bracket and actually drilling the holes in the proper location, it wouldn’t work. I needed to turn the master cylinder upside down. I called Frank Kaisler to confirm that it was a remote possibility, it was. I cut another chunk of steel plate, drilled the holes again and dug through drawers to find a pushrod. Nothing.
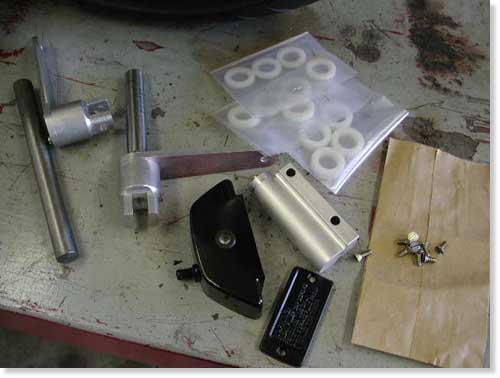
Parts and pieces we used to cobble together brake linkage.
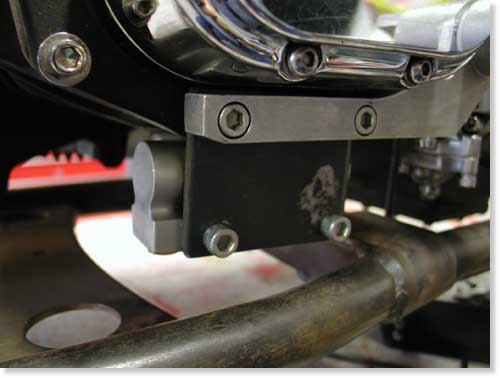
The master cylinder in place upside down under the tranny.
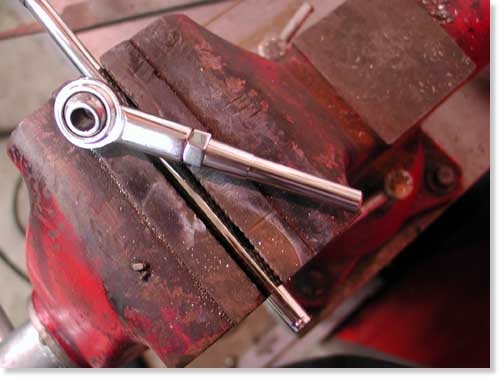
The stock stainless shift rod cut for a master cylinder pushrod.
I used a stainless steel shift rod unit for lots of adjustment, but had to grind/taper the end to fit. I also used the transmission shift lever for the connection. I cut Giggie’s brake axle to length and sliced the tranny shift linkage. Then I welded the linkage to the axle. That was a mistake. I should have machined the pieces to fit together, but it will work. The other end of the linkage was the perfect mate for the shift rod I cut and fashioned for the handmade master cylinder push rod. I lucked out. I think it’s cool.
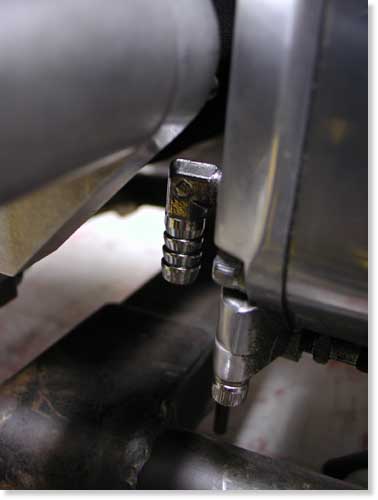
The inlet oil fitting had to be moved to make room for the brake linkage.
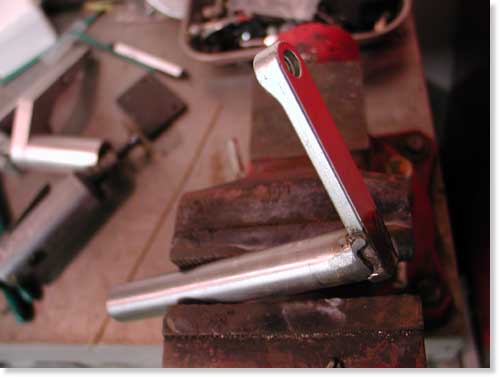
Here’s the tranny-gone-brake linkage welded to the brake axle.
That was last weeks endeavor. This week I stumbled. It all began with a set of exhaust I fabricated, from bits and pieces of other exhaust, for the Amazing Shrunken FXR. They worked out all right until my humble associate, Nuttboy, was assigned to grind the welds. Ya see, I held one piece of pipe against another and tacked them. The mating surfaces were not aligned perfectly, so when Nuttboy unleashed the Makita grinder to round off the welds he cut right through the pipes forming cavern-like gaps.
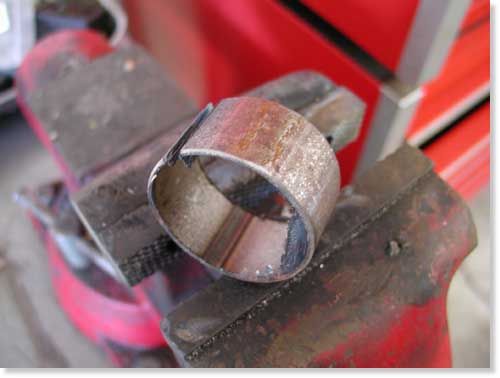
Kustom fab uses pipe inserts to hold pipes aligned securely for welding.
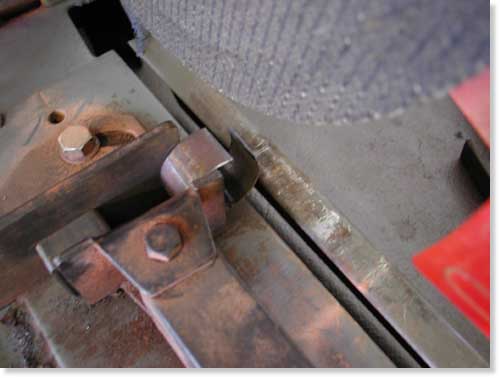
I had to enlarge the slot to make the insert fit.
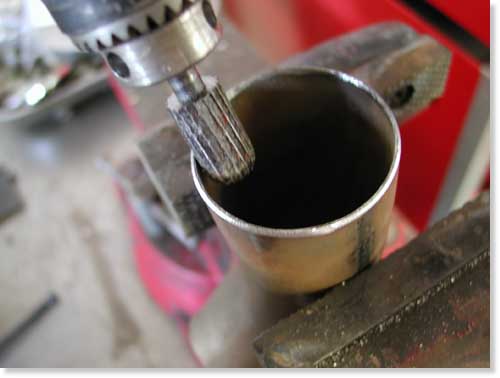
The insert won’t slip into place with burrs in the pipes. I had to grind them clean.
Lots of builders in the industry make their own one-off custom exhaust, so I started asking around about tools. Most don’t have tube benders, so they follow the same strict regime I did. They piece exhaust systems together using bits and chunks of other systems. One company will ship you a kit of various bends to work with. I inquired as to how shops held two chunks of tubing together in order to MIG, TIG or even gas weld pipes. The information highway opened up to me. Roger from Kustom Fab in highway takes a 1-inch section of like pipe, slices it (so the O.D. shrinks) and shoves it in one section of pipe then in the other. Simple system that adds strength but reduces the I.D.

Here’s the insert in place. It works well and adds strength but will restrict exhaust flow.
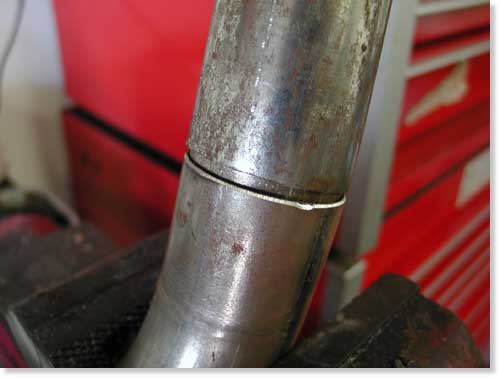
This system also makes welding easy.

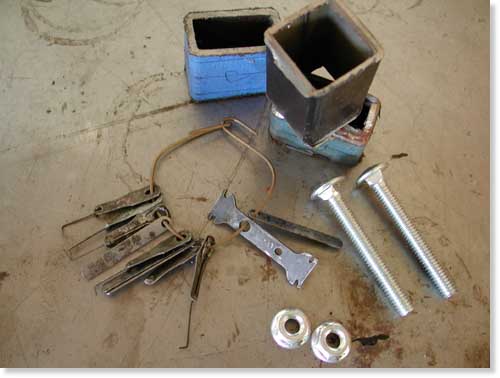
Some of the junk I dug up to kick-off my pipe clamp tool experiment.
Another builder told me of a C-Clamp arrangement using angle iron to lock chunks of pipe in-line. Scott from Chica’s explained a small unique tool that pulls the segments of pipe together using feeler gauge thin material. After tack welding the pipe segment, the clamp is loosened and the feeler gauge material slips out. Irish Rich pointed out that large hose clamps and chunks of angle iron work fine to hold pipes for tacking.
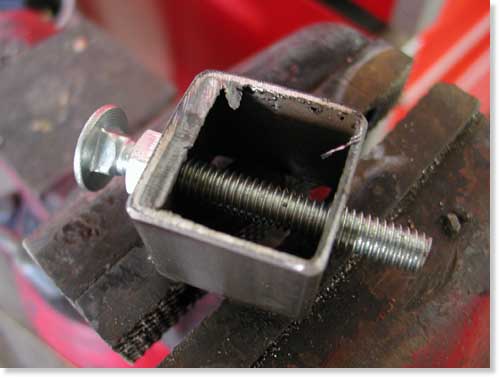
This was my bullshit attempt at building this tool.
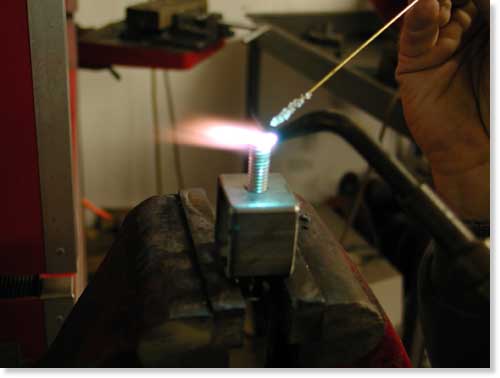
I brazed the feeler gauge to a nail and the nail to the end of the bolt.
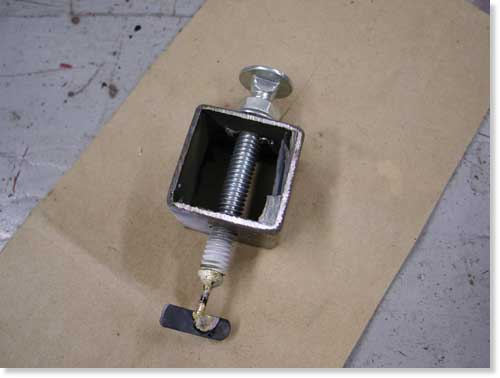
Here’s the completed tool. It looks better than it works.
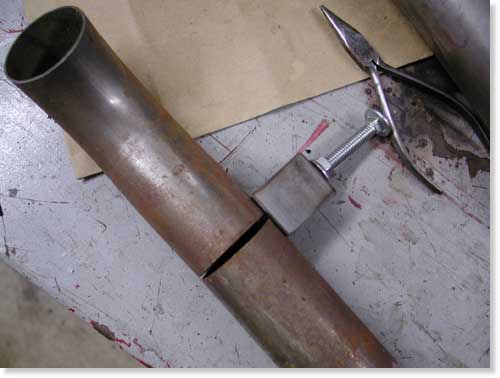
This shows the clamp in place. In order for it to work properly a notch needs to be ground in the pipe for the nail shaft, which is thicker than the feeler gauge.
The guys at Chica’s also told me about a wide stainless hose clamp with slots or holes that can be used to hold two tubes together during the tacking stage.
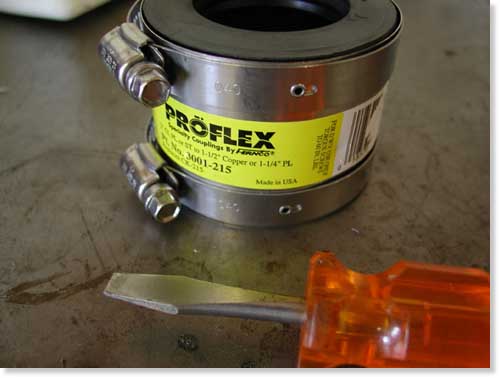
I found this puppy at Home Depot and thought I had hit gold.
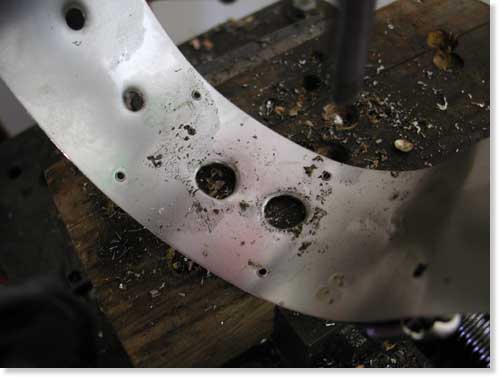
I drilled the stainless strap with a small drill then 1/2-inch for tacking room.
Then Fab Kevin clued me into Holley, the hot rod car part builder, who makes a sleeve that holds two pipes in alignment for tacking. I looked them up on the Internet.
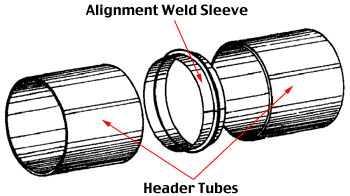
Our “Alignment Weld Sleeve” allows the fabricator to align, hold and weld two pieces of mild steel tube without help. Because no rod is needed, the welder has a free hand. The “Alignment Sleeve” assures a perfectly aligned joint with no weld slag inside to reduce the tube diameter and restrict air flow. Perfect alignment and just the right amount of welding material results in a very professional looking weld. Weld Sleeves are packaged 20 sleeves per bag.
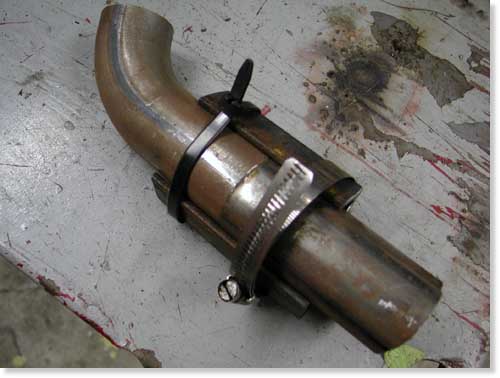
See, I couldn’t find a hose clamp to do the job. I need another hardware store run.
This is where the story runs astray. I followed each veteran’s suggestion and began to fabricated every exhaust pipe alignment device known to man. I cut, brazed, hit Home Depot, bought clamps, hoses, sliced my only .013-inch feeler gauge, dug through drawers and took photos along the way. No shit, I fucked up every tool design suggested.
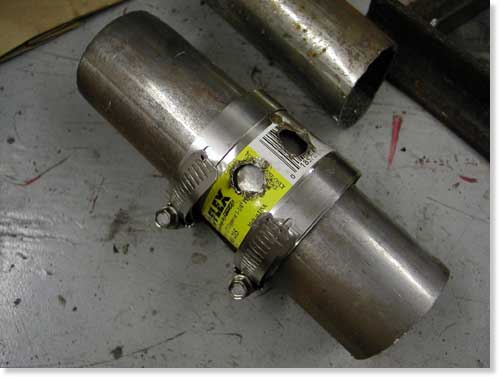
This is how it’s supposed to work. Unfortunately the clamp I bought was too large.
I didn’t have two hose clamps that would pull the angle iron hard against the tubing. The wide stainless clamp notion was golden, but I bought the wrong size at Home Depot. The feeler gauge routine was followed to the finish, but my tool doesn’t work without a notch snipped in the pipe. The C-clamp notion is too involved for my thinking so I decided to buy two clamps and modify them. Of course I didn’t have two spares to screw with. And finally the perfect solution from Holley was unavailable from my local auto parts store. I’m forced to buy their catalog.
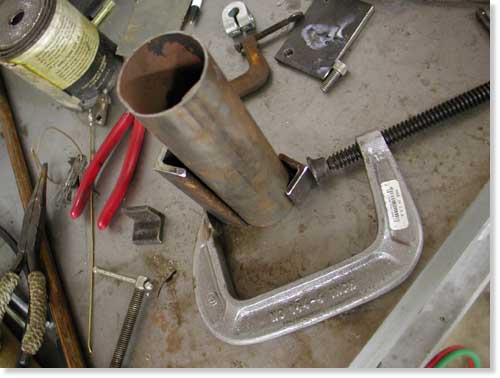
This is the C-clamp notion. I’ll build it after I hit Home Depot again.
If tonight you called and offered me a cool million to build an exhaust system, I still don’t have the tools. I need to hit Home Depot again. I almost fired myself last night, but you get the idea.
–Bandit

5-Ball Factory Racer, Part 9 Final Assembly
By Robin Technologies |

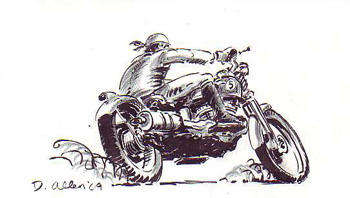
Every custom motorcycle build is an adventure. It takes me from one crazed time in my wild life to another. Fortunately, I'm not spilling my guts about another woman I lost during a knuckle-busting build. But this build did represent turning points. I'm about to step off into my 62nd year and sign up for Social Security. It also represented our stinky economy, and for the first time I pulled the plug on riding this bike to Sturgis.
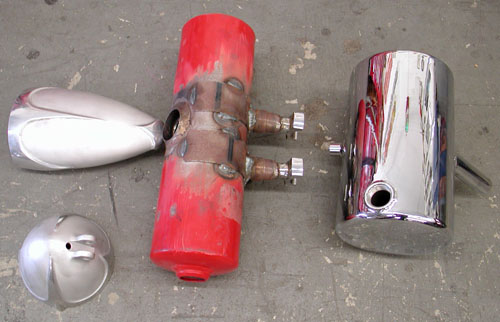
Imagine for a second, the middle of July. Days were long and hot, and the Bikernet shop boiled with activity. The Sturgis deadline was fast approaching. I needed to plan stops, hotels, food funds and a place to stay in the Badlands. Then suddenly we were forced to shift gears. Actually, we took the planning process out of gear. One day, I scrambled for the finish line; the next I coasted. I couldn't find the stress switch for a week and relieve the pressure.
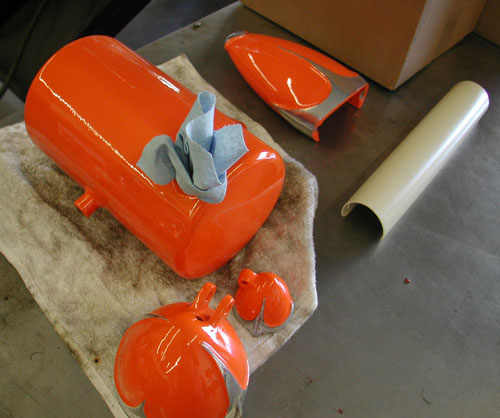
Most of my parts were baking in the Tony Pisano, Worco powder-coating ovens. It took me a week to realize the Sturgis Rally would survive without me, and I could relax. I was no longer under the gun to finish this build and risk my life riding an untested motorcycle halfway across the nation. Then it dawned on my feeble brain. I had a terrific opportunity to finish this bike and test it for a year before riding into the Mojave Desert and across several Indian reservations. Plus, I could kick back and enjoy the summer, pressure- free. I bought an ice-cold six-pack of Coronas, a couple of fresh limes and grabbed a sun tan. Not bad.
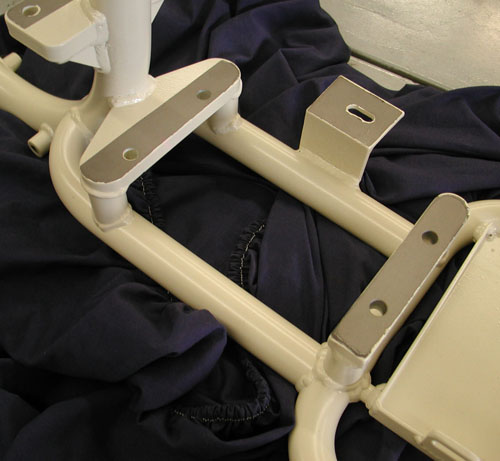
Tony is a pro powder-coater of the finest order and knows what it takes to tape off motor mounting plates and plug threaded holes. He saved long days under a grinding wheel. The powder work came out supreme. This year I tried something new. I powdered even the sheet metal, then asked a pro to paint panels on the tank and a flat black stripe down the Chica rear fender. He handled that aspect in a flash. Then I turned the job over to George the Wild Brush for the 5-Ball Racing logo on the tanks and pin-striping.
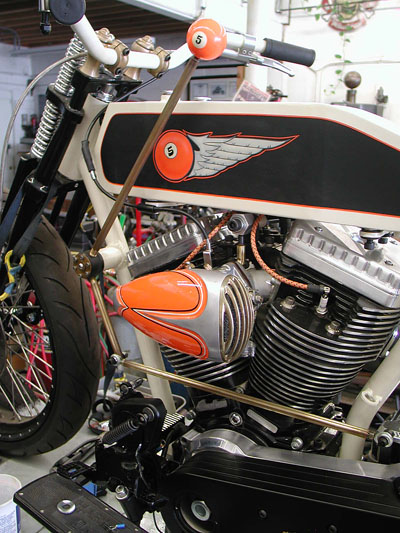
George drives around Los Angeles in an old Toyota truck with a camper shell, the home of paint headquarters. He folds down the tailgate, uncovers his vast, dripping assortment of paint and goes to work. He's old school to the bone. He pinstriped the giants' drag race funny cars in the '70s.
Here's where my fuck-ups began to surface. After the tanks were powder-coated, I decided to test them for leaks. I had planned to coat them with a sealer, and received Kreem tank sealer from Bikers Choice.
Here's the quandary: You can't seal tanks and then have them powder-coated. It might all go to hell in 400 degree ovens. So I held off. Then I decided to hit a local radiator shop for the test. We discovered one small leak where I welded in a rubber-mounting bung in the bottom. I ground it clear of paint and re-welded it. No problem. The painter touched it up for me. It was on the bottom of the tank and I was good to go. I thought.
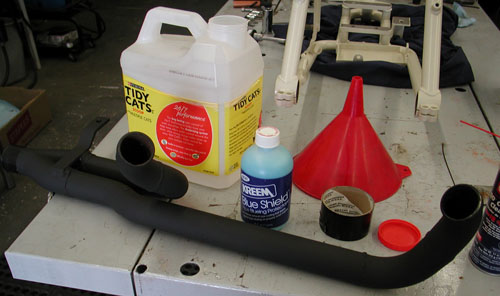
Next blunder: Instead of pressure-testing my handmade exhaust system, I decided to try another sealant available from Kreem and Bikers Choice. It's blue madness and can only be used on new pipes. I followed the directions, but it's a messy operation, and of course, I attempted this process for the first time, after I painted the pipes. What did I learn from these hiccups? Test tanks and pipes before you coat them with anything, period.
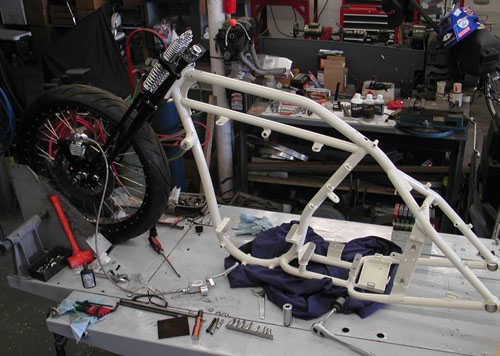
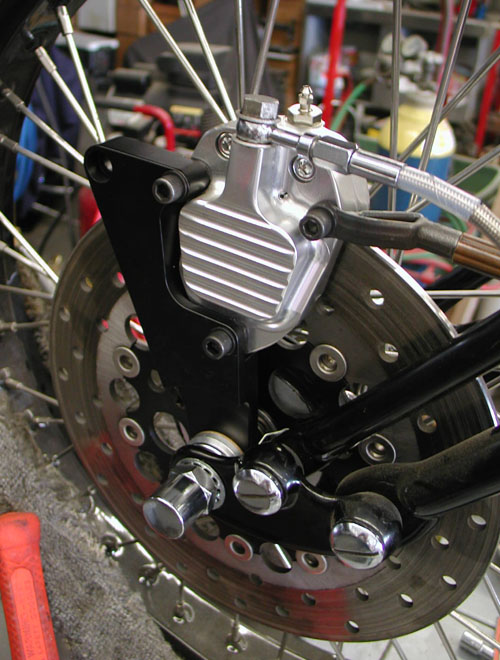
The first item to be installed was the new Paughco narrow, taper-legged springer front end. It slid right into place. If only I had four arms when I'm working in the shop alone. The front end already had the 23-inch Black Bike Wheel installed with a special Avon Tyre. I just needed to grapple with the front end, fasteners, bearings and top crown. No problem. I also installed the GMA front brake bracket and spaced the front wheel for the 14th time. It's a tight fit, and I need something art deco to mount on the front of the bracket. GMA, now owned by BDL, only builds a springer front brake bracket for the right side. I was forced to flip this one over. I could have machined the leading lip off, but I decided it could be used for some unique reflector, or quirky hood ornament. We'll see.
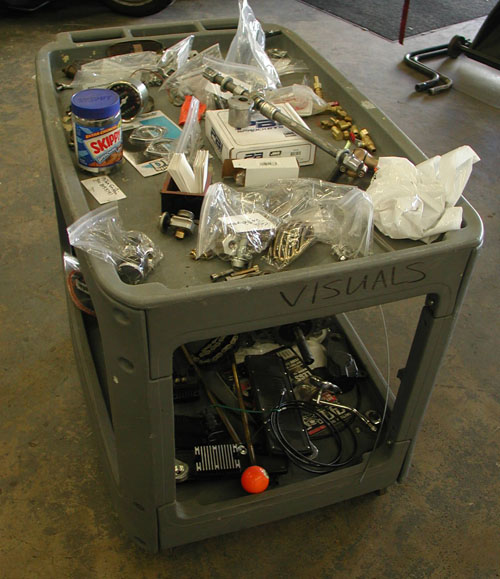
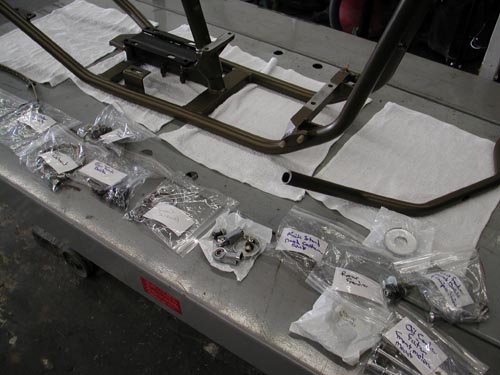
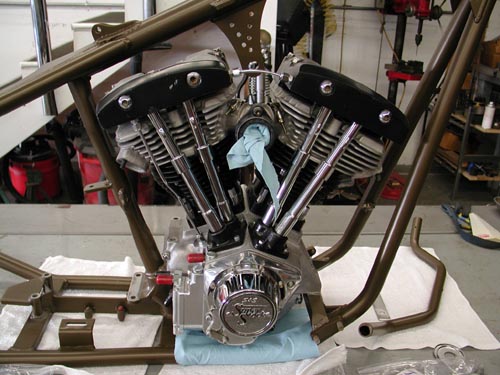
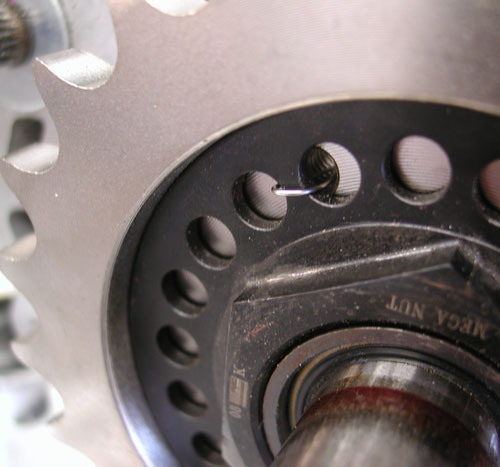
When I disassembled the bike, I carefully collected all the parts on this table. I also zip-locked all my fasteners and wrote their job descriptions on the back of each card. That was seriously helpful during assembly. Next, I dropped the Crazy Horse 100-inch engine in the Paughco frame, with the JIM's transmission and the Baker kicker system installed. Since the chain ran against a portion of the frame, I ordered a ½-inch 24-tooth tranny sprocket from JIMS and installed it with this special JIMS nut, designed with a built-in locking device. Unfortunately, no matter what I did, the holes wouldn't line up, so I safety wired the nut to the sprocket to prevent it from backing out.
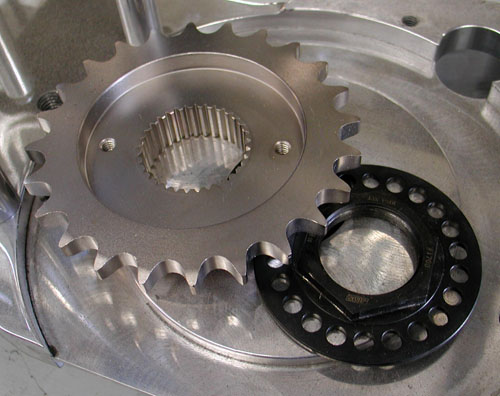
Then I faced one of the toughest assembly jobs, installing the Spyke alternator stator plug in the right engine case. It's easy and difficult at the same time. This time, I smeared the tunnel and the plug with Never Seize and tried to push the plug through the case tunnel. I also carefully backed out the set-screw and scraped any burrs of the case edges. That didn't help, but I ultimately wrestled it into place. I'm always careful of electrical connections, wiring, proper grounds, etc. Nothing leaves us alongside the road more often than electrical problems. So, I don't like pushing and prodding charging components.
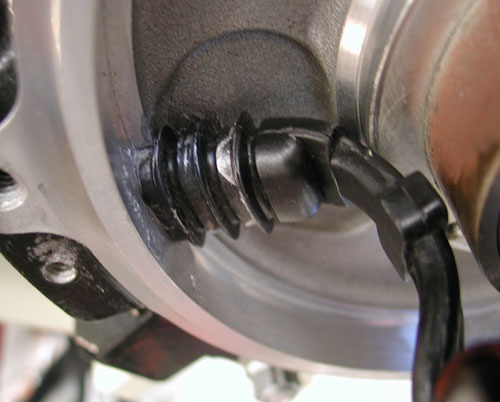
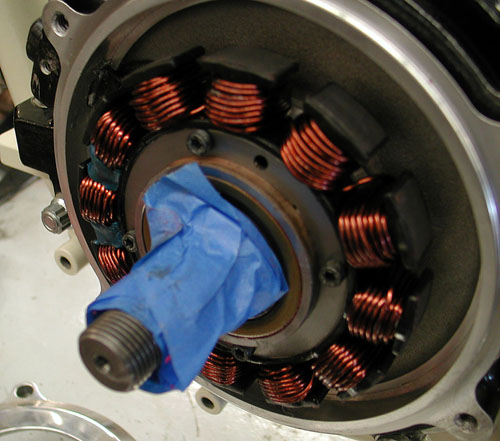

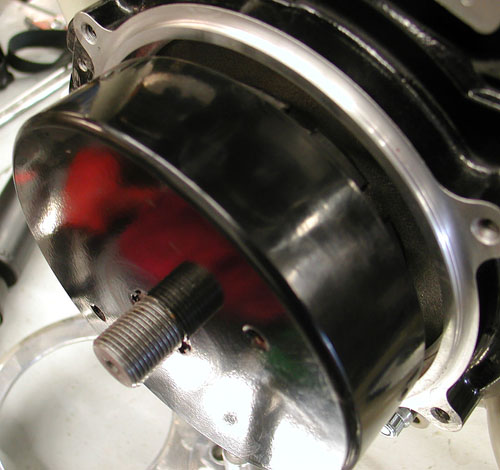
Once the stator was in place, I used self-locking fasteners from Harley-Davidson to fasten it down. Spyke is careful to supply all the proper assembly instructions, but it's always tough with aftermarket engines. Because it was somewhat of a guessing game, I installed the Spyke rotor a couple of times to make sure all the clearances were proper. Then I could move onto driveline alignment and the installation of the BDL narrow enclosed belt drive system.
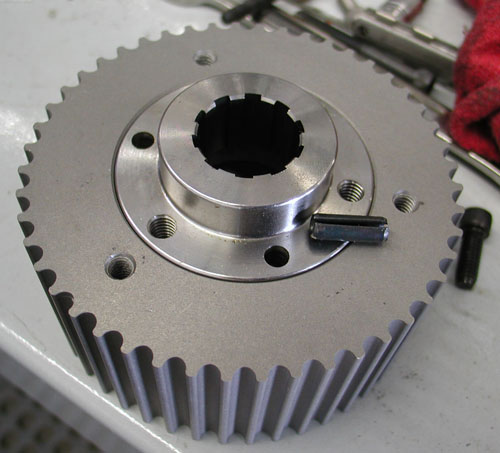
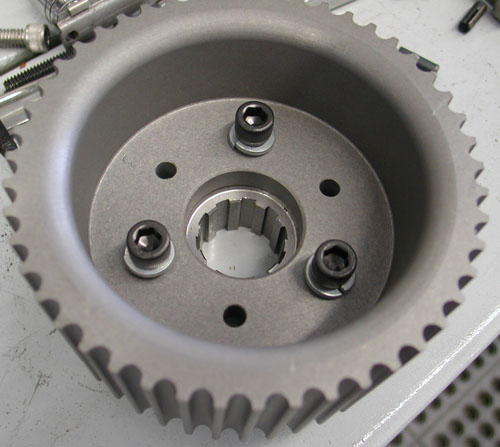
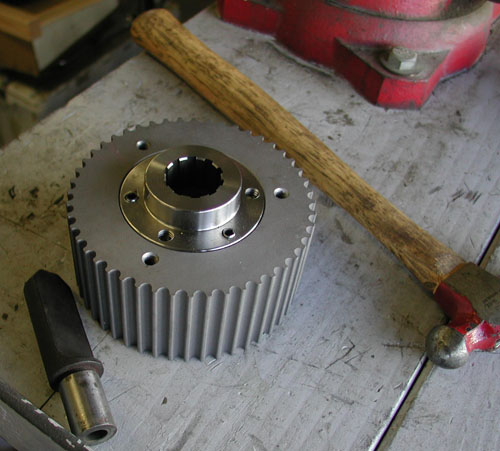
I've worked with BDL components for at least 15 years. They are solid as a rock. I used the inner primary to pull the engine and transmission into alignment. I left both major components loose in the frame until I pulled it up tight with the inner primary. Don't forget the John Reed Code. I use Never Seize on all bolts rolling into soft aluminum. John warned about damaging porous aluminum threads by running hardened steel against them over and over. Never Seize allows them to glide in and out of the cases without stress or abrasion.
With the driveline aligned, I tightened down the rear engine mounts and then checked the front ones for gaps. I shimmed the front motor mount perfectly, then tightened it down.
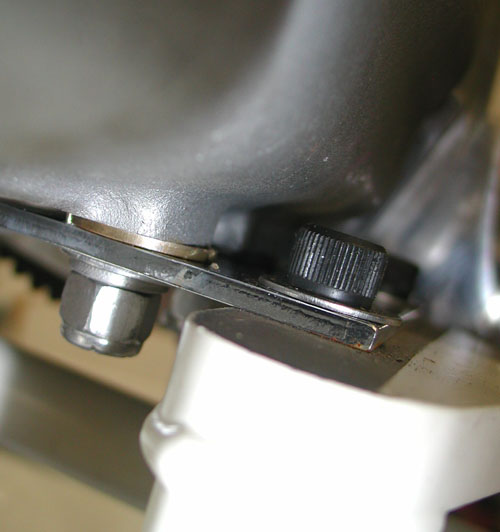
Next, I focused on the transmission. The Paughco mounting plate was tight and the JIMS trans case was fine in the rear, but slightly elevated in the front. I dug around until I found the correct shim washers and drove them under the trans and around the front tranny studs. It's key to go through these motions for proper alignment and to save problems with the belt. It's surprising how easy the BDL system slips together if the driveline is aligned.
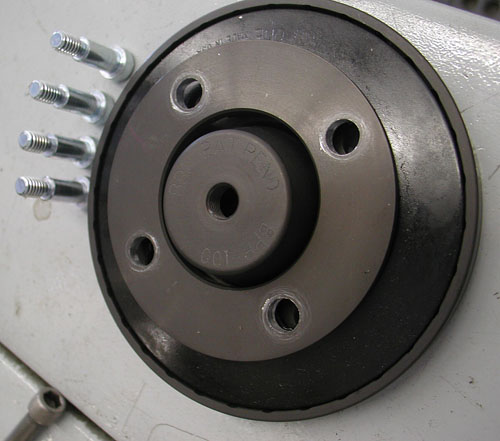
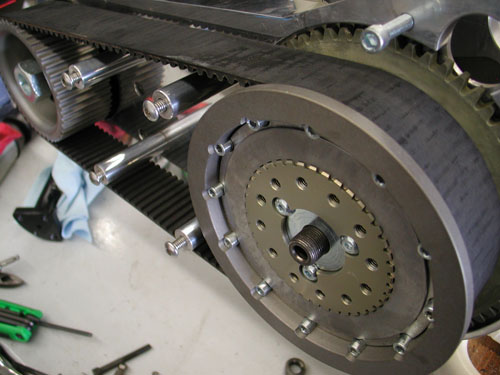
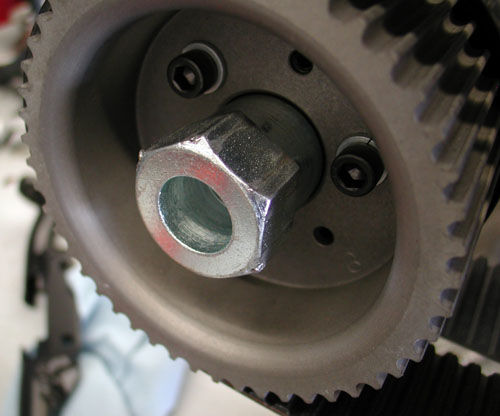
I followed the BDL instructions and bolted the engine shaft insert to the pulley then drove in the alignment pins and tightened down the Allen fasteners. I pulled the pressure plate pins out of the clutch and removed the clutch plates. With the clutch hub and the engine pulley holding the belt, I carefully slipped them on simultaneously. I attached the left-handed clutch nut and tightened it with an impact gun. I did the same with the engine main shaft nut. I turned over the engine and checked belt alignment and pulley alignment. I spaced out the front pulley slightly with a shim and was good to go.
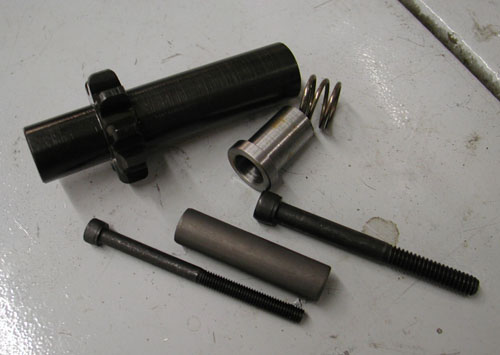
BDL TECHNICIAN NOTE:I received a call from BDL, “You fucked up, Bandit,” Dan said. He pointed out how I didn't mention using Loctite on the transmission mainshaft splines when I installed the clutch basket. “That's more important than many folks realize,” he said. Vibration from the spines can tear up the basket splines and ultimately the clutch plates.
I generally don't Loctite the mainshaft splines until the bike is tried and true, encase I need to remove the clutch. “Harbor Freight sells a cheap vintage steering wheel puller,” Dan said. “They work like a champ for pulling BDL clutches. If a hub is too tight a little heat does the trick, melts the Loctite.”
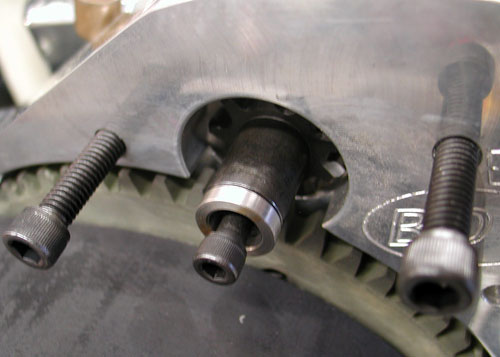
With the clutch back in place and all the elements tightened down I installed the Spyke starter and pinion shaft. Giggie, who just passed away the other day, told me years ago, how to check the spacing. To keep the starter strong and not fuck with the ring gear, the starter gear should rest about 0.150 back from the ring gear. Too close and it doesn't have the space to begin turning and jams against the ring gear. Too far receded and it won't make good solid teeth contact.
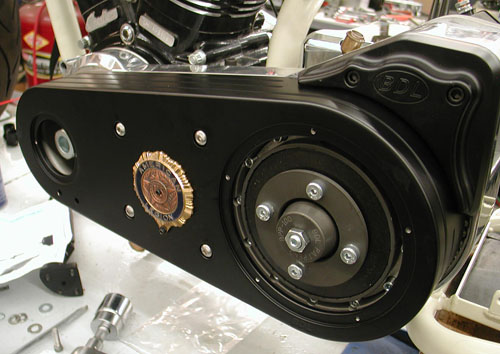
With the primary almost buttoned up, I moved to the LA Chop Rods new-fangled internal throttle installation. Internal throttles are cool but precarious. If a bike stumbles and falls over, the first damage is generally to the bars. It's easy to replace an external throttle or a grip. But what the hell. We're not building a bike to fall down.
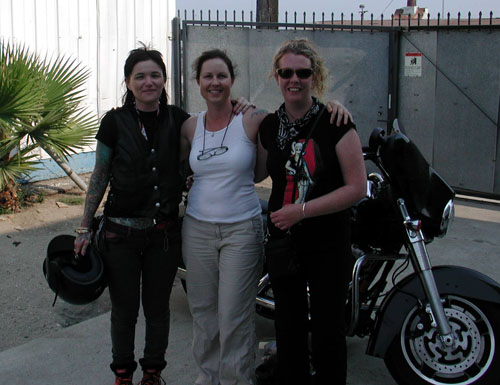
About this time, the Sturgis event hit the summer calendar, and folks arrived from Australia for the ride. Doc from Heavy Duty Magazine, in Australia, picked up a Victory for the run. Nicole Brosing, an Australian tattoo artist, flew to the coast, rented the same Road King she rode last year, grabbed her girlfriend and split north to San Francisco then east to the Badlands.
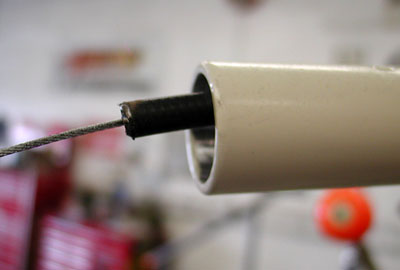
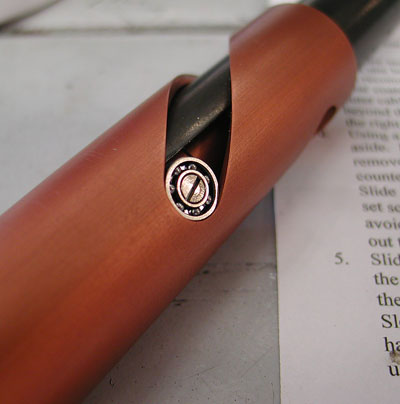
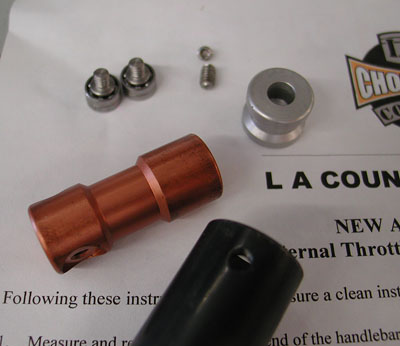


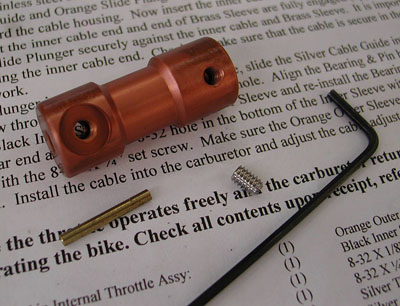
I wrenched in the shop, drank Coronas, smiled and caught a sun tan. Gard Hollinger from LA Chop rods slapped extra engineering into his internal throttle system. His instructions were detailed, but I was still nervous as I attempted to determine the proper length. It's always a sharp notion to take the bike off the lift so the bars can rotate for testing the overall length. It's actually a breeze to install, although I honed out the bars slightly, for an easy slip. Gard devised the cable lock-down with a brass sleeve to prevent damage to the internal cable and afford a solid grip for the set screw. This throttle, with extra bearings, is smooth as silk.
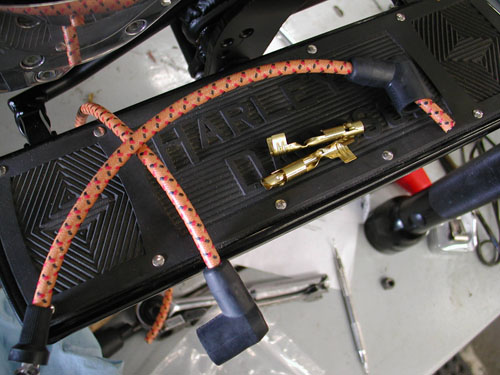
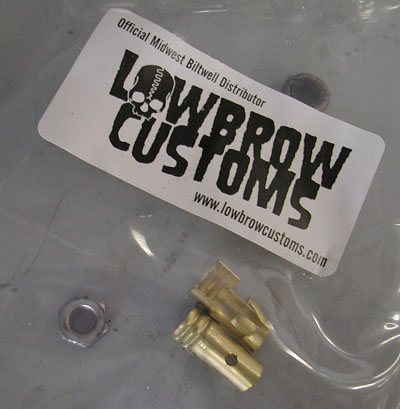
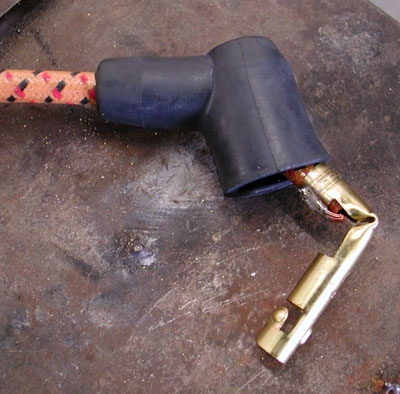
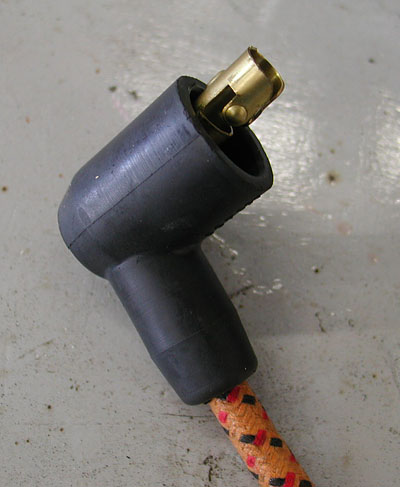
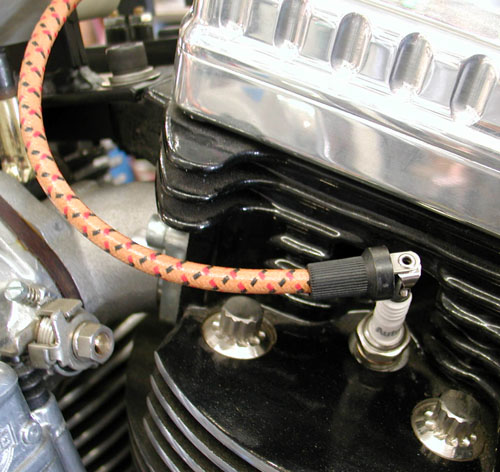
Then I turned to the classic spark plug wires from Low Brow. This is a cool system and adds class to any ride. They come in a kit form with all the elements needed, except a roll of solder, flux, and a gun. It was a simple operation, but I actually mounted the coil a tad on the tight side to the underside of the tank. Fortunately it all fit. Make sure to slip the boots onto the wires before you solder the brass fittings into place. Lowbrow attaches the other ends before shipment.
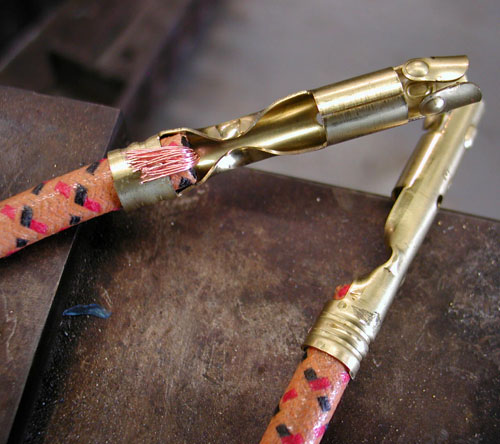
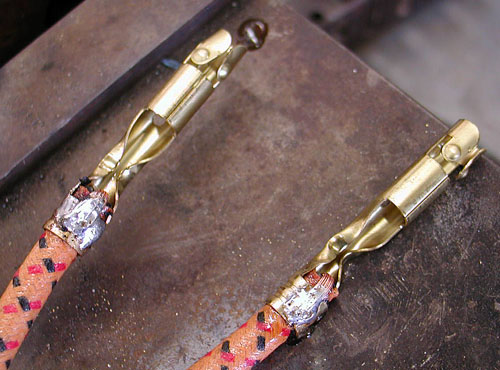
I simply attached the spark plug wire to the spark plugs, ran the lines out of harm's way to the coil, added an inch for safety, cut the wires, trimmed them back for soldering, and crimped and soldered the fittings into place. Frank Kaisler told me to make sure to wipe all the flux off after soldering. So I did as Commander Kaisler instructed. He uses alcohol or solvent to clean the area, preventing future corrosion.
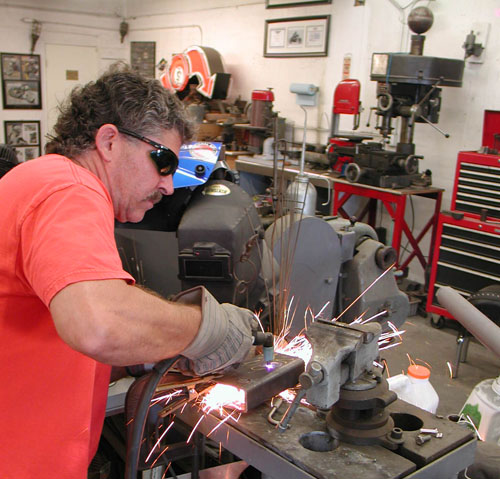
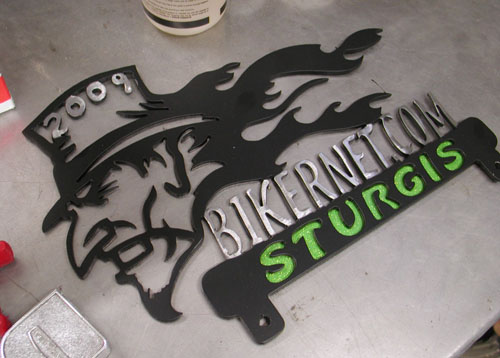
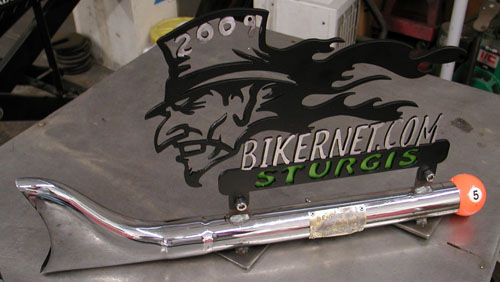
I took a day off to help Nyla's brother, Brad, build some diesel motor mounts for their 32-foot Cho Lee motor sailing vessel. They were smack in the middle of a complete restoration. It's a beautiful boat. I've sailed it to Catalina Island several times, when it belonged to an old friend of mine. Another deadline loomed. Less than a week away, the Easyriders Bike Show would rock the Broken Spoke Saloon in Sturgis. Bikernet sponsors the Panhead Class each year and I needed to create the trophy. Panhead Billy won the award. When I can reach him, we will feature his classic rat pan.


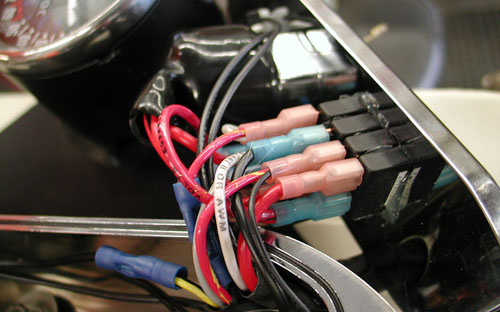
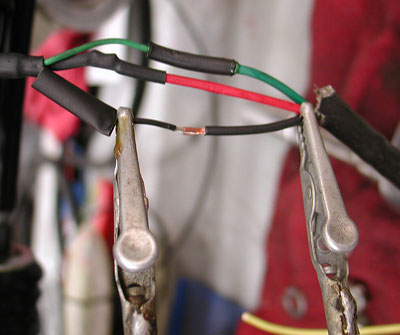
I shifted to the wiring. I used Phil's Speed Shop wiring system. It's designed for lots of custom applications and makes wiring a breeze. He includes instructions and a wiring diagram. The billet chromed box includes the ignition switch, the high-low beam switch, circuit breakers, starter relay, neutral light and starter button. I just ran the wires, used my Frank Kaisler soldering tool and ran the wires through the old H-D soaked canvas loom. I know that's not the correct term for it, but it's a close description.
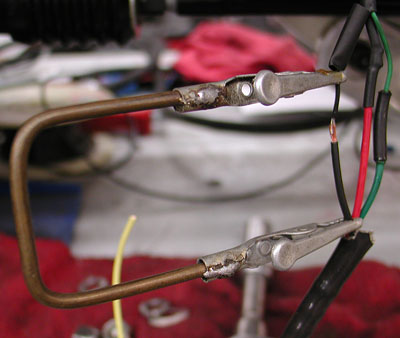
I ran into one problem that held me up for weeks. I like the CrazyHorse bottle cap engines. They offer three ignition alternatives. First, the original Thunderheart unit, an adjustable timing Thunderheart, and finally a cone motor system. Unfortunately, they don't tell you enough about the stock system. I thought it was like a Compu-Fire system in the cone. It's a one piece unit. I reached out to other Crazy Horse engine builders who told me I needed a Thunderheart ignition module. So, I ordered the system from Thunderheart, but when it arrived it didn't jive with any wiring diagram I received from Thunderheart or Crazy Horse. It was a riot. Every time I received a wiring diagram or a box from Thunderheart, I thought I was good to go. Then some goddamn thing wouldn’t match, and everyone had split to the Badlands. I paced the garage waiting for answers.
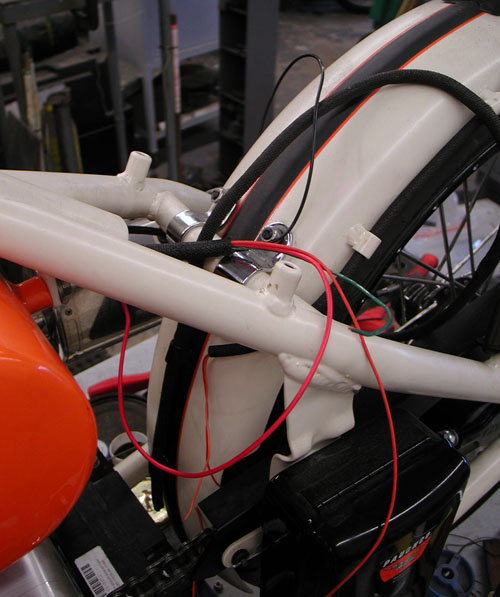
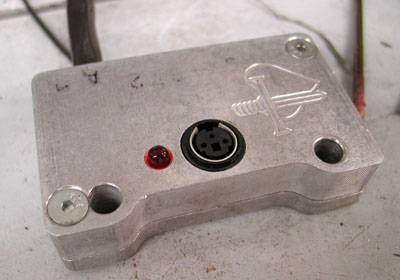
The Thunderheart tech guru sobered up after a week in the Broken Spoke swimming pool, doing belly shots with the lovely waitresses. He dropped me a simple e-mail: “There's only three wires goddamnit, black for ground, red for ignition and green to the coil. Go for a ride.”
That solved that mysterious issue and I moved on. Three more puzzling obstacles surfaced. I cleaned the Paughco oil tank with solvent and small nuts and bolts. I counted the fasteners before I slipped them into the tank. It was sorta rusty, and I didn't want to roll without cleaning it. I poured a cup of oil in it and flushed it out. I hooked up the oil lines, and Crazy Horse sent me very specific instructions, but this will blow your mind. I couldn't figure out venting. I'll get back to that.
I hooked up my gas lines. I filled the tanks and one leaked. I threatened to fire myself on the spot and another challenge surfaced. The pinhole at the front of the tank, where I cut away a section to allow for fork stops, stuck out like a sore thumb. It was obvious, but we didn't spot it during testing. I called Jim Murillo, a professional painter and cried for assistance.
“Don't use Kreem, it peels,” he said. “Use Casewell two-part Phenol Lovolac System.”
I ordered some and their customer service was supreme for a small $36 order. Some companies get it, when it comes to taking care of customers. This is where tank seals become terrifying. I needed to kick my ass into the middle of tomorrow. Make sure your tanks are sealed before any finish is applied, including powder coating. I suppose I was over confident. What the hell.
The directions called for cleaning the tanks with lacquer thinner, nuts and bolts, sand, you name it. I tried the lacquer thinner and immediately fucked with George's pinstriping. I called him, panicked and drank whiskey heavily. Fortunately a Bikernet reader shipped me a fresh bottle of Bulliet Whiskey, and Dusty, one of the 5-Ball Racing Team Salt Flat members, hand-stripped several pounds of walnuts and shipped them out.
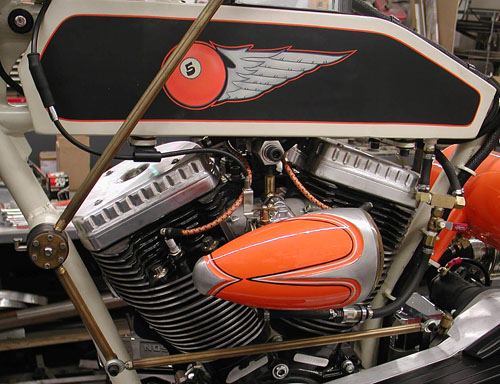
Incredible. I let the tank dry thoroughly, made up a small portion of the Casewell sealrant and poured it into the tank. I knew where the hole was, and fortunately it rested in an easy-to-reach corner. I tilted the tank in the sun and returned to the whiskey. George saved my ass once more.
With the tanks fixed and returned to the bike, all was well, and I put a key to the Phil's ignition switch for the first time. Here's another quirk. Crazy Horse doesn't tell you how to time your new 100-inch engine. It times itself. The bike didn't whine, growl, spit or cough. It fired immediately to life and purred. I checked the oil pressure, perfect. Then I unscrewed the cap off the oil bag to make sure the lubricant returned to the oil bag properly. Yep, it was returning, but the cap popped off into my hand. I wondered about venting. Everything was fine except for pressure in the oil bag.
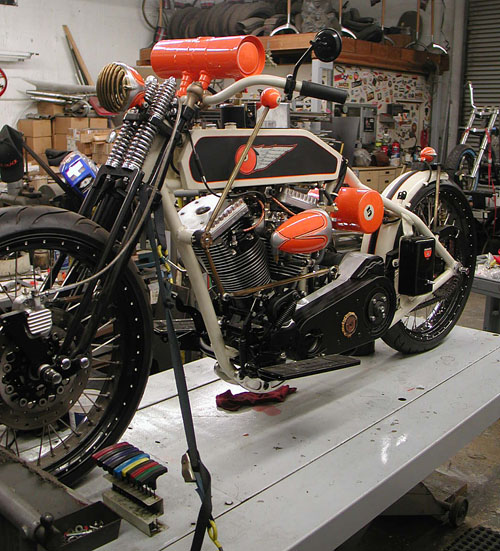
Again, I started a research project. The Crazy Horse installation material didn't mention a crankcase vent and I searched the engine. There are two 3/8-inch spigots between the heads, as if for a cross-over oil line. As it turns out they are designed as vents. I found out from Dar at Brass Balls that they just run a line under their gas tanks. I pulled one end, no oil flow. It had to be the vent, so I improvised and used another old machinery oil fitting to hold a screen to prevent crap from strolling back into the precious engine.
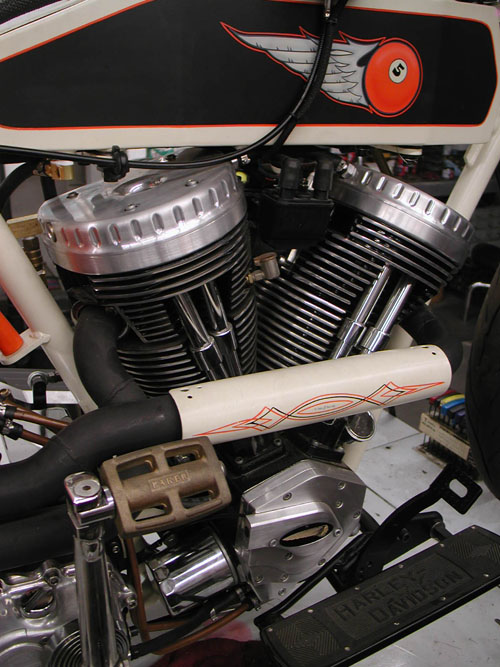
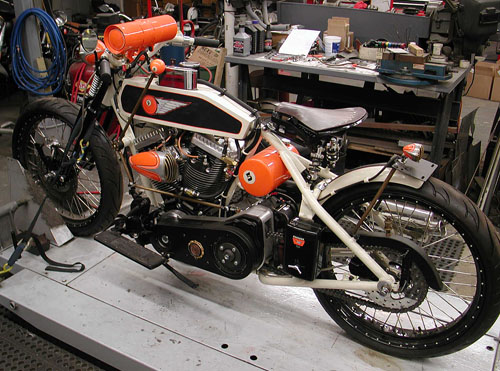
That solved that issue. I was ready to rock, but my seat hadn't arrived from Duane Ballard. It was a wild old sprung BMW seat he scored. When it finally arrived, it didn't fit. It was too high and too far back. I was faced with another quandary. If I moved the bars, I could barely place my boots on the footboards. I scratched my beard, looked at the box of walnuts, and then it dawned on me. Glenn Priddle, a leather seat master, who studied under classic saddle makers, made me a seat a couple of years ago for the 10th Anniversary of Bikernet. It was a wide, classic solo seat. I dug it out, dusted it off and it fit like a glove, dropped the seat height 2 inches and move the seat position forward 3 inches. It actually fit the frame better than the old classic from Duane. I dodged another bullet.
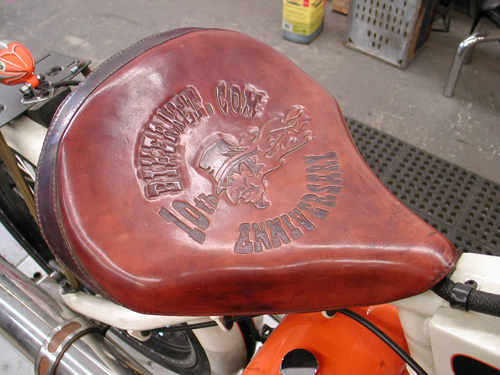
Every year when I build a bike, my mantra includes a solid, tough, rideable, unique bike that will last. But each year the unique project throws a few curveballs. It's part of my Zen education. Life is not meant for perfection. We need challenges to test our endurance levels and help us through the tough spots, find answers or solutions and persevere. Often my predicaments are caused by a lack of experience. For instance, if I ever use a Crazy Horse engine again, I'll know all the quirks and set-up issues.
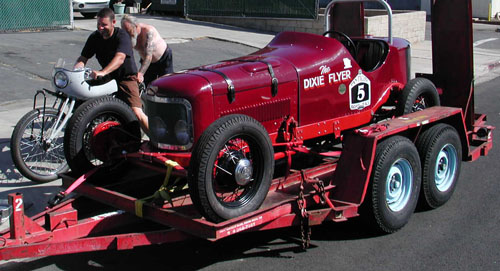

Now, let's see if I can ride it for any distance. I would love to ride it to the Badlands next year or to Arizona for our Too Broke for Sturgis Run.
We'll see what happens next, as I take her through the Eddie Trotta break-in routine. Eddie starts a bike for the first time, let's her run and checks her over. Then he takes it out for a one-block jaunt, and checks it over again. Then he ventures forth for one mile and returns for another inspection, then 5 miles, then 25, then 50 and she's ready for a cross-country blast. Hang on!



Witness Slips Needed Today
By Wayfarer |
|
|
