Road King 1/7/04
By Robin Technologies |

I had a bad feeling about this mod. First, I don’t like to pack anyone, any time. If you want a ride on my Panhead, carry a hand-towel and a bungie cord. I avoid giving a girl a ride home from the bar, even a babe with gigantic hooters. I would preferred to follow her home. I’m not the kind of rider to take a woman on a long run. I would rather have a variety of women in various towns and cities. Okay, I’m a bastard.
Okay, so the pressure’s on. Sin Wu want’s to ride once in a while, and I want to get laid daily. Gotta give up something. I kept the stock Road King classic seat for additional passenger comfort. It’s covered with dust, in the corner, but that quick change aspect is covered. I ordered the custom billet tab for the rear of the stock seat, and had it powder coated black, so both seats were ride-ready. When you purchase a new saddle, it doesn’t always come with the rear tab. The base is plastic and screwing fasteners in and out will wear out the threads.
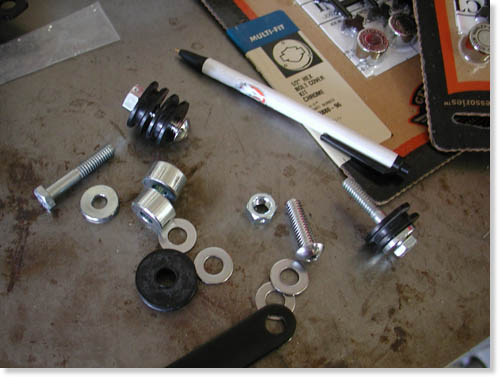
Here’s a handful of the fasteners and bag bracket spacers.
I ordered the front and rear detachable docking hardware kits, but be careful. I leaned toward the new lower backrest/sissybar for styling, which wasn’t in stock, but the pad was. I bought it, then the backrest was back-ordered so we bought the taller sissybar for immediate gratification, but when we got home the pad didn’t fit and we were forced to buy the tall pad. Watch out for this dilemma when ordering. Make sure to check all the installation instructions to make sure you have the correct puzzle pieces. There are several back rest options so watch that aspect when ordering.
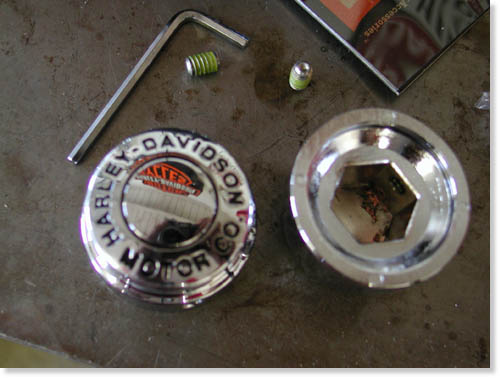
Here’s the massive chromed Classic H-D axle dress hardware.
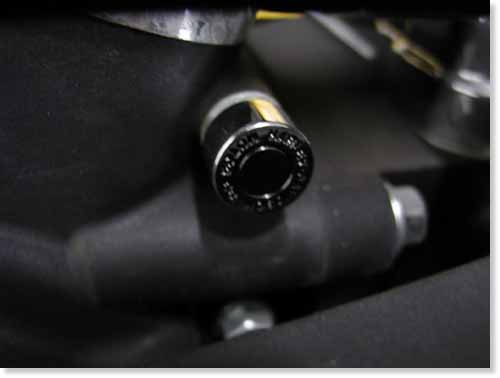
This is simple installation. Slip on the plastic wedge and the cap grips over it. Push them into place–done deal.
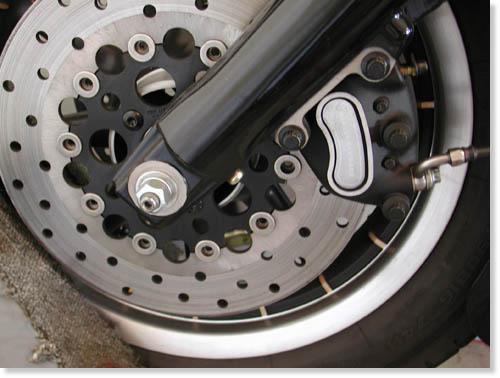
We also ordered some classic hex bolt covers and stainless Allen caps to begin an engine detailing process. We purchased chrome caps to detail the front brake calipers and classic chromed front axle covers. We didn’t use the plastic chrome caps ultimately but brush painted the raised edge of the calipers black. I’ll tell you why in a bit.
This was supposed to be one of the easiest mods we undertook, but we learned quickly, that wasn’t the case.
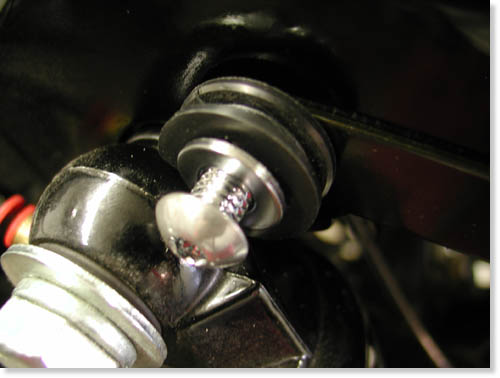
This is the front docking port in place, but not tightened.
When we black powdered a ton of components previously, we assembled the bike securely with Loctite and care. That was our undoing. The Phillips-head beside the shock needed to be replaced with the front docking hardware. Take one bolt out and replace it–no problem, right? The Phillips screws wouldn’t budge and we proceeded to strip the heads. First, I wished I had an impact driver.
I discovered an aerosol spray by Chemsearch called Yield in the auto parts store that loosens rusted bolts instantly. It worked like a charm, with a little patience the bolts came lose. An American Rider reader complained that this product isn’t available in retail stores. That’s true. My longshoreman connection hooked me up. You may need to find a factory worker or mechanic who has a connection.
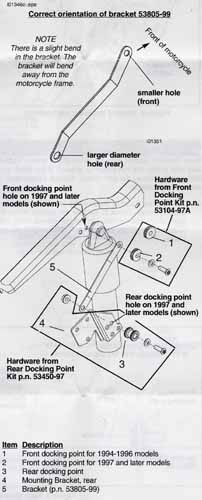
After reading the Low Detachable Backrest kit info that came with the taller kit, the Backrest Docking Hardware kit directions, the Front Docking Point kit instructions and the 100th Anniversary FLHT and FLHR Backrest Pad kit directions, I guzzled my first Corona.
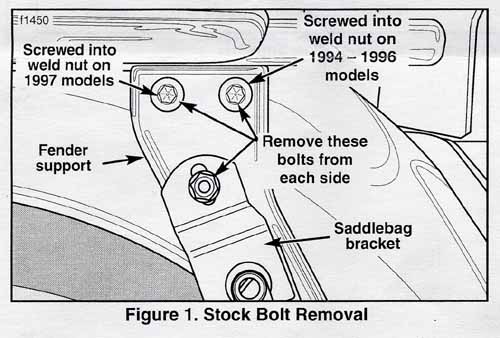
I opened the next Corona. The operation would have been simple if the directions were. I read them over and over. There were too many variations between years and configurations to sort through. The Front Docking port directions confused me with illustrations involving rear bag support spacers designed to bounce out the saddlebags and clear the release button on the backrest.
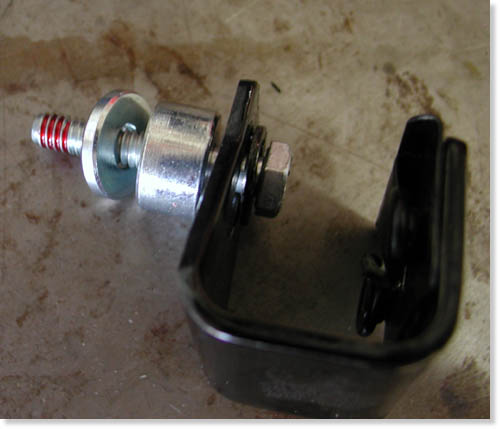
This was a matter of trial and error.
If you’ve built choppers as long as I have, there’s always a way to make anything work, so ignoring the confusion, we spanked our asses in gear. I ignored the spacers, installed the front docking rubber that was designed specifically for the King with a notch for the shock.
There’s a bracket that runs from the front docking station to the rear, but first the rear docking port bracket needed to be installed. On some models equipped with air shocks the shock filler bracket must be removed. The directions said I didn’t need to remove it on the 2003, bullshit. It was directly in the path of the docking bracket, so off it came.
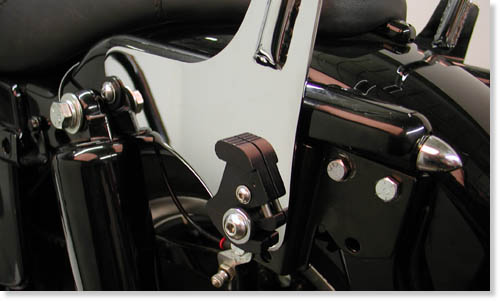
This shot shows the bracket in place, with the shock air port moved. Note the single empty hole in the bottom of the bracket. That’s where the rear bag mount bolts into place. The trick of the night.
Three lousy bolts had to be removed, the rear bag bracket 1/4-20 fastener and the two 5/16s fender support bolts. First the 1/4-20 spun the thin, tin clamp that holds the nut in place. Then the 5/16, once removed, could hardly be replaced. Nothing aligned properly. My lovely assistant had to squat and lift the tip of the fender, and in one case we were forced to remove the lower bag rail to align the top bolts.
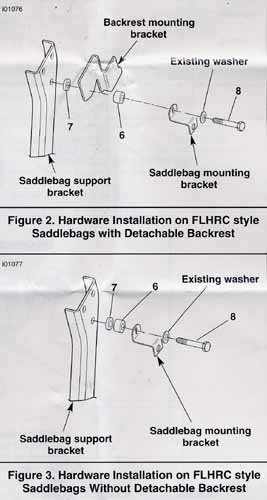
This still doesn’t totally jive. Actually washers had to be fed behind the top Backrest mounting bracket also.
“Can I let go of the fender, now?” Sin Wu asked grunting. The top docking port bolts are packaged in two sizes, 1 inch and 3/4 inch. The directions warn that if the rear inch-bolt comes too close to the fender, replace it with the 3/4. We replaced both and used the 1-inch jobs in the front holes on both sides.
Without the rear fender rack detachable bracket, another option, two washers were thrust under the rear docking port bracket to make up for the thickness of the rack bracket.
Part of the confusion was the numerous detachable elements available for various models. There’s also the two-up detachable rack front docking kit that surfaced from time to time.
That’s all there was to it. We bolted all the elements in place and tested the back rest and bags. Sure enough the King Classic bag lid smacked into the backrest latch when opening. We ultimately spaced the rear back bracket out only about an 1/8 of an inch and we were good to go.
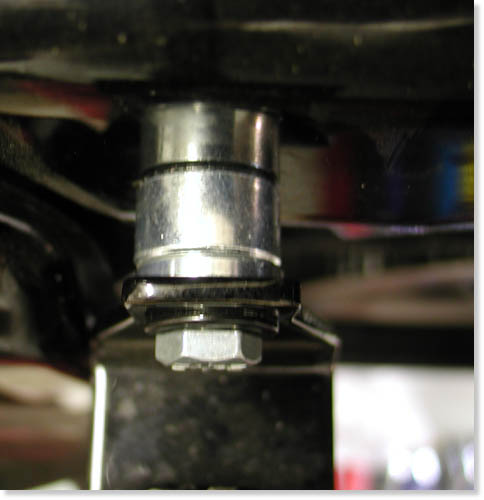
We tried it with the spacers, without, then with smaller spacers that worked perfectly.
Sin fed me chips and salsa and dabbed my sweating forehead with a bandanna, while I slipped the saddlebag bracket, 1/4-20 nut, into place using a long magnet. It worked on the right side. On the left we unbolted the entire fender support, replace the nut, adjusted the thin, tin tabs, and bolted the sucker all back together, only to have the nut fall out again. In this case we squeezed a slim square 1/4-20 nut behind the docking bracket and bolted the back bag bracket on with a spacer. It worked like a charm.
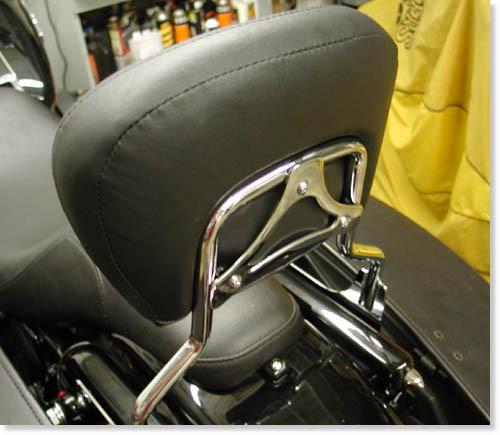
“Can we ride?” Sin cooed. I told her to gear up. We were just about ready to roll.
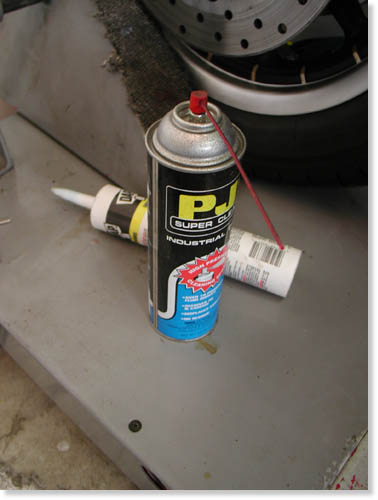
I used electrical contact cleaner to loosen the tin insignia plate, but discovered that wasn’t the intended plan. Leave it be, goddamnit.
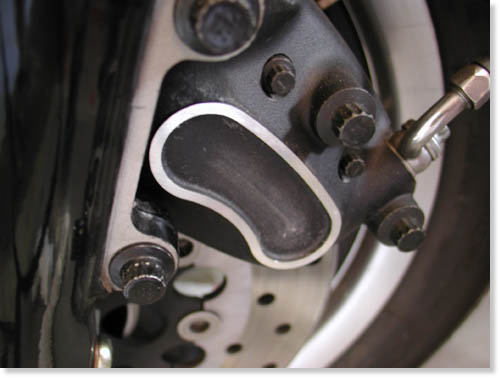
Here’s the totally clean caliper. Big mistake.
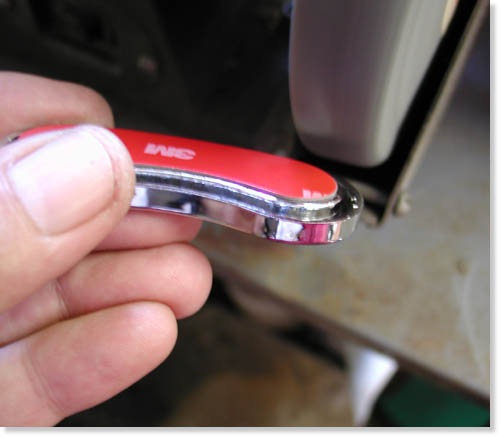
I ground the lip unevenly, but it then fit into the recessed slot on the caliper.
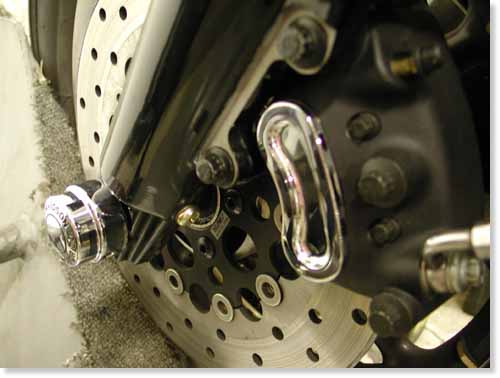
After grinding, all was well. Sorta.
The air in the garage eased as I warmed to her company. For an easy half-hour we played with the details of the bike by installing nut caps and front axle caps which I snugged down against a coating of silicon to prevent vibration.
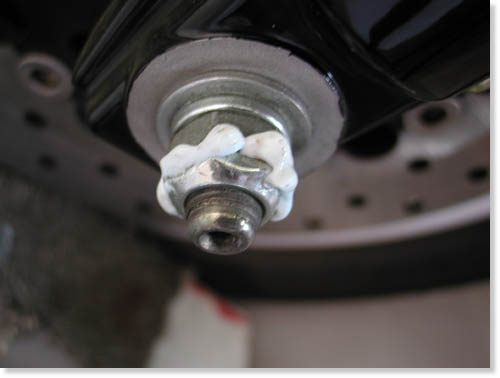
Some silicone on the axle nut will prevent vibration that may loosen the cap.
I discovered that the front chrome caliper caps stuck directly against the existing tin insignia. I took one off and cleaned the area thoroughly with electrical cleaner then the self-sticking surface didn’t reach the base.
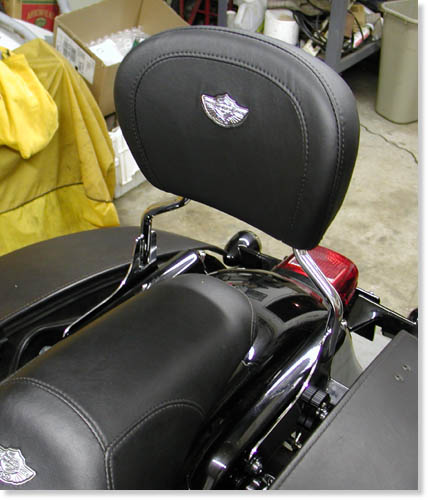
Here’s the 100th Anniversary backrest that will not fit on the short back rest bracket. We sent the short unit to Custom Powder Coating, in Dallas, for a coating of black.
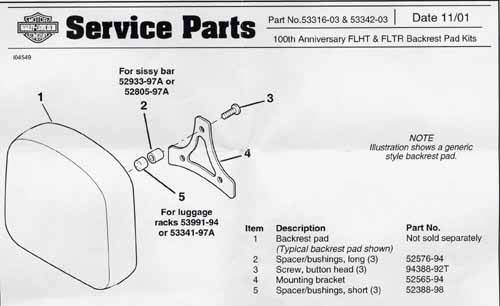
Note that there are various pads and various fasteners and spacers for different applications. Don’t try using common sense.
I ended up with 1/2 pint can of Rust-oleum paint and a small brush for touch-up details. I sent Sin Wu in the house to prepare for the ride. That meant striping out of her threads and waiting for me in bed. It’s the code. We must workout before we ride.
–Bandit
Editor’s note: I’m sniveling through this, but I’m sure with some experience this would have been a breeze. I suppose that’s what dealerships are for.
The Amazing Shrunken FXR Project Part 3
By Robin Technologies |
Bandit and I were checking out the Amazing Shrunken FXR. “Thedamned thing,” referring to the shrunken FXR project we had beenhammering at, off and on, for almost two years, “has attitude,” hegrowled, “a bad-assed attitude.”
“Yeah, but will it have sound attitude?” I mused. “I want it toget attention. I want it to be felt in their chests before they seeit. I want them to hide their children from the evil they fear.”
The Amazing Shrunken FXR has developed into a mythic ethos. Froma cardboard box full of rejected, beat-up, and cast off parts, thebike has become a sculptured icon, a physical dream, and perhaps awrong turn down a bad dirt road, three miles back.The project began back in the spring of 2001. After a lot of fitsand starts, the Buell Project, the Sturgis Run, the Deer Gut stewadventure, Bandit’s painful recovery, the Red Ball prep, variousevents including a trip around the world and soiree’s, we slappedparts on, hammered steel into shape, welded this and that, cussed andfarted and got to where we are with the help of a RevTech driveline,Custom Chrome, BDL belt, Joker controls, Cyril Huze sheet metal andCompu-Fire electrics. The bike is raw boned, trimmed down, and meanlooking. That’s where it stands, inert and waiting for inspiration,up on the rack at the Bikernet garage.

Bandit regarded the raw metal frame with squinty-eyed intensity.”What you thinkin’,” I asked, keeping my own gaze focused on thepotential of the bike. At my question he stretched out his gangly,egret-like frame to its full 6’5″. “It’ll be a loud mother fuckereither way you play it,” he intoned in his gravitas basso-profundodeep voice. “We’ve shortened the frame and rear wheel base so muchthat it’s barely a cunt-hair from the exhaust port to the rear wheel.”
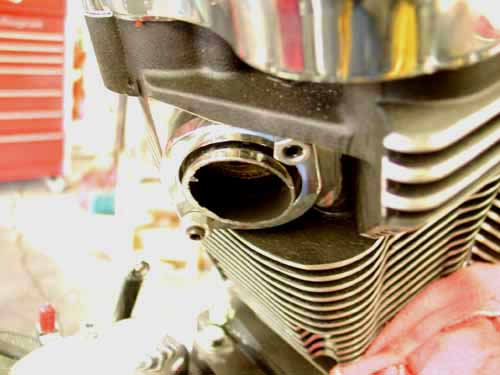
We cut a piece of an Samson Evolution system with a Mikita touse the exhaust port, then started welding other pieces in place. Wecut it back to make a tight turn and create space away from the oiltank.
“Fuck it,” I responded in my best Pancho Sanchezimprovisation, “let’s just start from the port and see what happens.”
We rummaged through a pile of Samson scrap exhaust pipes that wehad scavenged from a dumpster behind the Sampson factory. Flingingout fish tail tips, shot gun systems and swoopy cruiser exhausts,most of them dented and damaged so they couldn’t be re-used. Mr.Samson gave us only the best to modify. We eventually came up withenough pieces to fabricate a Frankenstein exhaust system.

As I grabbed for a section 1 3/4-inch chrome pipe, Imistakenly grabbed a goodly chunk of fur. Bandit’s midget, crazeddemon of a feral cat yeowled in protest and sank his needle-liketeeth into the back of my hand.
“God damn that crazy bastard,” I screamed, “he’s as crazyas a peach orchard boar.” I’m sure Bandit has a mescaline salt-lickfor that freaked out feline.After I extricated my hand from the jaws of Bandit’s feline Cujo, Ireturned to the exhaust system at hand.
Our intent was to minimize the exhaust system as much as possible.We ran the pipe straight down from the front exhaust port, thenturned it to hug the bottom of the engine case. We had originallyhoped to put a flattened pipe under the frame, but reasonable roadclearance dictated a different path. So we tucked it in and aroundthe engine case, then inside the frame, coming out just at the edgeof the back wheel.
“Our first mistake,” Bandit spouted, “we needed a smallerdiameter chunk of exhaust to form guides when welding chunks ofexhaust together. If we had slipped it in one piece even a quarter ofan inch. it would have held each chunk in alignment. That’s onetheory to building pipes. The key to fabing your own pipes is havingenough scrap to slice and dice, then cutting and working each pieceuntil it’s as close to a perfect fit as possible. Finally the tackingprocess is critical. That’s were the guides didn’t come in. If we hadguides we wouldn’t have offset pipes tacked into place. That problememerged severely a week later during the grinding process.”
“It took two days of playing, cutting, fitting and welding toform a completely custom exhaust system in place,” Bandit added.”Make sure you wet towels and form a fire barrior around your tackingarea to protect the rest of the bike. I used a small 0-sized torchtip and common hanger to tack the segments of pipes together. I’m notconfident enough with our new MIG welder with thin sheet metal, so Istuck with the torch.”

” It wasn’t perfect, but it was ours,” Bandit added, “acompletely unique system that would be tucked under the transmissionand attached to the driveline solidly under the tranny backing place.Then we faced the muffler aspect. The pipes were too short to be openor we would have been arrested within a block of the headquarters.”
Needing some kind of ‘standardized’ muffler elements, we went toour local San Pedro Kragen Auto Parts store. With the clamp-on piecein hand, we found parts and pieces enough to create a 7″ mufflercase. “Most of the elements were too heavy and glass packed,” Banditspouted, “We couldn’t weld on a glass pack.”
Back at the garage, with torch in hand, Bandit cut out a sectionof baffles from some scrap Sampson muffler. Spot welding the bafflesinto our jury-rigged muffler, we produced something that may, likeJapanese Fart Wax, diminish the painful ‘Brap-rap-rap’ flutter ofunrestrained exhaust back pressure. A right-angle turn-out willdirect the dragon’s breath exhaust from the screaming 88cc Rev Tech,high-performance engine to an unsuspecting public standingslack-jawed and terrified at the curbed edge of civilization, theirhair-dos blasted straight by the sizzling after-burner of the AmazingShrunken FXR.
“He gets sorta twisted,” Bandit muttered shaking his head.”Actually with the baffle in hand we went to San Pedro Muffler Shopand looked at the myriad of tips and tubing alterations we couldmake. We found a tip and had a chunk of 1 7/8 tubing spread to matchthe tip. That formed the other end of the muffler. We just had toweld the three elements together.”
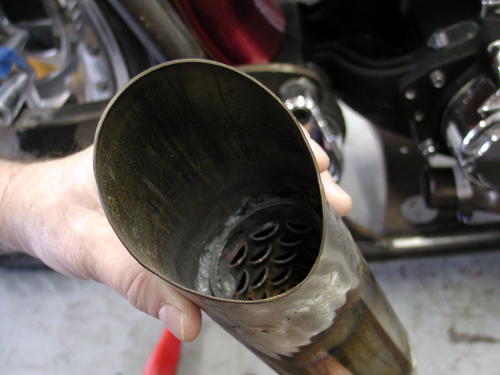
I welded the baffle in place, positioned as it was in theSamson System. I discovered that the two elements didn’t want to weldtogether. I have a feeling the tip was made of an inferior metal.
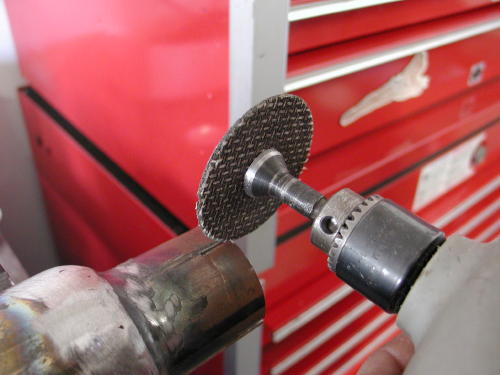
With the die grinder we cut notches for the muffler clamp.
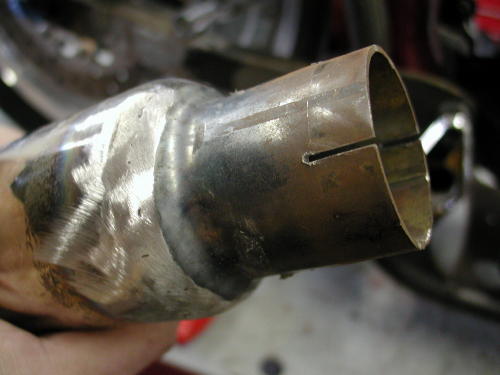
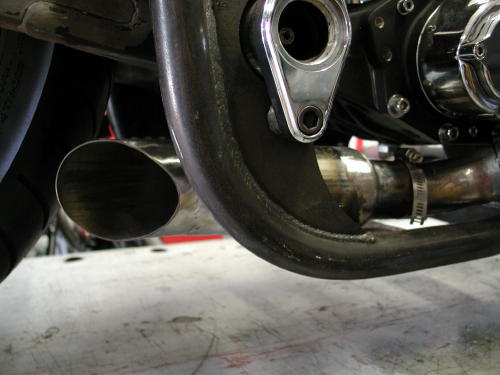
“After welding and fitting I stood back and was proud of ouruniquely tight system that would allow Giggie, from Compu-Fire, tomachine mid-controls for a final touch,” Bandit interupted. Theexhaust played perfectly into the Shrunken aspects of the project. Iremoved the tacked system and began hours of gas welding to make itwhole. That’s when all hell broke loose. While working on anotheraspect of the bike with my back turned to my partner, he began togrind the welds. The college art history professor sought perfectionwith each weld and ground right through the thin walls of the18-guage exhaust pipes. It was amazing. I was sure the system wasruined.”
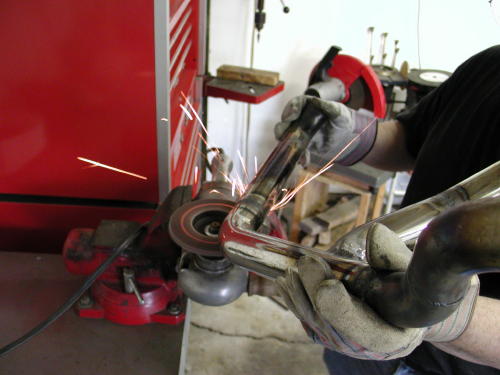
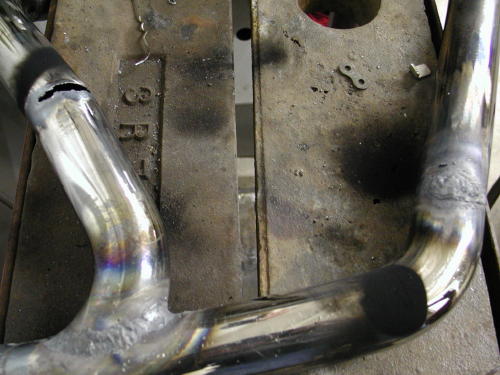
This shows the amount of area ground down so far we were forcedto fill it or destroy the system and start over.
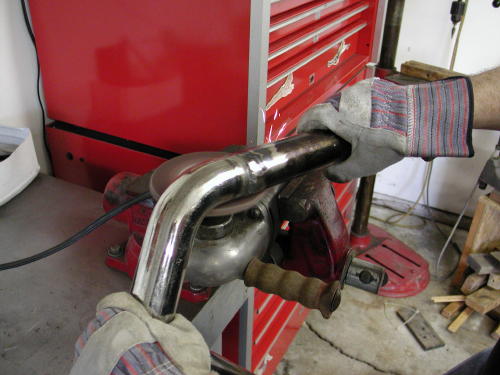
“Some builders tack systems together then take them tomuffler shops for professional construction. I thought that was mynext move. Unfortunately a regular muffler shop doesn’t have themandrels to make the tight bends we had proposed. I was devastated,but the man told me that he could fill the welds with his MIG welder.
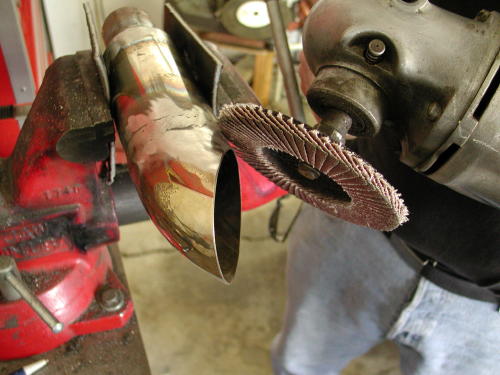
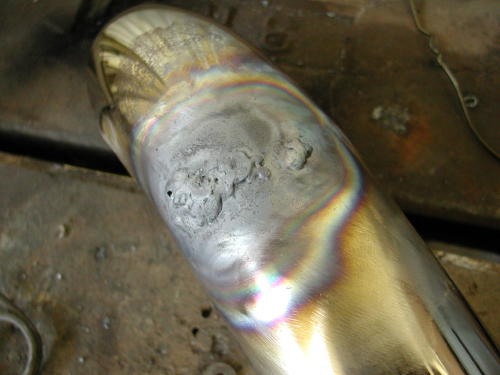
More welds to fill the mad grinder’s cutting work.
“Unfortunately each weld was now a 1/2 inch tall and wide zit atalmost each junction of the pipe. Nuttboy began the grinding processagain. More holes were found and I filled them with gas welding usinghanger rods. I joke now that if the bike runs like shit we blame iton the exhaust system. If it runs well, it’s the same roll of thedice. We’ll see.”
“Making your own exhaust system can be a blast, just don’tget heavey handed with the grinders. Pipe is thin and a little weldthat shows won’t matter much since we didn’t plan on chrome, butblack Jet Hot coating. I’ve sworn off chrome exhaust systems on mybikes for the future.”
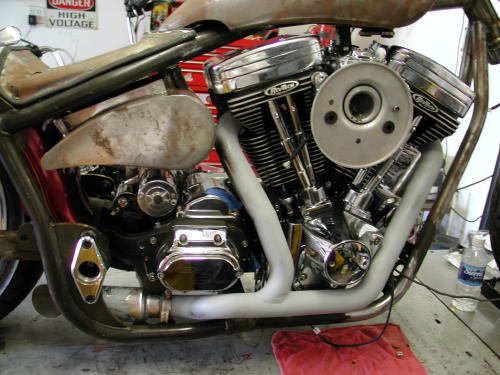
That big bastard just won’t shut up. The next episode in thismechanical adventure will feature Giggy’s attempt a electrifying thesteel monster. Next weekend, barring any new bike projects, Giggy’sinopportune finger damage at the power tools, splattered deer guts,San Pedro political insurrection, Sin Wu’s beguiling charms, a caseof beer, or any other form of diversion or chaos, we will be closerto cranking this monster over.
To Continue……..
Back to Part 2……..
Back to Custom Chrome on Bikernet……..
Back to Joker Machine on Bikernet……..
Sturgis 2000 – Part 4
By Robin Technologies |
|
The next morning, Myron and I got our asses in gear and loaded our scoots. Karl and Cheri were returning to Phoenix the long way through the mountains and Flag before getting home. We said our goodbyes and headed out. It was odd, or maybe not, that Myron and I were travelin’ without maps this year. We remembered the time we rode into Colorado by mistake and Mark the Warrior was mapped to the max. This was going to be an odd trip without a map. Sorta like sailing to Hawaii without a compass. We were flying by the seat of our pants. I babied the Blue Flame onto I-40 and tested it with my left glove. Not an ounce of vibration. It felt as if it was welded to the frame. I took it easy for another 40 miles then rolled it on. I had an entire fuckin’ tool box in the compartment of my handy-dandy bedroll. Hell, if it broke, I’d fix it. We rode to Gallup, N.M., some 98 miles to the east, pulled in and gassed up. A big Indian behind the counter told us, “Just stay on this street til you get to the Mexican restaurant — best food in town. Hang a right there and you’re on 666 heading north to Shiprock. Should take you about 2 hours.” “How about peach pie?” I asked. He just shrugged. An older gentleman dressed in Indian attire and turquoise jewelry looked at us through squinted eyes surrounded by leather-tough skin. “Two hundred miles,” he said. We looked at him, then at the younger man who ignored the bent over old dude with the knowing eyes. Something wasn’t right. We copped out and Myron bought a map. We rode the lumpy street for five miles until we came across the turn for 666 and the restaurant. Inside, we opened the map. He had purchased a perfectly good map of Utah. We weren’t going there, so I folded it and set it beside my napkin while I ate huevos rancheros, then asked the waitress how far Cortez, Colo., was. I’m not sure she knew what state she was in, but she delivered some mean salsa. After eating, we strolled out to the bikes and the waiter followed us. “You forget this, senors,” he said, handing me the map. I waited for him to return to the restaurant then shit-canned the map. We don’t need no stinkin’ maps. Myron’s wheel was clicking and it felt strange in the turns, so we had pulled it apart in Holbrook and found nothing. It sounded even worse as we pulled onto Highway 666 heading north, unaware of how far Cortez or Shiprock were. We just kept riding. The straight stretch from Gallop north was dry and hot, just under 100 degrees as we plowed into a junk yard of a town called Shiprock, named after one of the massive outcroppings in the desert. The roads were torn up like they were when we came through in ’97. We tried to find peach pie, but struck out, so we stopped at a McDonald’s for a shake. We were befriended by a small young Indian man wearing a camouflage hat and pants, a Vietnam ribbon and a tightly pressed denim shirt. He sat across from us, bent over in our direction and started the conversation like he had access to a couple of slices of black market peach pie. He glanced around the plastic franchise nervous like. His voice was slow and low and he peered at me like I was a passenger in De Niro’s “Taxi” movie. His eyes were deep and haunting. He whispered about the Harley he wanted to own more than anything, a Sportster he was planning to leave his wife and kids to get. I got it. If anyone heard him tell that story and it got back to his wife, he was toast. We pulled our chairs closer to the young man and listened intently as he explained his dream. I gave him a Bikernet sticker while wishing I had a Sportster in my bedroll. I would have gladly given it to the man. You could see the intensity in his eyes, the longing and the desperation. Apart from 15 liquor stores and the big Mac, the town had little to offer. On the outskirts there was a track of desolate homes indicative of the area. Each structure was about the size of a single, shoe-box mobile home. They were all painted brick red with white gravel roofs. A winding gravel path wound between them and small tufts of cactus. That was it. No garages, decks, driveways or carports. Each one was worn down by the sun and the wind that kept them engulfed in a cloud of dust. We noted the depressing atmosphere that loomed like acid rain over dying crops and got the fuck outta there. It was only 31 miles to Cortez. We rolled in before 3 p.m. and pulled up to the Best Western inhabited by the Hamsters. In fact, so many of the furry beasts were riding out that they had taken over two motels. My first impression as we pulled into the parking lot packed with dressers was a question. Where were all the custom bikes? The Hamsters have a reputation for being rich and riding nothing but $50,000 customs. From the looks of the parking lot, and the lines of black dressers, I had run into a HOG chapter on its way to the rally. My version of the dubious Hamster mantra has always been a club for custom builders and custom bike enthusiasts. As far as I’m concerned, that’s still the case, although as the guys get older, most can afford something comfortable for the long haul. Arlen Ness still rides a full custom all the way to the Bad Lands. And as far as being wealthy, most of these guys weren’t born that way. They worked for it, building a business that finally became successful. So now they have some money and deserve it. They also employ many riders, like Phil and Karen Day of Daytec. You couldn’t meet more down-to-Earth people. Arlen began his working life as a postman while building bikes in his garage. It’s only idiots like myself who decide to drop everything, go through a divorce and write books for a living who are on the brink of poverty. At least I can say I’m not a yuppie. The tank was still in place, Myron’s wheel continued to be round and roll as we pulled in just before a thunderstorm. Adjacent to the motel was a run down but functioning gym. Although the equipment was rickety and loose we hammered our bodies until we couldn’t walk and beat feet out of there. Every year on the way to Sturgis, Thomas throws a major party for his wife, Cheryl. Tom and Cheryl ride from the Bay area to Sturgis annually on one of Arlen’s luxury liners. He pushes that black beast with red and orange flames, with his wife on the back throughout the entire trip, keeping up with us hot rods. Quiet and unassuming, they plow down the freeway each year dressed in all black, riding hell bent to reach the Bad Lands. Each year at one stop, Thomas makes arrangements to feed and pour for all the Hamsters to celebrate Cheryl’s birth and their relationship. I don’t need to eat or drink that night. It’s enough to watch Cheryl’s face glow as he introduces her once more to the rabid clan. She glows with appreciation and love for her man. The “wind ’em up” call came at 7 a.m. the next day and a handful of riders jammed to breakfast, scarfed their eggs and omelets, asked for peach pie without success and rushed back to the motel to be with the gang as they rode out. We had 320 miles to go through Durango, over the pass into Silverton, up to Delta and into the mountains leading to Aspen. About 30 of us rode out together. There’s nothing more boring than riding in a pack. You can’t look around, check out the girls or look for peach pie. You can’t stop to pick your teeth, scratch your ass or look at the valley below. You can’t fuck around and do wheelies or someone will vote you out of the club. Well, we learned this the first year and then gradually worked our way to the front of the pack and disappeared over the horizon ahead. If a club wants to look impressive, they should meet five miles from their destination and ride together into town. Riding in a pack is fuckin’ dangerous but damn, it looks impressive. It’s the slow guy in the middle of the pack who falls asleep and wipes out the rest. Since I was still testing the handling of the blue chopper, I held back as we entered the mountainous curves leading out of Durango along the narrow gauge railroad into the steep mountains ahead. The tank held fast as we rolled through the sweeping bends and I warmed up to the morning sun. Soon I was trying to drag something as I careened around one curve after another, reminiscing about the touring chopper four years ago and how I had to shift my weight to keep the bike as upright as possible until I could get to a welder at a gas station in Silverton.
 As I cruised into the old mining town, I pulled into that same gas station and two of the guys who helped weld the swingarm into place were still there. One showed me his Knucklehead chop at the house behind the station. Some of the guys who hadn’t eaten breakfast were chowing down — another reason packs are a pain. So I grabbed my work gloves, saddled up and headed out of town with one Hamster wannabe behind me on his dresser. Little did I know that this would become a day to remember. We blew out of town and into the hills beyond. The trip at that point was perhaps the most picturesque, with rivers running through the pines below as we rolled through Montrose, then Delta and off at 133 toward Carbondale. We were making good time until we came to a small canyon outside of Carbondale, where the road was torn down to the dirt, grated and driven on enough to become washboard. The rigid handled it well, but I didn’t like the jarring impact on the tank. It seemed to scream as I bounced from one pothole to the next ridge and gully for three long miles. When we finally pulled onto the smooth pavement, I knew I was in trouble. I had a new series of vibrations screaming at me. Another 30 miles and we stopped for gas in Carbondale. We had covered 122 miles. Although I was richening the mixture due to the altitude, I put a mere 2.216 gallons in the chopper for 55 mpg. Aspen wasn’t far off. All we needed was fuel and 23 miles and we would be staring at a Jacuzzi, a pool and drinks. I looked at my cellular phone entrepreneur partner, Milo, and at my tank. Both the front and the rear tabs were broken and basically the tin tank with 25 pounds of gasoline stored inside was being held on with a piece of 3M tape a 1/2-inch wide. Milo shook his head, but I had to jinx the situation. “No problem,” I said, “I had to pry off the tape the last time. It’ll hold.” Yeah, right. Half way up the hill toward Aspen, I went over a slight bump in the road and the tank landed in my lap. Milo was in front and I lost him. I held onto the tank and pulled over. Setting it back in place, I stared at the wonderful paint work by Harold Pontarelli and pondered my situation. I wasn’t thinking immediate fixes. I was thinking about tomorrow and finding a welder, about the outcome of this run, and finally about Agent Zebra and the east coast contingent that was barreling up from the southeast. I had to make it, to fix the fucking tank and keep rolling. I was riding the first rigid chopper to Sturgis in, well, there were perhaps infinite rigids converging on the Bad Lands, so what was my point, anyway. Finally, I awoke from my nightmare, dug out a bungee cord from my bedroll, ran it over the tank, behind the gas cap and down to the front legs of the frame. It seemed to be stable so I rode on into town holding the tank with one hand. We were staying at a swank hotel in the center of trendy Aspen, but all the glitter and class only told me there wasn’t a welding shop in town. I had a mission. I unloaded my shit, checked into my room and picked up the phone. Myron came in about the same time, went to the room and tried to turn on the television. It didn’t work. That was a precursor to the events that lay ahead. I made call after call until I found a welder in Basalt, some 30 miles away. While I was calling all over the valley, Myron attempted to order something to eat, but the swank lodge didn’t start room service until 6 p.m. The welder I was looking for couldn’t be squeamish about welding gas tanks and I made sure to mention that pitfall immediately while calling around. With the welder lined up and a plan in place, I went to the bar to get a drink to calm my nerves. The bar didn’t open for another hour, but Myron and I glared at the barkeep until he found a couple glasses and filled them with Jack. We opted for an early dinner in town, so we attempted to clean up for the event. In the head, I stepped on a piece of glass and bled all over the slate floor. Then I attempted to iron a shirt, but the iron didn’t work. Myron, Milo and I went to dinner with Randy Aron of Cycle Visions in San Diego. I offered to pay for dinner, since Randy was going to run my ass around Aspen to find a welder, but my credit card was turned down. Plus the restaurant didn’t have any peach pie. Hell, the shitty tabs on the tank were my fault, not Randy’s. I was beginning to feel jinxed. El Swank Aspen hotel seemed OK. What else could go wrong? I discovered later that Wachovia bank was trying to track me down. Seems some biker had accosted my card and was riding to Sturgis on my dime, ‘cept that crazed thief was me. Randy, a young, stylish sorta rider is one of those Hamsters everyone complains about. He doesn’t look like the average biker. He drives a new truck and builds world class custom motorcycles. He’s talented and good looking but how did he get there? He started a plumbing business 20 years ago and worked his ass off. He took the risks, learned the trade, found customers, dealt with employees and finally became successful. Let’s shoot the mutha fucker. While the rest of the crew slept in their little sawdust Hamster Beds, I crept out at 6 a.m. and loaded the long chop next to Randy’s hand- formed dresser in his truck. We paid close attention to my sketchy directions and rolled out of the mountain pass down to Basalt where we took a right on Frying Pan Road and found a small industrial building. I pulled up to 3-D Iron and Mike Horn, a skinny, wrinkled man, greeted us with the bad news.
 Peering up at me through thick glasses, he said, “If it’s a gas tank, we won’t weld it.” Reaching for the tank that we had taken off the frame, wrapped in towel and duct taped for security, I noticed that liquid had filled the corner of the truck bed. On second glance, I became rudely aware that the petcock had come open and it was gas that soaked my clothes and my bedroll. I rolled my eyes and asked if we could pay for the equipment and weld it ourselves. “Nope, can’t do it. Insurance liability, you know,” he said. “But I will make a strap for the tank.” While I stared at the old welder in astonishment and tried to explain that I spoke to someone who had given me the green light, I knew it was futile. I could see a guy in the back of the shop bent over a bare metal trailer frame. He would only glance in my direction from time to time. Perhaps it was the guilty culprit who said to bring the tank down. Randy stood beside the truck and greeted several guys from the sheet metal shop next door.
 Most of the middle-aged workers were going to Sturgis and they readily struck up a conversation. The shop was neat and most of the guys had salt-and-pepper hair pulled into pony tails. Randy tapped me on the shoulder. “These guys will let me use their mig welder,” he said, referring to the team at T&E Marshall Enterprises Inc., makers of custom sheet metal and heating systems. We finally had a formula for success. The old guy from the crappie shop made the strap and drilled the holes while we emptied the tank and readied it for welding. Randy flushed the tin container with water, then held the tank mouth against the exhaust pipe of his truck until the carbon monoxide dissipated any gasoline fumes. The tank smelled clean and he fired his lighter above the mouth. Nothing. In a matter of five minutes, it was ready to weld safely. Randy tested the welder on a piece of scrap. The mig would do the job, but he wasn’t as comfortable as if he had his tig. The mig would have to do. Welding dissimilar metals together is a trick I was once very adept at. The 16-gauge material of the Sportster tank had to be mated to the 1/4-inch thickness of the strap and Randy went to work. Sparks flew, metal crackled and paint sizzled as he welded the tab in several places.
 Since I had brazed the original tabs in place, the braze melted and flowed into the welds, causing them to sputter. We let the tank cool and filled it with water. It leaked, my worst nightmare. Even worse than breaking tabs or having a loose tank was the threat of a leak. Randy tried again, but the leaks were coming from under the tab where it was impossible to reach with the welder. In an attempt to fix the existing leaks, Randy blew a hole in the tank. He worked on the hole, then I suggested that we braze over the welds to seal them. It wasn’t a bad idea, but a torch and braze was going to generate much more heat to a wider area and Randy was considering the damage to the paint. So far, Harold’s creativity was unscathed. Finally, Randy and I began an hour job that could have taken 15 minutes. Because of the bondo smoke and the steam from the wet rag Randy held close to the area I was attempting to braze, the torch kept blowing out. It took forever to coat some of the welds with brass. We checked the tank again with water. It seemed to have sealed. We packed up and headed north. Checking tank leaks with water is like filtering your gas with screen door mesh. It’s an indicator, but not a good one. I felt that the only way to guard against gas seeping through the welds was to seal the tank. We had some discussion about saving the tank and welding on it in the future with sealant inside, but finally settled on trying to find some Custom Chrome Tank Creme, a three-stage process. We went to a small diner for lunch and I got back on the phone.
|
Sturgis 2001 Buell
By Robin Technologies |

It’s part of our job as moto-journalists to try what’s outthere in the American market and report back. The ultimate test is to take a bike, customize it and ride it to Sturgis. What could give you a truer test of a bike’s ability to look cool and endure a long run? I’ve been fortunate enough to customize and ride everything from nearly bone stock bikes to ground-up customs. Each trip is an adventure. Each run has varying characteristics, and with each journey there’s a new woman, but that’s my problem.

This year we needed to make a choice. I had a Kenny Boyce ProStreet frame that I planned to load a Twin Cam engine into and rideto the Badlands. I also had a 2000 Buell M-2 and I had recentlyinstalled dual Mikuni carb heads on my ’48 Panhead. Since I’m alsoworking on a Pro Street custom for Dr. Ladd Terry, the Bikernetmorale officer, I decided to hold onto my Pro Street project for nextyear. Another doctor, Dr. Hamster, had been working on his 34 VL andwas excited about riding it to Sturgis. We both knew that the antiqueride would be a long shot.

On top of the time/money consideration, I enjoy riding the M-2. It’s the hotrod of Harleys, light, agile, brakes like a madman and hauls ass. The guys at Harley like to refer to Buells as their street fighters. I have to agree. So I decided that I needed to put some miles on it and experience its ability for distance. Like last year when I told folks that I was going to ride a rigid toSturgis, I got the same reaction to the Buell. I rode it toLaughlin with a passenger and soft saddlebags. The bike handled likea dream. At 100 mph, it was more stable than most Big Twins, andacceleration was always at hand. There’s no hesitation from zip to 100 mph, and that’s my riding range.I was advised at one point to put a smaller pulley onthe rear for lower rpms while cruising. Later I found that themodification had its glitches. I found that the bike was glass smoothat 100 and still zippy and that was good enough for me. We began aseries of mild mods with a cam change to the Screamin’ Eagle raceversion and added the stainless race header. My partner to Laughlinhad a blast and was so comfortable she passed on several rest stops.We kept going and ran out of gas in the desert. So you can understandwhy there’s a new woman each year. She’s still out there somewhere.In the final analysis the decision was made to ride the Buellto the Black Hills Rally.
If you’ve read the techs, you know what wedid to this puppy, so I’ll go beyond the build to a few conceptionsabout Buell. First, there is no fairing to speak of, but I actuallyfound the bike extremely comfortable to ride. The little chin fairingkeeps the big blast off your chest and I didn’t need anymore. I mayregret those words as I hit the Colorado monsoons, but so far, sogood. Some guys complained about the sitting position, but I found itcomfortable once I knew how to sit. Like any bike, you need to findthe groove. The brothers talked about leaning on the bars and toomuch weight on the wrists. I found that if I leaned over the bars Iput excessive weight on my grip, but if I sat on my ass, it was nodifferent than other bikes, although under hard braking situationsyou are thrust forward.

Some felt the ride on a Buell would be rough, yet most wereunaware that the bike is basically a rubbermounted Sportster, andincredibly smooth, especially at 80-100 mph.

Others thought I mightlook ridiculous, and I told them I look ridiculous all the timeanyway. What difference would this year make? Others don’t like midcontrols. If you’re not used to them, you may find that you need toadjust, but once you get the hang of them, you’ll find less pressureon your back.

Alright enough perceptions and conceptions, let’s get readyto ride. The Buell has 400 miles on it since we made thecosmetic changes and cured some rocker box leaks.
This last week weinstalled Joker Machine billet and anodized turn signals on it and hidthem as much as possible.

We picked up a small oil cooler from ChromeSpecialties and installed it with longer oil lines at the front ofthe bike. The oil capacity is about 2.5 quarts, which always makes menervous, so we changed oil and plugged in the largest Dyna oil filterwe could find. The filter and cooler combination allowed us to squeakin 3 quarts and take some precarious kinks out of the lines. I alsostopped by Joker Machine and they liked the mods so much they told meto run one of their point covers or die.

Dewey’s Custom Pegs makes thecleanest air cleaner cover on the market and it fit like a dream.Finally we ordered a chrome hardware kit for the rear pulley. While disassembling the rear wheel, we polished the right wheel spacerand the belt adjuster guides–not bad touches.
So Sturgis 2001 is one week away. If I collect enoughaluminum cans off the beach I’ll have a pile of quarters for spendingmoney. The woman in my life is the best candidate to run Bikernetwhile I’m on the road, and I’m ready.

This is our quest each year,to build a vehicle and make it to the Badlands to talk about it. I’llhave a full report upon my return. Hang on.
The Amazing Shrunken FXR Part 5
By Robin Technologies |

You’ve been there. You handed the Makita cordless drill toyou’re drunken buddy, and he drilled a hole in your big screentelevision. You tried to wrap the extension cord around his neck andfinish him off. We came close to blows in the garage a couple ofmonths back. I spent days carefully welding chunks of Samson exhaustpipes together to form a one-of-a-kind exhaust system.
All the welds were performed with gas and hanger rod. Thepipes weren’t perfect, but they fit the bill. They were actuallyintended to be prototypes, to be duplicated by a paid professional.After the first pass was completed the pipes fit like a glove,although they were artistically rough around the edges. Nuttboy cameby on his Wednesday afternoon escape, and I handed him a highspeedgrinder and instructed him to round off the welds. I worked onanother project and paid no attention while sparks flew. When he wasfinished he tapped me on the shoulder and said humbly, “Not sure thisis what you had in mind.”
He had ground right through the pipes and left gapingholes alongside most of the welds. In addition, I discovered to myteeth-grinding dismay, that there were still large sections of thepipe ground so thin, that as soon as the torch tip came within 6inches of the surface the pipe melted away. I spent another whole dayfilling the gaps. Who knows what will happen when the struggling bikefires to life. We’ll have the only exhaust system on earth withbaffles throughout.
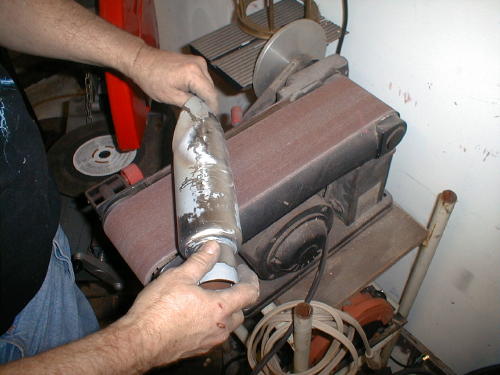
That’s not all. The grief continued. I hand made a mufflerusing a portion of a Samson baffle. We purchased a chromed, truckfender tip from San Pedro Muffler and went to work, but after hoursof screwing with the shiny metal we almost shitcanned the unit. Thefender tip was made out of a strange metal, almost pot metal, thatdidn’t seem to take to the gas welding and wouldn’t respond tobrazing. For every hole I filled, another crack lurked. I welded,then smoothed on a bench grinder only to find cracks and holes tofill again. The shorty muffler probably weighs 50 pounds due to thevast layers of welding rod. As it stands, this is a pure prototypeexhaust system. We should use it for testing then shitcan the rankpiece of shit and start over.
Click to order Catalog!
Frustrated, but pleased with the overall look we were readyfor final metal work. This bike is being built by inexperiencedhands, not professionals, in our backyard garage. Sure, I’ve builtsome bikes, but I wouldn’t consider myself a metal fabricator. I cameup with the initial design and we roughed out elements, but we neededa master metal worker to finish what we started. There are preciousfew, true metal craftsman, who I know. One is Billy Westbrook,another is Jesse James and recently, in the news, we displayed metalwork by Roger at Goldammer (Goldammer Cycle Works Ltd.,www.goldammercycle.com ,1-250-764-8002). High quality workmanship.
They’re out there but not on every corner. I stumbledonto another super-slag artist under my nose. James and LarryFamighetti are Hamsters and own a corrugated steel metal shop inHarbor City, California, called Fam-Art. You’d be tweaked to rumbledown Narbonne Street and stumble across this rusting corner buildingthat’s got to be the oldest swaying dump on the block. Theyspecialize in structural steel (you could never tell it from theircreaking tin shed) for homes and buildings. Large chunks of steel,massive shredders, presses and welders are scattered around the funkylocation that’s reminiscent of the first shack Harleys were built in.

Nuttboy and I darkened their doors a couple of times toask them to flame-cut a couple of chunks of steel for our fenderbrackets. The more I hung around the more quiet-James began to showme steel components he had fashioned for some of the local riders. Herebuilt and reformed Harley taillights to eliminate all the edges andgrooves, then welded them to fenders so that ultimately there were noseams. The more I gawked at the sculptured parts, that demonstratedhis ability, the more I knew we had discovered a man capable of BillyWestbrook fabrication qualities. We hauled the entire FXR to Jamesthe next week.
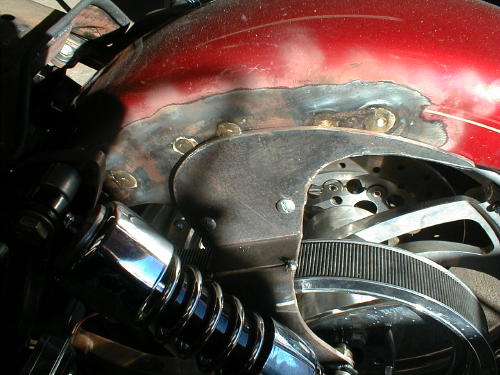
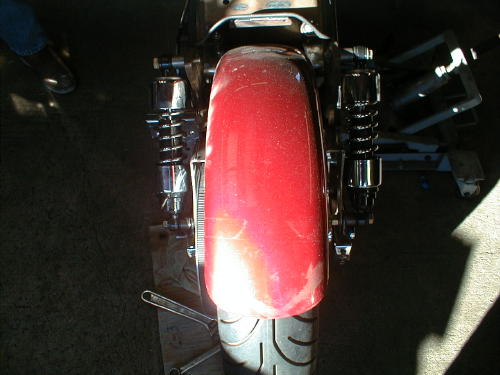
James relocated the straps in such a way to narrow the shockplacement keeping that shrunken look in mind.
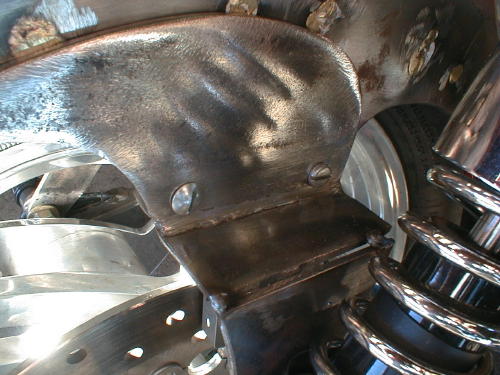
This is a close-up of the right fender strap. It’s beencorrected, reformed and readied for final welds.
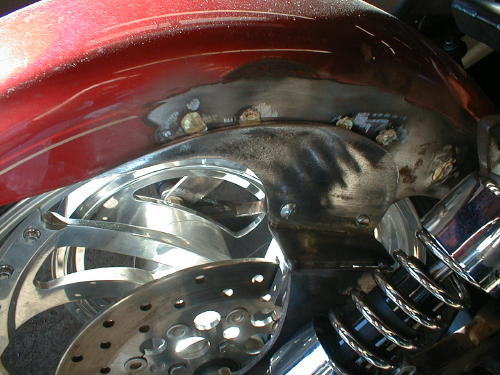

We cut and fitted the tank and made the mounts, butJames filled the underside, rear section for a perfect fit.
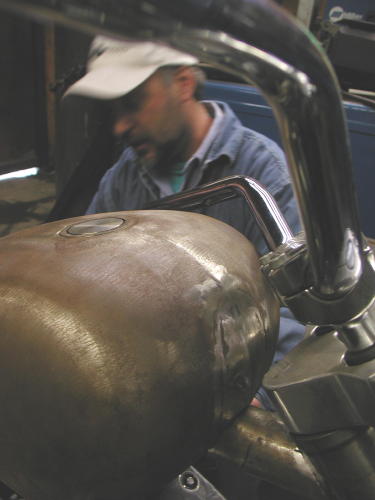
We jacked up the front of the tank and mounted it, butJames filled it and formed the front of the tank to match the customridge along the top. He even made paint work suggestions that I foundinteresting. “If you paint a ridge like this with a light color,”James said, “The ridge will disappear.”
We decided to paint the bike a light House of Kolors pearland create a dark teardrop panel on the top of the tank. He alsocreated and welded fork stops to the neck.
As we rolled out of the shop that day James still hadfinal welds to complete. He straightened out our seat pan, but neededto figure out a mounting arrangement. Finally we needed the CyrilHuze front fender brackets checked and welded into place.
We should have the Shrunken FXR back in our clutches inthe next couple of weeks. We need to finish our rear brake andshifting mechanisms with Giggie from Compu-Fire, fire it up for atest ride and tear it down for paint.
Oh, I need to untie Nuttboy. I need that extension cord.

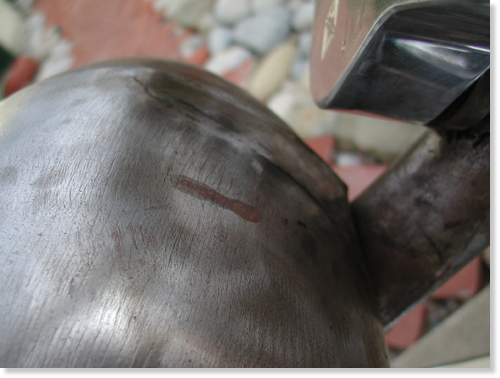
The Shrunken FXR returned recently from Fam Art, in HarborCity, California (310-326-2141). They welded, shaved, mounted theseat, manufactured fork stops and saved our poor- construction asses.James Famighetti mounted our Cyril Huze front fender, welded andformed the tabs and informed us that the Avon Venom was too large forthe narrow glide front end. It was our turn to work on it.
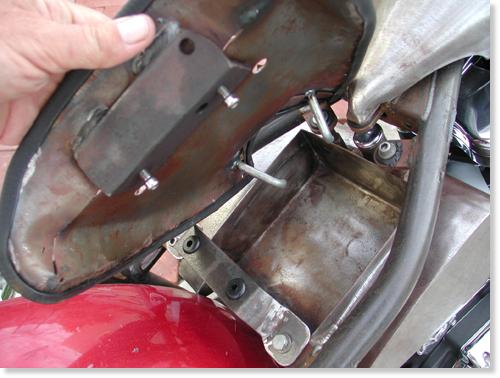
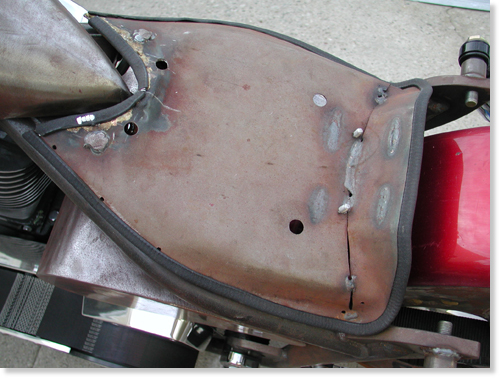
Note that James mounted the seat pan so that the edges wouldnot touch the frame paint in the future.
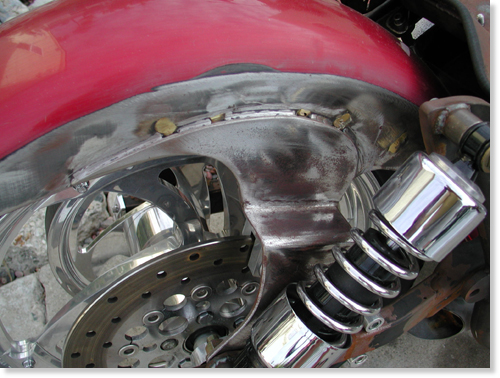
Like any self-respecting bikers we hate to have a bike, oreven components out of our mistrusting mitts. We had another dilemmathat needed handling. The bike still didn’t have a kick stand, and weused two 2 by 4’s, to hold it upright, when not perched on the lift.There’s a trick to this maneuver. If I backed the Pro Street FXR outof the garage and wasn’t hauling the wood planks, I was screwed. Ifalone, I could stand there for hours waiting for someone to strollpast carrying two 2 by 4s–unlikely. After a couple of unsteadyoccurrences, the bike didn’t move without the wood chips on the seat.You can imaging the major pain in the ass this caused.

We ordered a weld-on, Sportster style, kick stand fromCCI, and it arrived complete, with all chromed hardware and thebracket to be welded on the frame. There was one problem indetermining the position. The front Avon was a 100/100 18-inch, andwe planned to replace it with a 90/90. We needed to have the finishedPerformance Machine wheel in place.
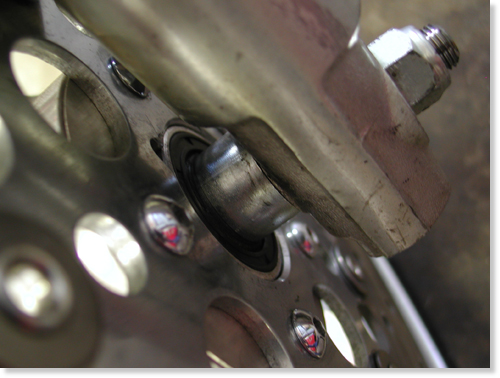
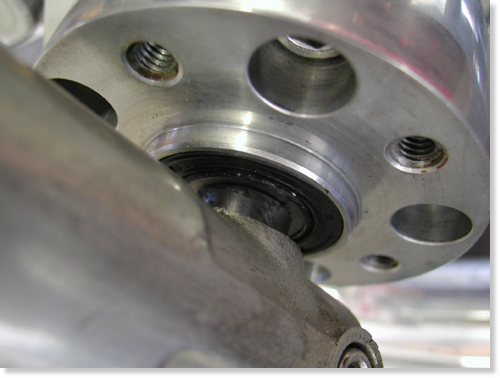
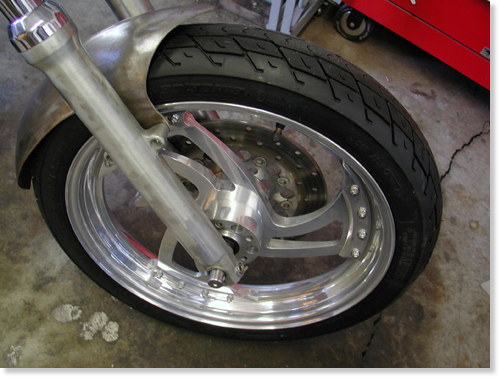
The Avon Road Runner tire arrived, and we had it installed at thelocal Yamaha dealer. James pointed out to us that our front tirespacing wasn’t perfect so I sliced a spacer to give us about a1/4-inch spacer on the right side of the wheel and about a 3/4 inchspacer on the left. The tire, almost centered, now had clearance, andthe wheel floated effortlessly under the modified Cyril Huze frontfender.
Now we were cleared to install the Hot Match weld-on kickstand.This is a tricky assembly process. First, you need to be absolutelysure you don’t plan to change the front wheel, to a 21, or extend thefront forks. If you do, the kickstand will need to be bent ormodified to fit. It’s not the end of the world, but it will destroythe chrome.
The other trick is determining the right position. Here’swhat my feeble brain told me, since the directions with the Hot Matchdidn’t cover positioning, except to recommend that you take yourtime–no shit. First I stood my Road King straight up and lifted theside stand until it was locked in place. Then I measured from thepoint that would touch the pavement to the ground. It varied fromaround 2.5 inches to 3 inches. I noted that the Hot Match lever wasnearly 3 inches shorter from the point of contact to the center ofthe pivot point. I took that into consideration. I also noted that Ihad lowered my King with shorter shocks, then added a larger Avontyre (a 150). Ground clearance was also a consideration.

Then we picked a placement area on the frame. Our designcalled for little or no forward controls. I kept the tab under theBDL belt drive system and hidden as much as possible, without beingso far back as to create a balance problem. If the weight is forwardof the kickstand, sometimes it can topple the bike. One otherconsideration. When the stand pops up you need to be able to reach itwith a toe, and it better not ride on the belt, or you’re toast. Makesure to check all that, before you burn any rod.
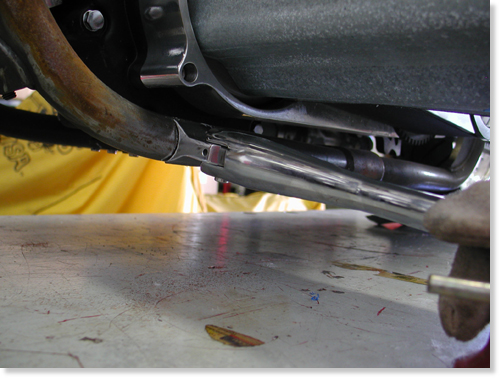
I sprayed the frame rail and the components with asilicone splatter preventative. It obstructs slag from sticking tocomponents. It also made the frame a slipper bitch. I tried settingthe stand end on a socket nearly 3 inches off the deck. Then Iconsidered the differing lengths of the stands and shifted to 2.5inches. Sin Wu was called, from the bedroom, to hold the stand firmlyin place. I marked it, with a grease pencil, then ground the edges ofthe bracket to be welded to the frame. Extra grinding took place toform a snug, metal to metal fit. In order to make all this work weneeded to partially assemble the kickstand without the ball andspring.
The easy-to-read directions called for disassembly, but we left ittogether and used it to hold the bracket in place for tacking. Beforetacking I backed the bike out of the clamp, holding it upright,positioned the bracket in the white grease pencil marks and leanedthe bike carefully until the stand rested on the flat surface. Itlooked cool, so we re-clamped the bike securely, held the stand inplace, protected the belt from hot slag and tacked the sucker withour Millermatic welder. Then we took the stand arm off the bracketand welded it some more. That would hold it securely until we torethe bike down for paint.
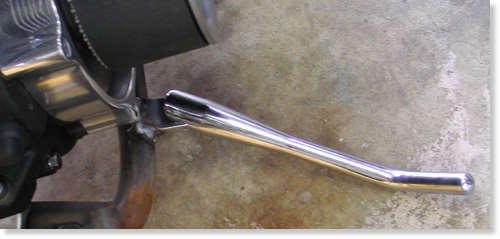
The Hot Match unit from Custom Chrome is a well madeprecision unit delivered show chromed. The instructions includedrecommendations to apply anti-seize to the spring and ball. Theyendorse using Red Loctite on the pivot pin threads. We didn’t becausethe bike would be torn down for paint in the near future. The armneeds to be placed firmly over the bracket and pushed into placebefore the pin will ease into the hole from the bottom. It doesn’thurt to have a spare set of hands and someone holding the bike.There’s also a pivot pin set screw to prevent losing that preciouspivot pin and kick stand arm, on a desert highway, in the middle ofArizona.
That’s it, except to mention that when we head to thepaint shop, we need to tape off the chrome bracket, so the painterwill paint over the welds but not the chrome tab.

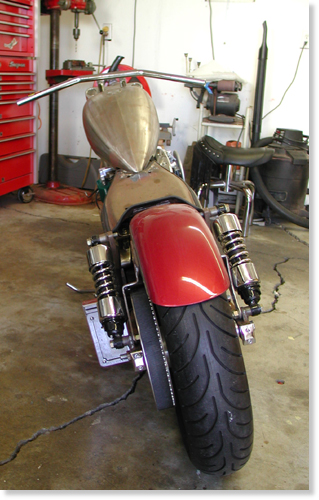
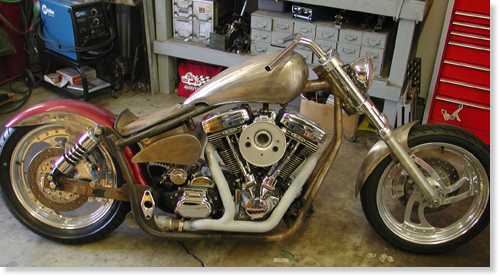
As you can see this bike is damn close to the spray booth.I need to coerce Giggie, from Compu-fire, to ride his FXR out to theBikernet Headquarters with our mid-controls. Once the Joker Machinehandlebar controls are bolted to the modified bars, we’re ready for atrial run, then off to paint. Stay tuned.

–Bandit

Custom Chrome ® and Chrome Specialties ® have joinedforces to bring you the most comprehensive product offering in theHarley-Davidson ® aftermarket! At over 1,400 pages and over 25,000part numbers, our 2003 Catalog features everything from nuts & boltsto HR3 bike kits, and sets the NEW industry standard.
ONLY $9.95 + 6.95 Shipping**
–Bandit
Back to Part 4…
The Amazing Shrunken FXR Project Part 2
By Robin Technologies |
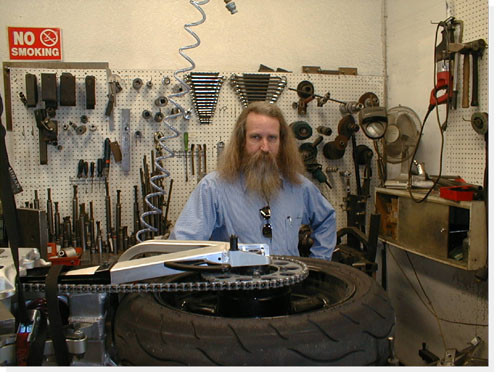
Like the enigmatic fortunes you find inside thosefolded Chinese cookies, our visit with Dr. John–the”frame doctor,” was a mix of New Age mysticism andpractical guidance. The week before, Bandit and Ibrought the rolling Pro-Street frame to the gooddoctor. We gave the him our best ideas of what wethought the bike should become. Basically, we wantedthe bike to fit my body proportions, to shrink theframe around the engine and to still have elements ofa street chopper.
Bandit and I had been trying to create a bike that hada real “signature” identity, yet we weren’t sure whatthat would mean. We tried to convey our concepts withawkward babbling.
Stroking his long, gray beard with a knowing gravity,the doctor calmly listened to our ravings. Eventuallyhe gave us a broad grin through the tangle of beardand said, “Don’t worry, boys, I understand exactlywhat you need.”
We had left the bike with vague misgivings.”Do you think he really has a clue what we want?” Iasked Bandit.
“I dunno,” Bandit said, staring off into the acrid,smog-laden sky.”The guy’s kind of strange, but everyone I’ve talkedto says the guy’s a wizard,” Bandit musedmysteriously.
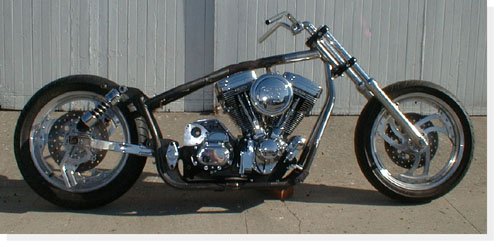
When we pulled up to Dr. John’s shop, there was ourcreation leaning up against the wall. Not averse tostreet-corner poetry, I intoned, “What a bitchin’fuckin’-lookin’ bike.”
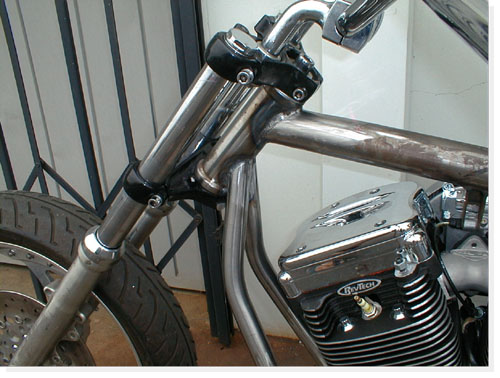
“Man, that bike is really unique,” Bandit exclaimed ina more civilized tone.
As we oohed and ahhed about the bike, Dr. John camearound the corner, grinning. I jumped onto theseat-less bike and grinned. It fit perfectly, betterthan an O.J. leather glove.
“I really think you’ve got something good goingthere,” the doctor spoke with unconcealedappreciation. “I wasn’t sure it was going to workuntil I got into it. The bike began to speak to me. Ithink it’s got the right karma,” the doctor spoke withmysterious gravity.
All this mystery was not without reason. Dr. Johnstarted this trek to ultimate frame adjustment workingat Goodyear Tires. A fortuitous opportunity, sponsoredby Goodyear, for advanced training at L.A. Trade Techgave him the chance to try motorcycle repair.Recognizing that he was more interested in bikes thantires, he began a course in bike repair withinstructor Pat Owens.
Dr. John soon connected up with a bike shop calledMotorcycle Menders. Right away, he could tell that hehad a better-than-average sense of what was needed tofix most frames. Eventually, he opened his first shopin Covina in 1983. In 1990, he moved to his presentlocation in Anaheim.
Dr. John’s expertise is extended to both traditionalstreet choppers and to the more exotic road racebikes, where competitive tolerances and alignmentshave seconds off of lap times. The challenges to hisexpertise in frame adjustment include the extremes ofcreating a bike for a 6’9″ rider and a Harley with a25″ over stock front end. For his own use, he isbuilding a karma-tingling three-wheeler with a VWengine.
In his shop, amongst a tangle of tweaked Ninjacarcasses, “destruction derby” ATV frames, twistedchopper forks and even a mangled Vespa body, Dr. Johnholds court. Side-tracking his stories about gettinginto the frame adjustment business, he mixes conceptsof metal stresses with ideas of mental stresses,Eastern philosophy, acupuncture points, shakras andauras, martial arts movements, elements of a good dietand muscle alignment of the spine.
The conversation stumbles easily into his personalexperiences. After an injury of his own, he explored avariety of methods of pain control, eventually meetingan American Indian psychic whose exotic beautyhypnotized him as much as her cosmic consciousness.Here, a glint comes to his eyes and a wry smile bringsone corner of his mouth up. “A rare beauty,” hemuses. “An aura just like Cleopatra of ancient Egypt.”
Bandit nodded in agreement repeatedly, like thoseDodger dolls that bobble in the back windows of cars,to the good doctor’s banter. Bandit slurped his greentea while listening to enchanting tales spun by theDoctor. While I shoveled in heaps of steaming andspicy-hot Kung Pao chicken, my eyes teared up and mynose started running.
“The magnetic flow is a flux of energy in the bodyof…” The steaming pots of green tea and plates ofexotic Chinese food sent wisps and tendrils dancing inthe air above our table like a chorus of swaying,sensual nymphets.
“The assorted colors of shakra balance…” Thisadventure had the aura of Zeke the Splooty about it.We were on a cosmic motorcycle Magical Mystery tour.
An hour or so later, Bandit and I were back on the 91Freeway with the bike strapped to the bed of hispickup, staring ahead kind of dumbly. “What a trip,Dr. John is,” I said.
“Yeah, but I think he did a great job on the frame,”Bandit said.
“Yeah, cosmic man,” my head was stuck in the ’60s.”What do we do now?” I asked.
“Let’s check out some trippy paint for the bike,”Bandit smiled. “Let’s drive down to Stanton and see ifWes at Venom can come up with something exotic enoughfor this mystery machine.”
“Go for it,” I laughed.
It’s days like these that make bike building seem likethe right thing to do. Bandit slapped in a tape of’60s funk and we were sailing down the road like acouple of latter-day Kerouac and Keseys.
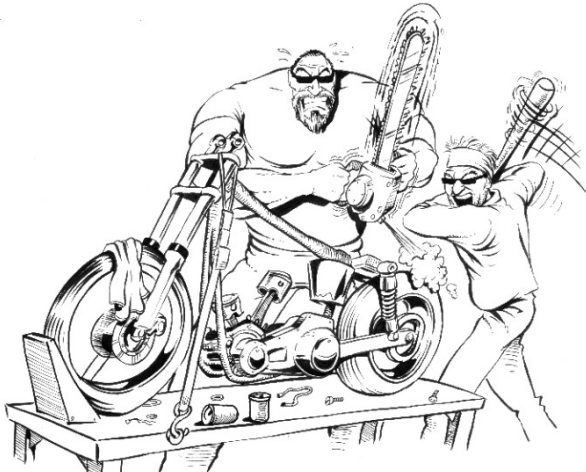


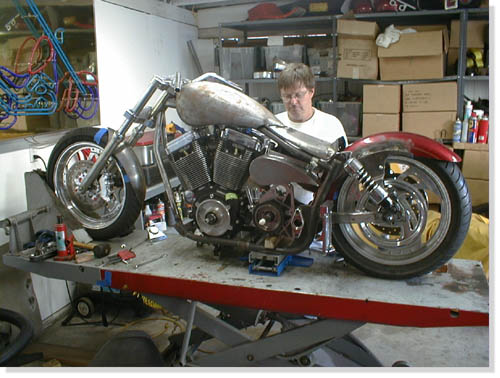
“Hand me a bigger hammer, goddamn it,” Bandit hollered across the garage. We were slamming together as much steel as we could to get this Frankenstein of a bike together in time to show it to the crowds at the Queen Mary Motorcycle Show this weekend.So far this week we’ve managed to cut 1.5 inches off the swing arm. This brings the wheel into the back end of the bike at the point of the pivot. We are designing the bike with brevity in mind. We are hoping that the finished impression will be a bike shrunken around the RevTech 88-inch motor and Rev Tech 6-speed. Oh, we’ll have devilish accents here and there, but the overall concept is lean and mean.
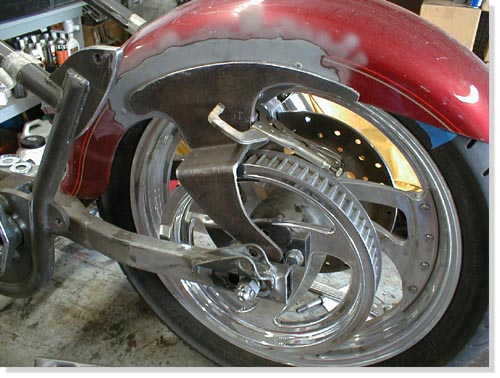
To that end, we are cutting off any unnecessary tabs and struts. Of course, everything changes as soon as a UPS box arrives. Joker Machine parts arrive every couple of days. The foot controls arrived. The new front Avon tire should be here Monday or Tuesday. It arrived, we had it mounted pronto and the fender was looking good. I hauled it to Urs who is a master body man and he widened it to fit perfectly. Having the right tools makes a big damn difference.

A new front tire was called for because the sexy front fender from Cyril Huze was too narrow, since he builds bikes for 19 and 21-inch from wheels and we’re running an 18 (our fault).
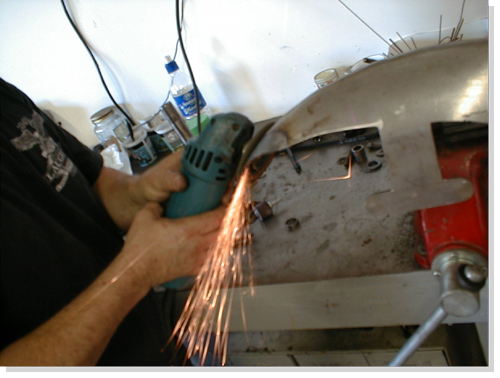
After banging the hell out of the fender to try to squeeze out a fraction of an inch clearance, we decided on a smaller sized tire. We ordered an 18/ 100-90. We hope this will allow us at least 3/8-inch all around.
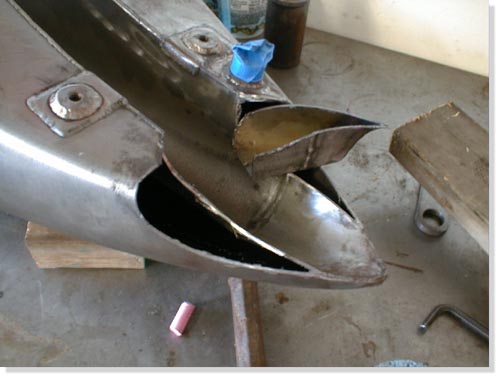
The new Cyril designed stretched tank arrived with the fenders. We cut out part of the bottom of the tank at the back where the front of the seat is, since every goddamn thing we do is backwards. Every builder in the country stretches bikes, we shrink ’em, so the tank won’t fit without mods. This move helped bring the tank down closer to the engine and since the FXR is short, well you get the picture. The tank tabs are in place and welded.
We decided to use an old rear fender off one of Bandit’s past bikes–a Fatboy. We turned it around backwards, the front end will be bolted to the center of the swing arm. Our next problem was how we were going to hold up the stern. After a lot of head scratching, cussing and phone calls we met with master fabricator James Famighetti who suggested that we create our own struts that will be bolted on the inside of the lower rear shock absorber bolt, then welded to the outside of the fender in such a way as to add to the over all look and strength of the fender and conceal the stock aspects. Mounting fenders to swingarms is treacherous. It will vibrate like a dog attacked by killer bees, so it better be strong and still able to remove for touchup.
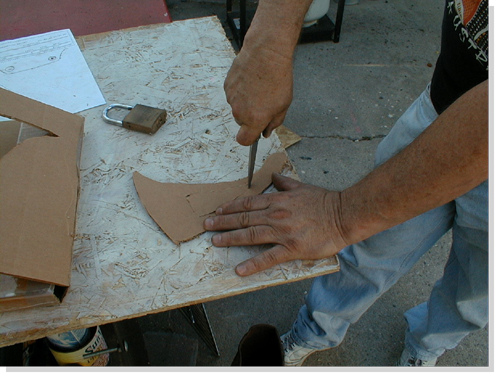
No problem, you say? Ah, ha, not so easy kimosabe! We are pretty sure the strut will have enough clearance for the Rev-Tech brakes on the right side of the rear tire. When you come around to the left side, you’ve got the pully to contend with. So on this strut we added a 2″ dog leg to clear the pulley. I made up the patterns on cardboard and the Fam-Art brothers cut and bent the pieces. Then it was time to fit. We’re getting there.

The BDL pulley from CCI is smaller than the one we used for the mock up. So with our fingers crossed, when all these parts come together this week it will be amazing if they all fit. They did, well, perhaps not perfectly, but we’re getting close.They did, well, perhaps not perfectly, but we’re getting close. If not, “Bandit, get me a bigger hammer, goddamn it!”
Here’s the score. The fender needs tabs and it’s ready. The rear fender needs rivet removal and the massive tabs tack welded. The shock tabs have been cut since the Progressive Suspension shocks from Custom Chrome need to be set wider away from the fender tabs. Let’s see if we can make it to the show. We’re still waiting on Huze oil tank mounting tabs.

The saga of the Amazing Shrunken FXR continues. This project is notonethat is merely slapping together after-market products to build a facsimileof a customized Harley-Davidson.From the start, Bandit and I sought to create a unique ‘signature’ bike.Even though we have used a lot of after-market products, most have beenmodified to fit our design plan. The products we use, from the FXRPro-Street frame to the Rev-Tech engine to the Joker Machine qualitycomponents, to Cyril Huze, Avon and BDLare some of the finest products available.

Because some of the fundamental elements of design were modified, we havebeen constantly fabricating new brackets, tabs, mounts, and studs. Eachmodification created new issues relating to the fit and function of thedrivetrain. It seems as if we’ve bolted and unbolted the elements of this bike ahundred times.For example, the frame was modified by Dr. John to fit the Rev-Tech engineinto our overall design concept. The top motor mount was bent to fit thenewspacing. We used this motor mount point to position the Cyril Huze teardropgas tank. When we positioned the tank we related it to the handle barclearance at maximum turn position. Rubber mount brackets were welded inplace. The tank was cut at the underside back end to fit low on the frame.It looked hot. Next I cut the La Pere seat pan to hug the pointed rear ofthe gas tank and strengthened the seat back. There is a continuousdouble-‘swoop’from the handle bars to the back of the rear fender. The seat pan lookedhot.

Then we tried to put the engine in. It didn’t look fit. The engine wasmere fractions of an inch from fitting. Even if we could have hammered itinplace the subsequent tight tolerances would surely create problems as thebike rattled and roared down the road.
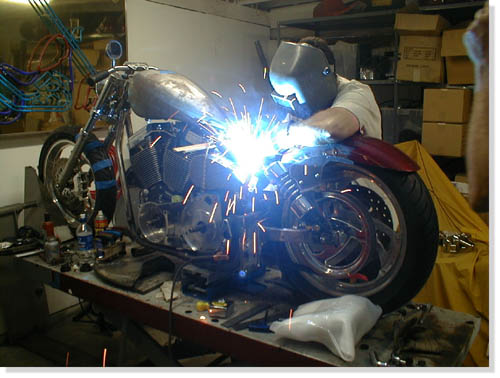
At this point, we cut the original tank brackets and repositioned themodified tank a little higher on the top frame tubing. The tank looked hot,the engine fit, but now the handle bar swing is a fraction of an inch tooclose to the tank. This means we will probably have to have custom handlebars.
It still looks good and we’re still optimistic. Even as wedroppedthe tank down on the new rubber mount brackets and began putting in the5/16″bolts, we found that the right rear bolt was too long to fit. So we got abolt with a thinner head and with my small fingers, I got the bolt in andstarted. We were still looking hot.
We decided to see if the belt fit since Bandit had cut andrewelded the swingarm 1.5 inches shorter for that Amazing Shrunkenlook. Bandit said no, the belt wouldn’t fit. It wasn’t suppose to. Isaid it looked close. As welooked at the bike we realized we’d had to remove the engine, drop thetransmission, which meant we’d have to support the swing arm. It alwaysseems harder than hell to make something easy. So with a couple of scissorsjacks, hunks of wood, and a crow bar, we were able to loosen the rubbermounton the left side of the pivot point of the swing arm. Then we gingerlyslipped the belt in, put the rubber mount back and bolted everything backtogether. Damn! It fit perfect and we were looking hot.

Wait a minute. The right side of the belt was almost touching the edgeofthe back fender. Quick surgery with a saws-all cut a chunk out of thefender. Fender fits, belt don’t rub, bike still looks hot.
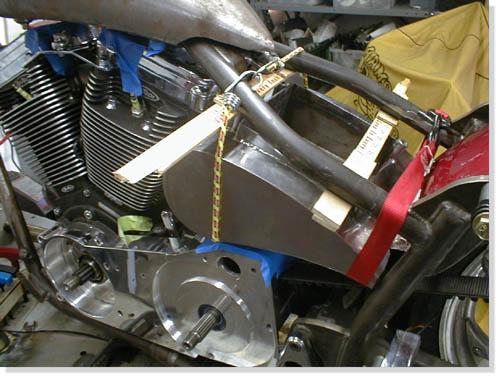
As we cram more operational parts together, the room to move gets lessandless. Next we positioned the oil bag, which also brought up the issue ofthebattery accessibility. With bungee cords, a busted yard stick and some woodshims, we finally got the bag in what seemed a reasonable position. Fourrubber mounted brackets were fabricated then welded into place. It lookedHot. Everything was bolted in place. And everything looked Hot.
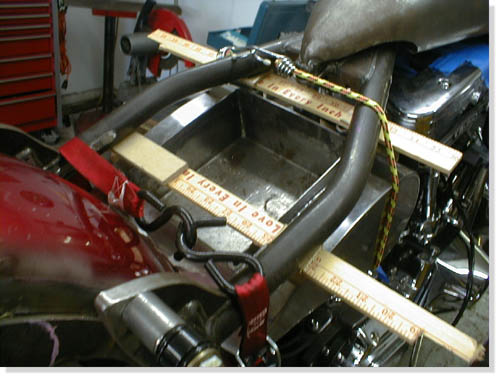
Ah, but not so fast kimosabe. We shaved the fins off the back ofthe oil bag for more clearance. With the two rubbermounts in place atthe rear of the oil bag under the seat pan we had enough clearancefor the battery, in the front for the engine and exhaust, under itfor the starter motor, but no clearance for the ever moving rearfender. It needed at least 1.5 inches of shock play since it’sattached to the swingarm. We had to peel the bag out of the frame andtake it to the Famighetti’s metal fab shop, Fam-Art, for theirexpertise. They came up with a plan to scoop out the back of the bagto the battery box without shortening the overall look of the bag.Then the fender will have the clearance to move with the swingarm andstill look hot.
Next, we neet to investigate whether the Joker controls canbe mounted mid frame. At the same time we will begin fabrication ofthe Amazing exhaust system. It’s gotta be lookin’ hot one way oranother.

–NuttBoy
To Continue……..
Back to Part 1……..
Back to Custom Chrome on Bikernet……..
Back to Joker Machine on Bikernet……..
BANDIT’S WIRE VISE
By Robin Technologies |

A while back, I spent a week one day in the garageof Bikernet headquarters with Bandit. Bandit was hot to putapehangers on his shiny new Road King Classic.
Once I arrived and cooled down his “high-bar desire”, I suggestedputting all the handlebar switch wires inside the bars where theywould be safe from his undue attentions in the future. After a quickassurance on my part that I wouldn’t feel a thing, he okayed the idea.

With the bars off of the bike and the switch wires laid out on thebench, he started whining about “all those wires”. It was at thistime I whipped out the handy dandy “wire vise” and showed him how touse it (it only took three times) to solder the wire extensions inplace. While Bandit amused himself with this new toy, he asked whereI found it. I explained to him (slowly) that the first time I saw onein use was at the old West Coast Choppers shop in Paramount, CA. Oneof the mechanics “Koon” was using the wire vise on one of the shopbikes, when I asked where he found it he replied, “some old guyshowed me one.” I asked to see it up-close and personal and tracedthe wire vise on the palm of my hand so I could make one once I gothome.

After Bandit was done with his soldering chores on the switchwiring, I retrieved the wire vise from the bench only to be stoppedat the door. The only escape was to promise Bandit a wire vise of hisown. So, the only way to one-up the doorman, was to showeverybody just how easy a wire vise is to make.

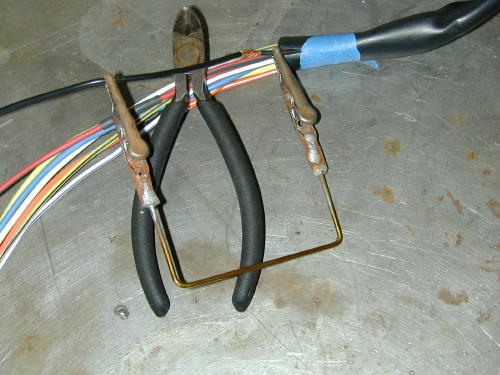
All you need is a short length of wire (a piece of welding rodor even a coat hanger) and a couple of alligator clamps. Here is mywire vise and the components for Bandit’s.

I’ve added a six-inch scale to give you and idea of the overalldimensions. The vise is two and a half inches wide and each arm is aninch and a half long.

After marking where each bend is, the wire is lightly clampedin the bench vise and bent ninety degrees.

You can see the first arm is bent so it is the correct lengthwhen compared to the original.

Pay attention to the orientation of the first arm when bendingthe second arm, make the second bend so the arms are parallel to eachother.

Using the scale to align the ends of the arms, Craftsman sidecutters snip the wire to the correct, equal length.

The wire is bent with the arms parallel and the ends of thearms, where the alligator clips will be soldered, have been cleanedup with Emory paper to insure a solid soldered joint.

Rolled up Emory paper was used to clean the inside of thealligator clip as well.

After the Emory paper treatment each end of the wire and bothalligator clips were cleaned with Super Cleaner from PJ1 to removeany Emory residue.

A good solder joint means using a liberal amount of solderingpaste, here the alligator clip is dipped a few times right into thepaste.

The wire receives the same treatment in the soldering paste.

Now the clips are slipped over the arms of the wire and lightlycrimped in place. The thin wire clamped in the alligator clip jawshelps keep the clips in alignment during the soldering process.

Using a soldering iron held against the alligator clip, feedthe solder into the joint until you see it flow out the other end.Note: it takes a minute or two for the clip and the wire to becomehot enough for the solder to melt and fill the inside of the clip. AnAllen bolt is used to elevate the wire off of the bench top. With theclip sitting on the bench top, it would absorb some of the heat fromthe soldering iron and take longer to solder the joint.

Solder both joints, allow to cool down and your done. Theactual size of the wire vise is unimportant, we found that this sizeworks well in all areas, especially inside the headlight housing ofdressers like the Road King.
I hope this makes Bandit happy for a change. The sonuvabitch wouldhardly let me outta here to go to Daytona. I had to promisethousands of flicks for Bikernet coverages. Hang on for the shots.
Below is a shot of the Wire Vise in use.
Road King 4/15/09
By Robin Technologies |

We decided to take a run at an electrical article, since about 90 percent of problems and breakdowns come from the electrical component. Besides, it’s riding season and we all need to check our electrical connections before we ride off into the sunset. This is especially true of bikes stored in moist or seaside climates. Besides, I’m riding the King to Laughlin and need to check it out. It’s been awhile. Here’s the lastest upgrade to the king: King Meets Zippers and D&D
This article will cover some basic electrical checks, since being forced to charge your battery indicates deficiencies in your charging, or wiring system–or you left the goddamn lights on.
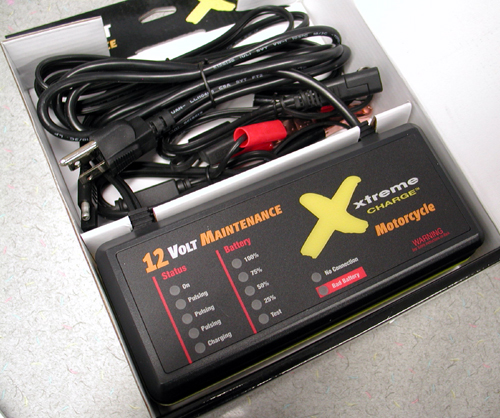
This rambling will also cover all the aspects of the latest battery charger from Biker’s Choice, the Xtreme 12-Volt battery maintenance charger. If you find it necessary to charge your battery, take it out of the bike and place in on a wood or fabric surface, not steel or concrete (draws battery charge). Make sure the terminals are clean. A loose or corroded terminal will prevent the battery from accepting a charge. No shit, just that will leave you along side the road.
Corrosion, or bad grounds cause most electrical problems, especially in dense humidity climates. Check your grounds annually; clean the connectors and the ground surface.
Batteries are nasty dangerous bastards. Make sure to protect yourself around them. Don’t mess with a battery near flame, extreme heat or next to your custom painted Ferrari. If the bastard explodes, you could lose your eyesight and that $5,000 paint job. And that acid crap is super nasty. Don’t get it on anything. There is a cure. Mix some baking soda and water and have it standing by to clean anything with battery acid splashed on it. This is no jive. If you get battery acid on anything, it’s toast. Believe me. I have a number of holy shirts from acid meetings.
Wear eye protection and don’t fuckin’ smoke around batteries. Fortunately, for incased batteries, we don’t have to mess with acid as much anymore, but I’m still building choppers and using bullshit little batteries with acid requirements. Whatta mess. Make sure the area used for charging is clean and well ventilated. Okay, enough for the safety procedures. The Xtreme Charger comes with complete safety warnings.
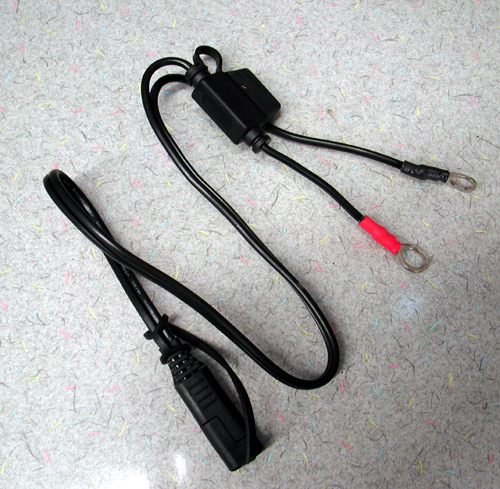
For years I liked Battery Tenders, because they monitored the charging process and dropped the charge level automatically, when the battery was completely charges. If the charge level dropped, the automatically kick into gear again. This Xtreme charge handles those tasks and more to keep your battery strong and charged. Below is the full description of the Xtreme capabilities. The kits also come with a lead set you can bolt directly to the battery for easy access at anytime. Check this out, then we’ll give you some testing, trouble shooting electrical tips:
The Xtreme Charge is ideally suited for AGM and Maintenance-Free Batteries. The combination of PulseTech’s patented pulse technology and proprietary charging algorithm allows it to charge these high-performance batteries more fully while maintaining a safe charge profile for traditional batteries.
The Xtreme Charge Battery Maintenance charger comes in variety of colors, which may suite a particular need. If your looking for the best battery maintenance charger for use on any 12v battery rated from under 10Ah to over 150Ah, pick your color, and get one today.Includes fuse-protected quick-disconnect battery clamps and lugs, Important Safety Instructions and Quick-Start Guide. The Xtreme Charge is fuse-protected, spark-proof, and is UL and CE certified.
Comes with a Five-Year Warranty
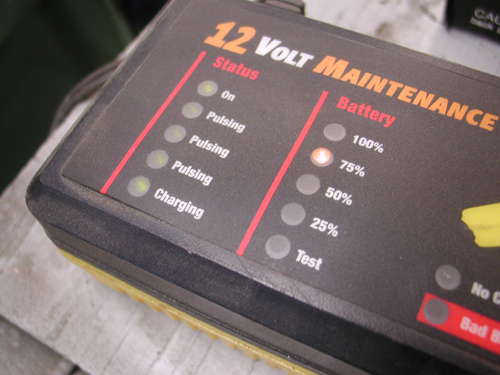
Xtreme Charge Maintenance and Charging
The Xtreme Charge is a microprocessor controlled maintenance and bulk charger for any type of 12-V lead-acid battery. It features PulseTech’s intelligent circuitry, which imposes only the correct amount of charge rate as determined by the continual evaluation of the battery’s condition. By using only the appropriate amount of charge rate, the battery is maintained safely at its proper operating voltage indefinitely. Conversely, if the charger is connected to a discharged battery, its bulk charge capability (2.5A actual/5A effective) will re-charge the battery rapidly and safely so it can be put back into service quickly. Charge rates may be as minimal as 0.2A during typical float up to the full 2.5A for more deeply discharged batteries. This variable float charge ensures optimal charge rate is applied to the battery at all times.
PulseTech’s unique and patented PULSE technology increases the duty and life cycles of your battery by minimizing the size of the lead sulfate crystals. This allows a battery to accept as much charge as possible. PULSE technology helps ensure that your new batteries will stay in like-new condition while improving older batteries dramatically. Duty cycles are typically extended from three to five times for all types of lead-acid batteries!
PulseTech’s ReNew-It Pulse Technology
Twelve years ago, PulseTech applied its technology to a full line of innovative and unique products designed to make batteries stronger so they will work harder and last longer than ever before.
To get an idea of exactly how important PulseTech’s technology is to the performance of all your powersport toys, consider this: The main cause of vehicle failure is battery failure. The main cause of battery failure is sulfation buildup on the battery plates. And ReNew-IT Pulse Technology prevents sulfation buildup.
When it comes to a dead battery, chances are it is still good. You just can’t reach the energy due to sulfate buildup. That means you have to buy another battery even though the one you have may still be useable. Xtreme Charge helps prevent this problem.
How Renew-IT Pulse Technology Makes Batteries Stronger
PulseTech’s Xtreme Charge connects directly to the battery. The Xtreme Charge emits a pulsating DC current that removes the sulfate deposits from the plates and returns them to the battery acid as active electrolyte.
Here is how it works:
1. Lead-Acid batteries work by releasing energy through an interaction that occurs between the positive and negative lead plates and the lead sulfates in the electrolyte.
2, Sulfation buildup occurs as lead sulfates form on the battery plates during the normal charge/discharge cycles. During this process, some of the sulfates enlarge to the point where they won’t accept energy so they stay on the plate. Over time these sulfates can build up until efficiency is reduced and finally the battery dies.
3. ReNew-IT Pulse Technology works to prevent sulfation buildup by removing the sulfate deposits from the plates through a unique Ion Transfer process.
4. The lead sulfates then return to the battery acid as active electrolyte. When connected on a regular basis, our battery maintenance systems will also keep the sulfates from building up again.
Get True Battery Power
PulseTech’s technology works with all types of lead-acid batteries including sealed, gel cell & AGM. By keeping the plates “clean”, batteries charge faster and deeper so they work harder and last longer than you ever thought possible. They also have greater charge acceptance so your battery will recharge faster and release all of its stored energy. With more available energy so your vehicles last longer between recharges and your electronic accessories work better. You get the true power of your batteries.
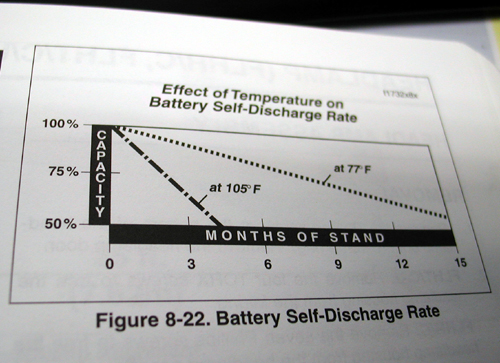
Some of our patented products also prevent the normal loss of battery power on stored vehicles and equipment no matter how long they sit unused—even months at a time.
They even help protect the environment. Since batteries last longer, it reduces the danger of contamination caused by lead and sulfuric acid dumped from prematurely discarded batteries.
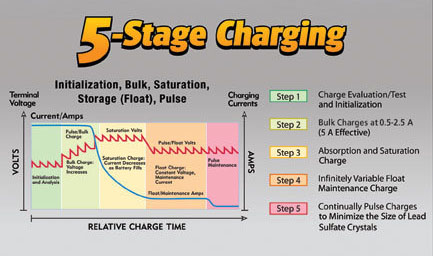
Xtreme Charge 5 Stages of Charging
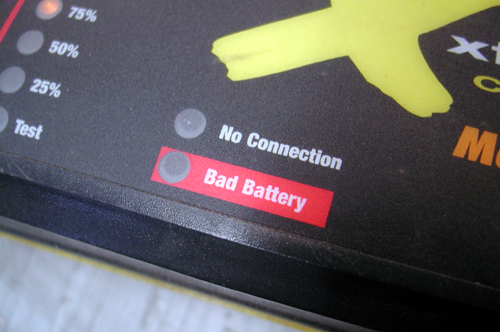
1. Initialization: Xtreme Charge’s unique test feature evaluates the battery thoroughly during initial connection to determine the appropriate charge rate based on its size and condition. It tests the battery continually for as long as it its connected to the charger to maintain the optimal bulk or float charge rate. This test step incorporates a “Bad Battery” indication if it determines the battery is faulty and can not be charged.
2. Saturation: A proprietary computer-integrated technology measures both the voltage and current to determine the appropriate amount of charge the battery is able to accept at any given time. As the pulse and saturation charges improve the battery’s condition, the charge rate is increased safely to an optimal level. This proprietary algorithm protects the battery from the risk of damage due to overcharging.
3. Storage(Float)
4. Pulse(De-Sulfation)
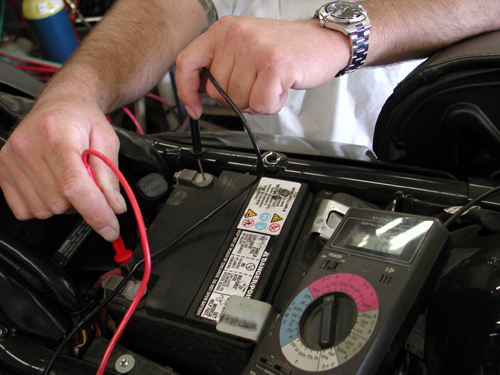
Testing Tips
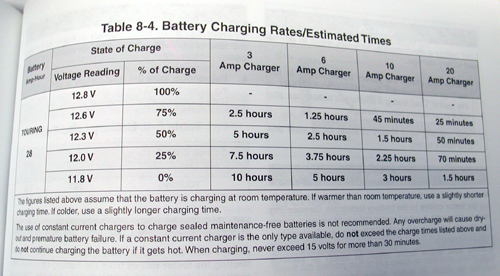
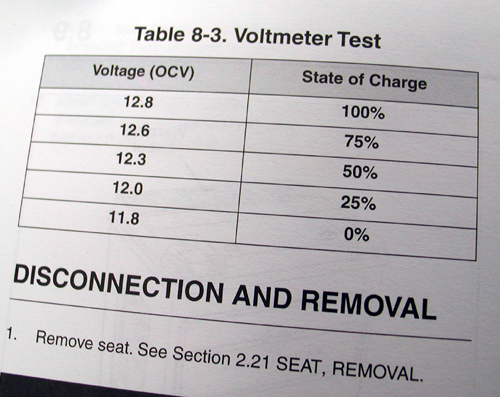
I reached into a couple of Harley manuals and to Pablo, our Bikernet Harley factory trained technician for additional info. If you suspect a problem with your charging, you’re experiencing sparking when you hit the starter, or the battery needs to be charges, here’s some tips.
First, check all your grounds and battery posts for connection and cleanliness. Then take a voltmeter and run it across the batter whiled the bike is idling. It should indicate 12 volts (see chart). Now run the throttle up to about 2,500-3,000 rpms. The indication should jump above 14.1 volts, indicating that the charging system is working.
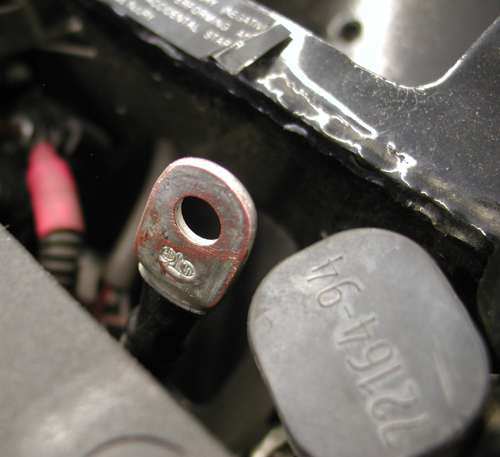
Before you toss the regulator and replace it, you need to check the connections with the alternator. Make sure you haven’t lost a ground or run over a speed bump and ripped through a wire running along the bottom of your frame, which is against the code of the west. Don’t run wires under frame rails. Keep them up and out of harms way.
To check the alternator, here are a couple of tips. Pablo suggests that you take an old regulator plug, with the wires and create a testing lead. If you check the resistance to ground on each lead, they should be open. “But if you take the derby off your primary and run into that burnt electrical smell,” Pablo said, “the alternator is toast.” There’s also an AC test. Start the bike and run it up to 3000 rpms. Attach your alligator clips to your alternator leads and it should read over 40 volts or 16-20 volts per 1000 rpms.
“With the newer models, we have seen some issues with the bikes having batteries going dead after a couple of days,” Pablo said. “A milliamp draw test and total current draw test is the first things you check in the H-D flow charts. Corrosion on the system relay on some models can cause this.”
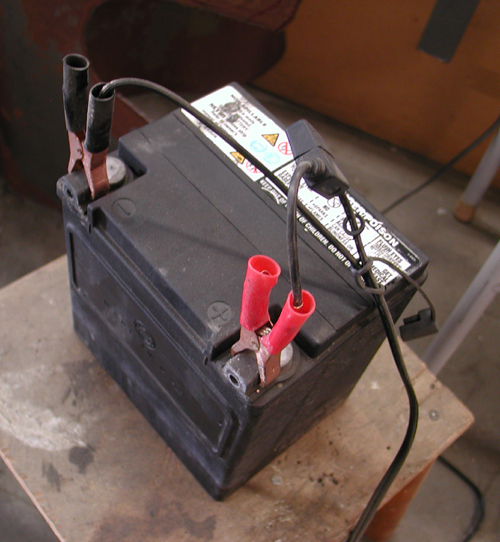
“The service manual, including the electrical diagnostic manual are a must on the new models. You basically have to be a Circuit Head to work on these things nowadays. The H-D Digital Tech we use at the dealership also helps with the serious hard to find electrical gremlins.”
“Fuck, I’m just a old Seabee resistant to change. Man invented technology to frustrate himself you know. Just look at what we have done to a motorcycle over the years. Seriously though, one can, with a cheap DVM (Digital Volt Meter) do allot of trouble shooting on the H-D charging system. Like checking the stator for AC volts output. A grounded stator, continuity checks, etc.”
One more addition from Pablo: DC Voltage output at the battery with the bike running is also a quick check. The system should be putting out over 14 volts but not more than 15 volts at 3000 RPM. Usually, you will see like 14.1 to 14.4 volts or so, that is if the regulator is good and shunting excess voltage to ground.
So, with the Xtreme Charger and a volt meter, you can check your battery, the charging system, the alternator and check for bad grounds and busted wires. That’s all you’re gonna get from the Bikernet tech staff today. Let’s go to the Cantina for a beer.

Bikernet West – Mikuni Carburators to the Rescue
By Robin Technologies |
With Sturgis 2000 looming over Bandit’shead we’ve been firing away at the getting the job done. Bikernet Eastmachine was well out in front in the competition when we wheeled the Agent’slow slung Softail onto a slick Gold Rush semi and said goodbye as the rig,packed with Ultra machines, Big Dogs and customs from the west coast, headedeast. Eddie Trotta from Thunder Design was more than happy to have thebike unpacked in his shop in Fort Lauderdale, so he could point a fingerat Bandit’s creation for Agent Zebra and bust out laughing, “You expectto ride that to Sturgis?” he said rolling on the floor of his shop. Weweren’t discouraged and neither was Bandit as we strapped the road wingswheels, the Weerd Brothers Front end on the Daytec rigid and went to work.
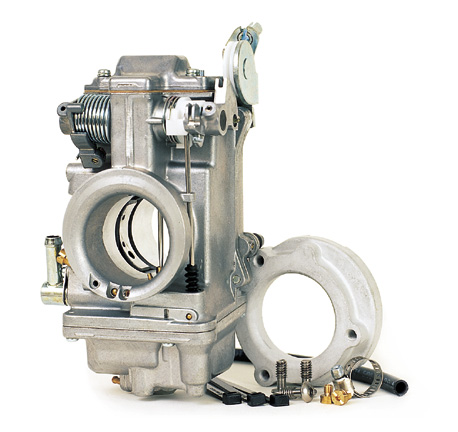
This was no ordinary installation. First,time was a factor, second it’s no normal, stock carburetor swap. The 98-inchS&S motor offered taller cylinders and improper intake manifold fitment.The stock Super E S&S manifold was too big for the 42 mm polished MikuniCarburetor. Stock manifolds shove the carb out too far and aren’t wideenough for the tall S&S cylinders so a quick call was made to JamesSimonelli of S&S who rushed the correct manifold to Mikuni. Lee alsowanted to explore an American Iron Horse manifold available for their customswhich pull the carb in closer to the engine and “L.T.” or James Littleof American Iron Horse moved equally fast and the parts were in hand inone day. The next hurtle: The cables. A call went out to Xavier at BarnettCables who turned about a set of Mikuni compatible cables which are setup the same as stock H-D cables, but cut to Bryan’s specifications forthe job. They also arrived in time.
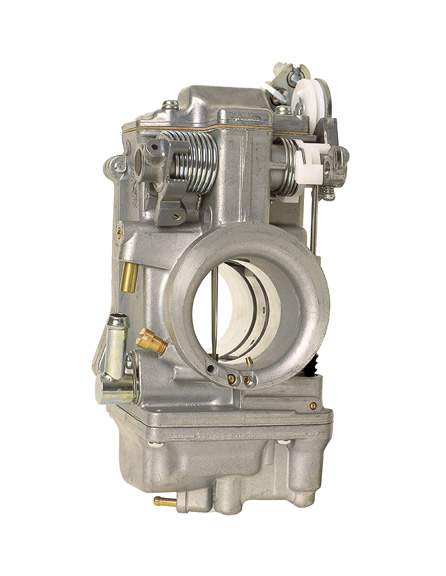

Bryan pointed out an adjustment on theleft side of the carb as you face it, a main jet air adjustment. He toldme to inform Bandit to turn it out a half turn in Denver for more compatiblerunning in altitudes. The bike immediately fired to life for the firsttime. Two weeks to go.
1928 Shovelhead Runs Part VII
By Robin Technologies |

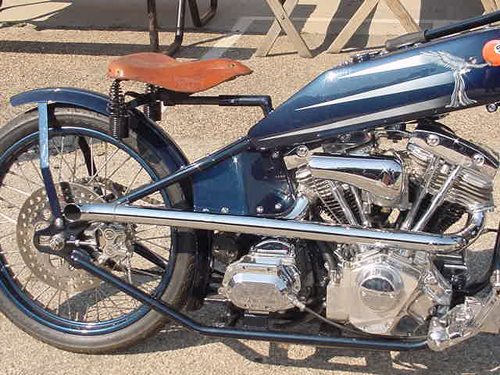
Here’s the deal. The 1928 project was recently completed except for a stylish exhaust system. The antique notion was based on racers from the ’20s, something way off the pavement, open and short.
JR, the service director of Strokers, explained the steps, “They were cut and pasted together. Bits and pieces from the scrap yard, combined with pre-bent 1 3/4-inch diameter 16-gauge tubing, which is similar to stock. We also used stock exhaust manifold chunks off scrapped systems.”
He hung up, and I sat back in my chair perplexed. I was faced with the same daunting task when we built the Amazing Shrunken FXR pipes. I had a myriad of questions and called back.
“Hold on JR,” I said trying to capture his attention while he was carb tuning a running, 100-inch, RevTech motor.
“What the hell do you want?” he said in a Texas gunslinger drawl.
“Do the pipes have baffles? I asked holding the phone like you grasp a girl you don’t want to lose.
“Nope,” JR said.
“Are there any brackets other than the exhaust manifolds?” I rattled the question rapid-fire quick, hoping that he wouldn’t hang up.
“One,” he said, “anything else?”
“Yep,” I barked.
“I gotta go,” JR fumbled and the straight-pipe, 100-incher roared.
“Wait,” I begged.
He hung up. I looked at the phone as if someone sliced the wires leading to the pole, and the died. The next day I called back. JR was off on Tuesday. I called Wednesday and the receptionist fed me to the service department. The service writer was courteous, told me JR was in but couldn’t find him.
I called the next day. He was on the premises but unavailable. I called the following day, still no JR. I was growing a complex. I called everyday for a week, no luck. I went around him to his boss, the magnificent Rick Fairless, the mastermind behind Strokers of Dallas with Strokers Ice House, one of the most happening biker bars in the South. An e-mail sprang back. JR suffered a heat stroke after road testing a new Big Dog, for two hours in 102 degrees, then helping his daughter move to college. I felt like shit.
Apparently heat strokes are notorious and can become an annual nightmare. This was his third devastating attack. We finally hooked up again, and he coughed up his exhaust pipe making secrets. Strokers is noted for their customs, which rock from old school radical choppers to hand-fabricated marvels. JR is learning more and more fabrication techniques to expand the shop’s capabilities.
“We’ve been performing sheet metal functions, with hammers, successfully,” JR said, “but with an English wheel and Yoder hammer machine, we can speed up the process. I’m taking classes.”
They don’t manufacture many exhaust systems, and when they do it’s by hand.
“You can buy exhaust pipe segments, 1 3/4-inch to 2 1/2 inches in diameter, from hot rod shops, and piece any pipe together,” JR explained. “We buy “U”, “S” shaped bends and straight chunks.”
Since I also faced the delicate job of trying to hold two chunks perfectly in line and tacking them, I asked JR how he handled the task.

“We discovered magnet clamps for holding chunks of pipe,” JR said, “they’re available from Harbor Freight Tool Supply. I made flat clamp brackets in dissimilar lengths from 3 to 6 inches long with a variety of holes drilled in them in an arch. There are two “C” clamps attached, on at either end. I welded bolts to the clamps so I can move them from hole to hole, on the bracket, or change the angle.
I asked a final nervous question about the allowable gaps when tacking pipes.
“I try to make the fit as close and precise as possible,” Jr explained. We continue to grind the edge of the pipe with a 90-degree, die grinder and a 2-inch 3M sanding disc. We also have a band saw with a tilt-able head for slicing exhaust at just the right angle.”
“The pipes haven’t blued,” I said looking at the shots.
“Yeah,” JR said. “We use three coats of Blue Shield by Kreeme, the guys who make the tank sealant.”
“So how loud are these puppies?” I asked holding my breath. They looked like window breakers.
“Not bad,” He muttered looking at the shop clock. I was burnin’ daylight in Dallas. “They’re loud enough that ya know what ya got.”
“That’s it,” I said. “I won’t darken your phone again.”
“It’s happy hour at Strokers,” JR barked, and I could sense that I was losing him.
“It’s party time,” were his final words.

