
You’ve been there. You handed the Makita cordless drill toyou’re drunken buddy, and he drilled a hole in your big screentelevision. You tried to wrap the extension cord around his neck andfinish him off. We came close to blows in the garage a couple ofmonths back. I spent days carefully welding chunks of Samson exhaustpipes together to form a one-of-a-kind exhaust system.
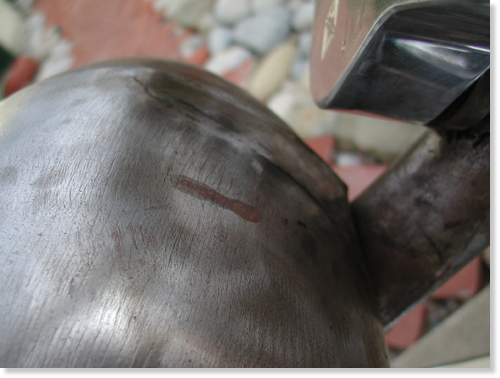
All the welds were performed with gas and hanger rod. Thepipes weren’t perfect, but they fit the bill. They were actuallyintended to be prototypes, to be duplicated by a paid professional.After the first pass was completed the pipes fit like a glove,although they were artistically rough around the edges. Nuttboy cameby on his Wednesday afternoon escape, and I handed him a highspeedgrinder and instructed him to round off the welds. I worked onanother project and paid no attention while sparks flew. When he wasfinished he tapped me on the shoulder and said humbly, “Not sure thisis what you had in mind.”
He had ground right through the pipes and left gapingholes alongside most of the welds. In addition, I discovered to myteeth-grinding dismay, that there were still large sections of thepipe ground so thin, that as soon as the torch tip came within 6inches of the surface the pipe melted away. I spent another whole dayfilling the gaps. Who knows what will happen when the struggling bikefires to life. We’ll have the only exhaust system on earth withbaffles throughout.

That’s not all. The grief continued. I hand made a mufflerusing a portion of a Samson baffle. We purchased a chromed, truckfender tip from San Pedro Muffler and went to work, but after hoursof screwing with the shiny metal we almost shitcanned the unit. Thefender tip was made out of a strange metal, almost pot metal, thatdidn’t seem to take to the gas welding and wouldn’t respond tobrazing. For every hole I filled, another crack lurked. I welded,then smoothed on a bench grinder only to find cracks and holes tofill again. The shorty muffler probably weighs 50 pounds due to thevast layers of welding rod. As it stands, this is a pure prototypeexhaust system. We should use it for testing then shitcan the rankpiece of shit and start over.
Click to order Catalog!
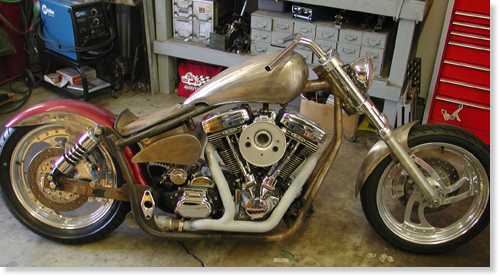
Frustrated, but pleased with the overall look we were readyfor final metal work. This bike is being built by inexperiencedhands, not professionals, in our backyard garage. Sure, I’ve builtsome bikes, but I wouldn’t consider myself a metal fabricator. I cameup with the initial design and we roughed out elements, but we neededa master metal worker to finish what we started. There are preciousfew, true metal craftsman, who I know. One is Billy Westbrook,another is Jesse James and recently, in the news, we displayed metalwork by Roger at Goldammer (Goldammer Cycle Works Ltd.,www.goldammercycle.com ,1-250-764-8002). High quality workmanship.
They’re out there but not on every corner. I stumbledonto another super-slag artist under my nose. James and LarryFamighetti are Hamsters and own a corrugated steel metal shop inHarbor City, California, called Fam-Art. You’d be tweaked to rumbledown Narbonne Street and stumble across this rusting corner buildingthat’s got to be the oldest swaying dump on the block. Theyspecialize in structural steel (you could never tell it from theircreaking tin shed) for homes and buildings. Large chunks of steel,massive shredders, presses and welders are scattered around the funkylocation that’s reminiscent of the first shack Harleys were built in.
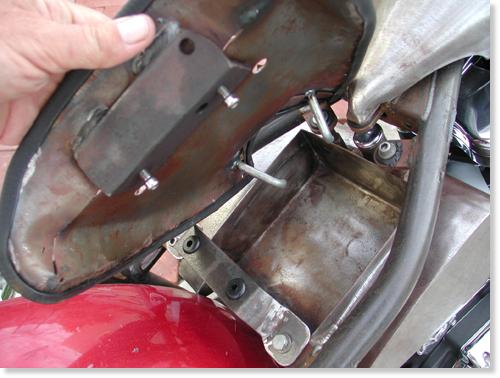
Nuttboy and I darkened their doors a couple of times toask them to flame-cut a couple of chunks of steel for our fenderbrackets. The more I hung around the more quiet-James began to showme steel components he had fashioned for some of the local riders. Herebuilt and reformed Harley taillights to eliminate all the edges andgrooves, then welded them to fenders so that ultimately there were noseams. The more I gawked at the sculptured parts, that demonstratedhis ability, the more I knew we had discovered a man capable of BillyWestbrook fabrication qualities. We hauled the entire FXR to Jamesthe next week.
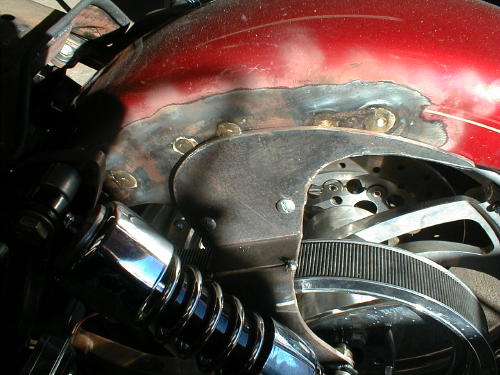
James relocated the straps in such a way to narrow the shockplacement keeping that shrunken look in mind.
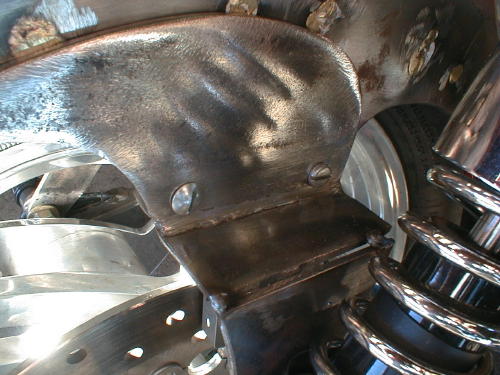
This is a close-up of the right fender strap. It’s beencorrected, reformed and readied for final welds.
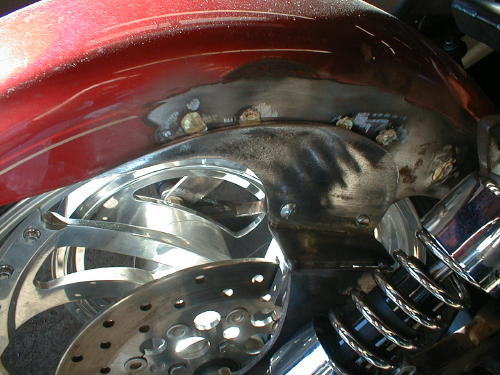

We cut and fitted the tank and made the mounts, butJames filled the underside, rear section for a perfect fit.
We jacked up the front of the tank and mounted it, butJames filled it and formed the front of the tank to match the customridge along the top. He even made paint work suggestions that I foundinteresting. “If you paint a ridge like this with a light color,”James said, “The ridge will disappear.”
We decided to paint the bike a light House of Kolors pearland create a dark teardrop panel on the top of the tank. He alsocreated and welded fork stops to the neck.
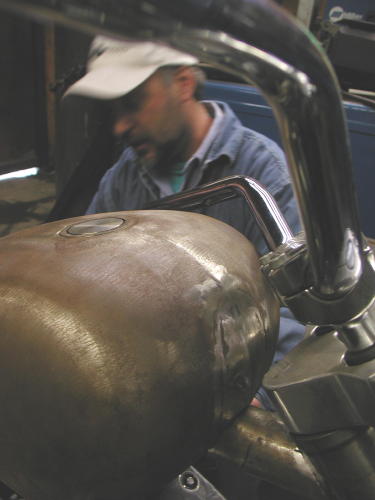
As we rolled out of the shop that day James still hadfinal welds to complete. He straightened out our seat pan, but neededto figure out a mounting arrangement. Finally we needed the CyrilHuze front fender brackets checked and welded into place.
We should have the Shrunken FXR back in our clutches inthe next couple of weeks. We need to finish our rear brake andshifting mechanisms with Giggie from Compu-Fire, fire it up for atest ride and tear it down for paint.
Oh, I need to untie Nuttboy. I need that extension cord.
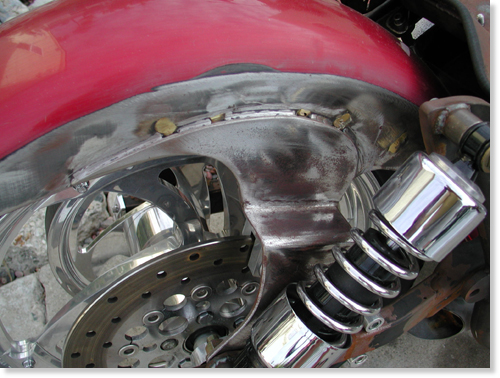
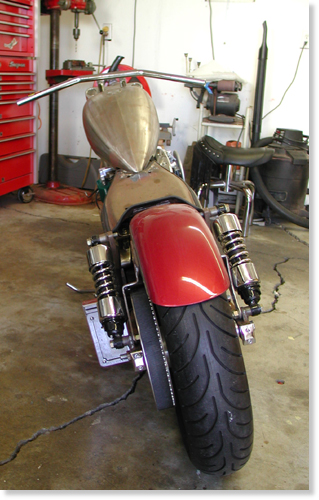
The Shrunken FXR returned recently from Fam Art, in HarborCity, California (310-326-2141). They welded, shaved, mounted theseat, manufactured fork stops and saved our poor- construction asses.James Famighetti mounted our Cyril Huze front fender, welded andformed the tabs and informed us that the Avon Venom was too large forthe narrow glide front end. It was our turn to work on it.
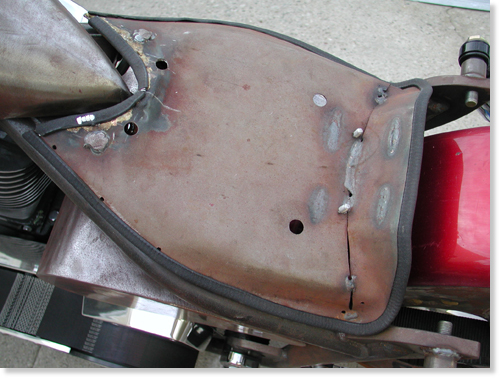
Note that James mounted the seat pan so that the edges wouldnot touch the frame paint in the future.
Like any self-respecting bikers we hate to have a bike, oreven components out of our mistrusting mitts. We had another dilemmathat needed handling. The bike still didn’t have a kick stand, and weused two 2 by 4’s, to hold it upright, when not perched on the lift.There’s a trick to this maneuver. If I backed the Pro Street FXR outof the garage and wasn’t hauling the wood planks, I was screwed. Ifalone, I could stand there for hours waiting for someone to strollpast carrying two 2 by 4s–unlikely. After a couple of unsteadyoccurrences, the bike didn’t move without the wood chips on the seat.You can imaging the major pain in the ass this caused.

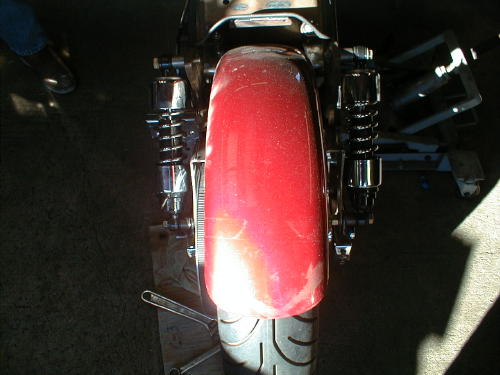
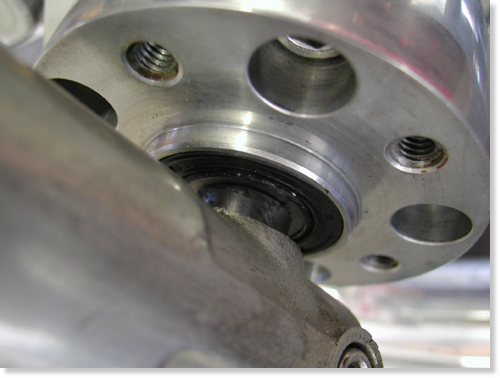
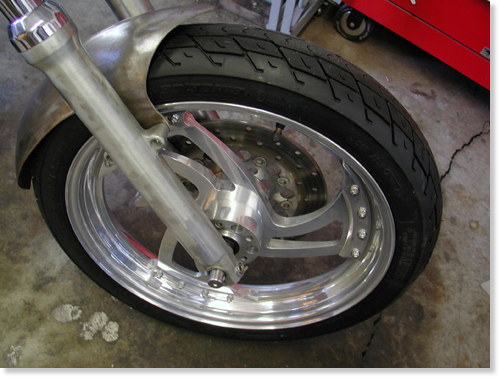
We ordered a weld-on, Sportster style, kick stand fromCCI, and it arrived complete, with all chromed hardware and thebracket to be welded on the frame. There was one problem indetermining the position. The front Avon was a 100/100 18-inch, andwe planned to replace it with a 90/90. We needed to have the finishedPerformance Machine wheel in place.
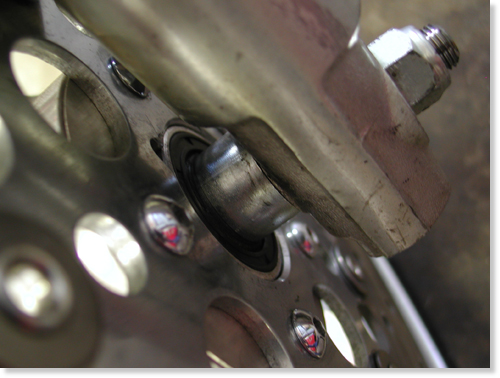
The Avon Road Runner tire arrived, and we had it installed at thelocal Yamaha dealer. James pointed out to us that our front tirespacing wasn’t perfect so I sliced a spacer to give us about a1/4-inch spacer on the right side of the wheel and about a 3/4 inchspacer on the left. The tire, almost centered, now had clearance, andthe wheel floated effortlessly under the modified Cyril Huze frontfender.
Now we were cleared to install the Hot Match weld-on kickstand.This is a tricky assembly process. First, you need to be absolutelysure you don’t plan to change the front wheel, to a 21, or extend thefront forks. If you do, the kickstand will need to be bent ormodified to fit. It’s not the end of the world, but it will destroythe chrome.
The other trick is determining the right position. Here’swhat my feeble brain told me, since the directions with the Hot Matchdidn’t cover positioning, except to recommend that you take yourtime–no shit. First I stood my Road King straight up and lifted theside stand until it was locked in place. Then I measured from thepoint that would touch the pavement to the ground. It varied fromaround 2.5 inches to 3 inches. I noted that the Hot Match lever wasnearly 3 inches shorter from the point of contact to the center ofthe pivot point. I took that into consideration. I also noted that Ihad lowered my King with shorter shocks, then added a larger Avontyre (a 150). Ground clearance was also a consideration.

Then we picked a placement area on the frame. Our designcalled for little or no forward controls. I kept the tab under theBDL belt drive system and hidden as much as possible, without beingso far back as to create a balance problem. If the weight is forwardof the kickstand, sometimes it can topple the bike. One otherconsideration. When the stand pops up you need to be able to reach itwith a toe, and it better not ride on the belt, or you’re toast. Makesure to check all that, before you burn any rod.
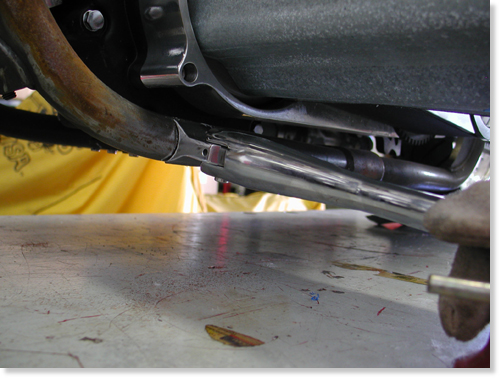
I sprayed the frame rail and the components with asilicone splatter preventative. It obstructs slag from sticking tocomponents. It also made the frame a slipper bitch. I tried settingthe stand end on a socket nearly 3 inches off the deck. Then Iconsidered the differing lengths of the stands and shifted to 2.5inches. Sin Wu was called, from the bedroom, to hold the stand firmlyin place. I marked it, with a grease pencil, then ground the edges ofthe bracket to be welded to the frame. Extra grinding took place toform a snug, metal to metal fit. In order to make all this work weneeded to partially assemble the kickstand without the ball andspring.
The easy-to-read directions called for disassembly, but we left ittogether and used it to hold the bracket in place for tacking. Beforetacking I backed the bike out of the clamp, holding it upright,positioned the bracket in the white grease pencil marks and leanedthe bike carefully until the stand rested on the flat surface. Itlooked cool, so we re-clamped the bike securely, held the stand inplace, protected the belt from hot slag and tacked the sucker withour Millermatic welder. Then we took the stand arm off the bracketand welded it some more. That would hold it securely until we torethe bike down for paint.
The Hot Match unit from Custom Chrome is a well madeprecision unit delivered show chromed. The instructions includedrecommendations to apply anti-seize to the spring and ball. Theyendorse using Red Loctite on the pivot pin threads. We didn’t becausethe bike would be torn down for paint in the near future. The armneeds to be placed firmly over the bracket and pushed into placebefore the pin will ease into the hole from the bottom. It doesn’thurt to have a spare set of hands and someone holding the bike.There’s also a pivot pin set screw to prevent losing that preciouspivot pin and kick stand arm, on a desert highway, in the middle ofArizona.
That’s it, except to mention that when we head to thepaint shop, we need to tape off the chrome bracket, so the painterwill paint over the welds but not the chrome tab.
As you can see this bike is damn close to the spray booth.I need to coerce Giggie, from Compu-fire, to ride his FXR out to theBikernet Headquarters with our mid-controls. Once the Joker Machinehandlebar controls are bolted to the modified bars, we’re ready for atrial run, then off to paint. Stay tuned.

–Bandit
Custom Chrome ® and Chrome Specialties ® have joinedforces to bring you the most comprehensive product offering in theHarley-Davidson ® aftermarket! At over 1,400 pages and over 25,000part numbers, our 2003 Catalog features everything from nuts & boltsto HR3 bike kits, and sets the NEW industry standard.
ONLY $9.95 + 6.95 Shipping**
–Bandit
Back to Part 4…