Sturgis Shovel Part 8
By Robin Technologies |
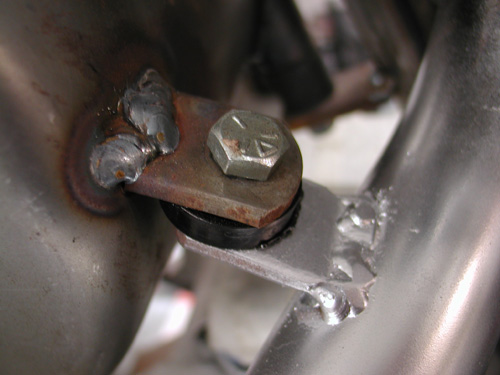
My first move began with a correction. I removed the exhaust pipe tab welded to the oil bag. The oilcan is rubber mounted, the exhaust pipe generated severe heat and the pipe system needs to be solidly mounted. It had to go. Actually Kent from Lucky Devil Metal Works in Houston tried not to mention the false move, but his frown gave it away. Or was it that question? “Is your rear pipe really mounted to the fuckin’ oil bag,” Kent said tentatively?
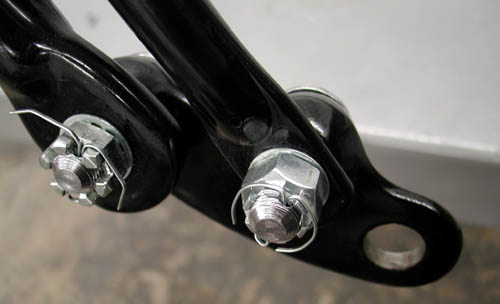
I discovered that the pipe exits the head close to the seat post and worked on a pipe connection there. There are a couple of rules in making pipes that I need to abide by. I needed to remove the pipe once in awhile, so I needed the pipe tab to be on the outside of the frame tab. Often mounting required slack, so I dug around for 1/16-inch washers to run between the tabs. That way when the fasteners are removed there’s some slack to pull the pipe free.
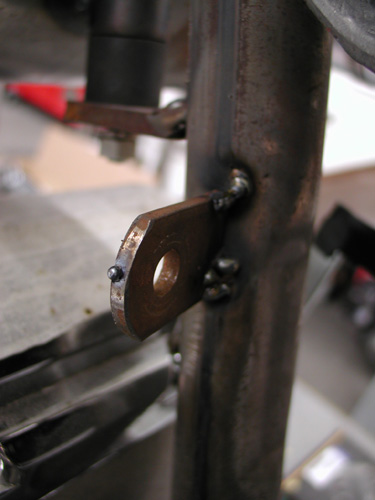
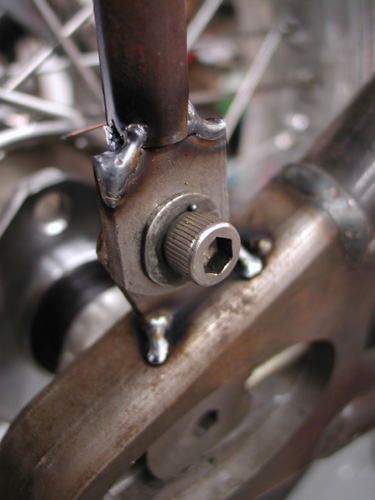
I worked with the pipe fully in place then tacked the seat post tab. Below is the tab tacked to the pipe. Then the tab welded in my shitty MIG welding fashion. I should slow down and clean the base metals more. I generally grind a bevel into the tabs for greater weld penetration. The welds are strong, just not handsome.
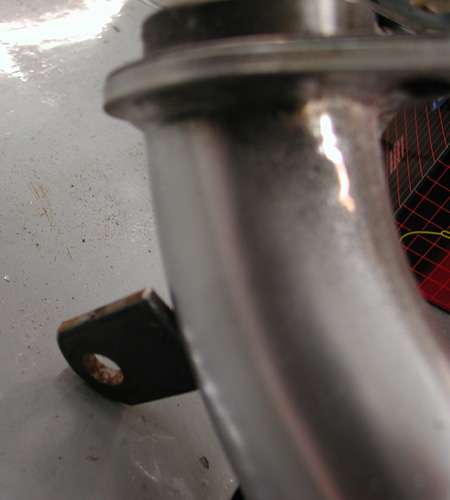
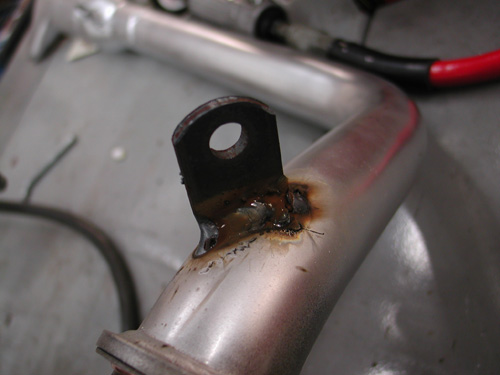

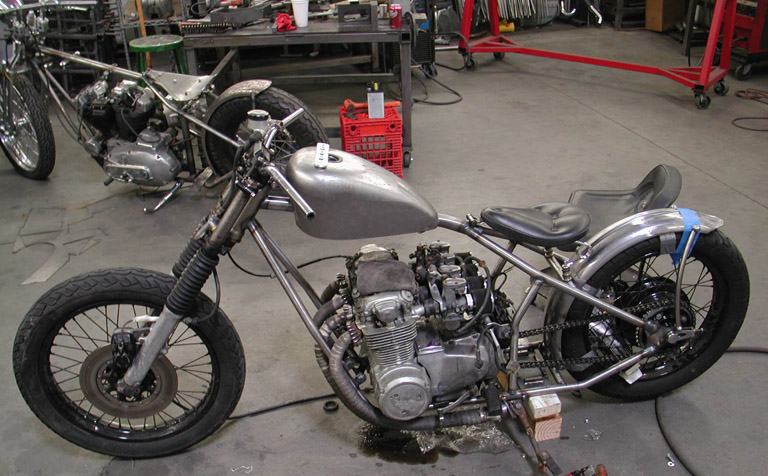
Next I needed to attach the Lucky Devil rear fender, align the rear wheel and cut the chain to fit. But first I needed to center the wheel in the frame, sorta. The custom Paughco frame is designed and manufactured to hold a belt pulley and a 180 Avon Tyre. That prevented me from measuring between the frame rails. I needed a straight line down the center of the frame backbone. It’s not incredibly accurate but close to draw a fabic or nylon line down the tube. Then with Doherty space kit and the seal spacers that came with the Custom Chrome aluminum and stainless spoke wheels, plus the Brembo brake caliper bracket, I aligned the wheel.
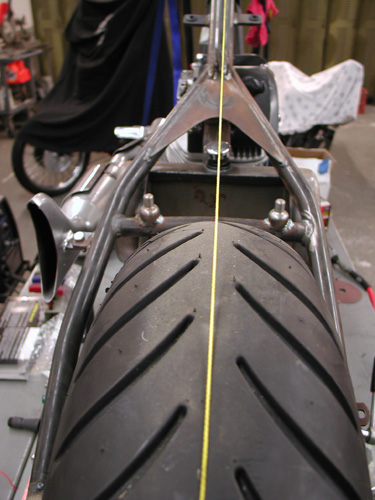
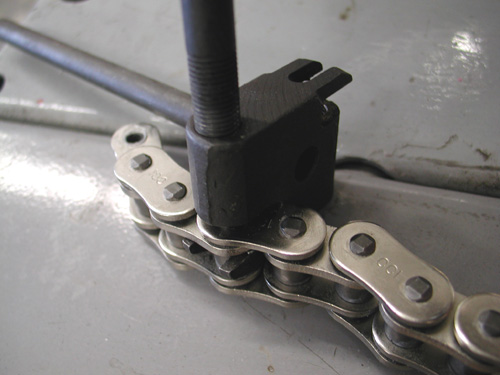
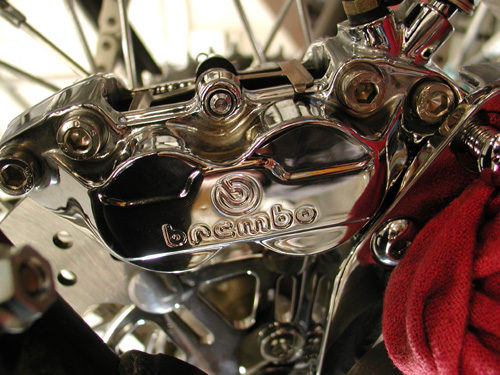
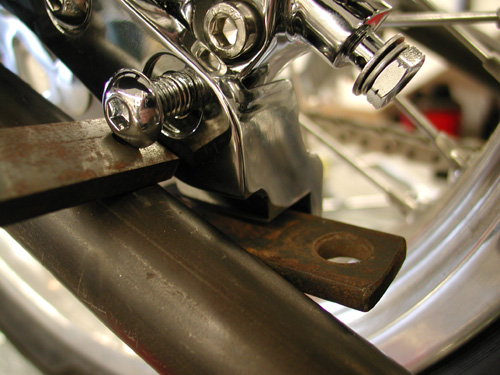
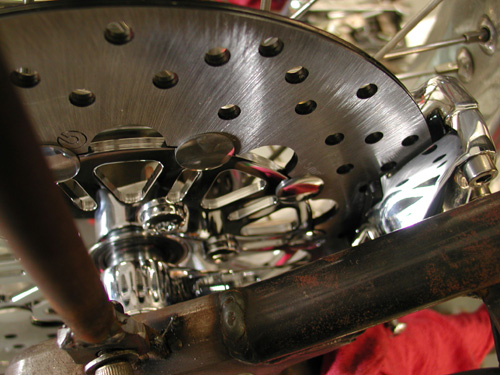

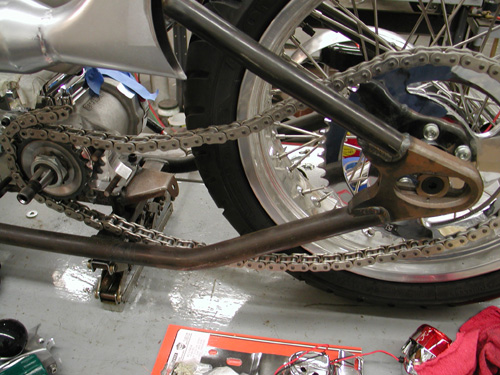
Before I cut the Rev Tech chain I installed the BDL Belt inner primary and pulled the engine and transmission into place which determined exact spacing. I know I covered this aspect somewhat a couple of chapters ago. There’s been some heavy drinking in the meantime, so if I lose track, it’s on Jack.
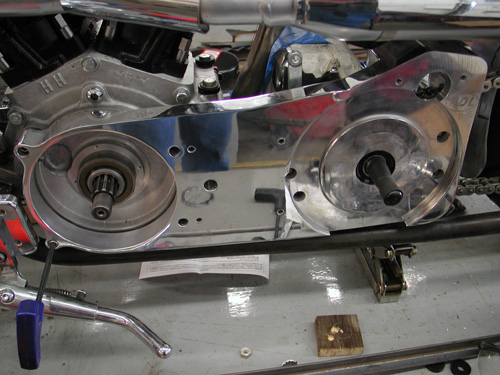
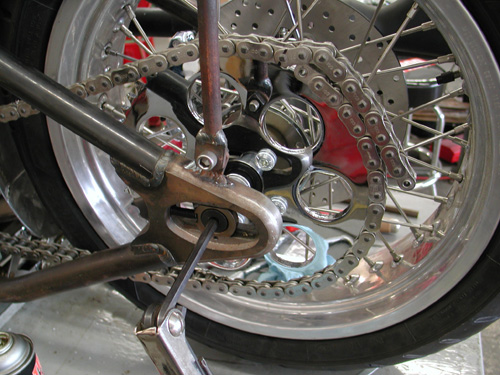
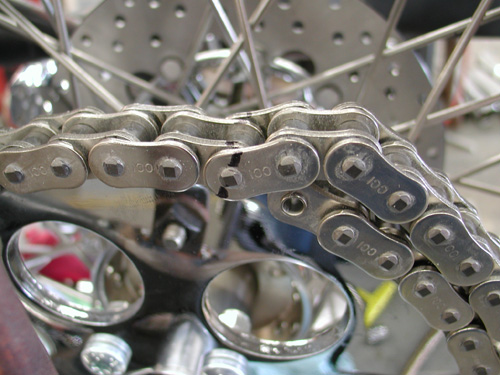

I centered the wheel in the chain adjustment slot to give me slack either way. Then I finally cut the chain with a JIMS tool.
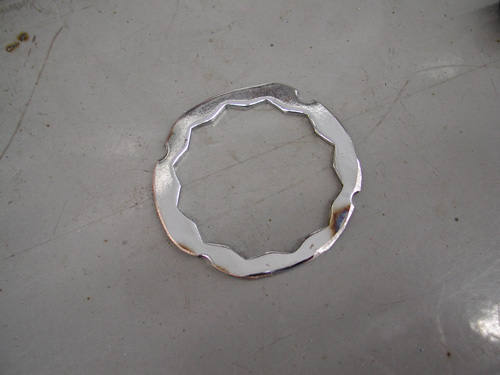
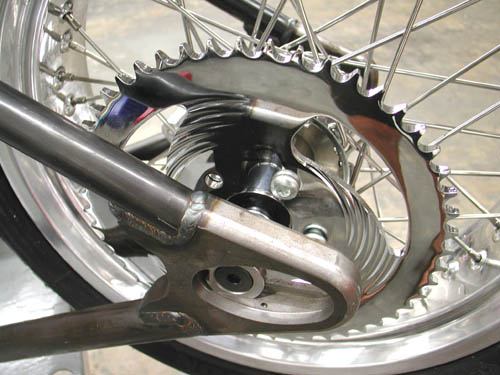
I spoke to a couple of guys about sprockets and was told that this contraption will hold a sprocket nut from coming loose better than simply Allen screws in the Custom Chrome sprocket. I may use it or not. Haven’t decided yet.

The reason this is altered is that it’s for a pulley and a different era. Add that to the fact that I flopped the dished sprocket over to space the chain away from the tire. That aspect worked perfectly.
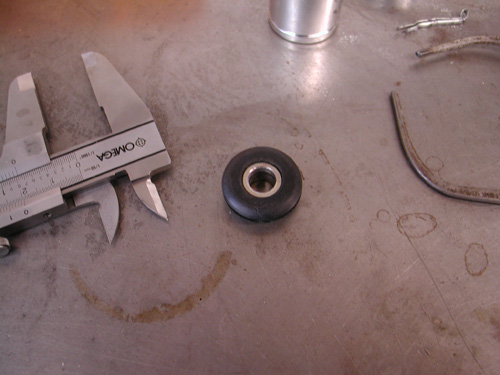
I decided that since the tank was rubber mounted and aluminum won’t flex as well as steel that I would attempt to rubber mount aspects of rear Luck Devil fender. Kent designed and handmade the fenders to match aspects of the XR 750 tank.
Cyril Huze sent me several grommets to work from and this pair are from some late model Sportster application. I measured the O.D. on the center portion and discovered that I needed ½-inch holes in the fender which I drilled after I had mocked up the fender in place, ground a clearance strip for the chain and stood back several times. Arlen Ness once told me that he used a chain wrapped over a tire to space a fender. I needed enough space for fasteners under the fender and some chain adjustment slack either way.
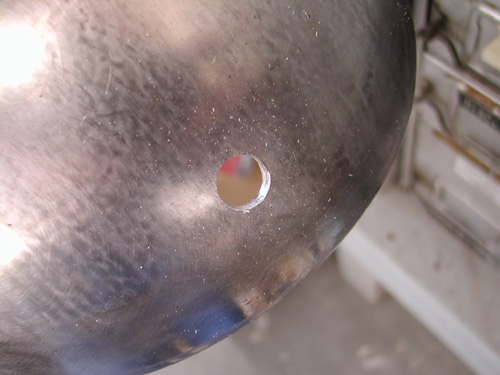
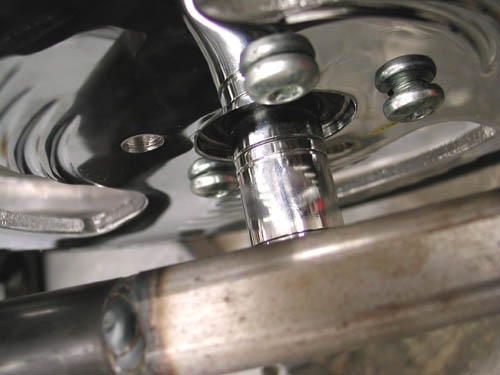
I moved the fender up and back, and side-to-side several times before making any hole-drilling marks. I was a nervous wreck. Ya don’t mess with the Devil’s fender. I finally drilled a half-inch hole, and smoothed the edges, in the bottom of the fender then at the crossover tube. I worked in the rubber with a dab of oil and bolted the bottom stainless bolt in place.
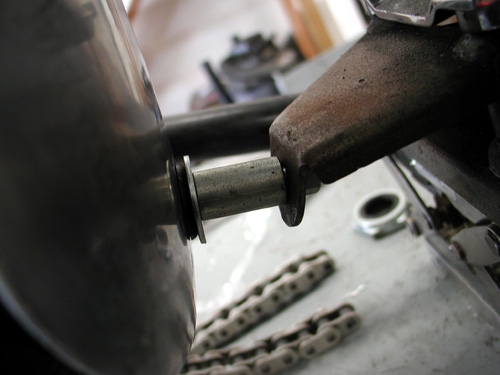
The Sportster grommets have metal inserts, which make them easier to install. With a couple of spacers in place the fastener held the center tab for tacking.
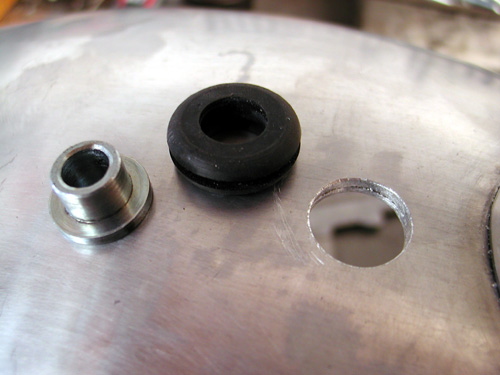
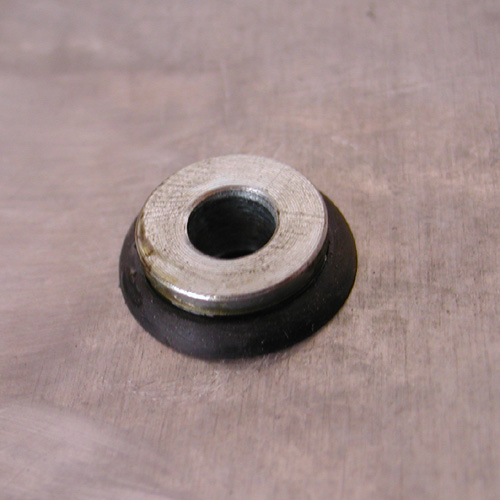
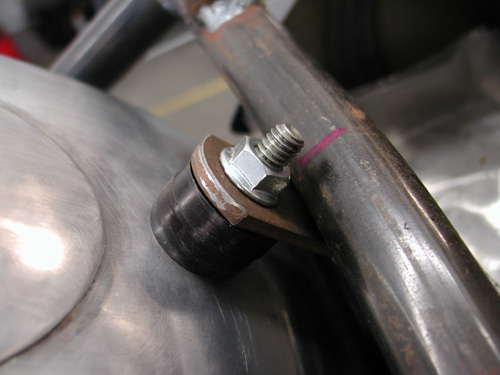
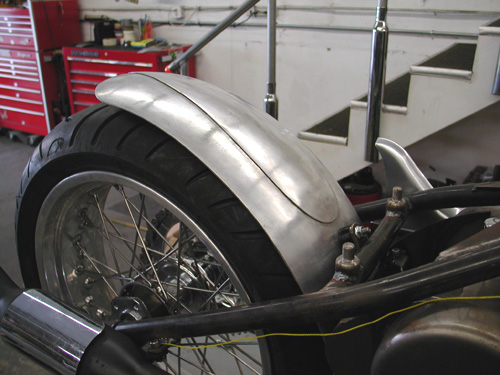
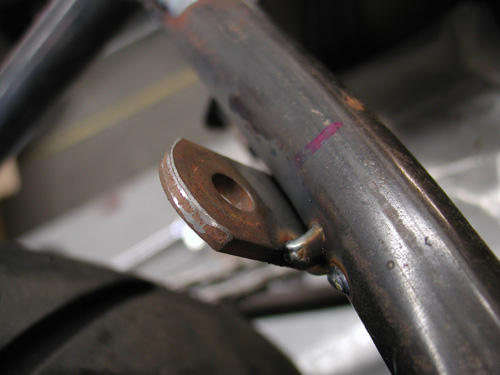
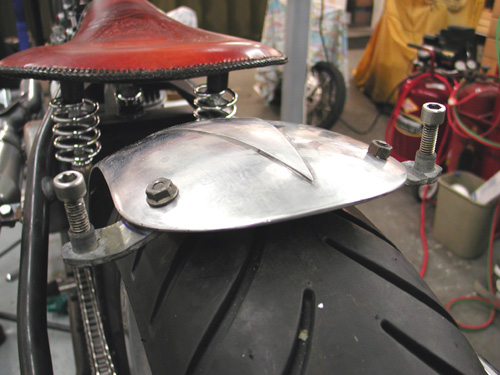
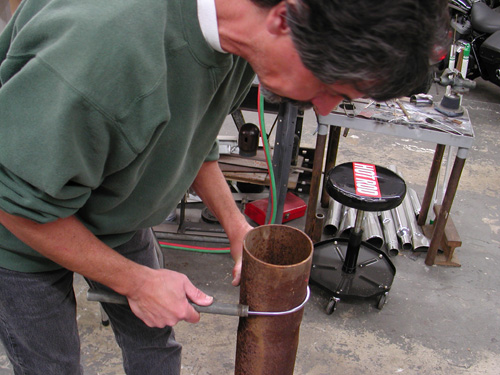
Here’s where it got tricky. I’ve been bending metal with a torch for years. Never improved my technique. Just the other day, a month after I built this fender rail system, I bought a small strap or tube-bending tool. Wish I had it when I went after this project.

First I built the fender strap out of a piece of exhaust pipe bracket. It came with two 3/8-inch coarse tapped inserts in each end. My plan was to build a fender rail system with tubing so I could adapt a couple of running lights on the tips. I carefully bent and drilled the strap and fender.
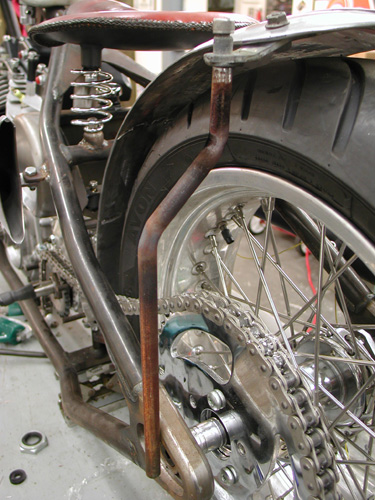
Then I bent the tubing fender rails to fit over the chain and tacked tab to the Paughco frame. One item I often attempt to use is a level. I’ll level the frame from side to side, then strive to keep all the other elements level. It helps.
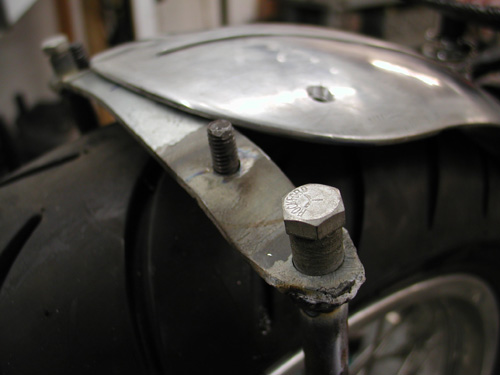
Here’s a perfect example. As I finished my welding chores, I got on a roll. I thought– wouldn’t it be cool to weld the fender bolts in place from the bottom. They would never come loose. Note the angle. There was no way they would ever return through their mounting locations. I was forced to grind them off and clean the holes.
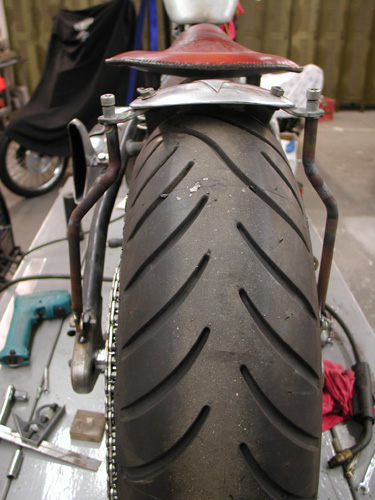
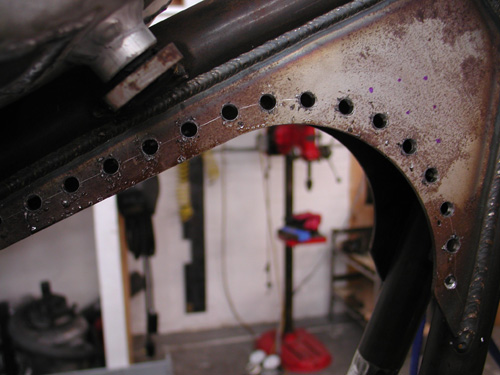
Here’s the finished fender rail system. I drilled holes in the frame and the rails to run wires. I still haven’t found the perfect running light style that rocks my boat and will afford me enough room to use the proper fasteners. Hang on!

Sturgis Shovel Part 7
By Robin Technologies |

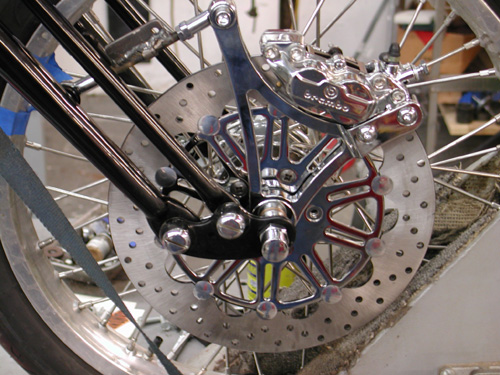
Brembo has a solid worldwide reputation, and I ran into a hot looking Brembo representative at an illustrious bike function and decide I’d give them a try. They’re hot and ready to rock. The only items I needed were the locking nuts for the back of the rotors bolts and the springer axle spacer. This set-up was designed for a stock springer replacement.
Because of the wild, light, taper-legged Paughco Springer my hiem joint link wasn’t long enough and I bastardized two fine bolts together temporarily. At that point I wasn’t considering a front fender. There are two aspects of chopperdom that I have a tough time working around. Bikes need front fenders and brakes. Can’t ride ‘em much without those two bastards. Even in the old days I ran front fenders, Avon Tyres and front brakes.
Chris Kallas came over at just the right moment. He’s as old at riding as I am and an artist. We’ve featured his work in special reports. He knows his bike shit and I’ve been trying to convince him to see Jim Murillo about a job. Jim has a paint shop in Torrance, but he’s not the graphics guy, Chris is.
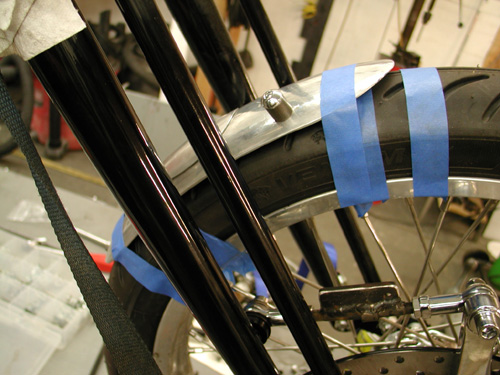
As usual, about the time I think it’s going to be easy, the devil pops up on my shoulder. Kent, from Lucky Devil Metal Works in Houston called, “What are you going to do about a front fender,” he said? “Yeah, that’s what I thought. I’ll send you some shots of my springer front fenders.” He hung up and Chris looked at me sorta strange.
”Who the hell was that,” he said?
”Never mind,” I said flipping my computer on. Kent developed a system of mounting springer front fenders that’s clean as a whistle and odd as only the devil would make it. An engineer wrote Bikernet when I first featured his wild notion and chewed us out. “That idea’s not worth the powder the blow it to hell,” he shouted.
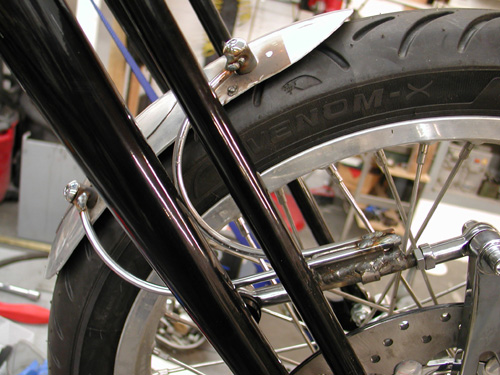
At first I thought he was correct, but the more I considered it, the more I determined that he was wrong. The caliper follows the line of the rotor, so the fender will follow the circumference of the Avon tire. Of course when I stepped into the ring to create a similar configuration I couldn’t do it like the Devil does. The Brembo caliper runs too far ahead of the rotor to mount the fender so we ran carefully designed struts off the brake linkage. Chris drew up the plan, then bent struts out of coat hanger for a guide.
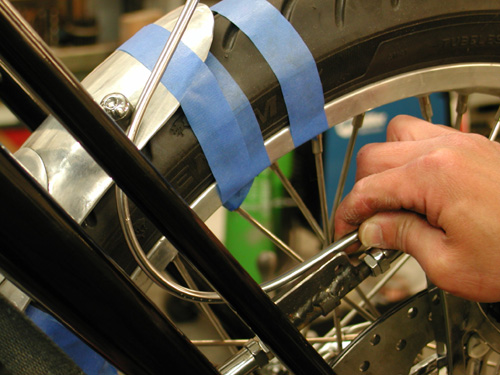
We constantly tried fitment again and again before tacking them into place. I wouldn’t recommend this configuration to anyone. If you run struts off the caliper they’re solid. The heim joints allow the fender to fluctuate, especially side to side. I had to find a concave washer that would allow the heim joints to work up and down but not side to side.
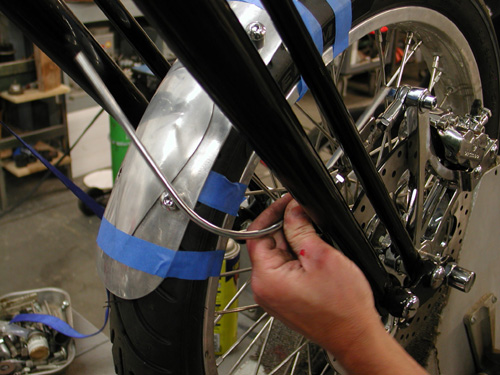
Chris bent each rail to match in pure artistic form. Then I tacked them.
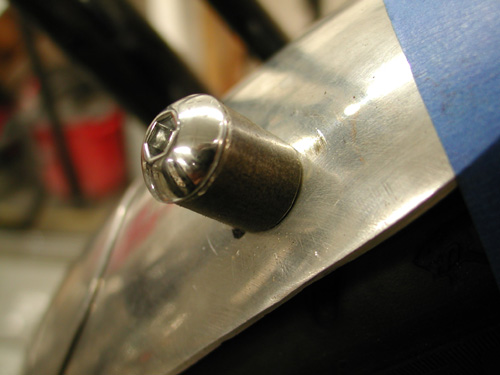
Kent built the front fender with threaded aluminum bungs underneath. I figured out some slender spacers to fit on top of the fender and tacked the rails to them. I must have welded them a dozen times trying to grab just enough rail, weld and spacer to prevent cracks.
There you have it. It’s wild, but will it last to the Badlands?
–Bandit

Sturgis Shovel Part 4
By Robin Technologies |


Here's an update on the Shovelhead. I picked up the engine from Phil's Speed Shop in Anaheim. He rebuilt the battered heads and lifter stools, installed new JIMS lifters, S&S roller rockers and CCI Black Diamond Valves. He welded and repaired cracks and exhaust manifold threads. Old used Shovelheads can be fragile.

I installed studs with a mixture of liquid metal and red Loctite. I don't like screwing anything steel in and out of aluminum. It wears on the threads and stresses the weaker material. Besides, from the extreme heat expansion and contraction the threads always feel loose. So I packed 'em with liquid metal to tighten the fit and added the red Loctite to keep them from coming loose. We'll see.


I dug through my junk drawers and discovered another top motormount stud. I treated it the same as the exhaust manifold studs for a tight lasting fit, I hope. I've decided to fab shotgun pipes. The front out the left and the rear out the right and attempt to keep the lengths the same. I would like to work in some shorty mufflers for performance and sound reduction, but a couple of fish-tips caught my eye that sultry morning.

I tinkered with the studs while Layla headed to Home Depot to grab some stainless steel bolts, that I could polish, and use for the motormounts. She was going to call me from the Fastener bin. I didn't hear from here for a half-hour so I dialed her number. She forgot and was rolling up to the Bikernet gate. So I dug around through drawers to find usable bolts for the time being. That's why the spacers show up on the rear mount–it's temporary.


The old code called for bolting the rear motor mounts down first, so that if any spacing was needed to the front, it would show up. It did and I found a piece of almost 1/16-inch aluminum plate that fit perfectly. I cut it, drilled, polished the edges and slipped it into place. We'll see if it works with the BDL inner primary belt drive plate.


That caused another dilemma to surface. The engine is a late '70s Shovel with a early electric start, JIMS four-speed transmission case and plate. According to Kent at Lucky Devil, there's another variable lurking. I'm still having a problem finding the correct chain sprocket. As you can see this CCI job is meant for even earlier transmissions. Then I need a BDL system that will fit the engine, transmission and line up. Hold on for that one.

1928 Shovelhead Project Part 1
By Robin Technologies |

In an effort to stay tuned with the rapidly growing and ever changing industry the staff of Bikernet began a project Shovelhead several years ago in conjunction with Randy Simpson of Milwaukee Iron and Arlen Ness. It’s been a strange road, but we’re now rolling closer to completion with the assistance of Rick Fairless of Dallas Easyriders and his ace fabricator Jim.

The project began with the purchase of a slightly destroyed Mexican Police bike from Arlen a couple of years ago. He had scored some 300 1984 Mexican cop bikes that had been ridden through several revolutions and costly rebellions. The bikes were shot at, dragged, bombed and ridden harder than any V-twins on the planet. When we first purchased the Shovel complete with police sirens and blinkers, we assumed foolishly that we would restore it to it’s original fighting condition. Arlen even hand picked our unit specifically with our goal in mind.
Well it’s one thing to dream of a restoration, but when the cast iron triple trees are broken, the frame is bent, all the sheet metal destroyed we took a step back and said, Help! We pulled the Engine and sent it to JIMS Machine for a rebuild along with the Transmission. With the cases replaced along with the barrels and heads and all the internals replaced, the engine was ready to rock once more. A similar concoction was mixed for the transmission and a couple of us dressed all in black and prepared to bury the chassis in a shallow grave in the desert outside of 29 Palms, California when the Editor of “Biker” pointed out that we had a valid pink slip. Dean, salivating, over the dying chassis took the entire unit and paid us handsomely for the paperwork. We suspect that he made a rocking chair out of the frame and wheels. During one of our weekly Bikernet meetings we discussed what to do with the Shovelhead drive train, and in the process we started discussing various options and some of the customs we respected the most. Several suggestions were thrust onto the rusting boardroom table. First Randy Simpson had volunteered to help us build an old time looking bike from the remnants of the ’84. We voted unanimously to pursue this avenue, since we had always been impressed with the workmanship and design Randy injected into his own 1928 Shovelhead projects, and he had a desire to create a simple chassis kit to build one of these puppies to market to the public. We agreed to help him promote the concept. We also all agreed that a gesture to the community of San Pedro was a necessity since several members of the staff had been arrested and the headquarters were constantly under surveillance, so we decided that Bikernet needed its own private San Pedro Police bike. How else could we crash the local parades. Randy is a persnickety builder who takes great pains to build quality parts for the market. Two years passed and he still didn’t have the frame built. He was obviously so successful with his growing line of fenders that his chassis concept was slipping onto the back burner. Arlen Ness was also taking giant strides to build a similar machine and if you picked up a recent Easyriders you would have seen the fruits of his labor in his 50/50 Shovelhead. In addition Chrome Specialties with the assistance of Chico in Southern California had recently completed a similar project around a Sportster (It’s called Trick and is featured on Bikernet right now). The competition was stiffening. Randy dropped out, and we moved ahead, and with some research we discovered that a number of reproduction parts are being built in Europe for early Harleys. Early like in 1915.
Devoted to successfully completing this project we picked up a rigid frame from Paughco. This is a standard scale Paughco Rigid for Shovelheads. From there our old part contact was Fred Lange in Santa Maria California. Fred informed us that a European group is remanufacturing 1915 springer front ends, flat track tanks, headlights, fenders and Fred was making appropriate sprung seats for these models. We were in business. We ordered the flat track tanks, the fender for a side car so it could be used for the front and the rear, a hand leathered seat and snuck out of the hills over looking Santa Barbara.
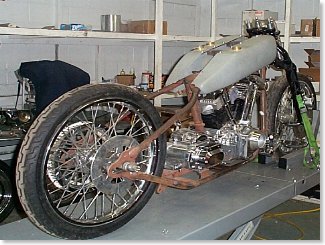
We had a Bad Boy front end, Wheels, etc. We’re in the market for some Custom Cycle Engineering lowering rockers. At that point we needed miscellaneous parts, pipes, etc., and we could get this puppy on the road. It was time to call in a favor. Rick Fairless had purchased the exclusive Bandit I Pat Kennedy Built bike from Bandit and part of the deal was parts and labor on a bike project in the future. It was time to call in that note. Then in a stroke of bad luck and good, Marty Ruthman decided to close his shop abruptly due to health problems and he had a massive sale.
–Wrench
Sturgis Shovel Part 5
By Robin Technologies |

Helluva weekend. Anytime there's lots of motorcycle carnage,sex, whiskey and writing, I'm all for it. Maybe it's Valentines Daycreeping up. Make a note. Here's the deal on the Sturgis Shovelhead. Sincethe engine was in and mounted I went to work on the exhaust system,then seat mounting, position and played with the bars. I made a runto a local steel joint, because I had a notion that I doubt will worknow, but I'm still investigatin'.
Let's hit the highlights. I'm fortunate to have a young,talented fabricator/builder who I'm sharing ideas and resources with.Kent from Lucky Devil Metal Works in Houston is on the phone dailyfor tips and knowledge sharing. It's damn healthy to have someone whois in the trenches daily to assist. In fact I had a couple ofcrucial metallurgy question that morning, but let's hit what Iaccomplished.
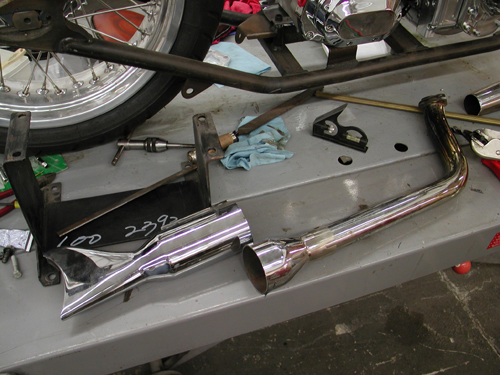
A crucial aspect of building any bike is planning. That'snot to say all my eggs are in a row. We'll see, but the more you canaccommodate, the less redo's will be necessary. Also, don't throwanything away. That junk part might be a critical bracket tomorrow. Idug through my partially organized pipe bin and found a set of oldglass pack, shorty muffler, shot gun pipes. I could use the rear one.I decided, since noise issues are a concern and performance issue area constant priority, I would build a set of shorty mufflers withBandit tuned baffles.

Then I spotted the fishtips in the pile and myconsideration changed. I dug further. Kenny Price from Samson allowedme to dig through his warranty bin when I was looking for stanchionsfor my Bikernet office railing. I remembered touring mufflers withfish tips, I kept digging.
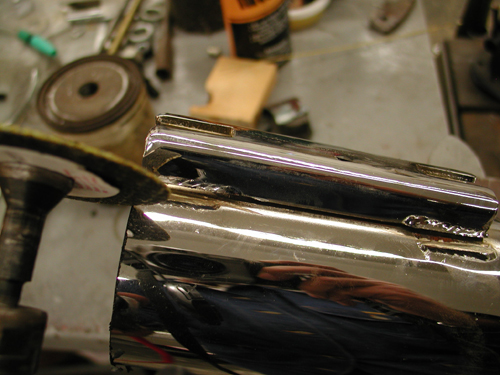
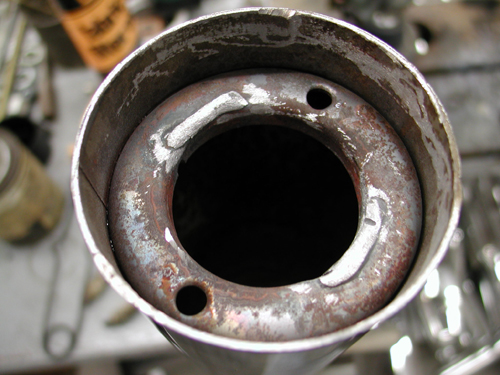
Sure enough I had a set and in quick movesI sliced them into chunks. You know me, I'm a gambler. I cut themwith no methodology in mind past the size and looks, but I came uplucky. Samson designed a baffle system with a cone at the front toguide exhaust pulses into the baffle and it seems to be working fortouring applications. I cut off that portion and discarded themajority of the baffle. But there was still 2 inches of baffle and astandard donut in the rear of the muffler. That's where fate movedit's evil hand over Richard Kimball again. Or in other words I rolledthe dice.
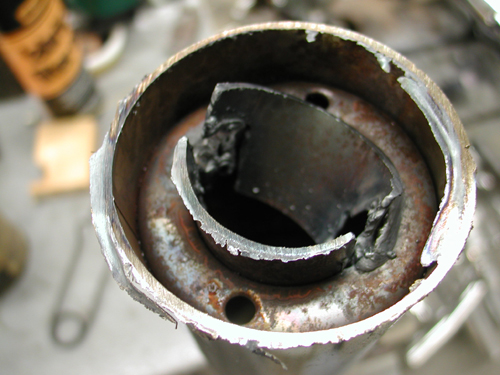
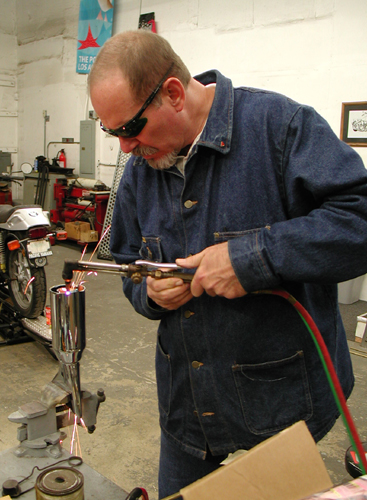
I spoke to Kendall Johnson recently and he told me aboutperformance stepped exhaust systems and reversion cones used to tunesystems at the rear of the pipe. I couldn't make this donut move upand back, but I had the makings of a reversion cone at the stern.With a torch I cut out the remaining baffle, then after speaking withthe HOT BIKE staff member, Craig Murrow, for a reversion cone descriptionI knockout out the remaining baffle, then with various cutting andgrinding cones I formed and smooth departure for the exhaust pulses.Then I had to remove the old touring mounts with a die-grinder andthey were ready to weld.
The rear pipe was comparatively easy since the pipe wasalready made except for the muffler and brackets. Shovelheads arenotorious for louse exhaust manifold connections and tearing out thesingle stud, so I wanted to mount them in the front and rear for asolid, secure connection. The only port for the connection at thefront was the oil bag. That was a bad choice and I'll run a bracket off the seat post before all is said and etched in stone.
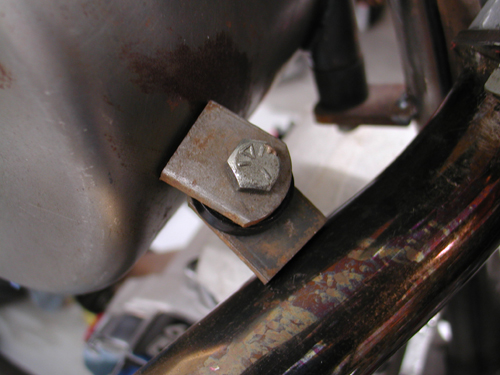
I had to make sure the pipe could be removed with the tabs onthe bottom, then I spaced the tabs apart with a heat sink material. Imay use Teflon, then the notion that the oil bag is rubbermountedfloated to the surface. What bearing would that have on thiscoupling? Hell the frame will vibrate like a mad dog. I'm stillquestioning that link, but we'll see, maybe a spring between the tabs? The final decision was the seat post bracket to come.
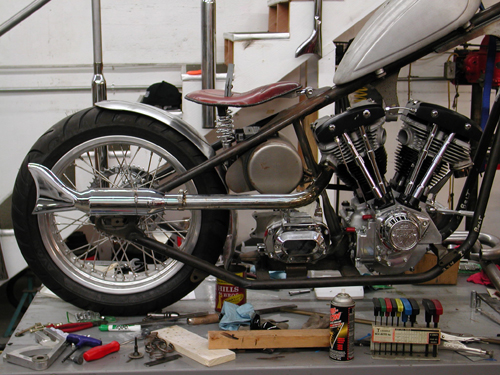
There was one other pipe design consideration–the length.I try to keep the pipes somewhat equal and between 32 and 38 inches.Buster's Sportster runs sharp and crisp with his hand-made 38-inchesfrom the Bikernet Headquarters, as seen in Street Chopper. So Idesigned this pipe to be 38-inches and not protrude past the tire. Mygoal was to make the front pipe curve out the other side and be ofequal length.
At the end of Friday night, one pipe was complete, toolswere scattered all over the shop and I had a couple of Hooker Headerchunks of 1 3/4 pipes segments cut and was fooling with the frontheader. The front was tricky as hell. I wanted to scoop out the leftside of the bike, which added length. I also had a bitchin Rohm Engineering oil filter/cooler system that mounts to the front motormounts and aims the filter at the ground for ease of removal anddraining. The pipe had to clear it significantly. This puppy was alifesaver. I planned to run an oil cooler (Shovelheads run hot) andfilter, for a lasting driveline and more oil capacity. My originalplan called for old school mounting on either side of the oil bag.This eliminated all of that and the plumbing for two elements, the cooler and the filter, wasreduced to one hot looking job in front of the engine for maximum cooling.
I spentall day long on Saturday, dodging the phone and working in thegarage. I had all the tools and materials I needed, even two new setsof welding glasses, which came in damn handy. The trick was to lineup the pipes, make all the right decisions, hope for the best andtack 'em. I did and with a level I constantly compared the pipe tothe top of the lift. The spacing worked out fine.
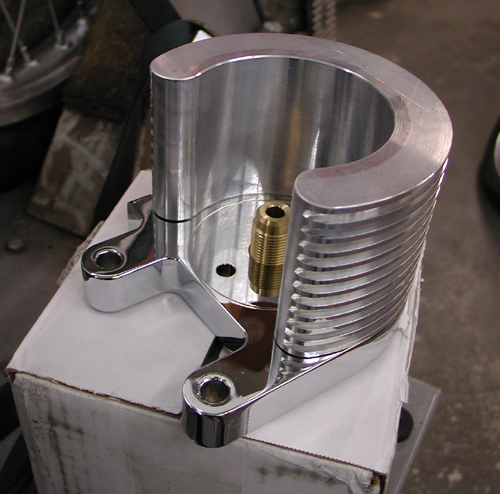
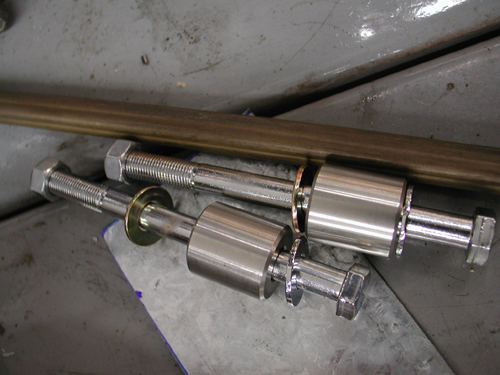
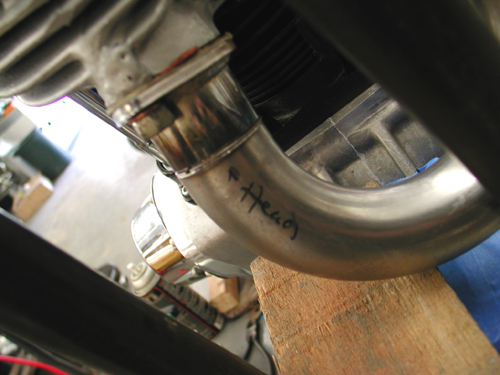
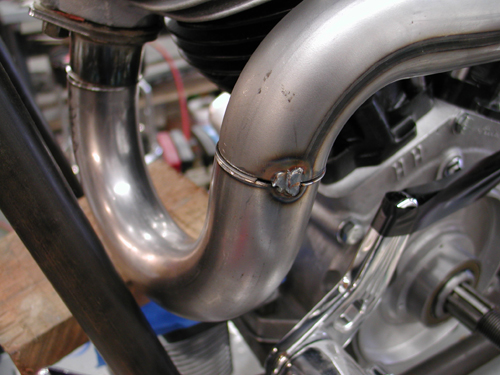
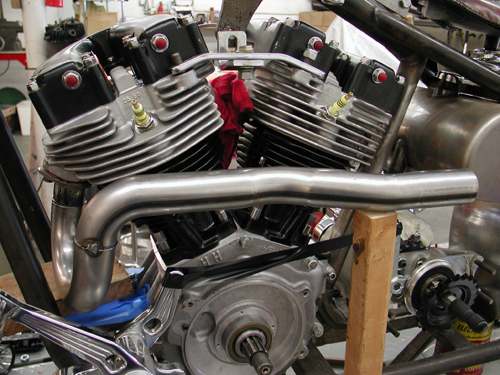
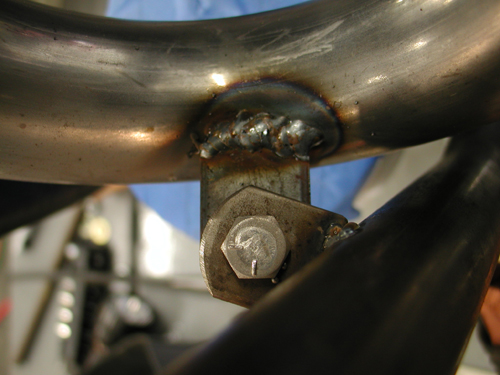
I cleared the top of the Rohm bitchin' oil cooler/filter mounthopefully by enough to allow the pipe slip down and out of the head (I was recommended to use a CCI Filter part number 270126).I tacked the tab with a spacer between the two for some jiggle room.And I made damn sure that the pipe tab was below the frame tab. Atthe back, the muffler was fabricated the same as the other one with aslight exception.
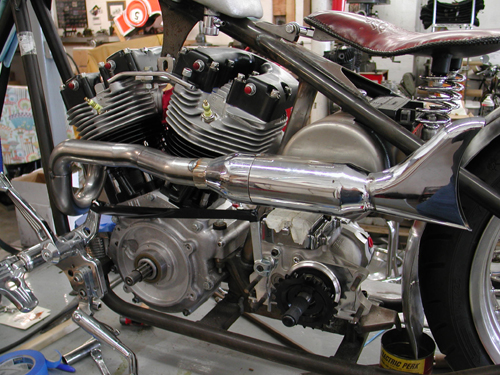
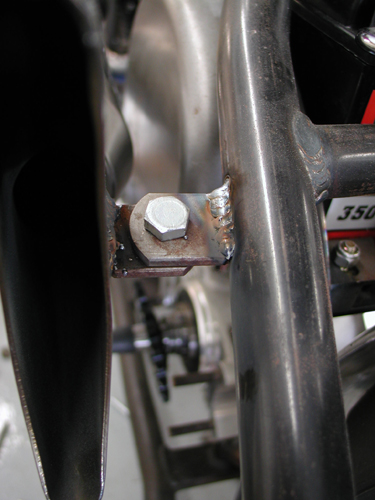
I shaped the reversion cone the same, cut off thetouring mounts and ground the tabs. Then I used a couple of V-blocksto hold it perfectly in line for tacking the halves together. Then Isliced off the crush tabs on the front of the Samson tapered muffler.They were wider and different than the other side, so I cut them off.You'll notice the difference, if you check both side.
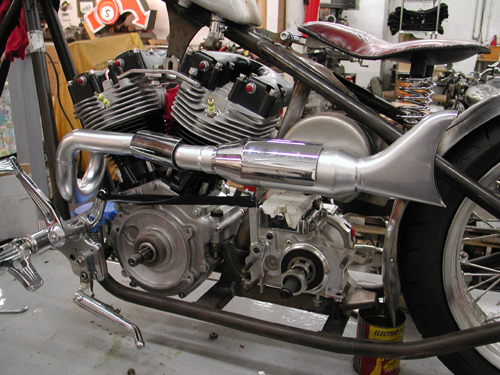
The front parts of the pipe were Hooter elements and theyare smooth mandrel bent segments. I used another one for joggedstraight piece between the muffler and the head. I took the 13/4-inch exhaust to my Muffler Master bender and bent it slightly oneway, then reversed the sucka and bent it the other way. It fit like adream and looped out enough to pass the oil bag. I used Hooker headeralignment sleeves to hold the front pieces in perfect alignment. Donedeal, I tacked them, constantly comparing the level with the lift,the pipes then the muffler. After the tacking was secure, another tabwelded to the frame, avoiding the oil bag (a Lucky Devil concern,since the oil bag is rubbermounted), then all elements wererechecked, I removed both pipes and MIG welded them as complete aspossible.

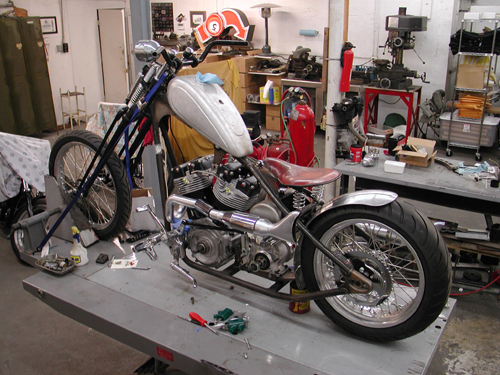
I find that MIG welding is a pain and blows holes in pipes easily.I also discovered that after I MIG weld a pipe I can flow the weldeasily with a torch and smooth out all the welds, fix holes and fillgaps. I actually found a piece of old steel rod, not much bigger thana piece of wire. I usually use old coat hanger, but it pops andwheezes from the paint coating.

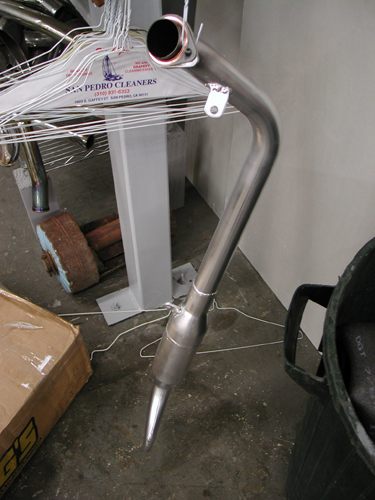

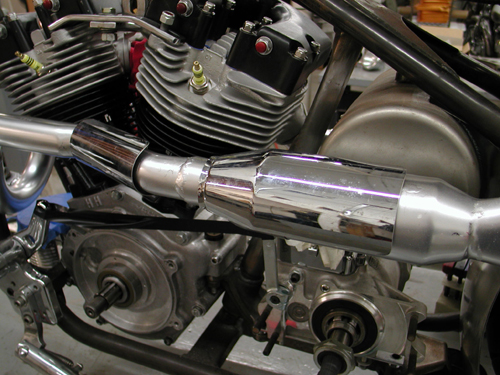
After the pipes were welded, flowedand checked twice, I ground all the surfaces with an emery disc andpainted them with whatever barbecue heat paint I had laying around.The lovely Layla is currently on her way back from Home Depot withsome flat black heat paint. We'll see how that works.
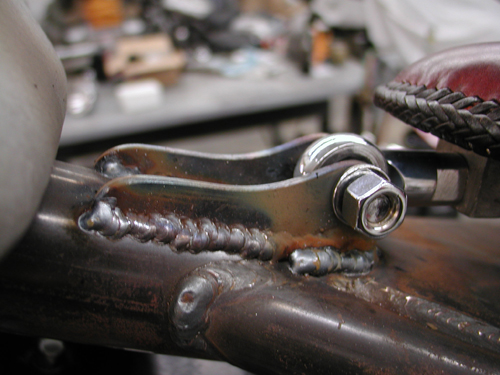
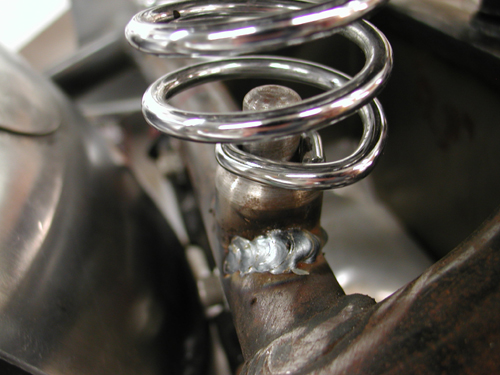
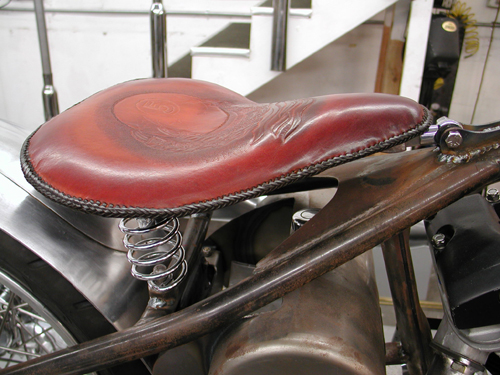
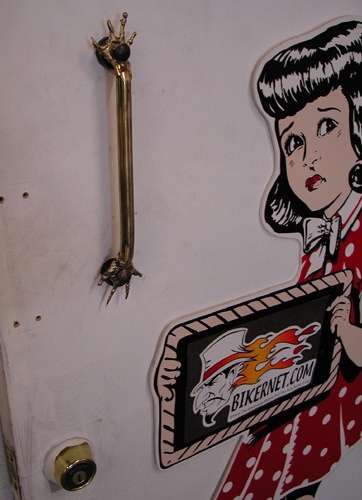
Kent from Devil hand fabricated the seat pan, brackets andbungs. I set them up and welded the parts in place. Then it was timeto roll the bike off the lift and see how she fit and where I mightneed heat shields. I discovered a couple of things. Yes, the scootwould require left side heat shields and nothing on the right. I alsotested my notion to sculpt claws out of brass, unsuccessfully.
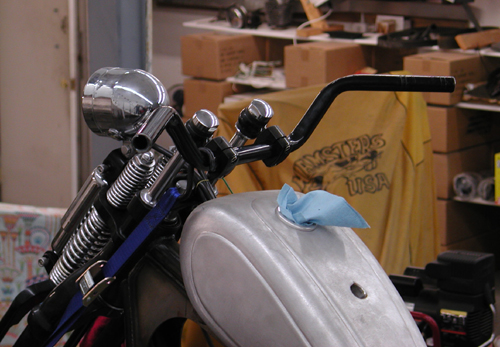
I also found that the existing bars wouldn't cut it. Igrabbed the old '48 Panhead TT-bars, narrowed them by 4 inches, and Isorta like them.
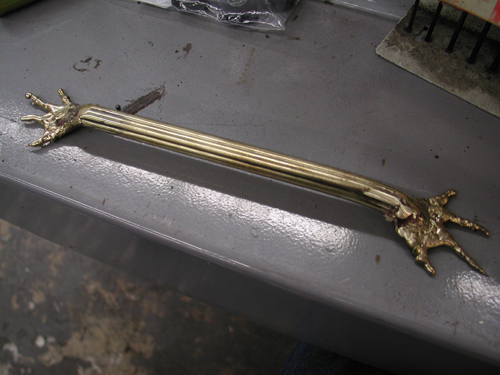
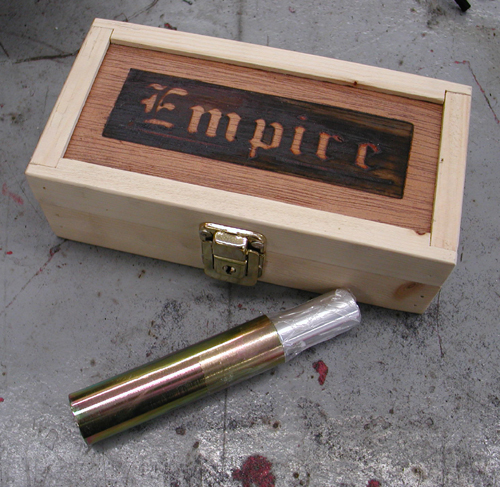
Okay, so I grappled with the sculpting business fora couple of hours and discovered that I can't control the brass likeI can steel. I spoke to Kent from Lucky Devil and he recommended thatI try TIG Silicon Bronze rod. I'll try that next week. In themeantime, my first brass sculpting attempt ended up on the shop door.Let's get the hell out of here.
Ride forever,
–Bandit

Sturgis Shovel Part 3
By Robin Technologies |

We've developed a working relationship with S&S, and I was concerned about the 105-inch Shovelhead Richard Kranzler scored for my Sturgis Chop project. His motorcycle ran like a raped-ape, but the 105 tore the livin' shit out of his old school chassis. The mirrors became frisbies, the footpegs vibrated lose and ditched him at 125 mph on the freeway. The stress was more than the old swingarm frame could take.
Hot Rod engines are cool but will beat the shit out of a solid mount frame configuration. The best bet is to let them stretch out in a rubber mounted chassis. I called S&S to see what they would recommend and they suggested a smaller 93-inch configuration. James Simonelli put me in touch with Steve George, a 10-year S&S veteran, who said under his breath that they prefer not to mess with engine configurations other than they're own, but he would look mine over.
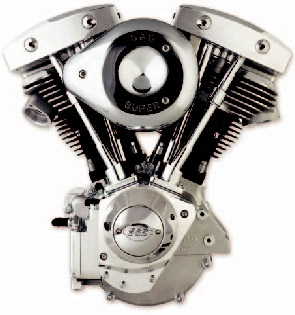
Made a lot of sense. S&S now builds a complete line of Shovelhead engines in four configurations: Two cone motor and two generator style. Each are available in 80-inch and 93-inch power configurations. Here's a description of their new units:
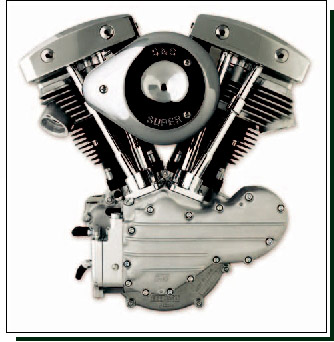
With the addition of the new S&S billet Shovelhead style rocker boxes and tappet guides, along with new pushrods and forged roller rocker arms for Shovelheads, S&S can now offer complete Shovelhead style engines. These engines will be available in 2005
S&S Shovelhead style engines feature the finest parts on the market today. Start with the bulletproof crankcases, flywheels, cylinders, and heads that they've offered for years, and finish the engine with new premium valve train components. S&S billet gear cover, tappet guides, and rocker boxes look outstanding and offer the performance level Shovel builders have come to expect.
What you can't see inside the engine is just as impressive. The new S&S Shovelhead style tappet guides are designed around the quiet, dependable Evolution style tappets. Corrected tappet guide bore geometry assures correct valve timing using Evolution style cams. The unique adjustable pushrods are collapsible for easy removal and installation, but are stronger than our old style adjustable pushrods.
Inside the billet rocker covers are S&S's exclusive straight rocker shafts and the new S&S forged Shovelhead style roller rocker arms. The result is a Shovelhead engine with the kind of quiet power that some folks may just have a hard time believing.
A new addition to the S&S Shovelhead family is the 93-inch alternator/generator engine. This is the perfect engine for that “retro” chopper, but with a modern alternator charging system.
In addition, the late style sprocket shaft used in this engine allows the use of late style transmissions for additional modern functionality. So when you take your chopper out for a late-night cruise, and you want to see the road ahead as you click `er into 6th gear, this is the one.

Note:S&S Shovelhead style engines equipped with S&S tappet guides and tappets will be supplied with an Evolution style camshaft. Custom engines ordered without S&S tappet guides and tappets will be supplied with a standard Shovelhead style camshaft.
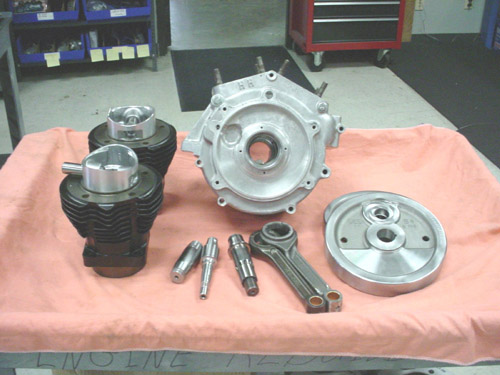
My engine was equipped with House of Horsepower cases. We used the same bore (3 5/8-inch) but S&S barrels and pistons with a 4.5-inch stroke (instead of 5-inch stroke). Stock bore is 3 7/16 and 3 1/2-inch for all 80 and 88 inch engines. This operation basically involved a S&S Sidewinder kit, including (left to right) cylinders, pistons, crank pin, connecting rods, cases and flywheels.
First Steve assembled the short block which was balanced to a 1300 bob weight for smooth operation and reliability. The S&S forged pistons are 8.2:1 compression with longer skirts for longer lasting reliability.
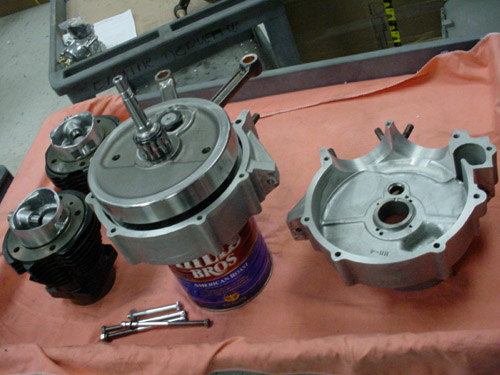
Then he assembled the wheels in the left case with fresh Timken bearings. My cases needed a ledge bored away for the longer skirted S&S barrels.
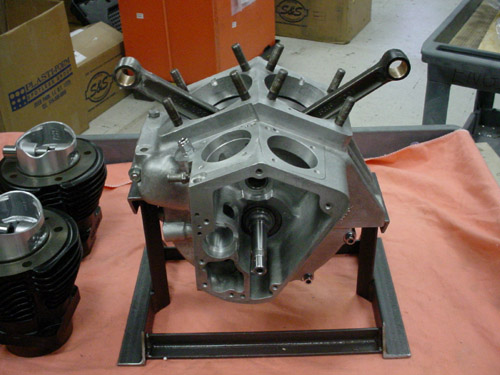
Next the other side of the case was slipped over the pinion shaft roller bearings and the lower end was complete. The flywheel weight is approximately the same as stock Evolution (lighter than Shovelhead wheel) for a balanced running engine and added reliability.
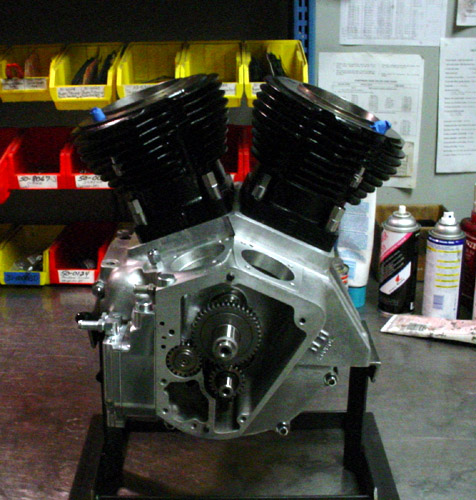
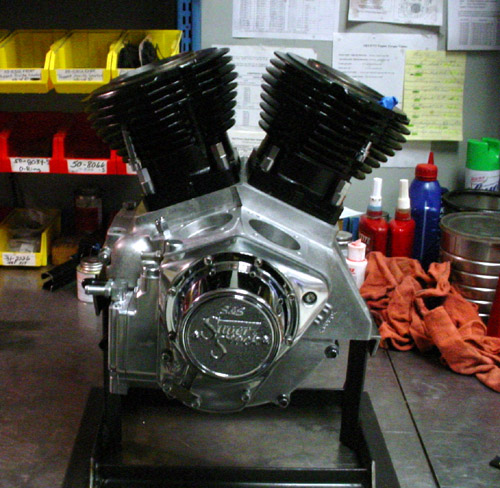
Ah, next came the pistons and barrels. I know we don't have all the details here, but at least you can see the big steps in building an engine. It's not tough but takes precision workmanship and quality components.

The final steps before shipping included the S&S oil pump installation and the cone cover. I'm returning a Compu-Fire ignition system to the cone in short order.

The engine is now at Phil's Speed shop. He're rebuilding the heads and will install S&S roller rockers, shafts, new Custom Chrome Black Diamond valves, new lifters (with bored-to fit lifter stools) and pushrods. Hopefully it'll be completed next week and ready to set into that Paughco frame. Then I can start bending pipes and making shit.
I've worked with Paughco for over 25 years, for quality frames and front ends, then this frame arrived and the tranny wouldn't fit. I had a 4-speed tranny plate that the JIMS trans slip right into, but the holed in the frame didn't align. I spoke to my tech guru, Frank Kaisler who contributes to Hot Bike, Street Choppers and was the editor of Hot Rod Bikes. He lives tech. Of course he pointed out that I needed a first electric start vintage plate. I had a late model, dipped, single sheet plate and the 4-speed job and neither worked. So I sat as my desk and poured a glass of jack. I had the bike buildin' blues.
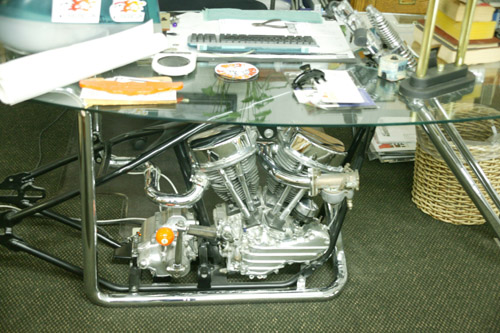
Here's the famous Bikernet Desk. I made calls about the tranny plate, unsuccessfully and slugged that amber liquid until my brow bounced off the glass top and I spied the tranny below–on the wrong plate. I couldn't believe it. All these years that desk ran with the wrong tranny plate, and it just happened to be the one I needed.
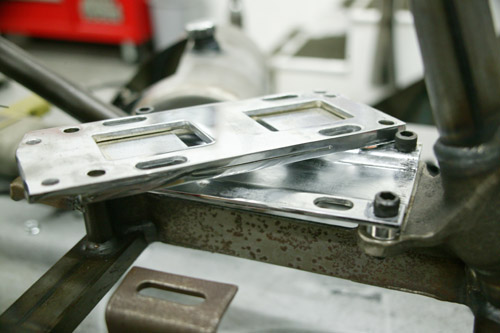
Here's both tranny plate together. The thick one with two slabs of steel is the original 4-speed job. The single, bent-in-the-center sheet with the four frame mount spacers was designed for the first electric start transmissions beginning in 1965.
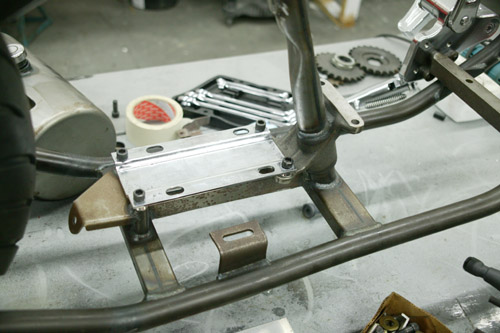
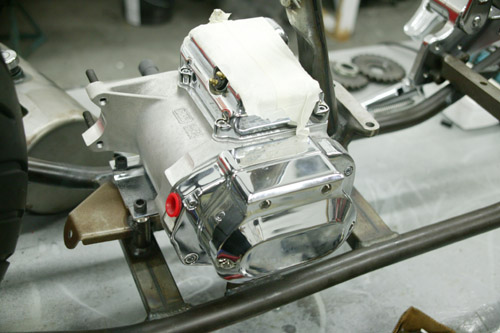
Finally the JIMS trans is in place with the proper mounting plate, and I was ready to move onto mounting the oil bag.
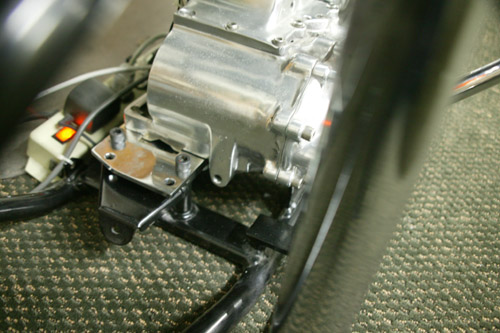
At last, after 15 years I installed the correct tranny plate into my desk. Damn, I'm embarrassed.
The rear fender is on it's way from Lucky Devil and I installed the Kraft Tech round oil bag last weekend. Movin' right along. You'll see that tech shortly. A new oil cooler/oil filter set-up is on it's way. It's a must for making the old iron last.
Sturgis Shovel Part 2
By Robin Technologies |


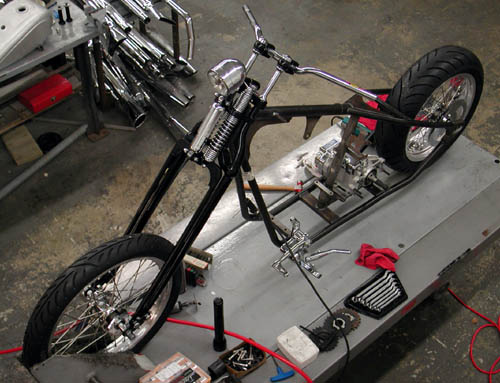

This bike might look like shit, but it should work perfectly. I'm endeavoring to keep it light, tight, narrow and right. So far so good. We've even decided to eliminate paint from the equation, except for rusty metal that may need black powder coating from Custom Powder Coating in Dallas, and the front end was powder coated black at the Paughco factory.

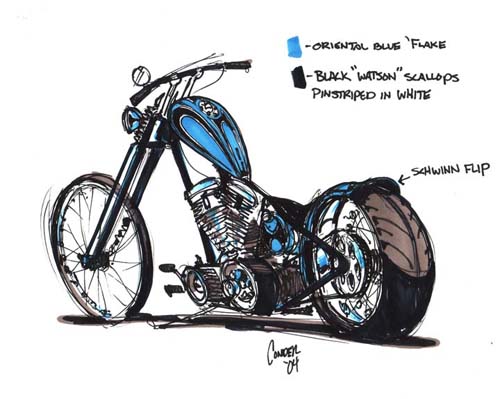
Let's jump into the shop. I was jazzed to receive my Rev Tech wheel order from Custom Chrome. I needed to mock up the frame and ship an image to Tim Conder for a concept drawing. Conder's images inspire any builder. I couldn't move on it until the Custom Chrome wheels were delivered and mated to the Avon Venom tyres. I'm also going to avoid chrome and flashy stuff as much as possible. We're running bare metal in several instances: Wheel rims, aluminum tank, brass fender rails and linkage, copper hard oil lines, and thick wall copper tubing bars. Dig this, we're going to galvanize the frame, rear fender and oil bag. The XR Sportster racing tank which is aluminum was delivered from Cyril Huze. I'm going to leave it brushed aluminum, but the capacity was a minimum 1.75 gallons. I'm mounting it high on the frame so we'll open the tunnel for additional fuel capacity and weld the area shut.
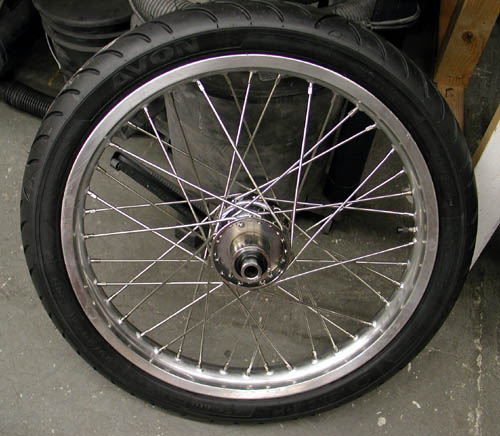
I'm jumping around. Let's get back to the Rev Tech wheels. The spokes are stainless with polished aluminum rims for a long lasting approach. Even the Paughco frame came with brushed aluminum axle plates. We're going to leave 'em alone. Cyril Huze designed a new, between the heads, coil and ignition switch mount. I ordered one without polish or chrome. It's unfortunate that we can't get wheels with Stainless hubs and eliminate chrome all together. The front is a 21 with a 18 by 5-inch rear for a 180 Avon Venom. I don't want a super wide tire. I'm specifically avoiding wide tires. I think they make choppers look like fat-assed chicks. They lose their chopper code of agility and lightness.
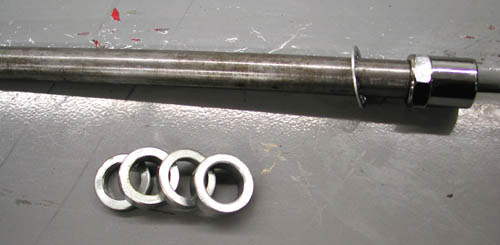
With my Doherty wheel spacer kit I was able to set up wheel spacing quick, for the time being. It's a trick working in the shop by myself and I will try to explain some operations from that perspective. We all face shop blues from time to time. Makes me kick back and rethink various operations when six hands are needed and I'm limited to one on the part and one on the arm of the drill press.
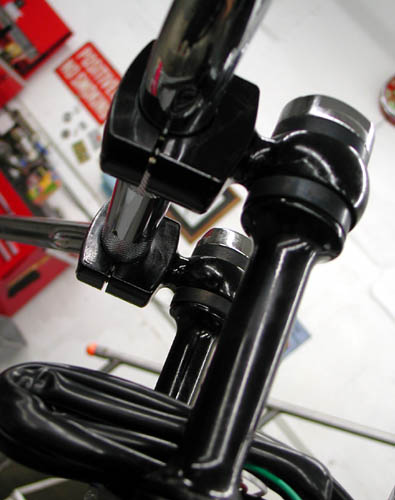
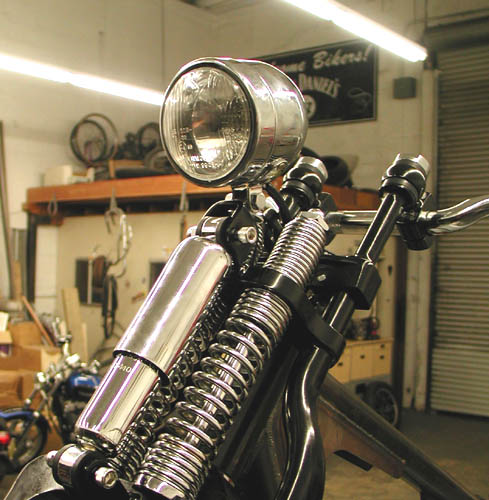
So alone one night I grappled with the installation of the CCI neck bearings (I need a JIMS tool for the races), to install the Paughco springer front end. After a trip to a local fastener store I was able to weave two studs into the rear legs of the front end for traditional, vibration dampening Custom Cycle Engineering risers. The studs needed were 1/2 inch about 2.5 inches long with 1/2-20 threads on one end and 1/2-13 on the riser end. The shop only had two different-length studs and one needed additional tapping to fit.
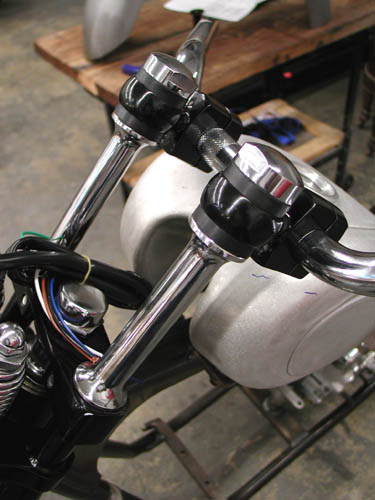

I use these risers on most of my bikes because of the traditional, old school appearance and the vibration element for long runs, but they take a degree of thinking since they shove the bars toward the rider (and often the tank) about 2 inches. I needed to watch for the appropriate amount of tank clearance and ultimately needed the 1-inch longer stems. Very high bars can be a problem with the leverage against the flexible rubber, but with patience, they will work fine. Since each riser is a single unit, they will flex and pivot until they're aligned and tightened down.
I installed low rise drag bars from Custom Chrome/Khrome Works. I'll see how they fit as the seat is mounted. I ordered a seat at a swapmeet this weekend, black with brass buttons by West Eagle. My plan is to bend thick-walled copper tubing and polish it for the final bars.
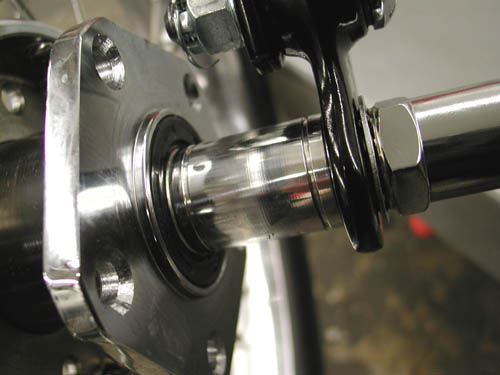

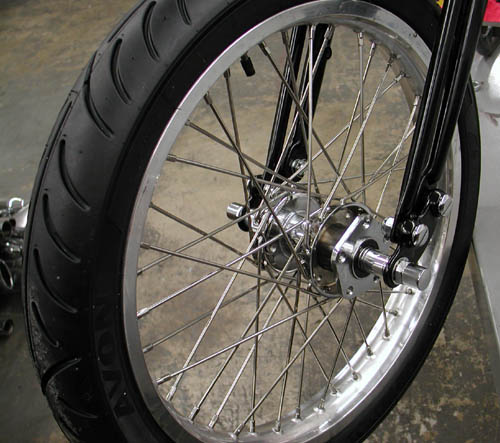
Now Imagine the first time I installed the front wheel, wrestling with the slipping front end and frame, the front wheel, the axle and the spacers simultaneously. Fortunately my 11-year-old grandson was on hand with a rubber mallet to assist. For the rear I used a crate to hold the wheel and the approximate height so I could muscle the axle and spacers through to align it with the frame. It was time for a Corona.

The engine is currently in the hands of S&S for a breast reduction from 103-inch to 93 smooth inches of reliable horse power. I'm waiting on the engine build images to share with you.
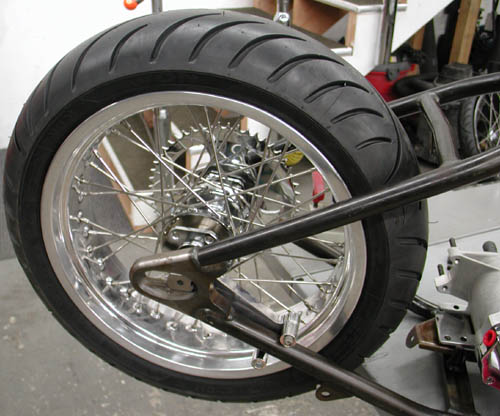
Hold on, I'm slipping the clutch again. Next I mounted the Rev Tech rear wheel with another Avon Venom within the Paughco frame. Unfortunately my Kraft Tech Fender is 9-inches wide and the tire on the 5-inch wide rim runs only 7-inches. I need about an 8-inch wide fender. I'm waiting for the shipment to arrive.
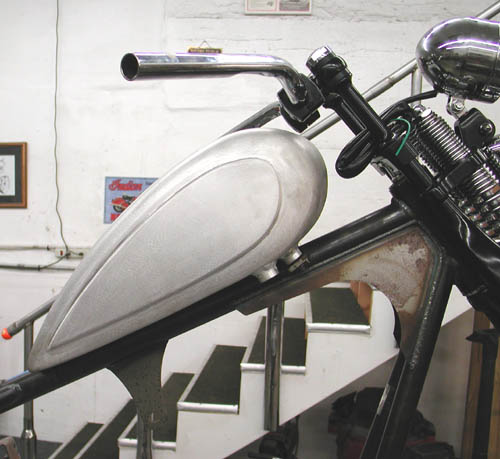
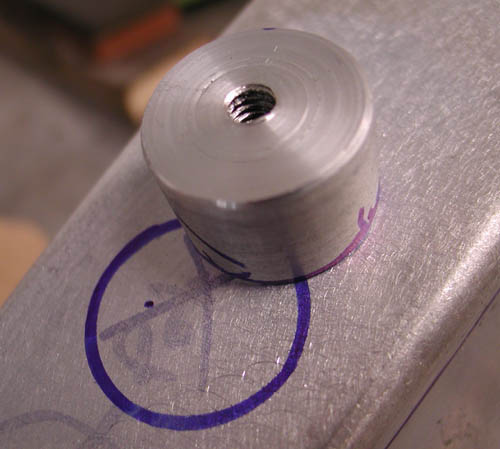
Then I moved onto the tank. I needed to create a couple of bungs for rubber mounting the rear of the tank and tap them for 1/4-20 threads. It was the first time I used our new/old lathe. This is all a new learning experience at the new Bikernet Headquarters. I grabbed a lathe that was rusting in Japanese Jay's backyard. He wasn't using it and I wanted one to cut wheel spacers. I reworked and cleaned the lathe until it was operational then the Doherty crew created a wheel spacer kit? Ah, but the lathe has a myriad of uses, like cutting bungs from a chunk of aluminum. Worked great.
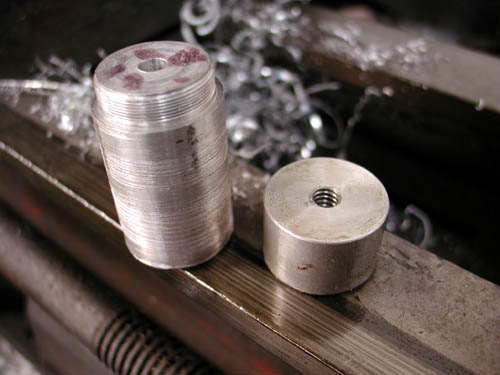
Then I tapped them using the lathe chuck. I discovered that the tank petcock bung needed moving to the rear, since the tank was mounted at an angle. I cut it out with a die grinder and returned to the lathe to machine off the welds.
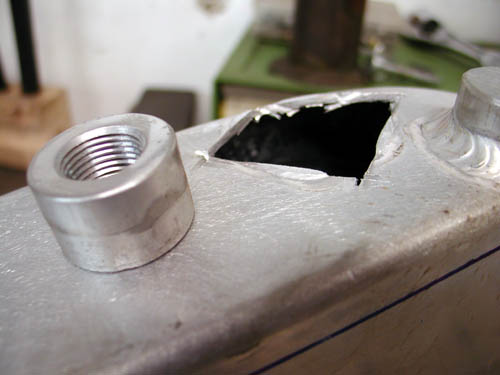
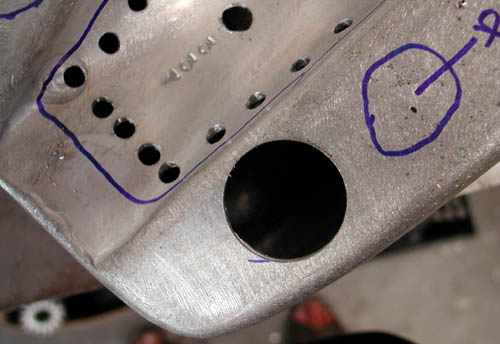
Next I need to learn how to use my new/real old, milling machine. My dad was a machinist most of his life and ultimately an engineer in the oil well industry. As a teenager I worked in machine shops and picked up equipment experience between smoking joints. I swear I learned something.
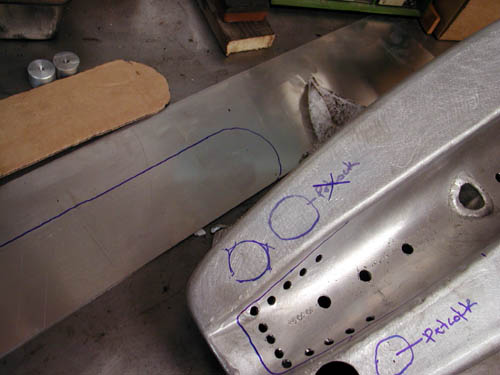
Let's see, what else. I dug through our parts bins and found the exact bracket I needed to mount the Kraft Tech oil bag. I need to cut off the existing coil and oil bag brackets and make a new front mount.
Wait a minute I'm slipping again. I dug through my bracket drawers and pulled a couple of old Jammer brackets 1/4-inch thick. I drilled 1/2-inch holes for the rubber mount grommets from Cyril Huze. I bolted them in place.
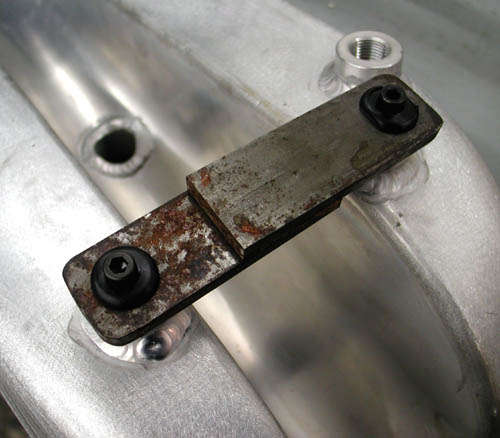
Next, I carefully measured the backbone tubing of the frame and figured the dimensions of the tabs and carefully marked and cut them, then beveled the edges for strong welds.
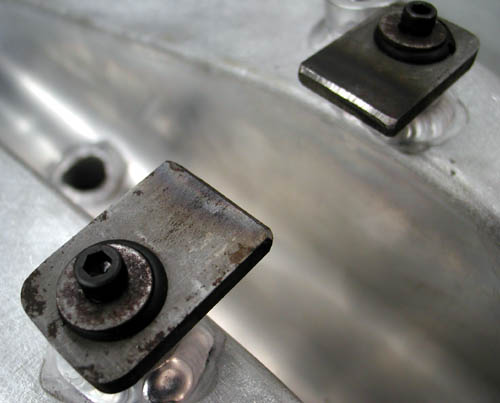
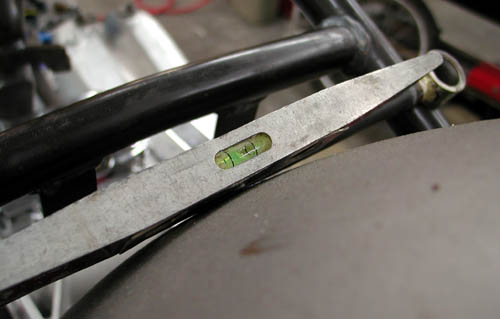
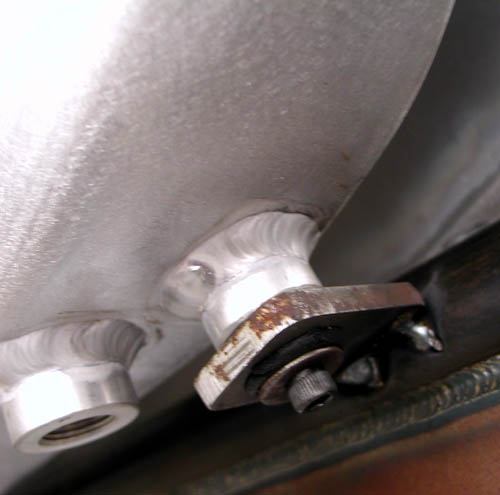
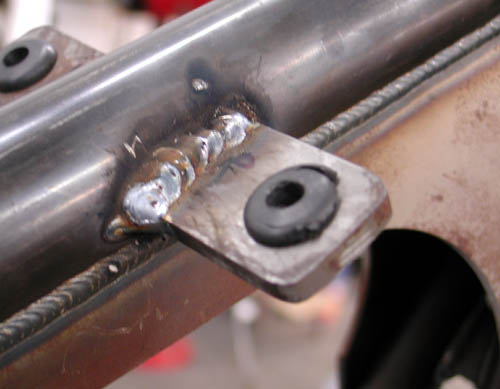
The next day under a sober sky, I refit the tank, tacked and MIG welded the tabs. Once the Bill Hall, pro-welder, welds my tank bungs in place and the tunnel is capped, I can make the final rear tabs and mount the tank semi-permanently. Is that possible?
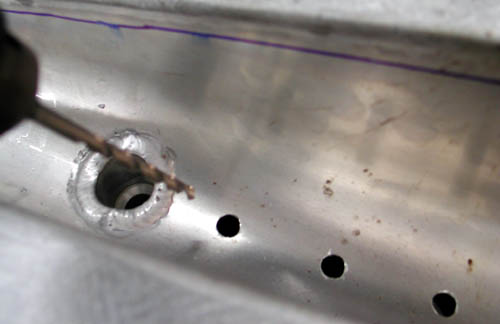
Next, I will mount the Kraft Tech Oil bag, the rear fender and sprung seat mechanism. I'm also dealing with the rear drive. The frame was set up for belt, but more and more I like the chain notion.
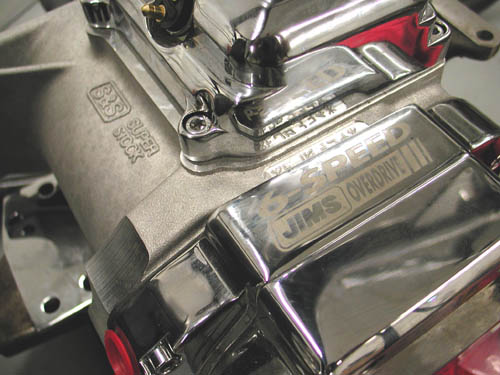
The JIMS machine tranny is set up for 4-speed applications with 6-speed gears. First, I ordered the wrong Custom Chrome tranny plate, then I was twisted about the sprocket vs. belt pulley needed to drive the bastard. I dug through old parts bins until I found gears, since it looked like a gear-driven job. Then the sprocket didn't fit. I'm still trying to figure it out.
I'm going to meet with Jim of JIMS in the next couple of days and get to the bottom of it.
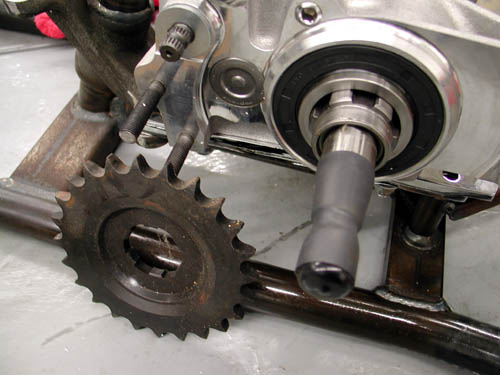
Although the frame is set up for a belt, that means if I run a chain, I'll have plenty of alignment flexibility. Hang on for my next report.
–Bandit
Doherty Machine
1030 Sandretto Dr Unit L
Prescott, AZ 86305
928-541-7744
mailto:Dohertymachine@aol.com
BRAND NEW CUSTOM CHROME CATALOG RELEASED–
Want the Custom Chrome's new offering for 2005. The California based distributor brings you the most comprehensive product offering in the Harley-Davidson aftermarket! At over 1,500 pages and over 25,000 part numbers, their 2005 Catalog features the new RevTech 110 Motor, Hard Core II, bikekits, frames and forks–everything from nuts & bolts to performance products. It's the Custom Bike Bible for the year. No, this is not the latest book, just click on it to find the real deal.
ONLY $9.95 + 6.95 Shipping**
** Price may have changed.
Sturgis Shovel Part 6
By Robin Technologies |

Here we go. I’m relunctantly behind the eight ball, or more likely the 5-Ball in this case. The bike is nearly complete and I haven't caught up with the articles. For the most part I was working at Primedia on the bike mags and didn’t have time to breath. No fucking lame excuses. Let’s hit it.
My original plan called for brass sculptures to hang this bastard together in a purely Bandit way. I messed with some odd heavy brass cloverleaf rod that was over a ½ inch in diameter. I wasn’t having my usual creative luck with bending or messing with this material. Kent from Lucky Devil Metal Works in Houston recommended that I use silicone Bronze rod and I’ve since messed with it. I shifted gears from Gargoyles and sculptures to pure mechanics. I started drilling holes is everything.
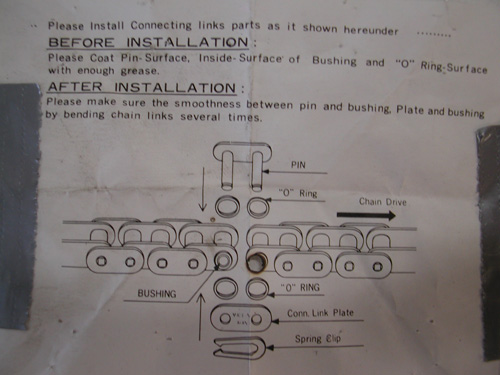
I discovered a piece of ½-inch wide strap that I thought was copper. Remember that the notion behind this mess is to use as much bare metal as possible. As it turned out the strap was brass so I gave it the Scotch Brite treatment and went to work. Before I made or positioned the rear Custom Chrome chain I needed to align the wheel, the transmission and the engine. I used my BDL inner primary and pulled the loose engine and tranny into position. Then I centered my chain axle adjuster and installed the chain using the CCI instructions (above). I have an old chain breaking tool, so I took out just enough links.
With the chain in place, aligned and adjusted the wheel using the Doherty wheel spacer kit (a life saver). I couldn't mess with the requisite chain guard until all was in the correct groove. Although the Paughco custom frame is designed for a belt, I choose the old school route and it worked out well. Lots of extra space to mess with.
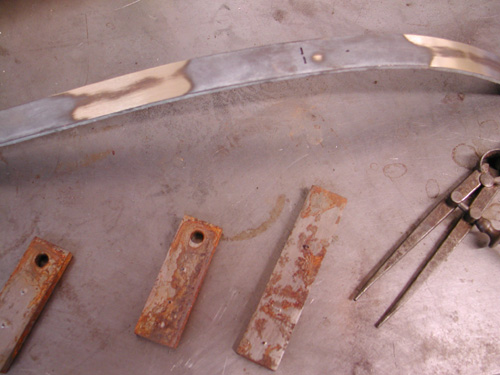
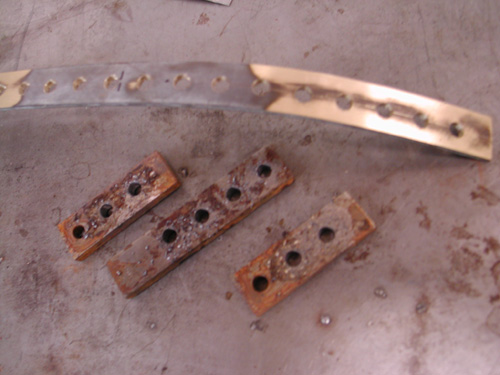
I dug through my drawers of tabs and crap that I’ve had around for 25 years. In the old days Mil Blair would call me from Jammer from time to time and tell me when it was time to shit-can scrap iron. I picked up tabs, spacers and brackets by the fist full and I’ve been moving them from place to place ever since. But damn, when you need a tab it’s bitchin to find just the right size in a drawer. Since I was going nuts with the drilling treatment, I matched the work on the frame with holes in the chain guard and counter sunk the edges for a more rounded look.
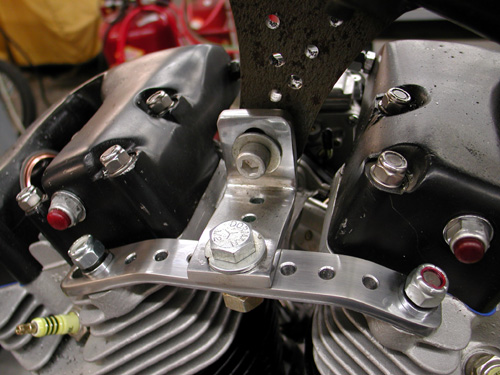
I also hit the top motor mount with a similar treatment. To give it a bit of consistency I measured from center to center on the holes and made all the holes the same diameter, 1/4-inch.

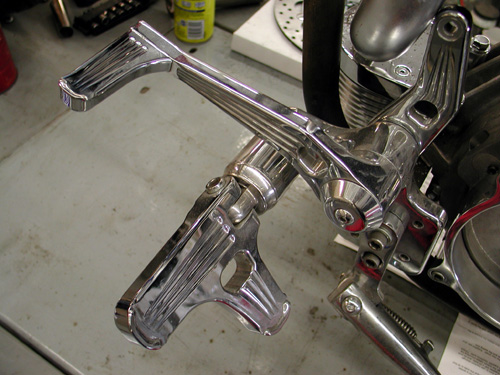
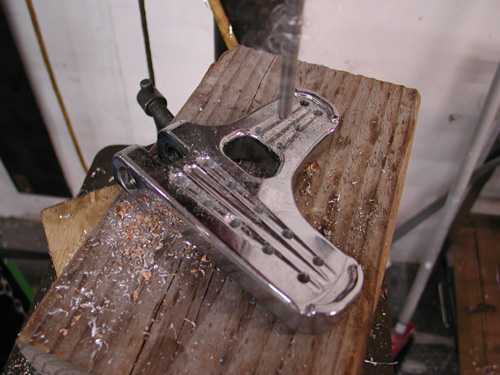
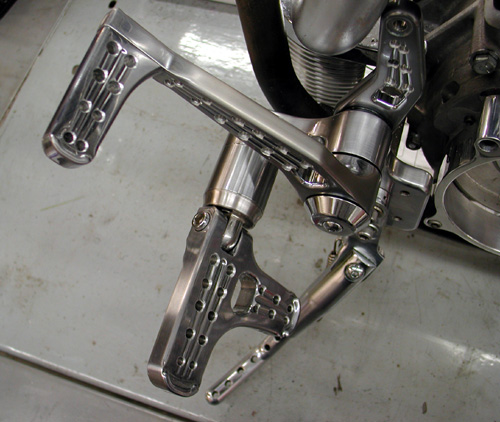
The hole deal became an obsession. I started drilling ¼-inch holes in everything including the Joker machine foot controls. I also went after Russell Mitchell’s Scotch Brite code. I swallowed hard and rubbed a piece of chrome with the coarse material and discovered that chrome reflects everything until it’s brushed with the wiry fabric. It gave it a raw material appearance and I decided that it was cool but a pain in the ass to do.
Again, I drilled the holes the same space apart, ¾ of an inch. It’s not always that easy, though. Sometimes the formula just doesn’t work. I use a pair of calipers to hold and mark the distance from hole center to center. If a hole ends up being located too close to an edge of the material, I back off and try another formula. Make sure to plan before you start drilling.
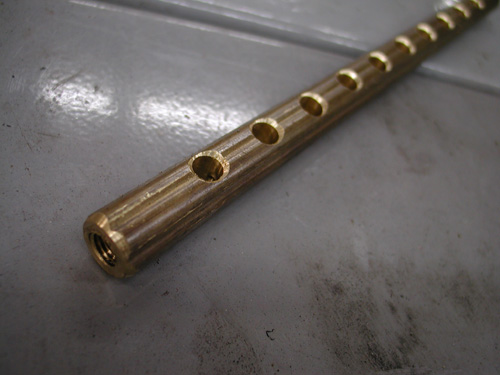
Here’s that damn brass stock. I was determined to have Brass, Copper, Stainless, Aluminum and a bare metal effect on the frame. You’ll see shortly how it worked out. I couldn’t bend that brass shit without destroying it, so I made the shift linkage out of it. I cut it off on a bench lathe and drilled and tapped the ends to 5/16 fine threads to fit the fine thread heim joints. Then I drilled the rod and countersunk the holes to remove the sharp edge.

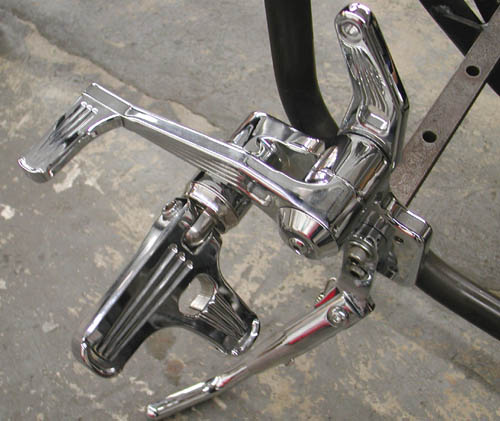
Here’s one of the Joker Machine control sets, rubbed with Scotch Brite and drilled. They make fine controls, some of the best. You can adjust these puppies anyway you choose to fit your riding position, inseam or foot angle.

Before I leave this chapter I’ll touch on this new petcock from Spyke. It’s incredible, if it works well. It’s designed to give you every option for positioning and spigot direction. I ran into only one problem. No wrench lands to help tighten the bastard.
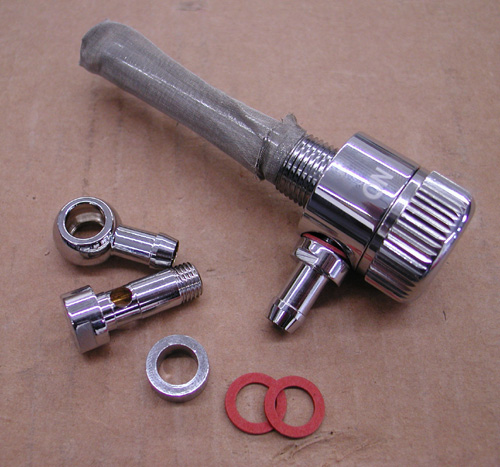
Check it out. You can run it faced in any direction and still read the switch locations and turn the knob without a lever smacking the frame and components. The spigot set allows builders to face the gas line in any direction.

I used the straight spigot and took off one of the fittings because my tank threads are female. The only problem I had was tightening it down, but I’ll get to that after the powder coating returns from Foremost Powder in Gardenia, California.
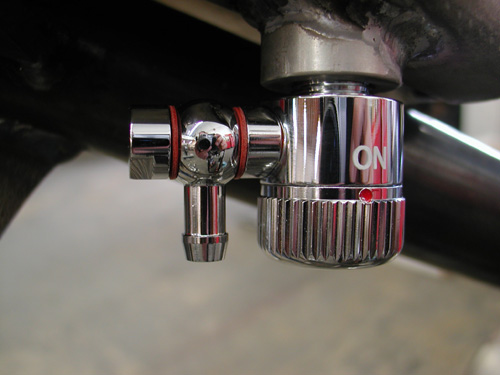
This puppy will revolutionize the industry for petcocks, if it works. I’ll let you know in a week or two.
Ride Forever,
–Bandit
1928 Shovelhead Project Part III
By Robin Technologies |

The lovely Lena Fairless, who has threatened to marry Bandit (the sixth Mrs. Ball) and make him work for her folks at the Easyriders Dallas store, has been pushing to see that this 1928 Shovelhead project is completed in time for her wedding plans. Bandit doesn’t seem to move unless there’s a motorcycle and a woman involved. There’s just one problem in this case, which Lena is well aware of, she’s under age…
The other news on this project is that we now have a corporate sponsor, Ed Martin of Chrome Specialties, and a mentor, Chica, who builds bikes in Newport Beach, Calif. Chica built “Trick,” the old-time Sportster that Chrome Specialties is displaying at all the events it attends, such as Laughlin this month. Randy Simpson from Milwaukee Iron and Arlen Ness are also building spindly retro scoots with late-model drivelines. I spoke to Arlen the other day and he told me that a number of top builders in the country are building this style of beast for upcoming shows. Arlen is now building Sportster frames, sidecar frames and the tubs for these units. He’s sold 10 sets. Don Hotop is building aluminum tanks, so soon the parts for building these retro bikes will be even more available.
The contact stateside for the European parts we used is Fred Lange at (805) 937-4972. He has access to seats, fenders, front ends, tanks, headlights and more. Let’s see if we can pick up where we left off.
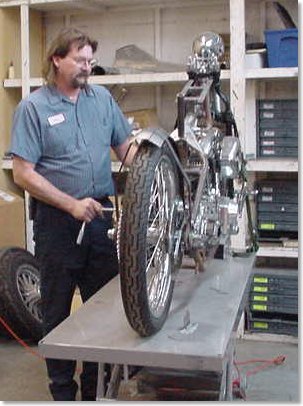
The frame is a stock rigid Panhead configuration from Paughco, with a stock, late-model Bad Boy front end. To drop the front slightly, Jim Stultz, Rick’s main fabricator/bike builder, used a KT components lowering kit to make the frame level because the newer springers are XA length. The retro tanks are sweat-brazed together and contain the oil in one half and the gas in the other. Unfortunately, the tanks did not fit the frame at all and had to be disassembled, cut and re-welded to fit. The fun part of such a round-the-town project is that it can be a true swap meet special once you have the basics in hand, and you can slip as far back into the retro world as you want. You can roll with chain or belt. You can use any old brakes you have around. Rick chose to use disc brakes and a chain, but he’s going with a jockey shift and internal throttle assembly from Chrome Specialties. The charging system will be state-of-the-art Compu-fire and the carburetor S&S. The engine and transmission were rebuilt from the ground up by JIMS machine and the engine cases are STD.
Both wheels are 21s for that spindly look. The handlebars were designed by Jim and bent by Milwaukee Iron. With the internal throttle cables, there will be a minimum of controls on the handlebars. Since the transmission was rebuilt with the notion that it would be electric start, an aluminum inner primary will be used with an old-time-looking tin outer primary that Rick picked up at a swap meet. Rick ordered a narrow Karata belt drive for the primary.
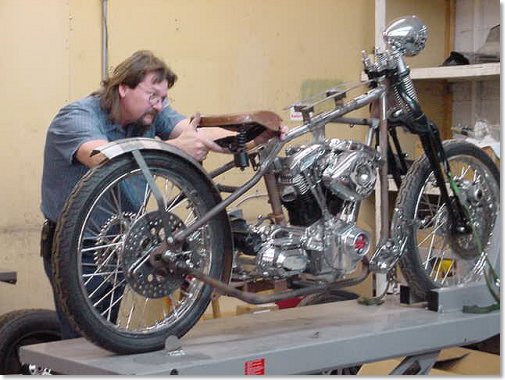
Jim sliced all the mounts off the frame except the front footpeg mounts, the engine and tranny mounts. Since the oil tank is part of the gas tanks, the only additional container would be for a battery to conceal a car-type marine ignition switch and a light/toggle switch.
“I try to fabricate components to be user friendly,” Jim said. He designed the battery box so it would only take two bolts out of the seat post and two out of the rear section and the whole pan will lift out through the top. The two sides covering the battery will meet in the middle in a flying wedge configuration, and Jim plans to build a top cap to conceal the battery from the area under the seat.
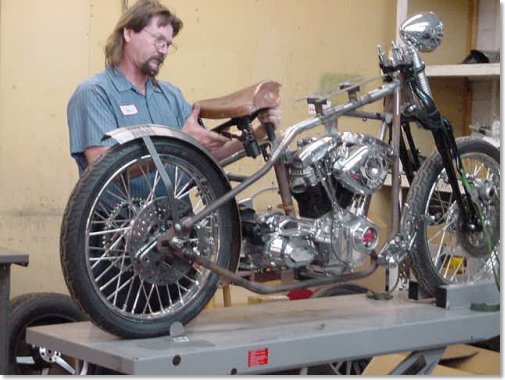
The steel gas tanks, once cleansed of the brass, were chopped and channeled to clear the rear head. The entire center of the tanks was removed to fit over the frame. Unfortunately that reduced the gas capacity to 1.5 gallons. The European threads in the cap bungs were tapped out of sync, so they had to be re-machined.
Lena teases Bandit with occasional shots from her mother’s digital camera. Next week we’ll discuss the mounting and installation of the Compu-fire ignition. Some members of the staff will be happy to see Bandit go to Texas, others, mostly the women, are bummed. He even called to see if he could ride it back to the coast and was told that it didn’t carry enough gas to get him out of town. Evidently the tank is Lena’s design.
–Wrench
Mudflap Girl Part 1, the Concept
By Robin Technologies |

Life is nuts, or is it just me? Fortunately, we have motorcycles and women to chase. And this year became the year of the Evo, the FXR, and the mudflap girl. I’m scratching the back of my head and wondering how to kick off this build for 2011. There’s a lot on the plate this year and it’s a tad difficult to explain. First, I must fess up. I’m turning 63 this year and no more riding rigids to Sturgis, or even chasing young broads. Ah, but the adventure continues. It’s actually a blessing not to be hassled with women troubles. I’ll let my son, who just turned 37, deal with the addiction to soft curves. I’ll hide out and watch…


The solution for my missing long distance rider was an FXR, and I have one, the John Reed V-Bike that I took to Bonneville in 2006 and set a 141-mph record with a top speed over 150. Unfortunately, I have a hip problem and can’t ride mid-control bikes anymore. I even modified that puppy, but that didn’t do the trick. I love that bike. So, what the fuck was I going to do?


Okay, so I started to piece this bike together. We factory re-manufactured a ’98 Evo engine and JIMS rebuilt the transmission into a six-speed. I had a couple of Renegade Wheels and Progressive Suspension shocks. Then I had a conversation with Kenny Boyce, the man who designed the Pro-street FXR frame. He wasn’t happy with now-defunct Quantum. I also found out that some of these frames break in front of the seat area at the backbone. The project was moving forward with a Custom Chrome, super-wide, upside down front end, Aeromach risers, and we added super wide, Burly bar highbars.
I even had an aluminum mudflap girl oil tank I ordered from Nick at New York Choppers. The bike was leaning toward a pro street touring model with a set of Redneck Softail fiberglass saddlebags and a Klockwerks touring bike rear fender.

I was rolling when Kim Hottinger called and asked if I could haul my old ass out to the American Built/Spitfire manufacturing facility in Rancho Cucamonga, California. Paul Cavallo was the engineer/manufacturing guru behind Hellbound steel. As we watched the production chopper industry dry up, in the wake of a floundering economy, only the diehard survived, and I wanted to support anyone who understood the code of the west.

The brothers who love motorcycles, choppers, bobbers, and custom parts continued to jump up every morning and do what they adore, work on motorcycles. Some went from building hundreds of bikes every month to a handful, but they kept building. Paul downsized and kept rolling with his father at his side. When I saw what he was up to, I was inspired. He can build any frame, for any motorcycle configuration, so my mind went wild. We could build a Frisco’d and stretched, single-loop FXR, and I dragged an old Durfee girder out to his facility so Paul could see how the master built the originals. Imagine an FXR with a state-of-the-art girder.

Paul is a wild man when it comes to building and manufacturing anything. He re-engineered the girder and refined the looks, and added two shock mounts to incorporate a state-of-the-art front suspension. Over the next year, you’re going to witness Paul’s Spitfire abilities with features in several national magazines, and you’ll begin to see his products pop up in Custom Chrome catalogs.


The more we moved forward with this bike, the more inspired I became. This was a bike for me, maybe the bike for my old-guy riding future, now that my Road King was down the road. So I went to Paul with the deal of the century: build two of these frames and front ends. I spoke to Paul, then to my son.

There had to be a goal behind this effort. We would ride to Sturgis together. Shit started to happen fast and I ran into a TV producer who wanted to follow the build, and Leomark studios got involved.

Next, I reached out to Chris Kallas and we started to work up a concept drawing. Here’s some of the e-mail that flew back and forth.

Here’s my initial description:
Frank’s bike: classic black mag wheels from Metalsport. Klock Werks rear dresser fender on Frank’s, might bob it. Both wheels will be mild width. Mudflap girl theme on my bike and Hardball tattoo on Frank’s. Paint reversed from Frank’s bike to mine. Forward controls on my ride, Frank’s will run mid controls. Rubber pegs, grips. dog bone-style tall rubber mount risers. Shotgun pipes. One Redneck bag on the left of Frank’s bike. We also talked about a small front fender.
–Bandit

Some questions?
Black and chrome or silver Evo engine?
Your wheels? Mag or spokes, what kind?
Style/brand of headlight, tail light?
The risers are the type with rubber mount at top?
Carb/aircleaner?
Shot gun pipes, staight, no mufflers?
Style of seat?
Your fender the same not bobbed?
Brakes? Dual or single up front? What brand of rotor/caliper?
If any of these things aren’t specific yet, they could be semi generic on art.

If you can send any photos or links to of fenders, wheels, bags, brakes or controls, it would be helpful.

As for paint, just a thought.
It looks good with lots of black or aluminum, and chrome.
It also looks good with your signature orange accents or striping. Since I’m not crazy for white frames, they could both have blue frames and just flop the two-tone paint on the tanks and fenders.
— CK 
Here’s the basic FXR platform showing the frame modifications.
This is with a 3″ extended swing arm.
I need to go back and recheck some measurements but it will give you a
rough idea of the stretch up front.
Is this the type of exhaust setup you were thinking of?
When you said shotgun and 2-into-1, I wasn’t sure.
— Chris K.
I think we should go with this type of exhaust, if we plan to pack passengers. I’m going to ask Dar about that swingarm, but my tendency is to extend it about 1.5 inches, not 3. The stretch looks great. Let’s fuck with those fender rails, arch them, or make them disappear and bob the fender slightly. Plus I think we will need to lower the rear at least an inch, with shorter shocks.
–Bandit
Hey, here’s my first crack at putting it all together. Overall the stance looks good. Since it’s a rough draft without much decoration, I just threw a couple
of mud flap girls on it. I thought I’d try a traditional Sportster/FX headlight with it’s rubber- mounted bulb to stay with the theme of using rubber pegs, grips, and
rubber mounted-risers…. not to mention a rubber-mounted engine, plus I like them.
The frame tube behind the shocks creates a challenge for curved fender struts. I’ve included a couple of photos of some frames so you can check out that area, plus for general interest I tried mounting the tank higher (Frisco style) but thought this looked better.
You might use a semi-later model Sporty tank (when they first started making them larger but still had a carb).
I don’t know at what angle or how Spitfire plans to deal with the secondary neck brace under the tank, so just drew it how I thought it might go.

When you said a Fantasy in Iron tear drop air cleaner I took that to mean a plain Goodson (no rib), for engraving. (We now have a Roger Goldammer air cleaner for Frank’s bike)
Since you need to run a front fender, I made it small. I like when they show most of the top of the tire.

Questions:
Who’s handlebar and foot controls do you plan on using?
How about brake calipers?
–CK
Hey, Chris,
I feel like I want more attitude. How about the tank mounted in line with the bottom of the top bar and stretched a tad at the back to more of a point? Take out the stress bar and add a gusset there with a mudflap girl cut out.
Check the news. I ran a shot of the air cleaner, but you nailed it. Did you check out the heavy green flake and silver bike? I like that theme. My bike will have a plain engine. I thought that style worked well with the plain silver, driveline. And I liked the green springer to match the frame.

We don’t need to go with green. It could be almost anything and silver, then reversed for Franks, with a silver frame, and colored sheet metal.
–Bandit

If the Redneck bags wouldn’t fit, we looked at what Bob T. runs on his fantastic RT.
Part number for bags:
’87-90 FXRS conv bags
H-D 90702-89 left
90703-89

As you can see we are flying at this effort. Don’t miss the frame build in the next segment. As it turns out Frank and I will be running the same drivelines: JIMS six-speed transmissions and Harley-Davidson Evo engines.
Sources:
