Doug Coffey’s RetroMod Panhead Part 5
By Robin Technologies |
Risers
What the Hell is 5-Ball Racing?
By Robin Technologies |






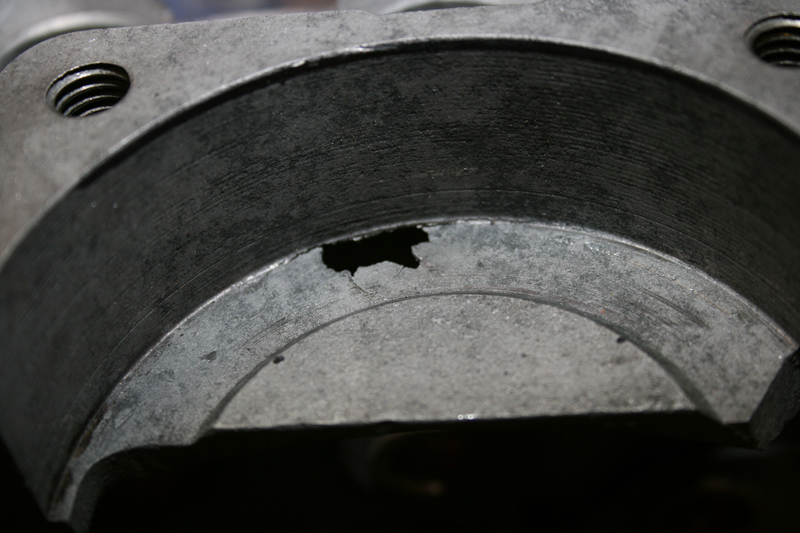
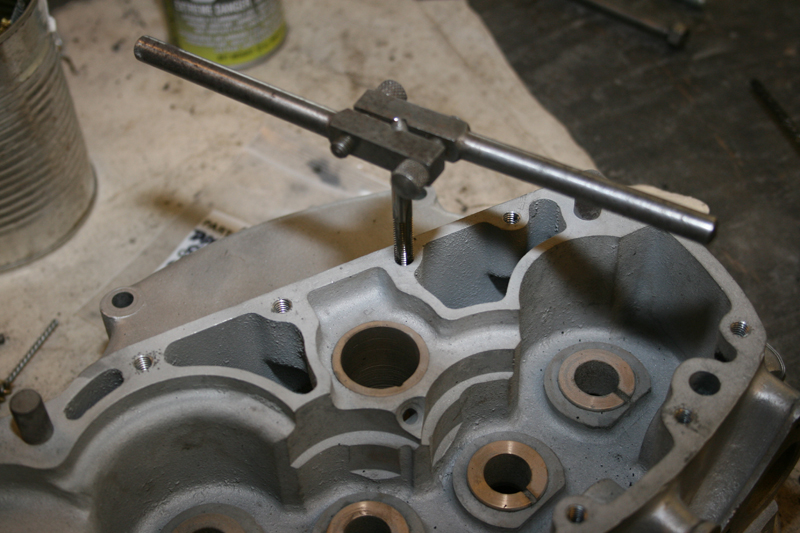
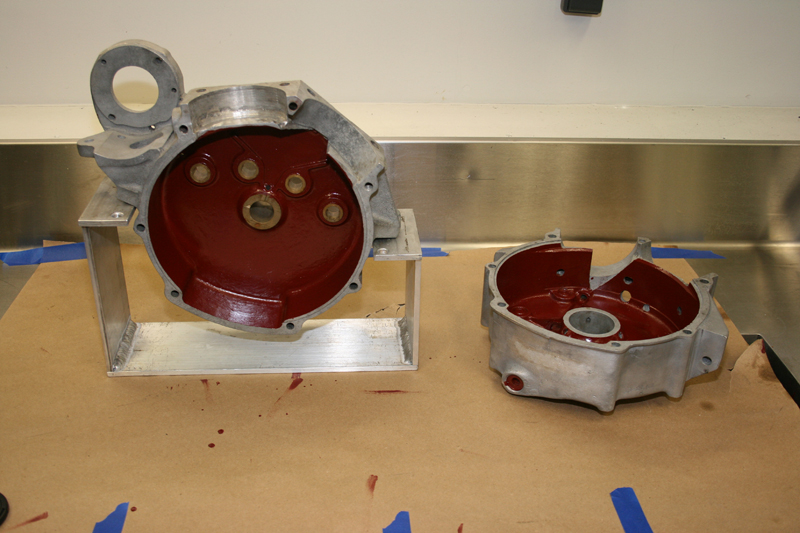
Rebirth of an American Classic: Case Repairs
By Robin Technologies |




|
|
|||
|
|
|||
|
|
|||
|
|
|
Bikernet Project: Charity Bike, Widowmaker Style
By Robin Technologies |
“A man’s got to know his limitations”-Dirty Harry
The Widowmaker crew is ready to do everything from rebuilding the top end of your old Sportster, fabricating a set of head turning handlebars, or adding class to your fresh-off- the-showroom floor Milwaukee Iron, by installing Hank’s custom two-into-one pipes. Then giving her the iconic Widowmaker designed and fabricated intake so she can breathe 15 horses faster. Your ride isn’t made-in-the-USA? No worry, Hank has a solid record of having a complete disregard for the national origin of any type of stray bike landing on his doorstep. He’ll take it and improve on your ideas, or, like he did two years ago, just take a crotch rocket, chop it up, lay his magic welding rod upon it and get top prize at the Ray Price Capital City Bike Fest in Raleigh, NC.
Each year for the past eight years, the Widowmaker family had been organizing a very successful ride raising money to help families deal with their child’s medical expenses. This year is different; Hank is fabricating a custom motorcycle which will feature his signature hand made parts recognizable throughout North Carolina as the Widowmaker brand. The plan this year is to sell raffle tickets and raise $25,000 and give five local families in need, $5,000 each, to help with the medical care of their child. We caught Hank early in the planning stages and wanted to share his progress of this project to the announcement of the winner on September 26th at Ray Price Harley Davidson’s Capital City Bike Fest in Raleigh, North Carolina.
Bikernet is going to follow Hank through the process of building a custom chopper and staying within the basic interactions between: cost, skill level and availability of tools. This is the first in a series of five articles in which we will be going over some issues that need to be addressed prior to putting fire to metal or pen to paper.
Here’s Hank layin’ it out straight for you in his words: Set the goal and make a plan…then be flexible while you work towards that goal. Reaching that goal is the successful art of harmonizing your choices with your plans within the parameters set by your skills, or as Dirty Harry would say, “A man’s got to know his limitations.”
Be honest in evaluating your skill level; choose a bike that works within your ability and the tools you’ve got in the shop. For example, I would not recommend a 2005 fuel injected V-twin to anybody but an advanced builder. If your strong suit is not electrical, stay away from electronic bikes. Stick with the basic skills for a basic drive train and fuel delivery. Use the theory of K.I.S.S.- Keep It Simple Stupid. A carbed Sportster has been a simple and proven canvas for decades of custom builders of all skill levels. Carbed metric bikes are getting more attention partly due to popular magazines such as The Horse-Backstreet Choppers and Cycle Source. The metrics tend to lose their value quicker yet remain reliable, but the metrics need a more fluent skill set. Sportster tooling is basic, aftermarket parts are readily available.
Choosing a bike. Choosing your donor can be difficult. However, surfing the internet somewhat simplifies this option. Knowledge is power, knowing people helps. Know your surroundings and what you are willing to do to get what you want. What are you limitations? If you find a great deal on a bike but its 1,000 miles away, is it worth the drive? Consider any time, effort and expense in acquiring the donor bike or parts for your project. Speedy decision making is the key to sealing any internet deal. If you find a good deal, jump on it. There are plenty of up and coming backyard builders, and many are out there in the fast lane. This is where your skillset, tooling, and above all- your planning comes into play. Choosing a bike that best fits your ability is better than choosing a bike that better fits your wallet. Knowing your limitations will save aggravation and keep you from wasting time and money. Decide if you want a running bike or not. Running bikes are easier to start with. You’re trying to re-engineer the bike completely. If you decide an engine rebuild fits your plans, your market for a donor bike expands considerably.
Choosing a wrecked bike. First question, does it run? Look at causes of failure. How bad of a hit did the bike take and where? What are you changing about the bike and how does this affect what your plans are? Is the front end in the frame? Are you replacing the frame? Looks can be deceiving. Frame can be bent. Always check. Where was the impact? What deemed it totaled? What condition is the engine? Compression Test? A compression test tool can be easily found at your local auto parts store. Review the specific bikes requirements before performing the test. Basic actions, remove spark plug, disconnect ignition coil, install tester. Spin engine over with throttle open. Evaluate readings. Every engine has different specs. Know your specs. You should not have a difference of more than 10% from one cylinder to the other. This will give you an idea of overall internal condition. An easy way to decide if you have leaking rings or valves is to squirt some oil into the cylinder. Retest them if you have a poor reading. If your value goes up, the rings are bad and the valves may be ok. How long has it been sitting? Perform a Cylinder Leak Down Test using another tool easily found. This can be confusing to understand. You will have 2 gauges. One showing the air coming into the cylinder, the other showing a percentage of air lost. The more air lost, the worse the condition of the internals of the engine, i.e. valves, rings, etc. Make sure the valves are closed and engine is on Top Dead Center (TDC) for that cylinder. Does it run? Get a grasp on the variables of how long it has sat, what is the overall shape of bike? How many miles? Is the speedo stuck on a certain speed? This is a good indication of speed of impact. Is it water cooled? How will this affect your ability? Can you rework the design of the cooling system? Have a game plan for the bike. What parts will you have to fabricate to use in your build? Again, what is your skill set and tooling for the bike? Plan ahead. How far can your abilities carry you and what do you have to buy or source. Make sure your plans also consider the laws of you state for signals, light sizes, handle bar heights, fork lengths? Look at the overall of the bike. What is damaged, where, why, how come?
In this build, we are using a wrecked ’99 Yamaha Road Star 1600. The insurance company determined the bike was “totaled” based on overall damage vs. cost of repair and value of a repaired bike. The bike was running good and in good riding order. The majority of damage was isolated to the front and right side of bike. Fender, exhaust, tire, turn signal bar, etc. (insert pix here). (talking about points of impact, overall condition and damage). But the overall running works of the bike were intact and in good running order.
Having a plan. For this project, we chose this bike specifically based on availability and cost. Knowing our skill set on the front end, we knew this bike would be a challenge, but be a great build. We already planned ahead. We had a Crafttech frame with a 240 back tire that needed a large displacement motor. The 1600 cc Road Star engine fit the bill. Now this comes into tooling. Keep posted to see how the overall pieces are made to fit. See you next month.
SPONSORS
Triangle Cycles
Grip Ace
Chop Rods
Fastnel of Roxboro, NC
Amzoil
Ah-maiz-in Paint and Finish
Carolona Custom Powder Coating
Turner Asphalt of Raleigh, NC
Camp Bow Wow
Chandler’s Towing
Peak City Trucking
Carolina Ceramic Coating
Brandon’s Harwood Floor and More
Bennett’s Performance 2004 Dyna Build 106-Incher
By Robin Technologies |

Eric Bennett grabbed the shop door chain and hoisted the roll up door for the first time, in 2000. He started his mechanical career as a certified diesel mechanic with 60-weight always flowing through his blood stream. Finally, he gave into his entrepreneurial spirit and his desire to make motorcycles his life—he opened his own shop on Signal Hill. The rest is motorcycle history, much of it spent at the Bonneville Salt Flats with his dad, Bob.
He recently owned a modified twin cam FLH, but a customer made him a deal he couldn’t refuse, so he let it go. Then a deal on a Dyna surfaced and he made a quick move to snatch it. This time, he decided he would take it to the concrete and rebuild every aspect of the bike to be moderately fast, ultimately reliable, precise, and built with absolutely all the best mechanical intentions and components in mind. You get to see the 106-inch project unfold before your very eyes right here.

One of the benefits of running a service center in the largest city in Los Angeles County includes encountering every possible mechanical malady and the ability to research whatever solution might be necessary. Since LA is also the motorcycle media hub, he has constant opportunities to test anything new on the market. After working on Twin Cams since their introduction into the market in 1998, Eric has watched every configuration, modification, performance recipe, and model roll in and out of his shop.


With this build he could pour every lesson and improvement into his own ride. It started as a bone stock 2004, 88 cubic inch TwinCam. Eric could choose from any hot rod configuration in the world, but he chose to roll with a 106-inch kit from S&S and Branch re-tuned heads. He started the process by installing a JIMS Timken conversion into his left case and welding his crankpin into the S&S lower end after it was balanced.

“With superior S&S flywheels, I didn’t need to monkey with the cases,” Eric said.
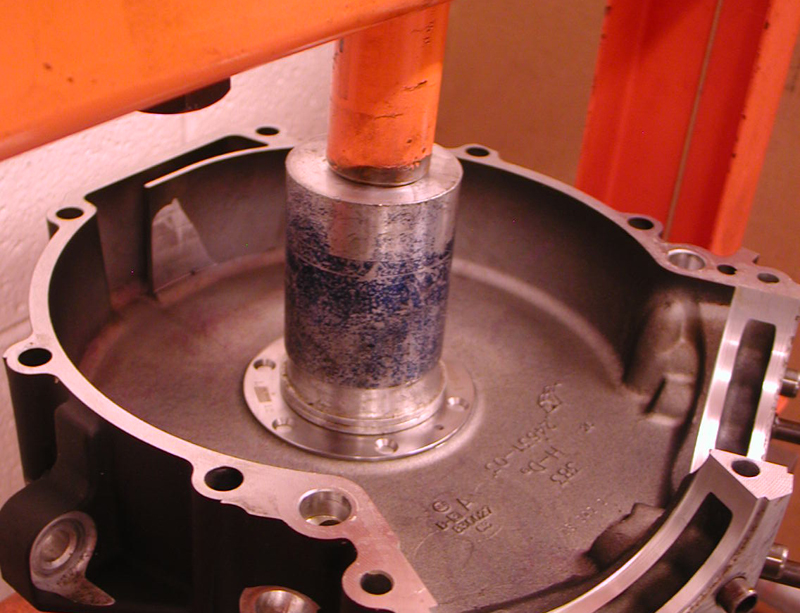
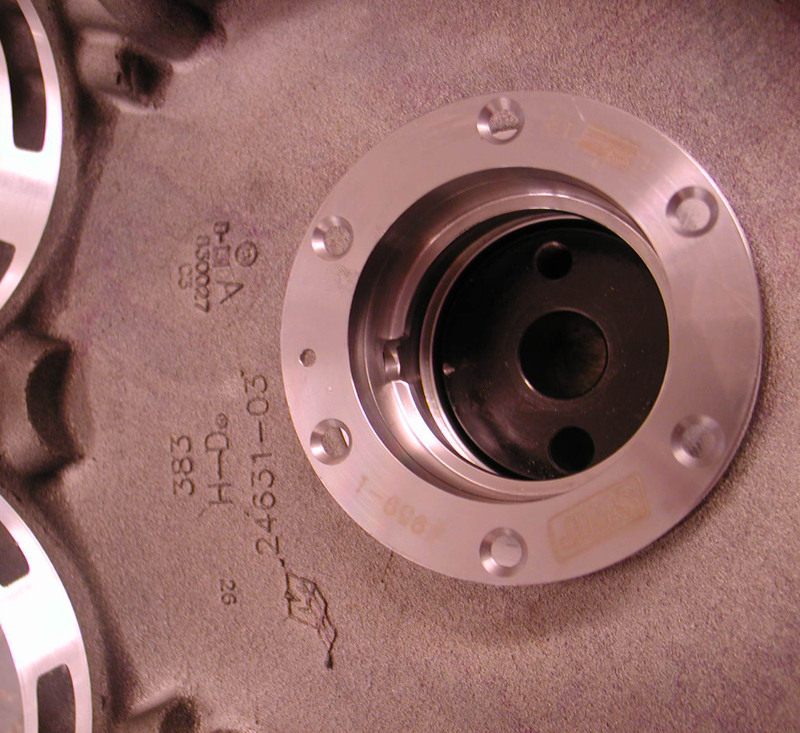
He bored the stock barrels from 3 ¾ to 3 7/8 inches and increased his stroke from 4 inches to 4.5. With JIMS tools he pressed in the JIMS race (using green Loctite) (9-59-1) while keeping his fixture perfectly flat and the hole in the race at 12 o’clock.


Using a JIMS fixture tool, he was able to drill guide holes in the case for Timken bearing and race oiling. The JIMS tool holds the drill and guides it. The drills are set to indicate the depth. Otherwise, he would need to use transfer punches and a milling machine. Then he used another JIMS tool to drill for the race fastener holes, and used tap guides to prevent misalignment.


“I’ve made tap guides for every size tap,” Eric said.


One of the benefits of the higher quality Timken lower end bearings is their ability to lock the lower-end into place.
“I have never seen a Timken bearing fail,” Eric said. Until recently Timken’s were used since 1957. “I’ve seen dozens of roller bearing failures!”
The cost saving shift to roller bearings started in 2003 during the 100th anniversary season. “The best Twin Cams were built in 2002,” Eric confirmed. “Better engines, still carbureted and with 1-inch axles for strength and stability.”


Eric used red Loctite on the race screws. He uses a tool for installing both Timken races at the same time. Kelly McKernnan, an amazing machinist out of Portland, Oregon, manufactured it.


The next phase included welding the S&S flywheels. Anytime Eric has a twin cam lower end out of a customer’s bike, he welds the crankpin in place with stainless TIG rod. It doesn’t create much heat and is not a structural weld; it just cements alignment and prevents shifting. He always checks the true after welding.

Next, he installed the Timken bearing by heating the race to expand it, and it slippped over the shaft easily. There is very little endplay in the shaft, just .001-.002-inch. Eric cinched down the top bearing with another JIMS tool, then pressed in the main seal and spacer with yet another JIMS tool.


At this point, we shifted to pressing the new S&S cam bearings into the new heavy-duty Screamin’ Eagle cam plate for hydraulic cam tensioners, but Eric chose to shift to an S&S gear drive system, so he blocked off the oil passages to the hydraulics.


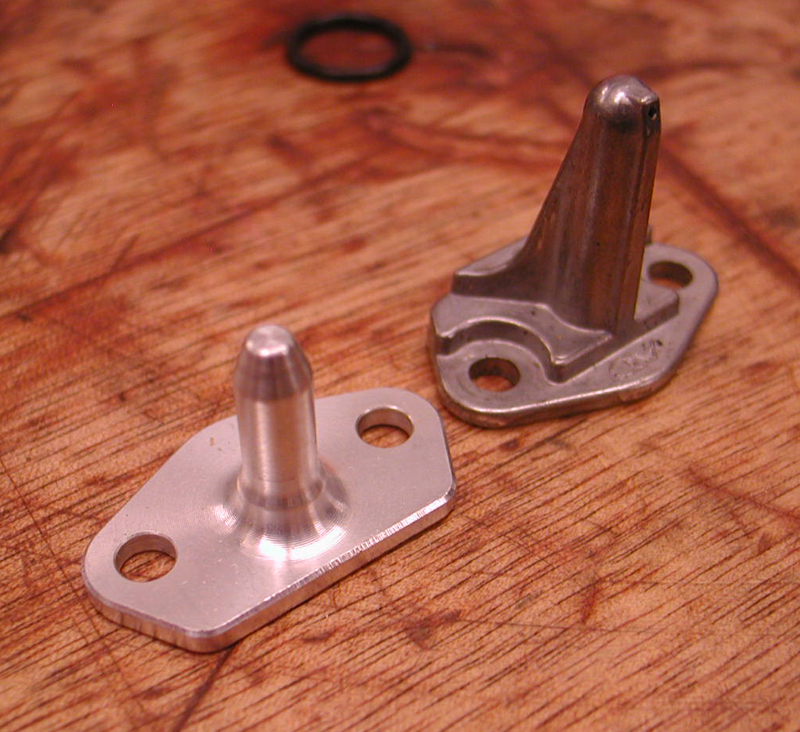


He installed Torrington cam bearings in the right case prior to installing the new cams. His plan called for installing a D&D Bob Cat exhaust system, which is 20 pounds lighter than a stock exhaust. D&D pipes come bolted together with all spring clips, flanges, and heat shields in place. “They take like two minutes to install,” Eric said.


“It’s the easiest system I have ever installed,” Eric said. “It comes with the all the components needed and the heat shields in place. No shimming is necessary or egg shaping holes.”
Day 2


We took a break for the day and grabbed a beer. But the next day, Eric installed a heavy duty Harley-Davidson pinion shaft bearing kit using a JIMS pinion bearing tool and it was time to slip the cases together with Yamabond on the case edge, while applying assembly lube on the pinion shaft. The case bolts were torqued to 18-22 ft. lb.


“Don’t forget the new oil pump O-ring when installing the high flow H-D pump,” Eric pointed out. Eric has an engine-building quirk. He continually turns the engine over, while rolling through the build process, and constantly tests for changes. “I want to catch anything that might bind early on,” Eric said. We actually ran into a small glitch while installing the cam plate.


But first, he installed the oil pump return gears, and then the separation washer and the spring, before the feed gear. He bolted the cam plate in place with ¼ -20 fasteners torqued to 120-inch- pounds. He used guide pins to help align the oil pump, and turned the engine over while tightening the pump so it would seat itself properly. He tightened two oil pump bolts, then removed the guide pins, and then tightened the other two Allens.


While aligning the cam drive gear dots, he installed the cams and used red Loctite on the drive gear Allen bolts, but used assembly lube on the washer for more accurate torque values and to prevent the bolt from galling against the washer surface for a false torque reading.


As we wrapped up the operation for the day, Eric installed the lifter with the oil holes facing the cam cover, then the guide pins, caskets and covers. No more lifter stools.


Day 3

Eric sub-leased a portion of his Signal Hill building to Branch O’Keefe, perhaps the best head porting business in California. I don’t want to put down any performance heads, but Jerry Branch, who is now about 82, built a helluva business around head performance.

Here’s a description of their heads from the Branch-O’Keefe site:
This is where is all began. Branch-O’Keefe is known throughout the industry for legendary cylinder head modification service. Our extensive reworking of stock Harley-Davidson cylinder heads begins with removal of the stock valve seats and guides. Next, the combustion chambers are heliarc welded to add additional aluminum alloy in the combustion chamber and around the valve seats for re-machining.

The valve seat pockets are then machined for larger nickel-chrome valve seats, and the combustion chamber is cut from the stock low compression rectangular shape to the legendary Branch “bathtub” chamber. After cutting the combustion chamber, new oversize valve seats and performance-quality valve guides are installed to tighter than stock tolerances.

The heads then advance to the porting room where the ports are fully hand-ported, blended and polished to Branch’s exacting specifications as proven on the dyno and flow bench. The head’s gasket surface is machined an additional 0.050-inch, which raises compression slightly. Finishing up, new oversize intake and exhaust valves (hard chrome stainless steel with stellite tips, polished face) are installed in bigger seats with a machined race-quality valve job and then hand-lapped. New seals and a high quality high-lift radius spring kit complete the installation.

The Branch O’Keefe head components are damn impressive from the titanium upper collars to the single oval wire spring with more travel and a larger diameter spring material. They have developed heads for JIMS big inch motors that produce 132 horsepower and ft-lb of torque, at an absolutely stock reliability level, even on a B motor. So natch, Eric had John O’Keefe and his master right-hand man, Paul go through his heads. Actually they used a formula they call the Dave Thew head. It’s a nickname for a performance formula. Dave beat everyone with these Branch O’Keefe head configuration. I will outline the different formulas next week.


We started the day installing S&S pistons with wrist pins first, since the oil rings pass over the wrist pin holes. Seems odd, but it’s the nature of the short-skirted piston. “Actually it allows for more skirt on stroker motors and does away with stroker plates,” Eric said. “This piston configuration will keep a stroker running longer.” The oil ring must be positioned with the dimple in the wrist pin area in a particular location to prevent rotation. The S&S pistons use four-piece oil rings with a removable ring land.


Eric installed the bottom compression ring so that the opening faced the exhaust port area. “No gaskets are used on the bottom of the cylinders,” Eric said, “just O-rings.” He compressed the rings carefully, lubed the inside of the freshly bored cylinder and slid the cylinder into place. Then Eric spun the motor over to check for binding. “I can’t wait to hear the D&D pipe.”


Eric started to install the heads using Cometic gaskets. The heads were torqued to Cometic specs and then he set to installing the rocker boxes and the fasteners, which were torqued to 22 foot-pounds. He started from the inside and worked out. Then he slipped in the S&S Quickee-Install intake pushrods for maximum valve opening. “I run premium S&S lifters with travel limiters,” Eric said. “They become solids at high RPMs.”


He tightened each pushrod until the valve slipped off the seat, and then let it bleed down, for about 10 minutes. He backed off the adjustment until he could spin each pushrod (one at a time). Then he backed off just one complete turn or six flats.


These shots were taken before John O’Keefe came up with a crazy notion to machine Twin Cam cylinder fins in a round configuration. Eric was knocked out by the procedure and pulled his barrels for the process.


In the next episode, Eric will slip the beautiful 106-inch Twin Cam into the stock frame, and we will discuss JIMS tools, while replacing the inner primary bearings, the slightly modified Dyna D&D pipe, and then and the new Rivera Primo clutch, the S&S G carb, and a new S&S high flow air cleaners.


Sources:
Bennett’s Performance
S&S
JIMS

Timbo’s ’64FL Panhead Part 3, Engine
By Robin Technologies |


Tear down was straight forward, first I removed the carburetor, followed by the oil pump, gear drive housing, push rods, tappet blocks, rocker covers, heads and barrels. After the barrels have been removed, place a couple of shop towels around the connecting rods to keep debris from falling into the crankcase.

I carefully cleaned all old gasket material from all the mounting surfaces. I ended up using razor blades and plastic scrapers. Be careful not to gouge any mating surfaces as you scrap. Any abrasion could create a leak if the gouge is deep enough.

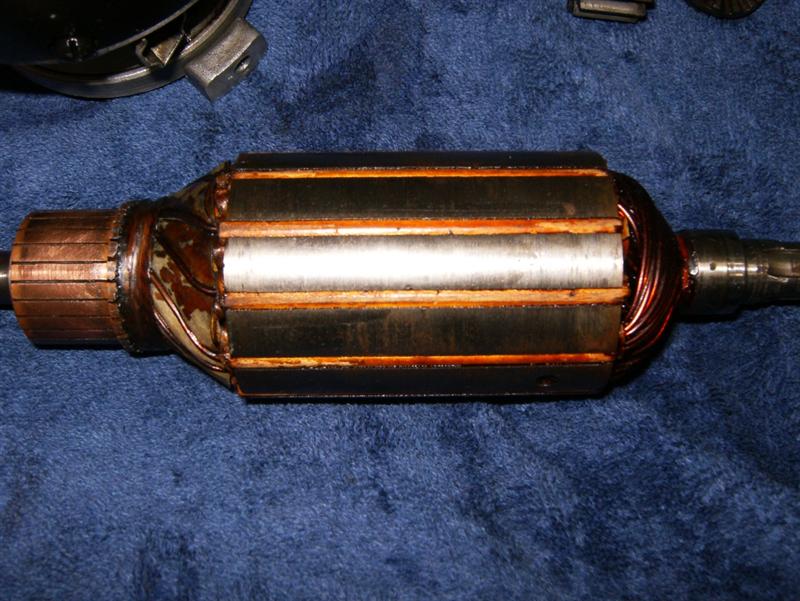
You can follow the generator instructions in the manual. It’s extensive and takes patience, but not overwhelming. I just hope it works, as a new costs around $400! Ouch! I also found “Rene “at National Starter in Lancaster, California. He Put the 6v through its paces to make sure we have a strong working unit, Thanks Rene!! The old mechanical voltage regulator was replaced with a new solid state unit and the OEM dual point circuit breaker was replaced with a state-of-the-art electronic dual contact unit from Quick Start 2000.

Ed from Quick Start custom builds electronic circuit breakers specifically for vintage motorcycles, and he spilled a wealth of knowledge, always willing to help in any way he can, yea ED!!!!
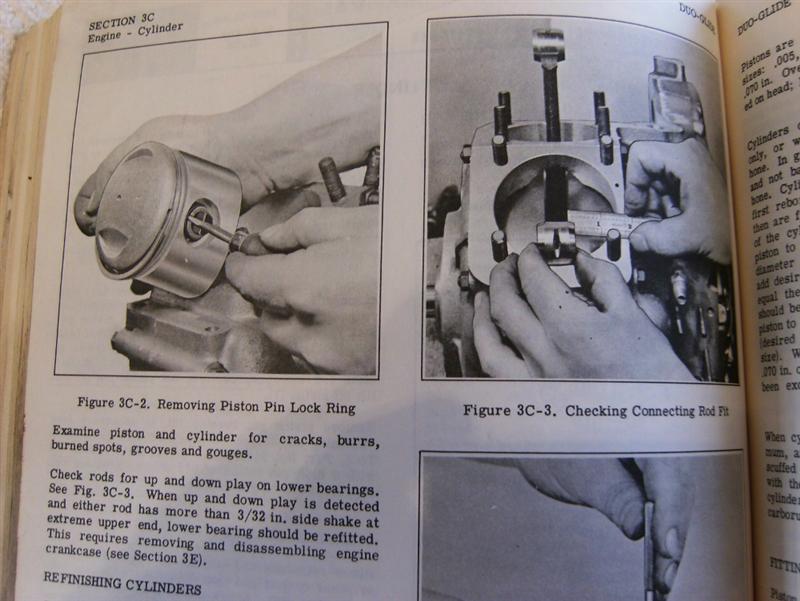


Rebuilding the oil pump was a simple task, you can get the complete kit from J&P Cycle. The gear case cover was removed and the timing marks were checked for alignment.


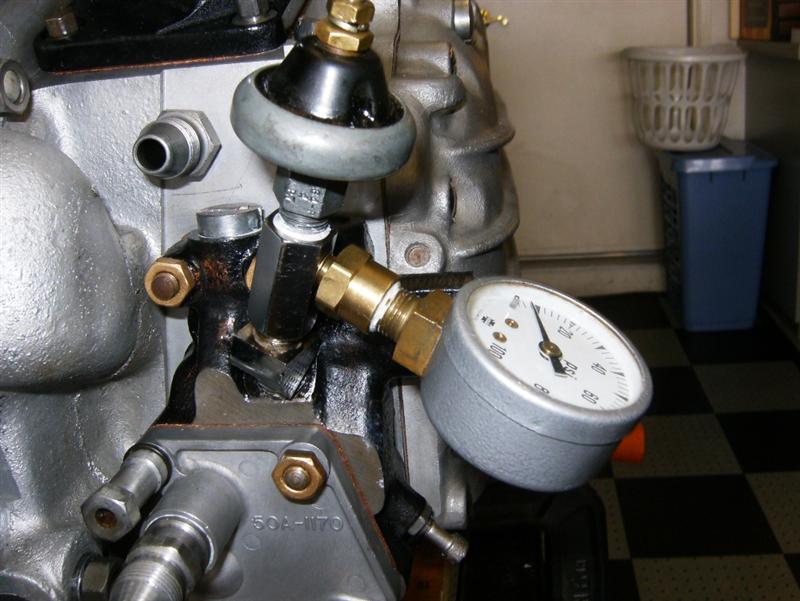

I removed the tappet blocks and tappets, cleaned them and miced them to see if they are within tolerance, they are. Be careful when reinstalling the tappets, they need to go in the same position (same hole) they came out of, with the oil passages near the rollers pointing inward (refer to manual). Failing to do this will cause the engine to seize, and we don’t need that.
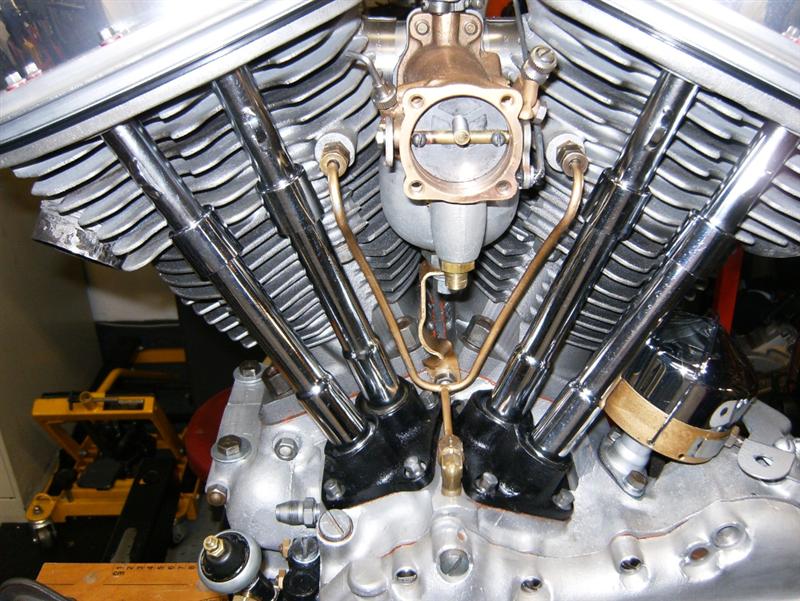

Timbo wanted the barrels to be blonde, so I had them bead blasted to remove the black Bar-B-Q paint someone had put on. In my opinion, they look way better blonde. As far as the heat transfer, I don’t think it makes much difference. Most Harley engines of today are blonde, the black is a cosmetic option. I have built aircraft engines for 20 years, and almost all are bare metal cooling fins. I coated the bare metal with clear 1500 degree heat paint, just to make sure they don’t rust up on me.

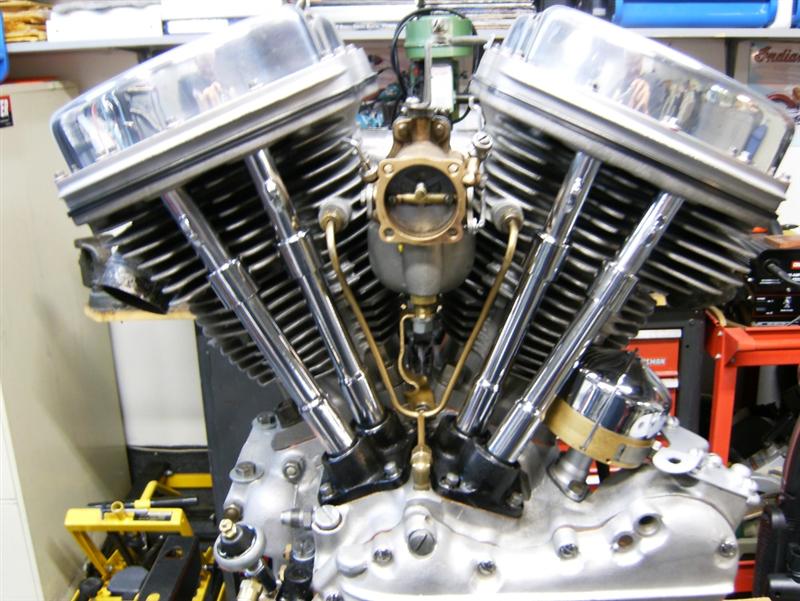
We can argue the “black heat dissipation thing” at a later date! For the barrels and heads, they suggest you purchase a special wrench to ease installation and removal. I found a little patience and a standard 9/16 and 5/8 box end wrench and 12-pt. deep socket worked just fine for removing the barrel and head bolts. I was fortunate to have the original manual, a Clymer manual and a cool restoration book sent to me from Bandit.


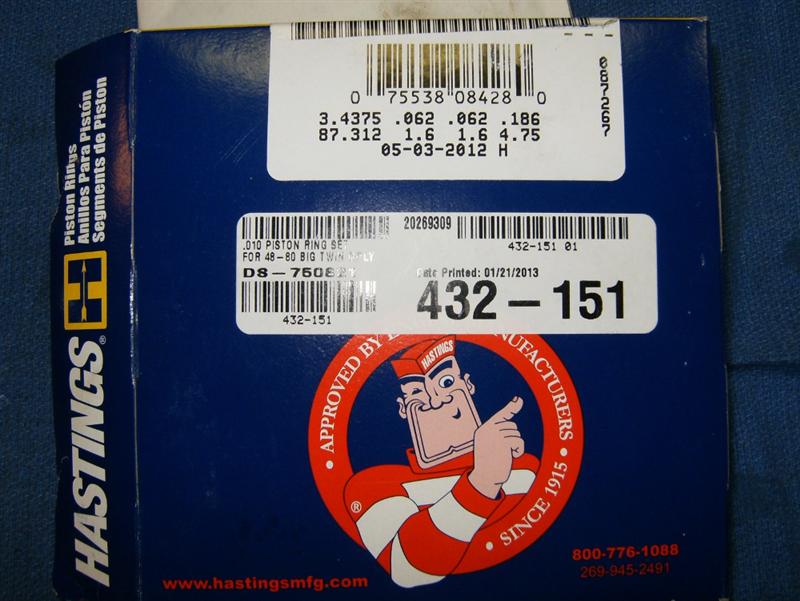
New rings installed along with the cylinders cleaned and honed. The heads looked really nice, no gunk had built up yet and the valves were lapped just to make sure. I also cleaned out all the oil passages, don’t want any debris mucking things up!!
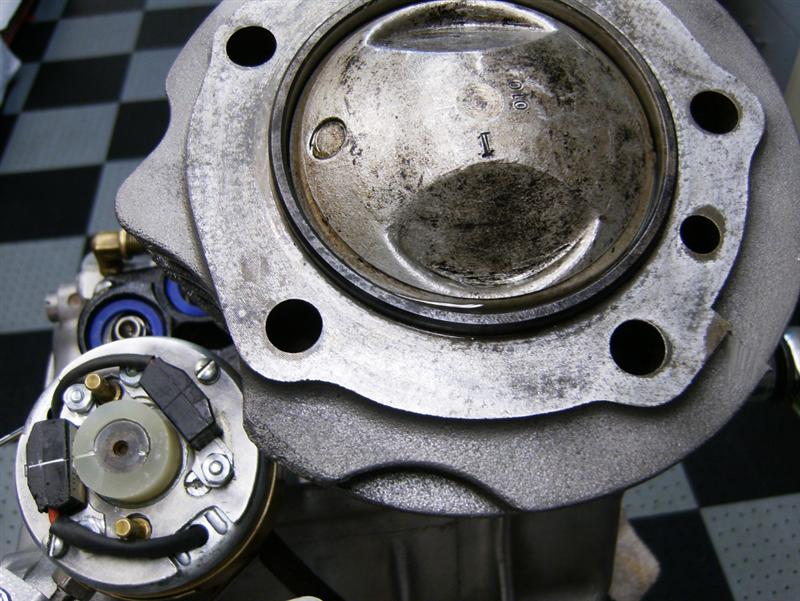

At last, the engine is complete for now. Since beginning this article, I have already installed the engine and trans in the frame, another article on the frame will follow soon.


Tail Gunner out for now!
Doug Coffey’s RetroMod Panhead Part 1
By Robin Technologies |


Other than the missing sidecar sidecar loops, it has a strong resemblance to a 1957 straight leg rigid frame. Exactly what I wanted.
Mudflap Girl FXRs, part 11: The First Road Test
By Bandit |
Mudflap Girl, chapter 10: http://www.bikernet.com/pages/Mudflap_Girl_FXRs_Part_10_Suspension_Tuning_and_Le_Pera_Seat.aspx
I can’t make it to Sturgis this year. We are focused Bonneville builds, like mad starving dogs, and the two events are only separated by two weeks. Ray is tuning and I still don’t have an engine, but we’ll cover that later. The engine could be running today, in Richmond, Virginia, at Departure Bike Works.

Okay, so what’s a poor bastard to do, when he planned to make the run to the Badlands with his brother Hamsters? They ride out from the West Coast every year. Some of the members, including Arlen Ness are in their 70s and riding custom Victory bikes. Some rode from Spearfish, South Dakota, out to Mammoth Lakes, California, to ride back to the Badlands with their brothers. So, what’s the least I could do? Meet them at their first stop in Mammoth, just east of Yosemite?

The good doctor has owned several motorcycles, including a 1934 VL I helped get running, but one motorcycle stuck with him, a 1989 FLH. He had clocked over 200,000 miles when he decided to rebuild it. Bennett’s Performance handled the semi-stock Harley engine (the rebuild was covered on Bikernet). With a couple of thousand miles on his rebuild, and 50 on mine, (another 80-inch semi-stock Harley engine, assembled by S&S, with headwork by Branch O’Keefe), we rolled out of Los Angeles.
About 15 million folks know rolling out of Los Angeles is the biggest challenge to any weekend excursion to someplace less congested. It’s amazing, like no-man’s land at the front of any war zone. Just try to slip out of Los Angeles on a Friday. Try to peel by noon or before. If you don’t you could be faced with serious bumper-to-bumper malady, or a lane-splitting conundrum. We recently published a report about splitting lanes and the benefits. They actually made a case for increased safety in areas supporting lane-splitting.
I’ll make one case for the freedom to split lanes, maybe two. Well actually, the published study pointed out the benefits of keeping motorcycles moving during high-congestion back-ups. My point included any rider’s sense of alertness. When splitting lanes the rider’s acute awareness is on high alert. Even while putting past a myriad of parked cars, a brother never knows what could blink, so his senses are hot wired. He or she is aware of anything that moves, from a slight wheel shift, to a nod, or a turned head.
So, I split lanes as soon as I hit the 405 freeway, off the 110, the oldest freeway in the US. It runs directly into the heart of Los Angeles, downtown, from my digs in the Port of Los Angeles. As I pulled out of Wilmington, two concerns stirred my humble sense of motorcycling comfort. First, I discovered my rear chain smacking the Spitfire hand made oil tank. There was always a bothersome noise bugging me, and I finally discovered the treacherous origin, the rear left corner of the FXR-styled, rubber-mounted oil bag.
Fortunately, the Spitfire team had welded a threaded bung into the corner, and a tab off the frame. I ran across the problem during assembly and removed the tab for more clearance, but evidently not enough. So the night before the run, I removed the chain, cleaned the threads with a tap, and made a countersunk Teflon bumper to protect the tank, but would it last? Or would the chain disintegrate my protective barrier, cut a hole in my oil tank in the middle of the Mojave Desert, dump all my oil onto the highway, seize up the engine, and leave me to be tarantula bait, after I baked under the 107-degree blistering desert sun?

I also made one final adjustment to my Wire Plus speedometer sensor stuffed into the JIMS Screamin’ Eagle over-drive 6-speed transmission. I had tried everything. I was at a strange juncture. It’s been so long not working, if it worked I would have been shocked. As I pulled away from the headquarters, I wasn’t disappointed. It still didn’t work. Now, I have another idea. I didn’t connect the wire from the sensor to the speedo wire directly, but to a connection board. Maybe a direct connection would be the trick.

Somewhere in the sizzling desert, with the afternoon sun baking my feeble skull, the notion of this road test article was spawned. The Mudflap Girl FXR contained only 50 break-in miles so far; this 700-mile jaunt would be the iron test. I had followed the Eddie Trotter break-in regime, almost to the tee. With each longer and longer ride, I returned to the headquarters to make corrections, repairs, and adjustments. It was time for the acid test, a long road into one of the hottest regions in Central California, a total round trip of perhaps 700 miles in 2.5 days. That’s a big deal for this old guy.
There I was, splitting lanes across the LA airport toward Santa Monica and the good doctor’s office, where he was leaning over his knockout secretary and adjusting a tall tattooed redhead. Tough job. Sticking around his office near the coast, with a bottle of something, would’ve made my weekend.
Oh, one more concern disturbed my peace of mind. I started to write peach. I was still with the girls in the office. I hand-made the two mounts holding the single RockShox to the girder. My mind whirled with 80mph impact, a bottoming out shock, and the stress on the mounts. Would they last or toss me into the fast lane of a crowded Los Angeles freeway? Ah, for the days when we would build a bike, smoke a joint, down a shot of whiskey and ride some half-wired together chopper across town at breakneck speeds to her house. Hell, we felt so good, it didn’t matter if we made it our not.
While parked at the good doctor’s office, I inspected my Teflon pad. It was sliced severely, in just 40 miles, but the next 40 or 100 would finalize the experiment. My shock mounts hung tough, but what about the next 100 miles? We gassed up and peeled out onto a crammed 10 Santa Monica freeway. Splitting lanes and dodging merging traffic we weaved onto the 405 Freeway. It peels over the notorious Sepulveda Pass, into the San Fernando Valley, and beyond toward the 5 Golden State, high-speed direct link from Los Angeles to the bay area and San Francisco.
We just needed to cut across the 101, to the 5 for a five-mile stretch, and then off on the 14 toward the Mojave mile airport landing strip and land speed trials location. I felt every bump and groove in the crappy road as I leaned into the fast lane and poured the coals to this 80-inch beast. It ran sweet. I set up the dual-fire, Compu-Fire ignition according to instructions, and installed the Trock modified CV carb, but never adjusted any aspect of it, except the idle.

The week before we peeled out I rode to Bennett’s Performance and Eric popped the cap off the air fuel adjustment behind the float bowl, and adjusted it—it was too lean. Trock removed the cap, so the adjustment screw was operational. I rode the bike, noticed an intermittent cough, and called Eric. He recommended backing out the needle one-quarter turn. She seemed happy, and in Mojave we refueled and checked our mileage against Christian’s trip meter. We had covered 90 miles and I reloaded with 1.82 gallons for 49.45 mpg. It pulled well in any gear, even in sixth gear. The JIMS Screamin’ Eagle Overdrive transmission shifted like butter and never missed finding neutral. I geared it slightly high for a 6-speed with a 23-tooth trans sprocket and 51 on the rear wheel.

So far, we flew along big wide freeways through the Soledad Pass, Palmdale, Lancaster, and then into Rosamond. At over 90 degrees, the freeway started to die and turn into a two-laner along-side the Pacific Crest National Trail leading into the Sequoia National Forest. It looked sorta bleak and hot to me, as I pondered the welds that held my chopped Spitfire bars together. So far, the riding position was a dream. My legs were stretched out nicely. I could move around on the very comfortable gel-impregnated Saddlemen seat with the spine relaxing channel, and just a touch of lumbar support. The bike handled well, as I adjusted to the long bike vibe.
Another rambling rural 50 miles in the desert with only rolling hills in the distance, and the 14 Highway disappeared to be replaced with the well-kept Highway 395 in Indian Wells Valley. We passed more deserted truck stops, than active ones. They were extreme sun-dried out buildings. Chipped paint was sandblasted by desert winds, and busted windows gave the dilapidated structures, gradually turning to dust a war zone appearance. I set the bike up to be a chopper for the long road, with rubber H-D pegs, old styled thick rubber Knucklehead grips, and Custom Cycle Engineering rubber-mounted traditional dogbone risers. Since the drive train was rubber-mounted, it all worked to minimize vibration.

We followed one billboard to an old gas station turned into jerky sales headquarters. It bragged “Good jerky.” It was actually so-so, and small packages were priced at nine clams. I wanted to support their sticker-scattered cause. The smiling Hispanic broad behind the counter gave me the okay to plant a Bikernet sticker on the building, yet I couldn’t cough up nine bucks, plus tax for a bag of so-so jerky. We peeled out.

Just a handful of small towns peppered the highway with reduced speed signs, some as slow as 25 mph, perhaps a fund-raising effort. We rolled into Lone Pine and the Dow Hotel, which was packed with tourists and bikers heading to Sturgis. The Dow, built in 1923, was specifically constructed to house movie crews, since a large number of westerns were shot in the region. What a roll of the dice, but it paid off. We topped off and compared notes this time. We had sliced through 111 miles and I took 2.3 gallons, for 48.3 mpg. The doctor grabbed more fuel between stops, so he crossed 38 miles and took 1.2 gallons for 31.6 mpg. He was disappointed, and we discussed options for the future.

The good doctor noticed some drops of oil on the pavement next to my bike. My oil cap isn’t correct for the screw-in bag bung, so I found a press-in rubber cap, with a small dipstick. It worked, but loosely, and a small amount of oil seeped onto the roof of the Spirfire steel oil bag, then some trickled down the right side, onto the frame and dripped onto the pavement. I pressed the oil cap deeper into place and check the oil level, and then it dawned on me. I noticed a softening in my rear GMA brake action. That was the cause.
[page break]

I checked the Teflon pad, and it didn’t indicate any more chain damage, plus the tank was well clear of the carved edge. It appeared very secure, and my shock mount held fast. Vibration was minimal, and at every stop, folks confronted me about the Mudflap girl bike, the traditional chopper appearance, and almost every onlooker said, “Is it a rigid?”
The next morning, we faced just 99 miles for our meeting with the evil Hamsters at the Westin lodge in the heart of Mammoth lakes. The roads were perfect and our 80-inch Evos purred as the elevation increased from sea level to 4000 feet, and we were expecting another 4000 thousand and more pine trees as we cut a dusty trail toward the Sierra Nevada Mountain Range, just east of Yosemite. We stopped in picturesque Bishop for breakfast, but the two hot spots were jammed. We strolled into Whiskey Junction without a problem, then rode the remaining 40 miles to the Mammoth cut-off. I was expecting winding, twisting mountain roads into the mountain/sky resort community, but it was virtually a straight shot. My memory reminded me of a similar stop the year I hit a deer inWyoming.

We didn’t pop for the high-dollar rooms, but stayed down the street at the Sierra Motel, where the doctor pointed out a concern with his front wheel. We rode up the street to hang with the Hamsters as they rolled in as early as noon. Some rode in from Spearfish, but the Bay Area contingent, including Arlen Ness chose to fight traffic in slow lanes through Yosemite National Park. They weren’t scheduled to arrive until the early evening, so we returned to our digs to take a look at his front wheel. Under the backdoor hotel overhang, we found a massive cinder block, jacked up his FLH and removed the front axle. One of the bearings demonstrated serious damage and we attempted to remove it with the help of the Hawaiian biker handyman.

We easily had enough tools between my Bandit’s bedroll and the doctor’s tool bag. Concern grew as we discussed our issue with other riders, and Ted Sands, from Performance Machine. “Did you powder coat the wheel?” Christian scored a couple of late model Twin Cam, 1-inch axle mag wheels, powder coated them, and replaced the bearings with ¾-inch axle jobs, but there was some question about the internal spacer. The spacer needed to be solid against the inside bearing race, and that didn’t seem to be the case. The left bearing demonstrated serious wear. We started to make calls.

The Mudflap Girl bike handled the roads to Mammoth extremely well, although we are hoping to step up and buy another RockShox with at least 2-inches of play and a 250-pound rated spring for testing in the future. I’m sure with the correct resources, we can make this girder ride like a Cadillac. I ran into one problem with the Mudflap girl. The left stock H-D foot peg with massive rubber padding for comfort, wanted to slip off the stem and depart. I thought this bastard wouldn’t budge, but I continually fought it.
We called for local bikes shops, but it was Saturday night and resources were limited. Christian made a run on my FXR to an auto parts and bought a jug of bearing grease, a spray can for chain-styled foam lube, and a small container of Buffalo-snot glue for my peg. I actually needed rubber cement, but gave it a shot.

“The FXR Chopper is one great looking scooter, with just the right stance to have attitude, without being obnoxious,” said the Doctor. “Everyone twists their neck when she goes by.
We operated as best we could on the doctor’s wheel but could not remove the bearing to correct the inner spacer problem. We packed that bastard full of grease and called for a U-Haul truck rental in Bishop for the next morning. The final question: Could, would, should the good doctor risk riding his Bessie down the hill? We confirmed with U-Haul; the regional office would open at 7:00 a.m. The Bishop franchise opened at 8:00 a.m., and a 14- foot box truck was available with a ramp. We would need to score a batch of tie-downs.
We returned to the Westin to hang with our brothers, Buckshot, a Bikernet and Thunder Press contributor, and Marilyn Stemp, the editor of Iron Works. That’s when Ted Sands told us about the drawbacks of powder-coating the interior of late model hubs and the impact on bearing spacers—bad news. I rode the FLH, and it rattled like marbles in an empty tin can, but I didn’t sense any grinding in the bearings. I didn’t want to make a recommendation. This had to be his call. Then I mentioned the 40-mile distance to Bishop. He was thinking 100 miles to Lone Pine.

By the way, we gassed in Mammoth for another 98 mile run. My bike was feeling the pain of reduced oxygen at 8,000 feet, and the night would drop to 41 degrees, but she still ran well. I struggled to squeeze the nozzle into my tank and loaded it with 2.5 gallons (39.2 mpg), and the doctor refueled with 3.2 gallons (30 mpg). He will look into a jetting change for his S&S carb.

As we hit the hay, the doctor decided to attempt the slow ride to Bishop. We set the alarm for 6:30 and tried to sleep.
The weather was amazing, just a tad cool in the morning as the sun slipped between pine needles to warm the streets. We packed and rolled down the hill to the first coffee shop. We were gassed and ready for the 40-mile delicate, risky ride to Bishop, a town of 5,000 along 395 just below Mount Whitney, the highest mountain in the continental United States. We were so focused on surviving the Bishop run, we didn’t think about the cool breeze, my wandering peg rubber, or any distraction. I’m sure Christian was as tense as an over-tightened drive chain as we rolled serenely down the mountainside onto 395 south at 45 mph.

“Going 40 miles down the hill towards Bishop was a bit nerve wrecking, since the bearings were grinding and clackering like marbles in a bag being tossed on the ground!” Said the doctor.
The good doctor rode almost 20 miles, his hands, like vice-grips on his bars waiting for the bearings to scream and spit from their housing. The hefty front mag would wobble, then lock against the twin Performance Machine 4-piston front brakes and scream for relief, maybe locking up and tossing the doctor and his gear in the weeds. I asked him to ride on the right for easy access off the road, just in case.
“But after about 20 miles the sounds and noises started to be less and less,” said the doctor. “Once we got to Bishop it had subsided 80%!!!!!”
We arrived right on time, and spotted a women in the U-Haul yard. “They don’t open until 11:00.” Her husband arrived and confirmed the bad news. Disillusioned, we rumbled into town for a hearty breakfast at Jack’s and made a number of phone calls. If we could make it to Mojave, we could find another U-Haul, but then we would only be 100 miles from home. The Doctor could ask his girl to meet us there with a trailer. He called U-Haul, bitched and sought alternatives. None were forthcoming.

We said, “Fuck it,” and kept rolling. With each 50 miles, his confidence grew, but we remained at a mild pace of 60 mph, them 65. I finally got fed up with my spinning peg rubber and pulled off the side of the road and strapped it down with tie-wraps, pulling them damn tight.

“Do you want to cinch them down with a pair of pliers?” said the good doctor.
“Nah,” I responded. “We’re good to go.”
Yeah right. The sonuvabitch still squirmed and tried to escape. At the final refueling stop in Mojave, I broke out the pliers and pulled those tie-wraps as hard as I could. The bastard never moved again.

The doctor, comfortable with his FLH, resigned himself to flying into LA by himself. I would cut off at the 210 and dodge the rough, jagged, concrete 405, heading directly into one of the most congested intersections and construction zones in Los Angeles, the 101 junction, over the Sepulveda Pass to the 10 Santa Monica interchange. I could fly into the city on the foothill freeway against the San Gabriel Mountains into Glendale, cut south on the Glendale freeway for just 10 miles and pick up the 5 for one mile before I jumped onto the 110 south directly to my door through downtown Los Angeles.

As I peeled off the 5 at the 210, Christian gave me a final thumbs up and rolled into congestion for just another couple of miles, then cut off at the 405. It was just about 3:00, the bewitching hour, before a city of half-drunk yahoos, talking on cell phones and playing grab-ass with their girlfriends, headed home from barbecues, weekend camping beer-soaked outings, cantinas, bars, ballgames, you name it. This is the most notorious crew of inexperienced drivers, on unfamiliar freeways, buzzed, and distracted, heading home after too much fun. This group of millions, in tin overseas boxes and SUVs, with stereos blasting, is in contrast to commuter traffic, made up of professional, daily migrants, who know every inch of their incessant trips back and forth to work.
Both Christian and I have ridden LA freeways for over 35 years. We both rolled into our respective digs within 20 minutes of each other and checked in. Within an hour and after my first Jack on the rocks, I wrote some compliments and foreword thinking thoughts to Paul Cavallo, the Spitfire master, and he immediately responded:

“Hey brother, good to hear from you. Glad you had a great ride,” Paul wrote. “I have you covered on the oil cap. I just finished up a re-design on the girder trees that eliminates the shoulder bolts. I will update yours to the new gear.
“Bill Dodge rode his out from Kentucky for Born Free, and loved the ride, but after a 5,600 mile round trip, those little thrust washers wore thin. I doubled the strength of all of the pivot components, and machined pivot pins into the trees, and cross bars. I even designed a retro kit for all of the existing front ends.”
We discussed RockShox with increased travel, and I also mention raked trees for better cornering. The more you rake a bike, the more it wants to go straight, which hinders cornering. Bikers generally love to corner, and I discovered, with my blue flame that even a chopper can corner with adjusted frame geometry.
“When I update your front end, I will give you 3, and 6-degree links for it,” said Paul in his response. “The girder is so easy to change the rake on.”
There you have it. The first 700-mile distance test of our Mudflap Girl FXR. Scooter Tramp Scotty is right on: Evos Rule and Choppers never die.

Spitfire
D&D Exhaust
Biker’s Choice
JIMS Machine

MetalSport
BDL/GMA
Wire Plus
Branch O’Keefe
Bennett’s Performance
Custom Cycle Engineering
Saddlemen
Progressive Suspension

Doug Coffey’s RetroMod Panhead Part 2
By Robin Technologies |

Bikernet/Cycle Source Sweeps Build Part 7 Sponsored by Xpress
By Robin Technologies |
Hang on. We are two weeks away from running out to Vegas for Bikefest and pulling the winner of this most magnificent custom motorcycle, specifically built for Bikernet and Cycle Source fans, readers, and subscribers. You need to sign up, if you haven’t, or come to the Cashman Center in Vegas to grab a card and sign up for the drawing. You don’t need to be on site to win. After Bikefest, the scooter will return to Kustoms Inc. near Detroit, for final tuning and break-in before being shipped to the winner.

So here’s the update in a flash, after Bonneville, and heading smack dab against a Cycle Source Deadline. “I’m way behind,” said Chris Callen, the esteemed Editor da Emperor, in Chief, in Charge, in Trouble. This year has turned into the scrambling year. We are scrambling to finish projects; builders are scrambling to finish bikes. Chris scrambles every month to finish a magazine. It’s bananas.
The bike was displayed in Sturgis at the Broken Spoke. Then it returned to Grand Ledge, Michigan, down the street from Ron Finch, for final manufacturing and paint by the master of Chop Docs, Ron Harris, but let’s finish the pieces first.
“I kill batteries no matter what I do,” Gary Maurer said as we started to discuss the battery box. “When I carefully rubber-mount the bastards, they vibrated enough to rip the battery cables to shreds.” So now he puts a small rubber lining under the battery and bolts the unit down hard with Jules-made steel battery straps. He is now using Brail and Ballistic batteries with some luck. This is where I started to learn more manufacturing processes from Gary and Jules, again.
It’s interesting. I don’t consider myself a builder, and when I work with someone with the manufacturing knowledge of the Kustoms Inc. team, I know I’m just an enthusiast, not anywhere near a pro builder. This story contains a couple of fine examples of their expertise. The battery straps are easily bent after marking the position for the bend on the top corner edge of the battery. Jules made the hand bend with a solid bar of steel, and then noted the amount of metal used in the radius and worked it into the formula for the next bend so the strap fit the battery perfectly.
“There is a mathematical formula for this process,” Gary said. “You need to add or subtract material from the next bend, but we bend one side and then adjust the other.”
I also noted how perfectly the fender edge fit the line of the tire, since most fenders do not align with the tire radius. “We often scribe the radius of the tire on the fender and cut it to match perfectly,” Gary said.
He uses thick welder ground cable stock taped to the fender to give him the proper fender clearance. “Sometimes we use chunks of busted rear drive belts,” Gary said. “Sometimes, if need be, we can double the belt, or mesh the teeth for a slightly larger space.”
They break the chain to be as close to the center of the adjustment path as possible, with the engine, primary and transmission in place. Then they adjust the chain to be bowstring tight, and then they tape the spacing material to the tire and start mounting the fender.
This Bare Knuckles fender was bobbed and channeled on both sides by Jules. She often cuts with a plasma cutter, and then works the edge with Matabo grinder with flap wheels. Bare Knuckle fenders are made with solid, thick spun steel. They are as strong as a battleship hull and easy to work with. “Our plasma was toast,” Gary said, “so she used a high-speed cut-off wheel, then the Matabo and flap wheels.
I like the exhaust system he built with D&D components and a carbon fiber muffler. I asked how he held the components accurately together for tacking. “I start generally, but not always, with the muffler in place and move forward,” Gary said. “I hold the chunks in place with three fingers and tack them.” If his weld pulls away from the joint, he adds a small ball of rod to one piece, then holds them together, and heats the ball until it flows to the other tubing piece.
Note how Jules fashioned the lower fender mount to the frame so it acted as a battery strap mount and fender mount.
Then Gary built the sissy bar by hand-bending the steel rod. He machined each chunk of bar stock for the frame rails, and drilled them ½-inch so the rail would simply insert into the welded boss. Then he drilled and tapped them for setscrews. On the top, he welded a machined bung to the bar, and a drilled and tapped the bung to the fender, so the fastener simply slips through the sissy bar tab and screws into the solid bung on the fender.
With all the components tested and brushed with flapper wheels, Ron Finch stopped by and picked up the components for the trip to Ron Harris, a third generation paint and body shop guy. “I couldn’t touch a paint gun until I could bump a fender,” Ron said of his granddad. Back in the day, bodywork was hammered and filled with brazing and lead.
“My dad called Bondo Chinese lead,” Ron said. Then he ran down the Chop Docs custom paint process. From the photos, paintwork slides along like ironing an old pair of Levis (who the hell does that anymore?), but any top-notch painter has the talents of a concert violinist. It may look easy, but there’s a refined eye and level of perfection that turns any steel surface into a perfectly smooth piece of art.
As soon as Ron Finch dropped off the components and peeled out, Ron Harris cleaned the welds with a cookie wheel, and then scuffed all the surfaces with 80-grit for a world-class bonded protective coating. Initially, paint was used solely to protect a surface. Now it protects and adds the final illustrious finish.
Then he coated all the sheet metal surfaces with a filler Bondo skin coat and block-sanded the surfaces. This is where perfection and talent come into play. I’ve been there. I couldn’t Bondo a baby moon hubcap and make it look like new. There’s an eye for sanding just the right level of Bondo to capture the perfect slick surface.
He followed the Bondo coating with a skim coat of putty to capture imperfections, and then tested his eyes with various levels of Emory paper from 80-grit, to 150, to 320, so he can minimize his primer usage.
“I’ve been working with Stage 5 Coatings for two years,” Ron said.
Stage 5 Coatings was established in 2008 and is the newest and one of the fastest growing coatings suppliers in the United States. We are committed to selling jobber direct and establishing an exclusive territory for anyone that carries our lines. We strive to offer the best values available in the market. We are a small company that is personal and ethical. We build a personal working relationship with every customer, whether they are our largest or smallest. We believe when a customer buys from us, a partnership is formed, and is not just another customer. We have the industry experience to put ourselves in your shoes and understand the everyday struggles in the body shop business. From us to the jobber to manufacturing, we have the personal hands-on experience in all areas of the aftermarket coatings industry.
States with Stage 5 or Technico:
Michigan New York
Illinois Missouri
Texas Oklahoma
Wisconsin Oregon
California Arizona
Washington Georgia
Maryland Caribbean
Virginia
Ron is working with Ken Dudley on a line of Chop Docs candies. After he primed all the surfaces, he used a black spray bomb dusting to cause imperfections to surface. After any pits or surface maladies were dealt with, he water-sanded everything with 400 grit wet and dry, and then hand-sanded with 600 grit and finished off with Scotchbrite.
With the components hung in a booth, he primed them with two coats of sealer, and then hit them with the silver base coat and inner clear before taping off for the black pearl inlay. Then everything was cleared again and sanded with 600-grit.
This was Ron’s first attempt with green variegated leaf* using Mona Lisa glue to attach it to the paint surface. “It’s like a very thin, watered-down Elmer’s glue,” Ron said. “The leaf is so thin, it’s like dust in your hands.”
Once the leaf was glued into place and the area cleaned with a cotton ball or a brush, Ron hit it with another coat of inner clear, which locks the base down and leaves sort of a satin surface to adhere any art to, such as pin striping by John Harrow, who used a one-shot enamel sign paint called Kansas City Teal.
Now for the final six layers of gloss clear coats and 1500 grit wet sanding, followed by 3000 grit with water, and then buffing with polishing compound, finishing glaze, and spit shine. It’s Saturday, and by Monday, all the elements will be returned to Gary and Jules and Kustoms Inc. for final assembly. Ron volunteered to help. Unfortunately, he’s 140 miles away, but he drove out and spent all day, Sunday, helping with assembly. “It’s 80 percent there,” Ron said on his way home.
Speaking of volunteer efforts, this has been an amazing build with efforts from a variety of sources, all to create a bike we are giving away. No one made a dime off this puppy. It’s all American-made, and the whole gang pulled together to offer Bikernet and Cycle Source readers a shot at a world-class custom motorcycle—thanks. Chance of a lifetime, goddammit.
Dimensions: 5½” x 5½”


Xpress
http://mysmartcup.com/
Crazy Horse
http://www.crazyhorsemotorcycles.com/

Texas Bike Works
www.TexasBikeWorks.com

Kustoms Inc.
KustomsInc@hotmail.com

Chop Docs
www.Chopdocschoppers.com

3 Guyz
www.3Guyz.com

Accel
Accel-ignition.com

Fab Kevin
http://www.fabkevin.com/home.htm
.jpg)
Evil Engineering
www.evil-engineering.com
D&D Exhaust
http://www.danddexhaust.com/
Wire Plus
http://www.wire-plus.com/

Barnett
Barnettclutches.com

Rocking K Custom Leathers
howard.knight@montana.com
Rivera Primo
www.RiveraPrimoInc.com

Spectro Oils
www.Spectro-oils.com

Bell
www.moto@rcn.com

Metzeler Tires
www.metzelermoto.com
.jpg)
Hawg Halters

Handy Industries
www.HandyIndustries.com

Grip Ace
www.gripace.com
Biker’s Choice
www.bikerschoice.com
Aeromach
www.aeromachmfg.com

Ride Wright Wheels
www.ridewrightwheels.com

Biker Pros
www.BikerPros.com

Bare Knuckle Choppers
www.bareknucklechoppers.com

