
Before the engine could be rebuilt, the cases needed some additional work to repair a damaged portion of the front baffle. It appears that an unknown piece of debris was wedged between the backside of the baffle and the flywheel which eventually knocked a hole right through the baffle.
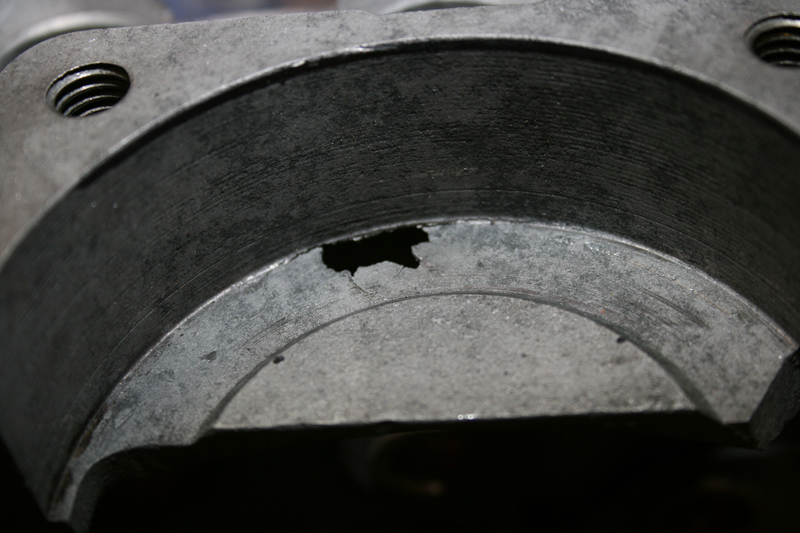
Since HD engine cases are made from aluminum, the best method for repairing the hole was to use a TIG welder to fill in the missing material. The hole was located at the thinnest portion of the baffle, so a piece of copper plate was used to cover the hole and provide support for the weld.

The entire case half was then placed in a parts oven set to 400 degrees Fahrenheit for 45 minutes. This helped to bake out the old motor oil which had impregnated the case over the years and ensured that the entire case was at equal temperature for welding. The heating also revealed that there were a number of cracks radiating out from the hole which also needed to be fixed. By the time the hole, the cracks and the casting imperfections had been repaired, I was left with a good deal of weld to grind away.

The backside of the baffle was easy to reach and was ground back into shape with the help of a curved template and a flap wheel mounted to a hand drill. The top of the baffle was much harder to grind with standard tools, so it was necessary to make a custom router bit using an aluminum sleeve epoxied to a ½” four fluted end mill.

Working slowly, I removed about 1/32” of excess weld with each pass of the router. Liberal amounts of Teflon lubricant was used throughout the process. After every pass the chips were removed and new lubricant was added to make sure no damage was caused by the aluminum sleeve riding against the case.

After some final shaping, the repair was complete and I moved onto chasing the threads for all the tapped holes.
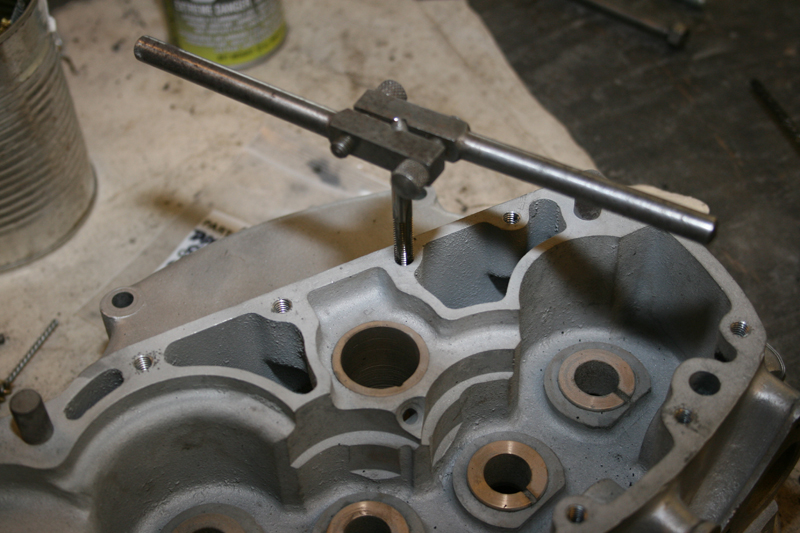
Next, both case halves received a thorough cleaning. All the holes were cleaned out with wire brushes attached to a hand drill to remove any aluminum chips and other debris. From there the cases were soaked in warm soapy water and scrubbed with bristle brushes. Then each case was carefully blown dry with compressed air, paying careful attention to blow out all holes and orifices.

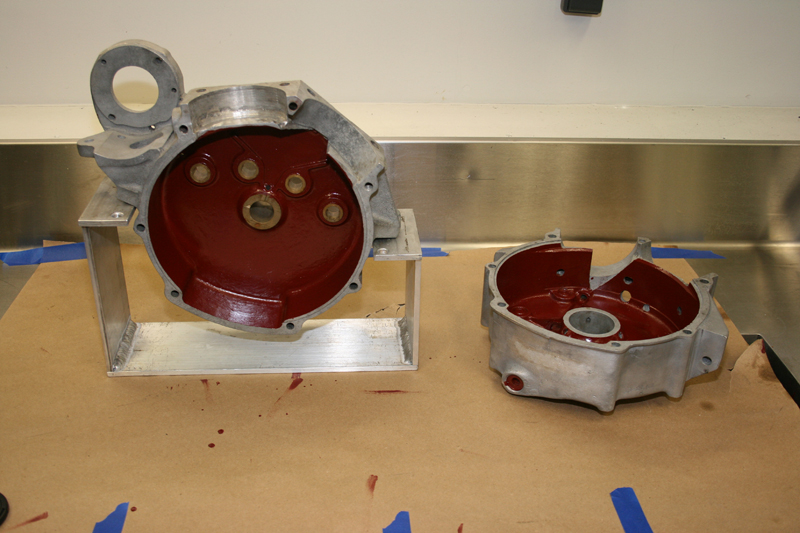
Once the cases were clean and dry, the last step was to apply a coat of Glyptal to the inside of both cases. Glyptal is an enamel based sealer, so once it dries, it is tough to remove. To insure that the sealer only coated the intended surfaces, each case half was carefully taped and covered. Once the Glyptal was applied, it was cured in an over for two hours at 275 degrees Fahrenheit. The result was a hard slick coat of Glyptal and a set of cases ready for assembly.
Editors Note:
If you would like to contribute to the completion of this bike please use the link below.
This project started on Black Friday of 2013 with just a set of engine cases and will end with a complete 1933 Harley-Davidson VL making a cross country run in the fall of 2014. Already a great deal of progress has been made on the restoration of this motorcycle, but more funding is needed to see this project through to the end. Additional articles will continue throughout the remainder of this build and will result in a complete digital archive which takes the reader through the restoration of a 1933 Harley-Davidson, step by step. By making this information available freely online, future vintage motorcycle enthusiasts will be able to rebuild and maintain these great machines.
We have already gained the support of many of the top compaines in the vintage motorcycle industry. If you would like to see your company’s logo included not only on the motorcycle, but also on every article, please contact me directly to learn more about our marketing campaign and advertising opportunities. EMAIL
Sponsored By
 |
 |
 |
 |
|
|
 |
 |
|
 |
 |
 |
 |
 |
 |
 |
 |
 |
 |
 |
 |
 |
 |
|
|
Please follow and like us: