1928 Shovelhead Project Part II
By Robin Technologies |

In a dank dark corner of a dusty debris strewn shop behind the Strokers Saloon on Harry Hines Blvd in Dallas was a small stack of bike parts guarded by a massive starving pitbull with one eye and most of one ear chewed away. The beast was so vicious that it once chewed through a 1/2 inch tether cable, and ate four Avon tyres before it could be subdued and chained in place. No one had the balls to feed the animal and it ran off so many customers that a collective decision was made to relegated the dog to guarding our Shovelhead project. It was like a death sentence. The lovely Lena, the 14-year-old daughter of Rick and Tina Fairless, the owners, who was scheduled to be Bandit’s 6th wife had a fiery temper and told Bandit, in no uncertain terms that the bike would be completed until he left the other women behind and came to Texas to settle down. The Dallas crew surmised that it would never happen so the fuckin’ dog would starve to death waiting for Bandit to return to collect the fair Lena and complete his pact with the marriage counselor.
Unexpectedly during a freak Texas panhandle thunderstorm Bandit walked into the shop, carrying a turtle the size of a baby moon into and asked for the Lovely Lena. Upon presenting her with the turtle, her hardened resolve melted like a torch to a metal hanger and she swooned then demanded that her crew set to work on the project. We apologize for the long-winded explanation, but it’s important to understand all the delicate facets of this project to obtain a feel for the treacherous nature of this undertaking and the lives that hang in the balance.
Just then the mega Dallas Easyriders store had a mass exodus of mechanics. Two were hospitalized trying to reach the parts, one died. Several were so pissed off at the shear audacity of Lena’s order that they started a competing business down the street. In reality they were so jealous of Lena’s affections for Bandit that they could no longer work and watch her dance through the shop on air. Enter Jim the transplanted fabricator from Florida who was hired before he knew what he was getting into. If you’re not from Texas, you won’t be familiar with the labor laws. Chain gangs are not exclusive to the Texas Penal system. They are a common phenomena in the work place. Jim hasn’t seen his family since going to work for the Fairless contingent. Between you and us, we have slipped Jim a note that once the project is finished we will spring him in the crate they plan to ship the bike, but that’s another story.
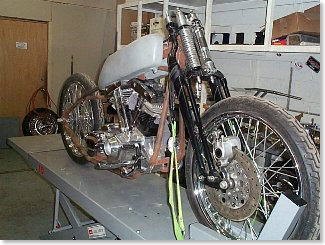
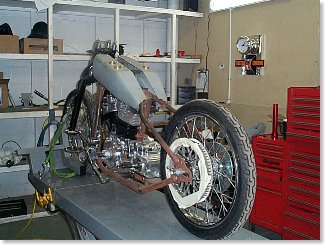
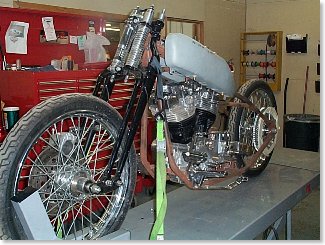
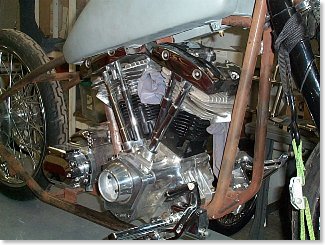
Jim has now modified the tanks for fit the Paughco rigid frame, mounted the engine and trans and front end. Randy Simpson is bending the bars for the project. Jim his building a box for under the seat for the battery since the oil will run from part of the gas tanks to the engine. If you note the belt pulley, we are now planning to run a chain for authenticity and since some other aspect of the bike forced us to go with a chain. We are still looking for the ultimate taillight to go with the project, and we hope to lower the front end enough to make the tanks more level, with Custom Cycle Engineering lower rockers. The front wheel is the stock Bad Boy 21 with an Avon tire. The rear will also be an 21-inch Avon with disc brakes. Pipes are scheduled to be reproduction stock early shovel pipes from Paughco.
Watch as this project comes together. All bets are that the San Pedro Police bike with never even see the border of California, unless she sees the coast before the bike arrives. Stay tuned.
–Wrench
Sturgis Shovel Part 1
By Robin Technologies |

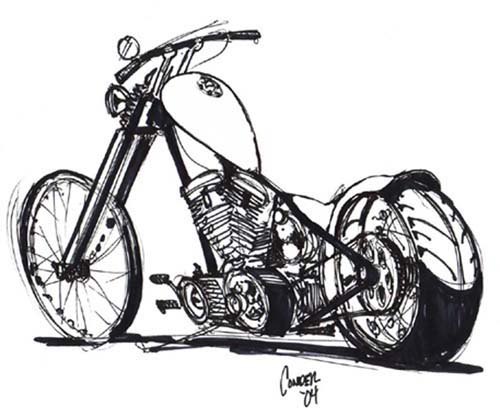
We're starting another project at Bikernet, the Ultimate Chopper. I dediced that title was bullshit. I look at some of the bikes built nowaday and mine pale by comparison, so screw it. It's the Bandit/Sturgis 2005 Chop. It's been a couple of years since I built a bike for myself. Hell, I can't ride the shrunken FXR, it's too small. Besides I need a rigid chopper for everyday flying. I gotta tell ya, I love choppers, like women. They're sleek, slim and move with an indescribable grace.
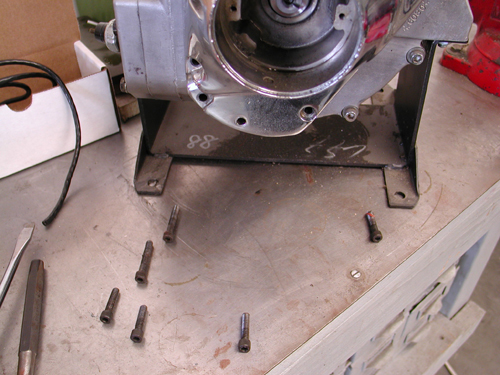
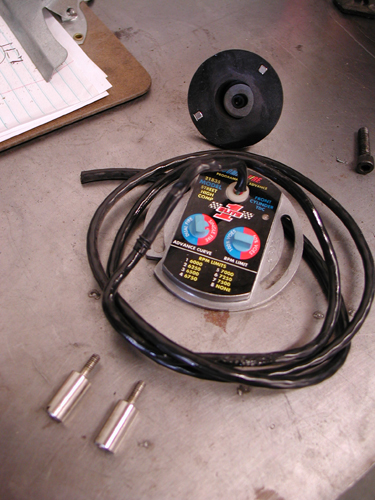
Here's the design notion. No we're not trying to compete with the Martin Brothers, Paul Yaffee or Matt Hotch, who are all master craftsmen and artisans in the custom motorcycle world. They are incredible and I have the utmost respect for each one of them. I'm sorta Indian Larry West. I want to build a light agile chopper for the ride. I'll attempt to explain. I've been riding choppers most of my life. I've tried out many styles, but consistently come back to the mighty light weight chopper.
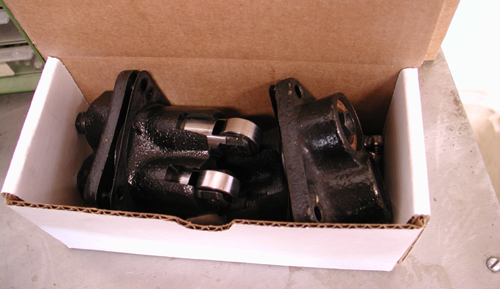

Let's get specific. I needed something stretched to fit my 6-foot, 5-inch frame so were going with a stretched Paughco Rigid with 4 inches in the downtubes and 3 in the backbone. But I'm sticking with a very moderate rake of 35 degrees for handling. I'm running a 9-over light tapered leg Paughco springer for class and city handling. I'll run my traditional Custom Cycle Engineering risers for limited handlebar vibration and traditional appearance.
One of the notions is to make this bike a very reliable, rideable chopper for long hauls, maybe to Sturgis next year. I would generally run a 96-inch Evo to fit the rule, but this time a brother, Richard Kransler cut me a deal on a Shovelhead engine with 3 5/8 bore and 5-inch stroke. That over 100-inch monster would tear this bike apart in short order so I called S&S for advice.
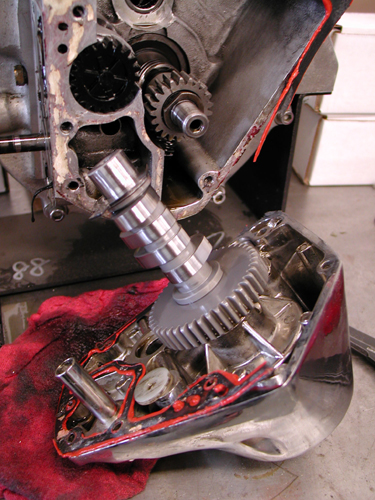
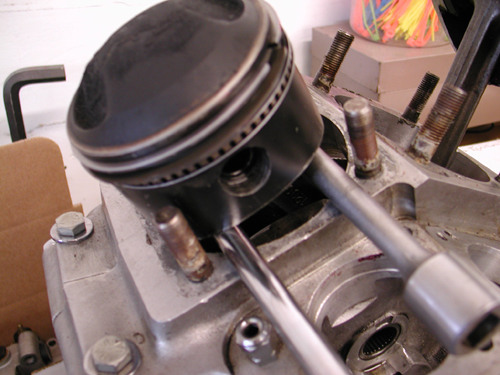
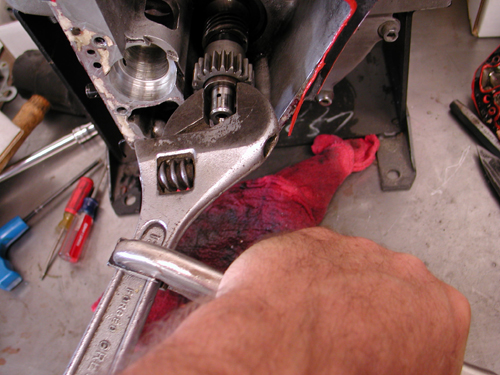
We're going to roll with a tried and true S&S formula for street power, reliability and balance–same bore with 4.5-inch stroke will give me 93 inches of grunt. I tore the engine down for modifications last week and shipped the lower end to Viola, Wisconsin for a S&S blessing.
In keeping with the chopper code of the west, no fat assed tire will cramp the handling. I'm going with only an Avon 180/18 and a 21 on the front. No wild billet wheels but clean Custom Chrome polished aluminum rims and 40 stainless steel spokes. This bike will have a touch of chrome, but not much. I'm going to start a bin of Stainless Allen fasteners to take care of assembly.

I'm not going to run anything that sticks out from this bike, no sidemounted license plate bracket or wide bars, just tall risers and what I call TT bars that I will narrow for splitting lanes on LA freeways.

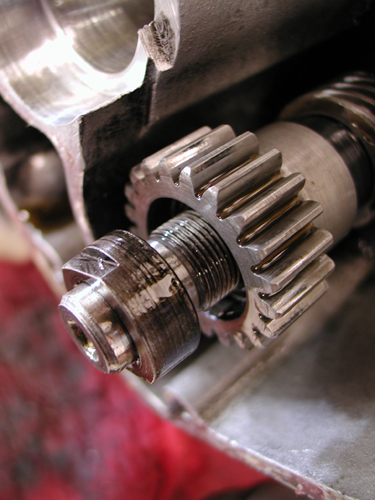
I may use a flush mount Sporty tank, or perhaps a Cyril Huze job like the one on the Shrunken FXR. What a sharp tank. I'll use a BDL belt, Compu-Fire alternator/ regulator and single fire ignition for reliability. We're mounting Kraft Tech fenders and oil tank, making our own pipes and brackets. Dewey's custom pegs will be used because they're light and contain just enough rubber to keep vibration away from feet and hands. The foot and hand controls are all Joker Machine for true reliability and simple clean design.
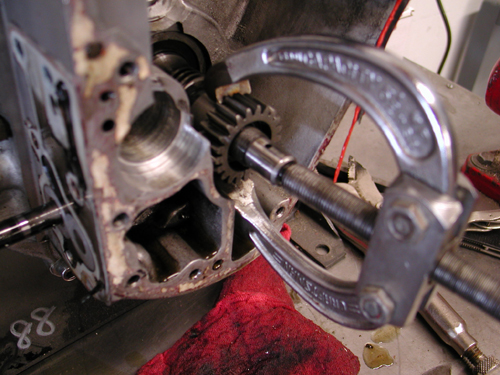

The Jim's 6-speed overdrive tranny is waiting a Custom Chrome Sprocket and Rev Tech O-ring chain. Finally I'll research the best possible sprung seat for comfortable, vibration free ride.
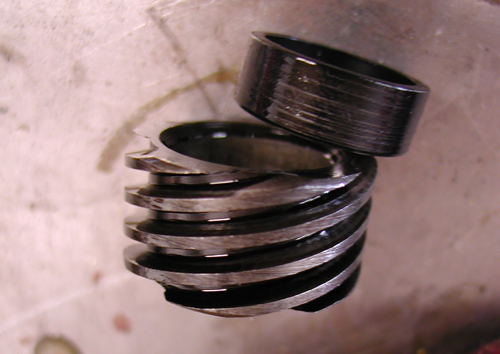
We're shooting for a bike that will be solid for the long run. It'll run strong, won't vibrate to shit, be reliable enough to ride to Sturgis, a street fighter in the old school fashion. Not a lot of flash, but tremendous class. Watch as it comes together right hear on Bikernet. Oh, I've got a couple of tricks up my sleeve that will be revealed as we turn this pile of parts into a running gargoyle.


Sturgis Shovel Part 12
By Robin Technologies |

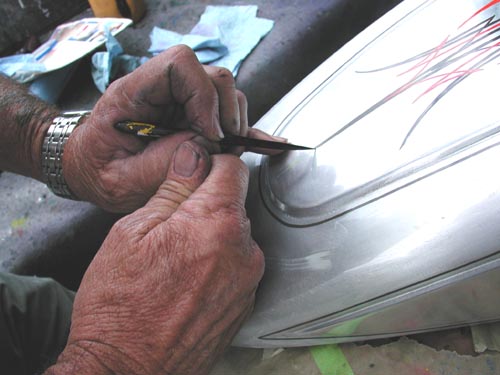
Hey, here’s quick bit on George The Wild Brush who handled the Pin Striping on the 2005 Sturgis Shovel project. He’s pin striped several other bikes for me in his 47 years behind the brush. Born in Hanford, California, a miserable military town, in 1944, he kicked tumbleweed while his mom worked on a base.
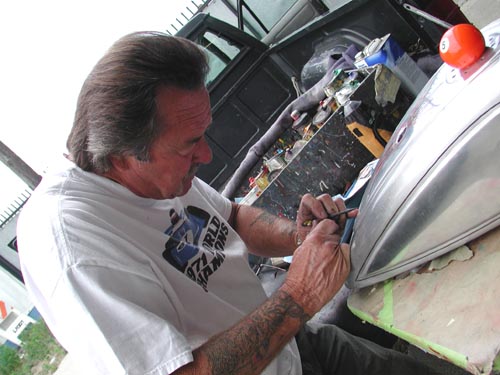
She moved to the safety of Southern California away from the miserable summer central Califa heat, to Long Beach then Lakewood (next door) where he went to school, but didn’t graduate.
He was warned that the fad would die so his vocation would fail. “The fad’s still rockin’,” George said. “My first car was a ’54 ford and I custom painted the driver’s side. I couldn’t afford enough paint to finish the passenger side, so I had the only cool side.”

He studied Von Dutch work, Larry Watson and George Barris. “I’ve striped refrigerators, toilet seats (new ones), and 50 and 110 Tom Gentry trans Atlantic ocean racing boats. He’s taught me a thing or two about striping. “It’s best to have the parts off the bike for the best quality art.”
It’s difficult to paint bare aluminum—“Paint won’t bond to it.” without a primer.” I worked at Gasoline alley for 15 years painting aluminum dragster bodies.
It’s also difficult to pin strip chrome—“It won’t hold up due to the lack of porosity.”
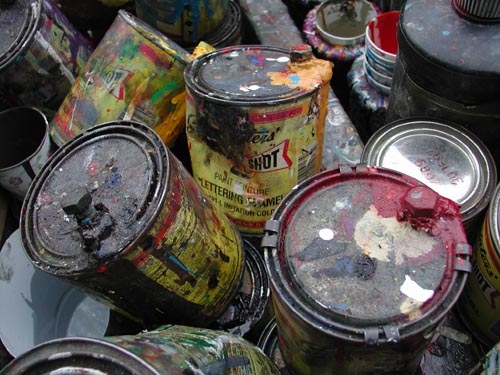
He only uses One-Shot enamel paints—“Can’t use any paint.”
With motorcycles it’s a good idea to clear over striping—“People don’t pour gasoline all over cars, but they do bikes.”
Cars don’t generally need to be cleared over striping work.
His number is (310) 488-5488 for classic pin striping and good stories.
George came to the shop just after I picked up the clear powdered aluminum sheet metal from Foremost Powder. He usually tells me what I’m going to have striped. I have a vote and initial color selection, then I best get out of the masters way.
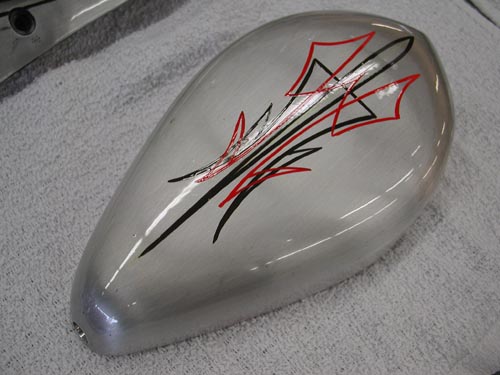
He striped the Goodsen Air Cleaner, which was treated to my holy treatment, then brushed with Scotchbrite to remove the polished appearance.
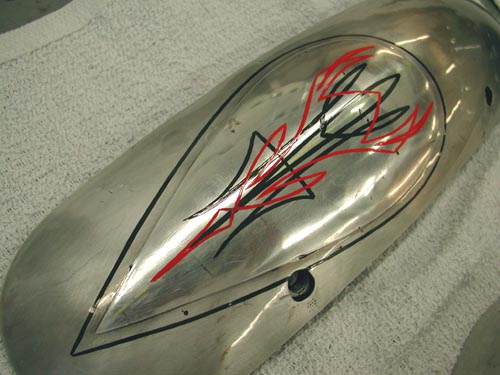
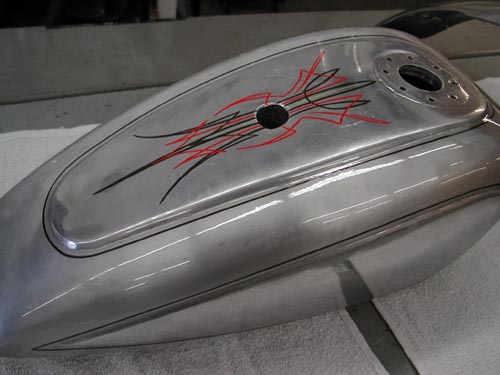
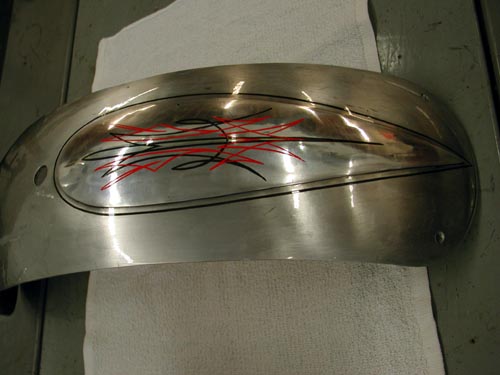
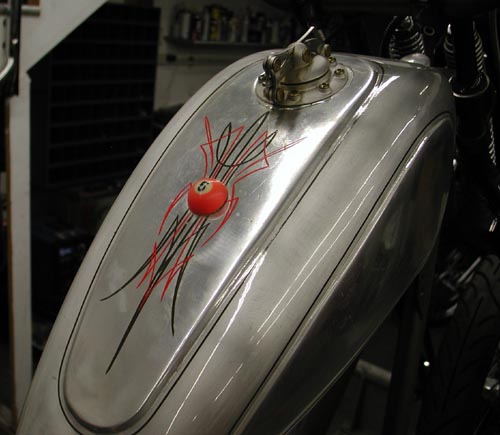
Then he striped the panel polished, highly-modified, XR750, Cyril Huze donated tank and Lucky Devil, custom made fenders. I polished the panels and brushed the rest for a two-tone effect. Not sure it worked, but George gave it a final touch.
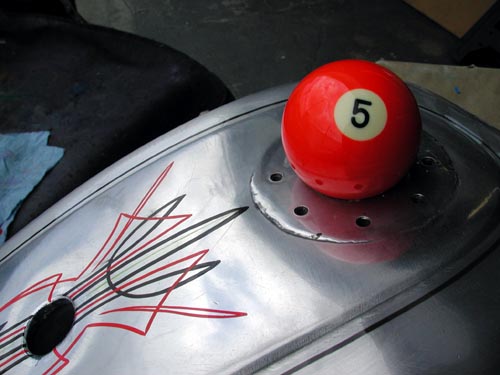
George suggested the 5-ball addition to the center of the tank. Not the gas cap. Ultimately I filled the center-mounting hole with a small 5-Ball to commemorate our company and all the women who put up with my shit over the years. In case you don’t know the story, I’ve been married five times, that’s five misses Ball.
Sturgis Shovel Part 6
By Robin Technologies |

Here we go. I’m relunctantly behind the eight ball, or more likely the 5-Ball in this case. The bike is nearly complete and I haven't caught up with the articles. For the most part I was working at Primedia on the bike mags and didn’t have time to breath. No fucking lame excuses. Let’s hit it.
My original plan called for brass sculptures to hang this bastard together in a purely Bandit way. I messed with some odd heavy brass cloverleaf rod that was over a ½ inch in diameter. I wasn’t having my usual creative luck with bending or messing with this material. Kent from Lucky Devil Metal Works in Houston recommended that I use silicone Bronze rod and I’ve since messed with it. I shifted gears from Gargoyles and sculptures to pure mechanics. I started drilling holes is everything.
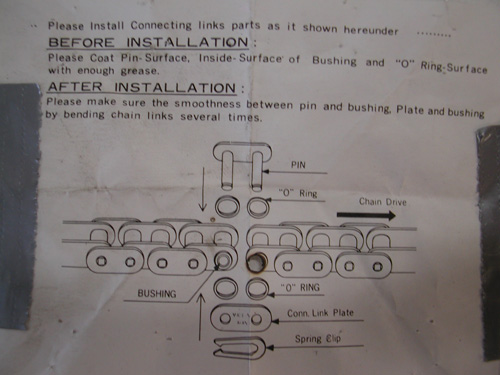
I discovered a piece of ½-inch wide strap that I thought was copper. Remember that the notion behind this mess is to use as much bare metal as possible. As it turned out the strap was brass so I gave it the Scotch Brite treatment and went to work. Before I made or positioned the rear Custom Chrome chain I needed to align the wheel, the transmission and the engine. I used my BDL inner primary and pulled the loose engine and tranny into position. Then I centered my chain axle adjuster and installed the chain using the CCI instructions (above). I have an old chain breaking tool, so I took out just enough links.
With the chain in place, aligned and adjusted the wheel using the Doherty wheel spacer kit (a life saver). I couldn't mess with the requisite chain guard until all was in the correct groove. Although the Paughco custom frame is designed for a belt, I choose the old school route and it worked out well. Lots of extra space to mess with.
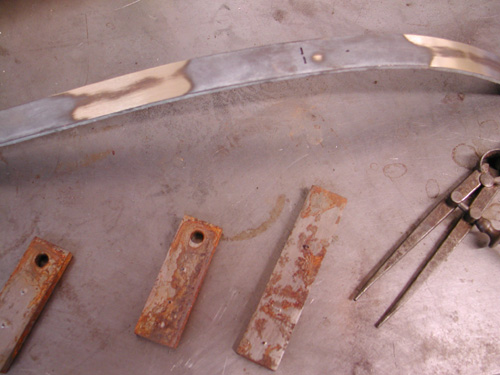
I dug through my drawers of tabs and crap that I’ve had around for 25 years. In the old days Mil Blair would call me from Jammer from time to time and tell me when it was time to shit-can scrap iron. I picked up tabs, spacers and brackets by the fist full and I’ve been moving them from place to place ever since. But damn, when you need a tab it’s bitchin to find just the right size in a drawer. Since I was going nuts with the drilling treatment, I matched the work on the frame with holes in the chain guard and counter sunk the edges for a more rounded look.
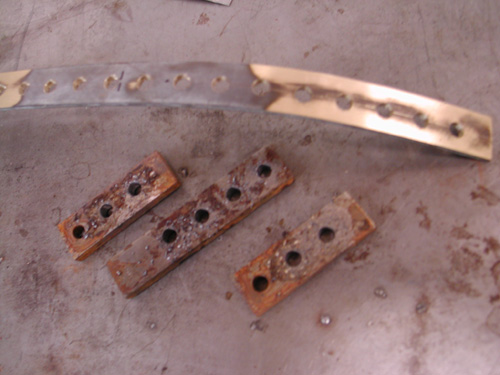
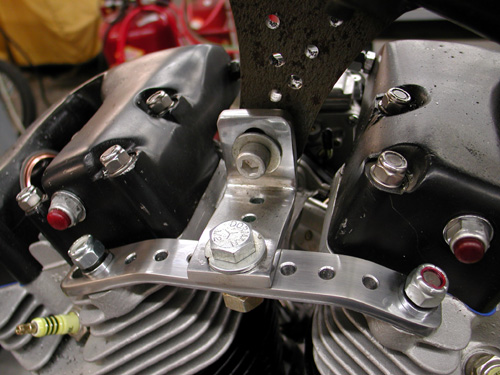
I also hit the top motor mount with a similar treatment. To give it a bit of consistency I measured from center to center on the holes and made all the holes the same diameter, 1/4-inch.

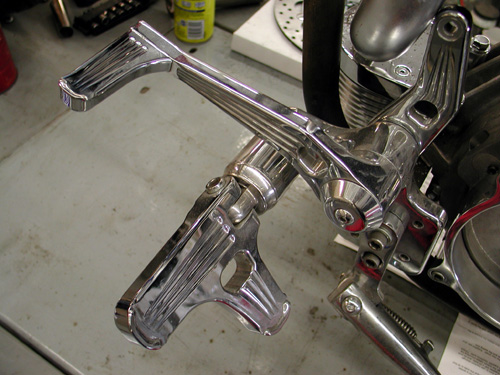
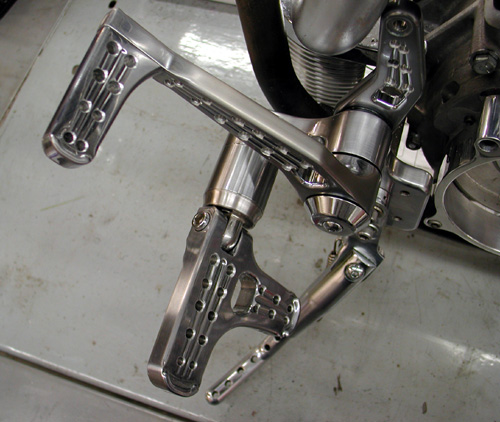
The hole deal became an obsession. I started drilling ¼-inch holes in everything including the Joker machine foot controls. I also went after Russell Mitchell’s Scotch Brite code. I swallowed hard and rubbed a piece of chrome with the coarse material and discovered that chrome reflects everything until it’s brushed with the wiry fabric. It gave it a raw material appearance and I decided that it was cool but a pain in the ass to do.
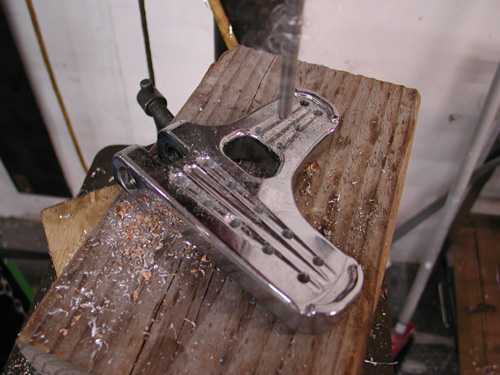
Again, I drilled the holes the same space apart, ¾ of an inch. It’s not always that easy, though. Sometimes the formula just doesn’t work. I use a pair of calipers to hold and mark the distance from hole center to center. If a hole ends up being located too close to an edge of the material, I back off and try another formula. Make sure to plan before you start drilling.
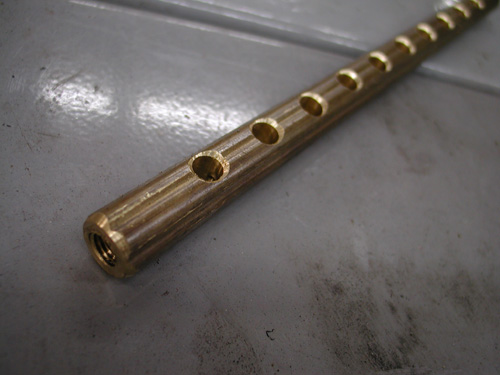
Here’s that damn brass stock. I was determined to have Brass, Copper, Stainless, Aluminum and a bare metal effect on the frame. You’ll see shortly how it worked out. I couldn’t bend that brass shit without destroying it, so I made the shift linkage out of it. I cut it off on a bench lathe and drilled and tapped the ends to 5/16 fine threads to fit the fine thread heim joints. Then I drilled the rod and countersunk the holes to remove the sharp edge.

Here’s one of the Joker Machine control sets, rubbed with Scotch Brite and drilled. They make fine controls, some of the best. You can adjust these puppies anyway you choose to fit your riding position, inseam or foot angle.

Before I leave this chapter I’ll touch on this new petcock from Spyke. It’s incredible, if it works well. It’s designed to give you every option for positioning and spigot direction. I ran into only one problem. No wrench lands to help tighten the bastard.
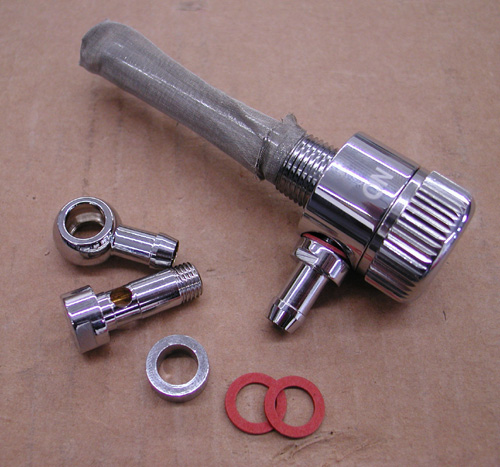
Check it out. You can run it faced in any direction and still read the switch locations and turn the knob without a lever smacking the frame and components. The spigot set allows builders to face the gas line in any direction.

I used the straight spigot and took off one of the fittings because my tank threads are female. The only problem I had was tightening it down, but I’ll get to that after the powder coating returns from Foremost Powder in Gardenia, California.
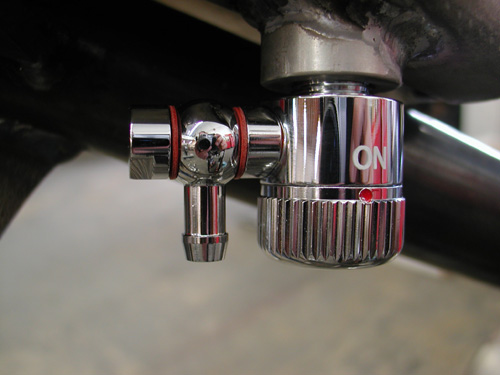
This puppy will revolutionize the industry for petcocks, if it works. I’ll let you know in a week or two.
Ride Forever,
–Bandit
Sturgis Shovel Part 9
By Robin Technologies |

This is strange. I’m writing several Sturgis Chop Techs after I returned from Sturgis. I’ll try to remedy that in the future, but we were so damn busy trying to complete the bike and run Bikernet, we didn’t keep up on the techs. Many apologies.
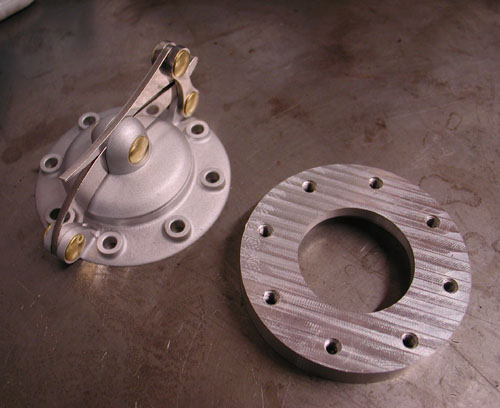
This piece covers the installation of the hot Speedster cap from Crime Scene Choppers in the modified stock XR 750 factory tank. Later, you’ll discover, that this highly modified, strengthened and extra rubber mounted beast was my Sturgis nemesis. But more on that later.
We added rubber-mounted bungs to the back of the tank. I moved the petcock to the rear and filled the center for a 2.76-gallon gas capacity before it hit reserve. I doubt that it contained more than a quarter tank of reserve, so I’ll toss it a 3-gallon total gas capacity.

Oh, I need to thank Cyril Huze, who designs beautiful steel tanks for the opportunity to experience an aluminum tank once more. He suggested this classic for the Sturgis effort.
I’m not holding it against Cyril. He’s a master and I’m the bungler for attempting aluminum on a 93-inch rigid S&S hot rod. As you’ll see the vibration aspects came from several sources that I could have remedied. It’s all just a roll of the dice.
When I received the Speedster cap I drug the cap and tank down the street, about three doors, to Bill Hall’s Welding. He handles my aluminum welding, since I don’t have a TIG welding system. I’ve got the rest, but not TIG. I would highly suggest a TIG system for quality welding capacity and good looking welds. It’s much like welding with a torch, so you’re certain of the bead and depth of penetration.
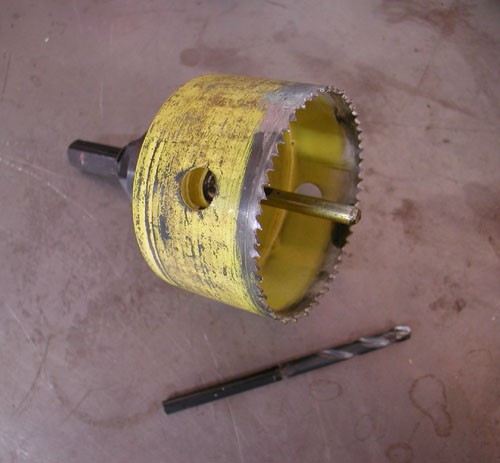
Bill’s a retired designer who enjoys welding and fuckin’ with his customers. “How are you going to drill the hole for the bung,” he asked?
I was thinking about die-grinders and files. I knew it would make a mess. Bill hooked me up with a 3-inch hole saw. He suggested that we hit a marine store for a tapered dowel pin (used for plugging holes in the leaking hulls).
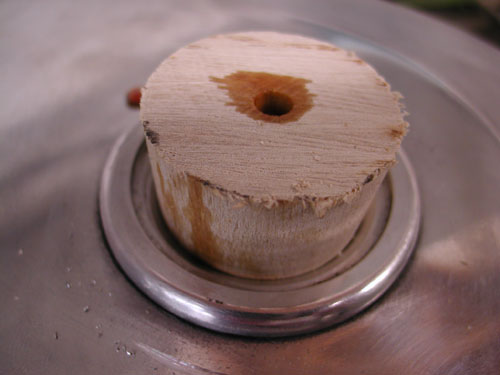
The key was to drill a perfectly centered ¼-inch hole to maintain a center approach to the cap bunghole. I drilled it and then ran the tapered wood dowel into the tank.
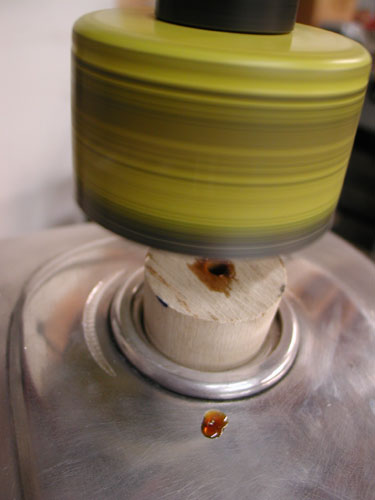
Then we set the tank on a pad on the drill press platform and lined up the hole saw. I used plenty of cutting oil on the edge of the blade and aluminum face to prevent the tank from snagging or catching. I knew how tender the surface of the tank was. We oiled the hole in the tapered wooden plug and carefully went to work. Bill’s formula worked like a charm.
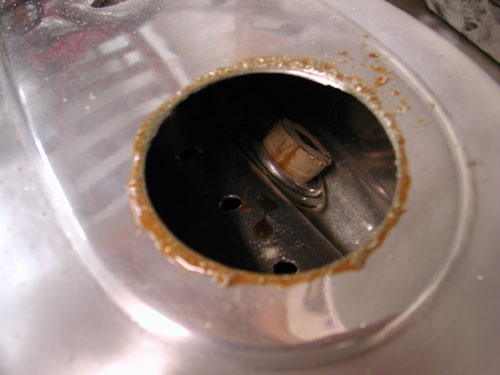
Next, we needed a tool to hold the Crime Scene Speedster bung in place. I grabbed a piece of strap, drilled a hole or two and mounted it with the supplied hardware, which was brass. You can order the cap with several styles of fasteners for your application.
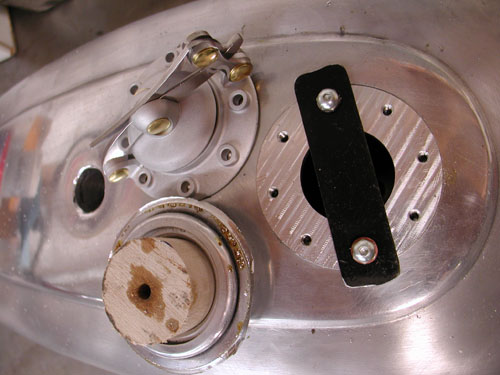
It was off to Bill’s for welding. While the gaping 3-inch hole was available I could have made a tapping tool and tapped out any imperfections in the tank walls. I dinged it way back in the beginning and never got around to fixing it. I left her be, as if it was the first injury and she needed to stay. I know it’s one of those wild superstitions.
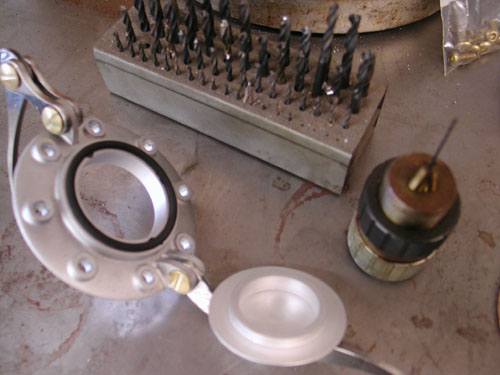
Okay, so during the “read the directions” phase, I noticed the bit about a non-vented tank. I would need to drill a tiny, cunt-hair hole in the cap of the tank. I discovered that I actually had such a tiny fuckin’ drill and dug it out. I had to find a chuck that pinched down to that size. Then I had a wise ass notion to drill the initial hole about 1/8 inch in diameter, since drilling with hair-thin bits causes easy drill bit breaks. The thinner the surface the better.
So, I initially drilled the inside of the cap with a 1/8-inch drill and drilled right through—Bummer. Ultimately I tapped the cap with a 10-32 then drilled the stainless Allen stud with the tiny drill bit. Then I screwed the stud into place and the job was finished.
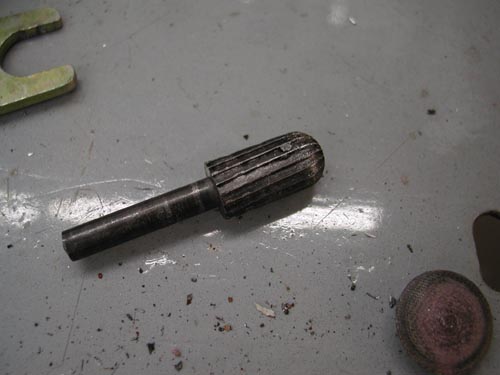
After Bill welded the bung into place it was my job to grind the welds down and ship the tank to Foremost Powder for a clear coat. I hit the big spots with a grinding tool. I tried my damnest to take only meat off the welds and not off the surrounding tanks surface.
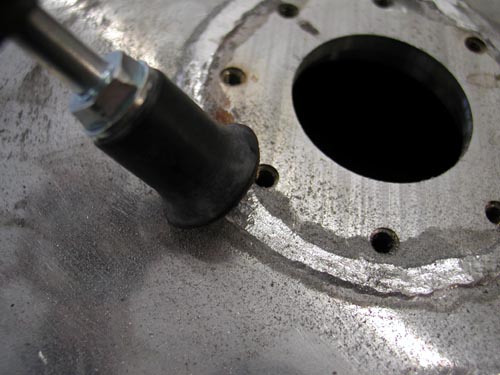
Next I used small emery discs to carve at the aluminum bead. I also smoothed some of the welds on the front of the tank where we filled the tunnel for additional gas capacity.

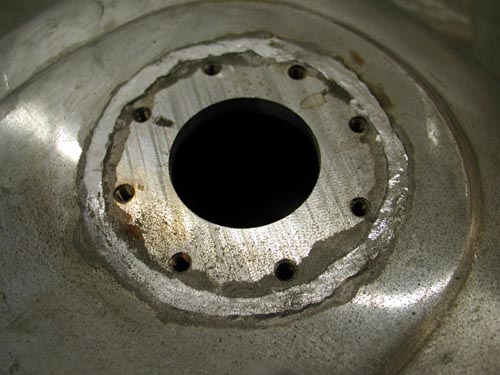
This shows the different grinding phases to reach a level that’s still strong with weld bead but handsome enough to live with. This was an interesting effort, since no bondo or thick urethane would be applied, covering a myriad of mistakes. This was the final stage before clear powder from Foremost in Gardenia, California.
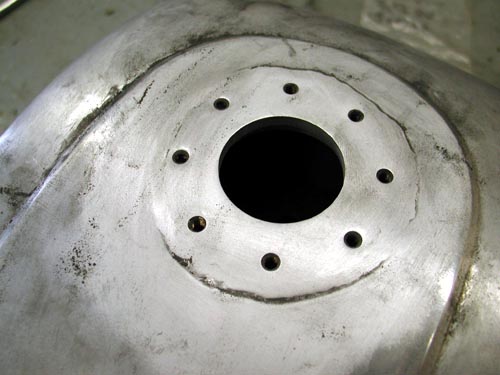
After this stage I polished the panels of the tank and hauled it off to the powder masters. There’s one other process I need to explain. I made every effort to clean the tank of debris and shavings. I also made sure to run a gas filter. I still had problems, which I will explain in my Sturgis Saga. They were easily remedied through Lee Chaffin at Mikuni. Just needed to dial the right number.
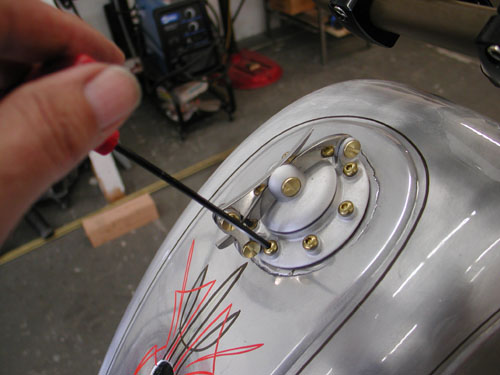
This shot was taken after powder and pin striping when I installed the gasket, decided which direction I wanted the cap to face and screwed the brass fasteners down. The cap worked flawlessly all the way to the Black Hills.

5-Ball Factory Racer Closing in on New Cam and Ignition
By Robin Technologies |
We were fortunate to hook up with Heather New, of New-Line Engraving several years ago. Since I was about to switch out my CrazyHorse engine ignition with a Blackhawk Motorworks cone cover I needed to come up with a classic point cover for the new unit and the 5-Ball Factory Racer. It was a natural choice to send her a chunk of aluminum, or I shoulda sent a piece of brass, but oh well. Either way I knew she would bring the project to life.

Heather started engraving in a small shop in downtown Edmonton in the Early 80’s, where she took care of over 100 jewelry stores. “I was engraving everything from I.D. bracelets to wine goblets to pocket watches, and more,” said the raving redhead, “items which other engravers said could not be done, I soon learned to do!!! This was when I first met Frank.”
Frank Gurney was (and still is) the best Hand-Engraver in Canada. “He is a true artist and craftsman, and along with the Alberta Apprenticeship Program, arranged for me to be his understudy,” Heather said. “I was thrilled!!! I learned so much from Frank in those years, confidence, trouble-shooting, and above all HUMOR!!!! We spent hours working and laughing (hoy-deedle-doy!!). He taught me so many things before he eventually retired out near Victoria, B.C.”

She then moved on to the largest Jewelry stores in Canada. “I was doing all of their machine engraving, as well as custom wedding bands, and one-of-a-kind jewelry pieces,” Heather said. “They treated me like gold, and I will always be thankful for the kindness I experienced there. I relocated near Calgary, Alberta, and began working for a gigantic company with more talent than I had ever seen gathered in one place. I naturally did the engraving there, and also moved on to operating CNC machines, and hand-carving moulds used in casting.” She became a programmer, writing the programs, which would later be used by the CNC machines to cut the actual moulds.
She started New-Line Engraving in the summer of 2005. “I hand-carved an inspection cover for my good buddy ‘Chicken’ and with her over-whelming encouragement, (she cried when she saw it) I decided to branch out into custom bike carving too (after all, a derby cover is just like a signet ring, only BIGGER.”
So here’s how the short, two-week process rolled: 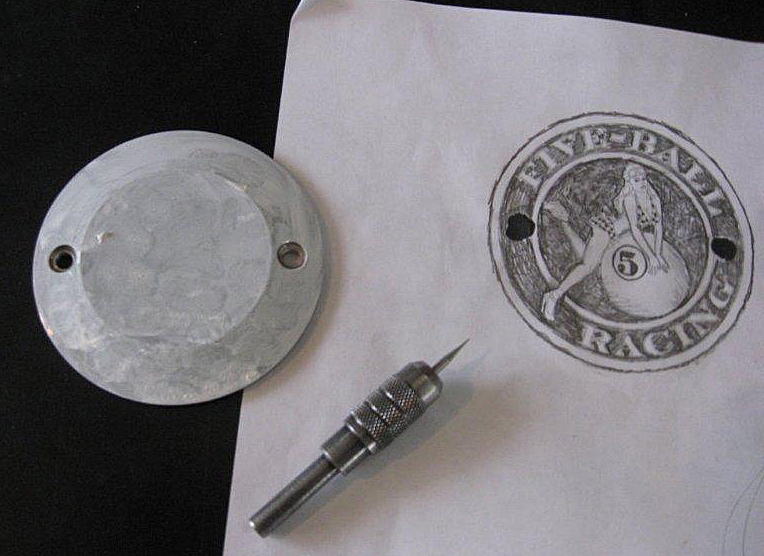
Cover the piece in white water-soluble paint, and transfer the artwork onto the surface
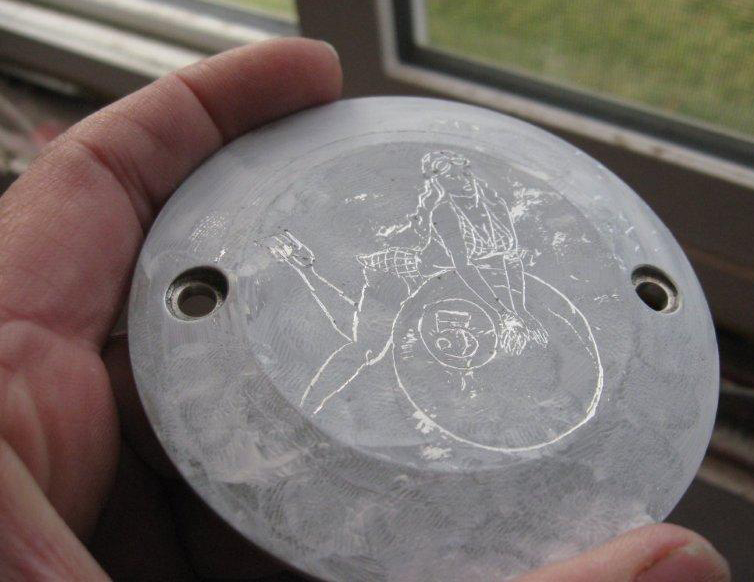
I highlight the general outline, scratching the paint leaves a more permanent mark than pencil, and you don’t rub it off as you work!
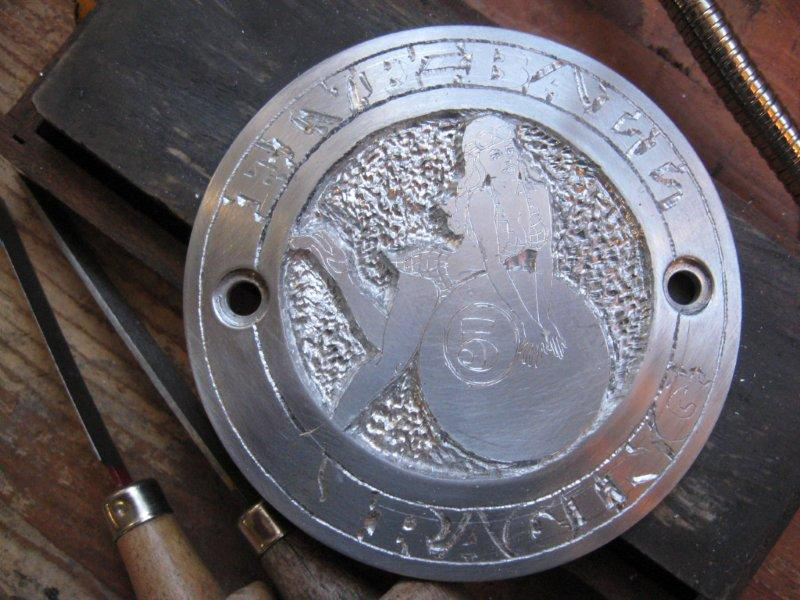
For removing large areas you can try a dermal, but they tend to vibrate too much for any fine work…I used small gravers hooked into a pin-vice to cut in between the letters,
as this cover was done mostly under a microscope.
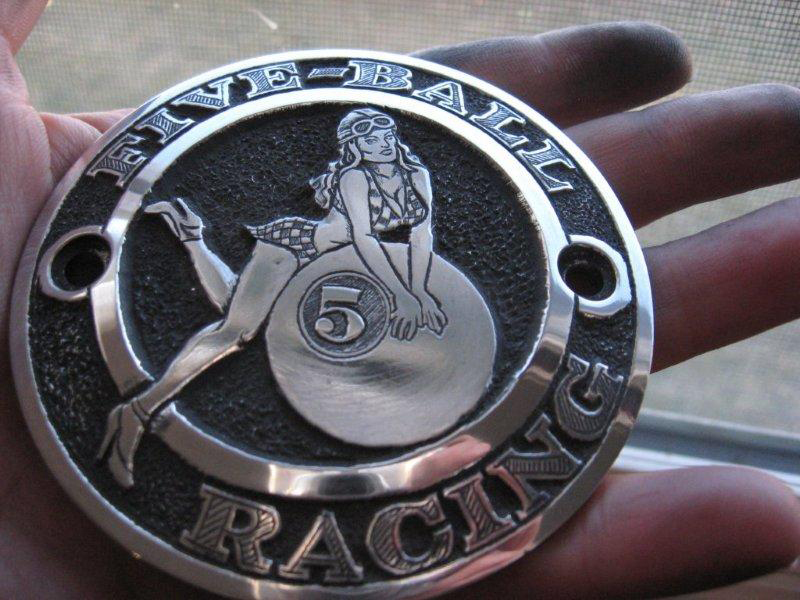
I also use fine sandpaper, jeweler’s files, and burnishers to “round-off” curves (as seen on her legs), and give some dimension to whatever artwork you are dealing with…
Details like hair, the features in the face, and fine shading are all done with fine gravers and files.
I then add an aluminum-oxidizing agent, which blackens the entire piece. When it is re-polished, the highest surfaces will become shiny again, while the black remains in all the nooks and crannies of the background. (I only do this by hand—a buffing machine can remove hours of work in a heartbeat!!)
“If anyone out there in Cyberspace wants to give it a whirl, I am always here with support and tips,” said Heather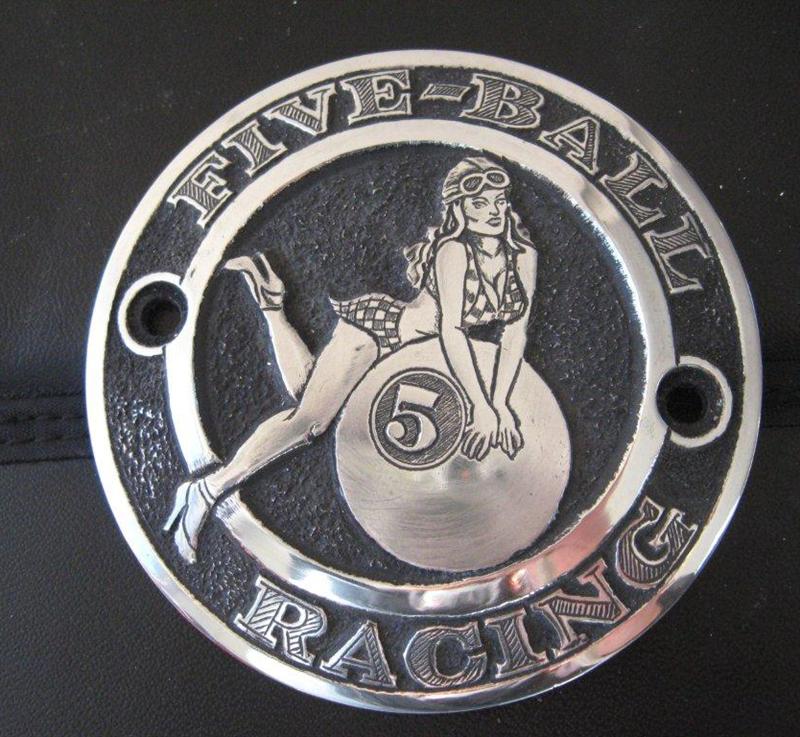
Sources:
NewLine Engraving: http://www.new-lineengraving.com/
Blackhawk Motorworks:
http://www.blackhawkmotorworks.com/
Compu-Fire Ignitions: http://www.compufire.com/
Custom Chrome:
S&S:
Sturgis Shovel Part 7
By Robin Technologies |

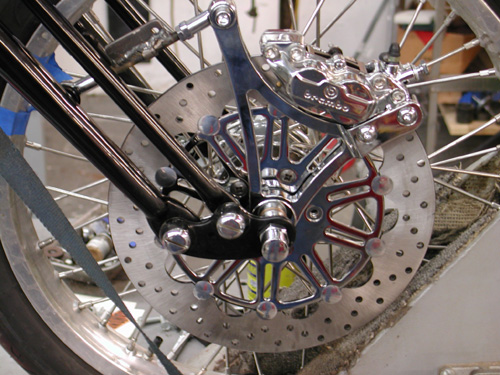
Brembo has a solid worldwide reputation, and I ran into a hot looking Brembo representative at an illustrious bike function and decide I’d give them a try. They’re hot and ready to rock. The only items I needed were the locking nuts for the back of the rotors bolts and the springer axle spacer. This set-up was designed for a stock springer replacement.
Because of the wild, light, taper-legged Paughco Springer my hiem joint link wasn’t long enough and I bastardized two fine bolts together temporarily. At that point I wasn’t considering a front fender. There are two aspects of chopperdom that I have a tough time working around. Bikes need front fenders and brakes. Can’t ride ‘em much without those two bastards. Even in the old days I ran front fenders, Avon Tyres and front brakes.
Chris Kallas came over at just the right moment. He’s as old at riding as I am and an artist. We’ve featured his work in special reports. He knows his bike shit and I’ve been trying to convince him to see Jim Murillo about a job. Jim has a paint shop in Torrance, but he’s not the graphics guy, Chris is.
As usual, about the time I think it’s going to be easy, the devil pops up on my shoulder. Kent, from Lucky Devil Metal Works in Houston called, “What are you going to do about a front fender,” he said? “Yeah, that’s what I thought. I’ll send you some shots of my springer front fenders.” He hung up and Chris looked at me sorta strange.
”Who the hell was that,” he said?
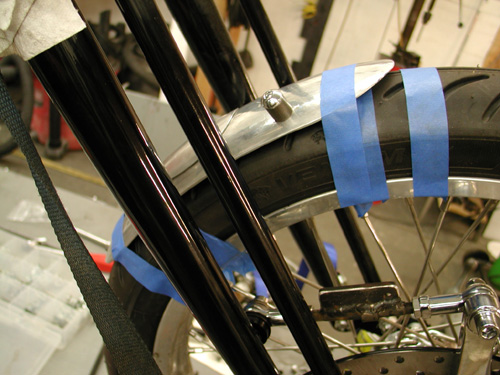
”Never mind,” I said flipping my computer on. Kent developed a system of mounting springer front fenders that’s clean as a whistle and odd as only the devil would make it. An engineer wrote Bikernet when I first featured his wild notion and chewed us out. “That idea’s not worth the powder the blow it to hell,” he shouted.
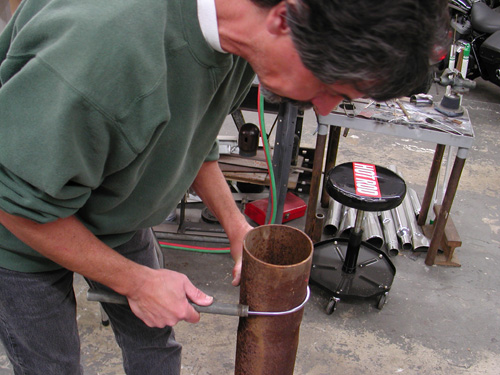
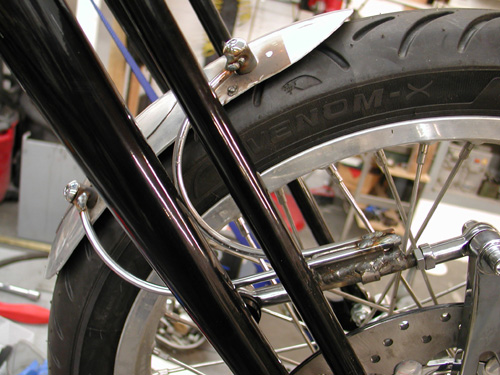
At first I thought he was correct, but the more I considered it, the more I determined that he was wrong. The caliper follows the line of the rotor, so the fender will follow the circumference of the Avon tire. Of course when I stepped into the ring to create a similar configuration I couldn’t do it like the Devil does. The Brembo caliper runs too far ahead of the rotor to mount the fender so we ran carefully designed struts off the brake linkage. Chris drew up the plan, then bent struts out of coat hanger for a guide.
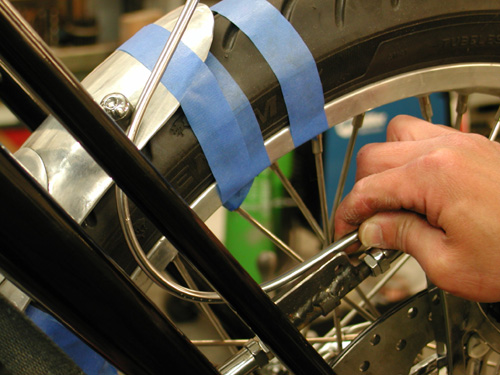
We constantly tried fitment again and again before tacking them into place. I wouldn’t recommend this configuration to anyone. If you run struts off the caliper they’re solid. The heim joints allow the fender to fluctuate, especially side to side. I had to find a concave washer that would allow the heim joints to work up and down but not side to side.
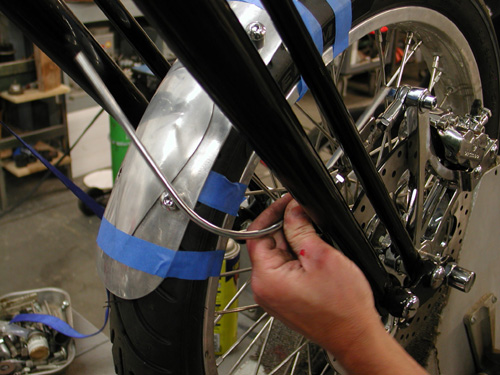
Chris bent each rail to match in pure artistic form. Then I tacked them.
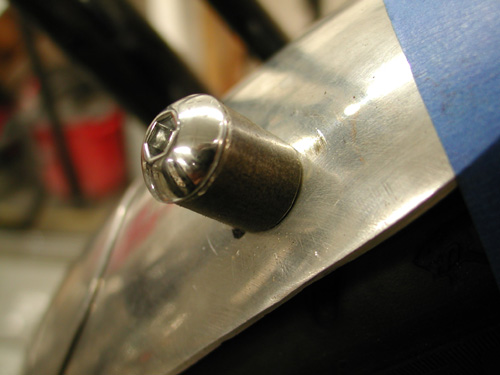
Kent built the front fender with threaded aluminum bungs underneath. I figured out some slender spacers to fit on top of the fender and tacked the rails to them. I must have welded them a dozen times trying to grab just enough rail, weld and spacer to prevent cracks.
There you have it. It’s wild, but will it last to the Badlands?
–Bandit

Sturgis Shovel Part 8
By Robin Technologies |
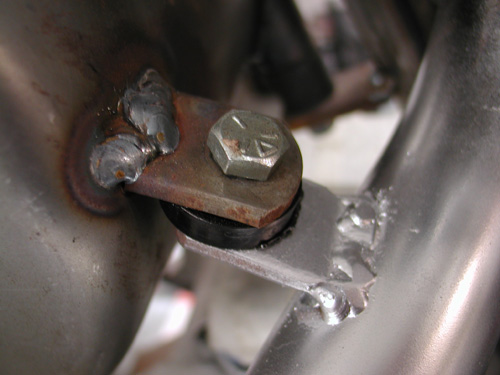
My first move began with a correction. I removed the exhaust pipe tab welded to the oil bag. The oilcan is rubber mounted, the exhaust pipe generated severe heat and the pipe system needs to be solidly mounted. It had to go. Actually Kent from Lucky Devil Metal Works in Houston tried not to mention the false move, but his frown gave it away. Or was it that question? “Is your rear pipe really mounted to the fuckin’ oil bag,” Kent said tentatively?
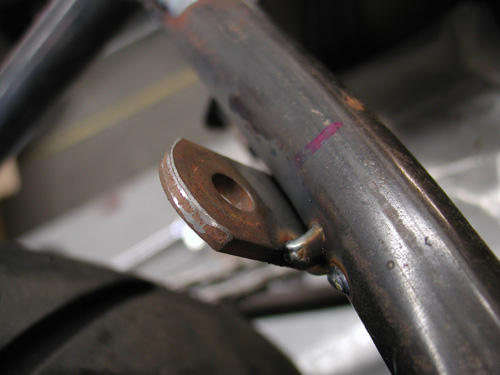
I discovered that the pipe exits the head close to the seat post and worked on a pipe connection there. There are a couple of rules in making pipes that I need to abide by. I needed to remove the pipe once in awhile, so I needed the pipe tab to be on the outside of the frame tab. Often mounting required slack, so I dug around for 1/16-inch washers to run between the tabs. That way when the fasteners are removed there’s some slack to pull the pipe free.
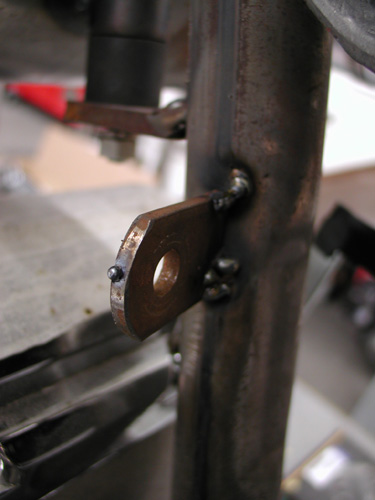
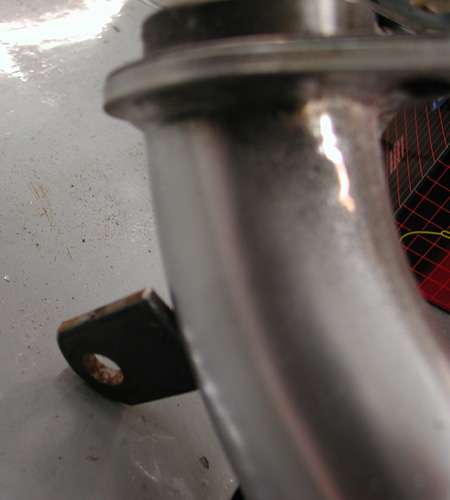
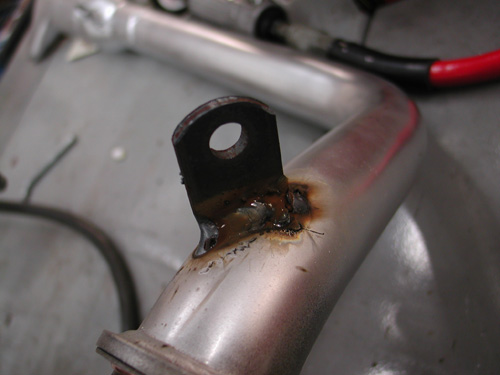
I worked with the pipe fully in place then tacked the seat post tab. Below is the tab tacked to the pipe. Then the tab welded in my shitty MIG welding fashion. I should slow down and clean the base metals more. I generally grind a bevel into the tabs for greater weld penetration. The welds are strong, just not handsome.

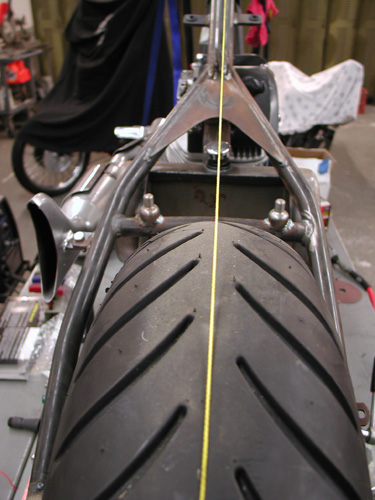
Next I needed to attach the Lucky Devil rear fender, align the rear wheel and cut the chain to fit. But first I needed to center the wheel in the frame, sorta. The custom Paughco frame is designed and manufactured to hold a belt pulley and a 180 Avon Tyre. That prevented me from measuring between the frame rails. I needed a straight line down the center of the frame backbone. It’s not incredibly accurate but close to draw a fabic or nylon line down the tube. Then with Doherty space kit and the seal spacers that came with the Custom Chrome aluminum and stainless spoke wheels, plus the Brembo brake caliper bracket, I aligned the wheel.
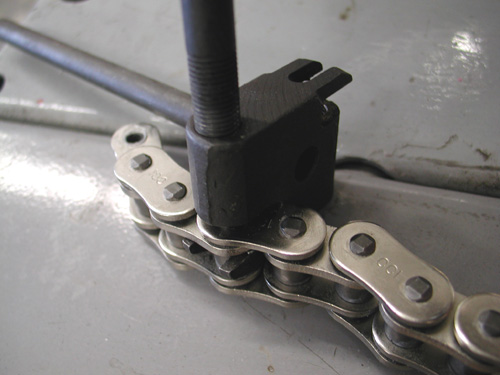
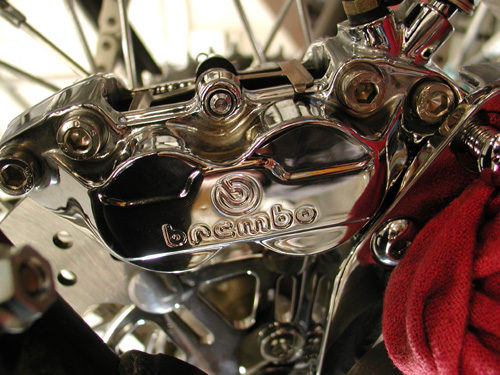
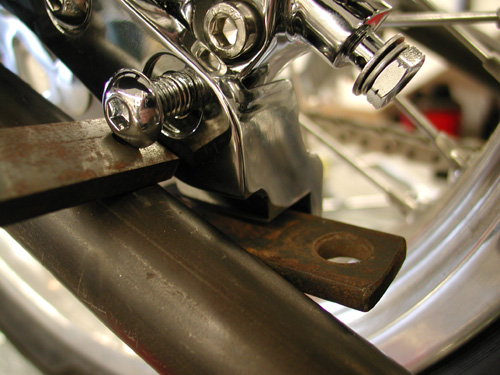
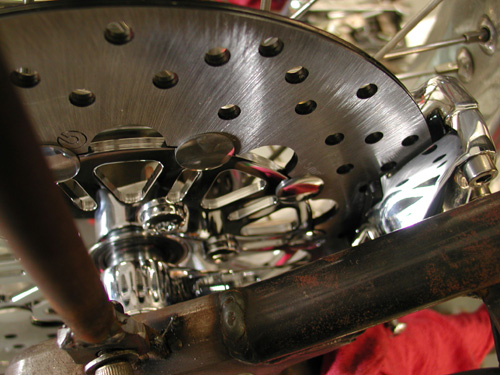

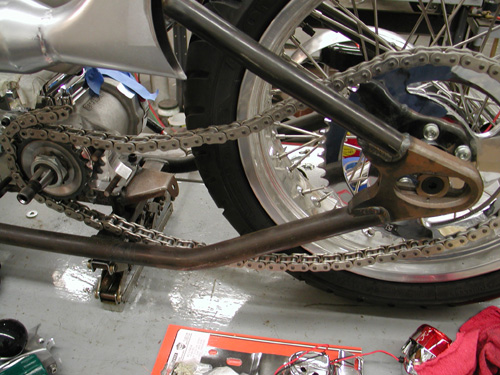
Before I cut the Rev Tech chain I installed the BDL Belt inner primary and pulled the engine and transmission into place which determined exact spacing. I know I covered this aspect somewhat a couple of chapters ago. There’s been some heavy drinking in the meantime, so if I lose track, it’s on Jack.
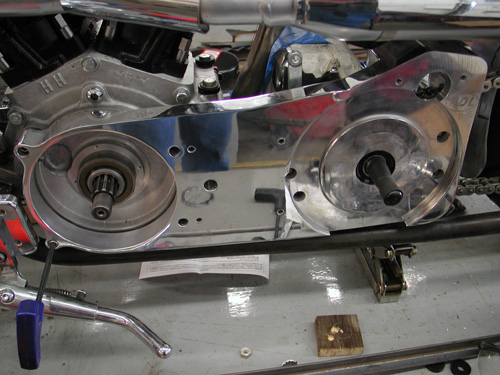
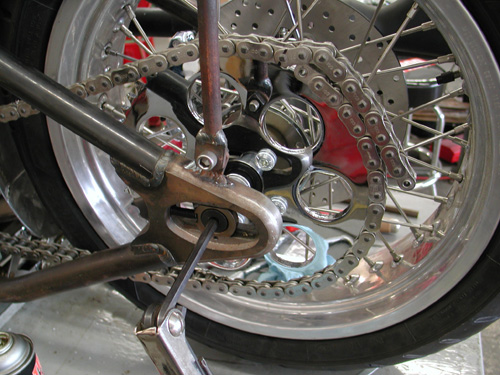
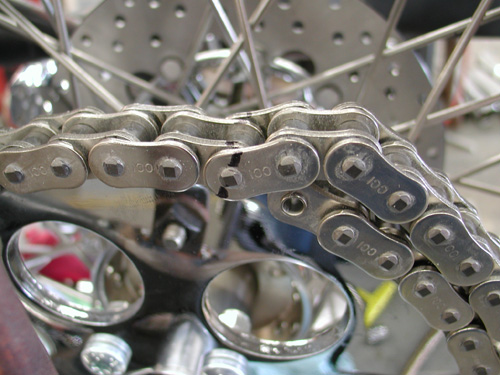

I centered the wheel in the chain adjustment slot to give me slack either way. Then I finally cut the chain with a JIMS tool.
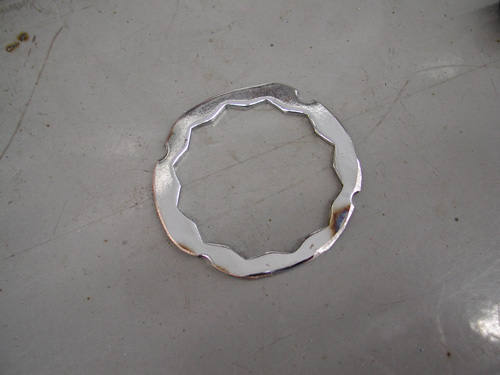
I spoke to a couple of guys about sprockets and was told that this contraption will hold a sprocket nut from coming loose better than simply Allen screws in the Custom Chrome sprocket. I may use it or not. Haven’t decided yet.

The reason this is altered is that it’s for a pulley and a different era. Add that to the fact that I flopped the dished sprocket over to space the chain away from the tire. That aspect worked perfectly.
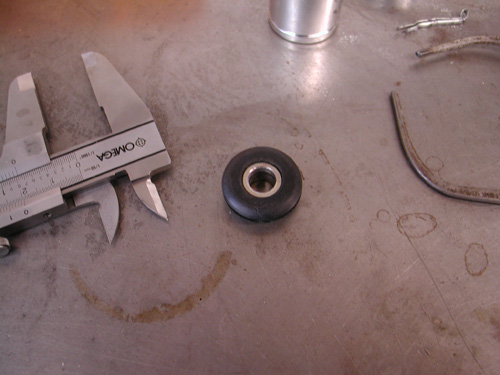
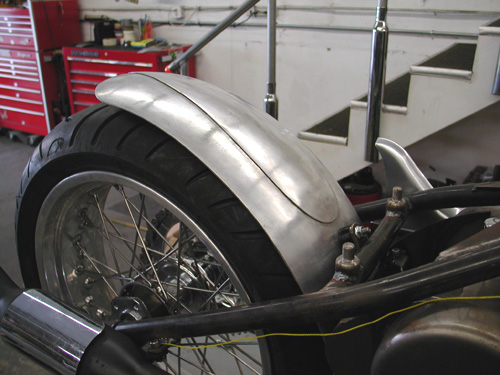
I decided that since the tank was rubber mounted and aluminum won’t flex as well as steel that I would attempt to rubber mount aspects of rear Luck Devil fender. Kent designed and handmade the fenders to match aspects of the XR 750 tank.
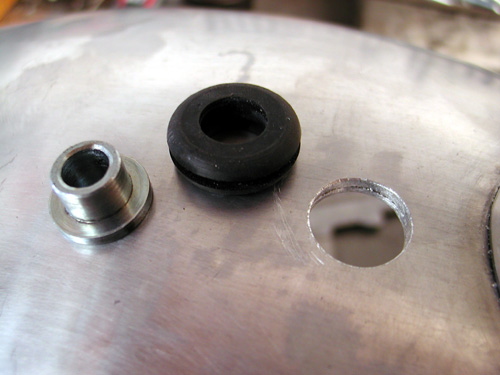
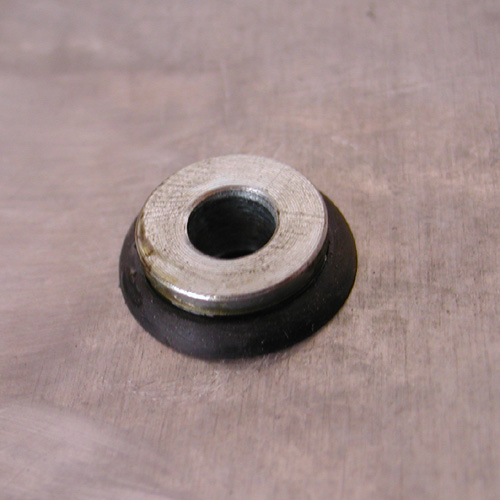
Cyril Huze sent me several grommets to work from and this pair are from some late model Sportster application. I measured the O.D. on the center portion and discovered that I needed ½-inch holes in the fender which I drilled after I had mocked up the fender in place, ground a clearance strip for the chain and stood back several times. Arlen Ness once told me that he used a chain wrapped over a tire to space a fender. I needed enough space for fasteners under the fender and some chain adjustment slack either way.
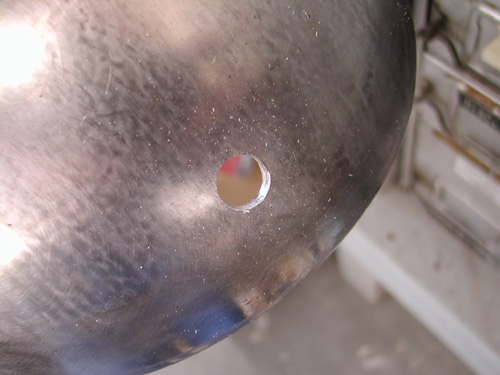
I moved the fender up and back, and side-to-side several times before making any hole-drilling marks. I was a nervous wreck. Ya don’t mess with the Devil’s fender. I finally drilled a half-inch hole, and smoothed the edges, in the bottom of the fender then at the crossover tube. I worked in the rubber with a dab of oil and bolted the bottom stainless bolt in place.
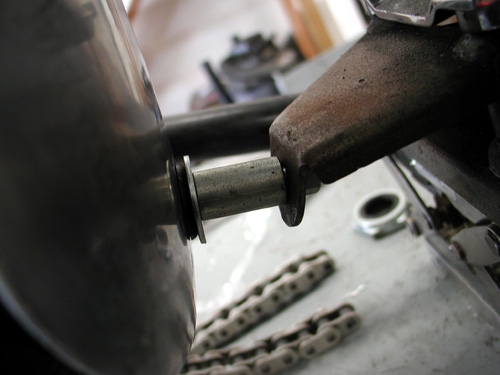
The Sportster grommets have metal inserts, which make them easier to install. With a couple of spacers in place the fastener held the center tab for tacking.
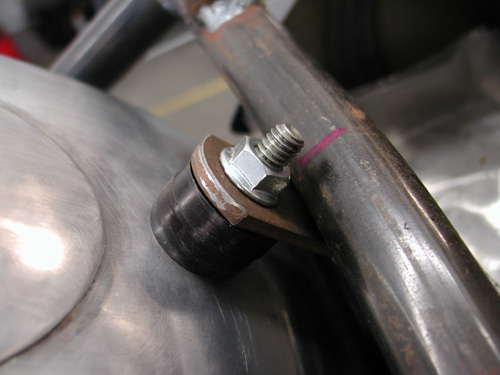
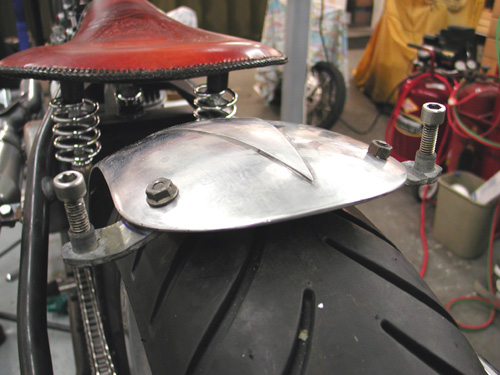
Here’s where it got tricky. I’ve been bending metal with a torch for years. Never improved my technique. Just the other day, a month after I built this fender rail system, I bought a small strap or tube-bending tool. Wish I had it when I went after this project.

First I built the fender strap out of a piece of exhaust pipe bracket. It came with two 3/8-inch coarse tapped inserts in each end. My plan was to build a fender rail system with tubing so I could adapt a couple of running lights on the tips. I carefully bent and drilled the strap and fender.
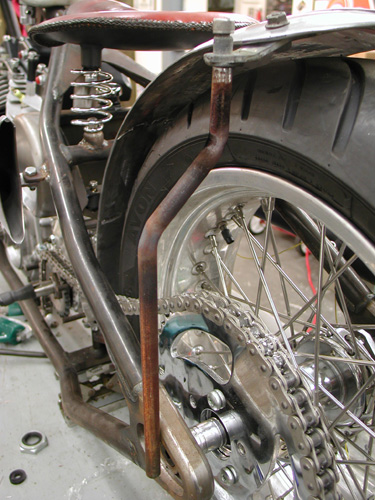
Then I bent the tubing fender rails to fit over the chain and tacked tab to the Paughco frame. One item I often attempt to use is a level. I’ll level the frame from side to side, then strive to keep all the other elements level. It helps.
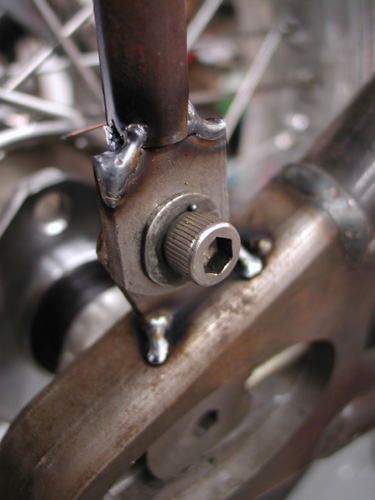
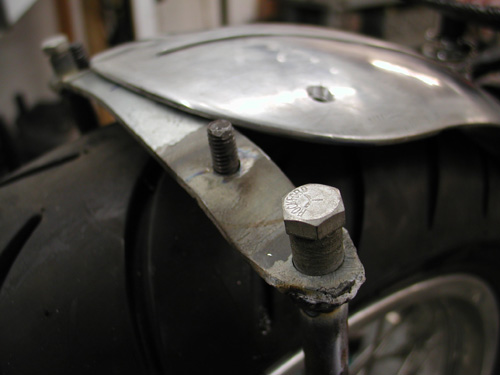
Here’s a perfect example. As I finished my welding chores, I got on a roll. I thought– wouldn’t it be cool to weld the fender bolts in place from the bottom. They would never come loose. Note the angle. There was no way they would ever return through their mounting locations. I was forced to grind them off and clean the holes.
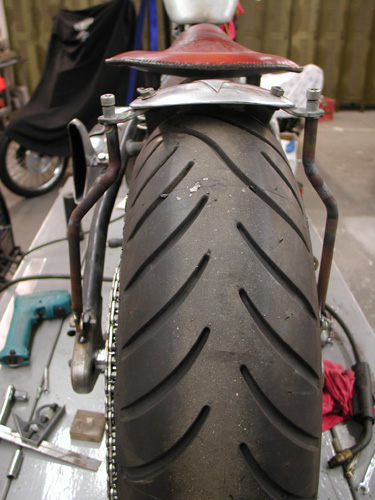
Here’s the finished fender rail system. I drilled holes in the frame and the rails to run wires. I still haven’t found the perfect running light style that rocks my boat and will afford me enough room to use the proper fasteners. Hang on!

Sturgis Shovel Part 11
By Robin Technologies |
I’m not sure if I’m keeping everything in line. But this segment took us to Foremost Powder Coating in Gardena California. I was at that point when these shots were taken. I’ve had a Powder Coating Sponsor for years, Custom Powder Coating in Dallas. They’re good people and know how to handle custom work. They’ve handled jobs for Strokers Dallas, our custom for American Rider and even the 1928 Shovelhead for Bikernet.com.

Powder coating costs have dropped and it doesn’t make sense to ship a frame to Dallas. It would cost less to have it Powdered in LA than to pay for the shipping. So I looked around the area and was recommended to Foremost Powder Coating (877) We-Coat-it, 1608 W. 139th, Gardena, CA 90249. These people have their shit together and the girl who runs day-to-day operations, Esmeralda, is a delight on the eyes and to work with.
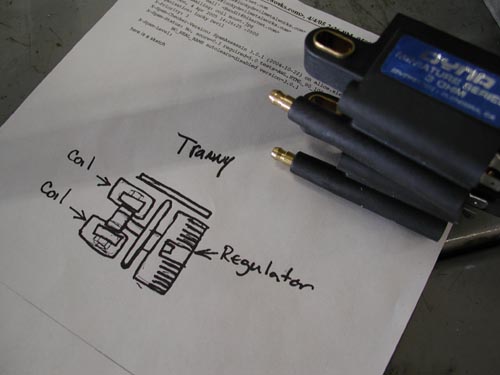
Let’s back up, though. Just before teardown for Powder I needed to think electrics. Kent from Lucky Devil Metal Works in Houston sent the above illustration for mounting the Compu-Fire voltage regulator under the tranny with the small Dyna Coils from Custom Chrome. I pondered that drawing and decided that I didn’t like the notion of putting my coils at ground level. What if I ran through a rain puddle? He’s built bikes using this technology several times and so has the guys at WCC, so it must work in most circumstances.
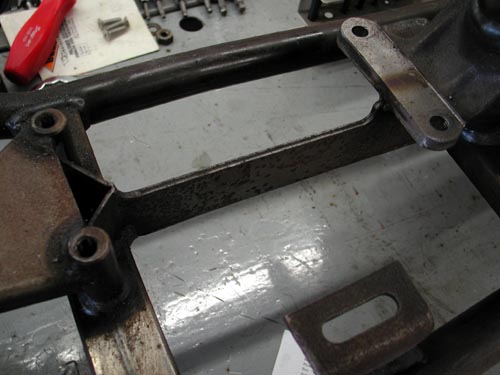
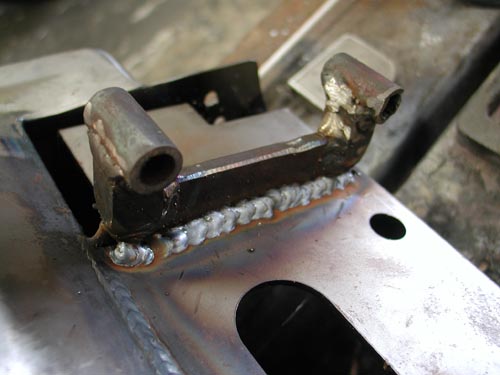
I decided that since I was going to run the Compu-Fire engine based electric starter that I had room under the oil bag for the coils. I still installed the sealed voltage regulator under the tranny on a 3/16 sheet of aluminum. But then welded brackets under the Craft Tech Oil bag to hold the two coils apart.
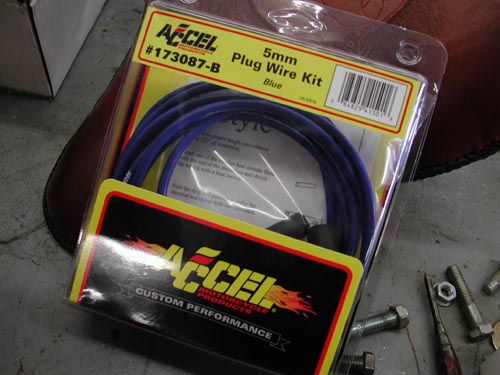
This was a delicate operation and ultimately the new Accell Sparkplug wires run right across the top of the RevTech Tranny. I also had just enough room behind the coils to house the wiring for the single-fire Compu-Fire ignition system. I thought through most every aspect of this motorcycle right up to the wiring business, then came up with a nuts notion, which I will explain during the final assembly process. It actually worked out fine with a handful of scary moments.
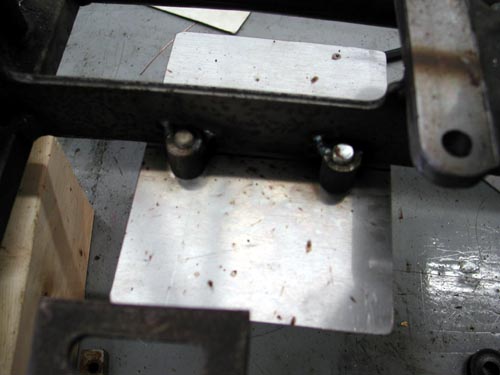
I welded four bungs that housed 3/8 fine threads to the frame with my Miller MIG welder. Ultimately I mounted the Compu-Fire voltage regulator to the pipe side (right) and it worked out fine.
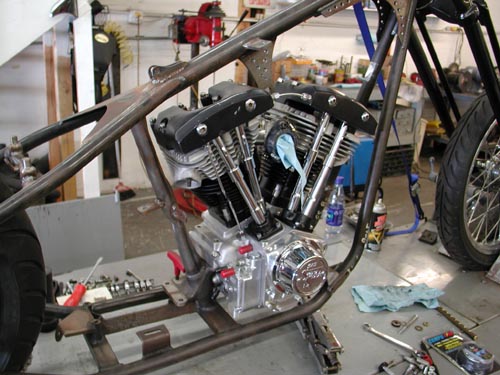
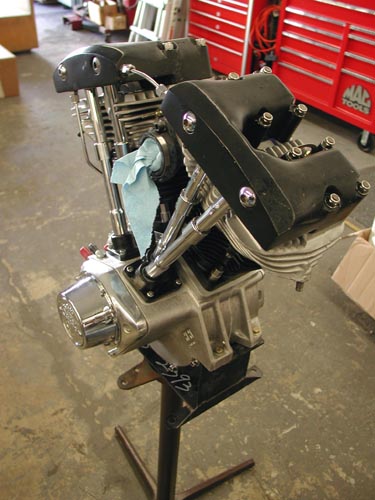
It was time to strip the Engine out of the frame, complete final welds, grind the welds and ship the parts to Foremost Powder. I needed to create a temporary engine stand to hold the S&S 93-inch Shovel in place. I used a RevTech engine stand and mounted it to a junk metal table leg. It worked perfectly and I shoved it in a corner for future use.
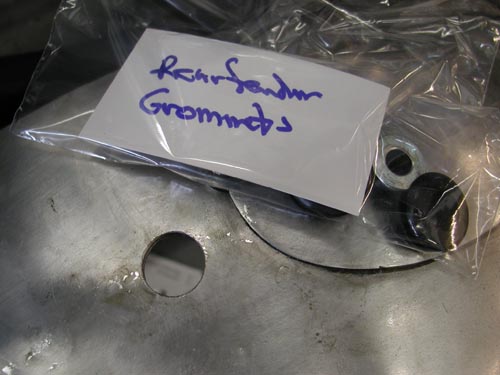
As I tore portions of the bike down I formed zip-lock bags with labels to hold the fasteners. You’d be surprised how fast you forget which spacer fit what, unless you organize. Mike Egan told me years ago that he takes photos of every part and organizes his assembly with photographs to demonstrate how components matched or were fastened. Since I try to take shots constantly I had an archive of various aspects. Hell, I just need to turn on Bikernet and look up the tech.
The next move was to finish welding any tab or bracket that had been tacked or partially welded. MIG welding is a breeze, but not as dead certain as TIG and I’m after a Lincoln TIG welder.
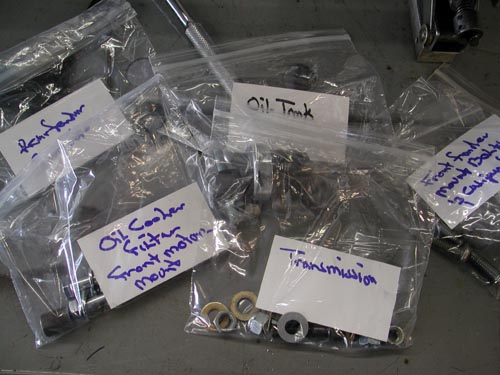
Here’s all the fasteners, grommets and spacers in bags with biz card labels. It works like a champ although I replaced some of these fasteners with stainless Allens wherever possible.
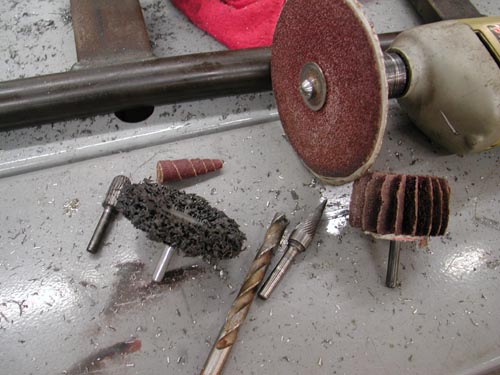
Next I dug out all my tools for grinding welds and went to work. This level takes a great deal of patience and artistic style, which I don’t have. The more time and patience, the better each weld will look. There is actually a process for bondo filling powder now, but it’s more costly. If you don’t want welds to show ask about it. If you don’t mind the look of a clean weld, just powder. I wanted the look of a machine, nothing slick.
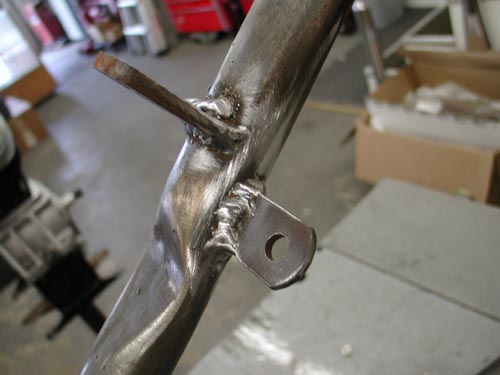
There’s one more consideration. Try to make each weld look the same as the next one for consistency. In my case that was tough. Some of my welds were decent, others sucked. I did my best, but my welds didn’t compete with the Paughco paid professional beads.
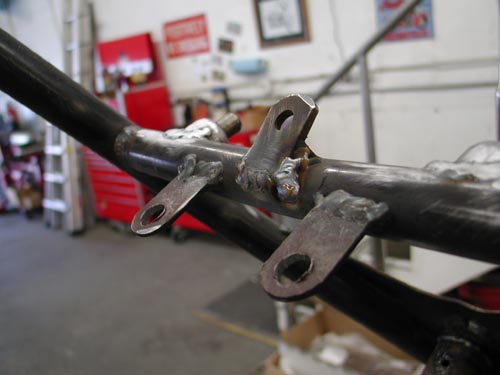
As I finished grinding and drilling holes in the frame for wiring I separated each group of powder finish parts and took a shot for the Powder guys at Foremost. It was a lifesaver to be able to hand them a shot of each group of parts since some had to be sand blasted before the finish was applied.
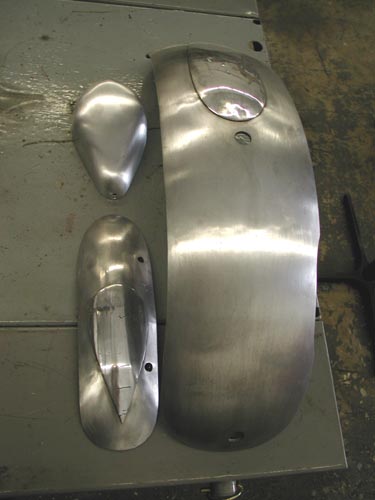
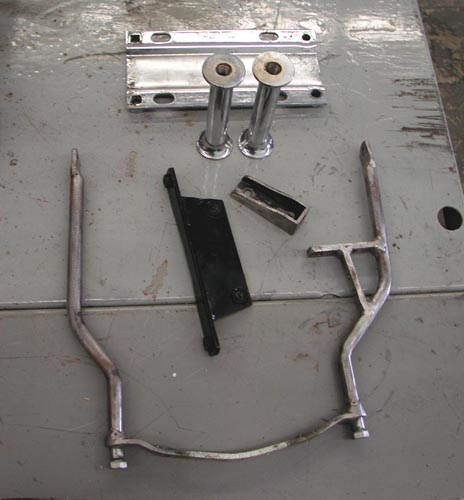
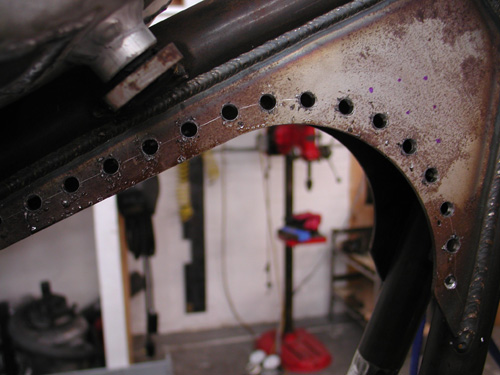
One more comment on drilling holes for wiring. This was one of the first times I drilled plenty of wiring holes. Remember Frank Kaisler’s rule? Drill the hole. Ream it out on a taper to prevent cutting your wires. Then with emery cones make sure there are no razor-sharp burrs in the tubing. Frank ran the emery paper then he’s twisted a Kleenex and shoved it in the hole. If it caught he’d sand the edges more. If not it was good to go. Let’s hit it to the next chapter, we’re burnin' daylight.

1928 Shovelhead Project Part III
By Robin Technologies |

The lovely Lena Fairless, who has threatened to marry Bandit (the sixth Mrs. Ball) and make him work for her folks at the Easyriders Dallas store, has been pushing to see that this 1928 Shovelhead project is completed in time for her wedding plans. Bandit doesn’t seem to move unless there’s a motorcycle and a woman involved. There’s just one problem in this case, which Lena is well aware of, she’s under age…
The other news on this project is that we now have a corporate sponsor, Ed Martin of Chrome Specialties, and a mentor, Chica, who builds bikes in Newport Beach, Calif. Chica built “Trick,” the old-time Sportster that Chrome Specialties is displaying at all the events it attends, such as Laughlin this month. Randy Simpson from Milwaukee Iron and Arlen Ness are also building spindly retro scoots with late-model drivelines. I spoke to Arlen the other day and he told me that a number of top builders in the country are building this style of beast for upcoming shows. Arlen is now building Sportster frames, sidecar frames and the tubs for these units. He’s sold 10 sets. Don Hotop is building aluminum tanks, so soon the parts for building these retro bikes will be even more available.
The contact stateside for the European parts we used is Fred Lange at (805) 937-4972. He has access to seats, fenders, front ends, tanks, headlights and more. Let’s see if we can pick up where we left off.
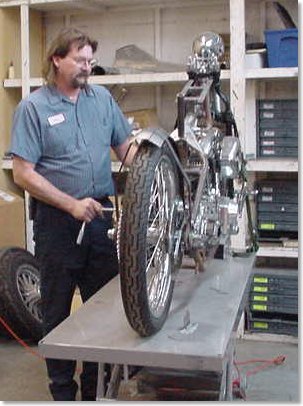
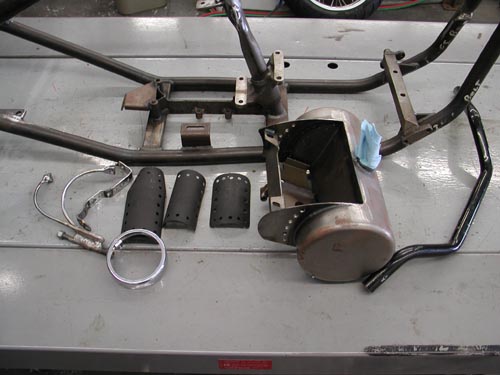
The frame is a stock rigid Panhead configuration from Paughco, with a stock, late-model Bad Boy front end. To drop the front slightly, Jim Stultz, Rick’s main fabricator/bike builder, used a KT components lowering kit to make the frame level because the newer springers are XA length. The retro tanks are sweat-brazed together and contain the oil in one half and the gas in the other. Unfortunately, the tanks did not fit the frame at all and had to be disassembled, cut and re-welded to fit. The fun part of such a round-the-town project is that it can be a true swap meet special once you have the basics in hand, and you can slip as far back into the retro world as you want. You can roll with chain or belt. You can use any old brakes you have around. Rick chose to use disc brakes and a chain, but he’s going with a jockey shift and internal throttle assembly from Chrome Specialties. The charging system will be state-of-the-art Compu-fire and the carburetor S&S. The engine and transmission were rebuilt from the ground up by JIMS machine and the engine cases are STD.
Both wheels are 21s for that spindly look. The handlebars were designed by Jim and bent by Milwaukee Iron. With the internal throttle cables, there will be a minimum of controls on the handlebars. Since the transmission was rebuilt with the notion that it would be electric start, an aluminum inner primary will be used with an old-time-looking tin outer primary that Rick picked up at a swap meet. Rick ordered a narrow Karata belt drive for the primary.
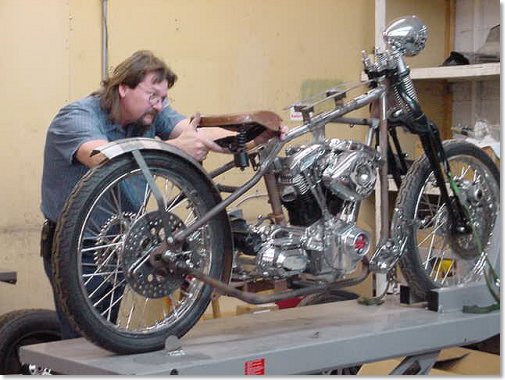
Jim sliced all the mounts off the frame except the front footpeg mounts, the engine and tranny mounts. Since the oil tank is part of the gas tanks, the only additional container would be for a battery to conceal a car-type marine ignition switch and a light/toggle switch.
“I try to fabricate components to be user friendly,” Jim said. He designed the battery box so it would only take two bolts out of the seat post and two out of the rear section and the whole pan will lift out through the top. The two sides covering the battery will meet in the middle in a flying wedge configuration, and Jim plans to build a top cap to conceal the battery from the area under the seat.
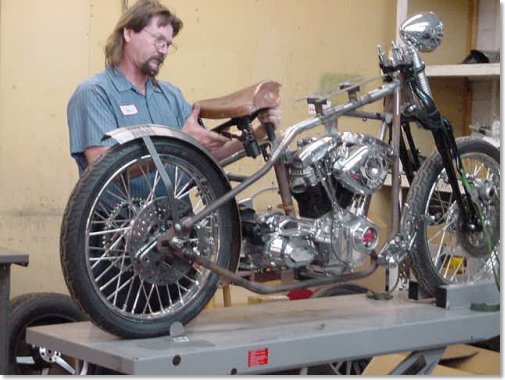
The steel gas tanks, once cleansed of the brass, were chopped and channeled to clear the rear head. The entire center of the tanks was removed to fit over the frame. Unfortunately that reduced the gas capacity to 1.5 gallons. The European threads in the cap bungs were tapped out of sync, so they had to be re-machined.
Lena teases Bandit with occasional shots from her mother’s digital camera. Next week we’ll discuss the mounting and installation of the Compu-fire ignition. Some members of the staff will be happy to see Bandit go to Texas, others, mostly the women, are bummed. He even called to see if he could ride it back to the coast and was told that it didn’t carry enough gas to get him out of town. Evidently the tank is Lena’s design.
–Wrench
