Mudflap Girl Part 2, the Bandit Engine and Spitfire update
By Robin Technologies |


As it turns out, the factory hired the S&S crew to assemble their Evo line of engines. What a natural. I liked that notion all the way around the block. First, it means more American hands in my new engine. Plus, what could be better than to have the best performance engine company on the planet working with the factory on the last and most refined V-twin configuration?

For this crew, and lots of riders all over the world, the FXR Evo is the best of the best. So, for Bikernet, this became the year of the FXR and the Evo engine. I asked the factory about their Evo engine program and received the following information.

A Modicum of Harley Engine History
The first 74 cubic-inch V-Twin engine on the JD and FD models was introduced in 1921 and the 45 cubic-inch side-valve V-twin engine (later to be known as the Flathead) on the D model debuted in 1929. The Flathead engine proved so reliable that variations of it were available on Harley-Davidson motorcycles as late as 1973 (servi-car trikes).

In 1936, Harley-Davidson introduced the EL model with an overhead valve, 61-cubic-inch engine. With increased horsepower and bold styling changes, the motorcycle earned the Knucklehead nickname, due to the shape of its rocker boxes.

New features were added to the 61 and 74 overhead valve engines in 1948, including aluminum heads and hydraulic valve lifters. New one-piece, chrome-plated rocker box covers shaped like cake pans earned this engine the nickname Panhead. The engine introduced on the Electra Glide models in 1966 to replace the Panhead became known as the Shovelhead, again due to the shape of its rocker covers.

1340CC Evolution Softail Engine – Silver and Polished SPECS
Type: 4-cycle, 45 degree V-twin
Bore X Stroke: 3.498 X 4.250
Displacement: 80 cubic inches or 1340 cc
Compression: 8.5:1
Torque ratings at 3,500 rpms: Touring with fuel injection, 83 ft./lb.
Touring w/carb 77 ft./lb. @ 4000 rpm
Dyna/Softail 79/76 ft./lb.
Miles per gallon: 50 hwy/ 43 city with a touring model using a carb
55 hwy/ 43 city Dyna or Softail
Variety and sales info:

1340CC Evolution Softail Engine – Silver and Polished
Since the first single-cylinder built in 1903, engines have been the heart and soul of Harley-Davidson history. Each motor has made its unique contribution, and the V2 Evolution engine is no exception. With the Smart Start Engine Program, buying a new Evolution engine has never been easier. When replacing your Evolution motor, Smart Start offers brand-new, factory-tested engines at an unbeatable price. Choose the standard silver and polished Evolution, sinister black, the classic black and chrome or the silver and chrome finish. Either way, you won’t just be making a new start; you’ll be making a smart start.
16161-99
IN-STORE PURCHASE ONLY, Contact dealer for pricing and availability.
Fits all ’99 Softail models. Does not include carburetor, manifold or timer cover.
MSRP US $3,295.00

1340CC Evolution Softail Engine – Black and Chrome
16160-99
IN-STORE PURCHASE ONLY, Contact dealer for pricing and availability.
Fits all ’99 Softail models. Does not include carburetor, manifold or timer cover.
MSRP US $3,995.00

1340CC Evolution Softail Engine – Silver and Chrome
16177-99
IN-STORE PURCHASE ONLY, Contact dealer for pricing and availability.
Fits all ’99 Softail models. Does not include carburetor, manifold or timer cover.
MSRP US $3,495.00

When my engine arrived, I immediately hauled it in the Bikernet Hearse to Bennett’s Performance for a slight performance upgrade. I needed to let that puppy breath without messing with the reliability aspect. Sharing the same building on the edge of Signal Hill, California is the headquarters for Branch O’Keefe. John O’Keefe worked for Jerry Branch for decades and ultimately bought the business when Jerry Branch decided to retire.
We’re looking at several options for stock engines and for rebuilds. We have three touring models coming together right now, and they are all 80-inchers. One for my son, my factory motor, and Dr. Hamsters 200,000-mile Evo rebuild by Bennett’s.
I’m running the brand-new factory plain Evo engine with the Andrews EV-27 cam and Andrews chrome-moly adjustable pushrods for less flex, a new cam bearing and the Branch flowed stock heads, for 8.9:1 compression, 78 cc Branch-flowed chambers, and 75-80 horses at 2,600 rpms.
The next higher upgrade step from Branch is the EV-51 cam and additional headwork and shaved heads for a 10:1 compression and 85 horses at the same rpms. And finally, a customer can run with an EV-59 Andrews cam and 10.5:1 compression and 90-95 horses. Not bad for never taking the barrels off.

“I like rpms,” John O’Keefe said, “and the new ignitions allow these engines to burn more fuel and bring out the horses.”

The key to all this performance is the headwork set to match the cam, and John O’Keefe has studied this science for most of his life. The key is building a mid-range hot rod without sacrificing reliability.

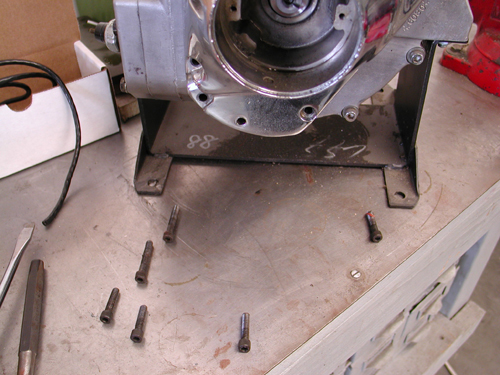
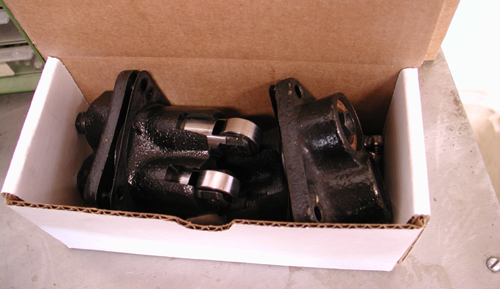
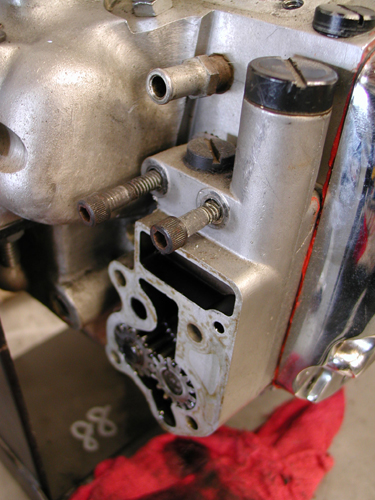
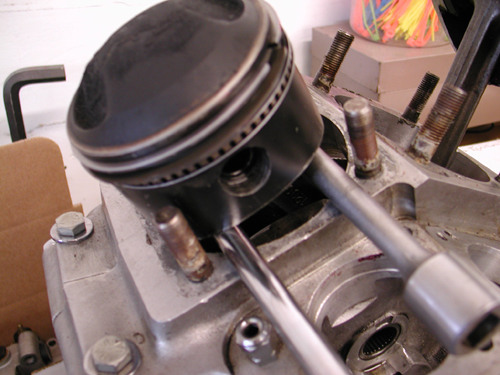
The first move was to strip the engine and deliver my fresh factory heads to the Branch team. Eric Bennett set my beautiful, plain H-D Evo engine on his clean room bench and removed the top motormount, the top rocker box that came off with the middle ring. We noticed much improved, one-piece factory Teflon gaskets. We won’t mess with them. Then Eric removed the rockers, the pushrods, pushrod tubes and rocker boxes. We also retrieved the new base gaskets to reuse.


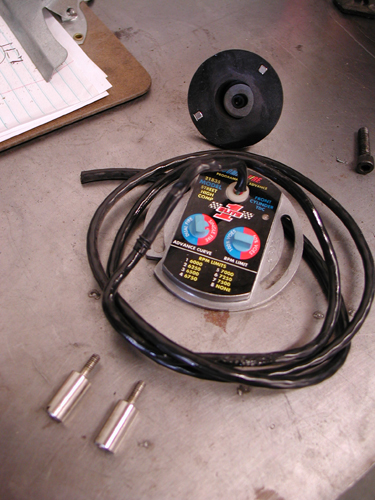
Then he removed the head bolts, the front head, and the rear head. I had already purchased the Andrews EV-27 cam from Branch O’Keefe, and Eric and I started to prepare for installation. He removed the point cover, ignition, and cam sensor.

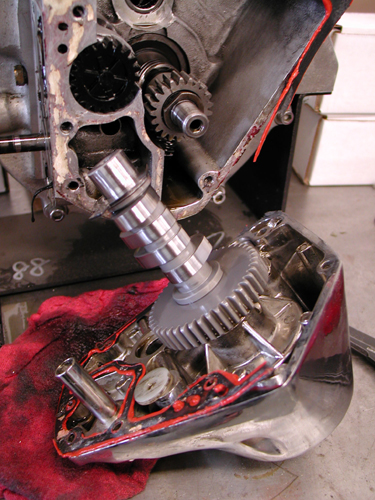
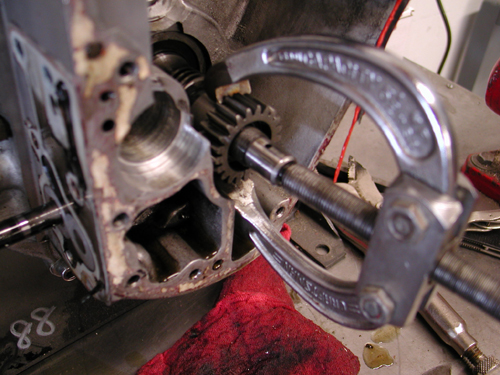
He had a terrific Trock tool for removing the cone cover. It’s always a bastard to try to carve around the narrow gasket surface with a screwdriver or a knife, hoping to find opening and risk damage to the cases or create a leak by scratching the gasket surface.

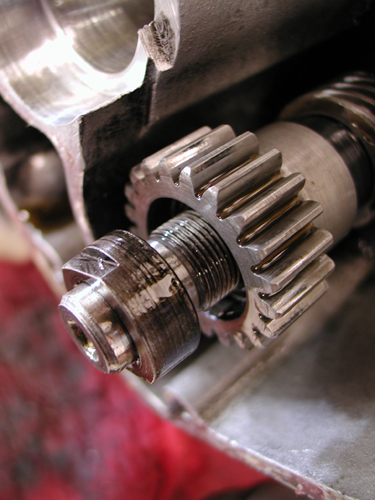
“We always replace the new factory cam bearing,” Eric said, “with a full compliment Torrington bearing. The factory ran the good ones from ’55 to ’92, then they shifted to a cheapo brand. It’s also not a bad idea to replace the factory plastic breather gear with a solid JIMS unit.”

I scrambled to take notes and photographs while Eric peeled into my engine. He popped a factory set of magnetic tools into the lifter stools to hold the lifters up during cam removal. I wish I had a set of those puppies.

“It’s interesting,” Eric said. “Virtually every stock cam is .060 longer than any aftermarket cam.”

Eric pre-measures the cams and adjusts the thrust washers before replacing the cam, which you will see in the next report, when we study the Branch recipe for performance, the headwork, and modifications. He replaces the valve seats for larger valves, then ports and polished the chambers. You won’t believe the long-lasting components Branch uses.

Then we will watch Eric replace the stock cam with the Andrews unit and adjustable pushrods, and put the whole Evo puppy back together. “Don’t forget to order a top end gasket set,” Eric reminded me as the rain cut loose outside and I wondered if this winter season would ever end. I need a ride.

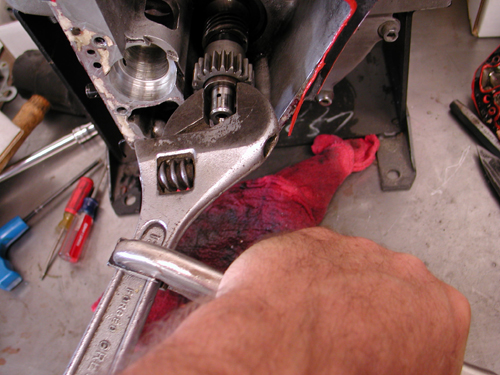
Then Eric grabbed a JIMS tool and a couple of wrenches and in 30 seconds pulled the cheap cam bearing from the new cases.


“I’ve seen these go south in 10,000 miles,” Eric said. “I’ll never understand why they replaced a perfectly good quality bearing with this junk.”


Just as quickly Eric took an aluminum guide and a mallet and tapped the new bearing in place, another 10 seconds passed, and we were finished.

A couple of days passed and I thought, just maybe my frames and front ends would be completed at Spitfire. On a hunch, I peeled 57 miles away from the coast in the hearse while listening to KJazz on the radio.

It was quiet as I wandered into the vast machine shop, welding shop, bike assembly area and ran into Joe Cavallo, Paul’s dad, who was hunting around the shop for Softail brake anchor brackets. He greeted me and said something about shop organization. The Spitfire and American Made business model has faced serious transformations over the last couple of years.


As I mentioned before, Paul was the partner and manufacturing arm of Hellbound Steel motorcycles. American Made manufactured fast moving products for a bunch of now defunct companies such as WCC. At one time, they were building hundreds of choppers each month, and thousands of products in a much larger facility. During the last year, they adjusted their business model and tightened their facility. They rewired their building, replumbed it with compressed air lines, and kept building products.


It’s tough to stop everything and regroup, scour through boxes of tools, base material, parts, and junk. With a skeleton crew they are still building any frame a customer needs, including big twins, rigid Sporty frames, British custom frames, and even frames for Yamaha 650s and Honda fours. They also build an entire line of forward controls, gas tanks, handlebars, girders, and glide front ends (bowling pin), pegs, oil tanks (a variety of styles), trees and taillights. Paul is the mad scientist of the group. As a kid, he manufactured exotic gun cases.

He’s the kind of guy who will catch a notion in a cup of Starbucks coffee, in the morning and by the evening, he has a new product. It’s not a one-off either. It’s fully designed and configured for multi-manufacturing.

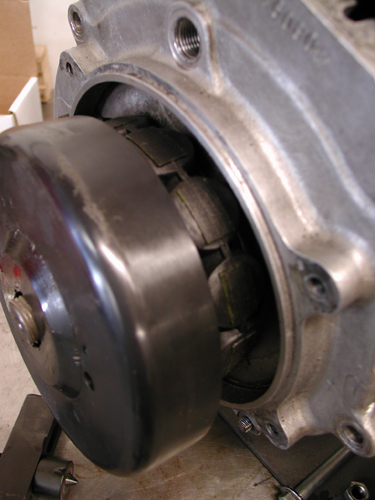
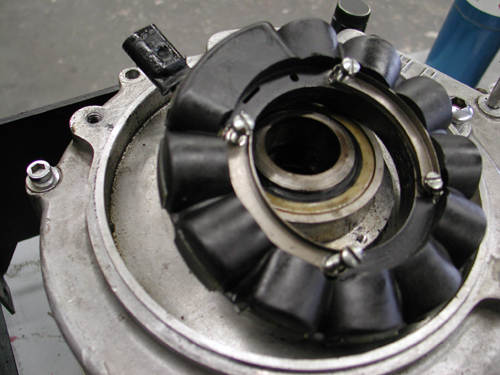
Some of his crew have been working with Paul and his dad for decades, including Larry, who is their master motorcycle assembly guru. He knows it all. “Pull the alternator rotor off that engine before you run it,” Larry told me. “Check the wires for twists or tears.”


I made a note. Then we made our way into the frame jig area to see the FXR frame progress. The FXR fever caught on and there were at least five FXR frames in the making. The first was based on the pro-street configuration with additional gussets, the squished wishbone, for the single-loop notion and 36 degrees of rake for a 2-inch longer girder front end.


They discovered some issues with my request for a V-style frame in keeping with the stock FXR configuration. I also hoped for less rake and a shorter Frisco style girder front end style. Paul was working on my unit with a 30 or 33 degree rake, but he also started building a couple of drop seat FXR frames, including one for himself.

We are also going to try a slightly longer swingarm suggested to us by Dar, the boss of Brass Balls for his FXR configuration. He wanted to pull the rear tire out of the frame some, and I was willing to try it. They are hot after these frames, since Paul plans to ride one on the Diablo run that kicks off on May 5th in Temecula, California and rolls toward the border. Don’t know if we will make it.

The plan for now is to pick up the frames, swingarms, axles, and Spitfire girders, on Friday April 8th. Between now and then, hopefully we will wrap up the engine and bring that puppy home to the headquarters. We are trying to match up these Mudflap Girl FXRs wherever possible, but not always. We are going to run long and short dogbone risers from Custom Cycle Engineering, but we’ve ordered a new set of Raw 2-into-1 performance pipes from Bub for Frank’s FXR, and I’m running a D&D 2-into-1 system. I’m running a Frisco’d and stretched tank and he’s running something completely different. He’s running a Klockwerks rear fender and I’m running something bobbed. I’m getting seriously ahead of myself. See you in a couple of weeks with the next report.
–Bandit
Sources:
Bennett’s Performance
Branch O’Keefe

JIMS
Spitfire
Custom Cycle Engineering
D&D
Bubs
Harley-Davidson
Rivera Primo Inc.
Belt Drive Unlimited
Metal Sport Wheels
Sturgis Shovel Part 5
By Robin Technologies |

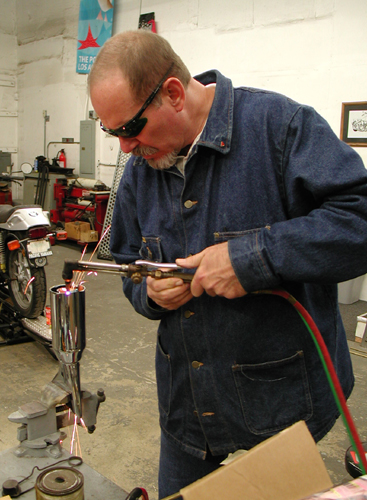
Helluva weekend. Anytime there's lots of motorcycle carnage,sex, whiskey and writing, I'm all for it. Maybe it's Valentines Daycreeping up. Make a note. Here's the deal on the Sturgis Shovelhead. Sincethe engine was in and mounted I went to work on the exhaust system,then seat mounting, position and played with the bars. I made a runto a local steel joint, because I had a notion that I doubt will worknow, but I'm still investigatin'.
Let's hit the highlights. I'm fortunate to have a young,talented fabricator/builder who I'm sharing ideas and resources with.Kent from Lucky Devil Metal Works in Houston is on the phone dailyfor tips and knowledge sharing. It's damn healthy to have someone whois in the trenches daily to assist. In fact I had a couple ofcrucial metallurgy question that morning, but let's hit what Iaccomplished.
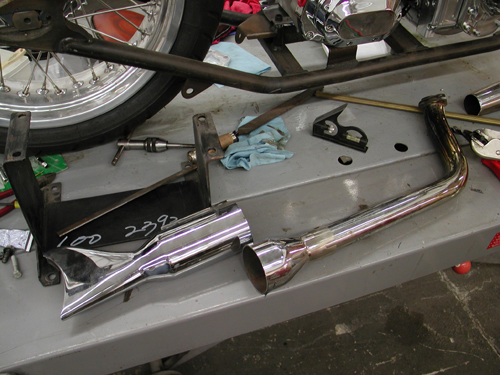
A crucial aspect of building any bike is planning. That'snot to say all my eggs are in a row. We'll see, but the more you canaccommodate, the less redo's will be necessary. Also, don't throwanything away. That junk part might be a critical bracket tomorrow. Idug through my partially organized pipe bin and found a set of oldglass pack, shorty muffler, shot gun pipes. I could use the rear one.I decided, since noise issues are a concern and performance issue area constant priority, I would build a set of shorty mufflers withBandit tuned baffles.

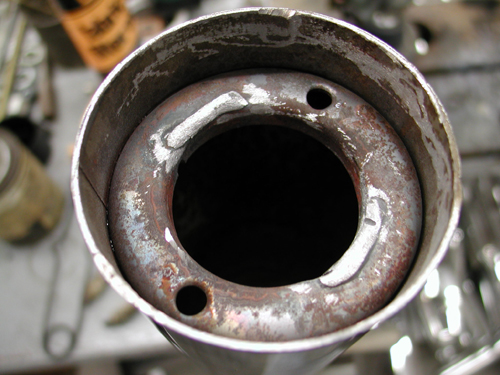
Then I spotted the fishtips in the pile and myconsideration changed. I dug further. Kenny Price from Samson allowedme to dig through his warranty bin when I was looking for stanchionsfor my Bikernet office railing. I remembered touring mufflers withfish tips, I kept digging.
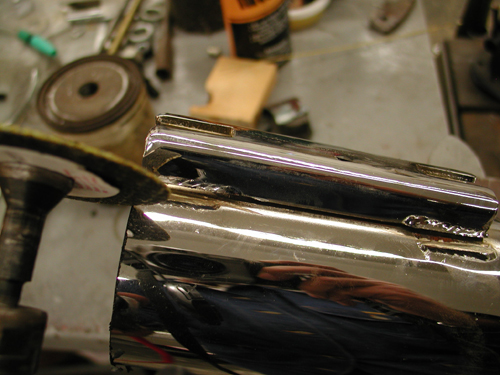
Sure enough I had a set and in quick movesI sliced them into chunks. You know me, I'm a gambler. I cut themwith no methodology in mind past the size and looks, but I came uplucky. Samson designed a baffle system with a cone at the front toguide exhaust pulses into the baffle and it seems to be working fortouring applications. I cut off that portion and discarded themajority of the baffle. But there was still 2 inches of baffle and astandard donut in the rear of the muffler. That's where fate movedit's evil hand over Richard Kimball again. Or in other words I rolledthe dice.
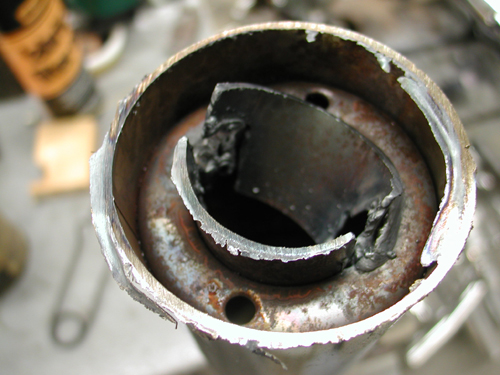
I spoke to Kendall Johnson recently and he told me aboutperformance stepped exhaust systems and reversion cones used to tunesystems at the rear of the pipe. I couldn't make this donut move upand back, but I had the makings of a reversion cone at the stern.With a torch I cut out the remaining baffle, then after speaking withthe HOT BIKE staff member, Craig Murrow, for a reversion cone descriptionI knockout out the remaining baffle, then with various cutting andgrinding cones I formed and smooth departure for the exhaust pulses.Then I had to remove the old touring mounts with a die-grinder andthey were ready to weld.
The rear pipe was comparatively easy since the pipe wasalready made except for the muffler and brackets. Shovelheads arenotorious for louse exhaust manifold connections and tearing out thesingle stud, so I wanted to mount them in the front and rear for asolid, secure connection. The only port for the connection at thefront was the oil bag. That was a bad choice and I'll run a bracket off the seat post before all is said and etched in stone.
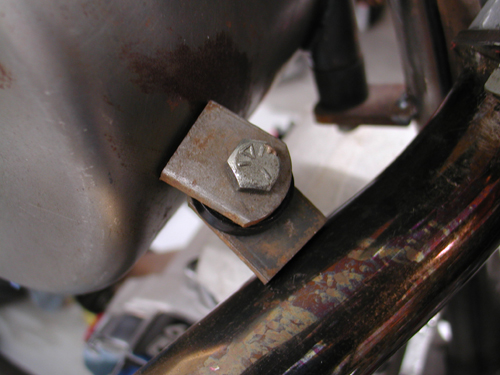
I had to make sure the pipe could be removed with the tabs onthe bottom, then I spaced the tabs apart with a heat sink material. Imay use Teflon, then the notion that the oil bag is rubbermountedfloated to the surface. What bearing would that have on thiscoupling? Hell the frame will vibrate like a mad dog. I'm stillquestioning that link, but we'll see, maybe a spring between the tabs? The final decision was the seat post bracket to come.
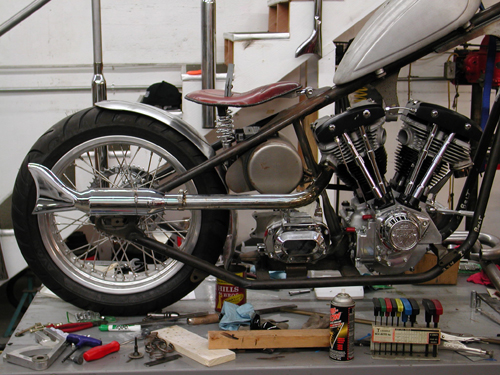
There was one other pipe design consideration–the length.I try to keep the pipes somewhat equal and between 32 and 38 inches.Buster's Sportster runs sharp and crisp with his hand-made 38-inchesfrom the Bikernet Headquarters, as seen in Street Chopper. So Idesigned this pipe to be 38-inches and not protrude past the tire. Mygoal was to make the front pipe curve out the other side and be ofequal length.
At the end of Friday night, one pipe was complete, toolswere scattered all over the shop and I had a couple of Hooker Headerchunks of 1 3/4 pipes segments cut and was fooling with the frontheader. The front was tricky as hell. I wanted to scoop out the leftside of the bike, which added length. I also had a bitchin Rohm Engineering oil filter/cooler system that mounts to the front motormounts and aims the filter at the ground for ease of removal anddraining. The pipe had to clear it significantly. This puppy was alifesaver. I planned to run an oil cooler (Shovelheads run hot) andfilter, for a lasting driveline and more oil capacity. My originalplan called for old school mounting on either side of the oil bag.This eliminated all of that and the plumbing for two elements, the cooler and the filter, wasreduced to one hot looking job in front of the engine for maximum cooling.
I spentall day long on Saturday, dodging the phone and working in thegarage. I had all the tools and materials I needed, even two new setsof welding glasses, which came in damn handy. The trick was to lineup the pipes, make all the right decisions, hope for the best andtack 'em. I did and with a level I constantly compared the pipe tothe top of the lift. The spacing worked out fine.
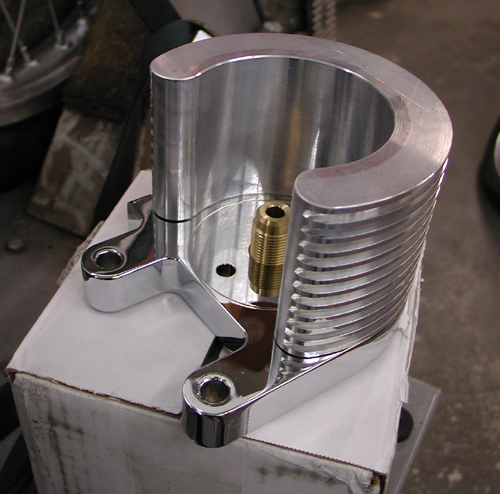
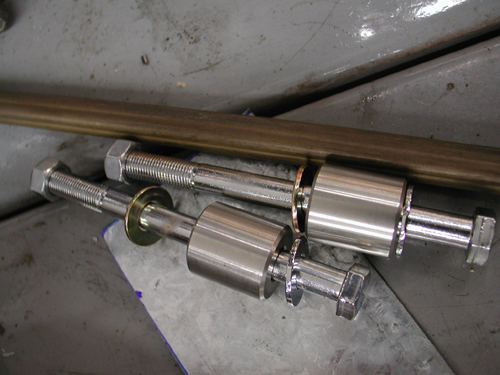
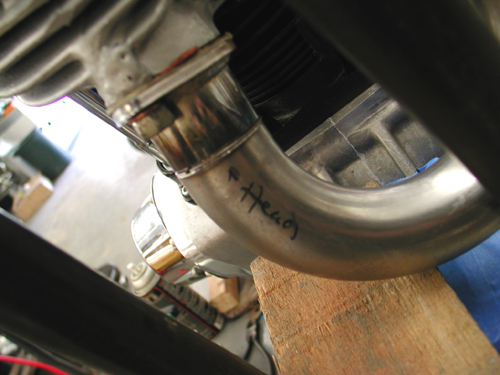
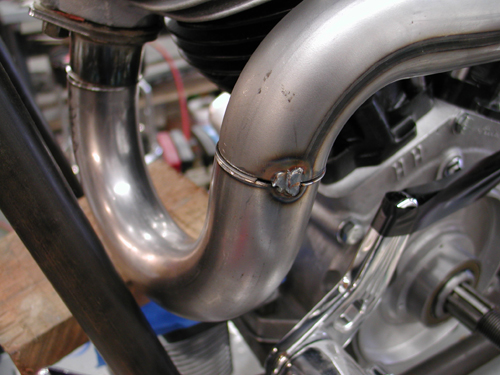
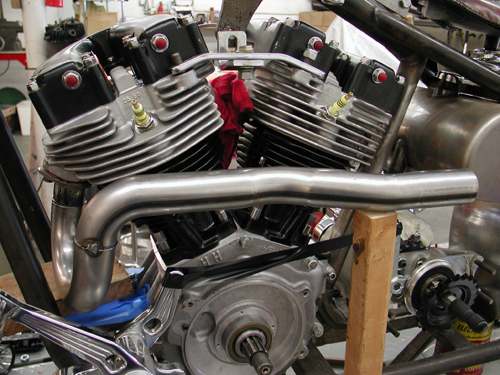
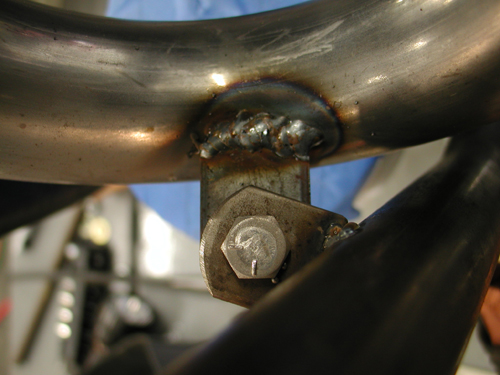
I cleared the top of the Rohm bitchin' oil cooler/filter mounthopefully by enough to allow the pipe slip down and out of the head (I was recommended to use a CCI Filter part number 270126).I tacked the tab with a spacer between the two for some jiggle room.And I made damn sure that the pipe tab was below the frame tab. Atthe back, the muffler was fabricated the same as the other one with aslight exception.
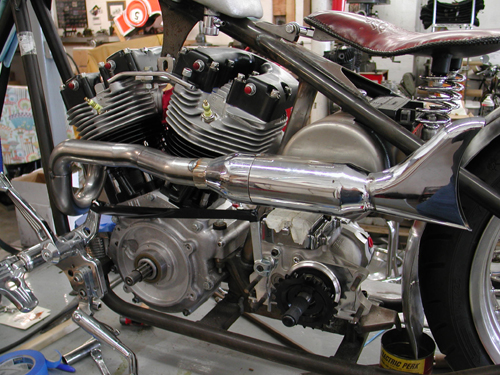
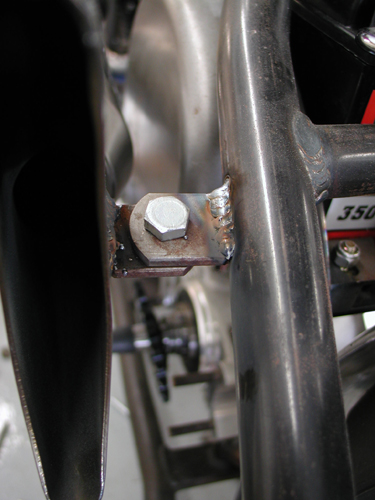
I shaped the reversion cone the same, cut off thetouring mounts and ground the tabs. Then I used a couple of V-blocksto hold it perfectly in line for tacking the halves together. Then Isliced off the crush tabs on the front of the Samson tapered muffler.They were wider and different than the other side, so I cut them off.You'll notice the difference, if you check both side.
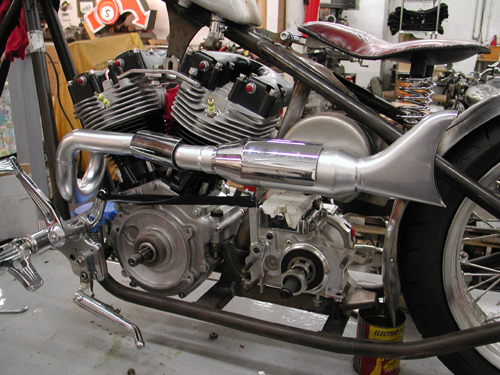
The front parts of the pipe were Hooter elements and theyare smooth mandrel bent segments. I used another one for joggedstraight piece between the muffler and the head. I took the 13/4-inch exhaust to my Muffler Master bender and bent it slightly oneway, then reversed the sucka and bent it the other way. It fit like adream and looped out enough to pass the oil bag. I used Hooker headeralignment sleeves to hold the front pieces in perfect alignment. Donedeal, I tacked them, constantly comparing the level with the lift,the pipes then the muffler. After the tacking was secure, another tabwelded to the frame, avoiding the oil bag (a Lucky Devil concern,since the oil bag is rubbermounted), then all elements wererechecked, I removed both pipes and MIG welded them as complete aspossible.

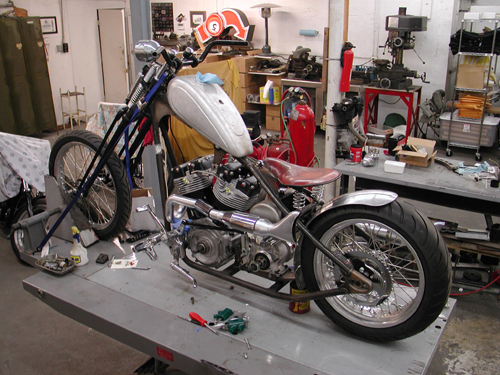
I find that MIG welding is a pain and blows holes in pipes easily.I also discovered that after I MIG weld a pipe I can flow the weldeasily with a torch and smooth out all the welds, fix holes and fillgaps. I actually found a piece of old steel rod, not much bigger thana piece of wire. I usually use old coat hanger, but it pops andwheezes from the paint coating.

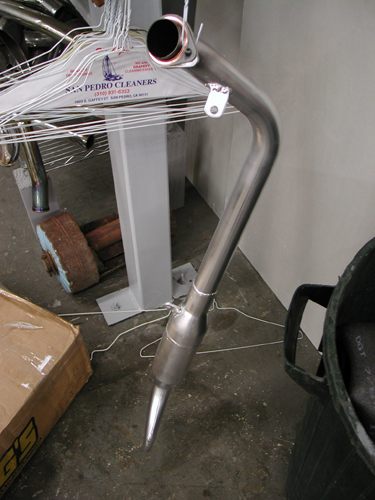

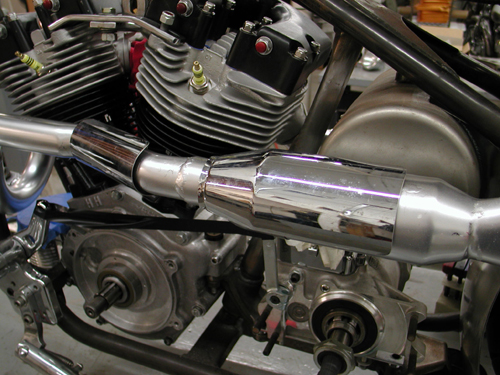
After the pipes were welded, flowedand checked twice, I ground all the surfaces with an emery disc andpainted them with whatever barbecue heat paint I had laying around.The lovely Layla is currently on her way back from Home Depot withsome flat black heat paint. We'll see how that works.
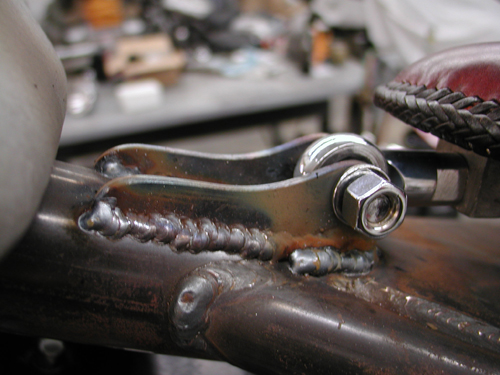
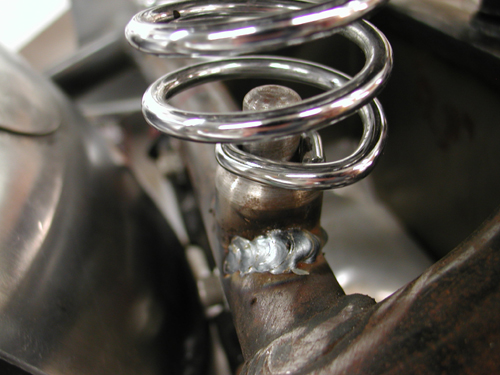
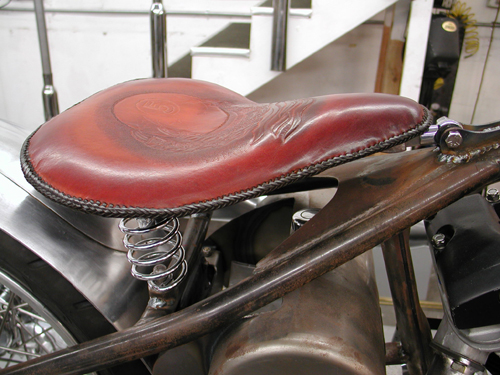
Kent from Devil hand fabricated the seat pan, brackets andbungs. I set them up and welded the parts in place. Then it was timeto roll the bike off the lift and see how she fit and where I mightneed heat shields. I discovered a couple of things. Yes, the scootwould require left side heat shields and nothing on the right. I alsotested my notion to sculpt claws out of brass, unsuccessfully.
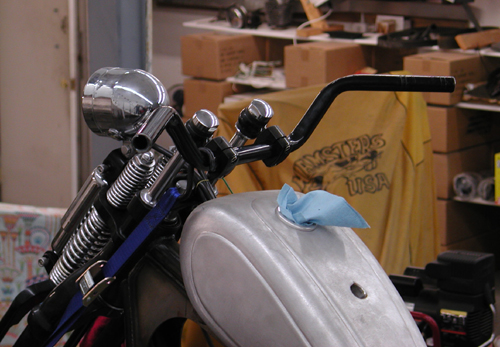
I also found that the existing bars wouldn't cut it. Igrabbed the old '48 Panhead TT-bars, narrowed them by 4 inches, and Isorta like them.
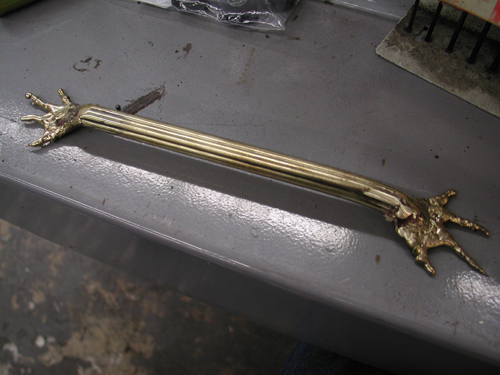
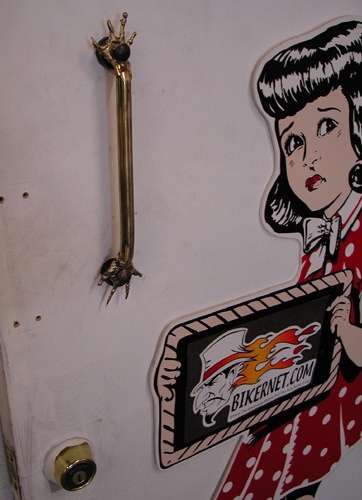
Okay, so I grappled with the sculpting business fora couple of hours and discovered that I can't control the brass likeI can steel. I spoke to Kent from Lucky Devil and he recommended thatI try TIG Silicon Bronze rod. I'll try that next week. In themeantime, my first brass sculpting attempt ended up on the shop door.Let's get the hell out of here.
Ride forever,
–Bandit

Sturgis Shovel Part 1
By Robin Technologies |

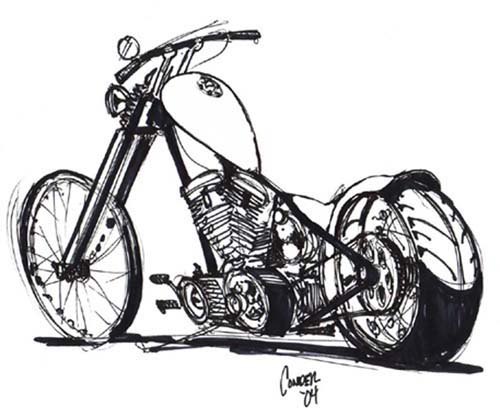
We're starting another project at Bikernet, the Ultimate Chopper. I dediced that title was bullshit. I look at some of the bikes built nowaday and mine pale by comparison, so screw it. It's the Bandit/Sturgis 2005 Chop. It's been a couple of years since I built a bike for myself. Hell, I can't ride the shrunken FXR, it's too small. Besides I need a rigid chopper for everyday flying. I gotta tell ya, I love choppers, like women. They're sleek, slim and move with an indescribable grace.
Here's the design notion. No we're not trying to compete with the Martin Brothers, Paul Yaffee or Matt Hotch, who are all master craftsmen and artisans in the custom motorcycle world. They are incredible and I have the utmost respect for each one of them. I'm sorta Indian Larry West. I want to build a light agile chopper for the ride. I'll attempt to explain. I've been riding choppers most of my life. I've tried out many styles, but consistently come back to the mighty light weight chopper.

Let's get specific. I needed something stretched to fit my 6-foot, 5-inch frame so were going with a stretched Paughco Rigid with 4 inches in the downtubes and 3 in the backbone. But I'm sticking with a very moderate rake of 35 degrees for handling. I'm running a 9-over light tapered leg Paughco springer for class and city handling. I'll run my traditional Custom Cycle Engineering risers for limited handlebar vibration and traditional appearance.
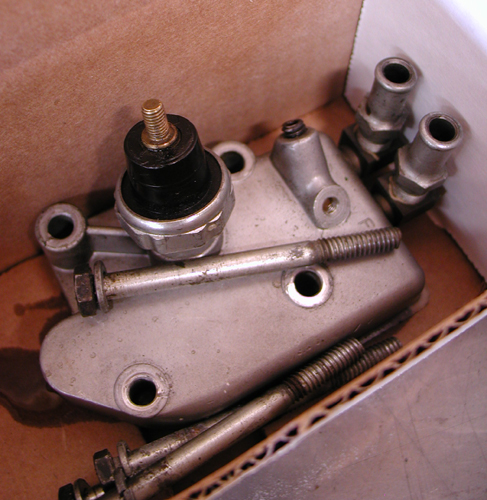
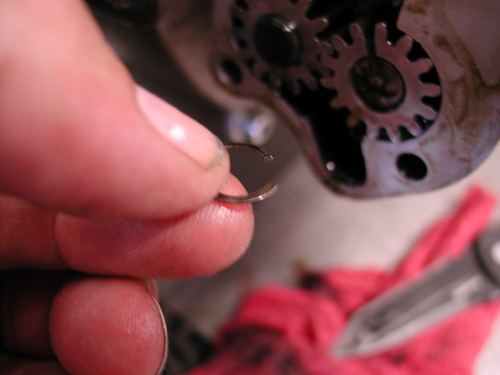
One of the notions is to make this bike a very reliable, rideable chopper for long hauls, maybe to Sturgis next year. I would generally run a 96-inch Evo to fit the rule, but this time a brother, Richard Kransler cut me a deal on a Shovelhead engine with 3 5/8 bore and 5-inch stroke. That over 100-inch monster would tear this bike apart in short order so I called S&S for advice.
We're going to roll with a tried and true S&S formula for street power, reliability and balance–same bore with 4.5-inch stroke will give me 93 inches of grunt. I tore the engine down for modifications last week and shipped the lower end to Viola, Wisconsin for a S&S blessing.
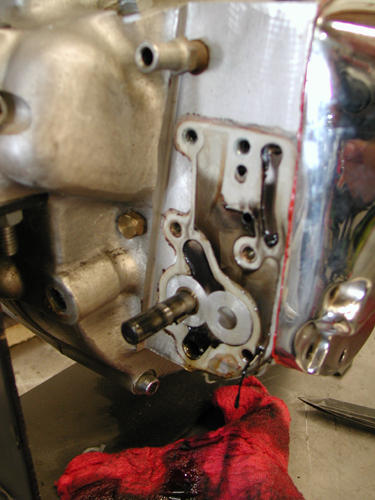
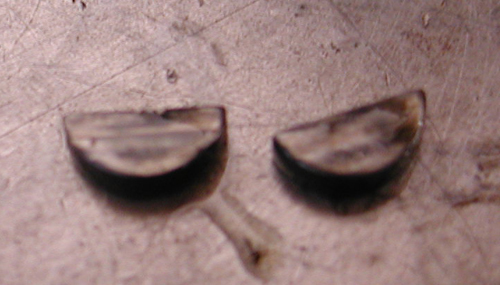
In keeping with the chopper code of the west, no fat assed tire will cramp the handling. I'm going with only an Avon 180/18 and a 21 on the front. No wild billet wheels but clean Custom Chrome polished aluminum rims and 40 stainless steel spokes. This bike will have a touch of chrome, but not much. I'm going to start a bin of Stainless Allen fasteners to take care of assembly.

I'm not going to run anything that sticks out from this bike, no sidemounted license plate bracket or wide bars, just tall risers and what I call TT bars that I will narrow for splitting lanes on LA freeways.

I may use a flush mount Sporty tank, or perhaps a Cyril Huze job like the one on the Shrunken FXR. What a sharp tank. I'll use a BDL belt, Compu-Fire alternator/ regulator and single fire ignition for reliability. We're mounting Kraft Tech fenders and oil tank, making our own pipes and brackets. Dewey's custom pegs will be used because they're light and contain just enough rubber to keep vibration away from feet and hands. The foot and hand controls are all Joker Machine for true reliability and simple clean design.

The Jim's 6-speed overdrive tranny is waiting a Custom Chrome Sprocket and Rev Tech O-ring chain. Finally I'll research the best possible sprung seat for comfortable, vibration free ride.
We're shooting for a bike that will be solid for the long run. It'll run strong, won't vibrate to shit, be reliable enough to ride to Sturgis, a street fighter in the old school fashion. Not a lot of flash, but tremendous class. Watch as it comes together right hear on Bikernet. Oh, I've got a couple of tricks up my sleeve that will be revealed as we turn this pile of parts into a running gargoyle.


Sturgis Shovel Part 12
By Robin Technologies |

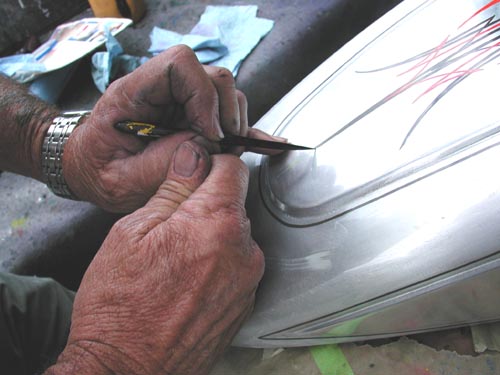
Hey, here’s quick bit on George The Wild Brush who handled the Pin Striping on the 2005 Sturgis Shovel project. He’s pin striped several other bikes for me in his 47 years behind the brush. Born in Hanford, California, a miserable military town, in 1944, he kicked tumbleweed while his mom worked on a base.
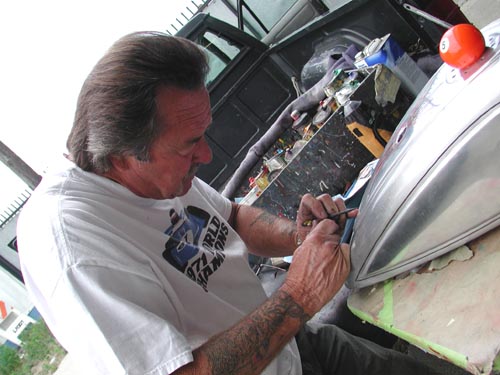
She moved to the safety of Southern California away from the miserable summer central Califa heat, to Long Beach then Lakewood (next door) where he went to school, but didn’t graduate.
He was warned that the fad would die so his vocation would fail. “The fad’s still rockin’,” George said. “My first car was a ’54 ford and I custom painted the driver’s side. I couldn’t afford enough paint to finish the passenger side, so I had the only cool side.”

He studied Von Dutch work, Larry Watson and George Barris. “I’ve striped refrigerators, toilet seats (new ones), and 50 and 110 Tom Gentry trans Atlantic ocean racing boats. He’s taught me a thing or two about striping. “It’s best to have the parts off the bike for the best quality art.”

It’s difficult to paint bare aluminum—“Paint won’t bond to it.” without a primer.” I worked at Gasoline alley for 15 years painting aluminum dragster bodies.
It’s also difficult to pin strip chrome—“It won’t hold up due to the lack of porosity.”
He only uses One-Shot enamel paints—“Can’t use any paint.”
With motorcycles it’s a good idea to clear over striping—“People don’t pour gasoline all over cars, but they do bikes.”
Cars don’t generally need to be cleared over striping work.
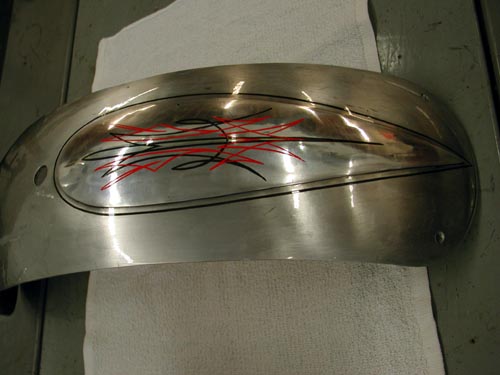
His number is (310) 488-5488 for classic pin striping and good stories.
George came to the shop just after I picked up the clear powdered aluminum sheet metal from Foremost Powder. He usually tells me what I’m going to have striped. I have a vote and initial color selection, then I best get out of the masters way.
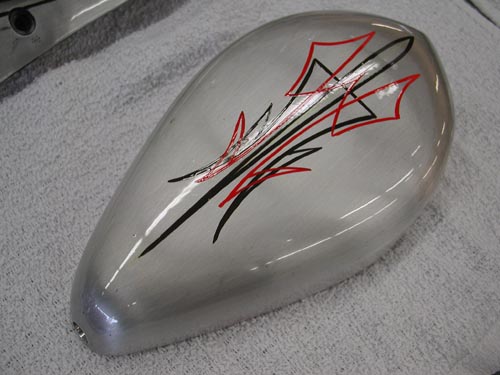
He striped the Goodsen Air Cleaner, which was treated to my holy treatment, then brushed with Scotchbrite to remove the polished appearance.
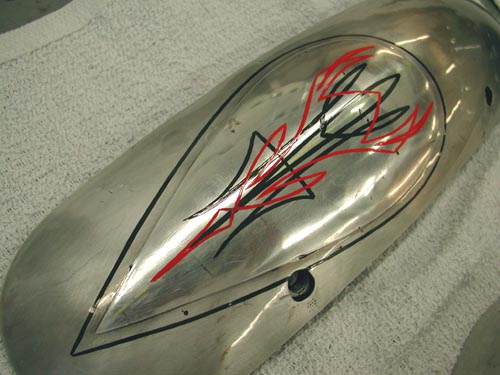
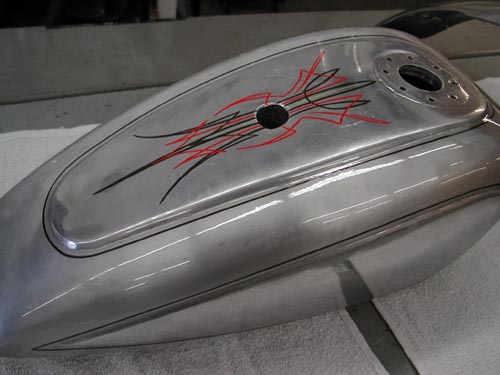
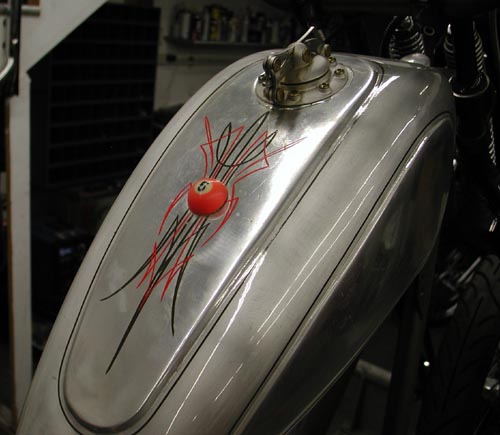
Then he striped the panel polished, highly-modified, XR750, Cyril Huze donated tank and Lucky Devil, custom made fenders. I polished the panels and brushed the rest for a two-tone effect. Not sure it worked, but George gave it a final touch.
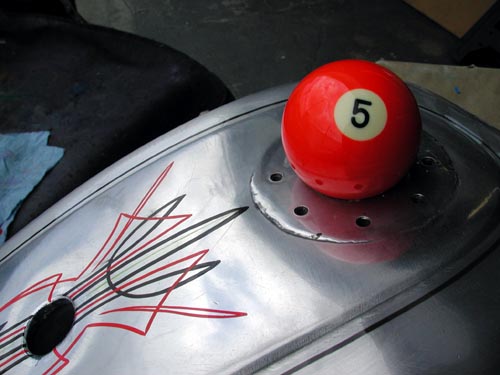
George suggested the 5-ball addition to the center of the tank. Not the gas cap. Ultimately I filled the center-mounting hole with a small 5-Ball to commemorate our company and all the women who put up with my shit over the years. In case you don’t know the story, I’ve been married five times, that’s five misses Ball.
1928 Shovelhead Project Part IV
By Robin Technologies |

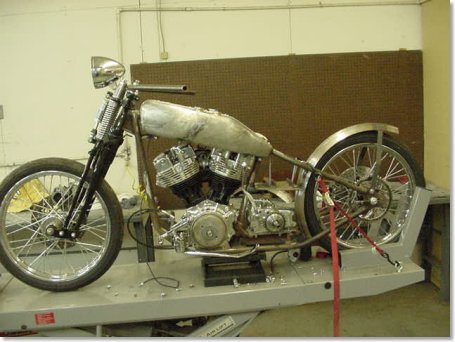
One of the best aspects of building bikes nowadays is the integrity of the components. If you get the right mixture of components together and take care with the wiring and assembly, you’ll have a bike as reliable as factory stock. That’s one of the reasons Bandit has moved to using Compu-Fire electrical components on most of his bikes. First, because even he can install them, and most of all, because Compu-Fire has been building electrical components for years. The stuff doesn’t break.
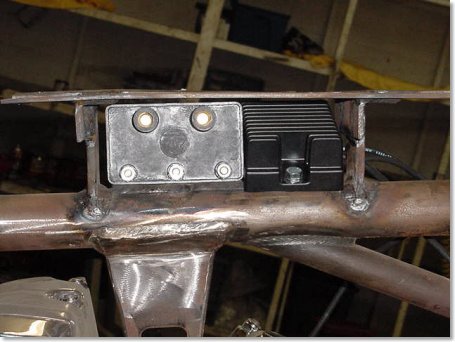
Take, for instance, this charging system. The stator slips firmly in place over the engine sprocket shaft race area and Compu-Fire suggests that you use the stock fasteners with a drop of red Loctite to ensure it won’t ever come loose. Compu-Fire alternator plugs are the protruding variety from the late-model design. Carefully oil the plug and slip it into place, then replace the plastic bridge and fasten it with blue Loctite. If you have new cases, make sure there are no sharp edges on the plug opening. File if necessary. Then with the shaft seal .090 shim in place, use a wire feeler gauge to determine that you have at least .060 of clearance between the rotor and the case.
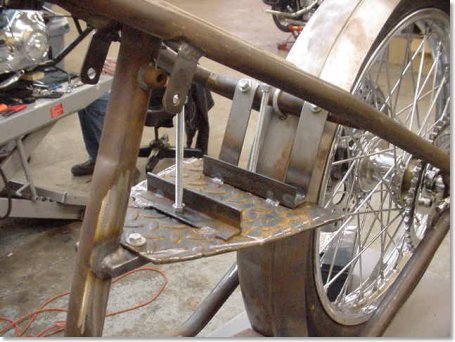
With each Compu-Fire charging kit for Shovelheads or Evolutions comes a thrust washer that goes on the outside of the rotor on chain primary systems. It may not be necessary on belt drive primaries. Mr. Gillihand from Compu-Fire recommends that you have a direct ground to the engine cases. Compu-Fire charging systems are the series type, unlike the shunt variety. The difference is that a shunt type drives the charge to ground if the battery is satisfied, causing the alternator to heat up and constantly work. The series type shuts the stator off when the battery is satisfied, which allows the unit to cool. The hot wire goes directly to the battery through a circuit breaker, or to your ignition switch on the hot side. In this case, the regulator was positioned with the coil between the tanks so the plug wire had to be extended.
That covers the basics of installation. Now here are the specs: Compu-Fire manufactures two versions of its charging kit, a 32 and 40 amp. From 1970-’75, stock charging systems were rated to 15 amps; from 1976-’80, they were 17.8 amps; between 1981 and 1988, they jumped to 22 amps; and finally, in 1989, skyrocketed to 32 amps. Now fuel injected models run 38-amp systems. So the two systems cover the lot.

We’ll get into wiring after paint and chrome. The ignition system is Power Arc. The timing module is in the nose cone and the coil is also positioned under the seat with a chunk of angle iron. This system is about as clean as you can find.
Next week we’ll hit the final sheet metal as we close in on paint and chrome, and the lovely Princess Lena, daughter of the rich and powerful Rick Fairless, king of the Strokers Ice House plantation, makes her move on the hapless Bandit. –Wrench
Sturgis Shovel Part 9
By Robin Technologies |

This is strange. I’m writing several Sturgis Chop Techs after I returned from Sturgis. I’ll try to remedy that in the future, but we were so damn busy trying to complete the bike and run Bikernet, we didn’t keep up on the techs. Many apologies.
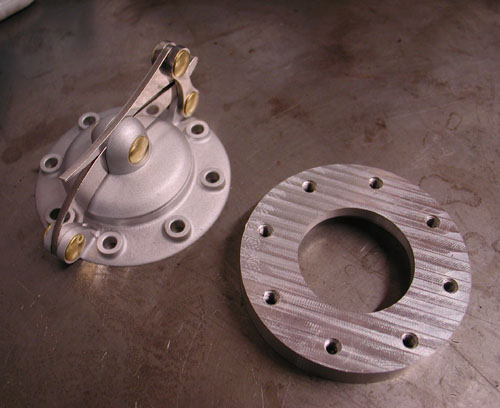
This piece covers the installation of the hot Speedster cap from Crime Scene Choppers in the modified stock XR 750 factory tank. Later, you’ll discover, that this highly modified, strengthened and extra rubber mounted beast was my Sturgis nemesis. But more on that later.
We added rubber-mounted bungs to the back of the tank. I moved the petcock to the rear and filled the center for a 2.76-gallon gas capacity before it hit reserve. I doubt that it contained more than a quarter tank of reserve, so I’ll toss it a 3-gallon total gas capacity.

Oh, I need to thank Cyril Huze, who designs beautiful steel tanks for the opportunity to experience an aluminum tank once more. He suggested this classic for the Sturgis effort.
I’m not holding it against Cyril. He’s a master and I’m the bungler for attempting aluminum on a 93-inch rigid S&S hot rod. As you’ll see the vibration aspects came from several sources that I could have remedied. It’s all just a roll of the dice.
When I received the Speedster cap I drug the cap and tank down the street, about three doors, to Bill Hall’s Welding. He handles my aluminum welding, since I don’t have a TIG welding system. I’ve got the rest, but not TIG. I would highly suggest a TIG system for quality welding capacity and good looking welds. It’s much like welding with a torch, so you’re certain of the bead and depth of penetration.
Bill’s a retired designer who enjoys welding and fuckin’ with his customers. “How are you going to drill the hole for the bung,” he asked?
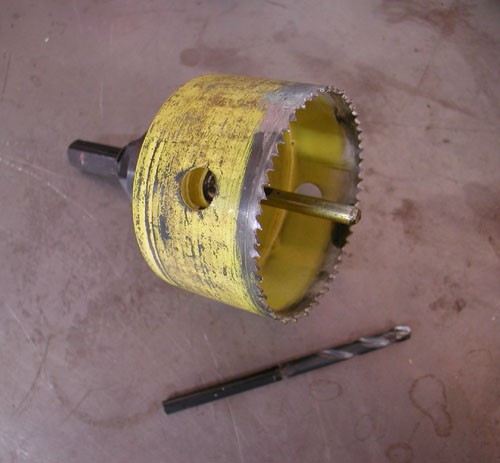
I was thinking about die-grinders and files. I knew it would make a mess. Bill hooked me up with a 3-inch hole saw. He suggested that we hit a marine store for a tapered dowel pin (used for plugging holes in the leaking hulls).
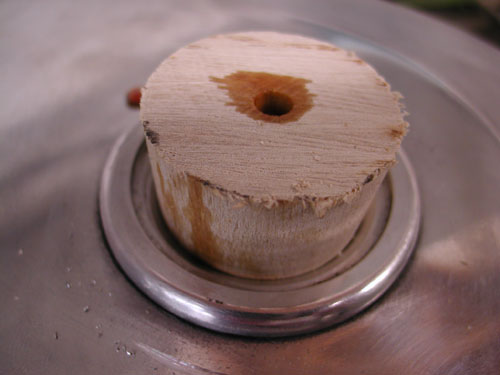
The key was to drill a perfectly centered ¼-inch hole to maintain a center approach to the cap bunghole. I drilled it and then ran the tapered wood dowel into the tank.
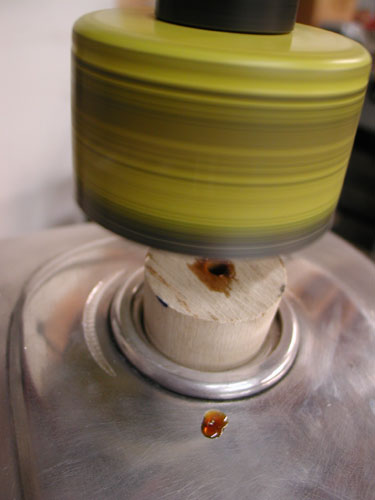
Then we set the tank on a pad on the drill press platform and lined up the hole saw. I used plenty of cutting oil on the edge of the blade and aluminum face to prevent the tank from snagging or catching. I knew how tender the surface of the tank was. We oiled the hole in the tapered wooden plug and carefully went to work. Bill’s formula worked like a charm.
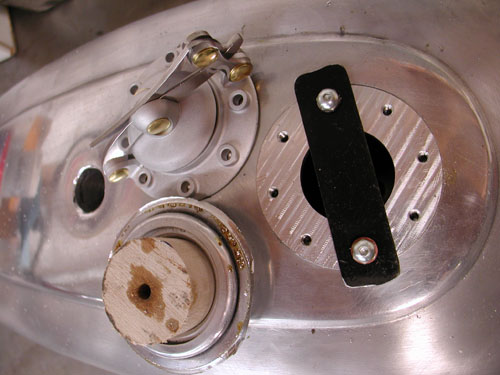
Next, we needed a tool to hold the Crime Scene Speedster bung in place. I grabbed a piece of strap, drilled a hole or two and mounted it with the supplied hardware, which was brass. You can order the cap with several styles of fasteners for your application.
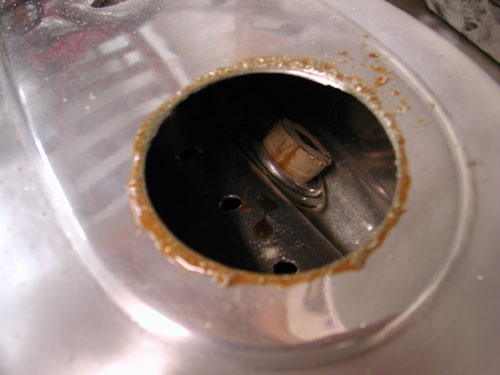
It was off to Bill’s for welding. While the gaping 3-inch hole was available I could have made a tapping tool and tapped out any imperfections in the tank walls. I dinged it way back in the beginning and never got around to fixing it. I left her be, as if it was the first injury and she needed to stay. I know it’s one of those wild superstitions.
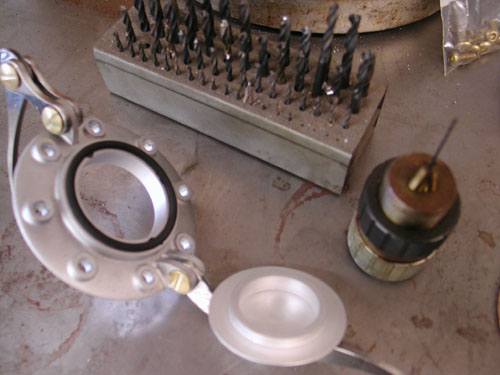
Okay, so during the “read the directions” phase, I noticed the bit about a non-vented tank. I would need to drill a tiny, cunt-hair hole in the cap of the tank. I discovered that I actually had such a tiny fuckin’ drill and dug it out. I had to find a chuck that pinched down to that size. Then I had a wise ass notion to drill the initial hole about 1/8 inch in diameter, since drilling with hair-thin bits causes easy drill bit breaks. The thinner the surface the better.
So, I initially drilled the inside of the cap with a 1/8-inch drill and drilled right through—Bummer. Ultimately I tapped the cap with a 10-32 then drilled the stainless Allen stud with the tiny drill bit. Then I screwed the stud into place and the job was finished.
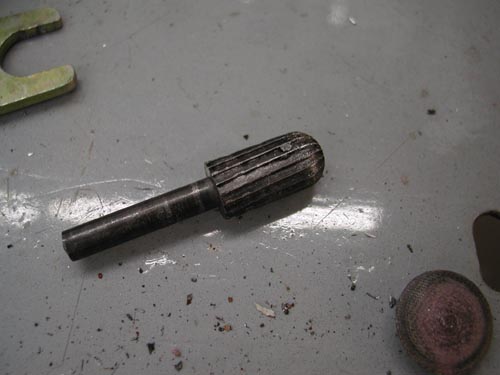
After Bill welded the bung into place it was my job to grind the welds down and ship the tank to Foremost Powder for a clear coat. I hit the big spots with a grinding tool. I tried my damnest to take only meat off the welds and not off the surrounding tanks surface.
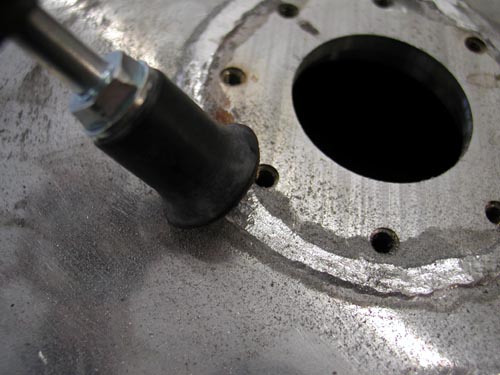
Next I used small emery discs to carve at the aluminum bead. I also smoothed some of the welds on the front of the tank where we filled the tunnel for additional gas capacity.

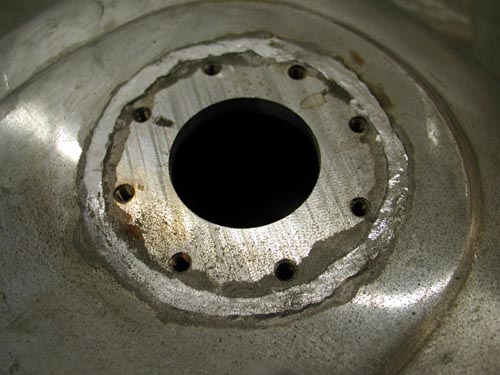
This shows the different grinding phases to reach a level that’s still strong with weld bead but handsome enough to live with. This was an interesting effort, since no bondo or thick urethane would be applied, covering a myriad of mistakes. This was the final stage before clear powder from Foremost in Gardenia, California.
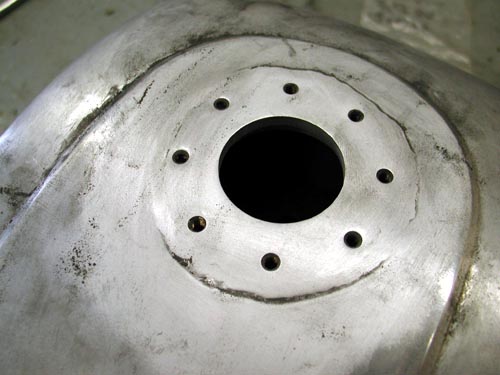
After this stage I polished the panels of the tank and hauled it off to the powder masters. There’s one other process I need to explain. I made every effort to clean the tank of debris and shavings. I also made sure to run a gas filter. I still had problems, which I will explain in my Sturgis Saga. They were easily remedied through Lee Chaffin at Mikuni. Just needed to dial the right number.
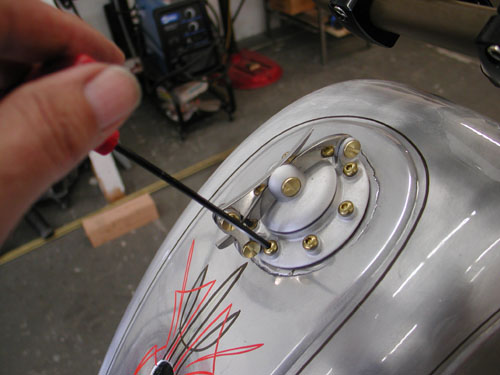
This shot was taken after powder and pin striping when I installed the gasket, decided which direction I wanted the cap to face and screwed the brass fasteners down. The cap worked flawlessly all the way to the Black Hills.

5-Ball Factory Racer Closing in on New Cam and Ignition
By Robin Technologies |
We were fortunate to hook up with Heather New, of New-Line Engraving several years ago. Since I was about to switch out my CrazyHorse engine ignition with a Blackhawk Motorworks cone cover I needed to come up with a classic point cover for the new unit and the 5-Ball Factory Racer. It was a natural choice to send her a chunk of aluminum, or I shoulda sent a piece of brass, but oh well. Either way I knew she would bring the project to life.

Heather started engraving in a small shop in downtown Edmonton in the Early 80’s, where she took care of over 100 jewelry stores. “I was engraving everything from I.D. bracelets to wine goblets to pocket watches, and more,” said the raving redhead, “items which other engravers said could not be done, I soon learned to do!!! This was when I first met Frank.”
Frank Gurney was (and still is) the best Hand-Engraver in Canada. “He is a true artist and craftsman, and along with the Alberta Apprenticeship Program, arranged for me to be his understudy,” Heather said. “I was thrilled!!! I learned so much from Frank in those years, confidence, trouble-shooting, and above all HUMOR!!!! We spent hours working and laughing (hoy-deedle-doy!!). He taught me so many things before he eventually retired out near Victoria, B.C.”

She then moved on to the largest Jewelry stores in Canada. “I was doing all of their machine engraving, as well as custom wedding bands, and one-of-a-kind jewelry pieces,” Heather said. “They treated me like gold, and I will always be thankful for the kindness I experienced there. I relocated near Calgary, Alberta, and began working for a gigantic company with more talent than I had ever seen gathered in one place. I naturally did the engraving there, and also moved on to operating CNC machines, and hand-carving moulds used in casting.” She became a programmer, writing the programs, which would later be used by the CNC machines to cut the actual moulds.
She started New-Line Engraving in the summer of 2005. “I hand-carved an inspection cover for my good buddy ‘Chicken’ and with her over-whelming encouragement, (she cried when she saw it) I decided to branch out into custom bike carving too (after all, a derby cover is just like a signet ring, only BIGGER.”
So here’s how the short, two-week process rolled: 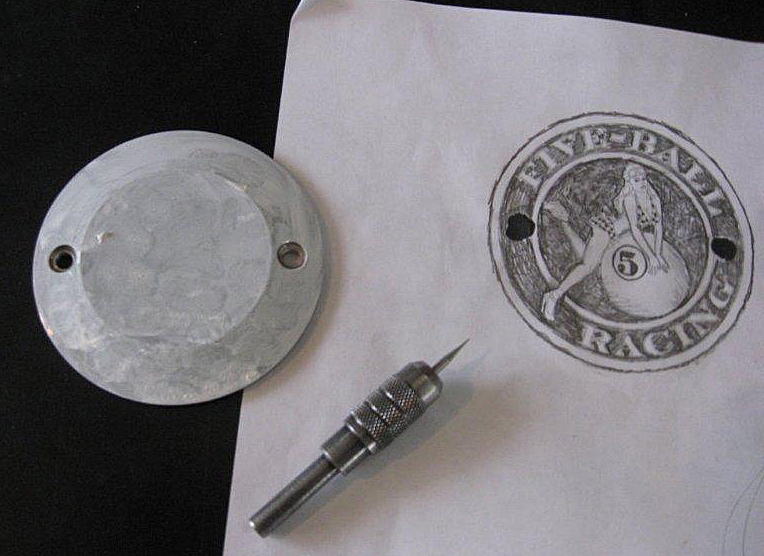
Cover the piece in white water-soluble paint, and transfer the artwork onto the surface
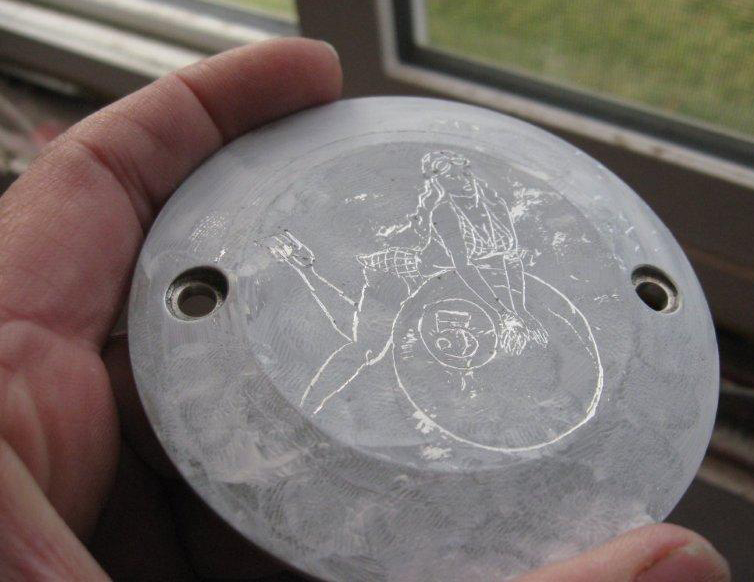
I highlight the general outline, scratching the paint leaves a more permanent mark than pencil, and you don’t rub it off as you work!
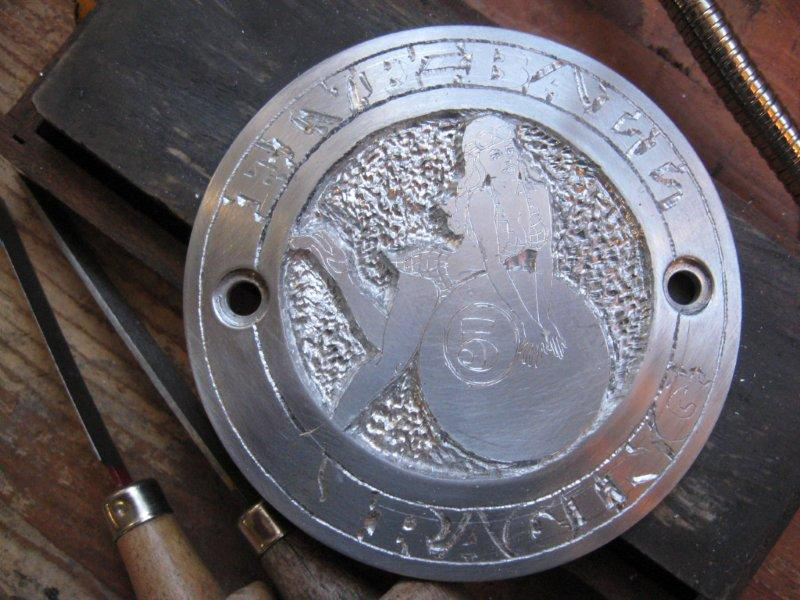
For removing large areas you can try a dermal, but they tend to vibrate too much for any fine work…I used small gravers hooked into a pin-vice to cut in between the letters,
as this cover was done mostly under a microscope.
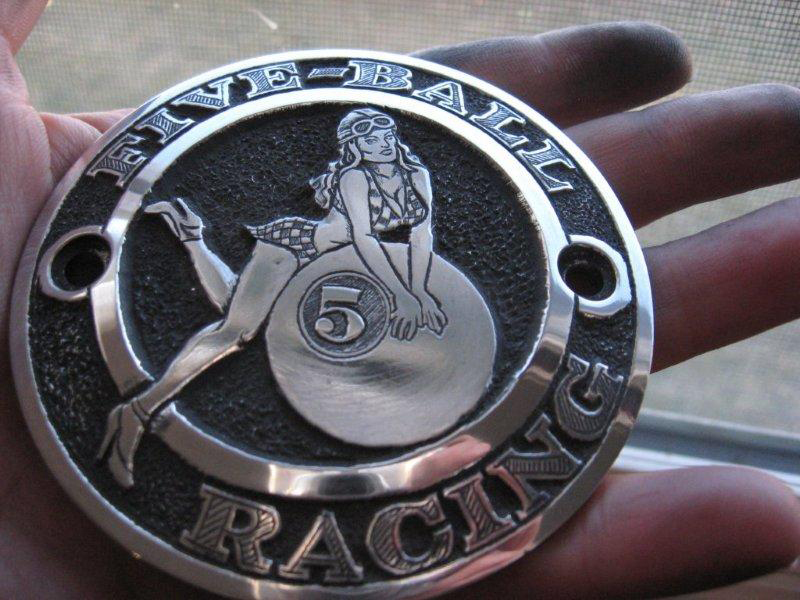
I also use fine sandpaper, jeweler’s files, and burnishers to “round-off” curves (as seen on her legs), and give some dimension to whatever artwork you are dealing with…
Details like hair, the features in the face, and fine shading are all done with fine gravers and files.
I then add an aluminum-oxidizing agent, which blackens the entire piece. When it is re-polished, the highest surfaces will become shiny again, while the black remains in all the nooks and crannies of the background. (I only do this by hand—a buffing machine can remove hours of work in a heartbeat!!)
“If anyone out there in Cyberspace wants to give it a whirl, I am always here with support and tips,” said Heather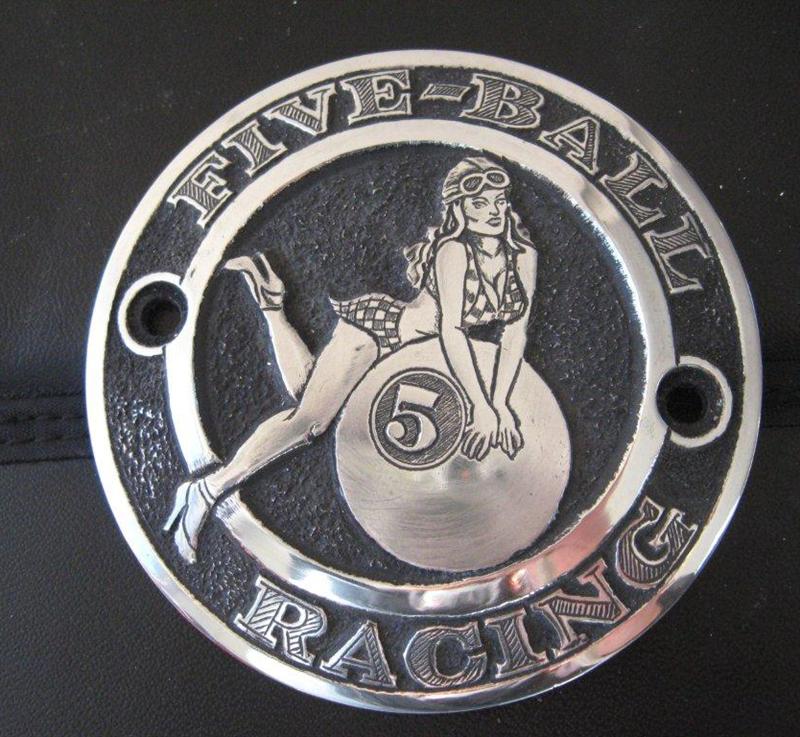
Sources:
NewLine Engraving: http://www.new-lineengraving.com/
Blackhawk Motorworks:
http://www.blackhawkmotorworks.com/
Compu-Fire Ignitions: http://www.compufire.com/
Custom Chrome:
S&S:
Sturgis Shovel Part 7
By Robin Technologies |

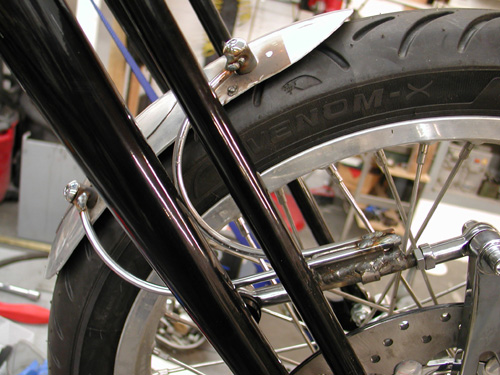
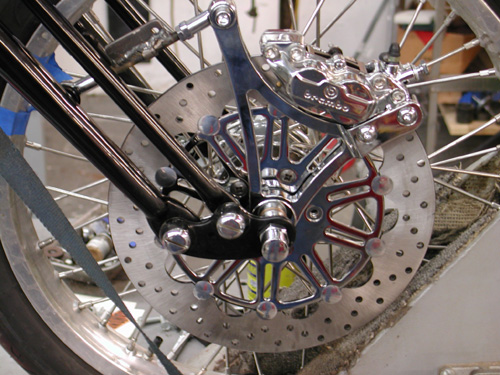
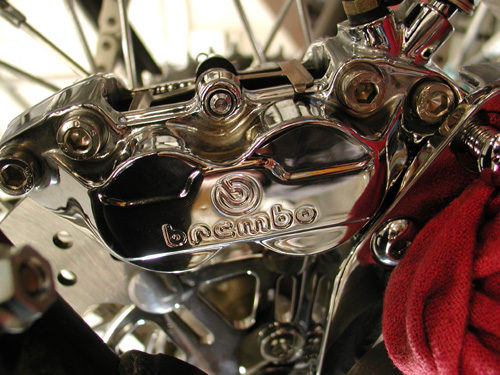
Brembo has a solid worldwide reputation, and I ran into a hot looking Brembo representative at an illustrious bike function and decide I’d give them a try. They’re hot and ready to rock. The only items I needed were the locking nuts for the back of the rotors bolts and the springer axle spacer. This set-up was designed for a stock springer replacement.
Because of the wild, light, taper-legged Paughco Springer my hiem joint link wasn’t long enough and I bastardized two fine bolts together temporarily. At that point I wasn’t considering a front fender. There are two aspects of chopperdom that I have a tough time working around. Bikes need front fenders and brakes. Can’t ride ‘em much without those two bastards. Even in the old days I ran front fenders, Avon Tyres and front brakes.
Chris Kallas came over at just the right moment. He’s as old at riding as I am and an artist. We’ve featured his work in special reports. He knows his bike shit and I’ve been trying to convince him to see Jim Murillo about a job. Jim has a paint shop in Torrance, but he’s not the graphics guy, Chris is.
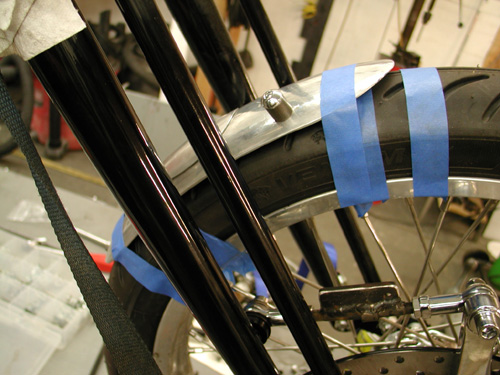
As usual, about the time I think it’s going to be easy, the devil pops up on my shoulder. Kent, from Lucky Devil Metal Works in Houston called, “What are you going to do about a front fender,” he said? “Yeah, that’s what I thought. I’ll send you some shots of my springer front fenders.” He hung up and Chris looked at me sorta strange.
”Who the hell was that,” he said?
”Never mind,” I said flipping my computer on. Kent developed a system of mounting springer front fenders that’s clean as a whistle and odd as only the devil would make it. An engineer wrote Bikernet when I first featured his wild notion and chewed us out. “That idea’s not worth the powder the blow it to hell,” he shouted.
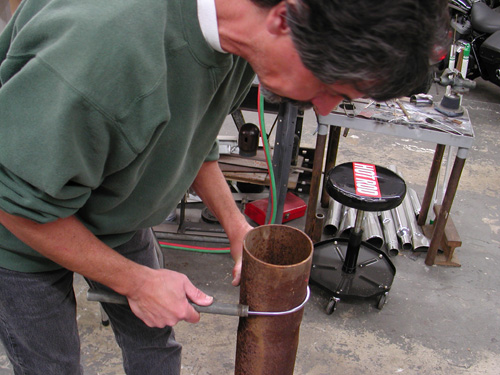
At first I thought he was correct, but the more I considered it, the more I determined that he was wrong. The caliper follows the line of the rotor, so the fender will follow the circumference of the Avon tire. Of course when I stepped into the ring to create a similar configuration I couldn’t do it like the Devil does. The Brembo caliper runs too far ahead of the rotor to mount the fender so we ran carefully designed struts off the brake linkage. Chris drew up the plan, then bent struts out of coat hanger for a guide.
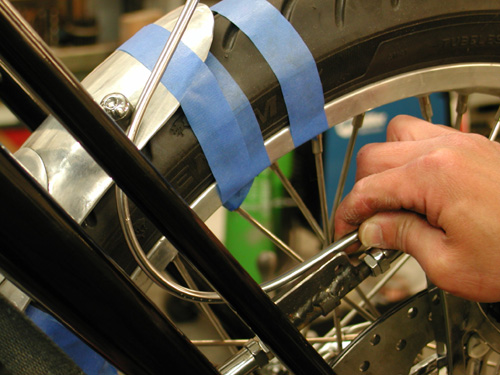
We constantly tried fitment again and again before tacking them into place. I wouldn’t recommend this configuration to anyone. If you run struts off the caliper they’re solid. The heim joints allow the fender to fluctuate, especially side to side. I had to find a concave washer that would allow the heim joints to work up and down but not side to side.
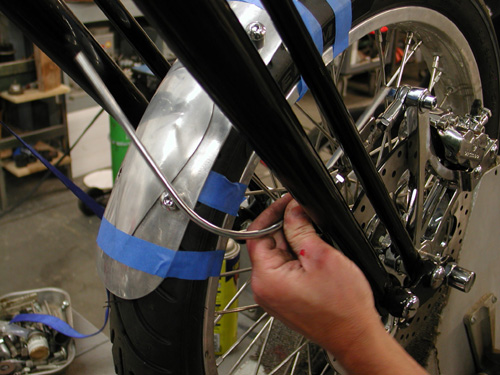
Chris bent each rail to match in pure artistic form. Then I tacked them.
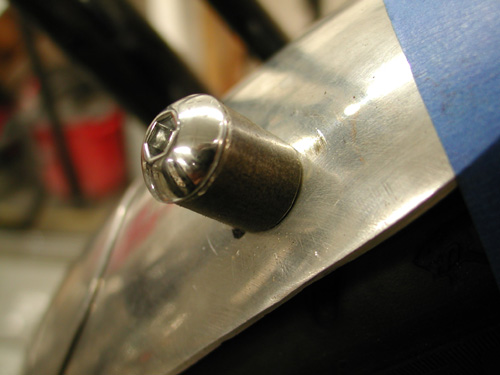
Kent built the front fender with threaded aluminum bungs underneath. I figured out some slender spacers to fit on top of the fender and tacked the rails to them. I must have welded them a dozen times trying to grab just enough rail, weld and spacer to prevent cracks.
There you have it. It’s wild, but will it last to the Badlands?
–Bandit

Sturgis Shovel Part 8
By Robin Technologies |
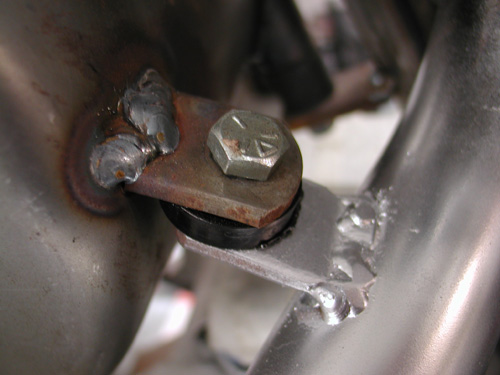
My first move began with a correction. I removed the exhaust pipe tab welded to the oil bag. The oilcan is rubber mounted, the exhaust pipe generated severe heat and the pipe system needs to be solidly mounted. It had to go. Actually Kent from Lucky Devil Metal Works in Houston tried not to mention the false move, but his frown gave it away. Or was it that question? “Is your rear pipe really mounted to the fuckin’ oil bag,” Kent said tentatively?
I discovered that the pipe exits the head close to the seat post and worked on a pipe connection there. There are a couple of rules in making pipes that I need to abide by. I needed to remove the pipe once in awhile, so I needed the pipe tab to be on the outside of the frame tab. Often mounting required slack, so I dug around for 1/16-inch washers to run between the tabs. That way when the fasteners are removed there’s some slack to pull the pipe free.
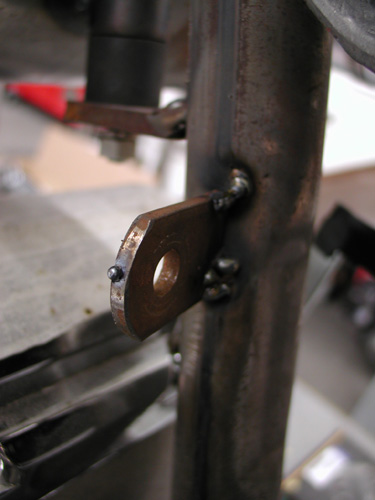
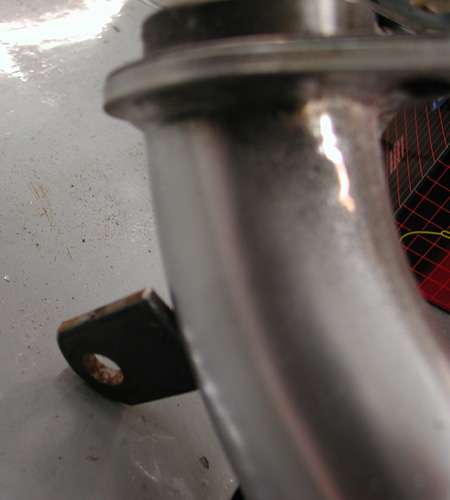
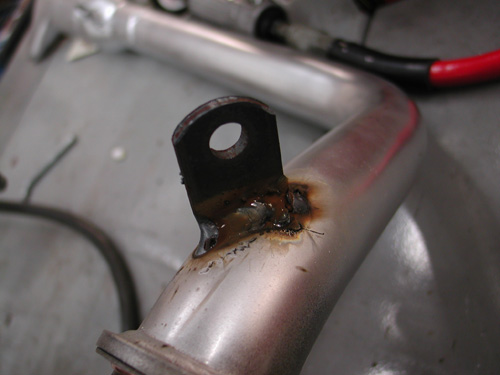
I worked with the pipe fully in place then tacked the seat post tab. Below is the tab tacked to the pipe. Then the tab welded in my shitty MIG welding fashion. I should slow down and clean the base metals more. I generally grind a bevel into the tabs for greater weld penetration. The welds are strong, just not handsome.

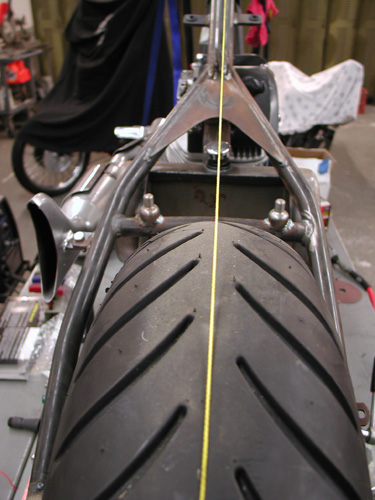
Next I needed to attach the Lucky Devil rear fender, align the rear wheel and cut the chain to fit. But first I needed to center the wheel in the frame, sorta. The custom Paughco frame is designed and manufactured to hold a belt pulley and a 180 Avon Tyre. That prevented me from measuring between the frame rails. I needed a straight line down the center of the frame backbone. It’s not incredibly accurate but close to draw a fabic or nylon line down the tube. Then with Doherty space kit and the seal spacers that came with the Custom Chrome aluminum and stainless spoke wheels, plus the Brembo brake caliper bracket, I aligned the wheel.
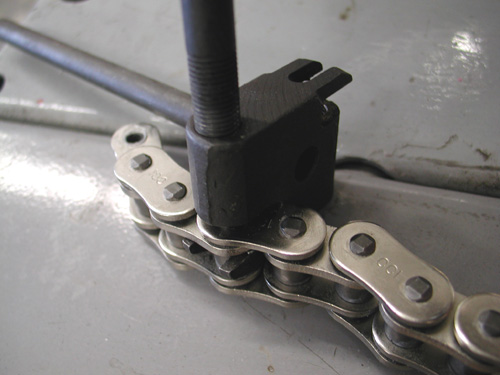
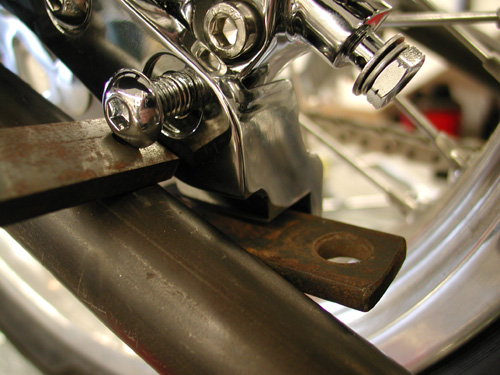
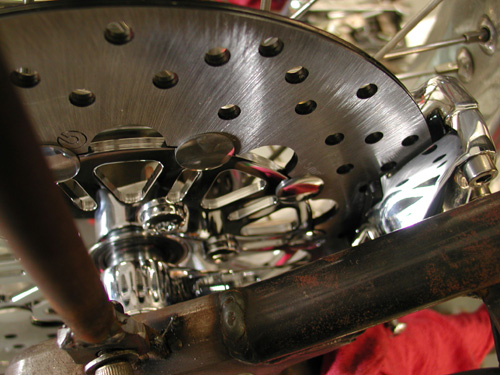

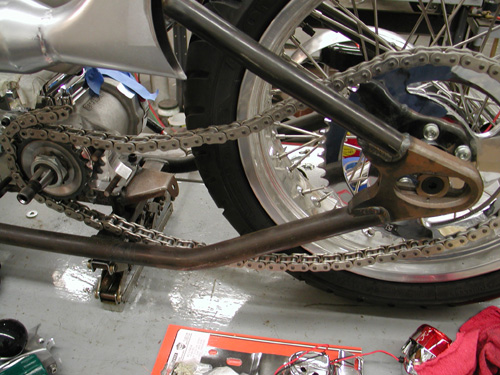
Before I cut the Rev Tech chain I installed the BDL Belt inner primary and pulled the engine and transmission into place which determined exact spacing. I know I covered this aspect somewhat a couple of chapters ago. There’s been some heavy drinking in the meantime, so if I lose track, it’s on Jack.
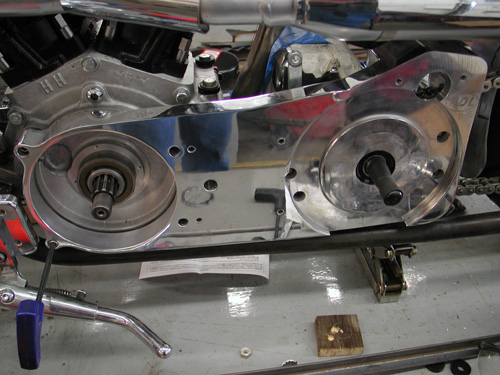
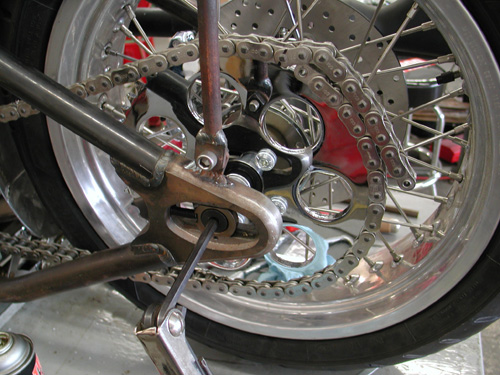
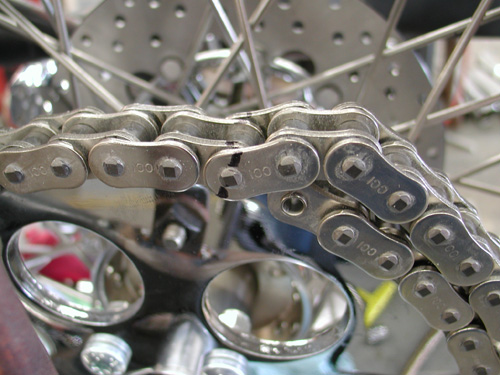

I centered the wheel in the chain adjustment slot to give me slack either way. Then I finally cut the chain with a JIMS tool.
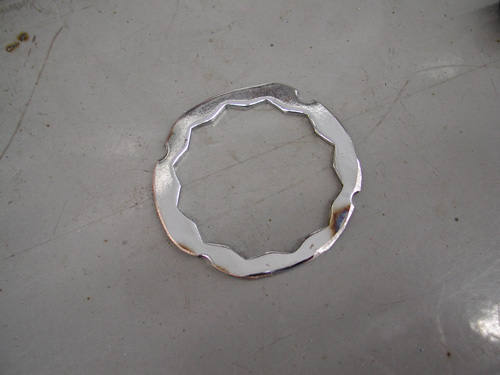
I spoke to a couple of guys about sprockets and was told that this contraption will hold a sprocket nut from coming loose better than simply Allen screws in the Custom Chrome sprocket. I may use it or not. Haven’t decided yet.

The reason this is altered is that it’s for a pulley and a different era. Add that to the fact that I flopped the dished sprocket over to space the chain away from the tire. That aspect worked perfectly.
I decided that since the tank was rubber mounted and aluminum won’t flex as well as steel that I would attempt to rubber mount aspects of rear Luck Devil fender. Kent designed and handmade the fenders to match aspects of the XR 750 tank.
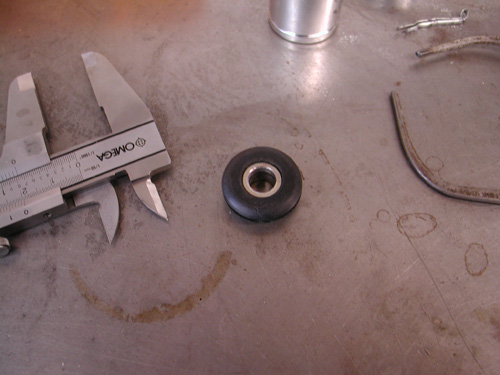
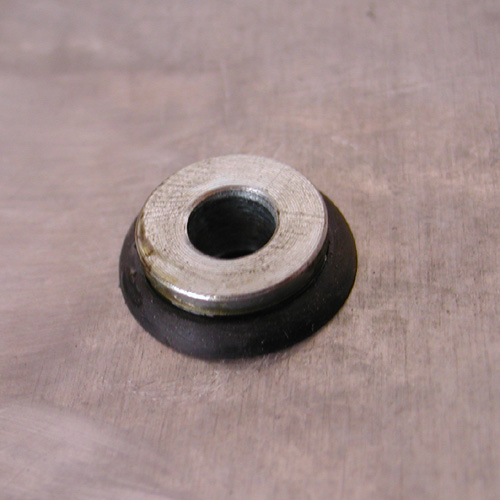
Cyril Huze sent me several grommets to work from and this pair are from some late model Sportster application. I measured the O.D. on the center portion and discovered that I needed ½-inch holes in the fender which I drilled after I had mocked up the fender in place, ground a clearance strip for the chain and stood back several times. Arlen Ness once told me that he used a chain wrapped over a tire to space a fender. I needed enough space for fasteners under the fender and some chain adjustment slack either way.
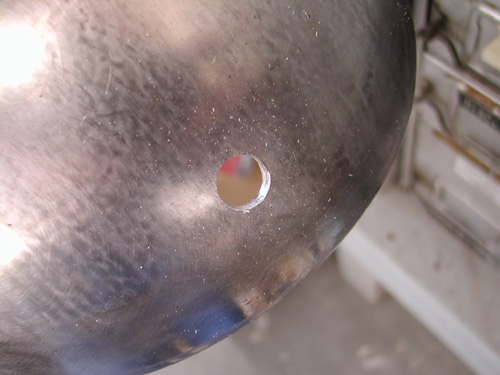
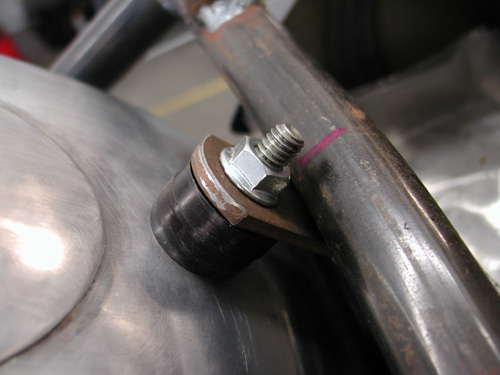
I moved the fender up and back, and side-to-side several times before making any hole-drilling marks. I was a nervous wreck. Ya don’t mess with the Devil’s fender. I finally drilled a half-inch hole, and smoothed the edges, in the bottom of the fender then at the crossover tube. I worked in the rubber with a dab of oil and bolted the bottom stainless bolt in place.
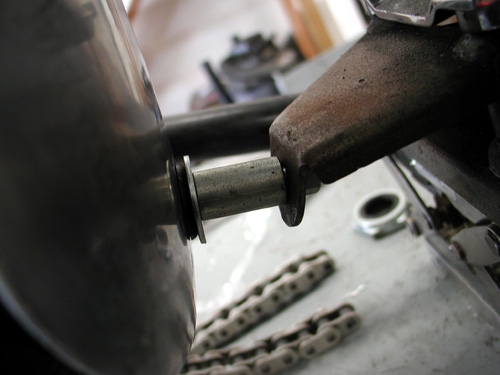
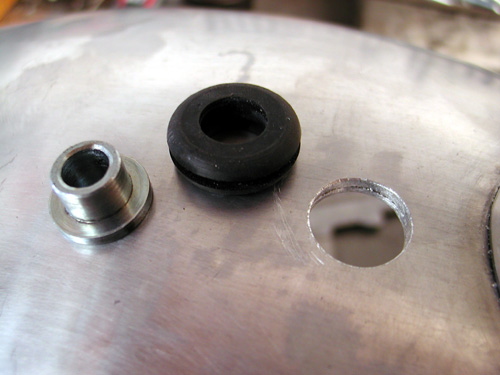
The Sportster grommets have metal inserts, which make them easier to install. With a couple of spacers in place the fastener held the center tab for tacking.
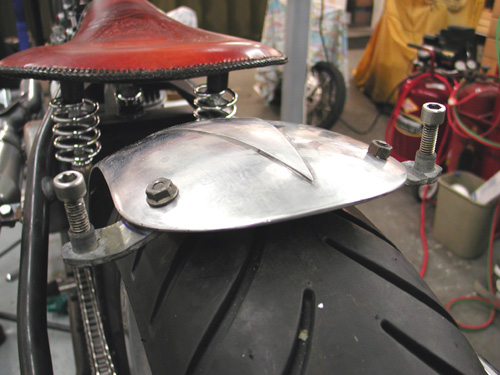
Here’s where it got tricky. I’ve been bending metal with a torch for years. Never improved my technique. Just the other day, a month after I built this fender rail system, I bought a small strap or tube-bending tool. Wish I had it when I went after this project.

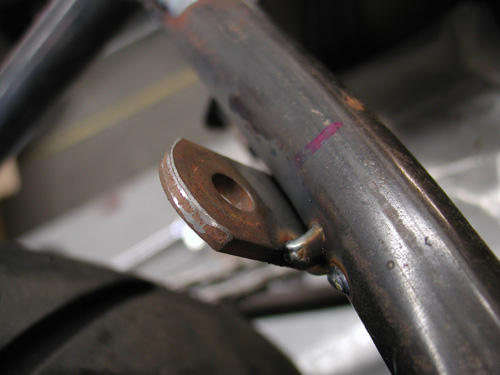
First I built the fender strap out of a piece of exhaust pipe bracket. It came with two 3/8-inch coarse tapped inserts in each end. My plan was to build a fender rail system with tubing so I could adapt a couple of running lights on the tips. I carefully bent and drilled the strap and fender.
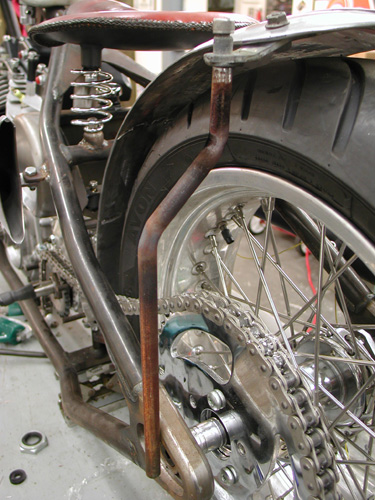
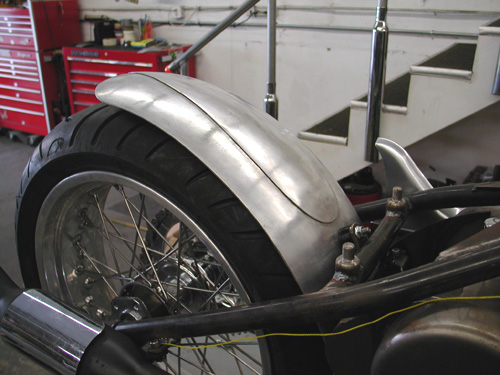
Then I bent the tubing fender rails to fit over the chain and tacked tab to the Paughco frame. One item I often attempt to use is a level. I’ll level the frame from side to side, then strive to keep all the other elements level. It helps.
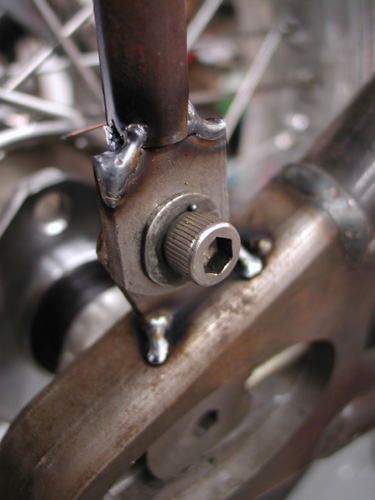
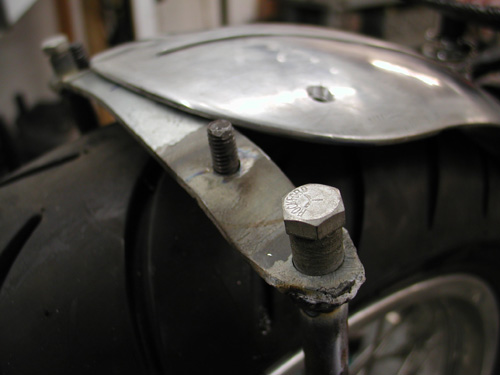
Here’s a perfect example. As I finished my welding chores, I got on a roll. I thought– wouldn’t it be cool to weld the fender bolts in place from the bottom. They would never come loose. Note the angle. There was no way they would ever return through their mounting locations. I was forced to grind them off and clean the holes.
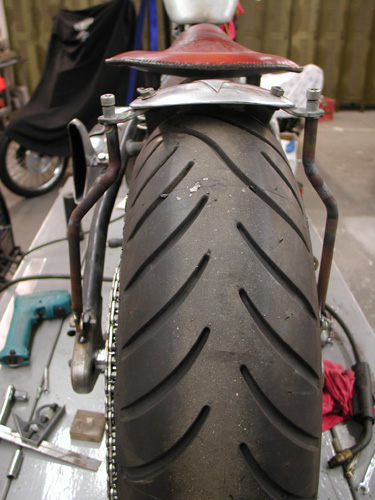
Here’s the finished fender rail system. I drilled holes in the frame and the rails to run wires. I still haven’t found the perfect running light style that rocks my boat and will afford me enough room to use the proper fasteners. Hang on!

Sturgis Shovel Part 11
By Robin Technologies |
I’m not sure if I’m keeping everything in line. But this segment took us to Foremost Powder Coating in Gardena California. I was at that point when these shots were taken. I’ve had a Powder Coating Sponsor for years, Custom Powder Coating in Dallas. They’re good people and know how to handle custom work. They’ve handled jobs for Strokers Dallas, our custom for American Rider and even the 1928 Shovelhead for Bikernet.com.

Powder coating costs have dropped and it doesn’t make sense to ship a frame to Dallas. It would cost less to have it Powdered in LA than to pay for the shipping. So I looked around the area and was recommended to Foremost Powder Coating (877) We-Coat-it, 1608 W. 139th, Gardena, CA 90249. These people have their shit together and the girl who runs day-to-day operations, Esmeralda, is a delight on the eyes and to work with.
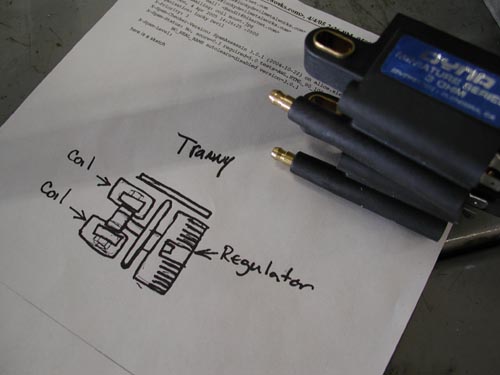
Let’s back up, though. Just before teardown for Powder I needed to think electrics. Kent from Lucky Devil Metal Works in Houston sent the above illustration for mounting the Compu-Fire voltage regulator under the tranny with the small Dyna Coils from Custom Chrome. I pondered that drawing and decided that I didn’t like the notion of putting my coils at ground level. What if I ran through a rain puddle? He’s built bikes using this technology several times and so has the guys at WCC, so it must work in most circumstances.
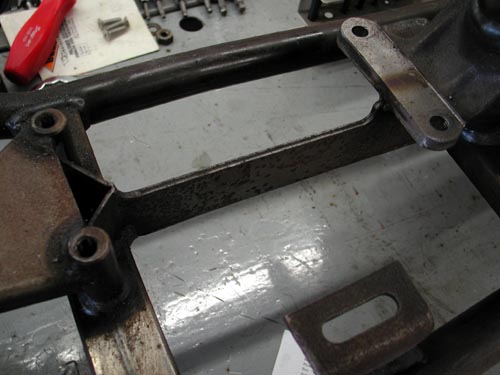
I decided that since I was going to run the Compu-Fire engine based electric starter that I had room under the oil bag for the coils. I still installed the sealed voltage regulator under the tranny on a 3/16 sheet of aluminum. But then welded brackets under the Craft Tech Oil bag to hold the two coils apart.
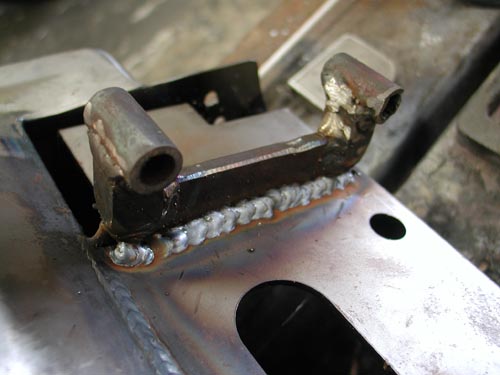
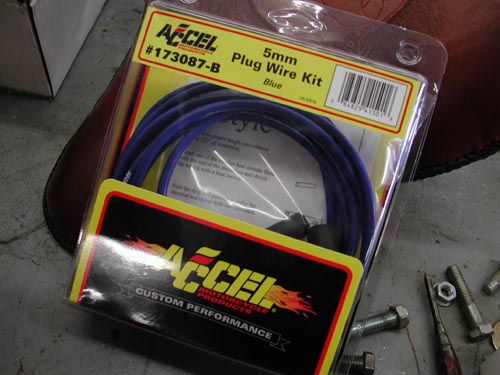
This was a delicate operation and ultimately the new Accell Sparkplug wires run right across the top of the RevTech Tranny. I also had just enough room behind the coils to house the wiring for the single-fire Compu-Fire ignition system. I thought through most every aspect of this motorcycle right up to the wiring business, then came up with a nuts notion, which I will explain during the final assembly process. It actually worked out fine with a handful of scary moments.
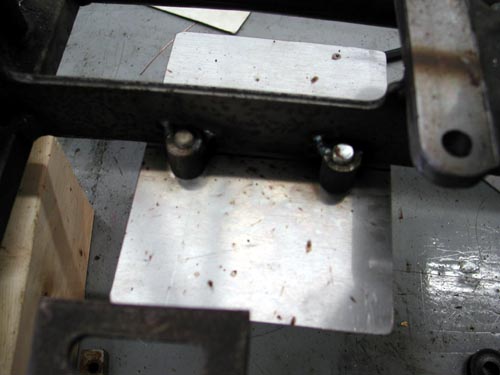
I welded four bungs that housed 3/8 fine threads to the frame with my Miller MIG welder. Ultimately I mounted the Compu-Fire voltage regulator to the pipe side (right) and it worked out fine.
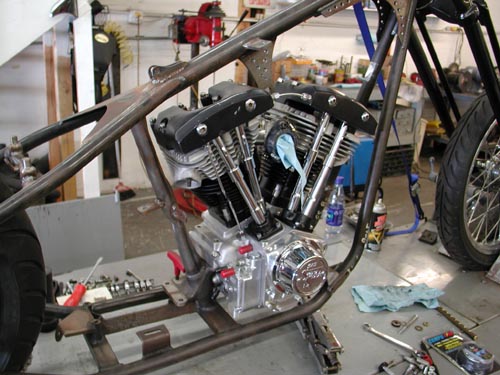
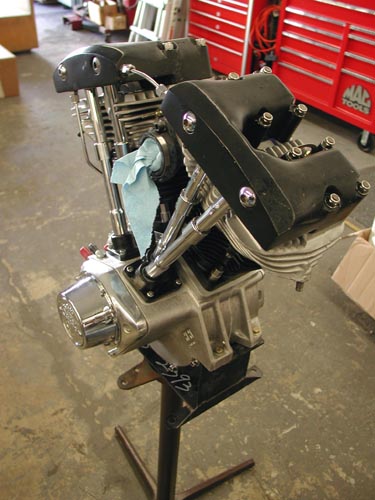
It was time to strip the Engine out of the frame, complete final welds, grind the welds and ship the parts to Foremost Powder. I needed to create a temporary engine stand to hold the S&S 93-inch Shovel in place. I used a RevTech engine stand and mounted it to a junk metal table leg. It worked perfectly and I shoved it in a corner for future use.
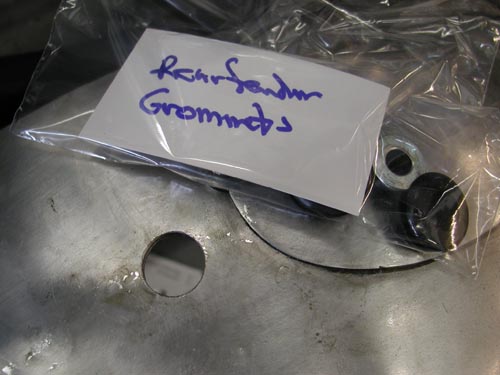
As I tore portions of the bike down I formed zip-lock bags with labels to hold the fasteners. You’d be surprised how fast you forget which spacer fit what, unless you organize. Mike Egan told me years ago that he takes photos of every part and organizes his assembly with photographs to demonstrate how components matched or were fastened. Since I try to take shots constantly I had an archive of various aspects. Hell, I just need to turn on Bikernet and look up the tech.
The next move was to finish welding any tab or bracket that had been tacked or partially welded. MIG welding is a breeze, but not as dead certain as TIG and I’m after a Lincoln TIG welder.
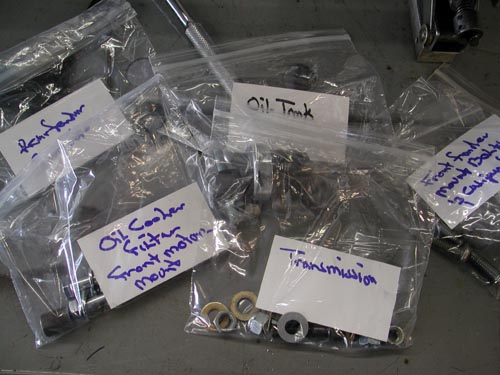
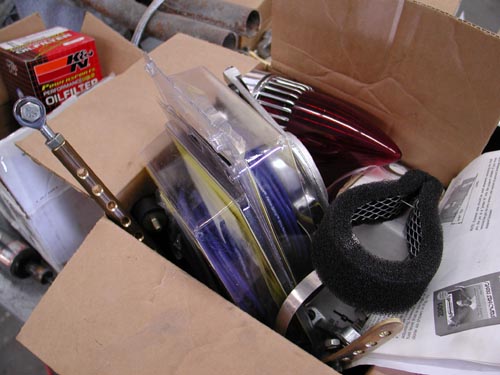
Here’s all the fasteners, grommets and spacers in bags with biz card labels. It works like a champ although I replaced some of these fasteners with stainless Allens wherever possible.
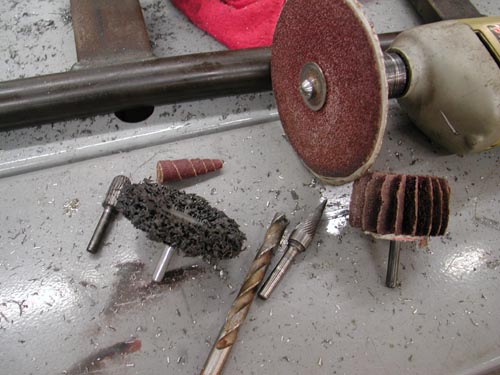
Next I dug out all my tools for grinding welds and went to work. This level takes a great deal of patience and artistic style, which I don’t have. The more time and patience, the better each weld will look. There is actually a process for bondo filling powder now, but it’s more costly. If you don’t want welds to show ask about it. If you don’t mind the look of a clean weld, just powder. I wanted the look of a machine, nothing slick.
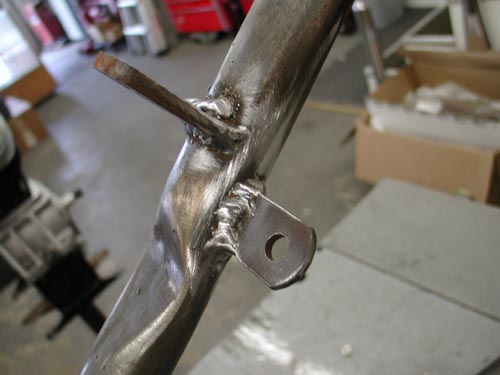
There’s one more consideration. Try to make each weld look the same as the next one for consistency. In my case that was tough. Some of my welds were decent, others sucked. I did my best, but my welds didn’t compete with the Paughco paid professional beads.
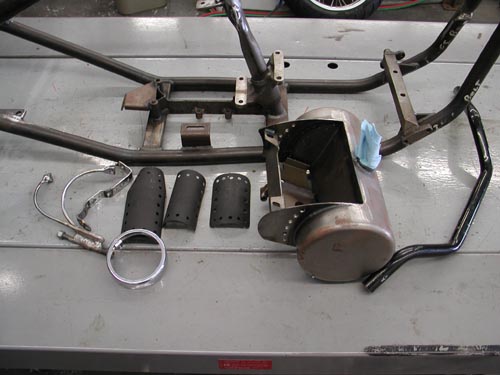
As I finished grinding and drilling holes in the frame for wiring I separated each group of powder finish parts and took a shot for the Powder guys at Foremost. It was a lifesaver to be able to hand them a shot of each group of parts since some had to be sand blasted before the finish was applied.
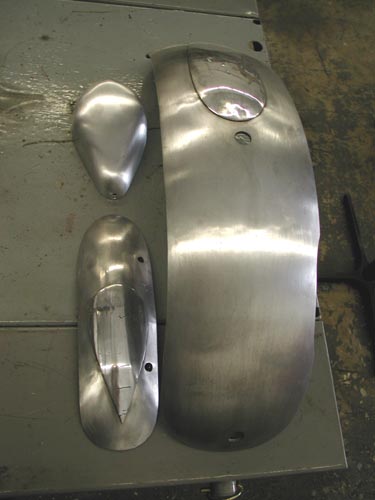
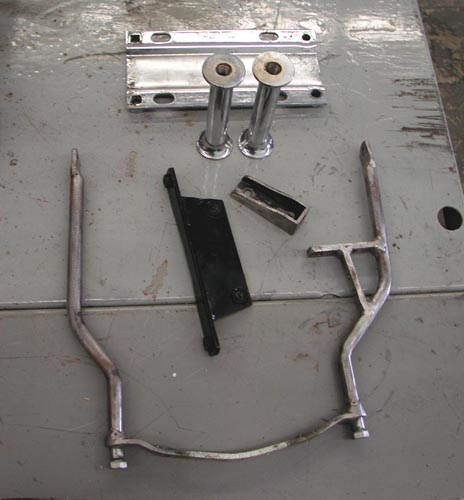
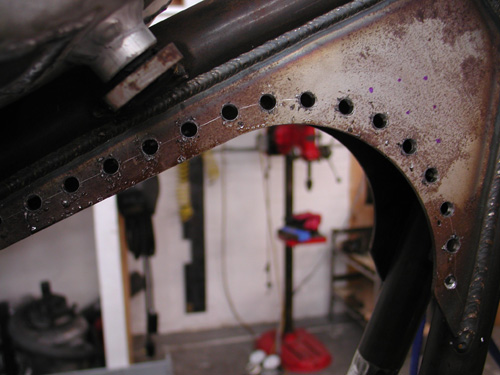
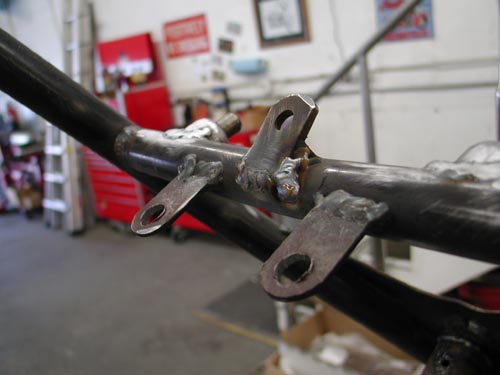
One more comment on drilling holes for wiring. This was one of the first times I drilled plenty of wiring holes. Remember Frank Kaisler’s rule? Drill the hole. Ream it out on a taper to prevent cutting your wires. Then with emery cones make sure there are no razor-sharp burrs in the tubing. Frank ran the emery paper then he’s twisted a Kleenex and shoved it in the hole. If it caught he’d sand the edges more. If not it was good to go. Let’s hit it to the next chapter, we’re burnin' daylight.

