Timbo’s ’64 FL Restoration (Part One)
By Robin Technologies |

Not too long ago, my good friend Timbo approached me with a proposition, restore his 1964 Harley FL, I agreed. Problem was, it’s in a box, literally! So after a brief discussion on exactly what we wanted to do, how much it would cost and the possible value at the end of the rainbow, I started the Hard Ride back from Hell with the old ’64. I picked up the bike, basically a roller and all the boxes of parts that came with it. As you probably expected, this will be a frame up restoration as close to factory specs as I can get it.

There will be some minor changes, which I’ll talk about as we go along. First thing was to lay it all out and take inventory to see what was missing. After some research, I found replacing parts for the ’64 surprisingly easy thanks to J&P Cycle, Biker’s Choice, and the internet. I ordered the Vintage catalog J&P Cycle puts out and started researching parts I needed to replace.

I also found a local polishing company and chrome hardware supplier (needmorechrome.com) to make life easier. Tear down was a snap. Make sure you bag or box all your parts as you go and label what they are, and in some instances what order they go in. It’s not a bad idea to take lots of photographs for future reference. Sometimes a parts manual comes in handy.


After tear down, I started the fun stuff, going through each and every part, each nut and bolt and cleaning them. Some parts and hardware will not be salvageable, so you’ll have to replace them with either new, or good condition used. I found that there is a tons of vendors on line for just about everything you need. Buying new parts from the catalog is not always the best answer, especially if you’re on a budget like I am.


So shop around, do some research, you may be able to save as much as 50% sometimes. You will also need repair manuals and a few restoration guides like the one my friend Bandit sent me for reference from Wolfgang publishing, thanks Bandit. It has been very useful so far. This is the first of many articles on this restoration project. As the months progress, I’ll try and give you a detail look at what’s involved with a full-blown restoration.
Tail Gunner out for now, see ya next month!

Bikernet/Cycle Source Sweeps Build Part 7 Sponsored by Xpress
By Robin Technologies |
Hang on. We are two weeks away from running out to Vegas for Bikefest and pulling the winner of this most magnificent custom motorcycle, specifically built for Bikernet and Cycle Source fans, readers, and subscribers. You need to sign up, if you haven’t, or come to the Cashman Center in Vegas to grab a card and sign up for the drawing. You don’t need to be on site to win. After Bikefest, the scooter will return to Kustoms Inc. near Detroit, for final tuning and break-in before being shipped to the winner.

So here’s the update in a flash, after Bonneville, and heading smack dab against a Cycle Source Deadline. “I’m way behind,” said Chris Callen, the esteemed Editor da Emperor, in Chief, in Charge, in Trouble. This year has turned into the scrambling year. We are scrambling to finish projects; builders are scrambling to finish bikes. Chris scrambles every month to finish a magazine. It’s bananas.
The bike was displayed in Sturgis at the Broken Spoke. Then it returned to Grand Ledge, Michigan, down the street from Ron Finch, for final manufacturing and paint by the master of Chop Docs, Ron Harris, but let’s finish the pieces first.
“I kill batteries no matter what I do,” Gary Maurer said as we started to discuss the battery box. “When I carefully rubber-mount the bastards, they vibrated enough to rip the battery cables to shreds.” So now he puts a small rubber lining under the battery and bolts the unit down hard with Jules-made steel battery straps. He is now using Brail and Ballistic batteries with some luck. This is where I started to learn more manufacturing processes from Gary and Jules, again.
It’s interesting. I don’t consider myself a builder, and when I work with someone with the manufacturing knowledge of the Kustoms Inc. team, I know I’m just an enthusiast, not anywhere near a pro builder. This story contains a couple of fine examples of their expertise. The battery straps are easily bent after marking the position for the bend on the top corner edge of the battery. Jules made the hand bend with a solid bar of steel, and then noted the amount of metal used in the radius and worked it into the formula for the next bend so the strap fit the battery perfectly.
“There is a mathematical formula for this process,” Gary said. “You need to add or subtract material from the next bend, but we bend one side and then adjust the other.”
I also noted how perfectly the fender edge fit the line of the tire, since most fenders do not align with the tire radius. “We often scribe the radius of the tire on the fender and cut it to match perfectly,” Gary said.
He uses thick welder ground cable stock taped to the fender to give him the proper fender clearance. “Sometimes we use chunks of busted rear drive belts,” Gary said. “Sometimes, if need be, we can double the belt, or mesh the teeth for a slightly larger space.”
They break the chain to be as close to the center of the adjustment path as possible, with the engine, primary and transmission in place. Then they adjust the chain to be bowstring tight, and then they tape the spacing material to the tire and start mounting the fender.
This Bare Knuckles fender was bobbed and channeled on both sides by Jules. She often cuts with a plasma cutter, and then works the edge with Matabo grinder with flap wheels. Bare Knuckle fenders are made with solid, thick spun steel. They are as strong as a battleship hull and easy to work with. “Our plasma was toast,” Gary said, “so she used a high-speed cut-off wheel, then the Matabo and flap wheels.
I like the exhaust system he built with D&D components and a carbon fiber muffler. I asked how he held the components accurately together for tacking. “I start generally, but not always, with the muffler in place and move forward,” Gary said. “I hold the chunks in place with three fingers and tack them.” If his weld pulls away from the joint, he adds a small ball of rod to one piece, then holds them together, and heats the ball until it flows to the other tubing piece.
Note how Jules fashioned the lower fender mount to the frame so it acted as a battery strap mount and fender mount.
Then Gary built the sissy bar by hand-bending the steel rod. He machined each chunk of bar stock for the frame rails, and drilled them ½-inch so the rail would simply insert into the welded boss. Then he drilled and tapped them for setscrews. On the top, he welded a machined bung to the bar, and a drilled and tapped the bung to the fender, so the fastener simply slips through the sissy bar tab and screws into the solid bung on the fender.
With all the components tested and brushed with flapper wheels, Ron Finch stopped by and picked up the components for the trip to Ron Harris, a third generation paint and body shop guy. “I couldn’t touch a paint gun until I could bump a fender,” Ron said of his granddad. Back in the day, bodywork was hammered and filled with brazing and lead.
“My dad called Bondo Chinese lead,” Ron said. Then he ran down the Chop Docs custom paint process. From the photos, paintwork slides along like ironing an old pair of Levis (who the hell does that anymore?), but any top-notch painter has the talents of a concert violinist. It may look easy, but there’s a refined eye and level of perfection that turns any steel surface into a perfectly smooth piece of art.
As soon as Ron Finch dropped off the components and peeled out, Ron Harris cleaned the welds with a cookie wheel, and then scuffed all the surfaces with 80-grit for a world-class bonded protective coating. Initially, paint was used solely to protect a surface. Now it protects and adds the final illustrious finish.
Then he coated all the sheet metal surfaces with a filler Bondo skin coat and block-sanded the surfaces. This is where perfection and talent come into play. I’ve been there. I couldn’t Bondo a baby moon hubcap and make it look like new. There’s an eye for sanding just the right level of Bondo to capture the perfect slick surface.
He followed the Bondo coating with a skim coat of putty to capture imperfections, and then tested his eyes with various levels of Emory paper from 80-grit, to 150, to 320, so he can minimize his primer usage.
“I’ve been working with Stage 5 Coatings for two years,” Ron said.
Stage 5 Coatings was established in 2008 and is the newest and one of the fastest growing coatings suppliers in the United States. We are committed to selling jobber direct and establishing an exclusive territory for anyone that carries our lines. We strive to offer the best values available in the market. We are a small company that is personal and ethical. We build a personal working relationship with every customer, whether they are our largest or smallest. We believe when a customer buys from us, a partnership is formed, and is not just another customer. We have the industry experience to put ourselves in your shoes and understand the everyday struggles in the body shop business. From us to the jobber to manufacturing, we have the personal hands-on experience in all areas of the aftermarket coatings industry.
States with Stage 5 or Technico:
Michigan New York
Illinois Missouri
Texas Oklahoma
Wisconsin Oregon
California Arizona
Washington Georgia
Maryland Caribbean
Virginia
Ron is working with Ken Dudley on a line of Chop Docs candies. After he primed all the surfaces, he used a black spray bomb dusting to cause imperfections to surface. After any pits or surface maladies were dealt with, he water-sanded everything with 400 grit wet and dry, and then hand-sanded with 600 grit and finished off with Scotchbrite.
With the components hung in a booth, he primed them with two coats of sealer, and then hit them with the silver base coat and inner clear before taping off for the black pearl inlay. Then everything was cleared again and sanded with 600-grit.
This was Ron’s first attempt with green variegated leaf* using Mona Lisa glue to attach it to the paint surface. “It’s like a very thin, watered-down Elmer’s glue,” Ron said. “The leaf is so thin, it’s like dust in your hands.”
Once the leaf was glued into place and the area cleaned with a cotton ball or a brush, Ron hit it with another coat of inner clear, which locks the base down and leaves sort of a satin surface to adhere any art to, such as pin striping by John Harrow, who used a one-shot enamel sign paint called Kansas City Teal.
Now for the final six layers of gloss clear coats and 1500 grit wet sanding, followed by 3000 grit with water, and then buffing with polishing compound, finishing glaze, and spit shine. It’s Saturday, and by Monday, all the elements will be returned to Gary and Jules and Kustoms Inc. for final assembly. Ron volunteered to help. Unfortunately, he’s 140 miles away, but he drove out and spent all day, Sunday, helping with assembly. “It’s 80 percent there,” Ron said on his way home.
Speaking of volunteer efforts, this has been an amazing build with efforts from a variety of sources, all to create a bike we are giving away. No one made a dime off this puppy. It’s all American-made, and the whole gang pulled together to offer Bikernet and Cycle Source readers a shot at a world-class custom motorcycle—thanks. Chance of a lifetime, goddammit.
Dimensions: 5½” x 5½”


Xpress
http://mysmartcup.com/
Crazy Horse
http://www.crazyhorsemotorcycles.com/

Texas Bike Works
www.TexasBikeWorks.com

Kustoms Inc.
KustomsInc@hotmail.com

Chop Docs
www.Chopdocschoppers.com

3 Guyz
www.3Guyz.com

Accel
Accel-ignition.com

Fab Kevin
http://www.fabkevin.com/home.htm
.jpg)
Evil Engineering
www.evil-engineering.com
D&D Exhaust
http://www.danddexhaust.com/
Wire Plus
http://www.wire-plus.com/

Barnett
Barnettclutches.com

Rocking K Custom Leathers
howard.knight@montana.com
Rivera Primo
www.RiveraPrimoInc.com

Spectro Oils
www.Spectro-oils.com

Bell
www.moto@rcn.com

Metzeler Tires
www.metzelermoto.com
.jpg)
Hawg Halters

Handy Industries
www.HandyIndustries.com

Grip Ace
www.gripace.com
Biker’s Choice
www.bikerschoice.com
Aeromach
www.aeromachmfg.com

Ride Wright Wheels
www.ridewrightwheels.com

Biker Pros
www.BikerPros.com

Bare Knuckle Choppers
www.bareknucklechoppers.com

Rivera-Primo Brute II Install
By Robin Technologies |

We have a goofy Shovelhead in the Bikernet shop called the 1928 Shovelhead. It has 21-inch wheels front and rear in a Paughco rigid frame, but some 1928 elements were used, including the re-pop semi-flat sided tanks, the rear fender and perhaps the seat. The bike was conceived by Bandit the bastard, built by the crew at Rick Fairless’ Strokers Dallas, with the help of Randy Simpson who manufactured the handlebars.

The bike has contained a couple of hiccups and hasn’t been ridden much. Recently, one of Bandit’s friends needed a ride, so Bandit shipped this puppy to Washington. Richard Kransler installed new Avon tires and took it out for a spin. Unfortunately, the early Rivera-Primo belt, stuffed into the semi-stock inner primary, snapped and the 1984 Shovelhead was garaged. More recently, Richard concocted a deal with Bandit for a van in exchange for his Sturgis Shovel, and returned the 1928 Shovelhead to the headquarters, where the gang went to work on it.

With Richard’s info, and after consulting with Ben Kudon at Rivera-Primo, a plan was put into motion to make this wild puppy more rideable. We needed to add an oil filter, rerun the oil lines to reduce heat, fix the sumping problem, replace the primary drive, and then we discovered a loose valve seat, but we’ll get to that.


This is also a two-part tech. We first installed the Brute II Extreme Belt drive with a 1 ½-inch wide 11mm belt with electric start in the closed primary. Then we will install the most magnificent Rivera-Primo Pro Clutch. Since this is a jockey shift, it will be interesting to test both the stock clutch against a new clutch system that’s state of the art. We will forward all of our extensive reports directly to the boss and all Bikernet readers.

We discovered immediately that the front Brute II pulley was larger than the previous model, which was disappointing because it called for more clearance in the case, which weakened one of the primary fastener locations. Not a big deal, so we went to work with a pneumatic cut-off blade and emery wheels.

It’s critical to disconnect the battery, especially while working on the inside of any Shovelhead primary. It’s too easy to bump or pull on the starter solenoid, and you could lose a finger pronto. Fortunately, we have a selection of JIMS tools and pullers for this operation.

Here’s the fine print from Rivera-Primo: Primo Belt Drives are designed and engineered to correctly fit stock Harley-Davidson motorcycles. Aftermarket frames, primary covers, engine shafts, or clutch hubs may cause installation problems. Also bent frames, sagging motor mounts, worn transmission mounts, and other defects may cause shortened belt life due to incorrect pulley alignment.

If you have a stock system being replaced, here’s the dope: Remove the front pulley, chain, compensator and chain adjuster. Remove oil lines to primary and plug or clamp to prevent leakage. Cut the chain oiler hose 3 inches from the oil pump and permanently plug it. All belts must be run completely dry, without lubrication of any kind. Therefore, remove all oil from inside the primary covers.

The spacer behind the front pulley should be removed before installing the belt drive. This spacer may or may not be required to correctly align the pulleys. If a spacer is needed for alignment, various sizes are available from your local Primo-Rivera dealer (part number PX-1, is a package of various sizes).

We discovered a very tight belt. We had to carefully install the belt in the case first. Then the front pulley was installed onto the main shaft, but just slightly to afford us some flexibility with the clutch hub. We re-greased the bearing on the clutch hub and inside the clutch shell. With the handle of a plastic hammer, while prying it with a large screwdriver, we were able to drive the clutch shell over the hub with some gentle persuasion.

We tracked the belt, and installed the same spacer from the last system behind the engine pulley. With the bike jacked and the plugs pulled, we turned the engine over to test the running direction. We made sure to run the engine over in a forward direction. It’s not a bad idea to use a straight edge at first to make sure the pulleys have the proper spacing.


“Spacing the motor pulley outward will cause the belt to track towards the outer primary cover,” said Ben. “If spaced too far out, the belt will rub on the inside of the clutch shell.

Then we attempted to install the outer, aftermarket tin cover and discovered a significant problem. It rubbed against the clutch shell. So far, our inner primary clearance adjustments worked.

We were concerned about the tightness of the belt. It seemed severe to us, and to Bandit. According to the Brute II directions, the belt requires a minimum of ½-inch up and down play at the center of the belt, and up to ¾-inch. We barely encountered ¼-inch of tough play. “Free play is critical,” Ben said, but when Bandit questioned him, he muttered something about ¼-inch being okay, since the belt was so stiff.

The crew even considered replacing the system with a stock chain, to avoid issues. We took the system apart and studied each element, and investigated. I looked into a longer belt, or installing the earlier unit again, which had its benefits with the smaller engine pulley and tapered clutch shell that fit in the primary. We installed the belt again and tested the flex—still tight. We cut a hole in the tin primary, eliminated that problem and affording us tremendous venting. We live and breathe by the Optimist Creed, sort of code of the west. We are hoping once the belt settles in and warms, we will encounter additional flex and no stress on the engine and trans bearings.

“This is a much stronger, more technically advanced belt over the previous 14mm belt,” Ben assured me. We will give it a shot. Venting is a critical element. Primo recommends venting enclosed belt installations to allow cool air to circulate into and out of the primary case. This will keep heat expansion to a minimum and extend belt life.


Special Note: Big Twins from 1969 require a #16657 motor seal. Next we will install the new Pro-Clutch from Rivera Primo and test it, so we will be in and out of this primary case and reporting back on our findings.


In the meantime, we rerouted the oil lines, added an oil filter mount, and an oil pressure gauge for more capacity, cooling, and cleaner oil. We worked on the sumping problem, and then discovered that a valve seat was loose in the rear head. We pulled the heads and delivered them to Branch O’Keefe for repairs.

Our shop intern and overall handy-man, Kyle Olsen, our official Bikernet electrician, will test this bike. We are determined to make it a solid rider, and Kyle will bring us reports and handling complaints in the near future.


We modified the jockey shift and added the 5-Ball for easy shifting that’s out of the way of our thighs at stops.

And Bandit has a code, a good one. All bikes need rear chain guards, and this bike doesn’t have one. We will remedy that. Plus we have a brand new set of Nology plugs and plug wires to install. Hang on for the next report.

Road King 4/18/03 Part III
By Robin Technologies |


Bad shot, but it’s the horn all blacked out and still grimy.


A shot of the spacer made to eliminate the rear shift lever.
We were getting stoked by the changing appearance of the King. The black was giving it unity. I re-greased the shifter shaft and installed the back linkage in a vertical position then tightened it. We eliminated one of the shifter pedals for my big feet and installed the remaining one with Loctite and a 1/4-20 Allen or socket head fastener. We cut a 3/4-inch chunk of 1-inch O.D. mild steel tubing for a spacer to eliminate the other pedal. The main part of the linkage to the transmission we had powdered but sprayed the flexible links and fasteners at each end.

We powder coated the center section of the shift linkage, but had to spray paint the flexible adjusting links and fasteners.
We assembled the kickstand by putting the jiffy stand in place then hooking the spring to the tab, then all four blacked fasteners were unscrambled and slipped in place. The two short 5/16 bolts went toward the front. A long one with a nut fit in the top rear bracket hole and a long one without a nut screwed into the rear footboard bracket. Then the footboard was replaced.

We had one element left to complete. We still needed to put the front end back together. I cleaned the interior of the lower legs with solvent to insure we would have a solid seal at the bottom since there are no gaskets. We had to slip the fork tube out of the trees. We replaced the small aluminum collar and inserted the tube into the lower leg. Then the socket head bolt was replaced and carefully tightened.
I must apologize for not taking shots of the front end assembly. I get caught up with wrenches and forget the camera.

Here’s the black Street Stalker front fender in place using new H-D brackets. The new mag also adds to the black along with the black center floating rotors. Looking Sharp.

We turned the leg over and with a seal tool carefully tapped the new seals in place and added the retaining clip. We removed the seal tool and slid the fork tube up through the bottom tree, passed the pinch bolt, added the fork stop rubber (don’t forget it!) and pressed the tube into place in the top tree. Nuttboy held it firmly while I torqued the pinch bolt. Lastly we added 11.1 ounces of fork tube fluid in each leg and then tightened the fork tube cap with its rubber washer. We torqued the rotor Torx fasteners to 25 foot pounds and broke off our Torx tool. I think I was over doing it. The new fasteners came with locking goo in place, no Loctite necessary.

We noticed that one of the new hydraulic brake lines was rubbing the fender, so we adjusted the position.
We lowered the King until the axle was lined up, then slipped it through with spacers. Had to check the manual and discovered that one of the spacers (on the left) was longer than the right. I instructed Nuttboy to hold the axle in alignment and started to install the collar below it (on the right leg) with the two metric nuts. I torqued the axle to 50-55 foot pounds, then Nuttboy tightened the fork cap fasteners on his side to insure the wheel was square with the forks. Finally we tightened the Allens that held the new jet black Street stalker front fender in place and bolted the calipers in place. I used plenty of Loctite, not those damn stock locking tabs.

I held up my side of the Nacelle and Nuttboy did the same. They didn’t fit. Could the coater have switched components? Could they have been bent in shipping? Didn’t appear so. Perhaps the metal shields flexed in the 425 degrees of heat. We were stuck. I called Steve at Custom Powder Coating. There was no way the nacelle was damaged, but maybe, just maybe the 425 degrees of heat allowed one side of the Nacelle to flex. We may never know.
The next day, in the mail, I discovered the new Harley 2003 Genuine Motor Accessories and Genuine Motor Parts Spring Supplement. On the cover was a fully blacked out King front end. I ordered two new nacelle covers.

A couple weeks later the new nacelle covers arrived. They don’t come with the rubber headlight fasteners. You need eight and I ran to the local H-D dealership. They were an inexpensive 4.97 for all eight. They slip right into place. We replaced the rubber cable guides and the nacelle was ready to be replaced. With it held in place with the side, stainless, dome nuts we slipped the blacked riser cover down over the nacelle lip, which held it in place. Then I replaced the two Phillips screws in the riser cover with blue Loctite, then popped the plastic fork lock guide in place. I was then faced with the most awkward screw on the King. The thin Phillips screw that holds down the front of the riser cover. I had to slip a massive washer in under the top of the nacelle and line it up with the screw. I rocked the bolt to hold the washer while slipping the 5/16 nut in under the nacelle and lined it up. With Loctite on the screw I tightened it down carefully holding the open end wrench with one finger while working a Phillips screwdriver on top while Sin Wu pressed the Nacelle halves together. Quit a trick.

After the bike was assembled I touched up fasteners with good old Rustoleum. I’ve used it all my life and still can’t spell the word.

Last motion was to replace the nacelle trim before the headlight. The still-chrome trim hooks in the riser cover then one stud slips between the nacelle halves. Another Loctited 5/16th nut spun into place.

Then I started the headlight ring. I almost forgot to plug the headlight in, but caught myself. All eight black Phillips screws rolled into place carefully. They’re a unique fastener. A brass nut is buried in rubber which slips through a 1/4 inch hole in the nacelle with a lip toward the outside. The screw slips into the rubber grommet until it reaches the buried brass fitting. As it pulls the fitting forward toward the back of the nacelle, the rubber expands creating a bond. Sort of a rubbermounting process for the headlight. Finally we replaced the spring in the blacked out headlight ring and snapped it in place on the top of the headlight assembly, then locked it down with a short Phillips sheet metal screw on the bottom. Done deal.

Not a great shot. The bike was still dirty, but you get the notion. Wait until you see the next segment. A few final touches and this puppy will sing.

–Bandit

Road King 8/8/03
By Robin Technologies |

There’s nothing like a run to nowhere. No plans, no dates, no deadlines and no formula, we just rode in the sweltering heat like two abused dogs searching for new owners. After a couple of beers, if someone asked, “why?” the cryptic answer would contain: Just to get out of town, to test the new H-D Twin Cam oil cooler, against an ’89 Evo, to see the Hamster gang on their way to Sturgis, to roadtest a new pair of denims, to have my bike blessed by a Catholic Cardinal and finally to avoid the rain.

The famous comforting Gusset in the Diamond Gusset jeans.
Granted some of this scattered reasoning was whacked. It’s summer, why would it rain? Dr. Hamster and I have ridden on perfectly clear days to Arizona, a fuckin’ desert, and it rained on us. Not a misty sprinkle that relieved the heat, but a goddamn downpour that had us standing knee deep in gas stations attempting to refuel.

High dollar chain wallet for road protection. It was given to me at the LA Calendar show by a blonde knockout. She handed out free wallets to anyone who would stare at her tits or her sponsor’s truck, Schapiro & Leventhal, The Motorcycle Attorneys.
This time we got the hell out of Dodge in the middle of the day, under scorching rays. The day before I tore into the King, changed all the fluids and installed a new 1999 and later oil cooler for touring models. Several readers wrote concerning cooling problems with Twin Cams, and I did some research. According to Clyde Fessler the Twin Cam was destined to be a fluid cooled motor, due to the excessive heat that the factory design crew couldn’t eliminate, until Jim Fueling stepped in, at the last minute. Jim tested larger exhaust valves to remove the hot exhaust gasses fast and efficiently. Apparently, his input saved the Twin Cam project. It’s not unheard of to see a Twin Cam running through town with oil heated to over 240 degrees, whereas an Evo will trip through the same crowded streets cooking the oil only to 130 degrees. That’s significant. The installation is destined for publication in American Rider and on Bikernet in the near future.

After washing, the Gusset jeans didn’t shrink. They had the length I needed.
As the week closed, and I loaded my shit for the run, a package arrived from a new Bikernet advertiser, Diamond Gusset Jeans. Here’s a confession: I’m close to 6 foot 5 inches and have a problem finding denims that fit and have the length for cowboy boots on bikes. I discovered that my 36-inch-inseam pants were riding high on boot shanks. Another tall partner recommended 38-inch inseams. I started looking. The only pair I hunted down were special ordered from Levis. There was a catch. They were unwashed 501s. When I washed them, they shrunk up to 36-length. Gusset came through with britches built loose for a biker and long enough for a tall bastard. I decided a road test was in order.

No button-fly on the Diamond Gusset jeans.
We traveled light, threw a couple of T-shirts in a bag, with some sunscreen and night glasses, and we hit the road with a digital camera. After only 31 miles, I met Dr. Hamster in Santa Monica and checked the oil temperature. It indicated 213 degrees and my ambient temp gauge told me it was 90 degrees on the coast at 11:00 a.m. We rolled onto the 405 freeway, to the 118 East, to Glen Oaks where we spun off to have our bikes blessed at a custom car gathering near the Hansen Dam. It’s an old school, new kid gathering of lowriders, hot rodders and bikers. It was located in a hot open park, in Pacoima, packed with metal flake, primer, babes, chrome and flames. We had scrambled through another 52 miles and the King was sporting 222 degrees in the 95 degree air temp. The jeans were still comfortable in the blistering sun. I wasn’t forced to pull on the legs for relief, as I sat in the King saddle.

Restored 1958 BMW


We dodged security and fluorescent cones to park with the show cars next to a 1958 restored R27 BMW single. A classic machine. A girl wearing a black quilted welder’s cap was lying in the grass. “I’ve had it seven years,” she said behind dark sunglasses, “but it took me a year to get it rolling.”

Dr. Hamster, riding partner and therapist.
We were impressed by the tattooed broads dressed like ’50s rod chicks with bleached blond hair in curls, checkered tops pressed against store bought tits and ruby red lips. An artist Sara Ray caught the action on canvas. She should go places.

Sara Ray art, (562) 223-0967.
I ran into a couple of riders I had featured in past issues of ER and one displayed his super sanitary, teal Panhead. I told him it deserved a feature. The truck-built hot rod by Ian Rousseau, was unlike anything I had ever seen. But the sizzling summer sun drove us back into our saddles and down the road. It doesn’t matter what the temp gauge says, at 100 mph we’re cool.


Industrial hot rod built by Ian.


We jammed onto the 210 freeway heading toward Pasadena when the traffic locked up. Downtown Pasadena and Sierra Madre are known for their restaurants and Sierra Madre Motorcycles.

Gusset jeans is Sierra Madre restaurant. Note the handmade Bikernet belt buckle.
We jumped off the freeway for chow at the Pepper Tree in the quaint Sierra Madre village. After refueling we were hell bent for Barstow on the 15, the main artery to Las Vegas. It’s a grizzly stretch of desert asphalt aimed at the border of Nevada and California.

We rode from the 210 to the 57 south, to the 10 east, to the 15 north, where we discovered that the 210 connected to 15 directly. We sliced through traffic jams in Monteclair, Ontario and Rancho Cucamonga. These goddamn towns are spreading across the desert toward Vegas like Locust on a ripe crop of corn. The traffic is stifling in Los Angeles, but there are times, when the revs of your motor match the rhythm of your heart beat, and you dance with the devil in lane number one. When the fast lane lagged we dropped, like fighter pilots, across four lanes of whizzing compact bumblebees, into the slow lane, between off ramps. We down-shifted a gear and gunned our motors, until we screamed past the slugs, then peeled back, through the vast expanse of lanes, to our home in Fastville. Dr. Hamster, aboard his ghost flamed ’89, blacked out FLT, with over 200,000 miles on the clock, slipped traffic like a wire through pepper cheese.
Freeways expand annually, but the traffic spreads with over-population, like ants in a sugar bowl. There’s no catching the growth. At one time various freeway sported motley personalities. The 15 was a truckers’ freeway, but now it’s Las Vegas central, fighting with 18-wheelers, for asphalt space, as the highway narrows peeling between desolate Day Canyon and the desert town of Fontana leading into the San Bernadino National Forest. For the first time we smelled open highway mixed with diesel fumes and blistering heat. The King held to the road tight as we piled on the high-octane coals and roamed into the hills toward Hesperia, the home of Atlas Frames.
“I won’t do much over 90,” the good Doctor told me at a gas stop. “This thing quivers too much.” We discussed Wil’s invention, the True-Track. “Yeah, I talked to Wil,” Chris grimaced, “he doesn’t manufacture them for early Evos.”

Mountain Gusset jeans test.
While flying along the freeway, just slightly below his limit, I watched the ass of his FLT shake like a plump girl dancing to Chubby Checker. The King held fast except on one sprawling stretch of cement freeway, carved with a cheese grater device, to form rain grooves. Occasionally the grooves snagged my Avons. They were no- more than hiccups on an otherwise perfect ride. We could smell Barstow, as if a camel could sniff sand, 60 miles east, as we cut through the Cajon Pass at 4260 feet. We made light of the next 40 minutes peeling through open miles, darting from one car or 18-wheeler to the next, like a kid playing pinball with Toyotas. Except our rule book called for going around as many lumbering vehicles as possible without touching any.
Barstow is a town millions travel through, yet never see. Freeways have that adverse effect on society. They slice through lovely seaside communities, but the travelers never experience the water’s edge. I’ve skidded through Barstow too many time to mention, but this time we rolled off the second “Business exit”. There were four. We should have stayed on the freeway and hit Daggot, Baker or Ludlow. Take it back, they’re all two-pony towns with one gas station. At least Barstow accommodates five restaurants, a major supermarket, and another succulent item, I’ll mention later.

It’s a dusty berg, of one main street and a myriad of motels, two Holiday Inns (one at each end of town) and a couple of Route 66 joints. Two main Mexican restaurants called to us, singing Maria’s Cantina ballad, but we were on a mission to hook up with 50 Hamsters riding across the country to Sturgis. The last time I split with them through 1,800 miles to the badlands, was two years ago, when I head-butted a deer, on a Buell, in Wyoming.
The hotel parking lot was jammed with customs and dressers. We unpacked and asked the host behind the counter for a room. “We have one, but it’s smoking,” the young guy wearing an flowered Hawaiian shirt said.
“When it stops smoking, we’ll take it,” I said. The Gusset jeans survived their first putt. The bike was peaking at 224 degrees in the 97 temperature and Chris’s Betsy held to 165 degrees. It was time for a beer.

It was good to see the bros, and even better to see Jennifer, the bartender. She sported a recent boob job and wore a top she should wear while cleaning her kitchen on a hot day. In her late twenties her boobs pushed against that spaghetti strapped, shear fabric like… Well, you know. They popped over the top, pressed out the sides and protruded just above her thin waist. Her budding nipples talked more than she did. The first thing that came to mind were the ominous words Sin Wu said to me as I pulled the King into the street, “Do me a favor. Don’t hook up with a girl in Barstow and make another life long friend.”
I could see friendship, in the making, each time Jennifer bent over the deep sink to clean a glass, those luscious soft mounds whispering endless tenderness to me.

View from Ramada window.
Shifting gears, back outside Barry Cooney pointed out his latest creation that’s scheduled for the cover of ER in the near future. It was a S&S, 120 inches of chopped monster surrounded by Ness frame, wheels, controls, etc. Barry has an eye. Mr. Lucky was one fine looking motorcycle. I apologize for not taking a group shot of the yellow shirted rodents. I was consumed with hanging out with some longtime pals.
Here’s a tip, not a tit, yet. Barry’s bike sports an S&S shorty and it was gagging at mid range. He tried everything to remedy the problem with no luck. Even S&S volunteered a carb replacement. He finally hauled the bike to a renowned motor man. After research, he discovered that the big engine was sucking the float bowl dry through the vent. He drilled a direct vent to the outside of the carb and welded up the internal vent. The bike hauls ass.
Speaking of ass, we scarfed enchiladas at a local Mexican restaurant and returned to Molly’s bar. I was wearing a DragonFly Hawaiian marvel that caught Jennifer’s eye. “I see you cleaned up, big boy,” She said with a smile that would melt a man, like a rose bud torch tip. My Diamond Gusset jeans handled the Jack Daniels with aplomb, but I avoided making a new friend. After five marriages, I’ve learned something. Not sure what the hell it is, but I blinked and let the opportunity pass. She had soft blue eyes and a smile that beckoned. A playfulness danced on her lips.
I finished my Jack and said goodnight as the conversation lingered. It was good to hang with the guys and catch up.

The Hamsters were scheduled to ride to Williams, Arizona the next morning, a mere 180 miles down the road. They had no choice, but to peel along the 40 interstate into the brittle Arizona underbrush. We had cut through a taste over 200 miles to reach Tarantula Tomb Barstow. Williams and another freeway didn’t call to us. We wanted two-lane highways and twisties.

Train racked sunrise in Barstow.
I was up at 6:00 a.m., since two sets of train tracks border the swimming pool out back, and our room faced the pool. Every 15 minutes trains packed with 40-foot truck containers rumbled past hell bent for Los Angeles, like machine-gun fire in the ghetto. I opened the window once and the crackling noise of a passing train blew me over my bed. But the sunrise was spectacular over the barren arroyo in the distance.

I dusted off my HA leather vest, donned a Crime Inc. T-shirt, and the good doctor and I hit the road before the rodents climbed out from under their sawdust covers. Small roads were the order of the day. The winding choices throughout the southern half of California were many: Big Bear, Ortega Highway, Oceanside, Escondido, San Clemente. We jumped desolate 247 running out of Barstow for the hills where we had breakfast in the Lucerne Valley. Check the signs around the restaurant at the corner of 18 and 247 Highways. It was nearing 75 degrees and the King’s oil was relaxing at 202 degrees in comparison to the Doctor’s dresser at 150 degrees.

We began a hill and mountain hopping ride on the 18, to the 38 into Yucipa, then stopped in Redlands for a beer. It was cresting 90 degrees, but the King’s oil had cooled to 191 degrees and the blacked out FLT was flying at 130 degrees. At that point the Doctor revealed that he was catching the 24 hour Mung. At 90 degrees under dazzling, Southern California sun shine, he had the chills.

We were in Redlands when I backed away from him at the Hotel California and dashed toward my ride. We caught a the 10 Freeway to the 91 and onto the 215 into Perris where we jumped off on the 74 by shear luck and scrambled over the Highway Patrol-encrusted Ortega Highway. They were behind every pine tree strewn corner. Bikers waved us to slow down at each bend.

We dipped and weaved into San Juan Capistrano on empty tanks, refueled, grabbed a bite to eat, jumped the 405 north to Los Angeles and home. I rolled into breezy San Pedro in the afternoon with 430 miles on my trip gauge, for the weekend, and 215 degrees on the digital oil temp gauge. Every rider we ran across praised the King and discussed finding one. The bike ran flawlessly, and the Diamond Gusset jeans survived the heat, the sand and the hot wind. I would estimate that the oil temps were down 20 degrees, we avoided rain and goddamnit, got to party with the bros.

–Bandit

Mudflap Girl FXRs, Part 7 My Son’s almost Grip Ace Wired
By Robin Technologies |
Click here to read the chapter 6: http://www.bikernet.com/pages/story_detail.aspx?id=10268
This is a blast. The year is just starting and shit is flying at us everyday. Gary and the gang from next door delivered enough steel I-beams and C-beams to build a deck, and in two days a gang from Long Beach will deliver a pool table into the Bikernet barracks and gym. And if we are lucky, (today is Wednesday the 3rd of January 2012) we will have all the elements in place to fire my son’s Mudflap girl bike on Tuesday, while IKustom films the event for his TV series. We may even have a live Mudflap Girl in the shop.
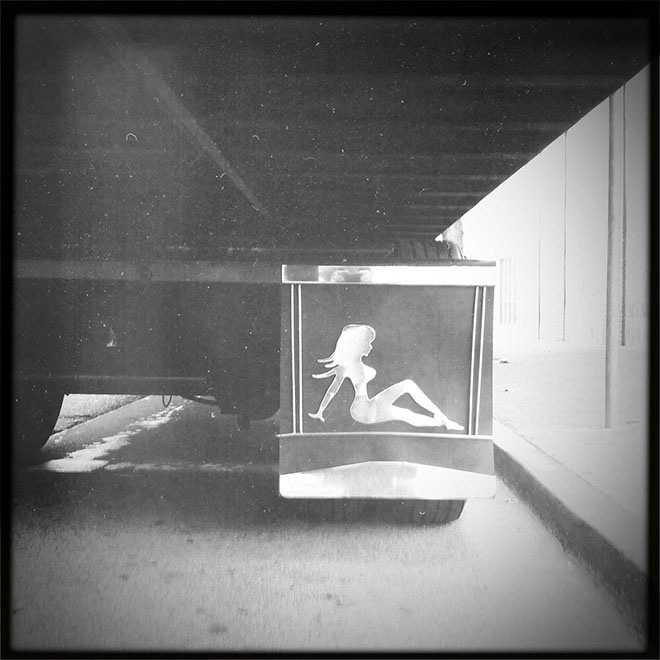
While my Mudflap baby is waiting on a custom Saddlemen seat, I hurriedly shifted back to my son’s version of the FXR. We needed to wrap up some minor elements, and hit the Ace Grip/Wire Plus wiring. Then we would be ready for another Saddlemen seat.
Before I could finalize the primary system, we needed to order a rear belt from Biker’s Choice. One of the major benefits of chains over belts is the mechanics. We had to pull the whole motorcycle apart to install the belt. It had better be the proper length–it was.

It took a while to clearance the outer primary around the Rivera Primo Inc. inner belt drive system. I needed to have the mid controls in place before I could install the weld-on Mr. Lucky kickstand that contoured the frame. All the appropriate elements needed to be in place. With the final linkage in position through a plastic tube that acts as a bushing, we moved forward, we installed the Primo Rivera belt and clutch system, but I still had to make a clutch pushrod. I removed the tranny pipe-side cover and checked the throw-out bearing type.

We finally made it, although my hard-working son was absent. At first, I grappled with the mentoring scenario. I shouldn’t lift a wrench without him on hand. Two elements pulled me from the tough-love fatherly position. Frank is struggling to support two ex-old ladies and three kids. This is a lesson to every young man. Beware.

You can imagine the tug-o’-war that goes on constantly. I’m not completely innocent. I was predominately an absentee father. A decade ago, I spent some time on the board of three group homes for abandoned kids. These kids had no folks and the effects were manifested in their lives like that tsunami in Japan. Kids need parents. Our society is all jacked up when it comes to sex and kids. I won’t go there, but the bottom line is simple: Kids need to be carefully planned and looked after. They need both folks and a stable family. So, I said, “Fuck it!” I’m moving forward to finish Frank’s bike, whether he’s on site or not.


Besides, we are rolling into 2012 and need to wrap up these bikes, road test them, break them in and prepare for the ride to Sturgis. Actually, I started to bug two of my grand kids who are 16 and 18, and very sharp, but ditched high school. Frankie or Frank Jr. is working as a tattoo artist, and I encouraged him to set some goals for 2012. He stepped up to take over the XS project, and came over to help with his dad’s bike. It was good to see him involved.

With the mid-controls in place, I could breakout Mr. Lucky’s weld on kickstand and begin the installation. I needed to make sure to assemble it is a safe location. Any time you have springs, ball bearings, and tiny setscrews, you need to be careful. It’s not a bad notion to perform assembly over a soft rag, so parts can’t vanish into a black hole.


This is actually a simple operation, but it takes 220 volts and a welder, either TIG or MIG. I slipped the supplied spring in the body of the kicker arm, then the ball bearing on top of the spring. Then the bare metal piece is carefully slipped into place. It’s easy to tell how to position the arm and the ball, since there are just two ball indents. So, the flat side of the bare chunk faces forward. Before final assembly, I will completely grease the ball, the spring, the mating surfaces of the weld-on portion, and the axle pin.


With the kickstand arm pushed and held against the spring and the ball, a second set of hands slipped the axle pin into place and started the fine threads. Again, upon final assembly I will blue Loctite the pin threads.


Then I faced the delicate, do, or die job: positioning the weld-on portion. We fitted it several times, then marked the position with a felt pen on the bottom frame rail. Then I loosened the lift clamp, strapped, and rolled the bike over toward the primary side with a strap, until I had it positioned at just the correct angle. This is always a trick. Too far adds dangerous weight to the kickstand and makes the bike awkward to maneuver. If the bike sets too upright, it’s iffy to park, and as with my Shovelhead, I can’t park it in many positions. It wants to pop over. Even the wind can push it over.


With all the touchy elements considered I positioned the Mr. Lucky kickstand against the frame, and folded it up to see how it fit in the running position. It ran smack into the mid controls system, so I adjusted, and we are thinking about running a piece of hose, or even shrink wrap up the kickstand arm to prevent vibration.

With the bike leaned and the arm in the extended position I made two guide marks on the weld-on portion and on the frame rail. Then I could straighten the bike for tacking. I tacked the weld-on bung on both ends, and then tested the position against the straps. Then I ran a bead along both sides with my MIG welder. I plan to double up on the welds with the TIG, once we pull the bike apart.


We were cranking along, but had to step back to my Mudflap girl bike, since the shocks faded and we needed 1-inch longer shocks. We had to pull them apart and add to the bumpers so that the fender would not hit the tire. Progressive has various bumper lengths. The key here is to dismantle the shock, install them, lower the bike until it hits the fender, and make a bumper measurement. Progressive makes hard plastic bumpers in various thicknesses. We made a special tool, used a drill press, and took the shocks apart several times, until we had them dialed in. The key when measuring for shock length is to consider about 1-inch of fade once the shock is installed. We shifted back from a 12-inch shock to 13-inch Progressives.

So, my Mudflap baby was hauled to Saddlemen for the gurus of seats to evaluate. I’ve toured many companies over the years, and the Saddlemen operation is impressive. I met guys who have been making seats for 25 years, and their sons are now working with them. It’s truly a family of operators. They’re very involved in an ongoing hunt for the perfect seat technology. First, they studied foams, and then gels, and now this new design that affords a buffer area to relieve pressure on the spine. We discussed styling and design. Then we peeled out to let the masters consider the options.

We faced an open warm, clear, SoCal day and jammed back into the shop. I started by installing the Biker’s Choice regulator bracket and the Spyke regulator into position. Ray turned to install the S&S carb, since we were faced with the opportunity to install and complete the Crane cam and lifter system. Most Crane products are manufactured by S&S, including their roller rockers for twin cams.


We discovered a crazy tough oil cooler system from Baker Precision, on Signal Hill, and I tacked studs into place on the front frame rails. It’s made in Canada for automotive power steering oil cooling applications. After we installed the belt, we discovered a problem with the rear fender and the belt slot. The fender needed to be removed and reshaped. I also needed to develop a rear brake anchor.


That was the day Buster came by and we decided to go for a ride. I crashed, returned to the shop bruised, but the Shovel kept running. I thought about kicking back and watching Sunday night football, but I needed to pause it, and jammed back to the shop to keep the program rolling on Frank’s bike. While Ray installed the S&S Super E carburetor, I removed the rear wheel, the rear fender, cut a new slot in it, and drilled a hole where the Choppers Inc. Mudflap Girl taillight stem hit the fender.


So here’s the snafu. It surfaced the last time Frank came over. “I didn’t want mid controls,” Frank said. “I wanted forward controls. It’s all your fault.”

In the next segment, we will deal with his changing desires–kids. Then we’ll fire his bike, with the ACE grip wiring system to lead the way.

Sources:
Spitfire
Biker’s Choice
JIMS Machine
MetalSport
BDL/GMA
Wire Plus
Branch O’Keefe
Bennett’s Performance
Custom Cycle Engineering
Saddlemen
Bub
S&S
Mr. Lucky
Saddleman Improves the Amazing Shrunken FXR
By Robin Technologies |

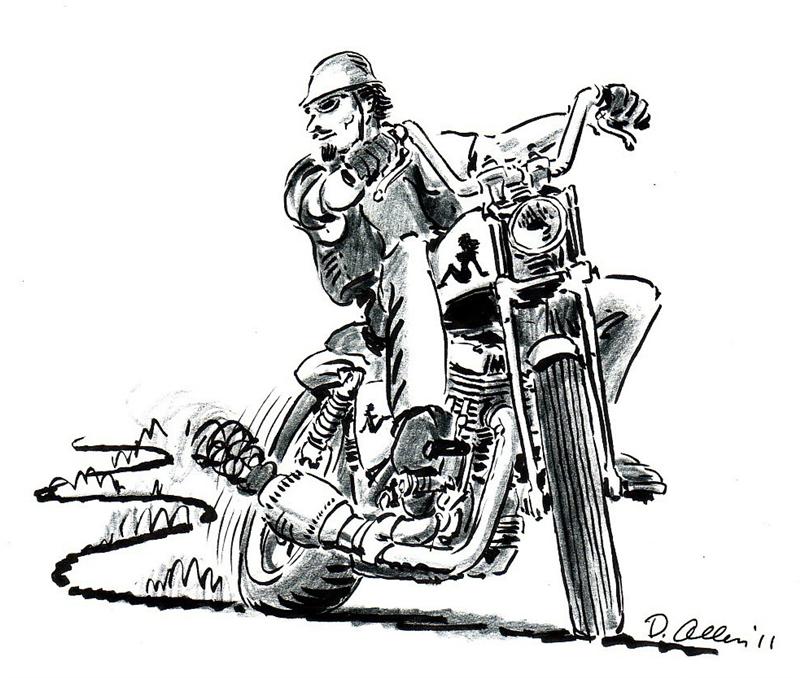
SADDLEMEN MODS TO THE SHRUNKEN FXR–In a world where over promising and under delivering has become all too common here is a gem I must share. The Bikernet built Shrunken FXR has become my daily rider and needed a couple small adjustments to be just perfect for me.
One detail was the too small seat or the bike was too fast (pick one). So I rode my bike over to meet the nice folks at Saddlemen and see what they could do to help me out with my seat. Upon arriving at the Saddlemen facility I spent time with guys from the front office to the guys in the shop ( all of whom took great interest in my motorcycle and the seat they were going to design and build). I noticed from the get-go these people were all riders. I shouldn’t be impressed by that, but there are so many folks in this industry who don’t even ride anymore.
We discussed what I needed (lumbar support) and a lip on the edge of the seat to keep me from being bucked off or sliding onto the rear fender. We also discussed the lines of the bike and that in the case of the Shrunken FXR , less was more. After the team and I spent a great deal of time figuring out what we wanted and didn’t want I was able to walk around the shop and see the whole seat making process from start to finish. man was I impressed!
So many talented folks all working together to put out an amazing array of products designed by and for riders! It was a real treat to see this and made me truly appreciate what they do much more. Great companies, in my opinion, are made of the people who work for them. So I left my bike for mock-up, and received a call back in a week.

When I showed up I saw the foam of the seat had been formed and pan had been constructed. We discussed coverings and stitching, again less is more. They got it and even pointed out to me the lines of the bike would be reflected in the seat.

Three days later I returned to pick up my bike and see my new seat! A seat is the finishing functioning touch to any motorcycle (much more than something you sit on) it must reflect the bike while being comfortable and a key suspension element.

I was so happy to see the seat. It looked amazing and really I could not have imagined it any better than they had built it. I put my helmet on, thanked them and jumped on the bike to ride away. First thing I noticed was the lumbar support made the bike so much more comfortable to ride and kept me in the perfect position to reach all my controls.
The biggest difference was when I hit a huge pot hole (tons of em’ in area) was my ass stayed firmly planted in the seat and the impact was minimal. The seat made my bike complete.
Can’t say enough about how impressed I was with the Saddlemen crew and facility, in short they made my custom bike have a perfectly functional and stylish seat. The perfect blend of function and form. I suggest anyone who needs a seat built or customized give them a call. They are a family team of bikers designing and building products for bikers. I like it!
–Buster
Mudflap Girl FXRs, Part 8 Wiring World
By Robin Technologies |

Since last time, my Mudflap Girl is still over at Saddlemens waiting on a custom seat, but good news filtered into the shop this week. Next week, we should move forward.
Then my son made his dire announcement: “I wanted forward controls,” he said. “It’s all your fault. I agree with Jesse James, you’re nothing but trouble.”

I struggled with the assembly of his mid controls for months. I kicked the Handy steel lift and stubbed my big toe, knowing full well I stood on the right side of the law, and my son was out to lunch on this issue. But as the dad in this scenario, I should be the bigger man. Besides, mid controls can be a puzzling pain in the ass. I dug through my lockers of old parts and found enough components to make up the shift side of forward controls, but I didn’t have the rear brake master cylinder, or the lever and plate. I kept digging.

I reached out to Paul Cavallo, the boss of Spitfire Components, and our Mud Flap Girl frame builders. I thought if I could order a set of the weld-on ½-inch forward frame mounts, I would find the remaining billet aluminum controls parts at the Long Beach swap meet.

Here are some thoughts when it comes to mid controls versus forward controls: Mid controls tighten the looks of the drive train, but make it harder to work on your primary, clutch, oil pump, engine and pipes. They can be a tight, cumbersome addition. On the other side of the coin, they enhance the appearance of any bike by allowing the frame to slither unencumbered until it fades under the engine. And from a handling perspective, mid controls can actually lesson the weight on the lower back.

Okay, so forward controls are sort of out of the way of the engine, the pipes, and the primary. They are easier to install and adjust for long-legged bastards. So what the hell; we started to shift gears. Paul Cavallo assured us of a new shipment of their super-simple to install and bleed forward controls, so we stepped up.

Oh, regarding Jesse James. He complained to the publisher of Heavy Duty Magazine, in Australia, when I didn’t vote for him during the big American Chopper Build-off, in Vegas a couple of months ago. A year ago Heavy Duty asked me to fill in for Jesse, since he was acting up, so I started writing a column for the largest Harley mag in Australia. But now I’ve been fired, because Jesse threatened the publisher, “It’s either him or me.”

In the meantime back at the Mudflap girl, I grappled with the electrics. I had a few issues to mess with. I planned to install a Wire Plus speedo-dash to Frank’s Spitfire T-bars. Grip Ace would handle switches with their electronic module, and the ignition was a Crane Hi-4, a versatile unit. The Hi-4 can be set up to fire a single-fire system, dual-fire, dual plugs, tach, VOES, you name it. I also had a Wire Plus wiring system as backup. It contained the starter relay, blinker relay, and wiring schematic.

A quick sidebar: We built this belt guard out of solid steel rod and strap. I’m a stickler for strength. I like looks, but strength is everything. I would rather the rear strap was 1/16-inch thicker. I will keep an eye on this puppy during the break-in period. Swingarms are bastards for abuse; that’s why mounting fenders to swingarms is particularly tough. Every bump, vibration, or shock a tire endures is transferred to the swingarm, and anything attached to it. Unlike a rigid frame, a swingarm is designed to move rapidly to cushion the ride.

I dug around and found an old ignition switch with an old worn brass key. I looked for a thick washer with the same I.D. as the switch’s O.D. and welded it to the top motor mount. Seems a very accessible position for a switch, and close to the coil and ignition system wires.

At first, I thought about running a circuit breaker on the other side of the motormount, and installed one. As it turned out, I never ran a wire to it, so I removed it.

Since S&S took over the classic Crane Performance products line, we had access to Crane products. My son’s performance aspects will all be Crane and S&S, including the E-carb, a Crane cam, adjustable pushrods, etc. First, I installed the Crane sparkplug wires. This is one damn thing I take my time with. It’s too easy to cut a wire short. I find the kits often lacking the proper pieces, or pieces too tough or tight to install without going nuts. It’s good to collect spare parts. Don’t throw anything away, goddamnit.


For instance, this kit comes with the sparkplug end of the wire already fastened to the cup and lead. I couldn’t find a brass fitting for the straight-in coil sleeve end, but I had some in another kit. I followed the directions and greased the inside of the rubber boot before I started. With the wire and the boot greased, I slid the boot past its position, carefully cut the insulation back about ¾ of an inch, and then folded the carbon lead over the insulation. I carefully crimped the brass fitting into place using several different configurations of pliers, since I don’t have any special tool for this operation. Notice how the brass must bite into the plug wire insulation.

It’s a delicate, tough operation, but once the boot is pulled into place, the tight rubber will hold the fastener and the wire firmly. My son, Frank, the tattoo artist, stopped over and we handled mounting the controls on the bars. These controls were designed for stock application, and we would not use the stock switch housings, because we were dedicated to using the new Grip Ace system due to its simplicity, but we’ll get into that later in this chapter.


We installed the modified handlebar controls with some 1-inch Dewey wheel spacers to make up for the missing bulky switch housings. We were installing the Biker’s Choice Motion Pro clutch cable when Erik Lundmark, from Lundmark Studios, popped in and started filming us for his new TV series, Kustomz. It’s so long between shoots, I forget about the creative effort, but it may pop onto a cable channel near you someday soon.


This build is interesting, because it forced me to go in different directions and away from another rigid frame. In fact, some readers applauded the variation from rigids to something more long-road worthy, and the FXR platform was perfect. I’m beginning to understand why some builders always use the same tried and true components over and over. I can use the same parts, and they fit the same way as the last build, with no surprises. Since Ben Kudon at Rivera asked me to try their new belt system designed for use in a stock primary, I agreed to try it. No big deal, right? The bike was built in 1996, and we stumbled across a set of 1989 primaries.


As it turned out, the starter jackshaft in the early primary was much larger in diameter than late model units, with less pinion gear teeth, but much larger. Consequently, the Spyke starter wouldn’t work and I had to return it. Then the jackshaft was all wrong, and finally, the ring gear on the Rivera Primo Inc. clutch was wrong. Ben sent me another ring gear and it wouldn’t fit on the Rivera clutch shell. He thought I had a stock clutch. What a minute; I was building this with a primary, primarily to use their new system. Switching ring gears was not fun, due to their red Loctite-coated fasteners, and we had to drill out several locked-down Allens. Fortunately, Rivera-Primo makes ring gears for almost any application, so I was covered.


Ray C. Wheeler and I tried everything, including WD-40 and stronger penetrating lubricants. Ultimately, we rounded Allen wrenches, drilled out a few, and used easy-outs. Then the clutch rolled back into shape with the new Spyke starter and jackshaft assembly, but we were missing one dinky element. That surprise came later.

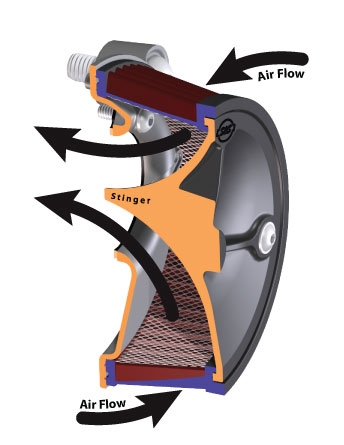
Next, we started to wrap up the carburetor install with the new S&S Stealth Air Cleaner design. Here’s what the gang at S&S said about this system: Everybody likes to go fast, but not everybody likes to advertise. The S&S Stealth air cleaner kits are for the rider who likes to go fast, but wants to be just a little bit sneaky. Get all the performance of the S&S design, including the air directional “stinger” cone in the filter, and hide it under your stock Harley-Davidson air cleaner cover.

Owners of 1999–2012 Harley-Davidson big twins can install the new S&S Stealth air cleaner kit and pick up more power, using their stock air cleaner cover. Nobody will know because it looks entirely stock. We’re talking sleeper hog!


Owners of 1993–1999 big twins with Evolution engines and owners of Sportster models can get the same performance kick, but won’t be able to use their stock covers.


We didn’t want to use a stock cover or be stealthy about it. S&S makes a series of their own aluminum cover designs, but we gave it the Mudflap Girl touch from 2Wheelers just before they packed up and rolled out from Denver, heading east for Daytona Bike Week. I liked this new system a lot, from the lightness of the components to the auto-venting system built into the bracket. No tubes or hoses needed. This installation was a breeze.

Something sneaky slithered around the shop about the time a cold chill slipped over the LA basin. I discovered how aerodynamic Frank’s Spitfire tank was and how well it fit on our Bonne Belle 45 being built for Bonneville this year. I stole the sleek tank off Frank’s bike and mounted it to the 45 Paughco frame. It fit like a glove. I ordered a 3.8-gallon tank from Paughco, and it arrived just after the winter show series. Ray helped me grind off the rubber-mounting tabs.


I started the wiring process, knowing full well the tank would arrive any day, and I would need to reroute some of the wires. I stuck the Grip Ace wiring module in the backbone of the frame, installed the Grip Ace grip, and tried like hell to find quiet, unencumbered time in the shop alone to perform wiring magic. It’s not difficult, but it takes quiet thought, testing, wire running, wire accounting, and figuring.

It’s too easy to run a wire, and then discover another wire needs to follow the same path, such as the neutral switch wires running off the transmission. That wire (one is a ground wire) can run up to the Wire Plus speedo, but the oil pressure switch will follow the same route, as will the speedo pick-up, the wire to the starter solenoid, and maybe the wire to the brake light switch.


I’m using the longer spin-on oil filter to hold the alternator/Spyke regulator plug in place and give the bike more oil capacity. We used the new JIMS tool to pull the filter, and we replaced it by hand. I mistakenly thought I could wire this bike without a circuit board, but quickly shifted gears after I made a small bracket to hold the 30-amp circuit breaker under the seat. Then I welded a small mounting plate to the bracket for the board, and everything started to fall into place. I found some quiet time and started running wires. When I first wire any bike, I draw a schematic with the basic components and start an initial map. It’s a damn good idea, because it’s super easy to forget one item, like the flasher unit for the turn signals.

I also grappled with the VOES switch. I reached out to Bruce Tessmer from S&S for input. I’ve run maybe one VOES switch in my building career, so I didn’t see any reason to go there. Bruce explained the reason behind the switch running off a vacuum tube from the carb. It is designed to help prevent pinging in high performance engines when they don’t have access to high-octane fuels, or run in high altitudes. Since we don’t generally encounter those problems, and we are running near-stock compression engines, I ducked that aspect, and wired the Hi-4 system into place.


My grandson, Frank Jr., recently took over the XS build, and he rolls over to the headquarters on a weekly basis. He’s a worker, willing to sweep the floors, turn wrenches, anything to assist in the process. He’s turned into a major asset around the shop, and has recently become the designated rider for 45 Bonne Belle, since our Australian female tattoo artist had to bow out for this year. Frankie, 18, is also a tattoo artist in the making. We dove into re-installing his XS engine into the Mr. Lucky, Paughco-built frame, and Frankie is now helping with the Bonne Bell build.


Next, we will fire Frank’s FXR, check the wiring, adjust the carb, and we will both be in the market for seats. Mine is scheduled to come from Saddlemen and Frank’s from Le Pera. Hang on. Oh, and we’ll come face-to-face with our jackshaft learning curve. I’m getting anxious to ride. I’m scheduled to meet the Saddlemen crew in two days.


Spitfire
Biker’s Choice
JIMS Machine
MetalSport
BDL/GMA
Wire Plus
Branch O’Keefe
Bennett’s Performance
Custom Cycle Engineering
Saddlemen
Bub


Road King 11/08/05
By Robin Technologies |

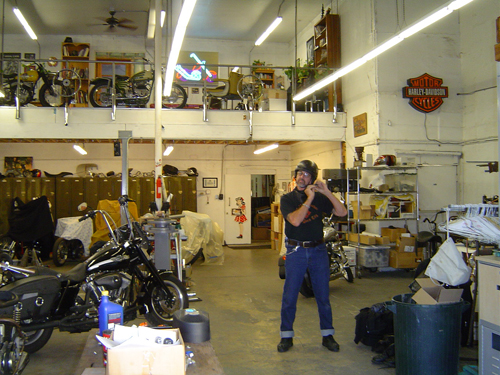
Around mid June Kerry and myself were organizing our trip to Sturgis, when Bandit contacted me an asked how would I liketo ride the Road King to Sturgis. Immediate thoughts were Wholly Shit, I’ve read all about the King on Bikernet and watchedthe different stages Bandit has put it thru, so I was very familiar with it, and for Bandit to be asking me was really a big deal, meaning, I felt honored enough when Bandit invited Kerry and myself to join them on the ride, let alone ride his bike. So youprobably guessed the answer was a big >>>>>> Yes Sir !! thank you very much.
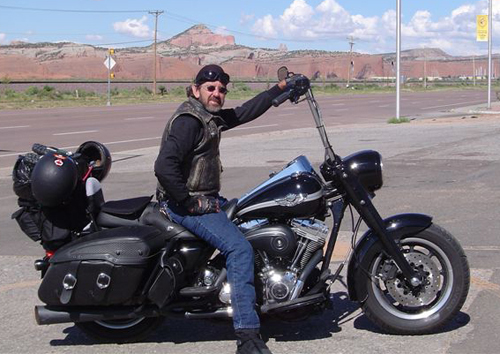
For the readers who aren’t familiar with the Road King, I’ll enlighten you. It started life as a stock 2003, 100th Anniversary model.Bandit said he designed the bike be a big bad assed, blacked out touring bike with heaps of attitude. Bandit and his crew wanted to use as many H-D parts as they could to prove you could build a mean assed bike out of Harley Davidson’s catalogue. They started by blacking out the dash, a set of one inch lowered air shocks and a detachable back rest along with some neat touring components. With the help from a dealer for some more involved tech mods to gain horsepower and some low-down torque, they came up with a formula by adding performance cams, Screaming Eagle Heads, air cleaner kit and two into one pipes powder coated black, giving them 68 horses compared to 60 and torque was 76 pounds with a 6 pound increase. Next they installed a factory oil cooler which Bandit tested on a run to Barstow saying how it kept the oil at a very reasonable temperature which is critical for long term, Twin Cam reliability.
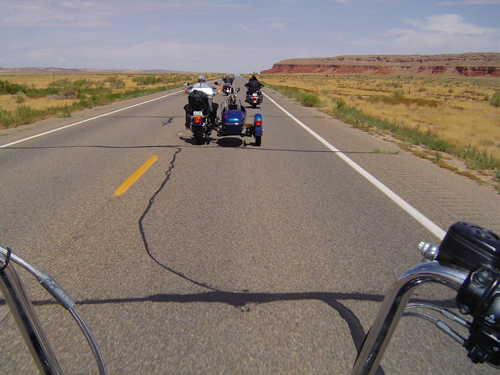
Fast forward to Sturgis, August 2005 and Kerry, my wonderful bride, and myself arriving at the Bikernet Headquarters being greeted by Bandit and the lovely Nyla. We were enjoying a beer while having a grand tour of their unbelievable home when Bandit said, “Get ya helmet Goddamit, we’re going for a ride.”
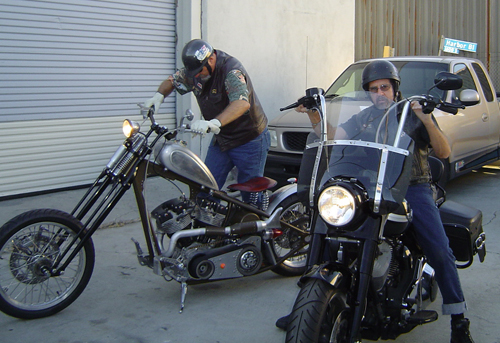
It’s hard to explain the excitement that was welling up inside of me, especially when I first laid eyes on Bandit’s bare boned, mean as shit Shovel, I swear it had a look like, let’s go, I’m ready. And right beside it sat the Road King.
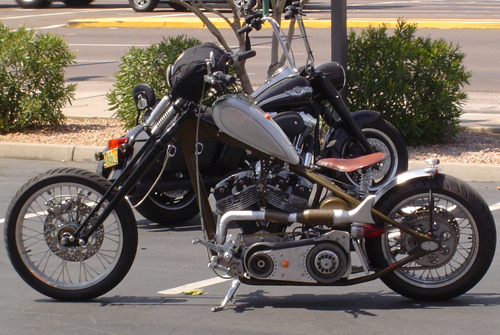
It definitely looked like itwas ready to do some very serious miles, man. It looked beautiful, all blacked out like a road warrior ready for action, 16-inch apes reaching for the sky, a very comfortable looking seat and a detachable back rest for Kerry. I gotta tell you these two bikes were like chalk and cheese, the Road King had all the creature comforts and Bandit’s Sturgis Shovel had absolutely nothing, excepta little back fender and a sprung seat, Shit !!! and he’s riding it to Sturgis, tough sonofabitch, I thought to myself.
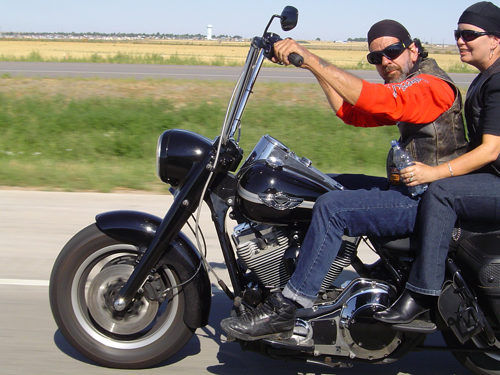
Just as the sun was setting over Long Beach we fired those puppies up and peeled out of the Bikernet Headquarters like two crazed maniacs going for their first ride after a long cold winter, ( sound familiar Bandit ). Seriously thou, we cruised around Long Beach taking in the sights and both of us getting used to our rides. We both had grins from ear to ear, especially when we twisted the wick on these babies, I was blown away, the King with it’s sheer size and weight, had some serious acceleration, man. I was impressed plus having a lot of fun and Bandit’s shovel went like a rocket, with it’s power-to-weight making it an awesome ride.
This was going to be my 4th trip to Sturgis (beginning in Australia) and I knew 100 percent this trip was going to be very special, I was feeling right at home on the Road King, everything was perfect except for the bloody windscreen, I think it was set up for Bandits 6′ 4” frame and I could not get used to it, but Harley had it covered. Two seconds and it was off, no problem.
I would love to tell you about our trip to Sturgis, but it’s been covered by Bandit and Johnny Humble, the young gun from Texas, both really great stories and you can still check them out by going to The Events Coverage in Bikernets Department Site.
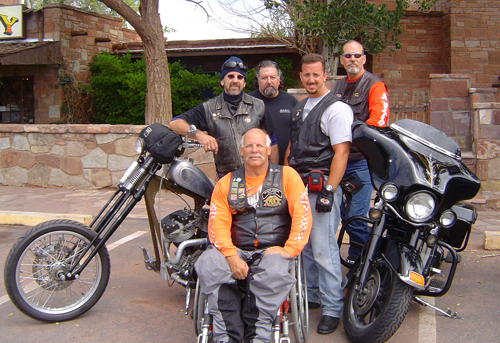
It’s hard to put into words, the true feeling of this road trip with such great company, I will say that we were very privileged to get to ride with them, even thou we live on the other side of the world, I know that Kerry and myself have forged life-time friendships and hopefully will get to do it again some day.
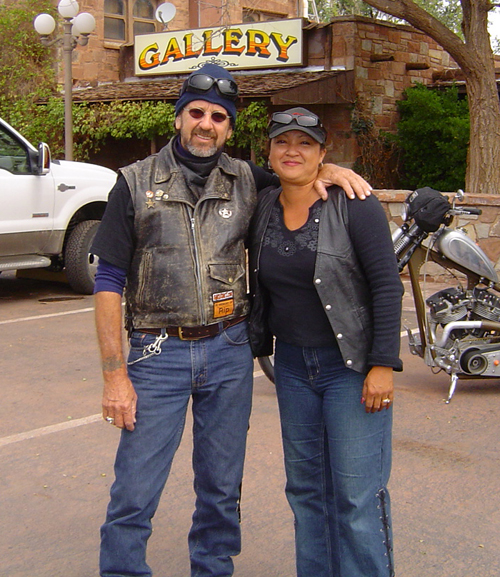
I have been privileged to ride a lot of bikes in my time and I must say the Road King was bloody brillante, we covered 4000 miles all up, came across all types of weather (as we all do) including high altitudes where the King never missed a beat with it’s superb fuel injection and very smooth motor. Seating was great, and I just loved the apes. Not only do they look really cool with an attitude, they were really comfortable.
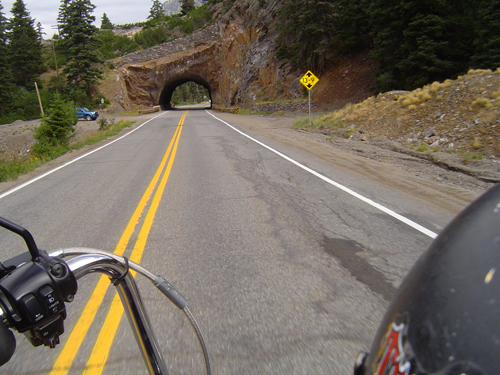
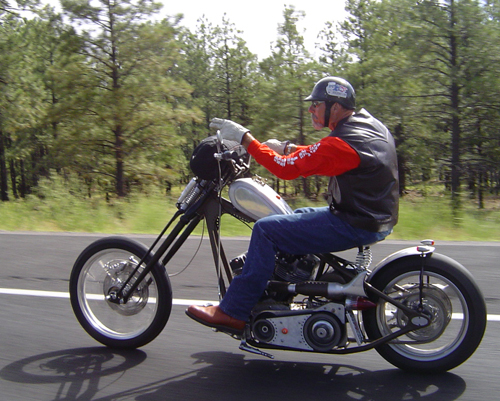
I will post some photos of our trip that you haven’t seen and would like to do a follow up of our trip from where Kerry and myself parted company from the rest of the crew, returning to L.A. via Denver, Santa Fe, Sedona and Vegas.

I would like finish up by thanking Bandit and Nyla for their friendship, hospitality and giving us such a great time, not forgetting the use of their Road King.
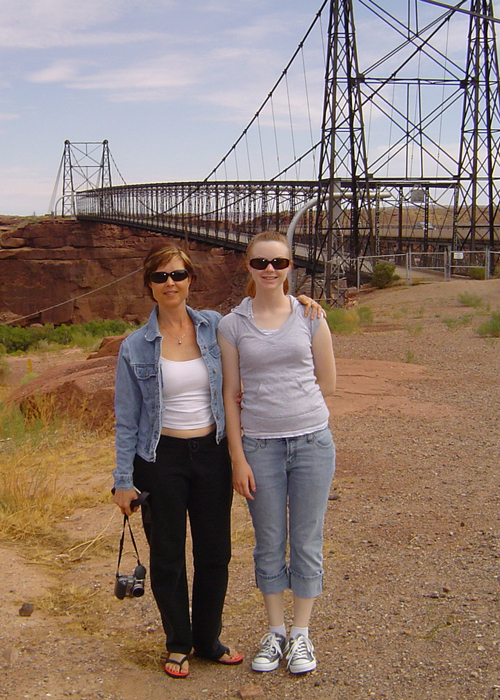
Okay guys thats a wrap, hope you like it.
Mudflap Girl FXR, Part 5
By Robin Technologies |
Life is nuts, but we are scrambling on the Mudflap Girl FXRs, at least mine. Us old farts constantly have discussions about how unmotivated kids are. I want to work on my bike constantly. Every waking minute I’m thinking about it, about new ideas, innovations, and who I can reach out to for resources. My son just complains: “I’d have to drive over there…”

I constantly come up with Plan B, another connection, or build it myself. We crawled out of the Sunday sack at 6:00 a.m. to haul ass to the Long Beach Swap Meet, just to scour rows of vendors for parts, to find a handful of pieces, and we scored. If it wasn’t for the Sunday Post, I’d comb the isles once a month, at least.

Whatever, I’m about to wire and fire-up the first Mudflap Girl creation with Spitfire, H-D, and JIMS.
But let’s back up to installing the Trock-modified CV carburetor. I ran over to Branch O’Keefe next to Bennett’s Performance on Signal Hill to discuss an intake manifold. I don’t have anything against most dealers, but I like to work with the talented independent shops, owned by guys with history, who go the extra mile for performance, quality, and their customers.


I feel Bennett’s and Branch O’Keefe work hard to keep guys on the road, with high performance motorcycles. John O’Keefe dug around and came up with a very rare H.E.S./Branch Evo intake manifold. I helped Andy Hansen get Harley Engine Specialties off the ground in the ’70s. Andy passed, as did Trock a few years ago. He was a great guy with veins full of 60-weight. John told me he still has a few of these rare, tested, flowed performance intakes and wanted me to try one.

With John’s assistance, these guys are building hot rod twin cams with some very special confidential products. I’m hoping to bring you the story and access to some of these secret products in the near future. I mounted his intake with stock clamps.

After installing the rear wheel, we discovered the oil tank could not be installed from the front with the engine and trans in place, and we had to remove the rear wheel. It wouldn’t install from the rear without removal of the wind guard and one frame-mounted rubbermount. We made it work without removing the engine and trans.


At this point, we jumped around the bike looking for any project affording completion, without trips to suppliers, missing fasteners, or parts orders. We took a hard look at Spyke’s new BDL starter jackshaft fix. I’ve used BDL systems for ten years without a problem, and no starting hassles. It took us a while to understand this system. Basically, it allows the starter gear to bounce, not jam into the ring gear. Once we understood how the Spyke fix operated and the lack of spring travel in the BDL system, we came face to face with the benefits. We moved on to fitting the fender.


This tough 9-inch fender fit perfectly with some slight modification grinding on the Spitfire fender rail tabs, but the bottom front of the fender smacked the oil bag and prevented perfect alignment. With some heat and our shop press, we pushed a buffing groove in the fender. Then we cut the massive notch for the chain and the fender was getting damn close. Ray took up the grinding duties after I cut the notch with the plasma cutter.


Then we turned back to the oil bag, which we had grown nervous about some characteristics. This was a one-off, first attempt by the Spitfire motorcycle crew. They did a helluva job, but we noticed that the return and vent oil bungs were down the face of the bag, restricting oil capacity. We stopped by Gard Hollinger’s LA Chop Rods facility and asked for a couple of 1/8-inch pipe threaded bungs. Gard doesn’t manufacture that size, but he does make ¼-inch pipe thread bungs, which seemed foreign to me, but we stepped up.

This was a tough, and scary operation. I didn’t want to risk drilling and dropping metal shavings in the tank. Jim Murillo recently sealed the tanks and coated the interior. The alternative was a 2.2-quart oil bag over a 4-quart oil bag. We swallowed hard and started the operation of drilling the holes in the top of the tank. I turned the bungs down slightly so I didn’t have to drill ¾-inch holes in the tank.

Ah, but for every obstacle, there’s an opportunity. We discovered a perfect exterior clear oil gauge, fucking beautiful. We started to drill the holes in the top of the tank for the return lines.

We also had a squirrelly obstacle with the top motormount. The frame came with a chunk of tubing protruding directly down from the backbone under the tank. In the end of the tubing, the Spitfire crew welded a hearty bung, and it was drilled and tapped to 7/16 fine threads. I went on the hunt for some 7/16 hiem joints and McMaster Carr had a couple in stock. That was my initial direction, but it had its drawbacks.


I kept looking for alternatives and discovered a tab that was part of the Biker’s Choice top motormount kit. The slot in one end was 7/16-inch, and it pushed the hiem joint anchor spot out far enough for the pivot point to reach the stock hole in the top motormount. I went to work welding it, but Dr. Willie didn’t like my fix. I want to give it a shot.


We also ran into a return line problem with the stock Softail engine configuration. The return oil line from the filter pointed directly at the transmission. We straightened it and ran the line, then thought about running an oil filter. We went on a search for an old Cadillac power steering oil cooler. This turned into an afternoon excursion, hitting junkyards in our ghetto area and all the auto parts stores. At the last Auto Zone, we scored this Cadillac power steering oil cooler and made a mad dash back to the shop.


We considered running one of those front motor-mount regulator brackets, but I didn’t like the way it interfered with the mount and the engine fasteners. Since the frame was built perfectly for this application, we cut and fitted a chunk of rectangular tubing stock between the frame rails to house the Spyke regulator.

We drilled it, installed fasteners from the back, and welded them into place, forming studs on the front. It was good to go once we tacked it into the frame. This project has a devilish twist, since we plan to build it, then test ride for a month or two before a paintwork teardown. I’m not using nylock fasteners this time around, just lock washers. Some items will be TIG welded, whereas some will be MIG spot welded for the tryout period.

When I grappled with the Biker’s choice CV carb mounting system, including breathers, I discovered the Branch/H.E.S. intake difference. I was forced to slice and weld the bracket in an alternate position. That puppy will need to be ground and reshaped before powder coating. We moved ahead and I discovered my Goodsen Fantasy in Iron air cleaner was built for a Mikuni, so I traded with my son for his Roger Goldammer, hand-pounded, stainless steel unit.


What a sharp, well-thought-out chunk of artistic workmanship. Everything about his air cleaner was well configured, from the backing plate to the position of the fasteners. It came with all the necessary fasteners and two foam sock-like filter elements.

I have never liked the single bolt rear axle adjuster. It allowed the axle to float and shift from its required setting, which can be downright dangerous. I ordered some special fasteners and set to drilling and tapping the stern of the swingarm bosses. They were massive, solid chunks of Spitfire steel. It took some time, but now the axle is locked into position.

.jpg)
Then we started to grapple with the kickstand. The obvious choice was a weld-on unit from Mr. Lucky, but he didn’t have any in stock.

I needed to install the 3-inch BDL belt system, to see where the kickstand would hit. Some kickstands can be a bear to reach, or take up much needed ground clearance. The more I looked at the Spitfire forward controls, the more I didn’t want to mess with that area. The only kickstands available that might fit this configuration were pricey jobs, and I suspected they wouldn’t fit. I started to dig around.


This new BDL belt drive fell into place after I drove the pins into the engine pulley. The clutch slipped right into place, and then I carefully selected washers and shims behind the engine pulley until both pulleys were aligned.


This new system has just two big, tough, 3/8-inch stud fasteners and stand-offs. One has a step in it, and it took very little time to determine which position it was machined for. The rear stud hung over the ring gear and needed additional clearance, but I goofed. I used red Loctite on the stud, and I should’ve stuck with blue. I’ll have to remove the aluminum stud anytime I remove the clutch.


Then inspiration surfaced with the notion to run a rear kickstand. In searching my parts bins, I came across a wild kickstand base. Unlike the old ones from the ’30s to the ’70s, this one worked the same, but was heavy and cast. With Ray’s assistance, we came up with the materials and the notion to bolt it to the swingarm cap, which is held with two 7/16 fine bolts. I went to work while Ray peeled out for Cook’s Shootout in Bonneville.


I tacked and tested it until I was convinced I hadn’t completely fucked up. Then I cut off the tabs, and ground and shaped the massive chunk of steel. I TIG welded this puppy together, mounted it, and made a cool stop threaded into the frame.

Next, I’ll start wiring with Wire Plus products and the bike should run within a week or two. Then it’s off to Saddlemen for a seat. Hang on, the Mudflap Girl will live.

But wait, I forgot that we installed the Spyke Push-Button solenoid starter. It eliminates weak connections, starter relays, and starter button wiring. It’s a breeze to install, but it’s important to make sure, once the button is released, it’s fully clear of contact.


Sources:
Spitfire
Biker’s Choice
JIMS Machine
MetalSport
BDL/GMA
Wire Plus
Branch O’Keefe
Bennett’s Performance
Custom Cycle Engineering
