Funky Panhead Part 3: The Feature
By Robin Technologies |
My grandson wrecked his Dyna. He thinks he went down on a slippery west side LA boulevard, but the bike looks like he was rear-ended, which launched his girlfriend. She was seriously damaged, but survived. He got scuffed and walked away.
He needed a place and some guidance with his ’05 Dyna. He could have sold it and moved on, but he was so impressed with the performance after Bennett’s Performance tuned it and added some S&S TC cams, he didn’t want to let it go.
I called Dr. John about his frame and spoke to Eric Bennett. Dr. John was able to straighten the frame without a complete teardown. Amazing.
Next, we jammed to the Long Beach Swap Meet to find Dyna parts and didn’t find much. We bought a later model touring swingarm with a 1-inch axle, because I planned to upgrade his suspension wherever possible, but the touring swingarm wasn’t right. Larry Settles from Settles Customs in Harbor City fixed us up with a solid late model Dyna swingarm.

Anyway, we rambled throughout the packed aisles looking for parts and I came across a large flatbed truck sporting a line of new, bare rigid frames. Great looking frames and I inquired. Kraft Tech only sells to distributors like Biker’s Choice, but they bring a few frames to the swap meet once in awhile and the price was right.
The Kraft Tech frames were obviously set up for Evo engines and 5-speed transmissions, but looked almost stock. I couldn’t resist. We carried that frame up and down aisles until we finally headed toward the exit with no Dyna parts and a set of stock Softail tanks, perfect for the frame.
As I meandered toward the exit, my cell phone rang. It was Brad Olsen, an old friend who recently scored an Oregon shop’s inventory and stashed it in a warehouse near a river leading to the sea.
“Yo,” Brad said. “I need to recoup some of my investment. Do you need a Panhead engine?”
I about shit my pants. I had just scored a sharp rigid frame, a set of fatbobs, and I knew I had a 5-speed Softail transmission at the Bikernet Headquarters. What the fuck? Hell yes, I needed a Panhead engine!
As it turned out, the engine was seriously incomplete, but with a good twist. The ’69, last kidney, Shovelhead right case was mated to a ’79 left case, which would allow me to run an alternator and Evo primaries. I hauled ass home from the swap meet and started to dig through drawers, cabinets, and lockers looking for parts.
I created a pile next to my lathe, but when I stood up, I wondered why the hell I needed another motorcycle. That wasn’t the mystic point at all. Fuck it, I was inspired and on a roll.
Here’s a code that works for us bikers. I tell young guys frequently to start to create equity in their lives for the future. You can buy and turn houses. You can restore a car, write a book (not a good idea), paint a painting, etc. But if you’re a biker, building bikes is perfect. No, they are not always worth a bundle, but they are like putting money in the bank. Think about that the next time the ol’ lady bitches at you for building another motorcycle. What’s she doing to build equity for your future?
Even before the swap meet kicked me into gear, I was moved by Go and Tasumi at Brat Style in Long Beach. Michael Lichter introduced me to them, just down the street on the evil industrial west side of Long Beach. They build the coolest shit on the planet with a major twist. Everything is vintage, seriously vintage. Go can build a totally custom tank and install it on a ’39 Indian Scout frame, but by the time he’s done, you would bet it’s a stock part and 70 years old.

His amazing painter adds the final twist, Deny 528. Maybe I should keep this a secret. But fuck it, it will slip out anyway. Deny studied and practiced to create original paint patinas for a year to prefect his process. He’s got it nailed.
I was gone. I couldn’t think of anything else but this Panhead project. I dug around and Mike from Pacific Coast Cycles, in Long Beach, came up with an oil tank. He’s a major fan of Kraft Tech frames.
“Everything just slips together,” Mike said. And he’s also a major fan of Paughco springers. They may be more expensive than overseas copies, but it’s your life you’re riding on. He has about a dozen rollers in his one-man shop. If you’re after a cool project, give him a call.
Daily, I made lists of needed parts and started to make calls. I couldn’t stop, and then my grandson flew to Deadwood to be a part of Scott Jacob’s Artist Retreat. Suddenly he wanted to go to Sturgis. I came up with a plan. I rode to Sturgis and back last year, so this year, we could alternate the plan. How about taking two old bobbers to Sturgis for the kicks?
The Sturgis 2017 plan formulated. Suddenly, I had a deadline. Oh, what the hell? I was inspired by many factors, but I still needed a few pieces to make it happen.
The engine was missing a cam and most of the cam case elements. It needed a carb, intake, distributor, oil pump and I started digging around. I had a set of rebuilt Panheads, but they were early model and this puppy would need outside oilers. I started to ask around.
Berry Wardlaw from Accurate Engineering offered to help, when I couldn’t find any Panheads through STD. Billy McCahill had issues with his foundry and didn’t have castings. Berry checked with a couple of distributors and no one had any in stock.
Berry searched forums and then found a set on Ebay. I immediately ordered them from Wilson Cycles, Inc. in Roswell, GA, but when they arrived, I encountered a problem. One was perfect with valves, an O-ring intake manifold flange and the outside oiler boss. Unfortunately, the other didn’t have an outside oiler fitting. It was an early model.
We hit the swap meet again and found a cop solo seat from a major seat guy, who had a pristine stock seat. I had an old hinged fender from an early swingarm Pan. I knocked out the pin and installed the bobbed fender with the help of Lowbrow’s new universal fender bracket. It’s strong as a bull and fit like a champ. My funky MIG weld didn’t hold a candle to the precision Kraft Tech TIG welds on the frame. Sorta embarrassing…
I dug out a Softail 5-speed transmission, and tried to figure out the plate to mount it. I called Chris at Kraft Tech and quizzed him. I have a Paughco offset 5-speed plate but needed a stock ’86-’99 Softail tranny plate for a 5-speed. There are so many configurations and Paughco has them all.
I want to write a tech about ordering frames and all the configurations available. It’s not just about rake and trail anymore or wide tires, but left and right side drives, which transmission, which set of gas tanks and the type of seat being used. The list goes on. Hopefully, if the Paughco crew can help out, and with Biker’s Choice, we can make it happen.
I found an old 41mm wide glide front end at the swap meet. Ultimately, I wasn’t happy with it, but we made it work (I hope) with an old drum front brake. I found some neck bearings and replaced the junk one. I tore the whole front end apart and cleaned it. The springs didn’t match, but I worked it out with Progressive springs. The Paughco axle did the trick to allow the brake and star hub to be installed. A local shop laced the star hub to an old 18-inch used aluminum rim.
I spoke to the guys at Spectro about which fork oil to run in the legs. Joe Russo recommended Fork Oil Type E. 20 SAE, since it’s an one-up light bobber. “Heavy two-up bikes would use the 40 SAE,” said Joe.
The brothers at Paughco are the best and have the best. After digging through my shit, I needed just a handful of vintage parts and pieces from the Paughco factory, like the correct front axle for an early glide. I made the mount for an old spotlight out of a bracket I built for a Bonneville bike but never used.

I needed the right side rear brake lever, mounting plate, return spring and plunger, but I had three Wagner master cylinders. This Kraft Tech frame was set up for a Softail-style rear disc brake. Years ago, we installed PM brakes on Dale Gorman’s Softail and I ended up with his stock solid aluminum Fatboy rear wheel and brakes. They would do the trick.

I had most of the pieces for the left side forward controls, except for one, and Paughco had it, the shift linkage arm. And I didn’t plan to run a dash, but I needed something for electrics, a switch, whatever. I ordered a Paughco universal tin toolbox and then discovered something wild at an antique store—a K-model motorcycle trophy a heavy casting.

The notion was to build a simple, easy-to-handle bobbed Panhead. But for some odd reason, finding an early automatic-advance distributor turned out to be a problem. I didn’t want any extra bells and whistles on this bike, no advance and retard mechanism, jockey shift, etc. Then I found a Mallory electronic ignition system in a locker from our ’06 Bonneville effort. I spoke to Berry Wardlaw from Accurate Engineering and it did the trick. I rocked. He coached me on timing it.

I went through the front end from stem to stern, drilled lightening holes in the brake backing plate and found a set of stock configuration stainless bars and some goofy 4-inch aluminum risers using a stock cap. I still needed the cable, lever and cable adjuster. I called Barnett’s. They had everything I needed.

The bike was headed back together for Sturgis. If the paint and engine comes together, I could be cool for the run.
In a sense, this project was indicative of this time in my life and the life of many bikers everywhere. I asked myself if this should be a life and times story. Could I make sense of my life at this point?

I’m feeling stressed at almost 70 and I don’t get it. Actually I do, but I don’t want to feel anything but nirvana. Hell, I built a motorcycle nirvana right on the coast, across the street from the Port of Los Angeles. But there’s something not right about that. ?
They are now calling it America’s Port, yet the port has basically shit on the town adjacent to one of the richest ports in the world.
Okay, so I started this Panhead project in the middle of a war over whether combustion engines will still be around in another decade. What the fuck? No wonder our industry is in a state of upheaval. Most folks think bad thoughts every time they get into their cars as if they are having a nasty affair with the earth on the other side. Brings me down, but I fight back. I try to keep folks informed regarding their rights and the issues. It torments me. I want freedom and fun back.
So, when the shit brings me down I try to jump down into my shop and work on a bike. The Panhead became a mission for freedom for my soul. I needed relief from the stress.
On the other hand, life couldn’t be better. We have more resources than ever before, if the government doesn’t make them all illegal. For instance, you can build anything your heart desires. This Pan is a terrific example.
Sure, it’s a Pan but it has a ’69 right case and a ’79 left case, which allows me to make it look like a Pan, yet run an electronic, automatic advance distributor, an Evo to Twin Cam alternator, and a spin-on oil filter, which allows me more oil capacity and more protection for the engine.
The heads are brand new STD outside oiler Panheads with knock-off rocker blocks. The STD heads breath better than stock and contain improved valves and springs.
I’m running hydraulic JIMS machine cam followers, S&S adjustable pushrods, an S&S mild cam and an improved S&S oil pump. Even the Kraft Tech TIG welded frame is modified for almost any engine and allowed me to run a rear Softail disc without doing a thing.

Basically, I could build 1998 rigid Panheads all day long with super-strong late model 5-speed transmissions, and BDL belt drives with any EVO starter. I was good to go.
I wanted to use a Linkert Carb and I had a couple rebuilt by Mike Egan. We planned to run two on a stroked Knucklehead. They were M-35s for early 45 flatheads. I decided to try one using the small venturi for snappy throttle response notion, like we’ve done with 42 mm Mikunis.
Bob Bennett went through the engine and I supplied parts where I could. You can no longer order any performance parts in California. They were banned by the California Air Resources Board, supported by the MIC. Unless companies want or can afford to spend hundreds of thousands trying to have each part tested to receive an Executive order through the MIC, they can’t be sold here. If you can’t buy a cam in California, how does the largest market in the US impact the smaller states?

Needless to say, I made my own pipes using a too bitchin’ shorty muffler from Rick Krost at US Choppers, who only deals with vintage bikes anymore. He’s done with anything new. The muffler was amazing; at least, I thought so. Deny, the man behind the vintage paint job, came over and I showed him the muffler and what I intended with the stock squished pipe under the engine.

We discussed having the pipe angle up with the bottom frame rail toward the axle, but we both looked at each other with dismay. I’m not a fan of anything that interferes with the line of the frame. Then I mentioned my appreciation for shotgun pipes and Deny’s blue-gray eyes lit up. I messed with parts and pieces, including the stock squish pipe. I like how it came out.
I worked with Tim at San Pedro muffler to make a couple of exhaust flanges to fit over the Panhead exhaust manifold. I was only able to use one, because the front pipe needed to turn abruptly.

I tried several different welding moves with this endeavor. The pipes from San Pedro are 1 ¾-inch aluminum coated chunks, coupled with old bare steel bends, chromed pieces and even an old Pan squish pipe. It was chromed at one time. I had to use various pieces and some were slightly different diameters. I don’t know why, but initially I thought about gas welding with steel rod, but the various metals, even ground and cleaned, weren’t happy with oxygen acetylene, maybe because of the carbon deposits on the inside of the old pipe pieces.
Various pipe manufacturers skimp on funds by running thin-walled tubing and blowing through it is easy. I shifted to MIG welding because of speed and convenience. Also, tacking pieces in place is much easier with a one-handed Miller MIG welder. I ended up carefully MIG welding most of the bends and pieces, but then added some braze just to add color to the pipes.

The pipe brackets were a trip of found brackets and chunks, but finally the pipes were strong enough to stand on and secured comfortably to the heads.
I used care with the driveline alignment. The engine, a mixture of years, fit perfectly in the frame without shimming. I used the BDL inner primary to align the engine and trans.

Moving right along, when I needed to escape the government control freaks, I darted into my shop and hid out, rebuilding the old Wagner master cylinder with Paughco re-pop controls. The rebuild kit arrived from Biker’s Choice and Twin Power. James and the Twin Power crew are on a mission to create and manufacture stock replacement parts for old and new Harleys. I dug out old manuals from Panheads to Shovelheads and Evos and followed them.

With Spectro Oils I studied brake fluids and I think I installed the Wagner and the Softail Caliper with DOT 4. According to vast research, the Wagner could have been DOT 3 originally and the Softail Caliper was DOT5. They don’t mix. Later, I flushed the system with DOT 5 a couple of times and will do it again in the near future. Dot 5 is less corrosive than Dot 3 or 4 but doesn’t work as well as Dot 4. Dot 5 also won’t mess with your paint.

I stashed the ignition switch in the Paughco toolbox I mounted between the stock Softail gas tanks. I made a goofy bracket running off a stock frame tab and it worked like a champ. I mounted a 15-amp circuit breaker in the box and an idiot light, to prevent me from walking away and leaving the switch on. Let’s see if it works.

Bob Bennett timed the engine with Berry’s instructions and I monkeyed with the Linkert Carburetor. I also made the top end oil lines with old parts and True Value Hardware, which is usually a tremendous source for fasteners, but pricey.

I installed a Biker’s Choice oil pressure gauge. Erik Bennett gave us the look and his dad suggested I run an adjustable valve in the line to the heads so we don’t cause the lower end pressure to drop. I did thanks to True Value, but we discovered a tiny hole in the valve, which wide open might do the restricting job. I’m still investigating it.

I wired the bike with old Harley fabric-wrapped wire and fiber-wound loom. I needed to replace the front vintage spot light sealed beam. And one of the spring hold-downs broke. I need to find them.
The stout rear fender didn’t need supports but I needed a place to mount the LowBrow vintage taillight and license plate mount, so I started to dig around.

I came up with a Road King front fender bumper rail set. With a little braze, some ball bearings and some imagination, it worked like a champ.

I need to give some credit. The day I fired her for the first time, I ran into a problem. I ran oil through her first to make sure it was getting to the top end, but noticed oil seeping out of the lifter stool gaskets, as if the crank case filled with oil. I checked with Eric Bennett and then a young Hamster stopped over, Tony Sportalli. We made an oily mess chasing all my new oil lines looking for a mistake.

I used those stock pinch oil line clamps and they are bastards to remove. We ended up removing half of them, and in some cases, replacing them with standard screw-on hose clamps. Then Tony pointed out that the oil wasn’t coming from the gaskets but holes in the JIMS lifter stools. Unbelievable. They drill through the stools to create an oil passage, but it was up to someone to press in plugs or set screws. We taped set-screws and we were golden. Thanks Tony.
There you have it. Now I’m in the Eddie Trotta break-in mode and the search for a pink slip and registration. It’s a kick, starts and runs like a champ. It’s a breeze to ride and the front end now works. Let’s see what happens next.
–Bandit

OWNER: Keith “Bandit” Ball
CITY: Wilmington Ghetto
FABRICATION BY: Bandit
YEAR: 19-something Panhead
MODEL: FL
VALUE: Very little
TIME: 4 months

ENGINE
YEAR: ’69 and ‘79
MODEL: FL
BUILDER: Bennett’s Performance
IGNITION: Accurate Engineering
DISPLACEMENT: 74 cubic inches
PISTONS: V-Power
HEADS: STD
CAM: S&S
CARB: Linkert
AIR CLEANER: Chopper Dave
EXHAUST: Bandit
PRIMARY: BDL

TRANSMISSION
YEAR: 1990
MAKE: H-D
SHIFTING: Foot
CLUTCH: BDL

YEAR/MAKE: 2017 Kraft Tech
MODEL: Classic Rigid
RAKE: Stock
STRETCH: None

FRONT END
TYPE: Wide glide
BUILDER: H-D
EXTENSION: None
TRIPLE TREES: Cast iron H-D

WHEELS
FRONT
SIZE:18-inch
FRONT TIRE: Avon
FRONT BRAKE: Mechanical

REAR
SIZE: 16-inch
REAR TIRE: Dunlop
REAR BRAKE: H-D disc

PAINT
PAINTER: Deny 925
COLOR: Orange and Cream
TYPE: Old

GRAPHICS: 5-Ball
CHROMING: Paughco

ACCESSORIES
BARS: Stainless
RISERS: Old aluminum
HAND CONTROLS: mixed

FOOT CONTROLS: Paughco
FUEL TANK: Stock Softail
OIL TANK: Pacific Coast Customs
FRONT FENDER: None
REAR FENDER: H-D
SEAT: Swap meet
HEADLIGHT: Old accessory spot
TAILLIGHT: Lowbrow

SPEEDO: None
CABLES: Barnetts

PHOTOGRAPHER: Markus Cuff


Funky Panhead Part 5: New front wheel and disc brake
By Robin Technologies |

Okay, so the classic 19-inch spoked wheel rolled in from Black Bike Wheels, in Van Nuys. They have grown to build spoked wheels for every make and model in virtually every size. Too cool. If you need a spoked wheel give them a call and speak to Elliot or Eric. Tell them Bikernet sent you.

The wheel, with a tough used and stained aluminum racing rim, unpolished stainless-steel spokes and a blacked cast aluminum Black Bike hub painted and scratched by me looked perfect. It was shipped, carefully packaged with the machined center spacer, Timken bearings and new seals wrapped securely and separately.

At first, I thought I would haul it to the local bike tire repair shop on Western, in Harbor City. It’s a cool little gas station turned motorcycle tire repair shop. It’s a classic and they will replace and balance any motorcycle wheel on the planet. Unfortunately, I didn’t feel like fighting traffic and I had a couple of other things going.

I crawled up onto our clean room, where I stash wheels and tires and dug around for 19-inch tires. I had two. One was a classic Avon Speed Master 3.00. The other was another Avon Tyre 100/90/19, a Venom. The rim was tough to measure the width, but it seemed to be 3 inches wide or slightly less.

Frankie was headed over, so I asked him to hit Cycle Gear for an innertube. As it turned out they had more than one size, so I went for the 3-inch job. I hadn’t mounted a tire in years but decided to go for it. I had several tire spoons and soapy water. The tube was called double tough and it was.
I took a large glass jar and pumped some dish detergent into it and water. I used the skull-faced pan brush to scrub the inside of the rim. I backed up the cleaning effort with a scotch-brite sponge. The used rim contained rubber residue, which needed to be removed. I scrubbed for awhile.

I slipped a couple of 2 by 6 boards under the rim, so as not to ding the hub or rim. I checked the rotation of the tire and the position of the rotor and popped the heavy bead of the tire over the edge of the rim. This was the easy part. Then I carefully worked the tube into the tire and against the wall already positioned over the rim.

The ultra-thick tube made the job tough, as if there wasn’t the space, I needed to feel the tube within the tire. I did my best to push the rim against the inside of the opposing wall of the tire.

The stem was interesting, and I made a special hook to help guide it through the rim stem hole. Also, a tricky maneuver.

I slathered the tire and the rim bead with soapy water and started to work the bead over the edge of the heavy rim with tire spoons. I had four. I tried to use the smoothest one and be careful not to pinch the tube.

Nervous but determined, it was a fight, but the tire bead finally popped over the edge of the rim. I added some air to the tube, but not a lot. I soaped the rim some more and bounced the tire around the shop and then added more air. It worked, amazing.

I put about 50 pounds of air pressure in the wheel and the Avon Tyre didn’t have a problem seating in its rim position.

Next, I greased the bearings and installed them on one side of the wheel and used a large socket and a rubber hammer to install the seal. The socket just barely fit into the hub, so it grabbed the OD of the seal and didn’t damage the seal mechanism. I tapped it into place and turned the wheel over.

I installed the carefully machined, by the Black Bike team, center spacer and the other heavily greased Timken bearing and seal. Then I turned the Black Bike Wheel over again and installed the rotor with the speedo drive spacer. I used 5/16 allens ¾ inch long. Ultimately, they were going to hit the caliper bracket, so I replaced them with domed stainless Allens and thin lock washers for more clearance. Damn, I still need to tighten them with blue Loctite.

Then I started to mess with the group of Paughco spacers I had. I put together the right grouping for the brake side on the right. This put both disc brakes on the same side of the bike. I liked that and that’s what Steve, from Paughco recommended.

With the caliper bracket race greased and in place on a special Paughco wheel spacer, I carefully measured for the tire to be centered in the frontend. This was a trick to determine the center of the tire and then the center of the front end and determine how much I needed to be machine off the spacer.


As it turned out it was about ¼ of an inch off caliper bracket spacer. I machined the spacer and tapered the spacer on the other side to allow it to fit properly in the seal. I put it together and dug around the shop for enough parts to make a brake system work. I found a front brake caliper for a Softail springer and Paughco sent me a right-side bracket, which I dunked in bleach to give it that patina look.


I sorta figured out how all the pieces fit together, and I had an 11.5-inch rotor. I also had a stock master-cylinder, which almost matched the stock (another year) clutch cable perch on the other side. Then I needed a brake line the right length and with Banjo fittings on each end. Amazing, I had one that reached with some slight modifications.

In this case, I just filled the reservoir with DOT 5 and started to pump slowly and watch for bubbles. Before I knew it, the damn thing was bled and we’re ready for a test ride. Hang on!
–Bandit

Funky Panhead Sources:
S&S
Biker’s Choice
JIMS Machine
Lowbrow
Mallory
www.summitracing.com
Accurate Engineering
www.accurate-engineering.com
Bennett’s Performance
Paughco
Departure Bike Works
www.departurebike.com
Spectro Oils
Chopper Dave
www.chopperdaves.com
Black Bike Wheels
www.blackbikewheels.com

THE CHOPPER OF CHOPPERS FOR SALE, Part 2
By Robin Technologies |

The story of Hugh King and his grand television career spanning four decades has been told over and over. In fact he just completed another adventure for the History Channel in the cold snowy north, but the series is a secret.


The master builders included Arlen and Cory Ness, Matt Hotch, Chica, Eddie Trotta, Hank Young, Kendall Johnson, Mitch Bergeron, Russell Mitchell and Joe Martin. Just up the dusty road roared the 2004 Laughlin River Run with all the temptations of Casino action including amazing food, entertainment, whiskey and girls. But the brothers stayed focused, almost.


Just 72 hours out they gathered at Dan Jackson’s Fort Mojave, Arizona, Desert Powder coat shop. Arlen Ness was assigned the shop foreman title, while Kendall Johnson, engine and trans builder. Mitch Bergeron handled frame and billet down tube construction. Russell Mitchell dialed in the handlebars and controls.


Matt Hotch hand built the fenders and the wild gusset under the frame neck. Cory Ness was responsible for paint and accessories procurement. Chica hand fabbed the gas tank, “but Johnny Chop helped,” said Hugh, and Eddie Trotta worked over the forks and front-end trees. Hank Young built the oil bag, Joe Martin the nasty pipes and pinstriping. And a late arrival Danny Gray supplied the hand made manta ray-covered custom seat—amazing.


The show had a design, but the King was only part of the scheme. “I wanted to depict the torment of the artists under extreme conditions.” Little did he know the bike would be turned over to him after he tortured the builders in the desert with hot iron pokers.


As the executive producer sat overlooking the mayhem of the final assembly while fanned by Vegas hookers and sipping long Island Iced teas he wondered if the concept would work.

“It didn’t at first,” Hugh said. “There was a lot of tension, people went off in different directions. All of a sudden, it just coalesced. You could feel the energy in the room. Everybody was suddenly working together, headed in the right direction. I think Arlen had a tremendous impact as the shop leader and guiding light in a dark tunnel of torment. It was touch and go for a while. If one of them had walked, they would have all walked, but they didn’t. The rebels held together.”

See the next episode for more details about the Chopper King’s Chopper, which is now for sale to the highest bidder. “My one burning desire now, however, is to buy the X Bike back from myself,” said the King with a tear in his eye.

Doug Coffey’s RetroMod Panhead Part 5
By Robin Technologies |
Risers
Biker’s Choice TWIN-POWER Ignition Tech
By Robin Technologies |

I recently rambled about never giving up. This tech is an example in not giving up, and looking for opportunities for success. James Simonelli recently went to work for Biker’s Choice and it’s a company constantly looking for opportunities to succeed. They continue to expand and James is working hard on the Twin Power line of products.
I built this bike a few years ago and enjoyed each element of the build. It was my first opportunity to work with Black Bike Wheels and installed the new 23s at the time. I also worked with Rick Krost and the Paughco team, who were building his US Choppers frames and several components. I also worked with Chica for the first time to build my rear fender. This bike slipped together like a dream.

I was digging the old board track notion from the ‘20s, although I wasn’t the first. Arlen Ness built vintage-styled bikes with sidecars around Sportster drivetrains. The master, Don Hotop build a Silent Gray Fellow more refined than any the Davidson and Harley team built — it was beautiful. The Shadley brothers built another example with a sidecar, which I proudly featured recently.
I was just one in a long line of masterful Hamster builders to take on the challenge. When the bike was completed and I slipped the key into Phil’s Speed Shop ignition box and fired it to life, it purred like a kitten. It was a beautiful thing and I appreciated all the help and guidance slipped my way to see this project through to fruition, including the hand-tooled seat by Glen Priddle in Australia. Some of my welds were not handsome, but I was proud to see this puppy finished, and then I went for a ride.
My first challenge was the handling and the two, seemingly giant Black Bike spoked 23-inch wheels and Avon Tyres. It felt odd, but then it popped and coughed at just about 30 mph and I thought it had to be jetting. I carefully tuned and ran an S&S super E for the classic styling and shorter reach sticking out the left side of the bike.
That’s one of the distinct reasons for a Crazy Horse, now American V-Plus engine. It fit in the realm of making a bike look truly old, especially with the carb leaning out between the cylinders on the left, like old flatheads. No matter how I jetted it, it wouldn’t run past 30 mph. Ultimately, I changed the carb for a Mikuni, and I switched out the original Crazy Horse Ignition for a reliable Compu-Fire. I switched coils. I changed the exhaust by removing the muffler. Nothing changed how it ran, and I moved on to the next project.

But obviously it bugged me and recently, when James pointed out the new Twin Power ignition product from Biker’s Choice and suggested an install, I jumped at one more chance to make this beauty come to life. James suggested I install it with Primo-Rivera advance weights, although Twin Power sells a kit.

“Try it in the dual fire mode,” James suggested. “You’ll like the exhaust note and the old school thumping idle.”
Back to the initial problem, I heard strange rumors regarding Crazy Horse engines, and struggles to make them run. John White bought a bunch of the Bottlecap engines when the Indian effort failed in Morgan Hill, California. With the engines in hand, he started Crazy Horse Engines. He was a big construction guy and hoped to build something from the stylized engines, and I agreed with his philosophy. The engines were magnificent, classic, 100-inch, and different.
The company is now American V-Plus and Irma Martin, out of Auburn, Washington, owns it. She is working with Frank Aliano to reintroduce these puppies to the aftermarket and custom world.
As a rider, Frank spent over ten years racing motorcycles in all types of environments, including motorcross, cross-country, scrambles, enduro, hill climb, TT, flat track, ice, and drag racing. As a builder, Frank’s custom and high power creations continue to be trophy winners around the country, with several featured in national magazines.
As a designer, Frank spent decades in engineering, fabrication, machining and product development for Indian Motorcycles, American Quantum Cycles, Big Dog Motorcycles, A&A Performance, Double Services, and more.

Frank designed the billet system to plug more tuneable and flexible Evo ignition systems onto a Crazy Horse and now V-Plus engine. I reached out to Frank, because my investigation steered me to Micah McCloskey and then to Keith Ruxton, who designed the Worlds Fastest motorcycle engines in 1990, two Shovelheads built by Micah. They took the Easyriders streamliner to 321 mph and the record for 16 years. I was a member of the team.
Keith suggested, since I have switched out the carb and ignition, that the breather gear was out of time. “It could be flooding the engine with oil and causing it to fail,” Keith said. And so I dug in during the process of switching out the ignition system to Biker’s Choice Twin Power.

The Twin Power electronic ignition from Biker’s Choice fits ‘70 – ‘99 Big Twin models and ‘71 – ‘03. The unit is entirely self-contained and fits under the original points cover. It can be wired single- or dual-fire, and the built-in timing light allows for easy timing.
Front to rear timing is accurate to 1-2 degrees. It is delivered with a one-year manufacturer’s limited warranty, and they are made in the USA.

Twin Power coils are high-quality direct fit with at least 20% more voltage than stock.
These coils improve starting, stop high-speed misfires, and increase mileage and overall performance.
They are available in black or chrome and carry a one-year manufacturer’s warranty.

I went to work digging into the cam cover of the V-Plus 100-inch engine. I removed the point cover, hand-engraved by Heather New in Canada, with the 5-Ball Racing mascot, and then I removed the Compu-Fire ignition system, the ignition cap and the first level of cam cover. Frank coached me on removing the final billet aluminum cover.


“You may not need to back off the pushrods,” Frank said, but I ended up backing them off for a couple of reasons, including ease of replacing the cap. It can be a bastard if you don’t.

“This plate has a gasket and is held in place with steel dowel pins,” Frank said and he was right. “Take a claw hammer and install a quarter/20 bolt with a couple of washers into the plate. Use the threaded hole closest to the cam. With the claw hammer, leverage against the cam and hook the bolt.”

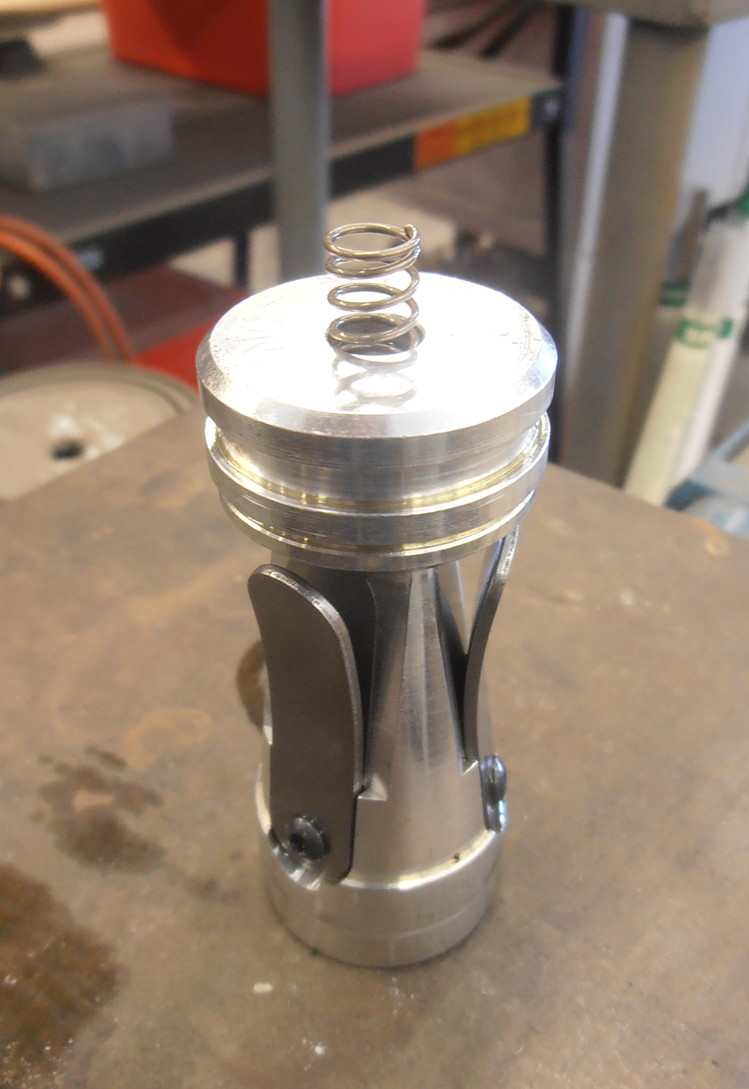

I readjusted the valves and looked for top dead center on the front cylinder with a massive tie-wrap. The tie-wrap cannot damage the sparkplug threads or any internal parts. Dominick, another master builder here in LA, suggested the tie-wrap.

“Once you have it at TDC, back it down 7/16-inch for about 30 degrees before top dead center, and your timing mark should show in the timing hole,” Dominick said. He was dead right. Worked like a champ. I grabbed a silver felt pen and was able to make marks to indicate TDC and 7/16-inch down. The timing mark popped right into the hole and I centered it by jacking up the bike and using the massive Black Bike wheel to move the engine in 4th gear.


Here are the Twin Power T/R #21-6500 ignition guidelines. They wanted me to rotate the motor until the front cylinder showed the fully advanced mark in the center of the timing hole, during the front cylinder compression stroke. Note: The compression stroke is evident when the both front valves are closed and you can rotate the pushrods with your fingers.
I installed the new ignition, keeping the rotor index hole in line with the light on the ignition, basically at 9:00. This system automatically runs in the single- or dual-fire mode, depending on how you wire the coil or coils. If it’s not in the 9:00 position, you’re on the wrong compression stroke. Rotate the engine again.

James recommended the dual-fire mode so I wired the Twin Power mini coil with the red wire heading to one lead and the black and white wires going to the other lead (it doesn’t matter which lead you chose on these coils). For single-fire coils, you need to run your hot wire and the red wire from the ignition system to the positive side of the coil, the white wire to one coil and finally, the black wire to the other coil.

This mini coil will afford more cooling space around it while it’s stashed between the heads. This coil doesn’t indicate a positive or negative lead position.

I ran the gray tube insulated wires out of the bottom of the cone cover and basically around the engine and up to the coil between the heads where many coils are located. I wish the insulation was black, and in hindsight I would have run shrink tubing over the gray sleeve for additional protection. I ended up extending the wires about a foot.
I also soldered a length of 14- or 16-gauge wire to pull the new wires through my existing loom. It worked like a champ to hide the new wires. I extended the wires, soldered them in place, using the Frank Kaisler soldering tool and his system for connecting wires, which can be a pain in the ass. He basically cuts and strips his wires and feeds one into the other for a direct connection, which also does not cause a lump in the wiring. It’s almost like shoving a key into a lock and it sometimes takes some maneuvering. That’s where his handy-dandy tool comes in.

Don’t forget to install the hot wire from your ignition switch to the hot side of the coil. You will need that power. I installed a new Twin Power Lithium Ion Battery while I was at it. What an amazing puppy.

This battery fit like it was meant to be. Most of these Twin Power Lithium Ion batteries were designed for stock applications, but we found just the right one for my situation.
Note: Use this ignition system with 3 to 5-Ohm coils.


After the coil was wired and actually before I completely installed the Twin Power ignition system, I installed the magnificent Rivera/Primo mechanical advance weights. I lubed the weight axles with some engine oil and slipped them into place over the cam and then slipped the billet aluminum rotor in place with timing magnets embedded into the cylinder. Be careful, the rotor only fits over the stem in one way. Note the position of the flat.


I repositioned the ignition plate and turned on the ignition switch. The red LED light lit up, and with a right angle punch I was able to push the rotor into the advanced position. It only moved about 20 degrees, if that. The light came on, indicating power to the coil and the ignition system. The key is to rotate the rotor counter-clockwise to the fully advanced position and have the light go out. As soon as you release the rotor, the light should come back on.
I always shoot for the exact link. I want it to light up at the exact point that the rotor moves. The coil and the spark plug fires the moment the LED light shuts off.
The timing procedure is exactly the same for both single- and dual-fire operations. The front and rear cylinders are internally timed and accurate to 1 degree.

That’s when life got interesting. The Redhead loaded up my 5-gallon gas can with premium and I poured a couple of cups in the tank and turned on the petcock. Nothing. I monkeyed with the carb. Nothing. Sometimes there can be a vacuum. I almost filled the tanks; still, nothing passed through the clear glass filter. I started at the carb and removed the line. Still nothing. I removed the line to the brass, inline petcock. No joy.
I could even looked down the mouth of the petcock and saw the large ball valve. I could see it turn and open. Nothing. If it had worked, my face would have been covered in gas. Then I attempted to remove the petcock.

I moved a large crescent wrench into position to back up turning the brass petcock and was immediately sprayed with gas. It was one of those strange moments in the life of a mechanic. Sure, it was a pain in the ass, but it always seems that stuff shows up at just the right time. The trick was to get all the fuel out of the tank so I could replace the split line, plus the petcock was clogged.

With the Redhead wearing protective purple gloves, we maneuvered large old fuel lines, funnels and the gas can to carefully remove all the fuel. I replace the split line (I have never, ever seen a line split like that). We removed the petcock and discovered what appeared to be a glazed layer above the ball valve. The redhead cleared it out with a short piece of brass rod and the fuel delivery system was replaced and fuel added. The 5-Ball factory racer fired right to life.
I spoke to Keith Ruxton the day before, and he told me that top end breathing engines, especially high performance engines don’t need breather valves, or even reed valves. I started looking at fuel delivery from the gas tank, which makes a lot of sense. I need to check to see that my fuel line will deliver 16 ounces of fuel in one minute, according to Dr. Ruxton. I removed the fuel line from the carb, stuck it in a measuring cup, checked my watch and turned on the petcock. It filled it to the 16-ounce mark in about 20 seconds. It wasn’t fuel delivery. So, I’m still not sure if my sputtering problem is solved.

I noticed one more item that needed to be addressed. When tightening the advance bolt, the rotator rubbed against the ignition plate, which would mess with the advance weight mechanism. First I took out the plate, because this cone was removable and if the Allens were loose it shifted around. I loosened them, shifted the system and retightened them. It was substantially better, but not perfect. This wouldn’t happen with a stock cone motor.
“The weights and the rotor have to be completely free to be able to advance,” said Ben Kudon, the Executive Director of Rivera-Primo

I reached out to James. “Here’s what you can do to Auto Advance units. Put a drop of blue Loctite on the advancer bolt and do not over-tighten. Spin the motor without the ignition in place and watch the rotation. If it is eccentric, take a small punch and give a tap on the flat of the hex head screw that will shift it to best center it, until it runs true. Please let me know, nothing should need to be modified. Occasionally, a shim is needed between the advance unit and the cam to shift the mechanism outward.”

“I am not familiar with the Indian cam cover, might be a little different from H-D. Does the plate fit nicely and rotate easily in the recess or is it tight? If this is tight, you may have to slightly sand or file the plate O.D.” That’s what I did until the rotor was centered. I also noticed the hex rubbing on the gasket. Again, this wouldn’t happen in stock applications. I cut a hole in the gasket and rotated the gasket to allow the 5-Ball Racing cap to set out slightly more. Done deal. James also suggest thin washers under the stand-outs, which would accomplish the same thing.

I took the bike for a ride. Over and over it fired right to life and hummed, but again is sputtered. I called Phil at Phil’s Speed shop late at night. He was still working. “It could be the cam timing,” said Phil. “They may have switched the gear for a better pinion shaft mesh and since there is no direct key-way to align the cam, it could have shifted.”
I’ll pull the cam today and take it to Bennitt’s Performance or Branch Flowmetrics to have it checked. Never give up!

Biker’s Choice
Paughco
Rivera/Primo
Black Bike Wheels
Chica
US Choppers
Rick@USChoppers.com
Phil’s Speed Shop
941 West Collins, Orange CA 92867
Appointment (714) 771-6727
Avon Tyres
New Line Engraving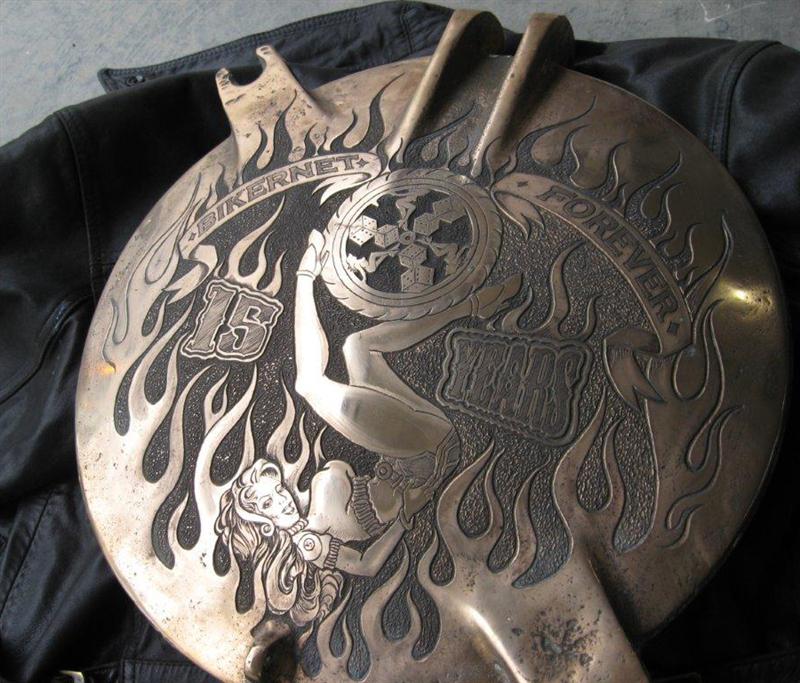
Timbo’s ’64 FL Restoration (Part Five)
By Robin Technologies |
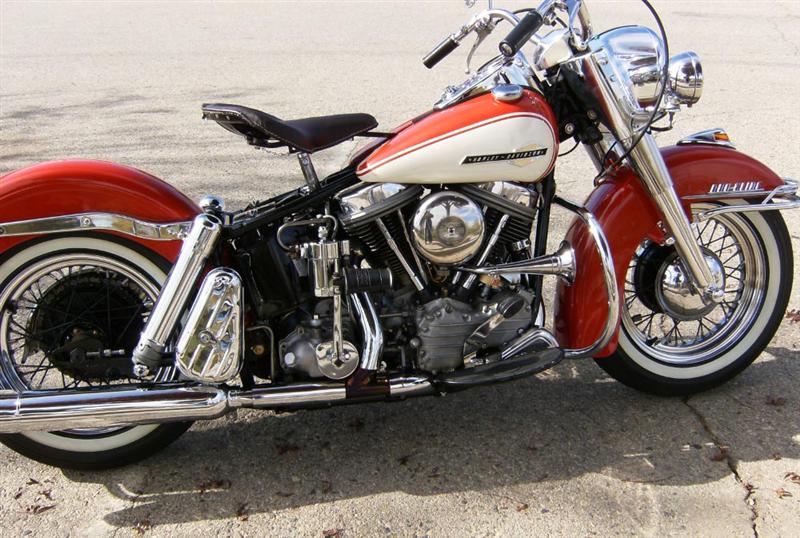
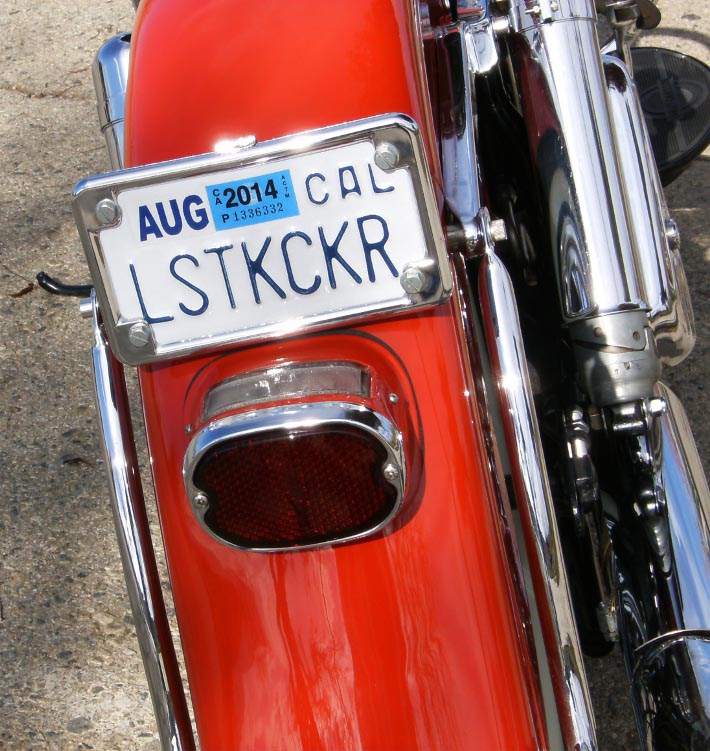
Well here she is, finally complete and out for her last shake down run. We stopped at a scenic area and shot a few pictures before I have to hand her over to the owner, Tim. 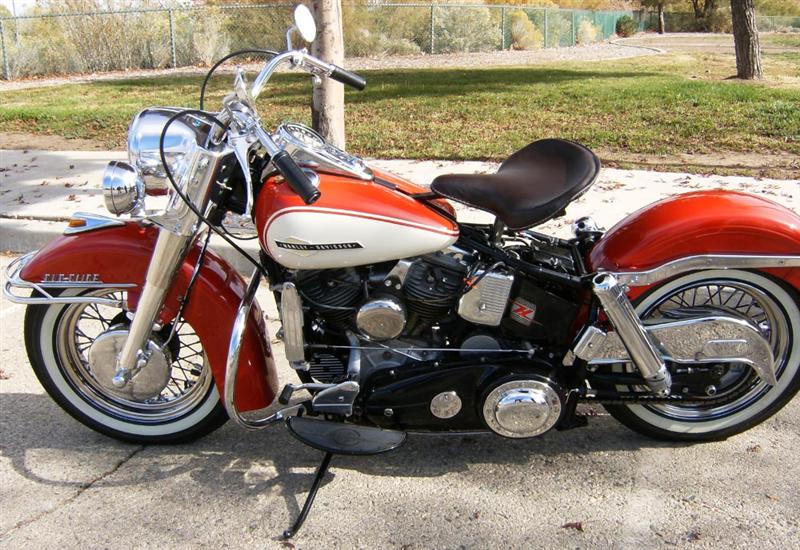
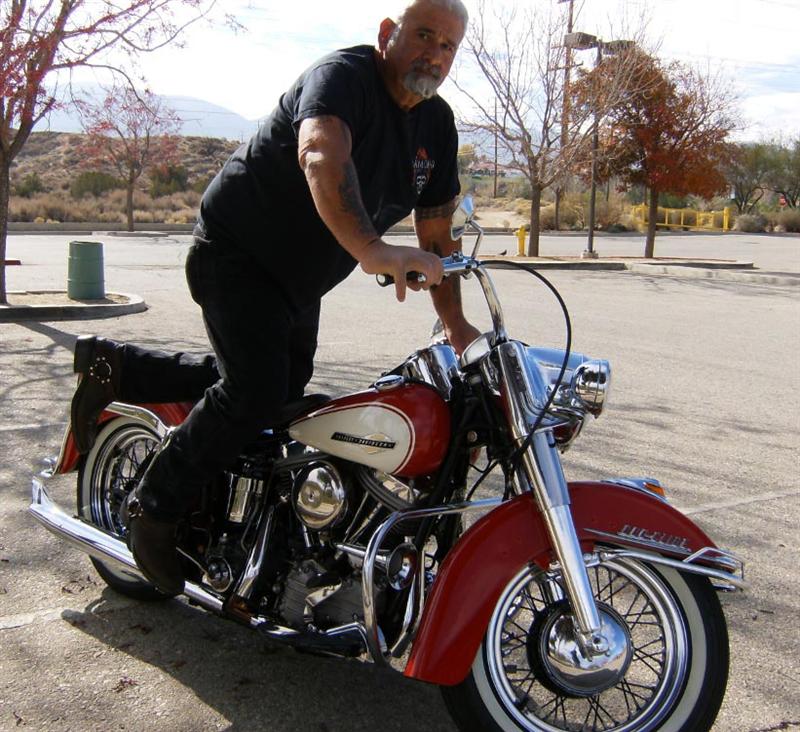
Riding the Pan is an art form in itself. The steering is spot on; it will turn on a dime! The suspension is wonderful for the age of the bike. It floats along better than most modern Harleys. The only thing I can’t get use to yet is the pogo seat, feels like it wants to buck you off sometimes.
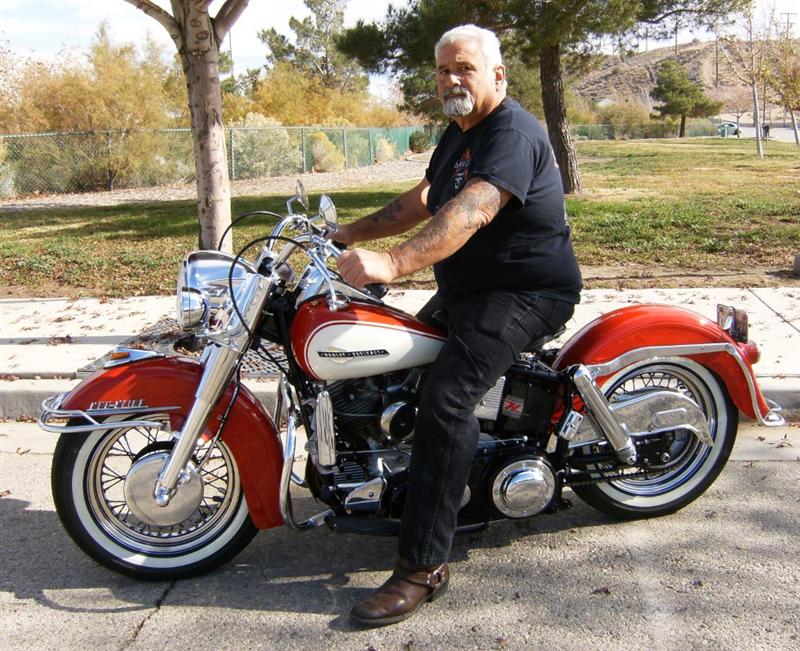
On the way back from our ride, I noticed a loud noise as I pulled to the stoplight. It’s Sal, yelling at me to slow down, YOUR DOING 85!!
If you followed the articles from the past year and a half, you know that hundreds of man-hours and a little mega money went into this restoration. And I loved every minute of it!
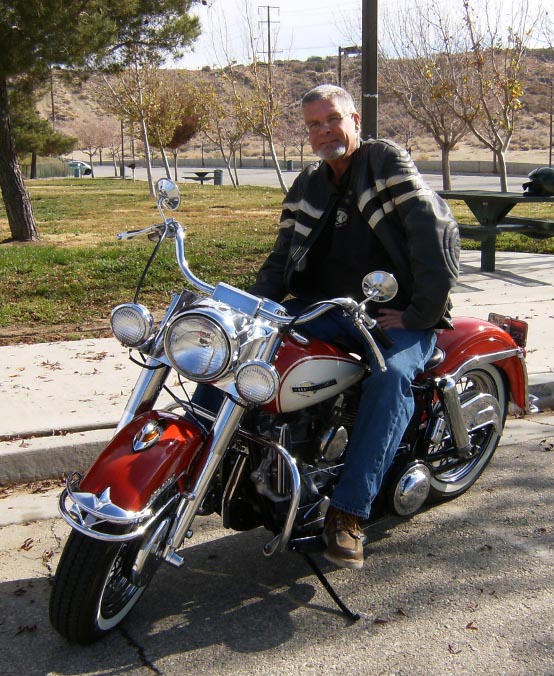
Enjoy the photos, and stay tuned next month when I start another restoration. This time a 1966 Shovelhead, Police special. Here’s a sneak peak!
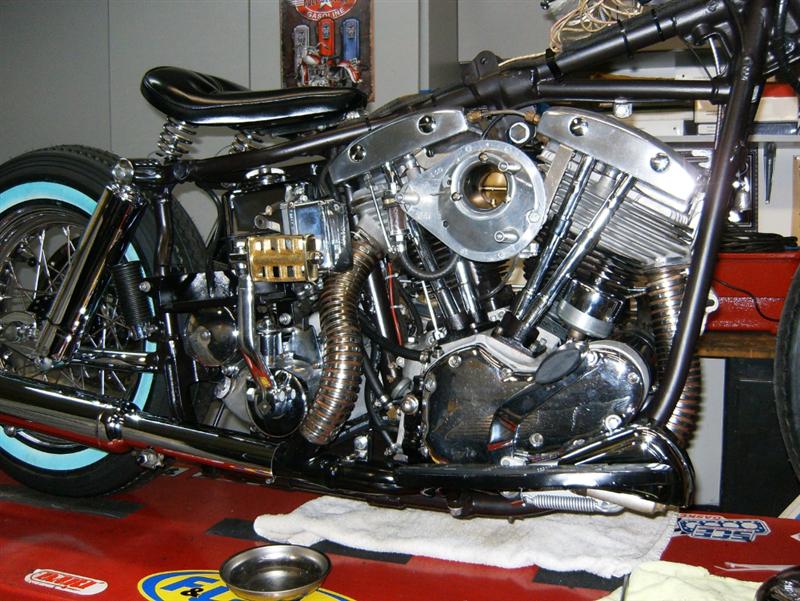
–Tail Gunner out till next month.
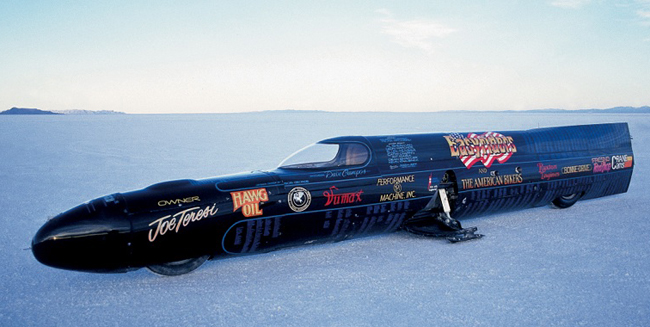
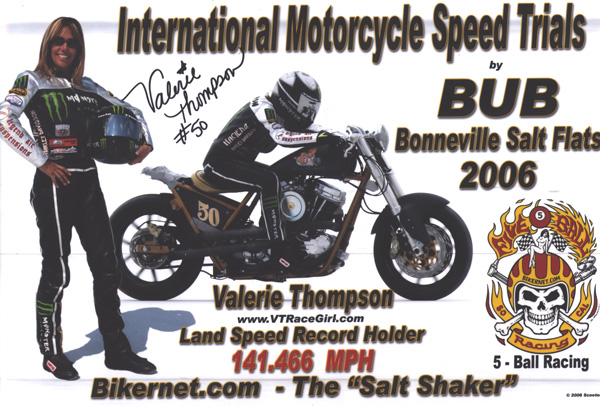
What the Hell is 5-Ball Racing?
By Robin Technologies |





Rebirth of an American Classic: Case Repairs
By Robin Technologies |



|
|
|||
|
|
|||
|
|
|||
|
|
|
Rebirth of an American Classic: Transmission Rebuild
By Robin Technologies |
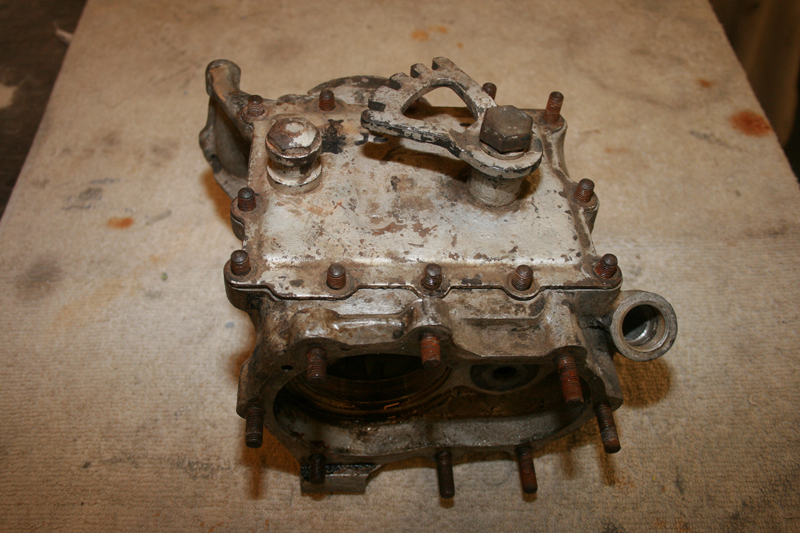
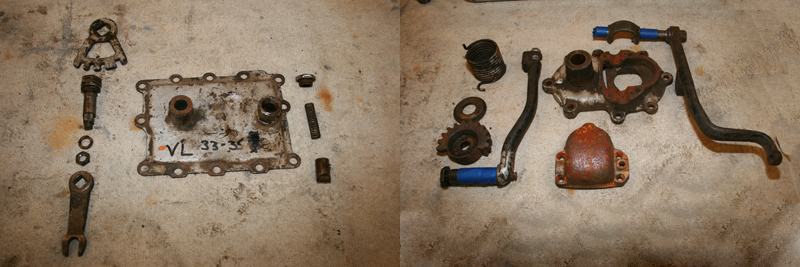
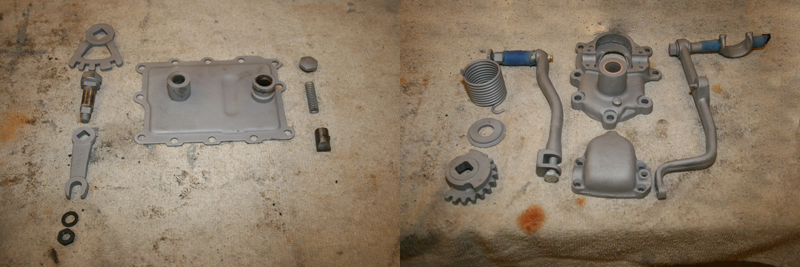
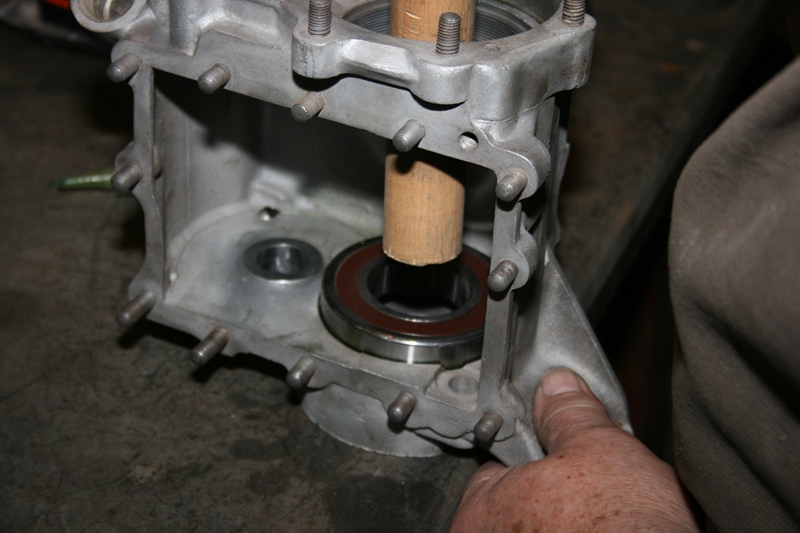
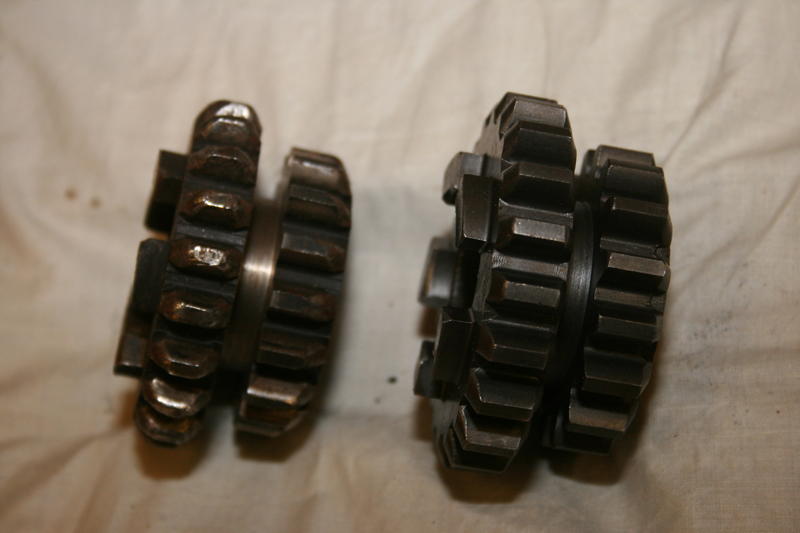
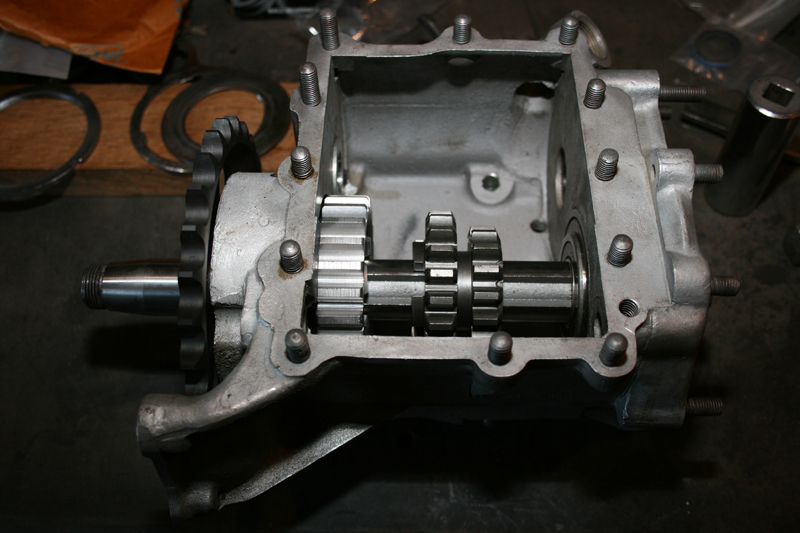
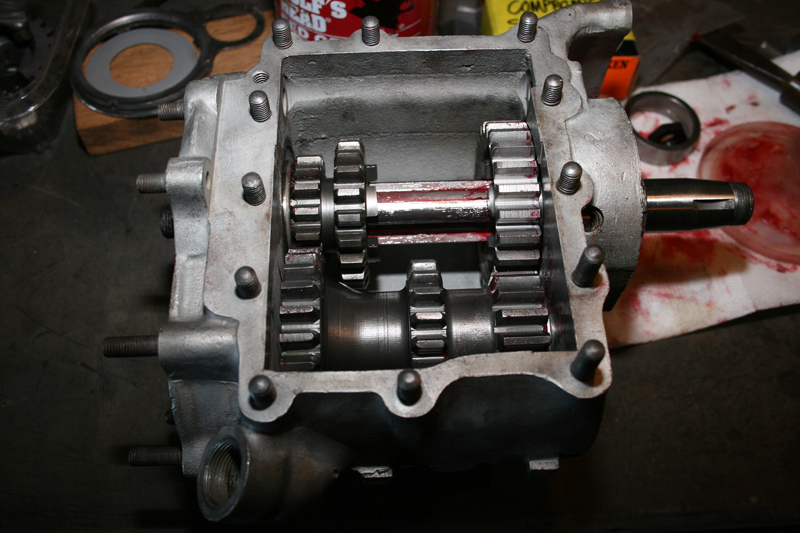
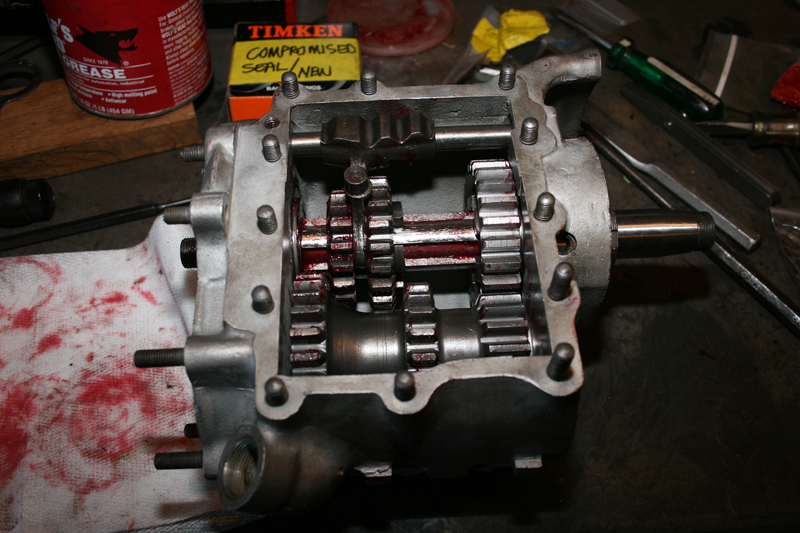
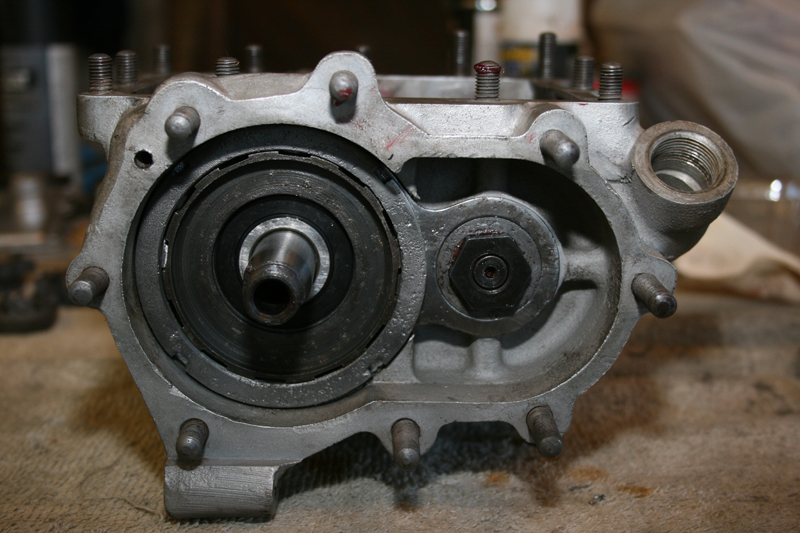
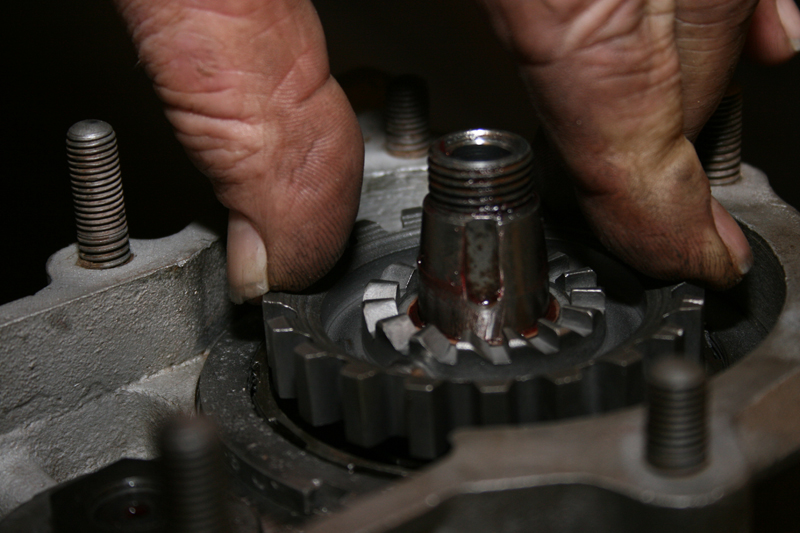
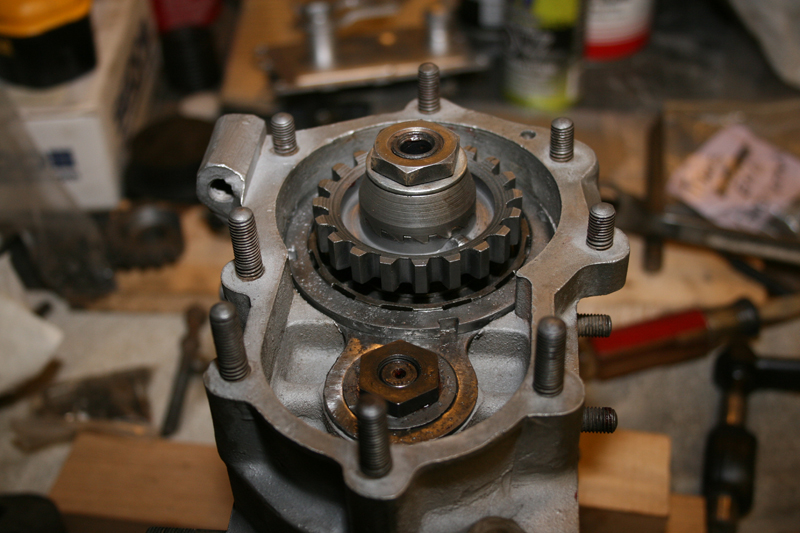
We have already gained the support of many of the top compaines in the vintage motorcycle industry. If you would like to see your company’s logo included not only on the motorcycle, but also on every article, please contact me directly to learn more about our marketing campaign and advertising opportunities. EMAIL
|
|
|||
|
|
|
||
|
|
|
|
|
|
|
|
|
|
|
|
|
|
|
|
|
|
|
|
THE CHOPPER OF CHOPPERS FOR SALE
By Robin Technologies |

This bike represents an upbeat era when choppers were kings and the Discovery Channel made it so.
We are going to attempt to tell the story of the bike, the shows, and the esteemed owner, Hugh “The Chopper” King, the producer/director.

Hugh actually worked for Easyriders, as the video editor/director, while I watched over the magazines. But he moved on to Original Productions. Motorcycle Mania was the first motorcycle show and I got a call. “Who should I recommend?” Dave Nichols asked. I said Jesse James, and the rest is history.
“Tom Beers, the boss of Original Productions, came to me,” Hugh said. “He asked me if I knew anything about motorcycles, and I said I knew everything about motorcycles, which of course I didn’t.”

“I had worked for one year at Easyriders, “Hugh continued, “doing Easyriders home videos, back when Keith Ball was the editor. These videos really captured the hard core, get down, biker lifestyle. So when Discovery came to us about a custom Harley show, I was all over it.”
The industry started flying and the ratings for these shows went through the roof. During filming at an Easyriders granddaddy bike show in Columbus, the Discovery Channel guys interviewed me and they asked what sorta chopper show I would suggest.


“Roger built his beautiful machine in honor of his daughter,” said Hugh, “who was killed on a motorcycle on the previous New Year’s Eve. It was very moving. His bikes are mean, man, and they run. The guys rode like bats out of hell, at over 100 mph a lot of the time, from Florida to North Carolina. At one point, Billy hit a big pothole, and flew so high into the air I thought we were going to lose him. That episode was really well received, which was enough for Discovery to order four more, and then seven after that, and 11 after that. There were a total of 44 Biker Build-offs.”

Hugh and I talked from time to time during the seasons. The flurry of action was high and the drive-by builders to be celebrities flew over the top. I remember riding my 2003 Road King to the Laughlin River Run. Hugh invited me to, I believe, the unveiling of this bike, but as usual, I got lost with a girl in the desert and never made it. While at Hot Bike, I attended with my crew one of the season finales to celebrate the builders and their accomplishment. The King presided over the festivities.


This chopper may end up on eBay, but if you’re seriously interested reach out to Hugh King at: hughk16@gmail.com.

