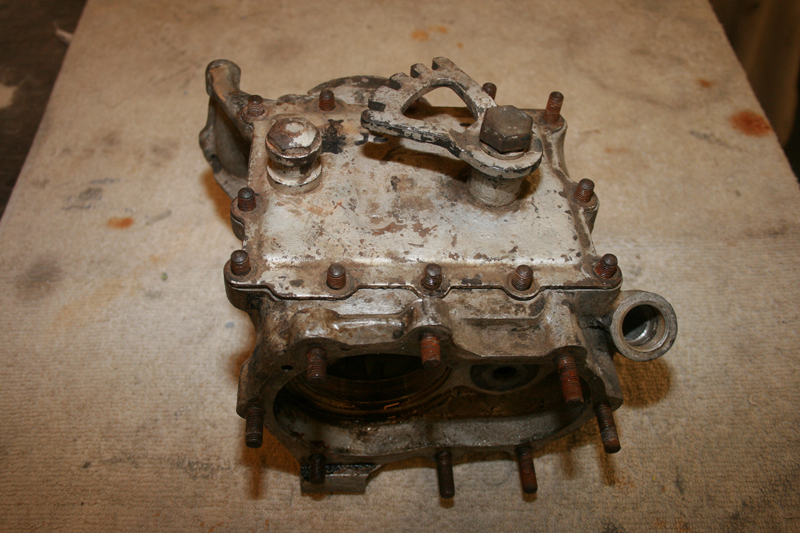
My 3-speed transmission started out very similar to my engine, an empty case and a pile of parts, all in need of cleaning. So the first step was to break everything down into individual pieces and perform a thorough inspection of each piece, to see which parts just needed cleaning and which parts needed repairs or replacement.
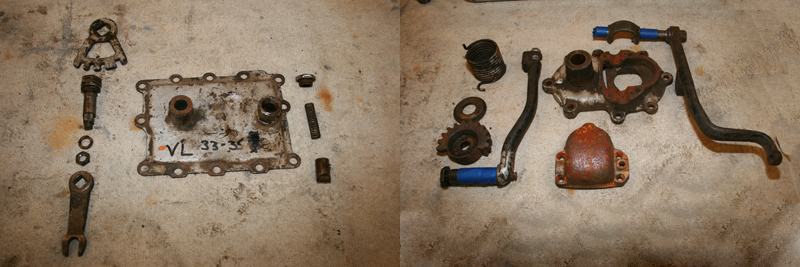
Luckily most of the parts were in good shape, even the transmission studs, so everything was put into the blasting cabinet. It’s always important to note that you don’t want to blast bearing surfaces and fine threads, so these areas need to be covered before the part goes into the blast cabinet. After a couple of hours of blasting, the results speak for themselves.
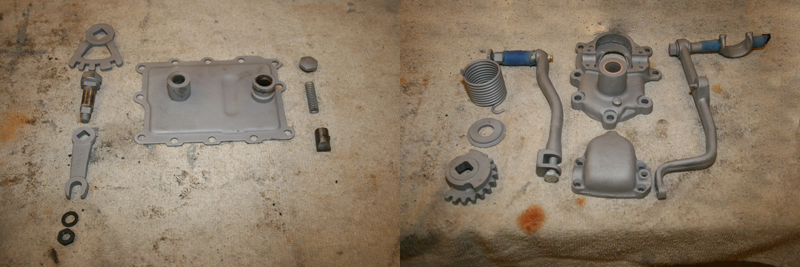
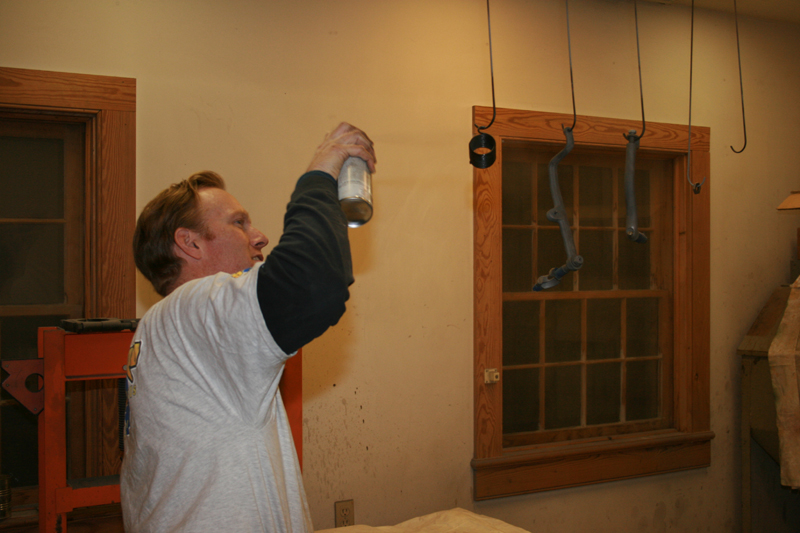
Next a coat of paint was sprayed on all the external parts (except the case). Some parts were Cadmium plated from the factory, but a layer of silver paint was a quick way to approximate the original finish.
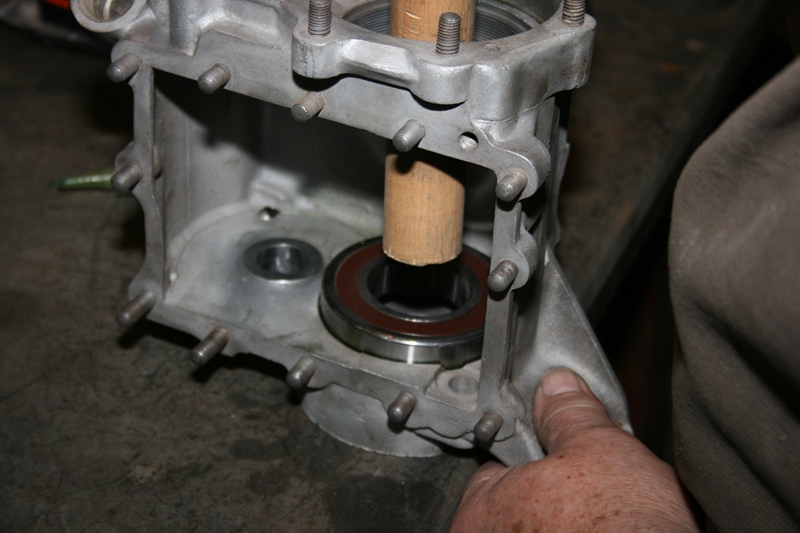
While the paint was left to dry, work began on assembling the internal components of the transmission. I decided to upgrade the mainshaft bearings to sealed units which are available from Replicant Metals (www.replicantmetals.com). Using sealed bearings helps to eliminate fluid leaks, which is always a worthwhile improvement. In order to install the new bearings, the case was carefully heated with a torch to expand the opening while the bearings were placed in the snow to contract. Once the case was hot, the bearing was quickly dropped in and tapped into place with a wooden dowel.
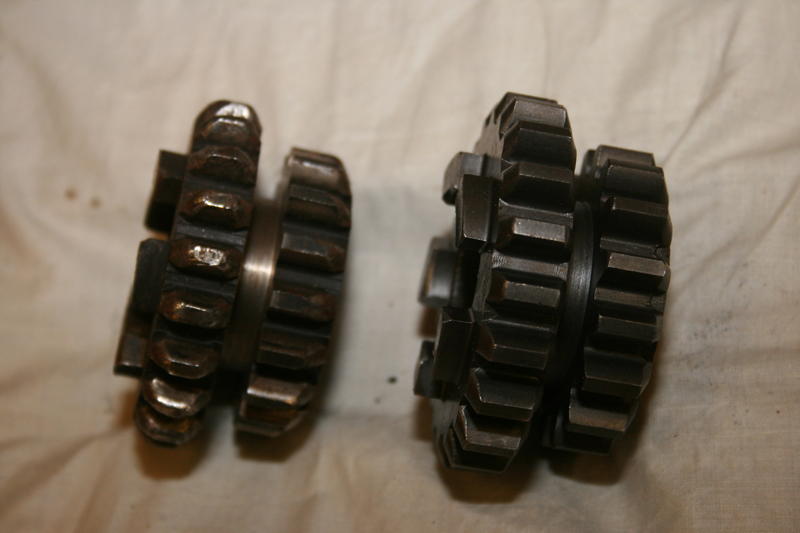
Both my countershaft and mainshaft were well worn, so I replaced them with new units from Eastern Motorcycle Parts (www.easternmotorcycleparts.com). My slider gear was in terrible shape too and was replaced with a new unit from Eastern as well. Here’s a side by side photo of my original slider gear and the Eastern replacement. Definitely is big improvement!
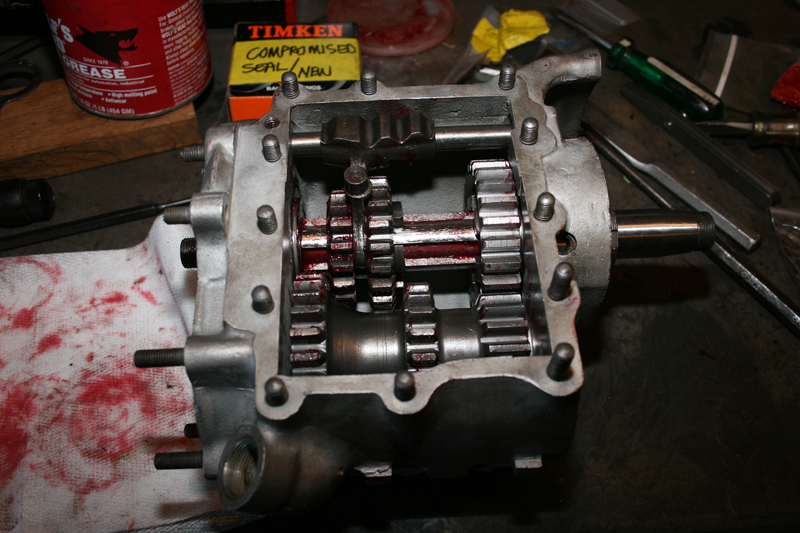
Assembly was very straight forward, the mainshaft was slid partially into the case, allowing room for the main drive gear and slider gear to be installed, before the mainshaft was slid the rest of the way through the case.
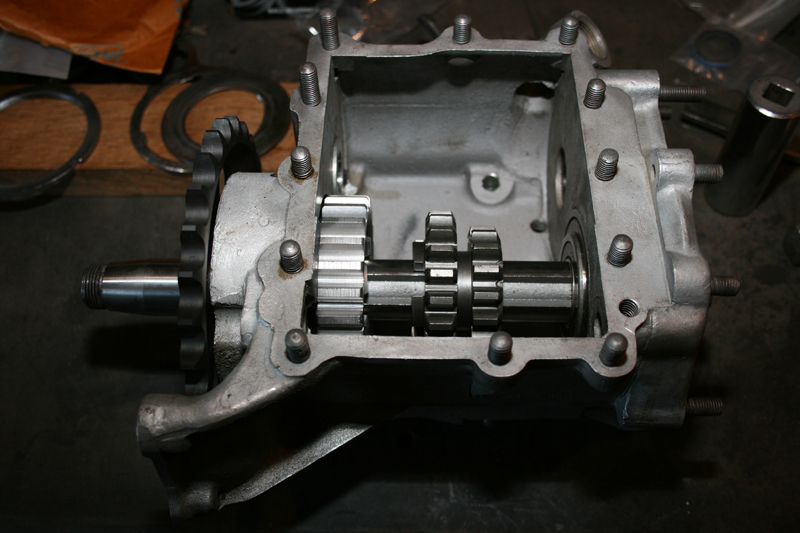
Next new bearings were installed inside the cluster gear and it was held inside the transmission case while the countershaft was pushed through it. Lots of red grease was used for this step, not only to lube the new bearings, but to hold them in place as some of them rode loose inside the cluster gear.
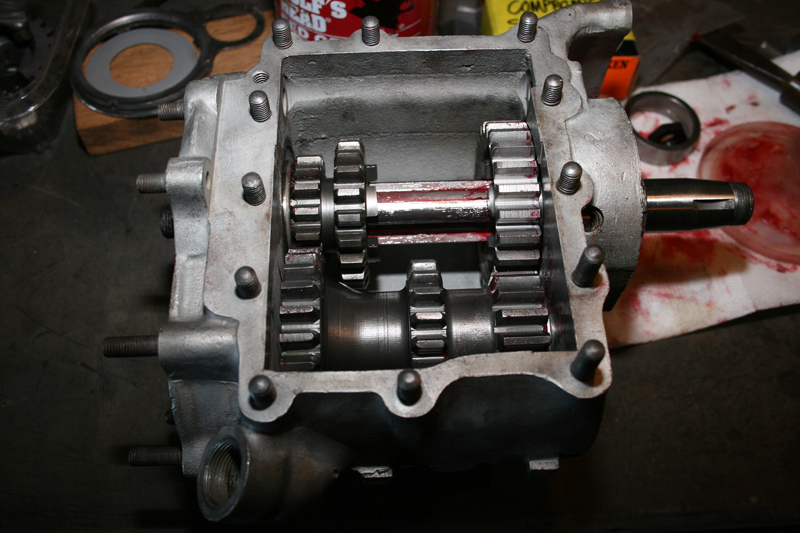
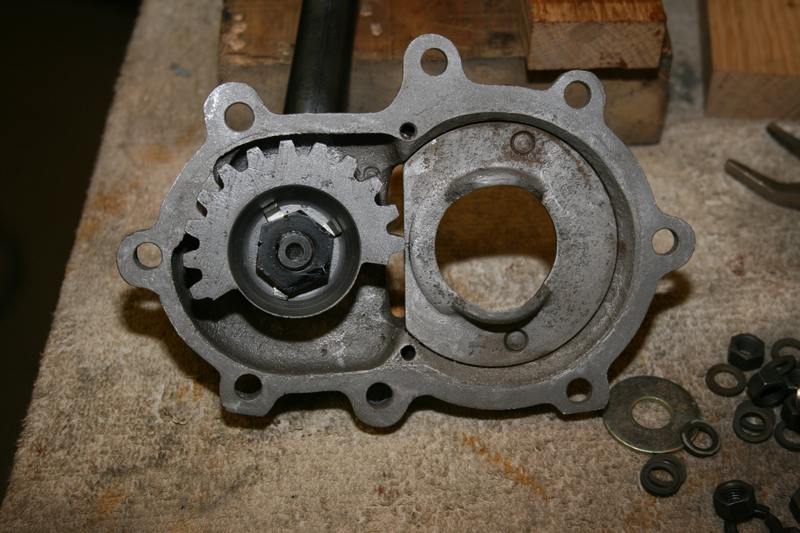
The last thing to install inside the case was the shift fork assembly. The shift fork attaches to the center of the slider gear and slides back and forth on its own shaft. An arm in the transmission lid moves the shift fork, which in turn moves the slider gear and engages it with the selected gear on the gear cluster.
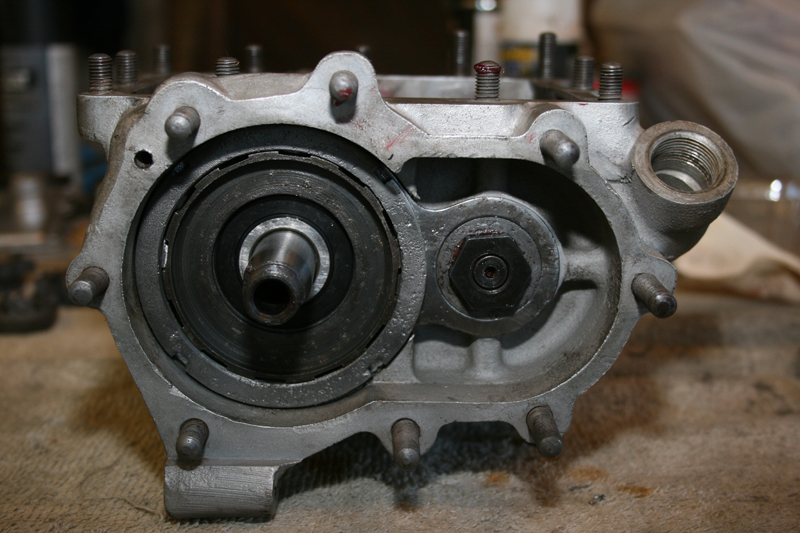
With the internals finished, work began on the kicker assembly. Using a special lock ring, both the mainshaft and countershaft were secured on the right side of the transmission before the kicker parts were added to the mainshaft.
Assembling the parts on the mainshaft was a two man job as there was a spring which had to be compressed while two keys are installed in the end of the mainshaft.
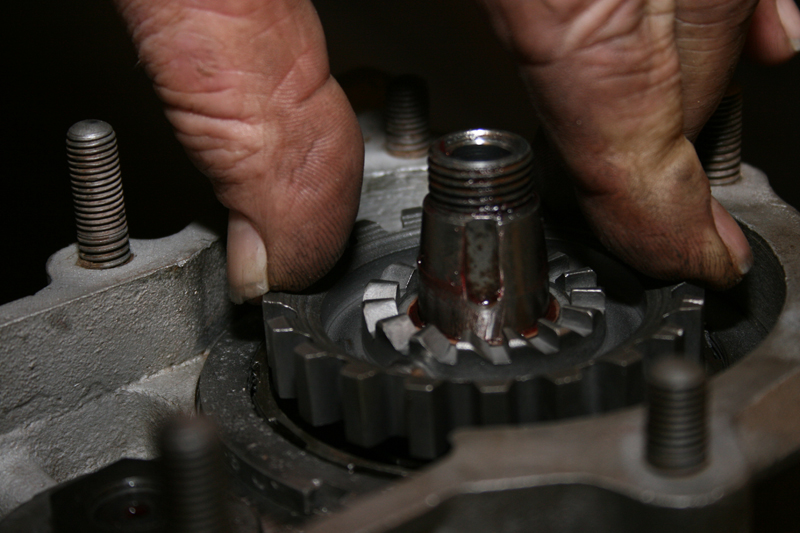
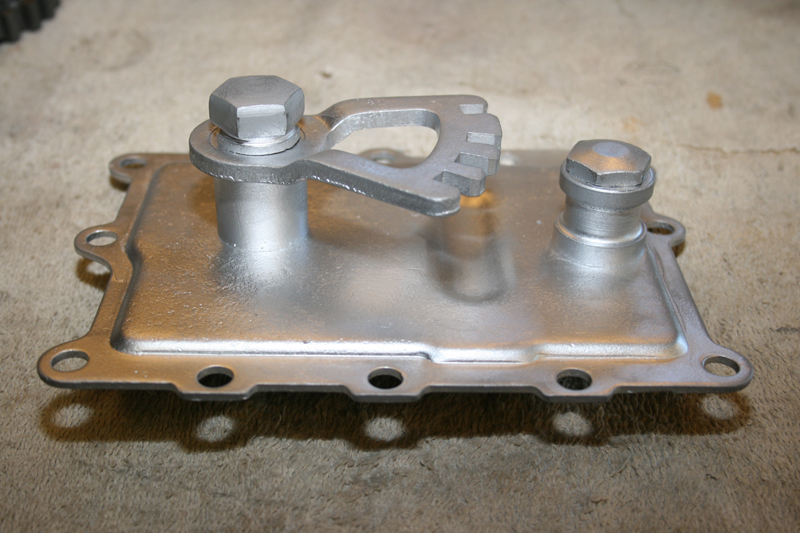
Once everything was stacked onto the mainshaft, a nut and washer was installed to hold the whole assembly in place. The following photo shows the assembly ready for the kicker cover to be installed.
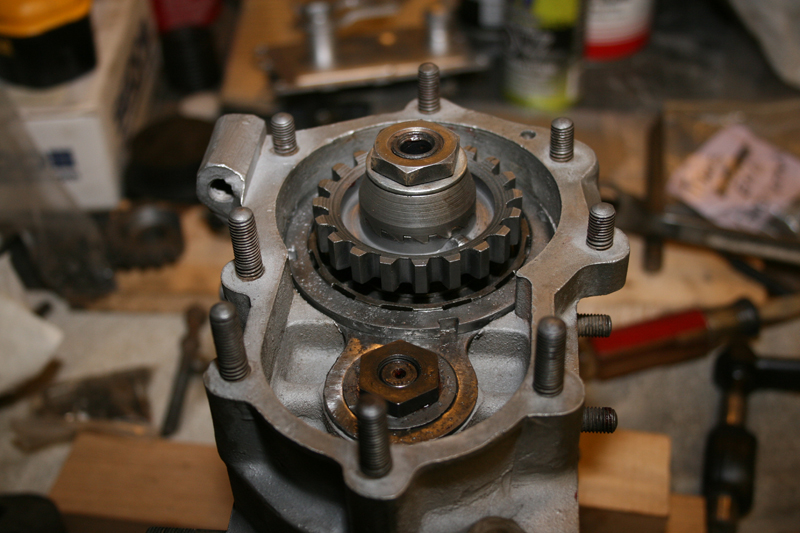
Inside the kicker cover and attached to the end of the kicker arm is a half gear which meshes with the kicker gear that was just installed on the end of the mainshaft. This half gear turns the mainshaft when you kick down on the kicker pedal.
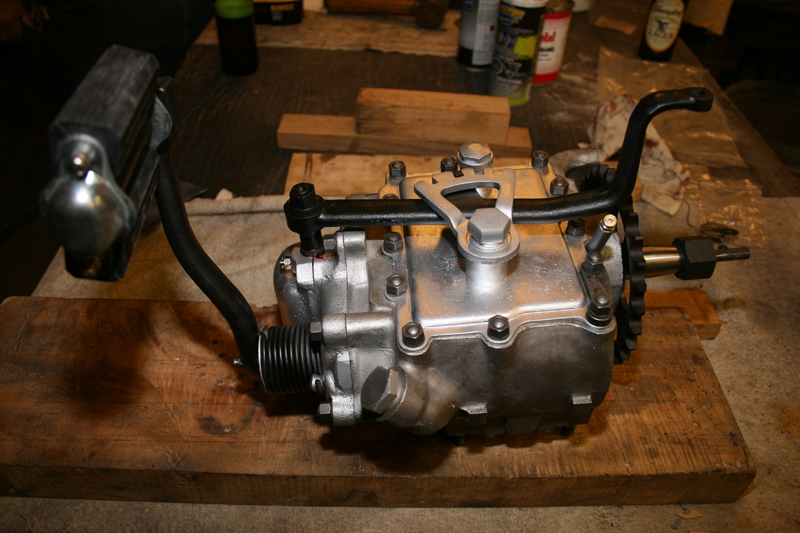
A paper gasket and a handful of washers and nuts was all that was needed to complete the kicker installation. There was a little bit of work left to assemble the transmission lid and it was soon bolted onto the top of case.
A couple of new grease fittings finished off the build and we were left with a great looking transmission.
Editors Note:
If you would like to contribute to the completion of this bike please use the link below.
This project started on Black Friday of 2013 with just a set of engine cases and will end with a complete 1933 Harley-Davidson VL making a cross country run in the fall of 2014. Already a great deal of progress has been made on the restoration of this motorcycle, but more funding is needed to see this project through to the end.
Additional articles will continue throughout the remainder of this build and will result in a complete digital archive which takes the reader through the restoration of a 1933 Harley-Davidson, step by step. By making this information available freely online, future vintage motorcycle enthusiasts will be able to rebuild and maintain these great machines.
We have already gained the support of many of the top compaines in the vintage motorcycle industry. If you would like to see your company’s logo included not only on the motorcycle, but also on every article, please contact me directly to learn more about our marketing campaign and advertising opportunities. EMAIL
Sponsored By
 |
 |
 |
 |
|
|
 |
 |
|
 |
 |
 |
 |
 |
 |
 |
 |
 |
 |
 |
 |
 |
 |
|
|
Please follow and like us: