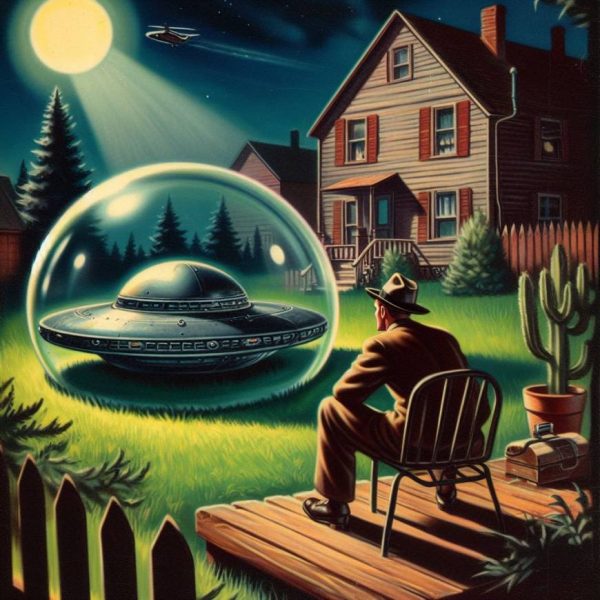
General Posts

Doug Coffey’s RetroMod Panhead Part 3

  I needed an oil tank for this build that would be rather unique. It had to hold a full size battery from a late model electric start Dyna or Softail as my large high compression stroker motor would need all the starting power it could get. It had to completely hide the battery because I didn’t want any of it to protrude above the frame rails and it had to hold lots of oil.
My preference was round oil tanks so I started looking for cylinder like containers to see what size might fit.
After testing a variety of ice cream containers and my wife’s Tupperware I found a one gallon paint can to be perfect. (once I cut the bottom out to clear the electric starter)       The first step in  making the oil tank was to fabricate a battery box. I used some 14 gauge sheet metal and bent one up on my brake and then welded in the sides. The batteries I use are the late sealed type so they can be placed in any position. This one was going to lay in at an angle to miss the electric starter.   With the battery box out of the way I used some more 14 gauge sheet metal and rolled up the tank on my 3 roll machine.       I cut a rectangular piece out of the tank shell and welded the batter box inside the tank. Now you can see why I wanted such a big tank, that battery box displaces a lot of oil holding capacity.       The under side of the tank had to be notched for electric starter clearance.     With the oil tank shell part taken care of it was time to make some tank ends. […]

Doug Coffey’s RetroMod Panhead Part 3 Read More »

Bennett’s Performance Dyna Build, Part Two

It took a while before the call shook the receiver on the wall.   “We’re ready, finally to move onto the next stage,” Eric said, and I slipped across congested Long Beach on Pacific Coast Highway to the base of Signal Hill, where the clean offices of Bennett’s Performance and Branch O’Keefe reside in an alley.   There’s a bit of a dichotomy here. When you say Pacific Coast Highway, you immediately have visions of the sea splashing against white sand. That’s not the case when PCH skirts through the Los Angeles Harbor area behind container ships, container trucks, and container trains Terminal Island and through the concrete jungle of Long Beach packed with steel supply joints, body shops, junk yards, stucco Mexican fast food joints, and dingy bars. Sure, once you weave south of Long Beach, the coast comes into view again and islands, marinas, and white sand can one again be seen. Sorta the same equation in reverse fits Bennett’s. They are located on an alley, but it’s about as clean and wide as a comfortable two-lanner, and the buildings are pristine and orderly. Hell, there’s even some landscaping bordering the buildings. Eric and his dad keep the shop tidy and it’s open and painted white on the interior and the exterior. Makes it easy to take tech shots. So we got to work. Eric hadn’t ridden his own motorcycle in six months, broke up with his girlfriend three times, and needed his two-wheeled Valium. Working with D&D, they altered a stock D&D system to fit ’91 to ’13 Dynas. The heat shield was modified and the system was ceramic-coated for a long-lasting satin black. He also had to modify the mounting bracket for the performance pipe system. Eric is going to share his mods with the D&D

Bennett’s Performance Dyna Build, Part Two Read More »

Mudflap Girl FXR Part 13 New Paint and More

Here’s the link to Part 12: http://www.bikernet.com/pages/Mudflap_Girl_FXR_Part_12She_meets_SS.aspx Okay, so my Mudflap Girl FXR was running fine and I enjoyed every ride with the bare chassis, but I got a hair to treat the frame and powder coat some parts, but the corrosion treatment made the frame look almost black, and I didn’t want to build another black motorcycle. I also had some tech obligations. I needed to test the new Centramatic wheel balancers. I needed to install new Spitfire rocker axles in the girders and tack weld them into place. Then the bros at Digital Dawg contacted us and told us about their new keyless ignition. Suddenly I was inspired. I had installed a marine ignition switch in the backbone of the frame, and Saddlemen carefully made me a seat that fit, but reaching in to install the key was a pain in the ass. I started to work with Bruce McKinley from Digital Dawg, and the keyless system made more and more sense. One day, under the spicy effects from drinking RedBall Whiskey, I decided to tear the bike down to the ground, finish the final TIG welds, and then powder coat the frame and Spitfire Girder front end. I tore the whole damn thing to the ground, and then discovered that I still needed to build a front fender. For some reason that seemed a daunting project, but ultimately I cut a slice of Bare Knuckles heavy-duty fender blank and went to work. With the help of our certified welder, and master metal fabricator, Tobey, we came up with the perfect fender. I cut and shaped the fender brackets and tacked them into place. He performed all the final welds. Then all the parts were shipped to Worco Powder for heavy silver and asphalt satin black.    

Mudflap Girl FXR Part 13 New Paint and More Read More »

Timbo’s ’64FL Panhead Part 3, Engine

After the engine was removed from the frame, I mounted it on an engine stand and clamped it to a work mate. This worked perfect, as I have limited working space due to all my daunting, ongoing projects.   I got lucky with this engine, as I later found out it had recently been rebuilt and had just .010 over in the bore. However, the rocker covers were both leaking and the front head gasket blew. This was a perfect time to for a complete top end job. I planned to replace all the old leaking OEM gaskets with state of the art new gaskets and seals, and check all the tolerances, while looking for any potential problems. Tear down was straight forward, first I removed the carburetor, followed by the oil pump, gear drive housing, push rods, tappet blocks, rocker covers, heads and barrels. After the barrels have been removed, place a couple of shop towels around the connecting rods to keep debris from falling into the crankcase. I carefully cleaned all old gasket material from all the mounting surfaces. I ended up using razor blades and plastic scrapers. Be careful not to gouge any mating surfaces as you scrap. Any abrasion could create a leak if the gouge is deep enough. I also rebuilt the generator at this time, which included new brushes and a new paint job.     You can follow the generator instructions in the manual. It’s extensive and takes patience, but not overwhelming. I just hope it works, as a new costs around $400! Ouch! I also found “Rene “at National Starter in Lancaster, California. He Put the 6v through its paces to make sure we have a strong working unit, Thanks Rene!! The old mechanical voltage regulator was replaced with a new solid

Timbo’s ’64FL Panhead Part 3, Engine Read More »

Sturgis Shovel Gets A Wrap

  The Sturgis Shovel has seen its share of LA Harbor town back alleys in the eight years of pounding the streets around Wilmington, California. The exhaust is really starting to show the effects of the road and weather. Originally these hand fabricated pipes were painted with barbeque paint found lying around the Bikernet Intergalactic Headquarters. Surface rust was starting to take hold, and I really needed to do something about it. The Sturgis Shovel was built to be a “Take no crap, back alley brawler,” so shiny powder coating or chrome just wasn’t going to cut it. I had to research my options and come up with a quick and simple, yet great looking backyard solution to my problem.   I decided I would sand the pipes down to bare metal and spray them with VHT High Temp, Flat Black Exhaust Paint. Then I contacted J&P Cycles for a 50-foot roll of Design Engineering Inc., 2-inch Titanium Exhaust wrap and called it a day.     Once you have the pipes removed from the bike, getting the rust and old paint off is the first step. How you go about this is completely up to you, send them out for media blasting, grab your DA sander and some 120 grit, or do what I did, just pull up a lawn chair, with some 120 grit sandpaper and go to it. How you get to bare metal isn’t important, but getting there is, if you want a good looking final product.   Now, we were ready for painting or so we thought. Before you get your spray cans out make sure to degrease the freshly sanded metal with either a metal prep or lacquer thinner. There are a lot of high heat exhaust paints out there and you can use

Sturgis Shovel Gets A Wrap Read More »

1964 Pan Head part 4 (frame)

Well, here we are, past the point of no return. In this chapter I cover the reassembly of the 1964FL restoration. I have been working on this classic for the past nine months. I know it says frame above, but the frame was bone stock, no dings, or mods. The customer requested paint over powder, so off it went. We sandblasted it clean, checked for cracks, magna-fluxed the frame for imperfections, and checked all dimensions for tweaks. This puppy was straight. With new neck bearings and cups from J&P the frame flew back together. We cleaned the paint off the engine and transmission mounts and went to work. Assembly was straight forward, almost the reverse of the disassembly. Engine goes in first, followed by the transmission.   Primary with belt drive is next. However before the inner primary goes on, make sure you hook up the shift linkage, otherwise there’s not enough room to install the pin and cotter pin. After the linkage and inner primary are on, you can install the main shaft pulley and belt drive clutch. Loosen the transmission and adjust it all the way forward to ease the belt installation. After the belt is on, adjust the transmission rearward to achieve the proper belt tension.   I figured this was a good time to install the rear wheel and chain, making sure the proper alignment and chain tension are acquired. Oil tank and lines were next on my agenda. I opted for a more modern spin on oil filter adapter, it looks nice and makes oil changes a snap. I kept the original oil filter that was polished just in case the owner wants to go all original some day. The front forks have been completely rebuilt with all new modern seals, I had them polished

1964 Pan Head part 4 (frame) Read More »

Mudflap Girl FXRs Build, part 9

Here’s a link to the last chapter: http://www.bikernet.com/pages/Mudflap_Girl_FXRs_Part_8_Wiring_World.aspx What a year, and we’re cranking on so many two-wheeled fronts. Both Mudflap Girl bikes are running and one is in the wind, but I’d better back up. You’re going to love this tech, and the ending. I took the Mudflap Girl bike to Saddlemen during the holidays, at just the wrong time. They faced the holiday schedule, then dealer shows, including the Easyriders V-twin show, then Daytona, before the dust settled and the shop was calm enough to focus on a couple of custom seats. Sure, the economy sucks, but you wouldn’t know it if you stumbled into their brick manufacturing facility in a Los Angles industrial community. The shop is cooking, building twice as many seats as last year, and adding 420 new seat part numbers. Tom Seymour, his partner, Dave Echert, and Avery Innis have stepped into the luggage arena for touring bikes, cruisers, and sport bikes. They designed a line of bag inserts, sissybar pads, tank and fender trim, you name it. If you’re going for a long ride, they have the product for you. That’s just the tip of the chrome and leather iceberg. The Saddlemen team will attend 78 shows, and events this year, from Sturgis to flat track racing, with the marketing director, Ron Benfield in the lead. The family atmosphere in their facility started to impress me after a couple of visits. I met 25-year team members and their sons and cousins. In fact, Avery kindly took a liking to an old Bikernet buddy, Buster Cates, and offered him a position on the team. Buster owns and rides our Shrunken FXR to work every day. Let’s cut to the seat-building chase. The Saddlemen team turned motorcycle seats into an engineered art form. They don’t

Mudflap Girl FXRs Build, part 9 Read More »

Bennett’s Performance 2004 Dyna Build 106-Incher

Eric Bennett grabbed the shop door chain and hoisted the roll up door for the first time, in 2000. He started his mechanical career as a certified diesel mechanic with 60-weight always flowing through his blood stream. Finally, he gave into his entrepreneurial spirit and his desire to make motorcycles his life—he opened his own shop on Signal Hill. The rest is motorcycle history, much of it spent at the Bonneville Salt Flats with his dad, Bob. S&S JIMS Branch O’Keefe      

Bennett’s Performance 2004 Dyna Build 106-Incher Read More »

Bikernet/Cycle Source Sweeps Build, Part 3, Sponsored by Xpress

Hang onto your asses. This is going to rock your boat, or your solo seat springs. We are building a bike just for you. That’s right. A Cycle Source or Bikernet reader will own this one-off custom at the end of this year. No, I’m not kidding. This world-class team of builders, lead by Prince Najar, the vast and all-powerful organizer is headed-up by builder/designer Gary Maurer of Kustoms Inc, and Ron Harris of Chop Docs. We have the Texas Bike Works frame, the magnificent Crazy Horse 100-inch engine, and Jules, of Kustoms Inc. hand-made an oil tank. This issue we welcomed another state of the chrome-arts team into the fray, 3Guyz, a manufacturing shop capable of anything. They work out of a former aerospace manufacturing facility in Hillsboro, Oregon. Their mantra is as follows: Providing specialized customizing and performance solutions for American V-Twin and sport motorcycles, Smart cars, and industrial clients. I spoke to Andy, one of the guys, who introduced me to the boss, Bob, and the other guy, John. Around 2004, they needed a springer, and although they were big fans of Sugar Bear, they decided it was time to manufacturer their own. “We started by building a dozen all stainless springers,” Andy said. “We still have a few.” Then they discovered the need to build springers for builders who sought flexible units for various finishes. Each springer is custom-made for whatever application any builder needs. In this segment, we will reprint the 3Guyz tech on how to measure a roller for the perfect length springer. They also published a tech on tearing a 3Guyz springer down for finish work. For more details about fork design and handling, take a few minutes to read through their “Fundamentals of Front Fork Geometry” in the 3Guyz.com tech section. So

Bikernet/Cycle Source Sweeps Build, Part 3, Sponsored by Xpress Read More »

Doug Coffey’s RetroMod Panhead Part 1

    Having been in the aftermarket Harley business since 1969, I have pretty much done everything  from lacing wheels and custom painting to establishing a performance specialty manufacturing company known as Head Quarters.     Over the years everything in Harley-Davidson aftermarket world has evolved. Today finds old timers like myself better skilled with better tools and far better parts to work with than we had back in the day.   I have built probably thirty motorcycles from the frame up  and they have all been builds that kept pace with what the current factory offerings were and the style of the day. The latter builds being Evos and Twin Cams in rubber mount swingarm frames.   That being said, I didn’t find I got the same buzz I used to get when I first started out building those rigid framed choppers back in the early 1970’s.   Some people count sheep to go to sleep. I found myself planning a new rigid frame chopper to send me off to La La Land for a good night’s sleep.   This went on for two or three years before I decided the time had come to act upon my dreams.   After twenty five years of manufacturing performance parts for my company Head Quarters, I realized most of the people I had met over that period had no idea I could actually build a custom bike completely by myself so I decided I would do everything possible in my own shop.   As I preferred the look of the choppers built in the 1960’s and early 70’s but preferred the technology of the parts offered today, I refer to my build as a Retro Mod Chopper combining both old style and new improved parts.   Allow me to show you

Doug Coffey’s RetroMod Panhead Part 1 Read More »

Scroll to Top