1928 Shovelhead Part IX
By Robin Technologies |

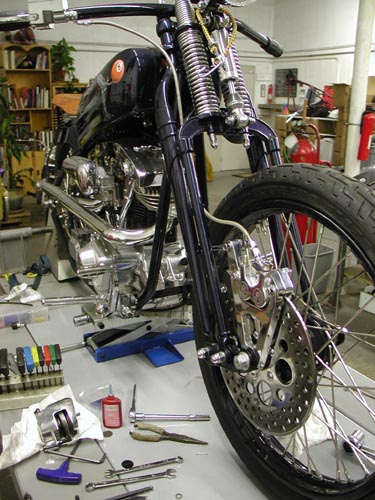
It’s time to feature the 1928Shovelhead and American Iron said theywould take it on. They’re the only bookthat accepts antique bikes. I’ve writtenabout four features for them on rare, very coolhistoric models.
No the ’28 Shovel doesn’t fallinto that catagory, but what the hell, it’sgot class. We needed to complete a couple ofdetail mods before Markus Cuff would aim alense at the blue beast. We needed matchingbrake rotors and a PM front brake system. Ipulled a front rotor from the CCI catalog andcontacted Performance Machine for theappropriate front brake caliper and springerbracket.
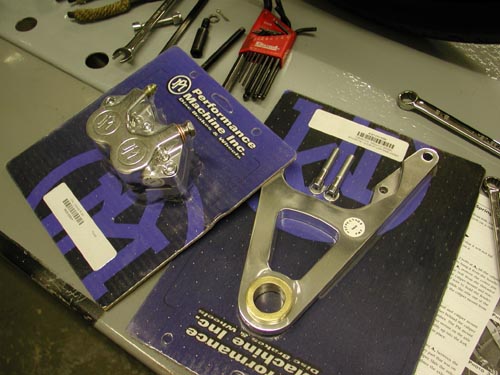
Much of the following comes directly fromthe very complete Performance Machineinstructions. They don’t mess around.There will be no doubt about the installation ofthis unit. Let’s hit it:
Before installing a caliper or rotor kit,read through these instructions completely;this will familiarize you with the way in whichthe parts fit together and the tools needed tocomplete the job.
In the course of installing these kits youwill be replacing the stock brake caliper(s)and/or rotor(s) with a high-performance brakecaliper(s) and/or rotor(s). Please pay specialattention to the section of the instructionsdealing with the centering of the caliper overthe brake rotor. Actually, I couldn’t findthis section. Generally a set of shims arepacked with calipers. Use the shims andmake sure the caliper is centered over therotor.
The brake caliper(s) used in this kit isdesigned to use DOT 5 brake fluid. Neverreuse brake fluid, don’t use brake fluidthat you are not sure is new and clean. Thisinstallation should only be attempted by amechanic with a thorough understanding ofand experience with motorcycle brakesystems.
If you plan on using the stock brakeline/hose that runs between the mastercylinder and the caliper, then you will be justswitching the line at the caliper’s banjofitting. We recommend that you do notdisconnect the line from the stock caliper untilyou have the new caliper bolted in place andare ready to bleed the brake system. This waythe brake fluid will not run completely out ofthe master cylinder before you have the newcaliper connected.
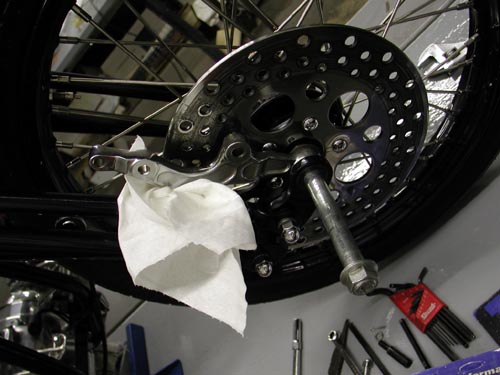
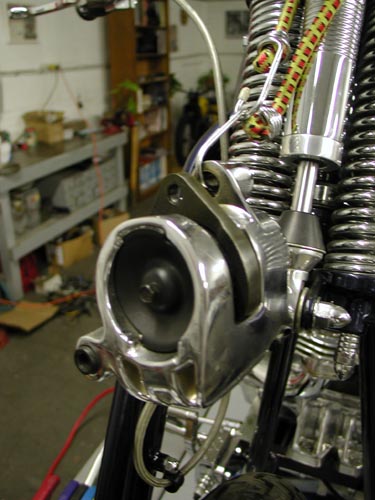
Loosen brake line and remove the twobolts, lift the caliper up off the rotor and use ashort length of wire or bungie cord to hang itfrom the handle-bars, up out of your way. Onthe 3/8‚ bolt, remove the cotter pin from therear; unscrew the lock-nut, unscrew the boltfrom the threaded bushing in the fendermount and pull it out of the caliper mount andreaction link. On ’93 and later models,use a piece of wire to hold the fender up out ofyour way. Unscrew the axle nut, slide the axleout of the fork and lower the wheel to theground. Remove the caliper mount from theaxle and the bushings and spacers. Keep thisshit around, you’re going to need it.
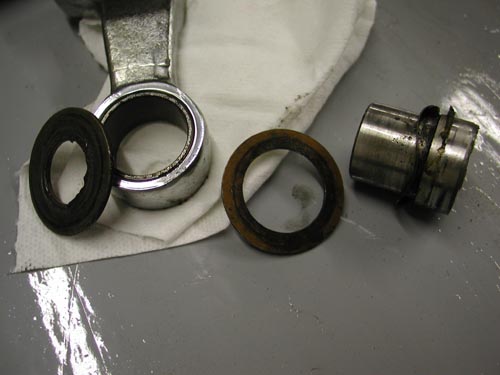
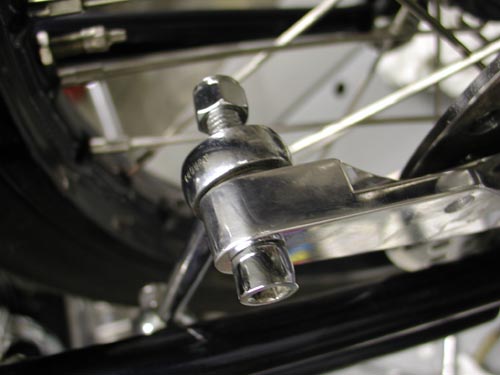
The Springer uses a combination axleseal and caliper mount bushing, with awavy-washer and bronze thrust washerbehind the caliper mount. Remove anddiscard the bronze thrust washer that goesbetween the caliper bracket and the wheel.The PM mount has this thrust washer built-in.Install the PM caliper mount on the axleseal-caliper mount bushing with the wavywasher and raise the wheel assembly up intothe fork.
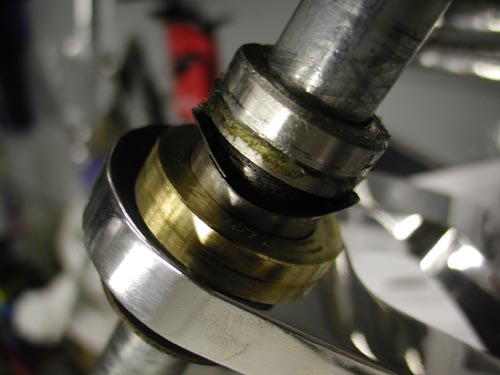
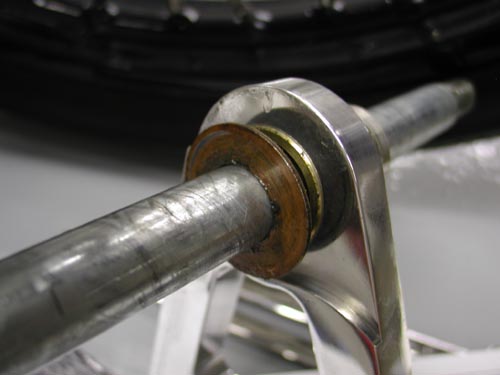
Here’s the outside brass bushing inplacebetween the rocker and the caliperbracket.
Install the stock outer caliper mount thrustwasher between the caliper mount and thelower fork rocker. This is a factory part thatwas on the fork assembly; the copper coloredside faces the caliper mount. Slide the axlethrough the fork, install the flat washer andaxle nut and tighten the axle nut to 65 ft. lbs.
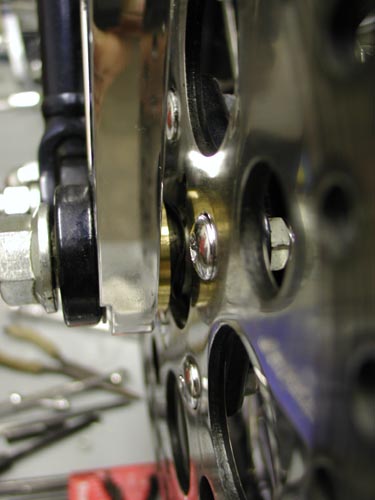
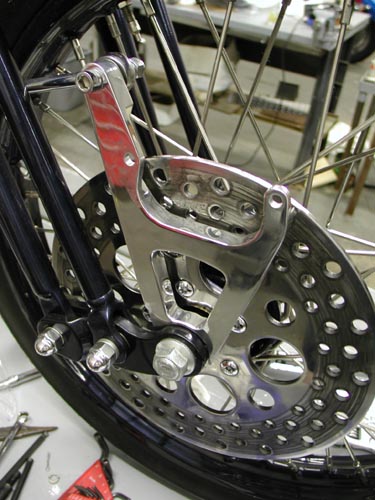
Caliper installation
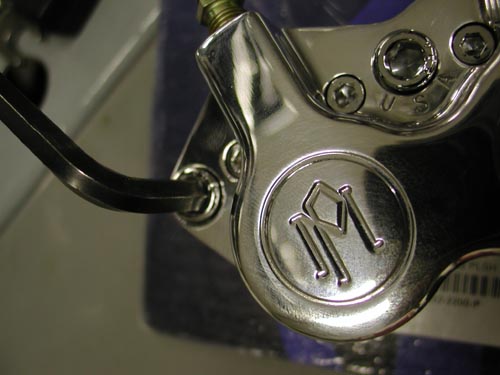
Remove the two chromed Allen end boltsfrom the Performance Machine caliper body,slip the caliper over the rotor and install the5/16 x 1 3/4-inch socket head bolts (Allens)and flat washers. Here’s where youcheck the caliper over the rotor. Step in front ofthe bike and eyeball the pads in the caliper.
Make sure the caliper is centered. Beforethe caliper is tightened down, it must becentered over the rotor; see page 3 for theproper procedure.
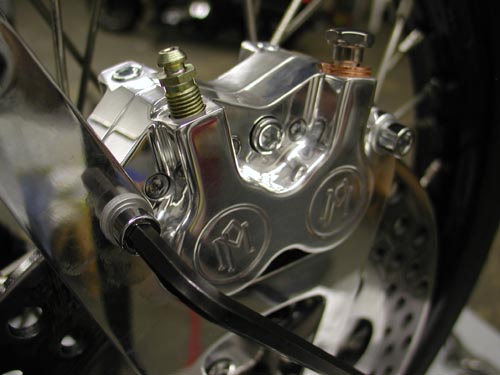
Yep, sure enough they were on pagethree. Here’s what I missed, “The centerline of the caliper is where the two caliperhalves meet. Look down from the top of thecaliper onto the rotor. If it’s offset to theoutside then you need to install mounting boltshims. Shim kit includes six shims, two each:.016, .032. .062-inch. Insert the shimsbetween the mounting boss on the bracketand the caliper body by removing themounting bolts. After the caliper is centereduse Loctite or lock washers and torque thebolts to 22 ft. lbs.”
The small print dictates that failure toproperly center calipers will impede theperformance of this fine braking equipment.They’re right. Do it right the first time.
Attaching The Brake Line
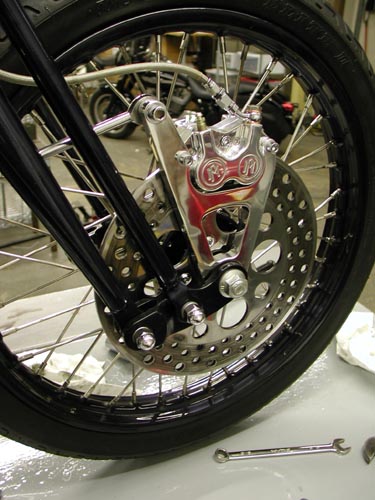
First tape handle bar master lever 1/2 wayclosed. This will prevent fluid from free flowingfrom hose. Remove the end of the brake linefrom the stock caliper.Working rapidly so thatan excessive amount of brake fluid does notrun out of the end of the brake hose, attach theend of the brake line to the new PM caliperusing the PM supplied seal washers, onewasher goes on each side of the banjo fitting.
Position the banjo fitting so that the brakehose does not rub on the frontfender or other part of the motorcycle. I had toreroute my Goodridge brake line. Had to movefast.Tighten banjo bolt to 10 ft. lbs. of torque.
Bleeding The Brake System
You will find it is easier to bleed the brakesystem if you have a helper. First, fill themaster cylinder with DOT 5 brake fluid and putthe cover back on the master cylinder. Attach ashort length of rubber hose to the bleederscrew on the brake caliper. Put the other endof the hose into a coffee can or other suitableclean catch can.
Have your helper pull inon the front brake lever or push down on therear brake pedal five times. At the end of thefifth stroke, have your helper hold the brakelever in or pedal down.
While the helper holds the lever/pedal,open the bleeder fitting on the caliper. You willneed a 1/4 box end wrench. Air and brake fluidshould come out of the end of the hose that isconnected to the bleeder fitting.
After theair and brake fluid have stopped coming out ofthe hose, close the bleeder fitting. Your helpercan now release the brake lever/pedal. Thisaction will force the air that is trapped in thebrake system out the bleeder screw. Repeatthis procedure until the brake become firm orthere’s no air in the line.
Check thefluid level in the master cylinder after eachbleeding. Don’t let the master cylinderrun dry as this will push air back into the brakesystem which will require all-night bleeding.
Front brakes can be a bear, since airdoesn’t want to flow down the forksthrough the line and out of the caliper throughthe bleeder nipple. Some guys force fluid upthrough the bleeder nipple into the system. Ifyou want to use the above system, sometimesthe caliper needs to be raised above the barsto allow the air to flow to the bleeder nipple.
I’ve discovered that with a littlepatience, bleeding is hardly necessary. Takethe cap off the master cylinder reservior andpump the handle slightly. This allows the airbubbles to rise out of the caliper, up the lineand out the master cylinder. Tap the lines acouple of times and pump the lever slightlyuntil it’s firm. Refill the reservior whenneeded until complete, top it off and call itquits.
Leave it overnight and check it again in themorning. It may take a couple of days beforeall the bubbles are gone, but it’s abreeze.
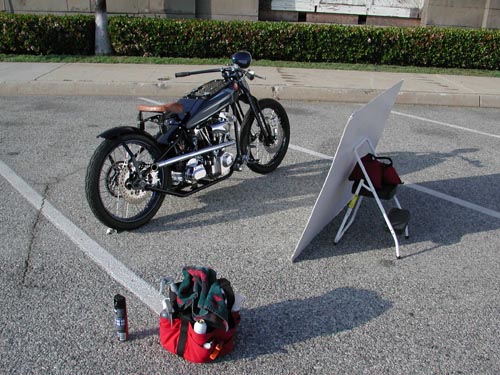
Here’s a shot of the 1928Shovelhead during the photo shoot forAmerican Iron. It looked sharp thanks to thefinal details from CCI and Performancemachine. Of course, it would be nothing but apile of parts without the talented efforts ofStrokers Dallas and painter Harold Ponteralli.Watch for the feature in American Iron, thenwe’ll post a feature on Bikernet.

Need to see the previous chapter:http://www.bikernet.com/pages/story_detail.aspx?id=9001
Goliath CCI Bike Kit Build
By Robin Technologies |


It was hard to imagine, when we stood in front of the garage doors, starring at a pile of boxes, that somewhere in there, somehow, a custom bike lurked. As it developed, except for a non-existent nut or bolt, the CCI Goliath kit was complete. The chromed quandary, could a novice builder, an average American rider (in this case a bumbling college art professor with limited mechanical experience), Ladd Terry, build a hard running 100-inch custom in a week to ten days?


Not just any cruiser, because the components that make up this rolling mechanical architecture scream “modified custom.” It starts with a solid foundation, including the potent RevTech 100-cubic-inch engine, a six-speed overdrive transmission and a Santee 230/250 frame made from 1-1/8-inch tubing. The engine has a two-year/20,000-mile warranty, and the gearbox is covered for 5 years or 50,000 miles. There’s another side to this powder-coated and pearlescent picture. The sheer enjoyment of being able to build your own bike. “It couldn’t be more educational and rewarding,” Ladd said listening to the sharp exhaust crack against the Bikernet.com Headquarters concrete. “What a blast.”

Other components are also top-notch. The 18-inch rear wheel measures a full 8.5-inch wide and is made from solid billet. An 11-inch-wide steel rear fender with streamlined struts covers the Avon 250 rear tire. Billet RevTech brakes grace both ends with clear-coated stainless braided brake lines. Tall 8-inch Custom Cycle Engineering risers securely hold powder coated TT bars that sit atop the smooth billet triple trees, holding 41mm front tubes. A billet dash housing a VDO speedometer adorns the six-gallon Fat Bob tank. The hand controls are CCI chromed, the foot controls are chromed billet. The chain primary drive was enclosed for quiet and smooth operation. Gleaming chrome hangs everywhere. And the complete electrical system includes a high-torque starter and 32-amp charging.

“It ain’t all about parts,” Ladd added, “It’s the experience, the rush of being able to build a tough performance cycle, and I need to congratulate the CCI crew for their organizational capabilities. I couldn’t have completed the task without them or the Tim Remus book on building kit bikes.”

“Hold on,” Ladd snapped as George Hayward, the benefactor for this Beach Ride Charity effort, dropped the clutch to peel out of the garage, “I want to add something.” A college professor always requests the final dissertation. “Even though this was a kit that could be followed to the letter, it allows the builders creative avenues to pursue.” We did, ultimately, build a one of a kind custom with the paint work, exchanging bars and risers, modifying the exhaust and fender rails, changing the pulley and additional small touches to make this ride an American Rider’s creation.

Not bad for a tight team with hand tools and the desire to build a unique machine for a children’s charity, the Exceptional Children’s Foundation in Los Angeles.


Amazing Shrunken FXR 14–Getting Close
By Robin Technologies |

We’re getting right down to the bottom line. Harold Ponteralli, our painter called, “If I deliver the paint can you make it to the show.” I assembled bikes overnight for run deadlines in the past, so we went for it. We installed the new sheet metal, ran the oil lines and picked up a few chrome knick knacks from Long Beach Chrome. Frank was on his way to the Bikernet headquarters with a brown bag full of Goodridge hydraulic fitting. The heat was on.
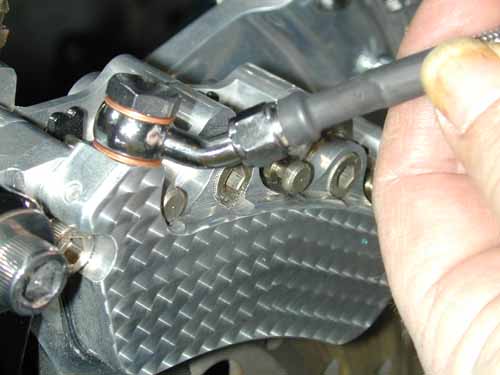
I installed the exhaust while Frank custom cut lines to fit each application perfectly. You can see how the man does it in our King tech articles using Goodridge lines, fittings and shrink wrap. For throttle cables we relied on Barnett for custom cut-to-fit lines.
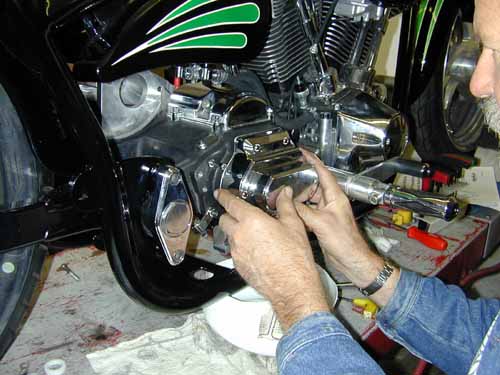
We replaced the Rev Tech 6-speed, cable tranny cover with a Joker Machine clean, chromed billet, hydraulic clutch. Why did we go hydraulic? Hell I don’t know, maybe to balance the Joker controls on the bars? The cover slid right on and we torqued it to specs (15-20 ft. lbs.).
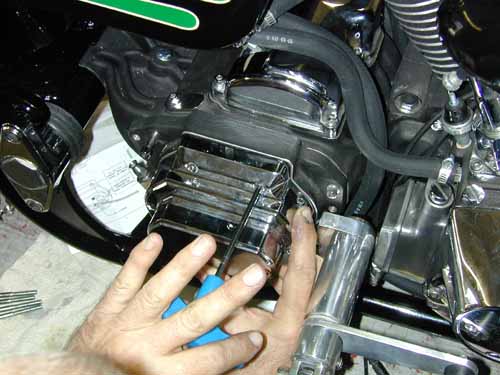
While I wrenched Frank ran a line from the Joker front brake mastercylinder to the Custom Chrome Billet-6 brake caliber. Crazy John took the calipers to a shop to have them milled smooth then engine turned for an added detail. Whatta ya tink?
Then Frank ran a hydraulic line from the H-D rear brake master cylinder (stuffed under the tranny) to the brake switch bolted to the tranny case, through a series of Goodridge fittings. Finally another line was constructed from the brake pressure switch to the rear brake caliper. We kept in mind that the wheel will be adjusted for belt tension and will flex up and down with the swingarm. There needed to be slack in the line.

Finally Frank carefully made a line that ran from the Joker handlebar controls to the Joker hydraulic tranny front. He immediately started bleeding the brake systems and they fell right in line. We watched the direction air bubbles might travel. Generally front brakes can be bled several ways. Some pump the fluid in from the caliper bleeder nipple forcing bubbles north out of the control reservoir. Sometimes, as soon as it’s filled, it’s cooked. No bleeding is necessary.
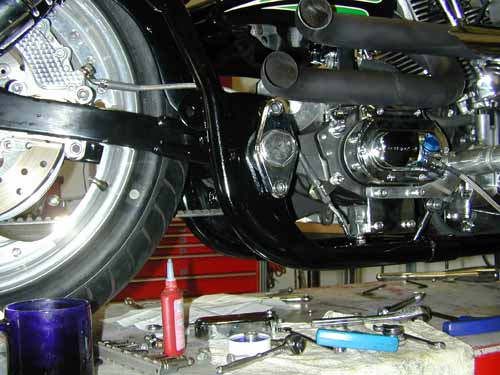
Sometimes I fill the reservoir and pump it slightly until the Dot 5 runs down the line and fills the caliper. This can take awhile, but as it sets the bubbles rise to the top and out the reservoir until it’s cooked again. We were lucky. The rear brake caliper was installed above the master cylinder and the bubbles blasted to the surface with little bleeding. Our Giggie (from Compu-Fire) designed, mid-brake lever worked like a champ with the sharp Custom Chrome pivoting pegs.
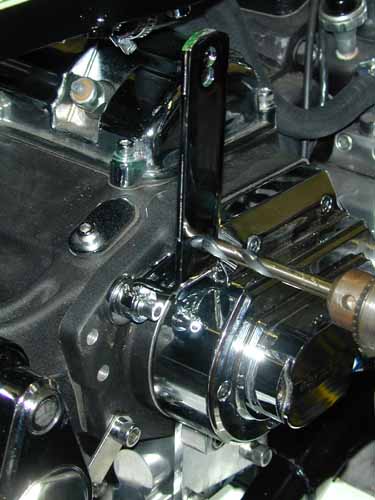
As a side note I coated the pipes with rattle-can barbecue heat flat black. What the hell, if they don’t work, I’ll mess with them again. Oh, and I tried to find a place to stash a H-D rear brake reservoir but couldn’t. I held my breath and entered a Yamaha shop and ordered a small sport bike unit. We made a bracket and stashed it under the tranny.
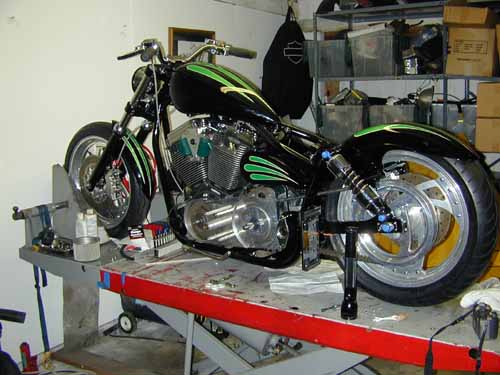
Building custom bikes is all about options, abilities, resources and a handful of rules. Check the John Covington Safety Code in Special Reports. He makes some good points. There’s also various considerations between rubbermounted bikes and rigids. For instance we designed the rear fender to hug the tire, but it moves with the swingarm which means the sonuvabitch better be strong. Also there needs to be considerable space between the seat and the rear fender for shock travel.
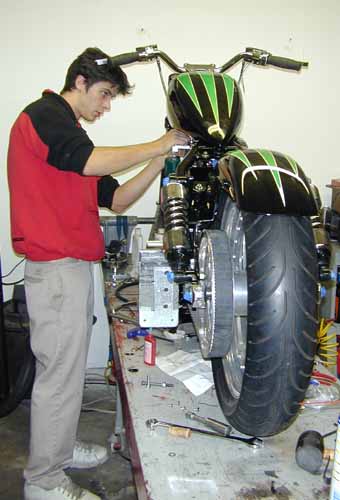
On top of style is ride consideration. I like to build bikes that will hang for a cross country run, handle slick roads and corner without dragging pipes or pegs. And it better corner. That’s what bikes are all about. Alright, I got off the tech. Kyle, the shop intern, installed the Custom Chrome petcock and gas line to the carb. He cut the line and inserted a gas filter (check the arrows for flow direction).

We loaded up the Cyril Huze oil tank with RevTech 10-50 Oil and looked for the UPS man. We waited patiently for the Le Pera styled/Bikernet seat to return to the fold stitched with emerald threads. Harold Ponteralli painted the sheet metal and want to see it in the Easyriders Pomona show. We didn’t make it. Then he jammed us about making the Pomona Roadster Show and we busted our buts. I did a couple of midnight runs installing the Custom Chrome stainless plates under the rear axle and polishing stainless fasteners. The gloss black powder arrived right on time from Dallas. The chrome sparkled and Custom Chrome delivered parts when we needed them.
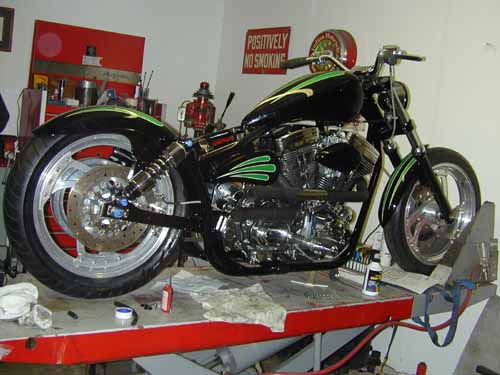
If the seat had rolled in the door, we would have wired the bastard into the wee hours and drug the scoot to the show, but nooo. Cross-eyed, we pulled the 1928 Shovel out of the headquarters, also painted by H-D Performance in Vacaville, California, detailed it and delivered it to Pomona. It was essentially built by Strokers Dallas, and sonuvabitch if they weren’t at the show with a half a dozen Stroker bikes. They took Best of Show and the Shovel took third place in the classic category. Whatta week.
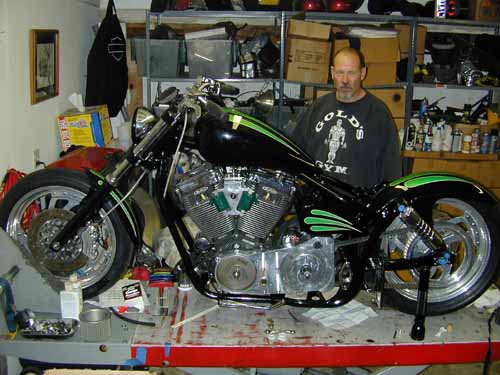
At this point we need final shifter linkage, which Frank fabricated, so we could install the BDL primary drive. Then some wire and we can fire this puppy. Hang on.


Witness Slips Needed Today
By Wayfarer |
|
|
Part 7 of VLXAFL5: Final Assembly Begins
By Wayfarer |
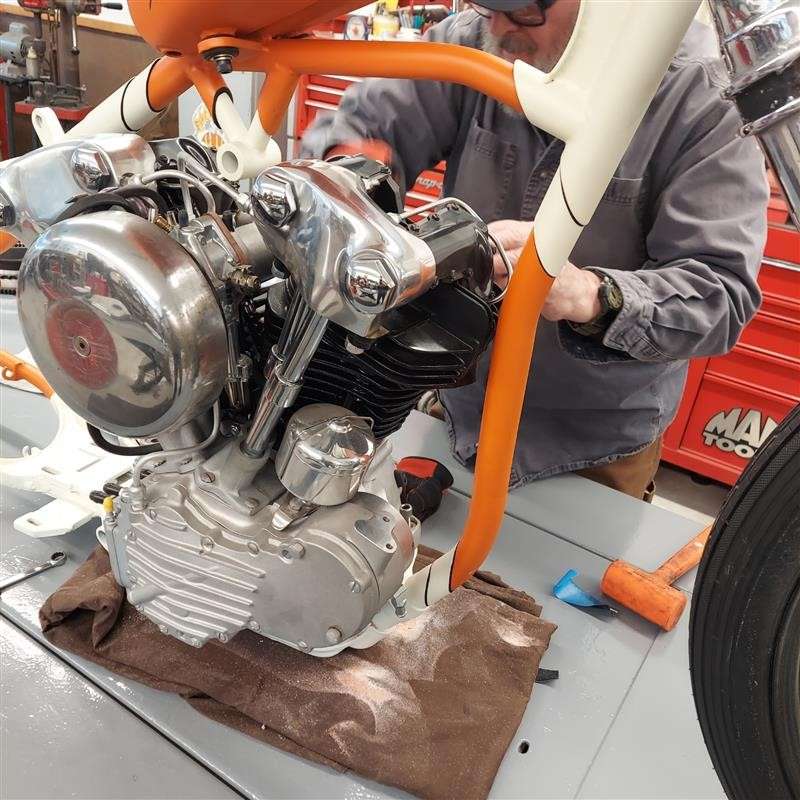
by Bandit with photos by Weed
The Paint Returned from TNT
It’s been awhile, but I haven’t dawdled. I’ve been working hard on various projects. That guy in Deadwood, who was once 45 John bought a 1960 Panhead roller/basket case and I’ve been helping with the reconstruction. I rebuilt or built and trans from a case and a sketchy box of parts. With Fab Kevin we built a front disc brake. John rebuilt the rear star hub and I helped with fitment and the rear brake.
We slid in the engine after I stumbled. I used the rear axle and a flat lift jack to jack up the bike, so I could block it, remove the jack and start to install the 5-speed trans in a 4-speed S&S case. The trans didn’t want to go so I filed and ground all the paint out of the 4-speed slots and the slot I made and welded for the 5th stud on the right. I even had to grind the rear tab on the trans case more for additional clearance.
I couldn’t run an old school 4-speed trans for a couple of reasons. It’s an alternator S&S engine and I wanted it to be electric start.
Click here for the accelerating Tech adventure with detailed photos and tips.
* * * *
Don’t stop there, we have a whole department on Motorcycle Tech since 1996. Click and build now!
https://www.bikernet.com/pages/Techs_Bike_Builds.aspx
Harley-Davidson’s 2024 Factory King of the Baggers Team
By Wayfarer |
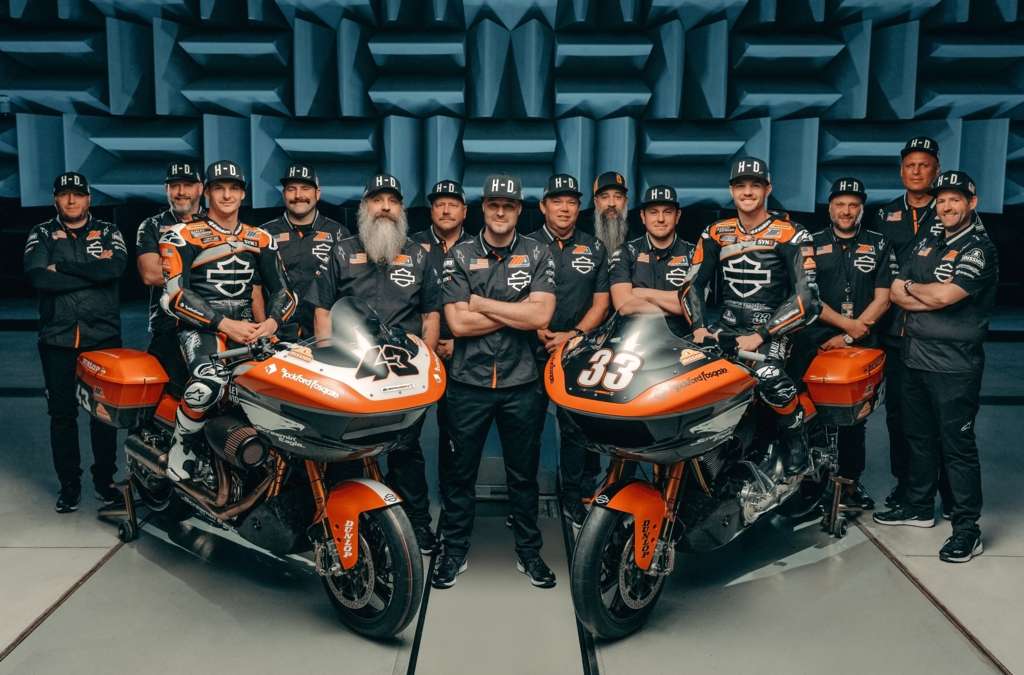
HARLEY-DAVIDSON FACTORY RACE TEAM LAUNCHES FOR 2024 MOTOAMERICA MISSON KING OF THE BAGGERS RACING SERIES
18-Race Schedule Includes Round at Red Bull Grand Prix of The Americas
MILWAUKEE (February 16, 2024) – The Harley-Davidson® Factory Race Team today launches its 2024 season with an exciting video featuring team riders Kyle Wyman and James Rispoli aboard new race-prepared 2024 Harley-Davidson® Road Glide® motorcycles based on the all-new touring platform for the MotoAmerica Mission King Of The Baggers road racing series. The video, with exclusive behind-the-scenes footage of the team, dials up the fun and irreverence of the King of the Baggers series, and will debut today on the Harley-Davidson YouTube Channel and other social channels.
An exciting special round was recently added to the 2024 Mission King Of The Baggers Championship by appearing during the third round of the FIM MotoGP World Championship at Circuit of The Americas in Austin, Texas, April 12-13. This two-race appearance during the Red Bull Grand Prix of The Americas weekend will mark the first time an international audience will see the thundering King Of The Baggers bikes in competition. In addition to the two points-paying races on Saturday, April 13, there will be a three-lap Mission Challenge on Friday afternoon with the six fastest qualifiers battling for a $5000 winner-take-all purse. This special round expands the 2024 Mission King Of The Baggers schedule to 18 total races.
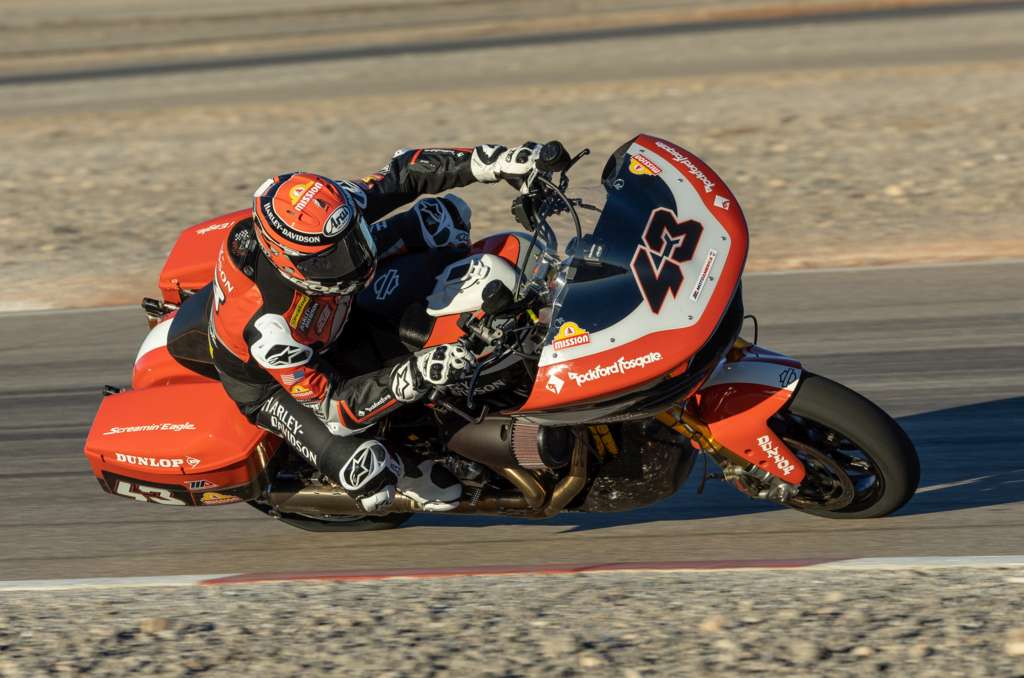
Wyman and Rispoli will compete aboard race-prepared 2024 Harley-Davidson Road Glide® motorcycles powered by modified Screamin’ Eagle® Milwaukee-Eight® 131 Performance Crate Engines. These motorcycles are based on the all-new 2024 Road Glide model, including the sleek new next-generation sharknose fairing design. Many of the race motorcycle body panels are formed with the same lightweight forged carbon fiber material featured on the 2024 CVO™ Road Glide® ST model. The team bikes also feature upgraded suspension components, including Screamin’ Eagle/Öhlins Remote Reservoir Rear Shocks, and competition Screamin’ Eagle exhaust, along with upgraded Brembo® Racing braking systems, Marchesini® wheels, and premium Harley-Davidson racing components produced by Protolabs®. The team motorcycles will appear in all-new livery featuring the classic Legendary Racing Orange color long associated with Harley-Davidson Factory Team racing bikes.
Wyman returns for a fourth season with the Harley-Davidson Factory Race Team. He won seven races during the 2023 King of the Baggers season and finished third in the season championship. Wyman is the most winning racer in MotoAmerica King of the Baggers history, with 12 total race wins in the 24 events since the start of the series in the 2021 season, plus the 2021 season championship to his credit. Wyman won the Daytona 200 in 2019.
Rispoli joins the team for the 2024 season after placing second in King of the Baggers series points in 2023 riding for the Vance & Hines Harley-Davidson team. In 2023, Rispoli won two races, and scored five second place finishes and three third place finishes. Rispoli began racing Harley-Davidson motorcycles as a teenager and earned the nickname “Hogspoli” after winning the 2020 American Flat Track Production Twins championship aboard a Latus Motors Racing Harley-Davidson XG750R. He also won back-to-back AMA Pro Racing Supersport championships in 2011-2012.
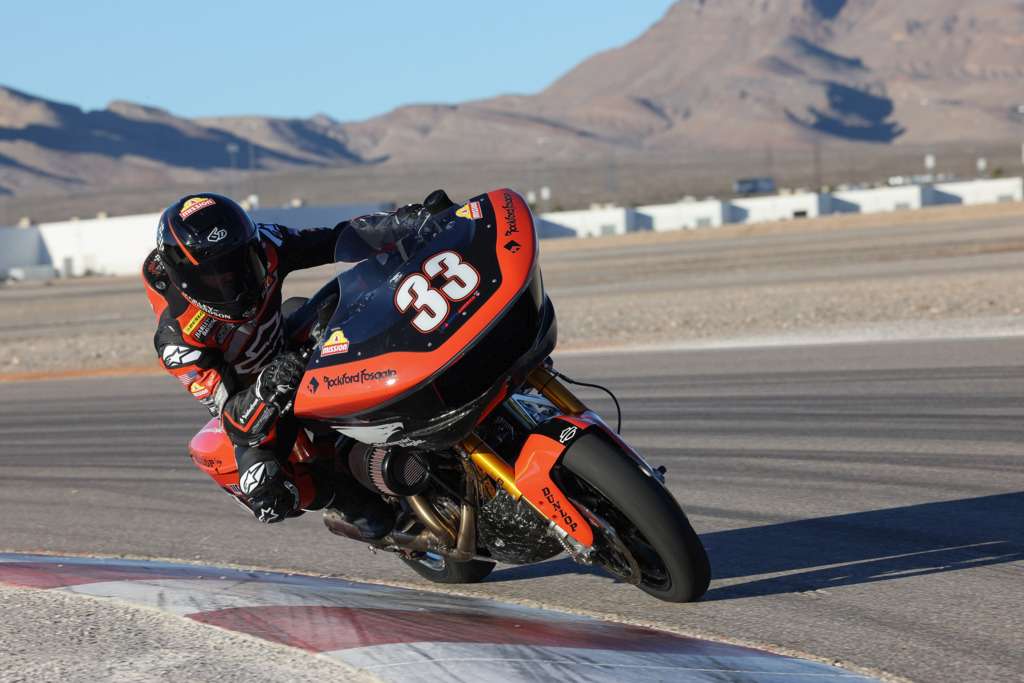
For the 2024 season, the Harley-Davidson® Factory Race Team is sponsored by Mission® Foods, Rockford Fosgate®, Brembo®, Öhlins®, Protolabs®, SYN3® lubricants, and Screamin’ Eagle® Performance Parts and Accessories.
The MotoAmerica King Of The Baggers series offers exciting competition between American V-Twin touring motorcycles prepared for competition and equipped with a fairing/windscreen and saddlebags. The 2024 series has expanded to 18 races over nine double-header weekends held in conjunction with the MotoAmerica Superbike Series. The series opens on the high banks of Daytona International Speedway in Daytona Beach, Florida, March 7-9. To experience all the King Of The Baggers action in 2024, check out the Harley-Davidson Factory Race Fan Ticket Packages.
2024 MotoAmerica Mission King Of The Baggers Season Schedule
(Two races each weekend)
March 7-9: Daytona International Raceway – Daytona Beach, Fla.
April 12-13: Circuit of The Americas – Austin, Texas (Red Bull Grand Prix of The Americas)
April 19-21: Michelin Raceway Road Atlanta – Braselton, Ga.
May 31-June 2: Road America – Elkhart Lake, Wis.
June 14-16: Brainerd International Raceway – Brainerd, Minn.
July 12-14: WeatherTech Raceway Laguna Seca – Monterey, Calif.
August 16-18: Mid-Ohio Sports Car Course – Lexington, Ohio
September 13-15: Circuit of the Americas – Austin, Texas
September 27-29: New Jersey Motorsports Park – Millville, N.J.
* * * *
FINAL DAY 30% PRES DAY SALE – ENDS TONIGHT
By Wayfarer |
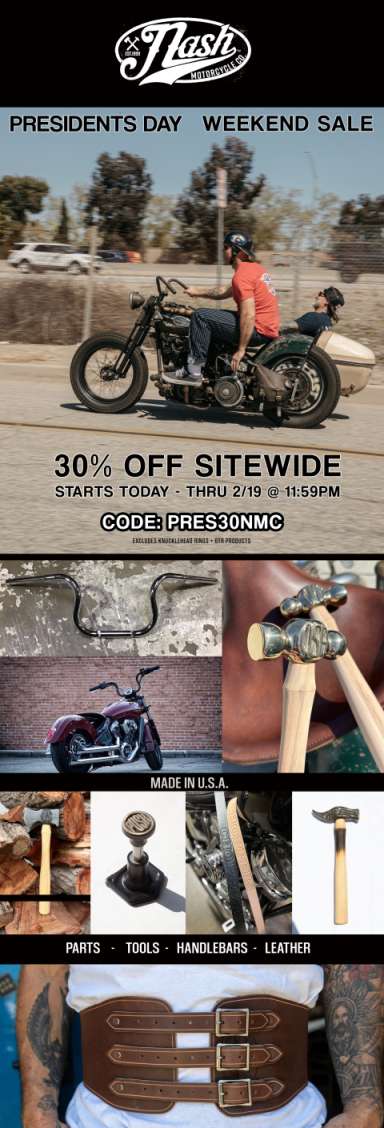
President’s Day Weekend Sale. 30% Off Sitewide.
Starts today through 19-February 12 PM
CODE: PRES30NMC
www.nashmotorcycle.com
* * * *
House Motorcycle Caucus Leadership
By Wayfarer |
New Leadership For House Motorcycle Caucus
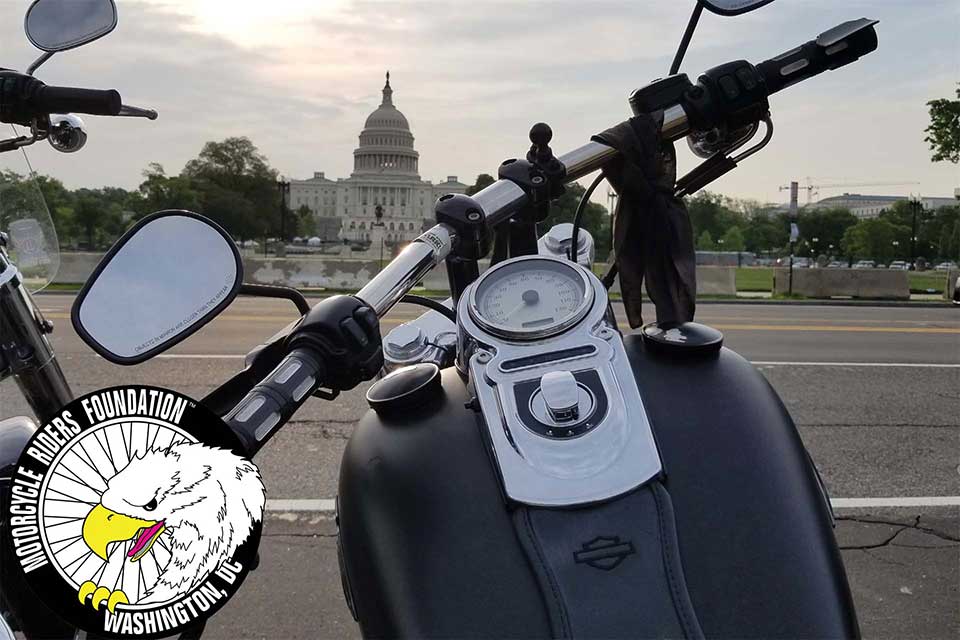
This week, the House Motorcycle Caucus announced changes to its leadership team. Congressman Michael Burgess of Texas, who will retire at the end of the year, has stepped down as co-chair of the caucus. Congressman Burgess helped found the caucus in 2009 and has been a tireless champion for bikers. He was the 2018 MRF Legislative Champion of the Year and we wish him well on his retirement!
The current co-chair, Congressman Tim Walberg of Michigan, revealed that Congressman Troy Balderson of Ohio and Congressman Donald Norcross of New Jersey will join him as the new co-chairs. Mr. Balderson and Mr. Norcross are longtime members of the House Motorcycle Caucus and strong supporters of biker priorities. The House Motorcycle Caucus has always been a bipartisan group, so we are pleased to see Representative Norcross, a Democrat, join two Republicans as a co-chair.
Additionally, the caucus named Freshman Congressman Derrick Van Orden of Wisconsin as vice chair. Mr. Van Orden is an avid motorcyclist who made a point to ride his motorcycle to the Capitol for his first day in office!
Thank you to all those who will lead and are members of the House Motorcycle Caucus. Remember, this organization and its sister group, the Senate Motorcycle Caucus, exist to educate, legislate and publicize the priorities of bikers on Capitol Hill.
Below is a current list of House Motorcycle Caucus members as of Thursday, February 15th, 2024.
Don Bacon (R-NE)
Troy Balderson (R-OH)
Jim Banks (R-IN)
Mike Bost (R-IL)
Angie Craig (D-MN)
Rick Crawford (R-AR)
John Curtis (R-UT)
Tom Emmer (R-MN)
Paul Gosar (R-AZ)
Glenn Grothman (R-WI)
Andy Harris (R-MD)
Dusty Johnson (R-SD)
Anne Kuster (D-NH)
Doug Lamborn (R-CO)
Tracy Mann (R-KS)
Mariannette Miller-Meeks (R-IA)
Donald Norcross (D-NJ)
Scott Perry (R-PA)
Bill Posey (R-FL)
Adam Smith (D-WA)
Pete Stauber (R-MN)
Bryan Steil (R-WI)
Chris Stewart (R-UT)
Glenn “GT” Thompson (R-PA)
Dina Titus (D-NV)
Derrick Van Orden (R-WI)
Michael Waltz (R-FL)
Joe Wilson (R-SC)
Ride With The Leaders ™ by joining the MRF at https://mrf.org/ or call (202) 546-0983
* * * *

SUBSCRIBE TO SUPPORT Bikernet.com – IT’S A FREE WEEKLY NEWSLETTER GODDAMMIT
Click here for newsletter options
VLXAFL5 Part 7 Final Assembly Begins
By Bandit |

It’s been awhile, but I haven’t dawdled. I’ve been working hard on various projects. That guy in Deadwood, who was once 45 John bought a 1960 Panhead roller/basket case and I’ve been helping with the reconstruction. I rebuilt or built and trans from a case and a sketchy box of parts. With Fab Kevin we built a front disc brake. John rebuilt the rear star hub and I helped with fitment and the rear brake.

I now have my son’s ’58 Chevy Belair and drove it to Spearfish the other day to the third mechanic. I have a good feeling about this one. He has a slick operation and was recommended to me by the TNT crew. It looks like the Carb may need to be replaced and or overhauled. I walked through the snow carefully into a large Antique barn and found a Rochester GM carb, amazing. I may see major progress in the future.


I sent the seat pan several months ago to the famous leather tooling expert Howard Knight. Howard is a master and the seat arrived just as the paint was completed. But I had a few more leather straps I needed make and one day, while cruising through Sturgis with the bros, we stumbled into Sturgis Leather. We met the longtime owner, fabricator, patch sewing maniac, seamstress, leather shirt maker, and metal artists extraordinaire Ron Hall. He’s been around a minute, part owner of a couple of bars and a bike riding fool.
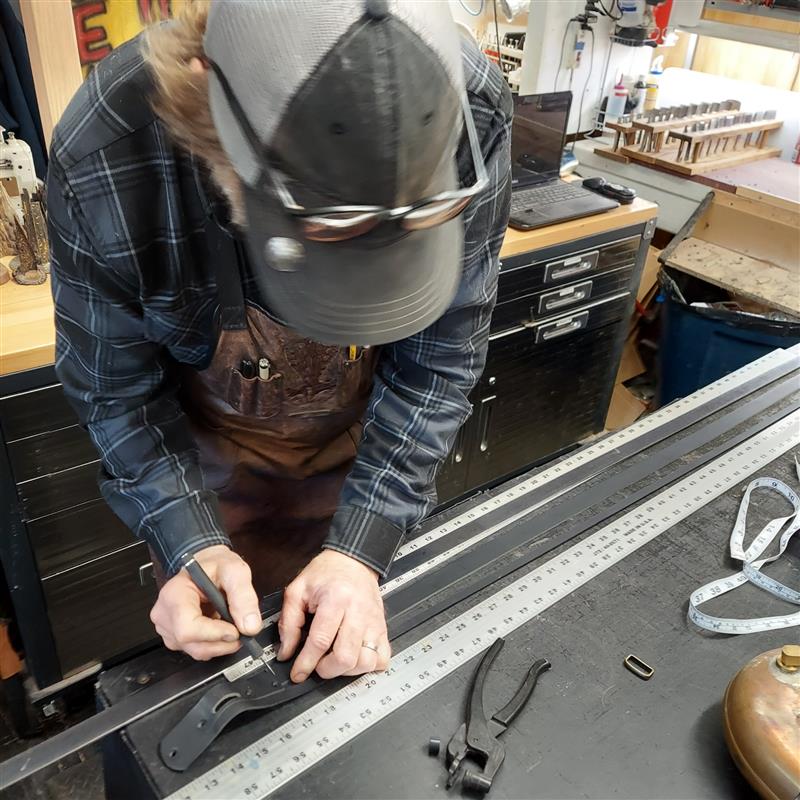
I took him my strap projects for the oil tank and battery and he performed his leather magic on the spot, making suggestions and hand fabricating each piece. Bada bing, I had a completed battery strap.


I’m concerned about the battery. It’s not quite 200 cranking amps, and I’m not sure it’s enough to turn over a new, tight, 93-inch S&S Knucklehead engine. I’m thinking about a back-up Shorai or Anti-gravity lithium battery. Lithium batteries are dangerous. If your lithium battery gets wet and or catches fire you’re fucked and so is your garage, be careful.

My plan would be to keep the battery stored away from my home. We’ll see about that down the road.

I received my frame back from Tim at flat earth, but I wanted some additional pinstriping. As you can see above with Atomic Bob’s concept drawing, we initially considered a cream tank and fender with orange graphics, but somewhere in the mix I shifted. Let me know what you think.
Tim from Flat Earth has a process for giving the pinstriping a patina effect, as if it was pinstriped a long time ago. With TNT Paint, Tim and Nikki we discussed making the cream flat and the orange glossy. That worked for awhile, then we decided to flat everything, which had a major quirk.


Here’s a bunch of shots from their stellar shop.


“Don’t touch the flat clear,” Tim said. “It will go shiny. Don’t get anything on the paint, it will turn glossy.”
I sorta freaked. It’s a motorcycle frame and everything is open. I’m touching shit constantly and I’m not going to wear plastic gloves throughout the process. I tried, but then the gloves get greasy…

I cleaned and prepped my shop for the final assembly, painted my lift and the top of a couple of rusting benches with Valspar rust preventive paint. Travis at A&J Welding supply recommended it, but he said they don’t make it anymore. This stuff is the shit. It’s tough, thick and glossy. It was even fun to apply. I mixed white with black to get the gray I wanted.


As soon as the bike paint arrived completed, I anxiously greased my Timken neck bearings and installed the springer onto the lift and the frame onto the neck stem.


With the frame on the front end but still bare sitting on a pad I wanted to install the engine. John came over to guide the left side as I lifted the heavy engine off the engine stand. Before it could go into the frame, I needed to sand the paint off the motormounts.

Irish Rich modified this frame and he helped me modify the XA springer front end I got from Matt at Carl’s, with fork stops built into the bearing cups.

We slid in the engine after I stumbled. I used the rear axle and a flat lift jack to jack up the bike, so I could block it, remove the jack and start to install the 5-speed trans in a 4-speed S&S case. The trans didn’t want to go so I filed and ground all the paint out of the 4-speed slots and the slot I made and welded for the 5th stud on the right. I even had to grind the rear tab on the trans case more for additional clearance.
I couldn’t run an old school 4-speed trans for a couple of reasons. It’s an alternator S&S engine and I wanted it to be electric start.
I faced the toughest aspect of this build at this moment, the driveline alignment. If you followed this build, we’ve made several adjustments because of the alternator engine and VL frame configuration. Fortunately, I ran a very narrow rear Black Bike wheel and tire. The sprotor rear brake was also an issue.

With the engine bolted in place, and the transmission setting in the frame with maybe ¾ inch of adjustment, I needed to grapple with the front, Tech Cycle, single-row chain. The chain fit with the transmission moved as forward as possible. I punched the master link in place after adding the O-rings and additional white grease. Paul Cox coached me on the rivet-styled O-ring chain.
I was careful not to crush the O-rings anymore than any of the other plates had. Then I looked for a punch to do the rivet job. I didn’t beat it to death, but just a couple of solid smacks at a time with a heavy ballpeen hammer. The punch can’t be too sharp or I wouldn’t splay the head but just drive against the center.

Paul Cox said he used a sharp flat punch to make cuts into the rivets across it at 90 degrees to give the head four slices. Then he punched the head and could see how the rivet split and splayed. Interesting suggestion.

At first, I was very concerned about setting the masterlink. What if I had to remove it to remove the chain. As it turned out I could remove the whole drive line by removing the nut on the engine sprocket, the left-handed nut on the transmission and pulling the entire system free. I had to do this a few times, machine a washer perfect alignment, etc. I will need to remove it once more to install a Paughco tin primary piece as a chain guard.
Then I shifted to the rear wheel. I’ve installed and re-installed this bastard 20-some times. Everything changed, but ultimately for the better.
Everything was a struggle with the Sprotor brake system, so I shifted to the same thinking as the front brake on John’s Panhead. I bored out the hefty brake bracket to 1 1/8 inch. Amazing, I had a drill bit that came super close, then some grinding and sanding finished the job. Now spacing became a more direct operation and the caliper could adjust itself to the rotor for more efficient operation, I hope.
On the other side I found one spacer that worked but I didn’t like the outside diameter to the frame. I went with a shorter spacer and a 1/8 thick washer on the frame side. Everything seemed happy until I tried to mount the sissybar.

Keep in mind, everything was fine in mock-up, but during final assembly shit shifted. Now the rotor mounting bolts hit the machined carriage bolt even after I machined the head down. I was forced to take the wheel off again to install this machined carriage bolt. The hardware store didn’t have the 1 ¾ 7/16 coarse bolt I wanted. I ended up with a 3-inch bolts. I had to machine the carriage aspect off, cut the bolts to size and die-cut additional threads.
Even with all these efforts, the 12-point rotor bolts still hit the head of the sissybar mounting bold. I considered my alternatives and thought about replacing the rotor bolts with domed Allens. I thought for sure the bolts were 3/8 coarse bolts and dug into my fastener bins. No problem. I had what I needed and exchanged them with the chromed 12-points. Nice, lots of clearance.
Just as I was about to shut the shop down for the whiskey night, I picked up one of the 12-pointers and discovered it was a 7/16 coarse bolt. Un-fucking real. I immediately loosened the 3/8 bolts and reached out to McMaster Carr for more bolts—WTF. The wheel is coming off again. Then it came off to mount the fender twice.

Then I tried to install a rear chain. It was fine, but two short and my half-link wouldn’t fit, why. I ordered another standard chain a D.I.D job. Nothing is standard anymore. You can buy a 530 chain for as low as 37 bucks, all the way to a $150 for a chromed O-ring chain. Beware, they make standard chains, heavy-duty chains, O-ring chains, heavy-duty O-ring chains. They keep getting wider.

I’m going to compare the chain I have with the new one when it arrives. As you know, I have a serious issue with the width of the chain and my transmission case because the sprocket is reversed.


Next, I moved the wheel back to the center of the travel because I couldn’t get the Tech Cycle starter in place. I did, and it slipped into place. Remember we went through several changes to the clutch housing, sprocket placement, ring gear location and the engine sprocket. We moved the engine sprocket out another ¼-inch and we moved the clutch sprocket in about a ½-inch. They were close, but it messed with the pinion shaft housing on the starter.

I thought about using my Smithy to machine a notch in it. I would have need to create a mounting plate to clamp the cone into the milling machine. I chose the old school way by using my new grinding wheels to do the job, then the Scotchbrite wheel to smooth it and ultimately my Eastman buffing wheel to polish the piece. I did this several times until I had about 1/6th of an inch clearance above the chain. I’m going to keep a close eye on this during the warm-up and break-in stage.

I started to install my controls. I have them a light coat of Rust-o-leum satin black paint, making sure some rust was still exposed. I dipped and painted the handles with flex seal for a rubber-like grip.
Today, master cylinder, pipes, petcock, oil tank, oil lines, sparkplug wires and gas lines. Hang on. Hopefully, the toughest installation elements are over.
Ride Free Forever,
Bandit

My grandson is building a classic Panhead and asked me about gas tanks. Here’s what he said, “I wanted to be period-correct for the ‘60s outlaw look.” Sounded like Dominic talking, his mom’s boyfriend who builds classic chops. He’s a celebrated builder at Born Free every year.

It’s a kick. There are builders out there like Micah McCloskey, Paul Wheeler and Dominic who are religious and specific about how they build choppers. They are precise and follow the classic code.
It’s sorta funny. The whole notion of outlaws and choppers thumbs their middle fingers at any rules. Build whatever you want and fuck anyone who doesn’t like it. There’s the code of the west in a tumbler of Jack Daniels on the edge of a bar fight over nothing.
Photos by Weed
SOURCES:

Atomic Dice
Clauser’s Machine Shop
Spearfish, SD
Dakota V-Twin
Spearfish, SD
www.dakotavtwin.com
JIMS Machine
McMaster Carr
www.mcmastercarr.com
Paughco
Shamrocks Customs
Sturgis, SD
S&S
TechCycle
www.techcycle.com
Terry Components
Check on J&P Cycles
Nash Motorcycles

Colony
www.colonymachine.com
Black Bike Wheels
www.blackbikewheels.com
Custom Chrome
www.customchrome.com
Barnett’s clutch and cable
Dennis Kirk

Flat Earth Paint
Spearfish, SD
605-645-7192

TNT Collision and Glass
Tim and Nikki
605-641-8602

Sturgis Leather
Sturgis, SD
Carl’s Motorcycles
There’s Hope Bikernet Weekly News for February 15th, 2024
By Wayfarer |
Hey,
I often say, “Life is nuts and then you die.” But there’s hope, at least on one front this week.
There’s Hope And We Can Prove It! But I will keep it short.
In the meantime, get involved with your local motorcycle rights organization, so we can ride free next year.
The Bikernet Weekly News is sponsored in part by companies who also dig Freedom including: Cycle Source Magazine, the MRF, Iron Trader News, ChopperTown, BorntoRide.com and the Sturgis Motorcycle Museum.
Click here to read this week’s edition of the Thursday News only on Bikernet.com
* * * *

SUBSCRIBE TO SUPPORT–IT’S A FREE WEEKLY NEWSLETTER GODDAMMIT
Click here for newsletter options
