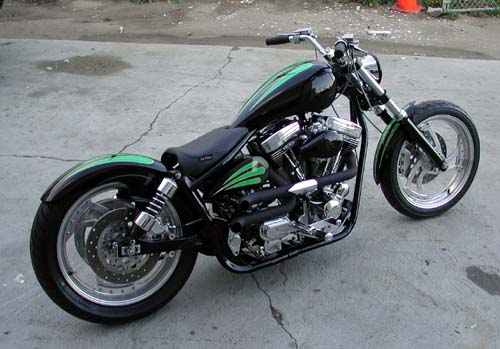
Sturgis Shovel Part 3
By Robin Technologies |

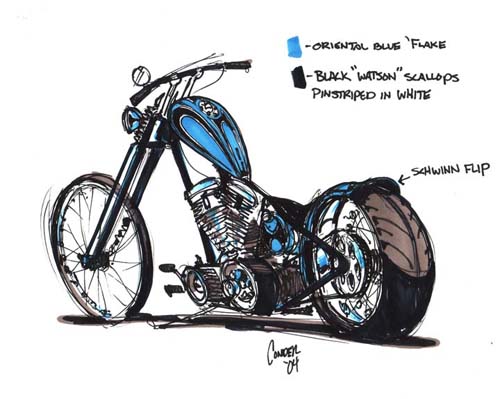
We've developed a working relationship with S&S, and I was concerned about the 105-inch Shovelhead Richard Kranzler scored for my Sturgis Chop project. His motorcycle ran like a raped-ape, but the 105 tore the livin' shit out of his old school chassis. The mirrors became frisbies, the footpegs vibrated lose and ditched him at 125 mph on the freeway. The stress was more than the old swingarm frame could take.
Hot Rod engines are cool but will beat the shit out of a solid mount frame configuration. The best bet is to let them stretch out in a rubber mounted chassis. I called S&S to see what they would recommend and they suggested a smaller 93-inch configuration. James Simonelli put me in touch with Steve George, a 10-year S&S veteran, who said under his breath that they prefer not to mess with engine configurations other than they're own, but he would look mine over.
Made a lot of sense. S&S now builds a complete line of Shovelhead engines in four configurations: Two cone motor and two generator style. Each are available in 80-inch and 93-inch power configurations. Here's a description of their new units:
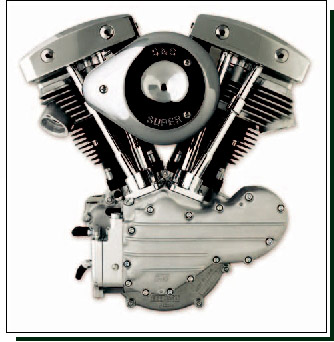
With the addition of the new S&S billet Shovelhead style rocker boxes and tappet guides, along with new pushrods and forged roller rocker arms for Shovelheads, S&S can now offer complete Shovelhead style engines. These engines will be available in 2005
S&S Shovelhead style engines feature the finest parts on the market today. Start with the bulletproof crankcases, flywheels, cylinders, and heads that they've offered for years, and finish the engine with new premium valve train components. S&S billet gear cover, tappet guides, and rocker boxes look outstanding and offer the performance level Shovel builders have come to expect.
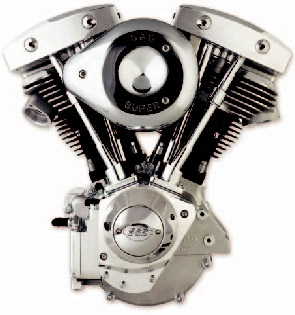
What you can't see inside the engine is just as impressive. The new S&S Shovelhead style tappet guides are designed around the quiet, dependable Evolution style tappets. Corrected tappet guide bore geometry assures correct valve timing using Evolution style cams. The unique adjustable pushrods are collapsible for easy removal and installation, but are stronger than our old style adjustable pushrods.
Inside the billet rocker covers are S&S's exclusive straight rocker shafts and the new S&S forged Shovelhead style roller rocker arms. The result is a Shovelhead engine with the kind of quiet power that some folks may just have a hard time believing.
A new addition to the S&S Shovelhead family is the 93-inch alternator/generator engine. This is the perfect engine for that “retro” chopper, but with a modern alternator charging system.
In addition, the late style sprocket shaft used in this engine allows the use of late style transmissions for additional modern functionality. So when you take your chopper out for a late-night cruise, and you want to see the road ahead as you click `er into 6th gear, this is the one.

Note:S&S Shovelhead style engines equipped with S&S tappet guides and tappets will be supplied with an Evolution style camshaft. Custom engines ordered without S&S tappet guides and tappets will be supplied with a standard Shovelhead style camshaft.
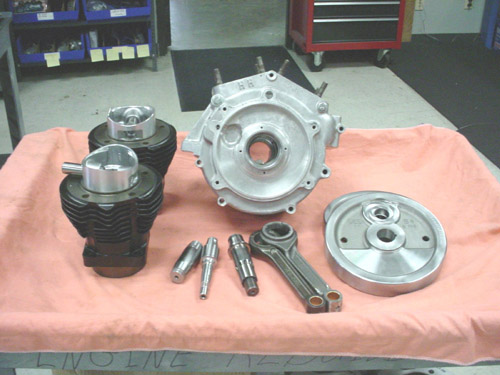
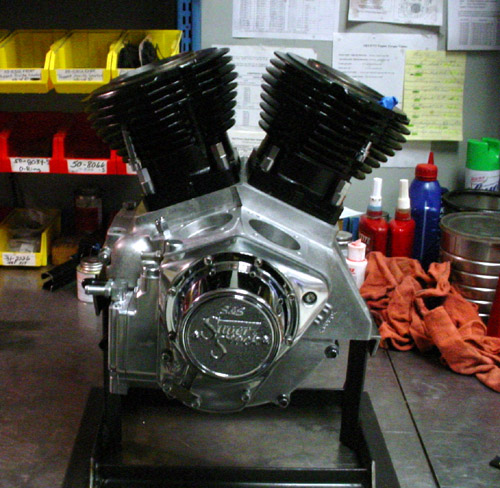
My engine was equipped with House of Horsepower cases. We used the same bore (3 5/8-inch) but S&S barrels and pistons with a 4.5-inch stroke (instead of 5-inch stroke). Stock bore is 3 7/16 and 3 1/2-inch for all 80 and 88 inch engines. This operation basically involved a S&S Sidewinder kit, including (left to right) cylinders, pistons, crank pin, connecting rods, cases and flywheels.
First Steve assembled the short block which was balanced to a 1300 bob weight for smooth operation and reliability. The S&S forged pistons are 8.2:1 compression with longer skirts for longer lasting reliability.
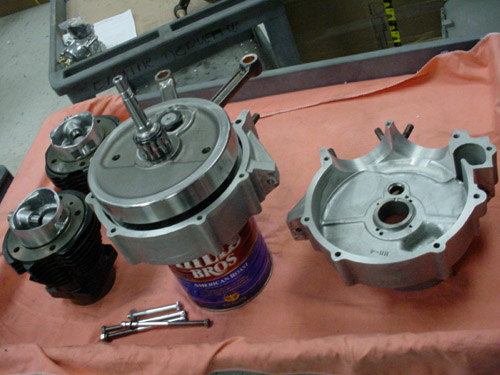
Then he assembled the wheels in the left case with fresh Timken bearings. My cases needed a ledge bored away for the longer skirted S&S barrels.
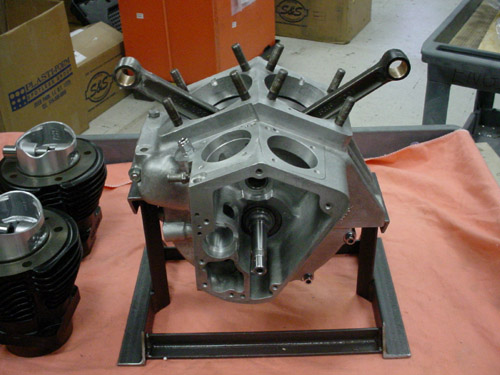
Next the other side of the case was slipped over the pinion shaft roller bearings and the lower end was complete. The flywheel weight is approximately the same as stock Evolution (lighter than Shovelhead wheel) for a balanced running engine and added reliability.
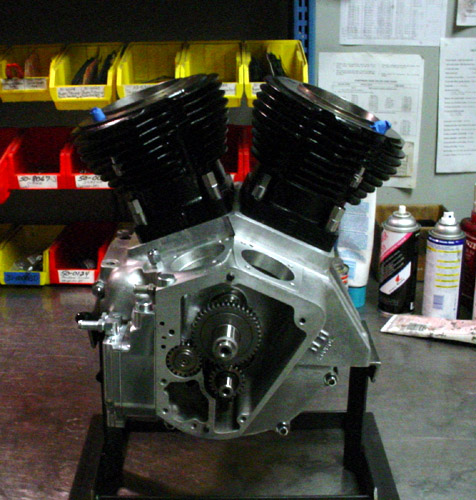
Ah, next came the pistons and barrels. I know we don't have all the details here, but at least you can see the big steps in building an engine. It's not tough but takes precision workmanship and quality components.

The final steps before shipping included the S&S oil pump installation and the cone cover. I'm returning a Compu-Fire ignition system to the cone in short order.

The engine is now at Phil's Speed shop. He're rebuilding the heads and will install S&S roller rockers, shafts, new Custom Chrome Black Diamond valves, new lifters (with bored-to fit lifter stools) and pushrods. Hopefully it'll be completed next week and ready to set into that Paughco frame. Then I can start bending pipes and making shit.
I've worked with Paughco for over 25 years, for quality frames and front ends, then this frame arrived and the tranny wouldn't fit. I had a 4-speed tranny plate that the JIMS trans slip right into, but the holed in the frame didn't align. I spoke to my tech guru, Frank Kaisler who contributes to Hot Bike, Street Choppers and was the editor of Hot Rod Bikes. He lives tech. Of course he pointed out that I needed a first electric start vintage plate. I had a late model, dipped, single sheet plate and the 4-speed job and neither worked. So I sat as my desk and poured a glass of jack. I had the bike buildin' blues.
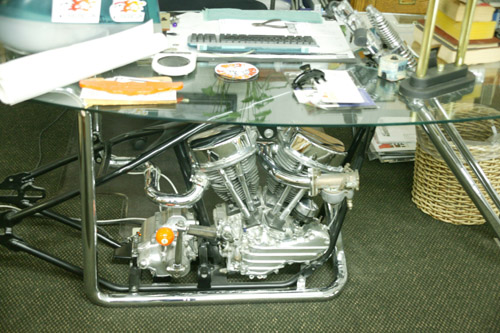
Here's the famous Bikernet Desk. I made calls about the tranny plate, unsuccessfully and slugged that amber liquid until my brow bounced off the glass top and I spied the tranny below–on the wrong plate. I couldn't believe it. All these years that desk ran with the wrong tranny plate, and it just happened to be the one I needed.
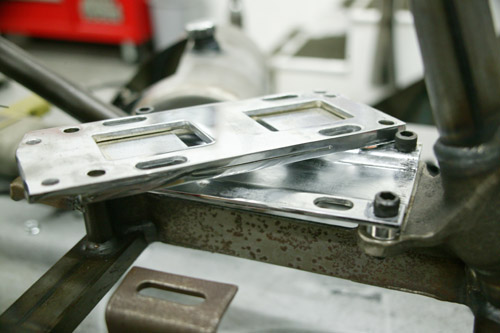
Here's both tranny plate together. The thick one with two slabs of steel is the original 4-speed job. The single, bent-in-the-center sheet with the four frame mount spacers was designed for the first electric start transmissions beginning in 1965.
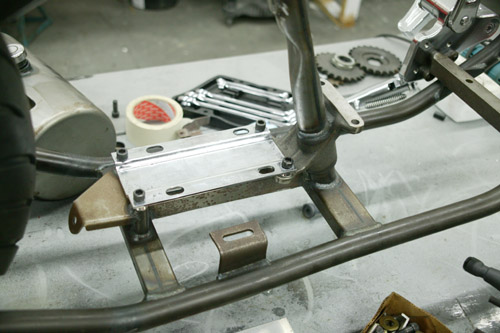
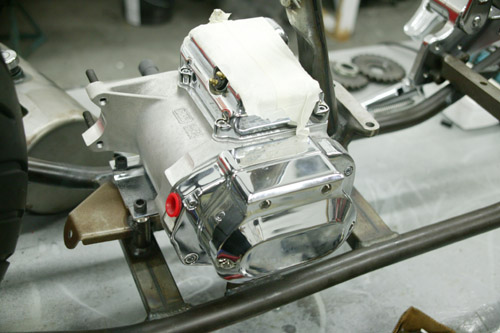
Finally the JIMS trans is in place with the proper mounting plate, and I was ready to move onto mounting the oil bag.
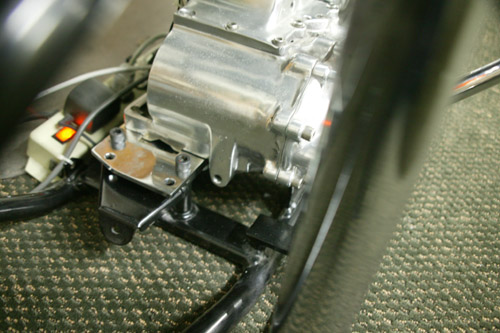
At last, after 15 years I installed the correct tranny plate into my desk. Damn, I'm embarrassed.
The rear fender is on it's way from Lucky Devil and I installed the Kraft Tech round oil bag last weekend. Movin' right along. You'll see that tech shortly. A new oil cooler/oil filter set-up is on it's way. It's a must for making the old iron last.
Sturgis Shovel Part 12
By Robin Technologies |

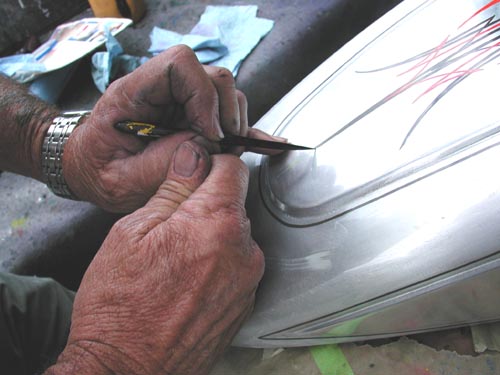
Hey, here’s quick bit on George The Wild Brush who handled the Pin Striping on the 2005 Sturgis Shovel project. He’s pin striped several other bikes for me in his 47 years behind the brush. Born in Hanford, California, a miserable military town, in 1944, he kicked tumbleweed while his mom worked on a base.
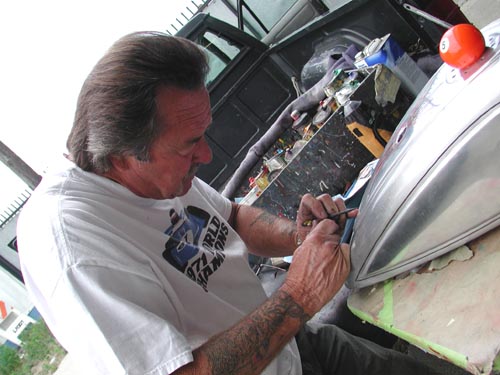
She moved to the safety of Southern California away from the miserable summer central Califa heat, to Long Beach then Lakewood (next door) where he went to school, but didn’t graduate.
He was warned that the fad would die so his vocation would fail. “The fad’s still rockin’,” George said. “My first car was a ’54 ford and I custom painted the driver’s side. I couldn’t afford enough paint to finish the passenger side, so I had the only cool side.”

He studied Von Dutch work, Larry Watson and George Barris. “I’ve striped refrigerators, toilet seats (new ones), and 50 and 110 Tom Gentry trans Atlantic ocean racing boats. He’s taught me a thing or two about striping. “It’s best to have the parts off the bike for the best quality art.”

It’s difficult to paint bare aluminum—“Paint won’t bond to it.” without a primer.” I worked at Gasoline alley for 15 years painting aluminum dragster bodies.
It’s also difficult to pin strip chrome—“It won’t hold up due to the lack of porosity.”
He only uses One-Shot enamel paints—“Can’t use any paint.”
With motorcycles it’s a good idea to clear over striping—“People don’t pour gasoline all over cars, but they do bikes.”
Cars don’t generally need to be cleared over striping work.
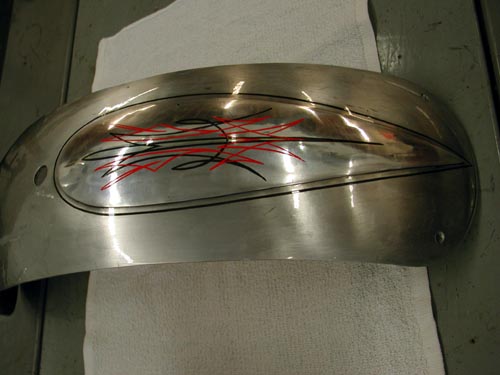
His number is (310) 488-5488 for classic pin striping and good stories.
George came to the shop just after I picked up the clear powdered aluminum sheet metal from Foremost Powder. He usually tells me what I’m going to have striped. I have a vote and initial color selection, then I best get out of the masters way.
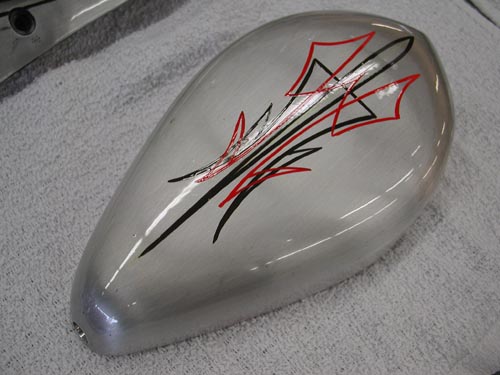
He striped the Goodsen Air Cleaner, which was treated to my holy treatment, then brushed with Scotchbrite to remove the polished appearance.
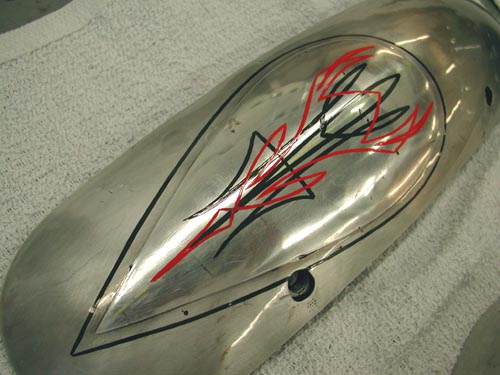
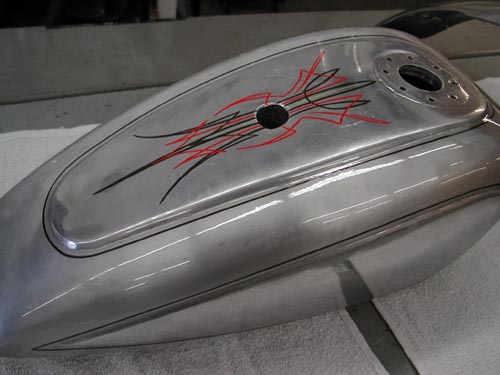
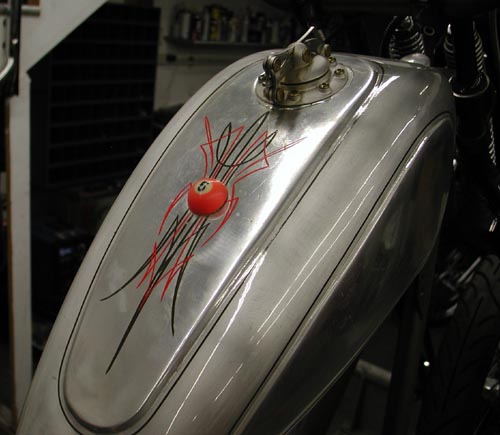
Then he striped the panel polished, highly-modified, XR750, Cyril Huze donated tank and Lucky Devil, custom made fenders. I polished the panels and brushed the rest for a two-tone effect. Not sure it worked, but George gave it a final touch.
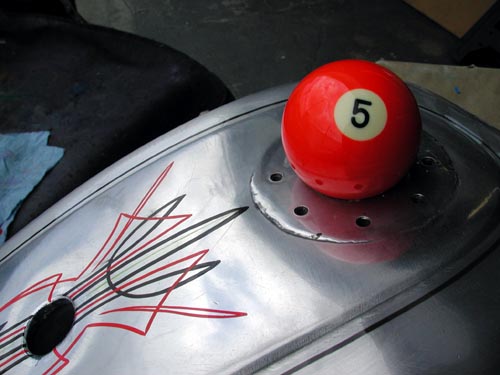
George suggested the 5-ball addition to the center of the tank. Not the gas cap. Ultimately I filled the center-mounting hole with a small 5-Ball to commemorate our company and all the women who put up with my shit over the years. In case you don’t know the story, I’ve been married five times, that’s five misses Ball.
Sturgis Shovel Part 5
By Robin Technologies |

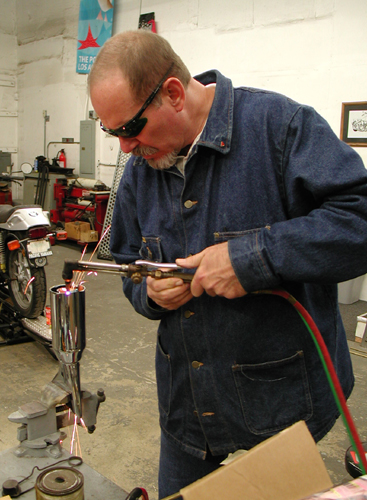
Helluva weekend. Anytime there's lots of motorcycle carnage,sex, whiskey and writing, I'm all for it. Maybe it's Valentines Daycreeping up. Make a note. Here's the deal on the Sturgis Shovelhead. Sincethe engine was in and mounted I went to work on the exhaust system,then seat mounting, position and played with the bars. I made a runto a local steel joint, because I had a notion that I doubt will worknow, but I'm still investigatin'.
Let's hit the highlights. I'm fortunate to have a young,talented fabricator/builder who I'm sharing ideas and resources with.Kent from Lucky Devil Metal Works in Houston is on the phone dailyfor tips and knowledge sharing. It's damn healthy to have someone whois in the trenches daily to assist. In fact I had a couple ofcrucial metallurgy question that morning, but let's hit what Iaccomplished.
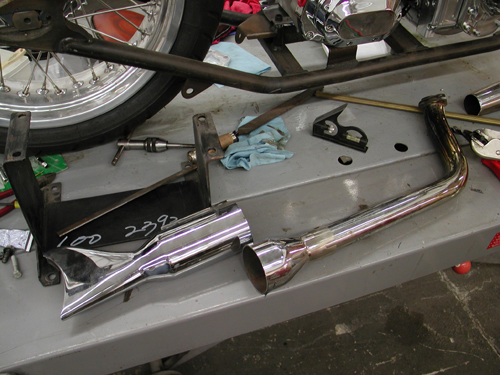
A crucial aspect of building any bike is planning. That'snot to say all my eggs are in a row. We'll see, but the more you canaccommodate, the less redo's will be necessary. Also, don't throwanything away. That junk part might be a critical bracket tomorrow. Idug through my partially organized pipe bin and found a set of oldglass pack, shorty muffler, shot gun pipes. I could use the rear one.I decided, since noise issues are a concern and performance issue area constant priority, I would build a set of shorty mufflers withBandit tuned baffles.

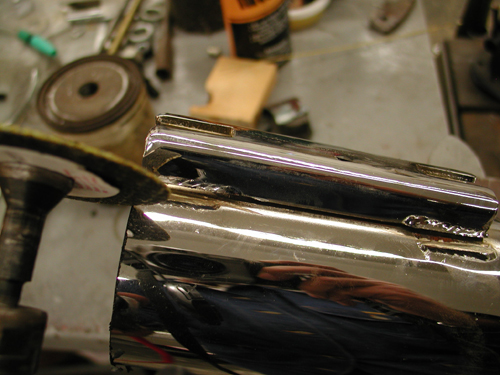
Then I spotted the fishtips in the pile and myconsideration changed. I dug further. Kenny Price from Samson allowedme to dig through his warranty bin when I was looking for stanchionsfor my Bikernet office railing. I remembered touring mufflers withfish tips, I kept digging.
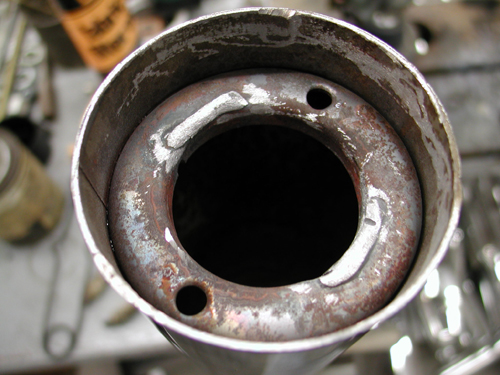
Sure enough I had a set and in quick movesI sliced them into chunks. You know me, I'm a gambler. I cut themwith no methodology in mind past the size and looks, but I came uplucky. Samson designed a baffle system with a cone at the front toguide exhaust pulses into the baffle and it seems to be working fortouring applications. I cut off that portion and discarded themajority of the baffle. But there was still 2 inches of baffle and astandard donut in the rear of the muffler. That's where fate movedit's evil hand over Richard Kimball again. Or in other words I rolledthe dice.
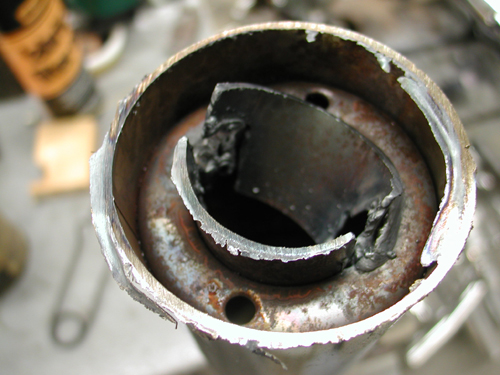
I spoke to Kendall Johnson recently and he told me aboutperformance stepped exhaust systems and reversion cones used to tunesystems at the rear of the pipe. I couldn't make this donut move upand back, but I had the makings of a reversion cone at the stern.With a torch I cut out the remaining baffle, then after speaking withthe HOT BIKE staff member, Craig Murrow, for a reversion cone descriptionI knockout out the remaining baffle, then with various cutting andgrinding cones I formed and smooth departure for the exhaust pulses.Then I had to remove the old touring mounts with a die-grinder andthey were ready to weld.
The rear pipe was comparatively easy since the pipe wasalready made except for the muffler and brackets. Shovelheads arenotorious for louse exhaust manifold connections and tearing out thesingle stud, so I wanted to mount them in the front and rear for asolid, secure connection. The only port for the connection at thefront was the oil bag. That was a bad choice and I'll run a bracket off the seat post before all is said and etched in stone.
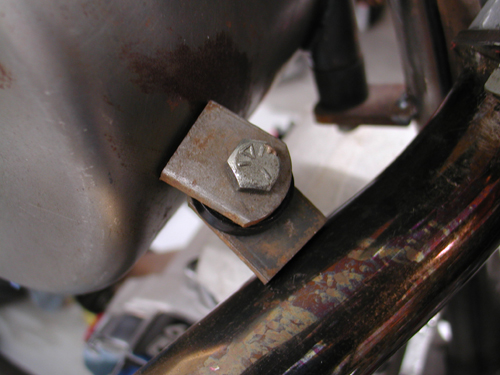
I had to make sure the pipe could be removed with the tabs onthe bottom, then I spaced the tabs apart with a heat sink material. Imay use Teflon, then the notion that the oil bag is rubbermountedfloated to the surface. What bearing would that have on thiscoupling? Hell the frame will vibrate like a mad dog. I'm stillquestioning that link, but we'll see, maybe a spring between the tabs? The final decision was the seat post bracket to come.
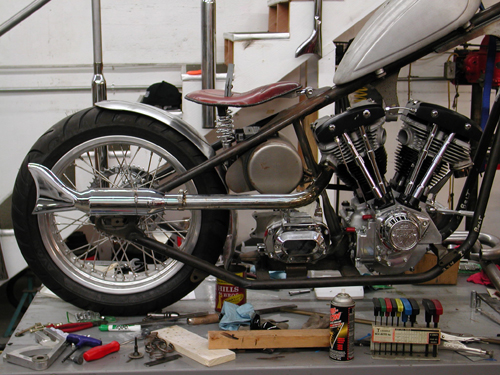
There was one other pipe design consideration–the length.I try to keep the pipes somewhat equal and between 32 and 38 inches.Buster's Sportster runs sharp and crisp with his hand-made 38-inchesfrom the Bikernet Headquarters, as seen in Street Chopper. So Idesigned this pipe to be 38-inches and not protrude past the tire. Mygoal was to make the front pipe curve out the other side and be ofequal length.
At the end of Friday night, one pipe was complete, toolswere scattered all over the shop and I had a couple of Hooker Headerchunks of 1 3/4 pipes segments cut and was fooling with the frontheader. The front was tricky as hell. I wanted to scoop out the leftside of the bike, which added length. I also had a bitchin Rohm Engineering oil filter/cooler system that mounts to the front motormounts and aims the filter at the ground for ease of removal anddraining. The pipe had to clear it significantly. This puppy was alifesaver. I planned to run an oil cooler (Shovelheads run hot) andfilter, for a lasting driveline and more oil capacity. My originalplan called for old school mounting on either side of the oil bag.This eliminated all of that and the plumbing for two elements, the cooler and the filter, wasreduced to one hot looking job in front of the engine for maximum cooling.
I spentall day long on Saturday, dodging the phone and working in thegarage. I had all the tools and materials I needed, even two new setsof welding glasses, which came in damn handy. The trick was to lineup the pipes, make all the right decisions, hope for the best andtack 'em. I did and with a level I constantly compared the pipe tothe top of the lift. The spacing worked out fine.
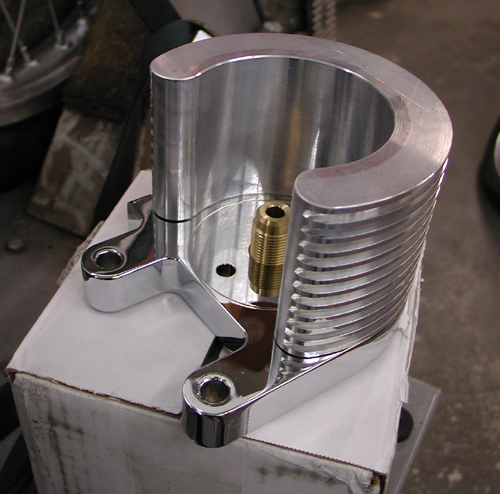
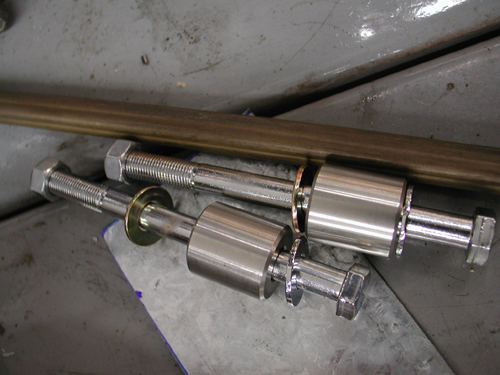
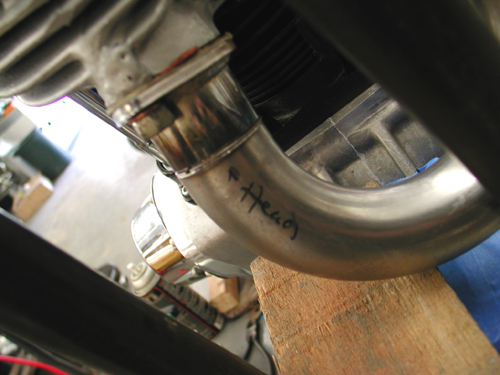
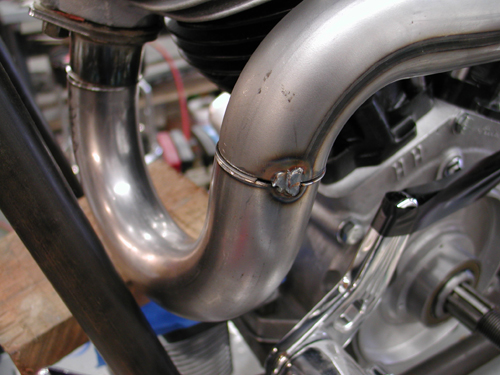
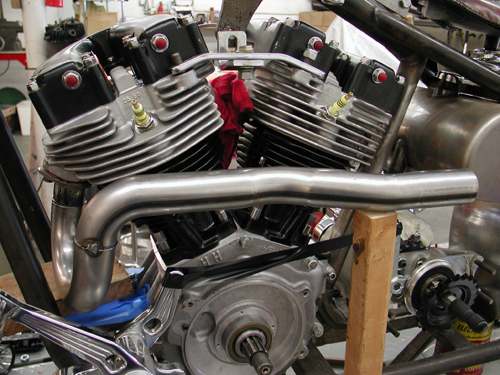
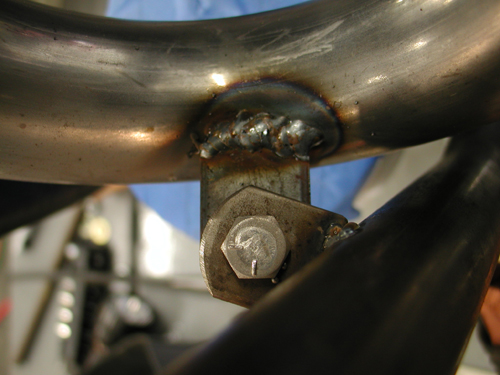
I cleared the top of the Rohm bitchin' oil cooler/filter mounthopefully by enough to allow the pipe slip down and out of the head (I was recommended to use a CCI Filter part number 270126).I tacked the tab with a spacer between the two for some jiggle room.And I made damn sure that the pipe tab was below the frame tab. Atthe back, the muffler was fabricated the same as the other one with aslight exception.
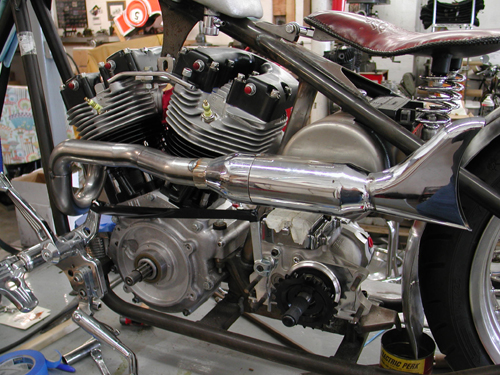
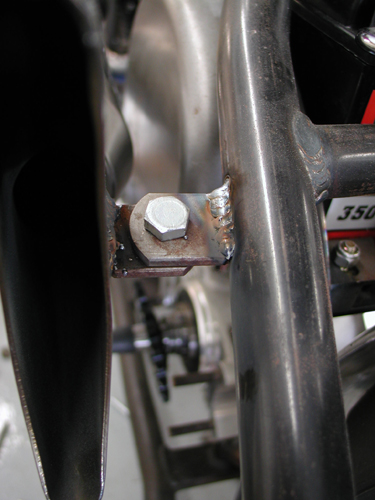
I shaped the reversion cone the same, cut off thetouring mounts and ground the tabs. Then I used a couple of V-blocksto hold it perfectly in line for tacking the halves together. Then Isliced off the crush tabs on the front of the Samson tapered muffler.They were wider and different than the other side, so I cut them off.You'll notice the difference, if you check both side.
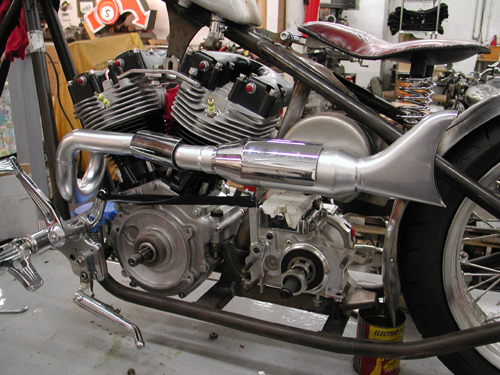
The front parts of the pipe were Hooter elements and theyare smooth mandrel bent segments. I used another one for joggedstraight piece between the muffler and the head. I took the 13/4-inch exhaust to my Muffler Master bender and bent it slightly oneway, then reversed the sucka and bent it the other way. It fit like adream and looped out enough to pass the oil bag. I used Hooker headeralignment sleeves to hold the front pieces in perfect alignment. Donedeal, I tacked them, constantly comparing the level with the lift,the pipes then the muffler. After the tacking was secure, another tabwelded to the frame, avoiding the oil bag (a Lucky Devil concern,since the oil bag is rubbermounted), then all elements wererechecked, I removed both pipes and MIG welded them as complete aspossible.

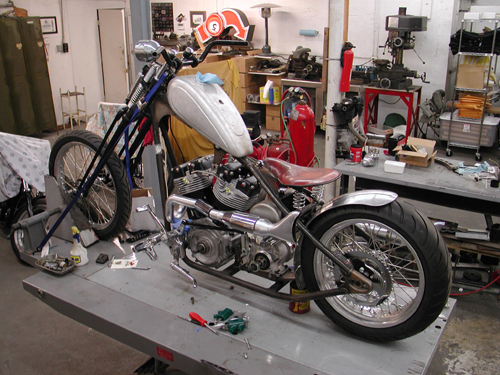
I find that MIG welding is a pain and blows holes in pipes easily.I also discovered that after I MIG weld a pipe I can flow the weldeasily with a torch and smooth out all the welds, fix holes and fillgaps. I actually found a piece of old steel rod, not much bigger thana piece of wire. I usually use old coat hanger, but it pops andwheezes from the paint coating.

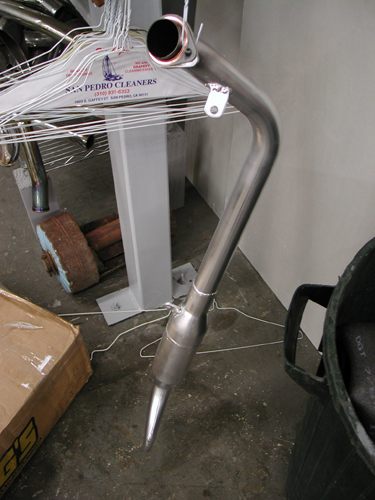

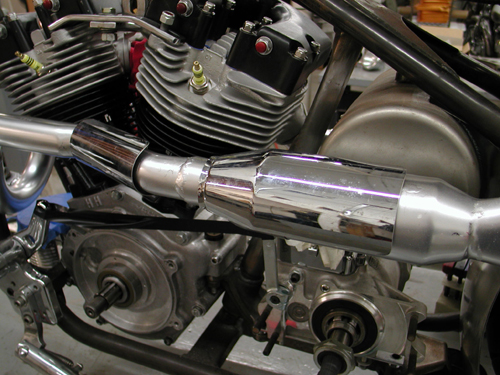
After the pipes were welded, flowedand checked twice, I ground all the surfaces with an emery disc andpainted them with whatever barbecue heat paint I had laying around.The lovely Layla is currently on her way back from Home Depot withsome flat black heat paint. We'll see how that works.
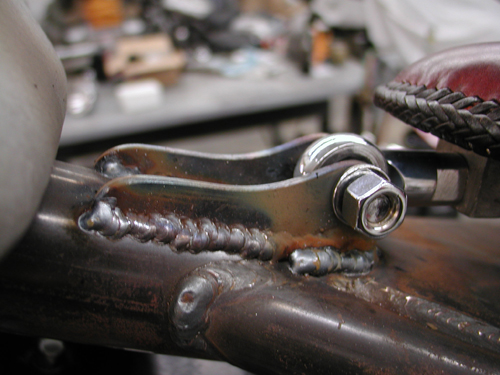
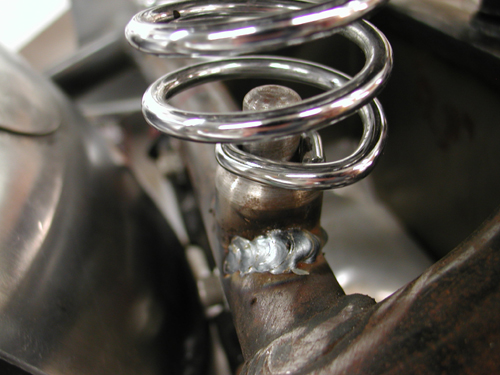
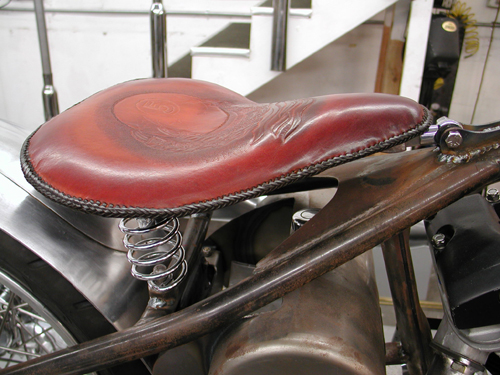
Kent from Devil hand fabricated the seat pan, brackets andbungs. I set them up and welded the parts in place. Then it was timeto roll the bike off the lift and see how she fit and where I mightneed heat shields. I discovered a couple of things. Yes, the scootwould require left side heat shields and nothing on the right. I alsotested my notion to sculpt claws out of brass, unsuccessfully.
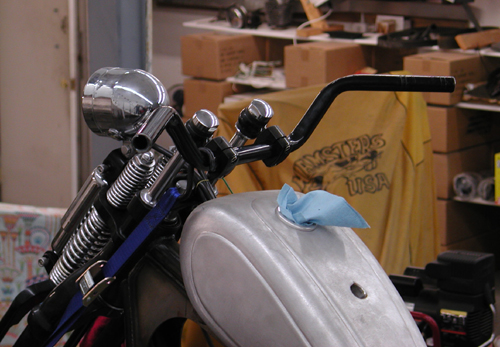
I also found that the existing bars wouldn't cut it. Igrabbed the old '48 Panhead TT-bars, narrowed them by 4 inches, and Isorta like them.
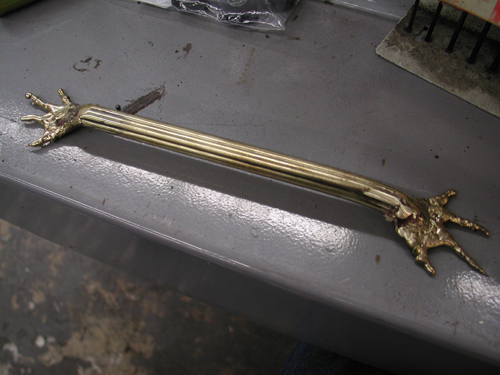
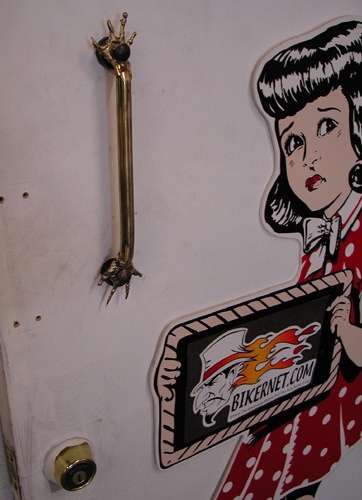
Okay, so I grappled with the sculpting business fora couple of hours and discovered that I can't control the brass likeI can steel. I spoke to Kent from Lucky Devil and he recommended thatI try TIG Silicon Bronze rod. I'll try that next week. In themeantime, my first brass sculpting attempt ended up on the shop door.Let's get the hell out of here.
Ride forever,
–Bandit

1928 Shovelhead Project Part 1
By Robin Technologies |

In an effort to stay tuned with the rapidly growing and ever changing industry the staff of Bikernet began a project Shovelhead several years ago in conjunction with Randy Simpson of Milwaukee Iron and Arlen Ness. It’s been a strange road, but we’re now rolling closer to completion with the assistance of Rick Fairless of Dallas Easyriders and his ace fabricator Jim.

The project began with the purchase of a slightly destroyed Mexican Police bike from Arlen a couple of years ago. He had scored some 300 1984 Mexican cop bikes that had been ridden through several revolutions and costly rebellions. The bikes were shot at, dragged, bombed and ridden harder than any V-twins on the planet. When we first purchased the Shovel complete with police sirens and blinkers, we assumed foolishly that we would restore it to it’s original fighting condition. Arlen even hand picked our unit specifically with our goal in mind.
Well it’s one thing to dream of a restoration, but when the cast iron triple trees are broken, the frame is bent, all the sheet metal destroyed we took a step back and said, Help! We pulled the Engine and sent it to JIMS Machine for a rebuild along with the Transmission. With the cases replaced along with the barrels and heads and all the internals replaced, the engine was ready to rock once more. A similar concoction was mixed for the transmission and a couple of us dressed all in black and prepared to bury the chassis in a shallow grave in the desert outside of 29 Palms, California when the Editor of “Biker” pointed out that we had a valid pink slip. Dean, salivating, over the dying chassis took the entire unit and paid us handsomely for the paperwork. We suspect that he made a rocking chair out of the frame and wheels. During one of our weekly Bikernet meetings we discussed what to do with the Shovelhead drive train, and in the process we started discussing various options and some of the customs we respected the most. Several suggestions were thrust onto the rusting boardroom table. First Randy Simpson had volunteered to help us build an old time looking bike from the remnants of the ’84. We voted unanimously to pursue this avenue, since we had always been impressed with the workmanship and design Randy injected into his own 1928 Shovelhead projects, and he had a desire to create a simple chassis kit to build one of these puppies to market to the public. We agreed to help him promote the concept. We also all agreed that a gesture to the community of San Pedro was a necessity since several members of the staff had been arrested and the headquarters were constantly under surveillance, so we decided that Bikernet needed its own private San Pedro Police bike. How else could we crash the local parades. Randy is a persnickety builder who takes great pains to build quality parts for the market. Two years passed and he still didn’t have the frame built. He was obviously so successful with his growing line of fenders that his chassis concept was slipping onto the back burner. Arlen Ness was also taking giant strides to build a similar machine and if you picked up a recent Easyriders you would have seen the fruits of his labor in his 50/50 Shovelhead. In addition Chrome Specialties with the assistance of Chico in Southern California had recently completed a similar project around a Sportster (It’s called Trick and is featured on Bikernet right now). The competition was stiffening. Randy dropped out, and we moved ahead, and with some research we discovered that a number of reproduction parts are being built in Europe for early Harleys. Early like in 1915.
Devoted to successfully completing this project we picked up a rigid frame from Paughco. This is a standard scale Paughco Rigid for Shovelheads. From there our old part contact was Fred Lange in Santa Maria California. Fred informed us that a European group is remanufacturing 1915 springer front ends, flat track tanks, headlights, fenders and Fred was making appropriate sprung seats for these models. We were in business. We ordered the flat track tanks, the fender for a side car so it could be used for the front and the rear, a hand leathered seat and snuck out of the hills over looking Santa Barbara.
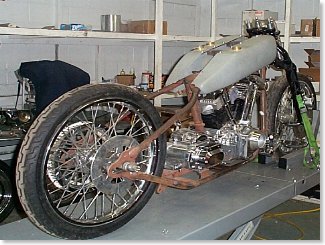
We had a Bad Boy front end, Wheels, etc. We’re in the market for some Custom Cycle Engineering lowering rockers. At that point we needed miscellaneous parts, pipes, etc., and we could get this puppy on the road. It was time to call in a favor. Rick Fairless had purchased the exclusive Bandit I Pat Kennedy Built bike from Bandit and part of the deal was parts and labor on a bike project in the future. It was time to call in that note. Then in a stroke of bad luck and good, Marty Ruthman decided to close his shop abruptly due to health problems and he had a massive sale.
–Wrench
1928 Shovelhead Project Part II
By Robin Technologies |

In a dank dark corner of a dusty debris strewn shop behind the Strokers Saloon on Harry Hines Blvd in Dallas was a small stack of bike parts guarded by a massive starving pitbull with one eye and most of one ear chewed away. The beast was so vicious that it once chewed through a 1/2 inch tether cable, and ate four Avon tyres before it could be subdued and chained in place. No one had the balls to feed the animal and it ran off so many customers that a collective decision was made to relegated the dog to guarding our Shovelhead project. It was like a death sentence. The lovely Lena, the 14-year-old daughter of Rick and Tina Fairless, the owners, who was scheduled to be Bandit’s 6th wife had a fiery temper and told Bandit, in no uncertain terms that the bike would be completed until he left the other women behind and came to Texas to settle down. The Dallas crew surmised that it would never happen so the fuckin’ dog would starve to death waiting for Bandit to return to collect the fair Lena and complete his pact with the marriage counselor.
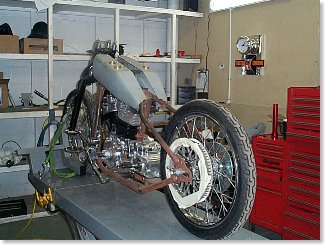
Unexpectedly during a freak Texas panhandle thunderstorm Bandit walked into the shop, carrying a turtle the size of a baby moon into and asked for the Lovely Lena. Upon presenting her with the turtle, her hardened resolve melted like a torch to a metal hanger and she swooned then demanded that her crew set to work on the project. We apologize for the long-winded explanation, but it’s important to understand all the delicate facets of this project to obtain a feel for the treacherous nature of this undertaking and the lives that hang in the balance.
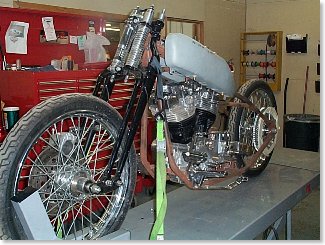
Just then the mega Dallas Easyriders store had a mass exodus of mechanics. Two were hospitalized trying to reach the parts, one died. Several were so pissed off at the shear audacity of Lena’s order that they started a competing business down the street. In reality they were so jealous of Lena’s affections for Bandit that they could no longer work and watch her dance through the shop on air. Enter Jim the transplanted fabricator from Florida who was hired before he knew what he was getting into. If you’re not from Texas, you won’t be familiar with the labor laws. Chain gangs are not exclusive to the Texas Penal system. They are a common phenomena in the work place. Jim hasn’t seen his family since going to work for the Fairless contingent. Between you and us, we have slipped Jim a note that once the project is finished we will spring him in the crate they plan to ship the bike, but that’s another story.
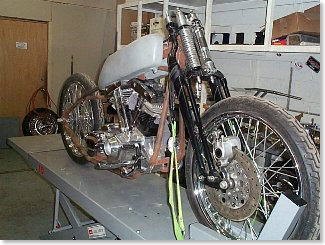
Jim has now modified the tanks for fit the Paughco rigid frame, mounted the engine and trans and front end. Randy Simpson is bending the bars for the project. Jim his building a box for under the seat for the battery since the oil will run from part of the gas tanks to the engine. If you note the belt pulley, we are now planning to run a chain for authenticity and since some other aspect of the bike forced us to go with a chain. We are still looking for the ultimate taillight to go with the project, and we hope to lower the front end enough to make the tanks more level, with Custom Cycle Engineering lower rockers. The front wheel is the stock Bad Boy 21 with an Avon tire. The rear will also be an 21-inch Avon with disc brakes. Pipes are scheduled to be reproduction stock early shovel pipes from Paughco.
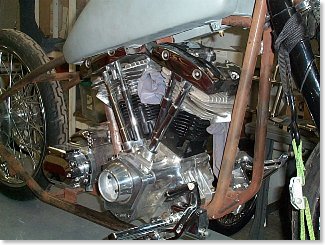
Watch as this project comes together. All bets are that the San Pedro Police bike with never even see the border of California, unless she sees the coast before the bike arrives. Stay tuned.
–Wrench
Amazing Shrunken FXR 11: Mid Controls
By Robin Technologies |

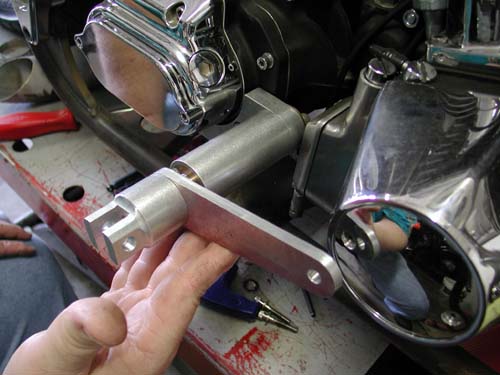
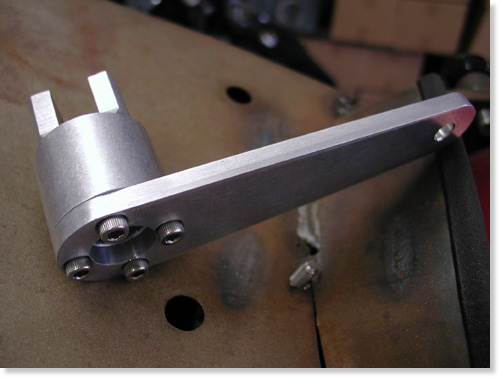
Shrunken FXR mid-controls by Giggie at Compu-Fire. Note: we need flat-headed Allens.
Giggie our master machinist from Compu-Fire rolled up to the Bikernet Headquarters last Saturday. We haven’t seen him for months due in part to his work on new starting systems for the custom market. They are dancing through the final development stages of a system configured to drive off the crank shaft of the motor with a 60- to-one ratio compared to stock 48-to-1. That will leave the area about the tranny available for custom applications or lower seat heights.
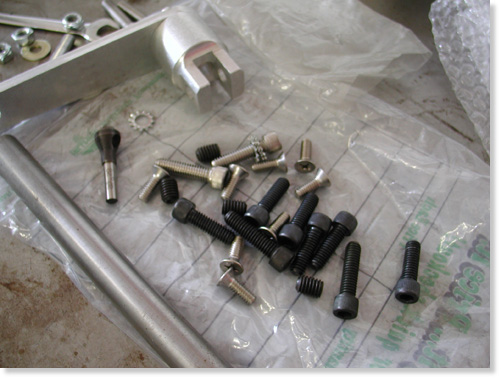
Giggie brought some wrong fasteners but lots of them and counter-sunk drilling tool.
Currently Compu-fire is soon to release a standard starting system, the Gen-2 HT, with 33 percent stronger magnets, 6-roller longer clutch (32 percent longer) with 30 percent more cranking while drawing the same amps from the battery.
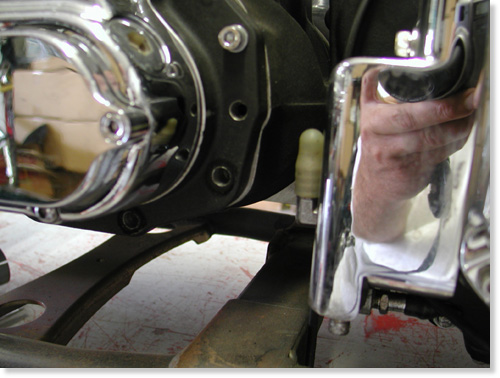
Here’s the tranny without the brake pedal components. There’s some tight tolerances going on.
I spoke to him about our cooling debate and here are some of his thoughts. “You want your oil to run at a minimum temp of 205 to eliminate water vapor or condensation that accumulates in oil,” Giggie said. “At 240 to 260 degrees petroleum based oils begin to break down, although synthetic lubricants could be good to 360 degrees. I have my doubts.”
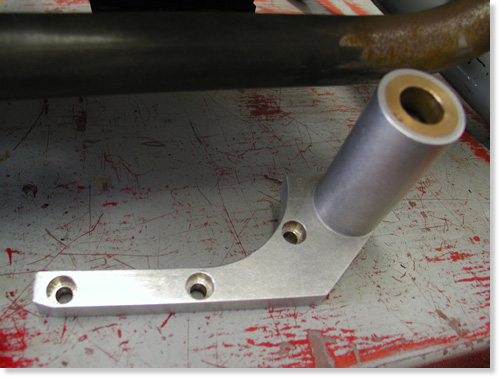
Base bracket to be bolted to the transmission.
Giggie developed an oil cooler for his FLH that kicks on at 220 degrees and off at 200. It has an in-line thermal switch continuously reading oil temp. He installed his cooler in a box with vents and two small electric fans wired to the thermal switch (to cool while idling).
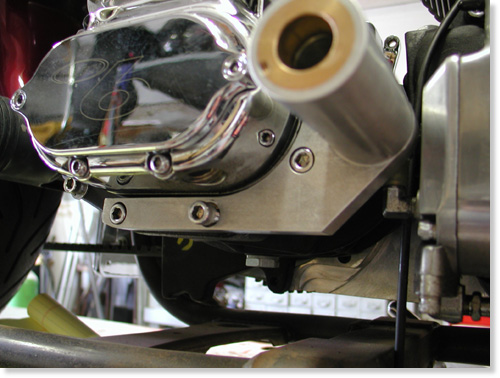
Giggie’s mounting bracket bolted in place.
Regarding our project Giggie dropped off hand machined mid-controls for shifting and rear brakes. Next, we must buy a H-D slave cylinder with remote reservoir with a built in brake switch. We will hide the reservoir behind the oil bag and design a bracket to hold the slave under the trans.
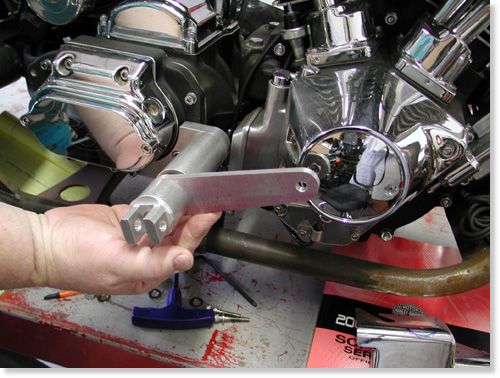
This shows the pedal and shaft in the mounting bracket.
Giggie will supply us with four more bushings to run behind the shift and brake levers, two 1/8-inch thick and two 1/2-inch thick, to allow us variable spacing away from the engine pulley or point cover on the cone.
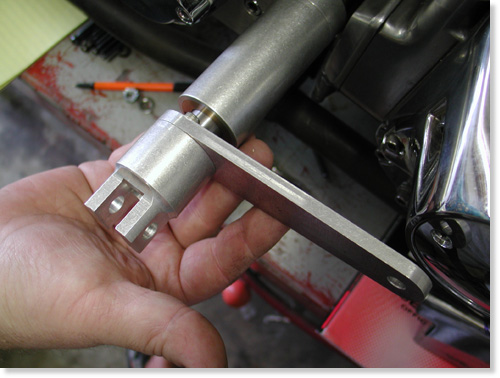
Giggie will supply two different bushing to be installed between the brake lever and the mounting sleeve. We’ll need the space to clear the point cover.
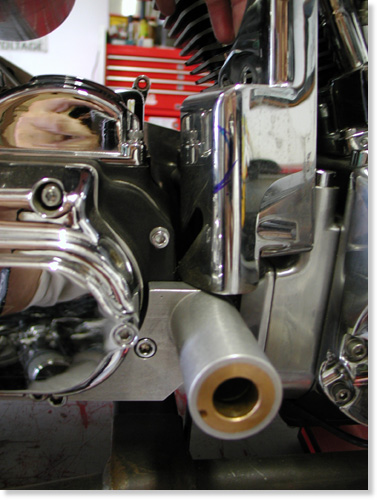
Unfortunately the sleeve hit the oil pump cover. We may be able to remove enough material or just polish the pump. The oil pump inlet fitting will also need to be turned down. It’s close.
With the bushings in hand we can develop our final linkage behind the BDL belt drive plate and Giggie’s tranny plate to connect with the slave piston.
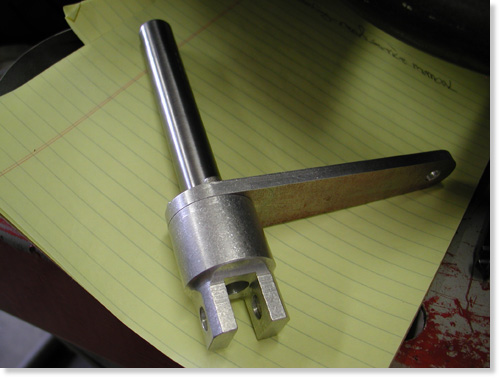
In both cases we need to cut and machine the other end of the shaft, depending on the linkage.
I’ve decided to remanufacture the exhaust system which is now a tight fit around the new brake linkage. Giggie also machined the foot peg mounts to accept any standard, pivoting foot pegs.
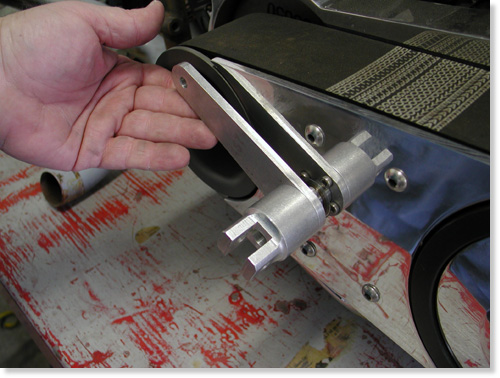
The slick new mid controls for shifting slid through bushings machined into the BDL outter and inner covers.
Next we need the bushings, slave cylinder and a day in the garage hammering and welding a new set of pipes.
–Bandit

Back To Part 10, Page 2
Amazing Shrunken FXR 14–Getting Close
By Robin Technologies |

We’re getting right down to the bottom line. Harold Ponteralli, our painter called, “If I deliver the paint can you make it to the show.” I assembled bikes overnight for run deadlines in the past, so we went for it. We installed the new sheet metal, ran the oil lines and picked up a few chrome knick knacks from Long Beach Chrome. Frank was on his way to the Bikernet headquarters with a brown bag full of Goodridge hydraulic fitting. The heat was on.
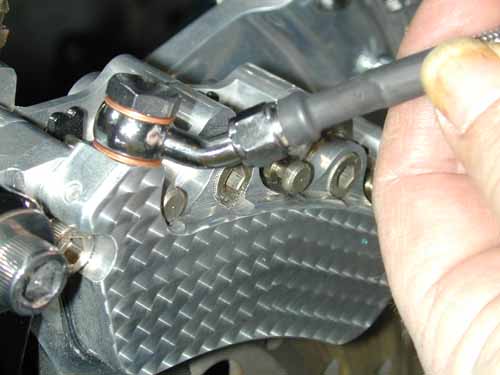
I installed the exhaust while Frank custom cut lines to fit each application perfectly. You can see how the man does it in our King tech articles using Goodridge lines, fittings and shrink wrap. For throttle cables we relied on Barnett for custom cut-to-fit lines.
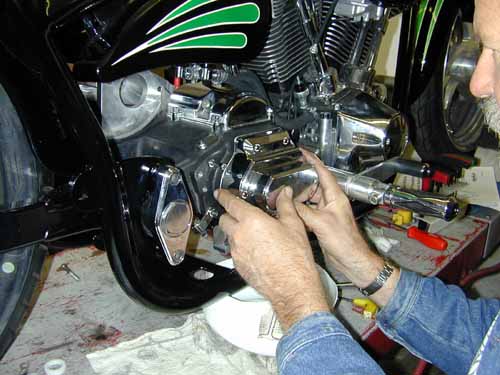
We replaced the Rev Tech 6-speed, cable tranny cover with a Joker Machine clean, chromed billet, hydraulic clutch. Why did we go hydraulic? Hell I don’t know, maybe to balance the Joker controls on the bars? The cover slid right on and we torqued it to specs (15-20 ft. lbs.).
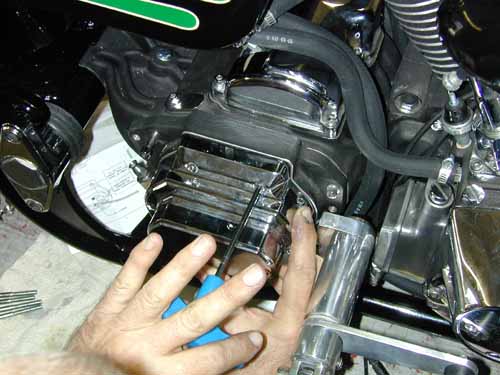
While I wrenched Frank ran a line from the Joker front brake mastercylinder to the Custom Chrome Billet-6 brake caliber. Crazy John took the calipers to a shop to have them milled smooth then engine turned for an added detail. Whatta ya tink?
Then Frank ran a hydraulic line from the H-D rear brake master cylinder (stuffed under the tranny) to the brake switch bolted to the tranny case, through a series of Goodridge fittings. Finally another line was constructed from the brake pressure switch to the rear brake caliper. We kept in mind that the wheel will be adjusted for belt tension and will flex up and down with the swingarm. There needed to be slack in the line.

Finally Frank carefully made a line that ran from the Joker handlebar controls to the Joker hydraulic tranny front. He immediately started bleeding the brake systems and they fell right in line. We watched the direction air bubbles might travel. Generally front brakes can be bled several ways. Some pump the fluid in from the caliper bleeder nipple forcing bubbles north out of the control reservoir. Sometimes, as soon as it’s filled, it’s cooked. No bleeding is necessary.
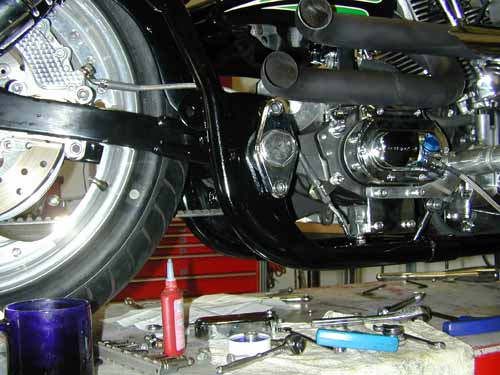
Sometimes I fill the reservoir and pump it slightly until the Dot 5 runs down the line and fills the caliper. This can take awhile, but as it sets the bubbles rise to the top and out the reservoir until it’s cooked again. We were lucky. The rear brake caliper was installed above the master cylinder and the bubbles blasted to the surface with little bleeding. Our Giggie (from Compu-Fire) designed, mid-brake lever worked like a champ with the sharp Custom Chrome pivoting pegs.
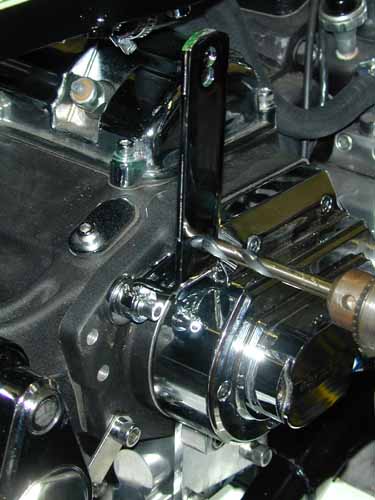
As a side note I coated the pipes with rattle-can barbecue heat flat black. What the hell, if they don’t work, I’ll mess with them again. Oh, and I tried to find a place to stash a H-D rear brake reservoir but couldn’t. I held my breath and entered a Yamaha shop and ordered a small sport bike unit. We made a bracket and stashed it under the tranny.
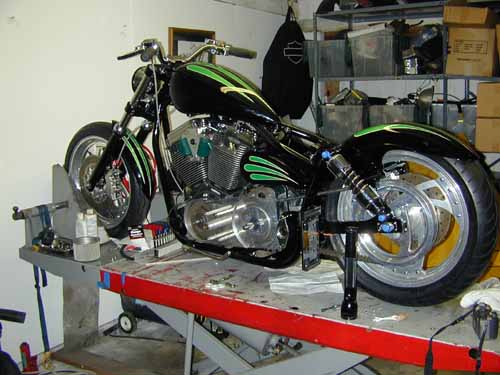
Building custom bikes is all about options, abilities, resources and a handful of rules. Check the John Covington Safety Code in Special Reports. He makes some good points. There’s also various considerations between rubbermounted bikes and rigids. For instance we designed the rear fender to hug the tire, but it moves with the swingarm which means the sonuvabitch better be strong. Also there needs to be considerable space between the seat and the rear fender for shock travel.
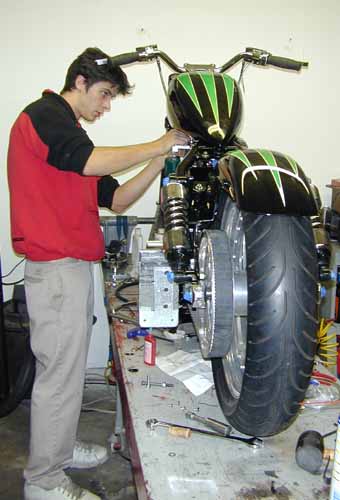
On top of style is ride consideration. I like to build bikes that will hang for a cross country run, handle slick roads and corner without dragging pipes or pegs. And it better corner. That’s what bikes are all about. Alright, I got off the tech. Kyle, the shop intern, installed the Custom Chrome petcock and gas line to the carb. He cut the line and inserted a gas filter (check the arrows for flow direction).

We loaded up the Cyril Huze oil tank with RevTech 10-50 Oil and looked for the UPS man. We waited patiently for the Le Pera styled/Bikernet seat to return to the fold stitched with emerald threads. Harold Ponteralli painted the sheet metal and want to see it in the Easyriders Pomona show. We didn’t make it. Then he jammed us about making the Pomona Roadster Show and we busted our buts. I did a couple of midnight runs installing the Custom Chrome stainless plates under the rear axle and polishing stainless fasteners. The gloss black powder arrived right on time from Dallas. The chrome sparkled and Custom Chrome delivered parts when we needed them.
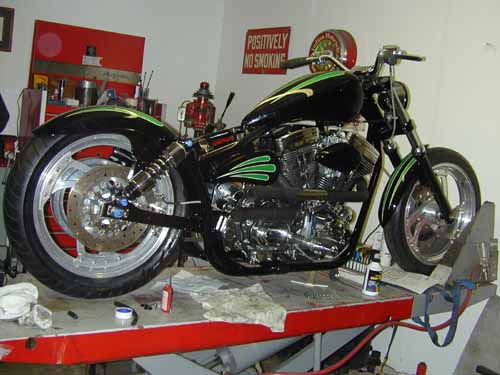
If the seat had rolled in the door, we would have wired the bastard into the wee hours and drug the scoot to the show, but nooo. Cross-eyed, we pulled the 1928 Shovel out of the headquarters, also painted by H-D Performance in Vacaville, California, detailed it and delivered it to Pomona. It was essentially built by Strokers Dallas, and sonuvabitch if they weren’t at the show with a half a dozen Stroker bikes. They took Best of Show and the Shovel took third place in the classic category. Whatta week.
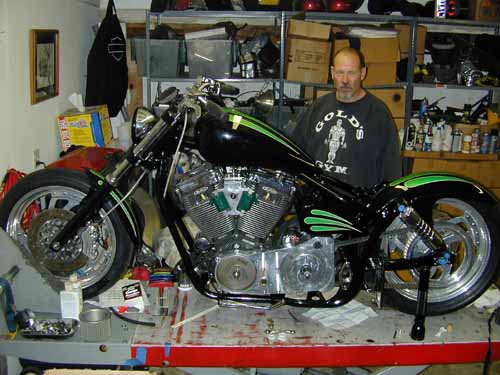
At this point we need final shifter linkage, which Frank fabricated, so we could install the BDL primary drive. Then some wire and we can fire this puppy. Hang on.


Mudflap Girl Part 1a
By Robin Technologies |

Back to Mudflap_Girl_Part_1_the_Concept
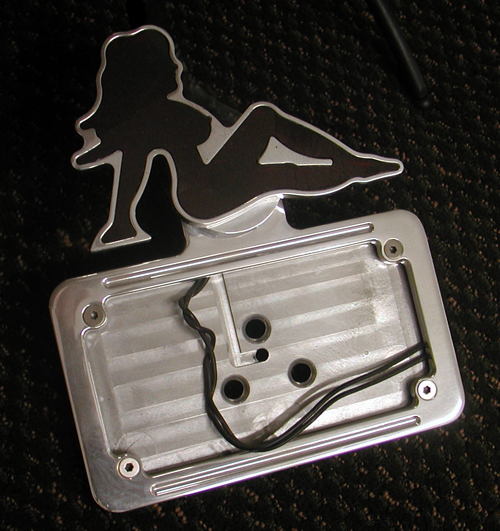
So we’ve collected a handful of mudflap girl products from Billy Lane, at Choppers Inc. , 2-wheelers in Denver, Sturgis and Daytona and Nick from New York City Choppers. Then we needed a fitting bike project, and one surfaced. Seems a Bikernet babe grew up in the San Pedro projects with eight brothers and sisters. The oldest one, and most supportive, hardest working, was Brad Olsen, a longshoreman crane operator in the LA Harbor.
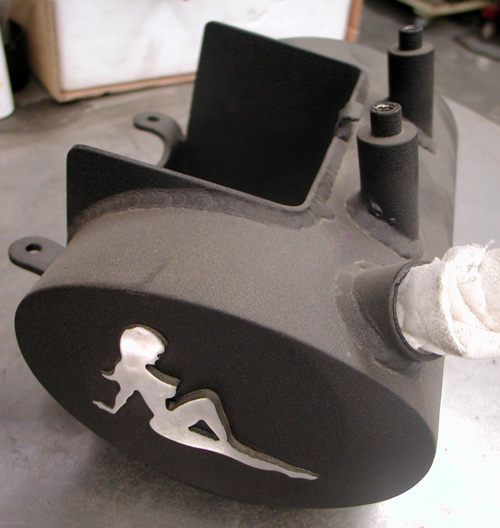
Those kids grew up on the tough side of the harbor and Brad took the brunt of the hard life, became a fighter and family member defender. He worked the ports, went to school, became a tugboat captain and ultimately, a crane mechanic. For eight years he trained under Richard Bustillo, who worked with Bruce Lee, and Brad became a master and owner of his own dojo, Harbor Kick-Boxing in San Pedro.

Brad fought for his brothers and sisters, and then worked with inner-city kids to build their self-defense abilities and self esteem. Brad has owned a 1961 Panhead for 25 years and keeps it pristine. It’s his baby, but his kicking knee is damaged and he needs a long-distance touring bike with an electric starter. That’s where the mudflap girl came into play.
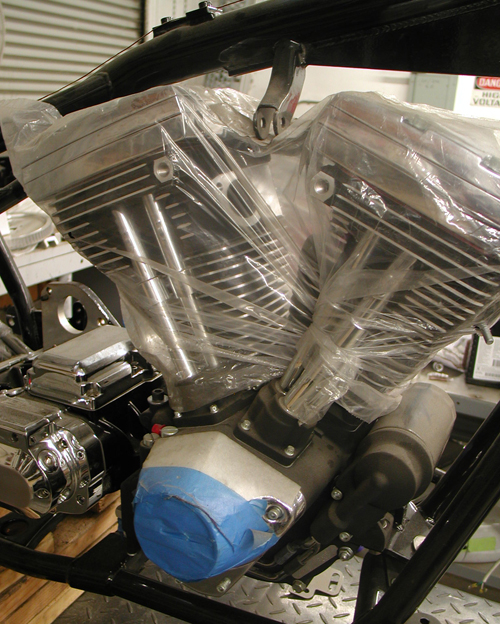
The project started with a salvaged 1998 Dyna Glide basket, which we tore apart. We sent the engine to Harley-Davidson for a re-man effort with the help of Fullerton, California H-D. The transmission was rough and we wanted a 6-speed for those long Mudflap Girl highways. I had a JIMS 6-speed, which I returned to the JIMS factory. We switched and twisted the Dyna Glide 5-speed transmission into a JIMS FXR, 6-speed and a Softail 5-Speed for another project (my 1915 5-Ball Factory Racer).
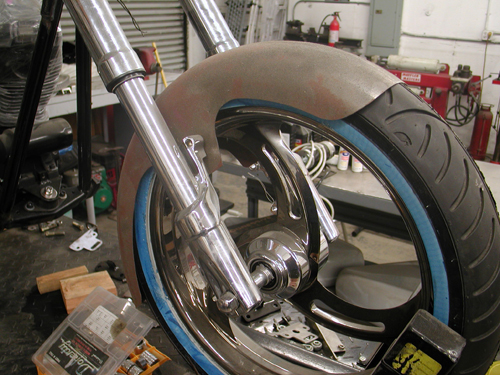
I’m not a big Dyna, fan so we dug out my last Quantum, Kenny Boyce styled Pro Street FXR frame and went to work finding parts. I bought a used Arlen Ness FXR swingarm from LA Chop Rods and dug out a wide Custom Chrome inverted front end with turn signals built in. The overall design element called for building a tough and reliable touring motorcycle for Brad.
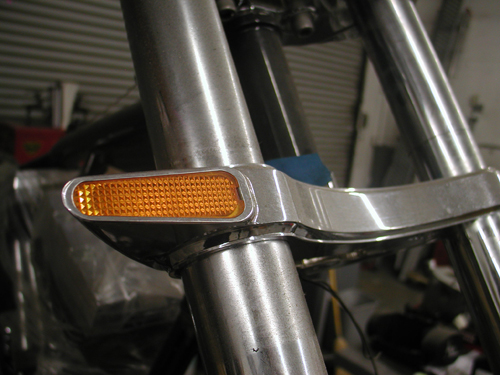
Another key element for the overall package was the bags we ordered from Redneck Engineering. Once we had a set of Renegade Wheels like we used on the Assalt Weapan, mounted to new Cobra Avon Tires we were ready to begin the mock-up stage.
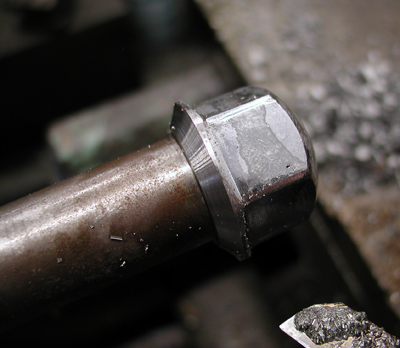
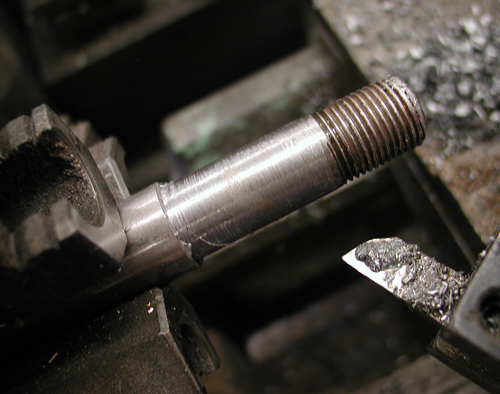
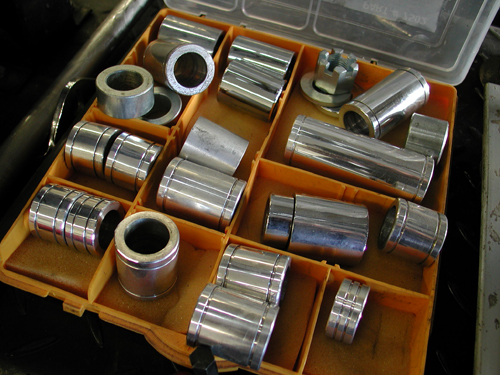
Of course, I used Doherty Machine wheel spacers to center the wheels and had to machine a stock axle to fit the Custom Chrome wide glide.
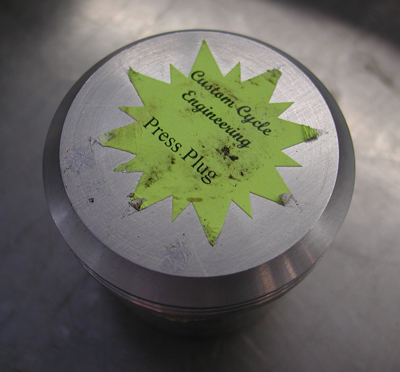
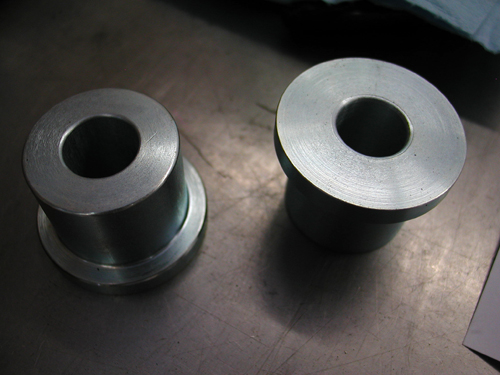
Handling is an issue with any rubber-mounted bike and we pressed in Custom Cycle Engineering swingarm bushings to tighten the ride. Plus I’m still trying to work with a tougher swingarm axle from www.Glide-Pro.com.
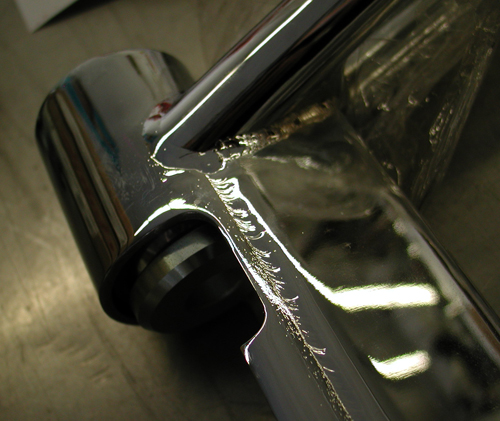
I spoke to a couple of builders about installing the driveline in a FXR frame and some bolt the engine and trans together, then lay them on their sides. They slip the frame over the top and install the swingarm, swingarm axle, rubber-mount biscuits and transmission to the frame. Unfortunately, I don’t care for that system. It’s against the Code of the West to lay a Harley engine on its side on the ground. Bad mojo.




We mounted the front end and front wheel to the frame, then put a jack under the frame. Then we mounted the swingarm and transmission together in the frame with the axle. Next we installed the Renegade wheel. I moved the jack. with a chunk of wood to lift the transmission until it was level.
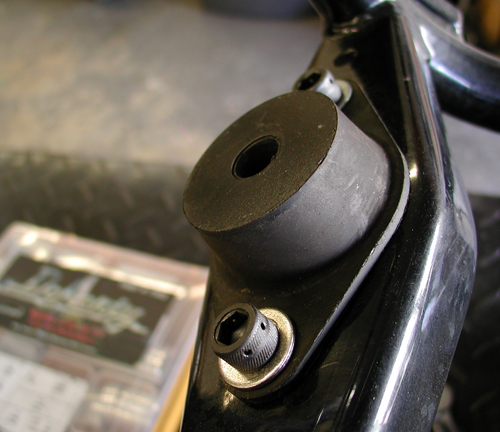
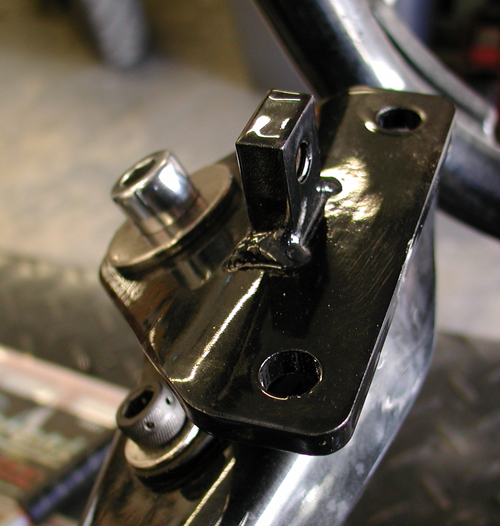
Then came the Quantum front motor mount, which was offset. We may replace it with a stock touring mount. Here’s what Rogue had to say about it:
No, they are not specific to the frames you have. They can be used with anyrubber-mount FXR frame to offset the engine 3/8ths of an inch to the left.We originally used them with the frames Kenny Boyce made for Quantum.
Looking back over some old paperwork it appears you got two blackpowder-coated Quantum frames that were made for Quantum by Kenny Boyce.
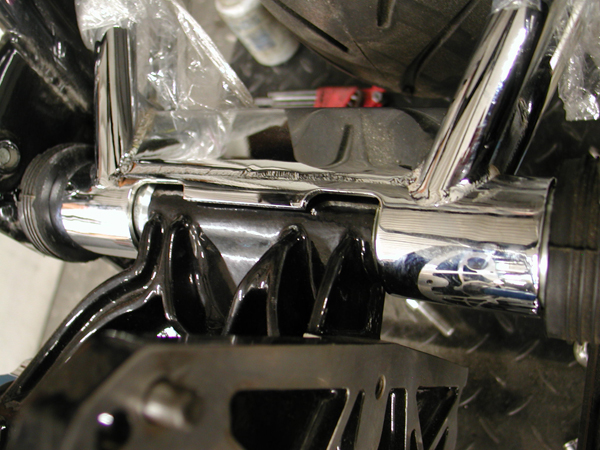
These frames were used with the front offset mounts and had the transmissiontail shaft modified by removing 3/8ths of an inch from the left side and useda spacer of the same size on the right. This moved the engine andtransmission equally to the left.
Later, Quantum used a set of offset rear swingarm end caps as opposed tomodifying the transmission. If a stock front motormount was used, no changes had to be made to the rear.
My notes say you also got a bare Quantum frame made for them by Kraftech. The mounts were usually used when using a fat tire on the rear.I had a bunch of them and figured you could use them for something. You donot have to use them!
I was confused by the offset, so it’s always a smart notion to check with someone who knows. Rogue worked for Quantum back in the day. We will eliminate the offset front motormount plate as we roll forward.
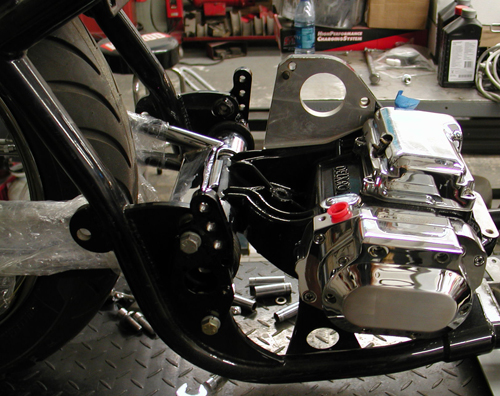
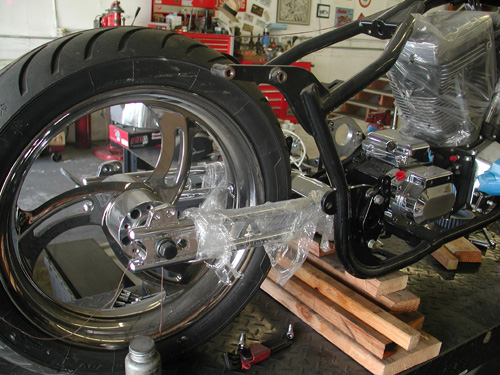
With the trans jacked level and the front rubber pad mounted loose with the front engine plate, mentioned above, snugged to the biscuit with a ½-inch bolt, we dropped the engine into place, like we would in a rigid or Softail frame.
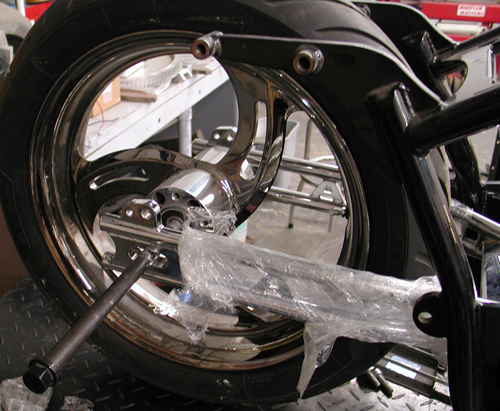
Next, we’ll replace that front motormount, shave off the existing tank mounts, start to mount a Custom Chrome gas tank and rear fender and prepare Redneck Engineering bag mounting brackets.
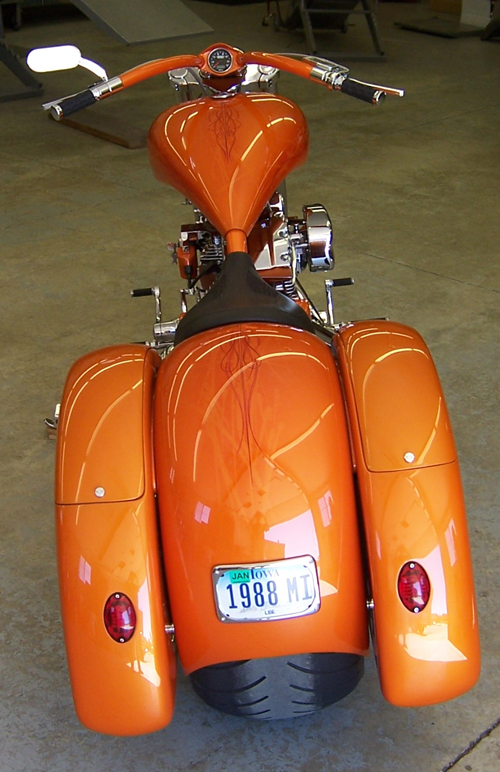
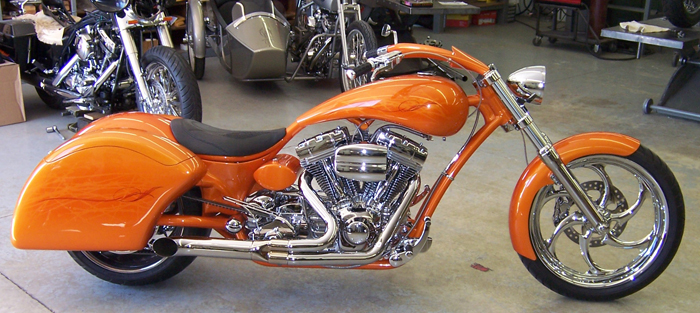
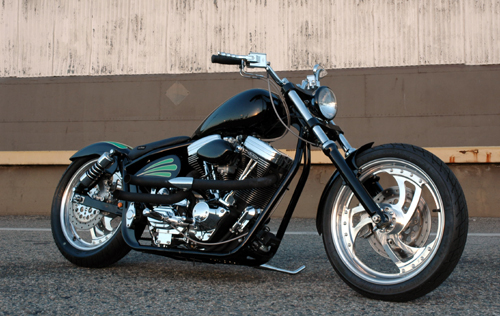
Above is a bike built by Don Hotop for his wife using Redneck Engineering bags. The fiberglass bags are designed, and come with mounting rails for Softails. We will need to cut the bags for Progressive Suspension shocks and build very sturdy basketry.
Click here for: Mudflap Girl Part 2, the Bandit Engine and Spitfire update

Amazing Shrunken FXR–The Full Feature
By Robin Technologies |

Not long ago an issue of American Rider was devoted to lowered models contrived for shorter more compact riders. It was natural to feature a custom devoted to the tight-is-right crowd. In a custom world gone nuts with bigger, stretched, wider, fatter and pumped up motorcycles it was a lengthy chore for Buzz Buzzelli to find a bike designed for a concise, agile enthusiast. But fortunately after long arduous months, digging through one sordid garage after another, he discovered the only majestic model of it’s kind on the planet, the Bikernet.com Amazing Shrunken FXR. It was right in our own back yard. All he had to do was call me.
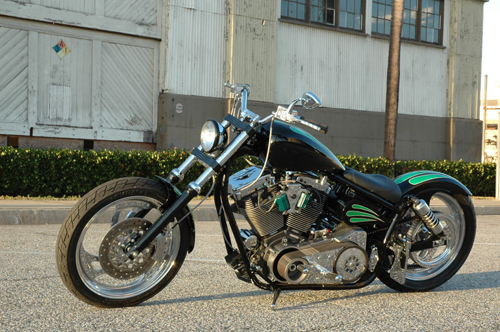
The bike was built by K. Randall Ball, of Bikernet and a writer for American Rider (the entire series of build stories are archived in the Bikernet Tech Area). “I generally build a bike every year to ride to Sturgis,” Ball said,
I’m too tall at 6’5″.” Pissed at the nasty notion that he couldn’t fly along desert highways into the red rock of Wyoming to sweep his same-time-next-year girl into his arms, he moved to build a dinky custom.
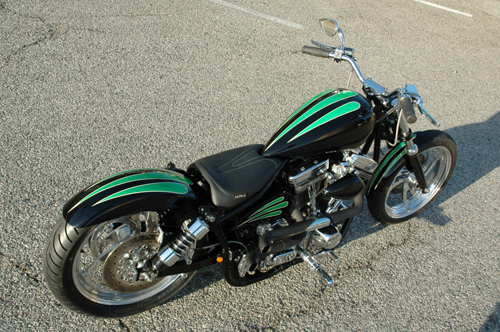
The bike was built to enhance the Rev Tech, 88-inch V-twin drive train and become the anti-big-bike representative. “So many bikes are long and fat, we decided to haul ass in the other direction.” There’s nothing like a small, tight custom bike, like Chica or the Zero guys build in Japan.
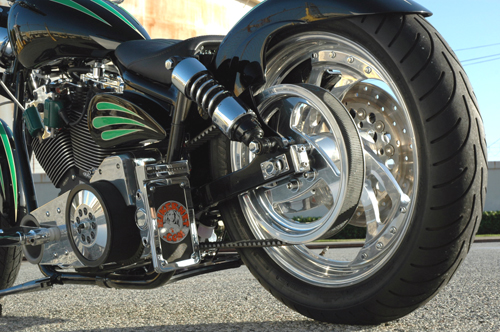
“We wanted to go in all different directions,” Ball added, “small rear wheel, black and chrome engine, no stretch and no passenger carrying elements.”
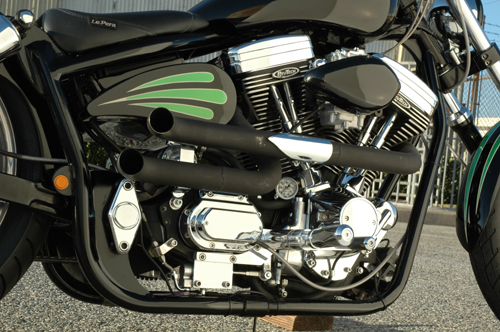
The Kenny Boyce Pro Street frame was modified by Dr. John in Anaheim, California. “The neck was dropped and shoved back toward the engine almost six inches,” Ball said. “We cut two inches out of the Pro Street swingarm and shaved off and tapered the fender struts.
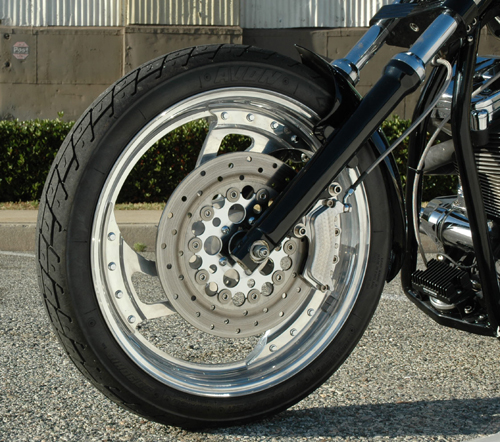
In the process several talented sources were utilized to create the design and components. “We relied on Cyril Huze for most of the sheet metal,” Ball added. The rear fender originated as a Fatboy front fender modified to ride the swingarm as a unified component with the ability to remove it for repairs. The Bikernet crew including Dr. Terry the mad grinder bitch roughed out fender rails, sliced the Cyril Huze tank, modified the seat pan and nearly destroyed the Huze front bender. “He ain’t no Jesse James,” Ball said.
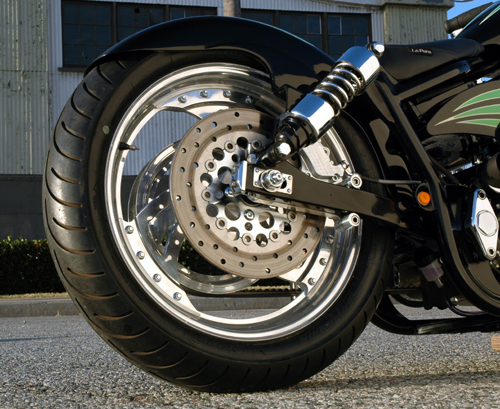
“A Hamster came to our rescue,” Ball said. There’s a talented worldwide group of builders called the Hamsters and one owns a structural steel shed in Harbor City, California. James Famighetti, who works I-beam forms for buildings, with his Brother Larry is actually incredibly talented with sheet metal and fabrication projects since both brothers ride with the group. “James took every bastardized element we created including the tank, front fender, rear fender rails, oil tank and seat pan and hand-formed them into works of art,” said Ball.
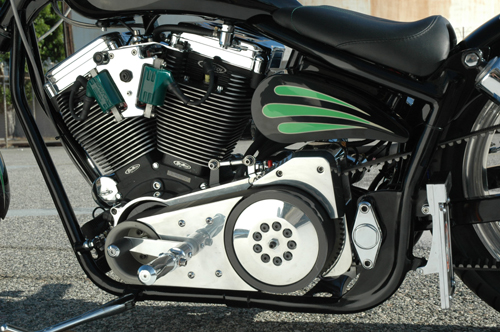
Electronically the bike took on the simplest form with the assistance of Giggie from Compu-Fire. “We installed a Compu-Fire charging system, starting assemblage and single fire ignition combination. Then we mated all the electronics around the Custom Chrome top motormount. Giggie also used the Compu-Fire machine shop to fabricated the mid controls for an even more compact motorcycle. Recently Giggie took his talents to the Rivera R&D department.
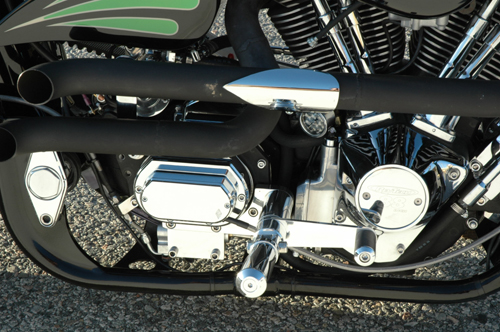
The final details included LePera’s seat upholstery, Harold Ponteralli’s teardrop paint scheme, crazy John’s machine tooled CCI brake calipers, Performance machine wheels with a 90/90/18 in front and a 150/70/18 Avon in the rear.
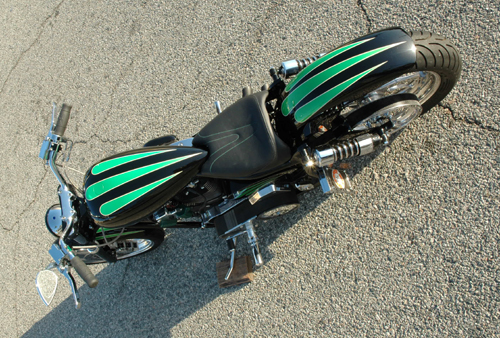
When completed and Buster hauled ass down the street the bike was trimmed of all frame elements on the downtubes and along the bottom of the frame on the right side to reveal the entire Rev Tech drive line. On the left only a Custom Chrome chromed, welded-on kickstand interrupts the frame flow around the BDL belt primary drive system. The pipes were hand made in the Bikernet Headquarters and only sprayed with flat black heat paint. The Front end is 39 mm narrow glide enhanced with black powder-coating and Joker machine trees and controls.
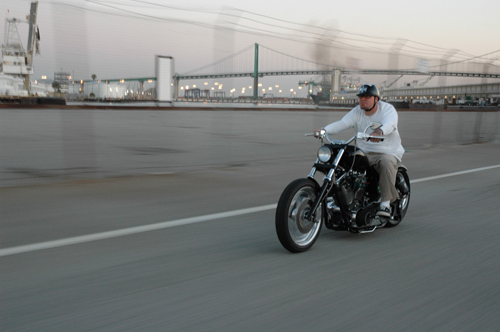
“I remember the first exhaust system,” Ball said, “and the sparks flying around the shop. While I wrenched Nuttboy, who is a college professor, ground the welds. Complacent, I twisted bolts and worked on the bike as hours passed.”
“We tossed those pipes in the trash and started over,” Ball added. “Dr. Terry was banned from the grinder.”
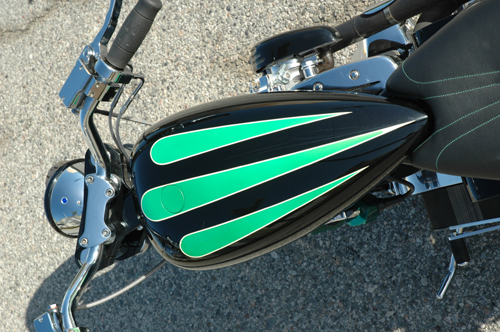
Okay, a short rider stock to custom comparison is in order. The seat height is 23 inches compared to the Softail Deluxe at 24.5 inches, the Buell CG at 28.5 inches, Dyna Low Rider at 25.5 inches and the new 883L at 26 inches. Overall length even with 38 degrees in the neck was 86 inches compared to the Sportster’s 90.3 inches, Dyna at 94 inches, the Softail’s 94.7 and the Buell Lightning series kicked the FXR’s ass with 76.2 inches.

Owner: K. Randall Ball, Bikernet.com
Where: Wilmington, California

Builders: Owner, Dr. Ladd Terry
Year and Model: 2004 Amazing Shrunken FXR
Fabrication: Owner/James Famighetti
Chrome: Long Beach Plating, Long Beach, California
Paint: Harold Pontarelli, H-D Performance, Vacaville, California and
Henry Figueroa (frame), San Pedro, California
Powder coating: Custom Powder Coating, Dallas, Texas
Color: Black with emerald tear drops

Year and model: 2003 Black and Chrome Rev Tech from Custom Chrome
Displacement: 88 cubic inches
Cases: Rev Tech
Flyweels: forged 4 1/4-inch stroke Rev Tech
Cylinders: Rev Tech
Pistons: forged 3 5/8-inch Rev Tech
Heads: Rev Tech
Cam: Andrews EV38
Valves: Nitrided stainless Rev Tech
Lifters: S&S solids kit
Oil Pump: Polished oil regulated Rev Tech
Heads: High flow Rev Tech
Carb: 45 mm Mikuni
Air Cleaner: Fantasy In Iron, Denver, Colorado
Exhaust: Hand made by Bandit
Ignition: Compu Fire single fire
Coils: Dual Dynas from Custom Chrome
Coil bracket: Custom Chrome with CCI ignition/starter switch
Transmission: 6-speed overdrive Rev Tech
Clutch: BDL
Primary Drive: BDL 3 inch belt
Final Drive: Custom Chrome belt
Rear Pulley: Custom Chrome Billet
Front Motormount: Billet by Paul Yaffee

Frame: Kenny Boyce Pro Street
Modifications: Neck cut and set back 4 inches
Rake: 38 degrees
Swingarm: Shortened 2 inches with CCI stainless axle plates
Front Forks: Joker Machine narrow glide
Risers: Custom Chrome
Rear Shocks: Short Progressive Suspension from CCI
Front Fender: Cyril Huze
Oil Tank: Cyril Huze
Gas tank: Cyril Huze modified by James Famaghetti
Rear Fender: Modified Fat Boy by Bandit
Hydraulic Lines: Good Ridge
Wheels: Performance Machine
Tires: front Avon 90/90/18, rear Avon 150/70/18
Brakes: Billet-6 piston from Custom Chrome engine turned by Crazy John
Brake rotors: H-D

Headlight: Custom Chrome
Taillight: Aeromach
Handlebars: Custom Chrome
Seat: Custom Le Pera
Speedo: None
Hand Controls: Joker Machine
Mirror: Aeromach
Foot controls: Handmade by Giggie at Compu-Fire
Pegs: Chrome Spur from Custom Chrome

Ignitions Switch: Bob McKay at CCI
Starter: Compu-Fire
Regulator: Compu-Fire
Alternator: Compu-Fire
Wiring: By Bandit
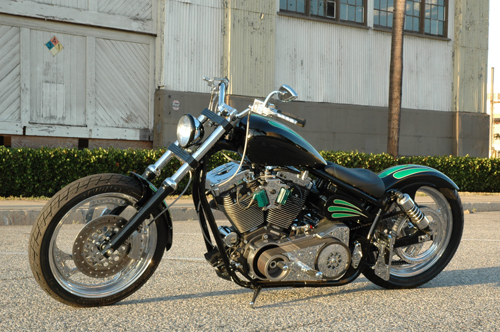

Amazing Shrunken FXR 15 Wiring Hell
By Robin Technologies |

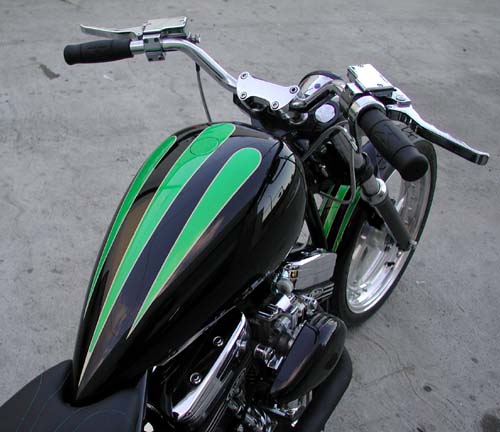
This was actually one of the easiest bikes I’ve ever wired. It’s not a bad notion to sketch out a wiring diagram with consideration for the placement of the components. Think about it long and hard, then take your time. Below this mess I ran the Hardcore Choppers basic wiring diagram and tips on wiring anything.
First, there’s the regulator that bolts over the front motormount. I use Compu-Fire regulators for reliability and they are wired not to over-work the alternator. So you plug the regulator into the case for the alternator connection, run a ground strap under the frame where the rubbermount bolts and the final hot wire to the hot side of the battery, or the hot side of the ignition switch. That wire feeds the charge back to the battery. Presto, goddamnit, the charging system is complete.
I’m lazy and want the wiring system to be as easy and component free as possible. No extra lights, no turn signals, no horns, buzzers or ringdings. I use Bob McKay’s marine ignition switches for toughness, reliability and ease of wiring. They are distributed by CCI or, if not in stock, contact Bob directly (519-935-2424).
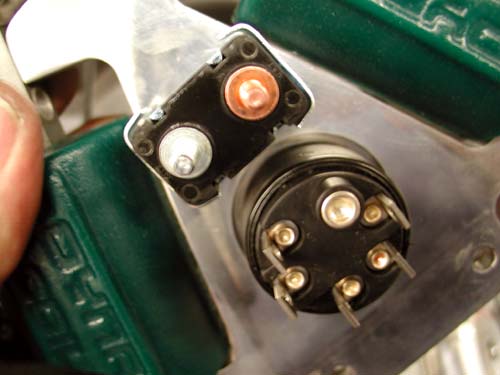
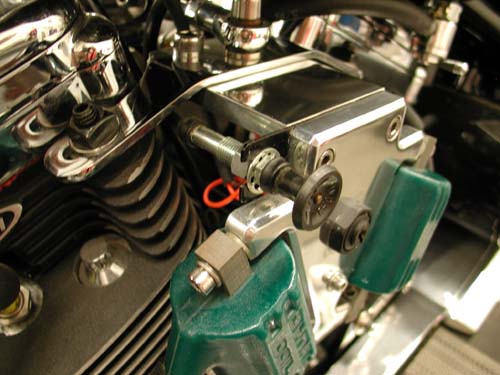
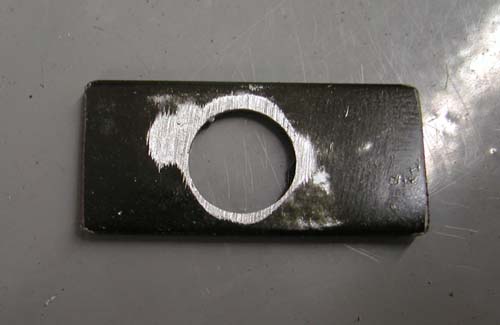
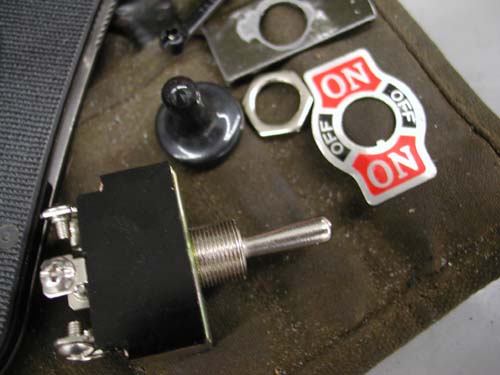

The switch is so complete so you don’t need a starter relay. All it takes is one wire to the starter, one wire from the battery and one wire to the circuit breaker. From the breaker a wire runs to the Compu-Fire single fire ignition system via the coils, one wire to the brake switch, one wire to the taillight and one wire to the highbeam switch. From the highbeam switch two wires ran to the headlight. From the Compu-Fire electronic ignition wires ran to the two Dyna Coils, front and rear and one hot wire that runs to both and the ignition circuit breaker. I ran only one 30-amp H-D circuit breaker, just a couple of inches from the ignition switch.
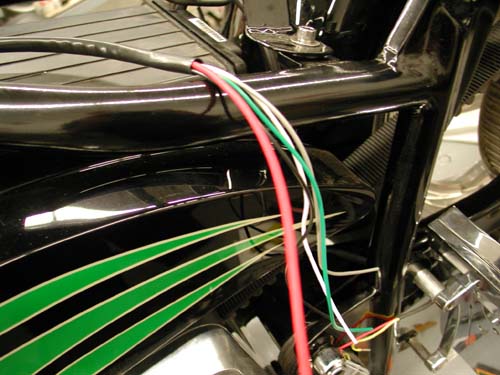
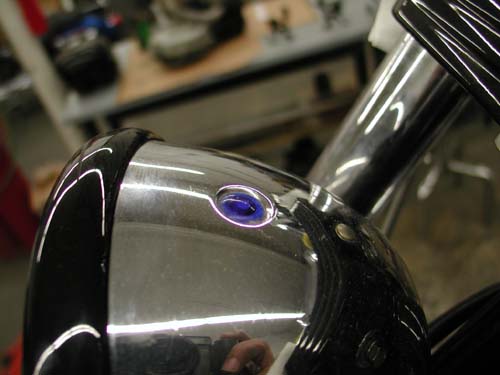
Since I don’t have space for idiot lights (there’s a highbeam indicator on the headlight), I need to run a oil pressure gauge on the engine.
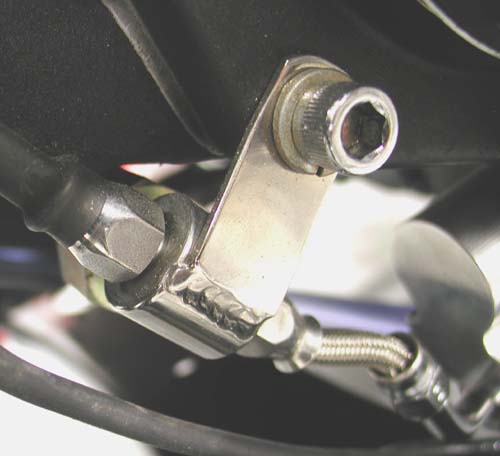
I only use Terry Components brake cables for their service and flexibility. The trick was to find and place the ground straps. The Terry ground strap ran comfortably from the negative side of the battery to the 5/16 starter mounting bolt. That grounded it to the driveline, but I needed a ground from the tranny to the frame. I worked that out by bolting another strap to the sidemount license plate frame bracket (welded to the frame), by making sure the paint was shaved away. I also used the 1/4-20 Allen to support the taillight ground strap. Let’s see, have I forgotten anything?

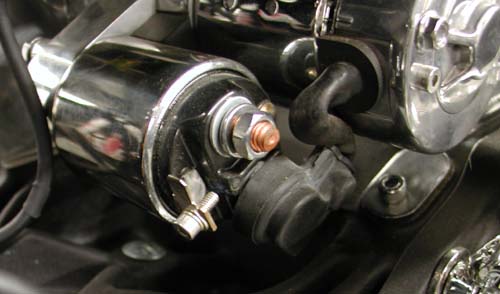
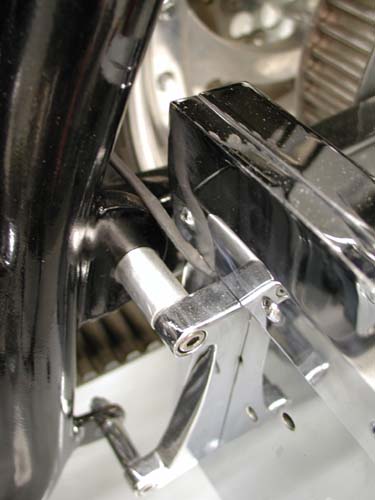

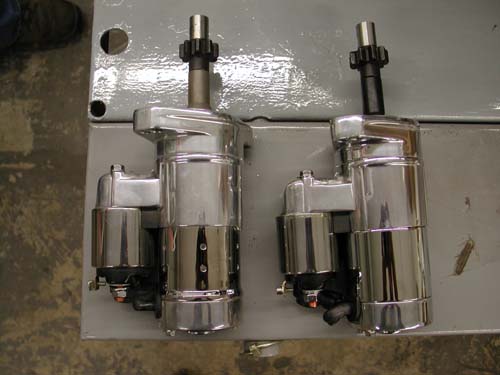
Just before we completed wiring, Giggie, from Compu-Fire, and delivered the new Compu-Fire 53700 hot starter designed to fit any big twin H-D from’90 up. All the special hardware is included and it’s rated to 2KW and was actually shorter by .150-inch for clearance dilemmas with Softail oil cans.
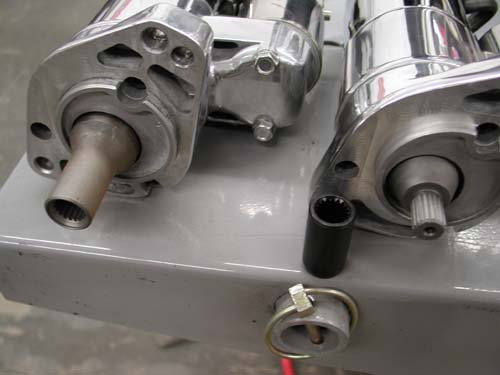
The starter roller bearings are 30 percent longer and it comes with shims to allow builders to install the starter perfectly. The Air gap between the pinion gear from the starter to the ring gear on the clutch basket needs to be between .75 and .125. If it’s too short the pinion gear can’t spin before engagement and collides with the ring gear. It needs to get a tad of momentum going. On the other hand, if the distance is too great, the starter gets up to full speed and fights engagement.
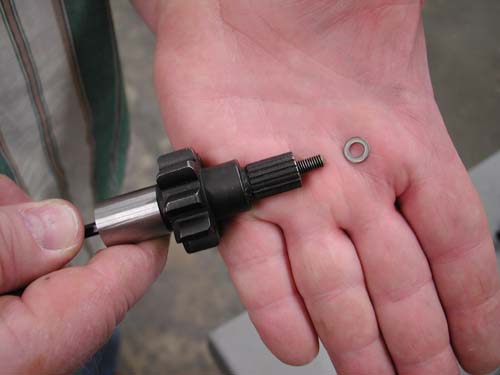
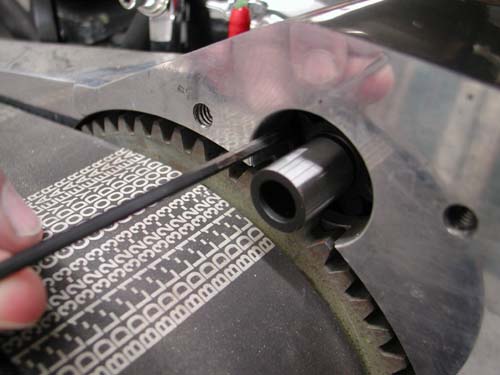
The measurement is difficult and Giggie uses a 1/8 Allen which is .125 across the flats. The shims are .026. Even the coupler on this new Compu-Fire starter is designed for lowered bike, to duck the belt.
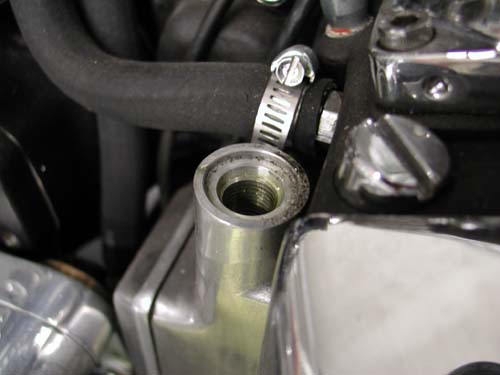
The wiring was completed and we were ready to fire the beast, but first Giggie recommended that we burp the bubbles out of the engine by removing the pump relief cap and using an Allen to pull up the valve and let bubbles pass for a pure oil lubrication.
The bastard fired right up, the Mikuni gushed gas, but as soon as it fired the Mikuni float bowl settled down.
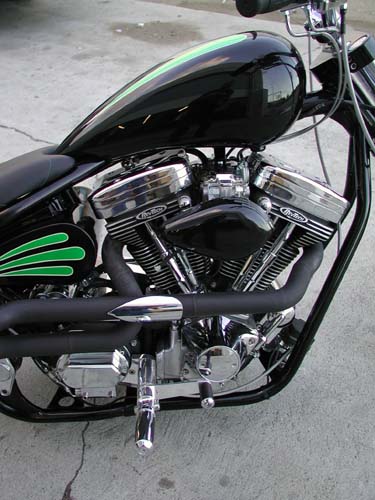

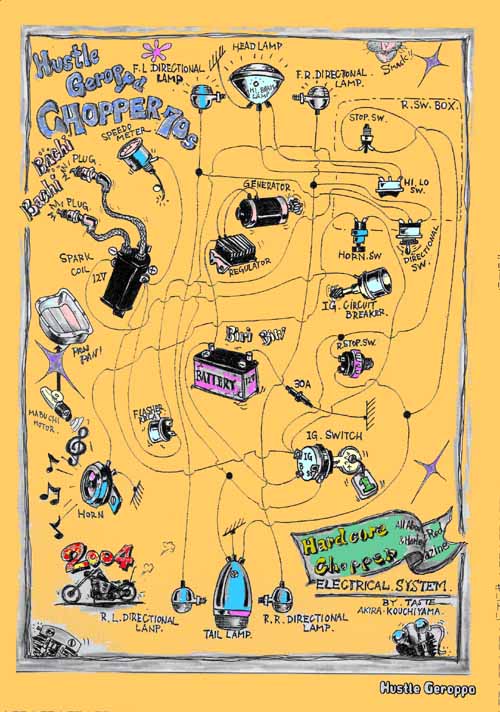
We often get calls for basic wiring diagrams. Here’s one that was taken from an old Easyriders and expanded by the wizards of Hard Core Chopper Magazine in Japan.
Take your time. Keep those copper strands away from sharp edges, moving stuff (like chains) and hot items. Cover everything with shrink wrap. Use extra layers of shrink wrap for more protection and stronger connections. I like to solder connections for a solid, vibration free contact, but some prefer crimping connections to avoid wicking. Watch out. Some of the littlest, coolest switches go to shit in a week under 100 mph vibration.
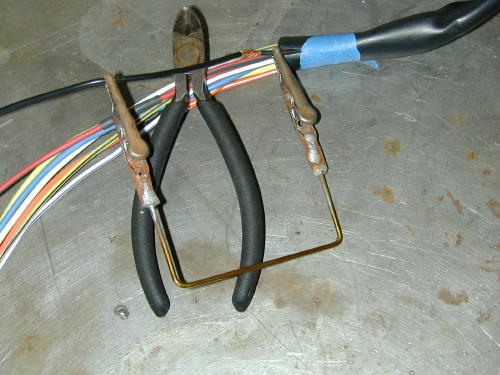
The Frank Kaisler, patent pending, wire junction tool. Send $99.99 to P.O. Box 666, Hollywood, Calif. Send only rolls of quarters.
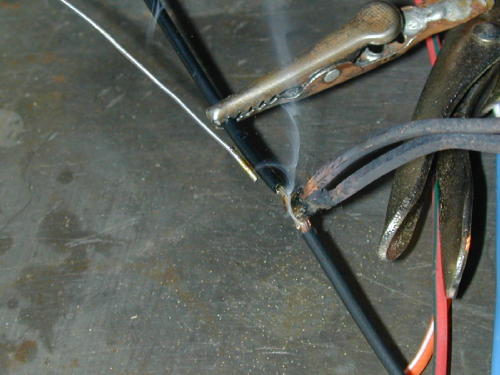
Don’t forget to work in circuit breakers and fuses. If one blows, disconnect the battery and research the problem. I like Terry battery cables for their flexibility, and they allow more amps to flow to the starter because of their low resistance.
Couple more tips: Watch out, wiring around the front-end. That sucker needs to turn. Don’t run the electrical connections too tight. If you run wires through the frame, debur the openings and use extra shrink wrap to protect fragile insulation.
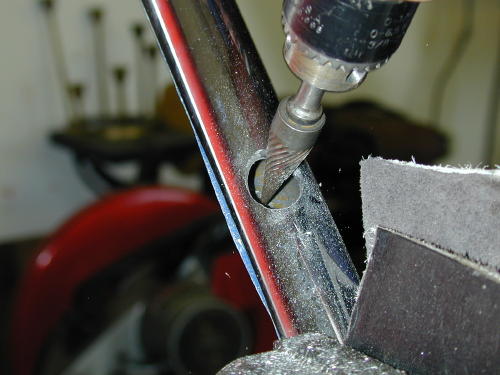
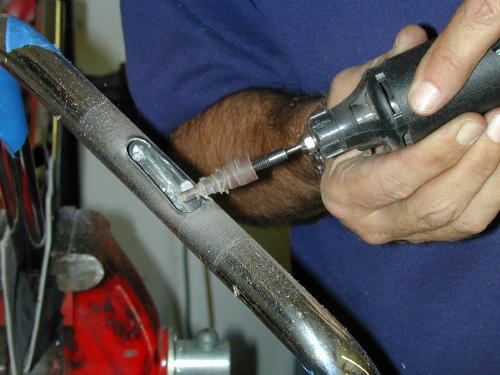
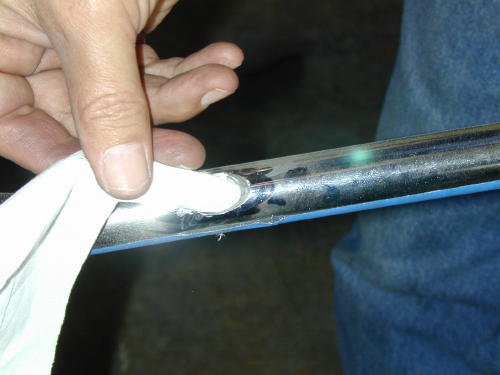
Bandit generally uses 16-gauge for most of the wiring, 18-gauge in the bars and 12-gauge from the battery to the ignition switch.
I called Frank Kaisler, a tech writer for decades, and before I finished reading the above he shouted across the line, “Yeah right, but you’re forgetting plenty, dipshit. Don’t forget to tell ’em about the breakers. Use a 30-amp breaker between the battery and the main electrical circuit (or the battery and the ignition switch). You can use one of the breaker lugs to attach the regulator hot line to minimize wires to the battery. Use 12 gauge wire for the main leads. Use a 15 or 20-amp breaker between the ignition switch and all the lighting connections.
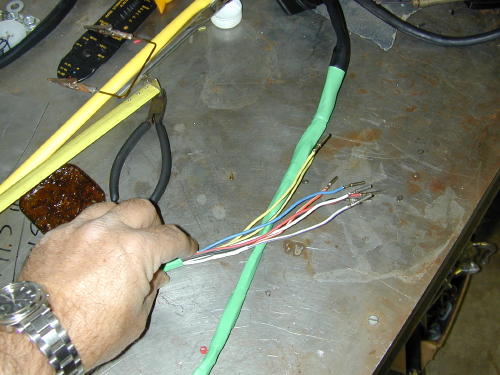
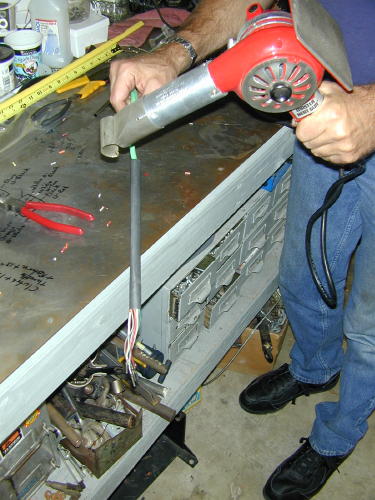
“Goddamnit, you didn’t explain wicking. Solder creeps under the insulation when it flows. The wire will flex against that soldered area and may break.”
“Yeah right, after two hundred years,” I muttered
“Shut up and listen,” Frank lit another cigarette.
“Quit smoking,” I babbled over the phone.
“The way your ride,” Frank coughed, “you won’t last another week. Let’s get back to the wires. I like to remove the plastic insulation on lugs and run shrink wrap right onto connectors, for a clean, stronger lead, and damnit, use the correct connectors. Blue for 14 and 16-gauge wires and red for 18 and 20. And make sure to use the proper ring sizes for stud connections, like the battery, circuit breakers and brake switch studs. Floppy lugs make for lousy connections.”
I was beginning to lose it. We could go on all night about wiring. He muttered something about using rubber grommets with wires that must run through sheet metal and additional ground straps from the headlight to the frame to maintain a solid ground to the front end.
“Don’t forget the final show bike detail,” He said and I remembered all the rats bikes I built in the ’70s with wires running everywhere. “Run wires down the left side of the bike. The hot looking side is always the pipe side.”
“Okay goddamnit,” I said. “I’m not writing a book. Just a handful of hints.” I sensed a lecture coming from a guy who edited bike magazines for 30 years.
“Do it right, Snake,” He coughed lighting another Marlboro, “or don’t do it at all!”
“Thank you, sir,” I said and hung up. Fuckin’ guy is worse than Bandit.
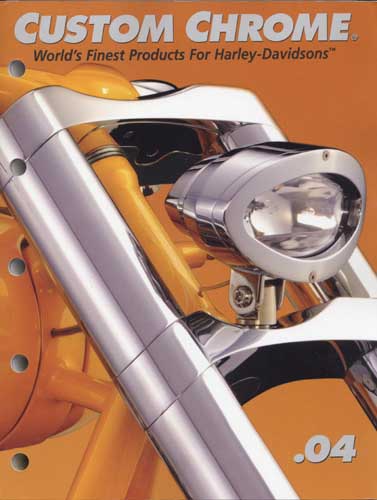
BRAND NEW CUSTOM CHROME CATALOG RELEASED–
Custom Chrome’s new offering for 2004. The California based distributor brings you the most comprehensive product offering in the Harley-Davidson aftermarket! At over 1,200 pages and over 22,000 part numbers, their 2004 Catalog features the new RevTech 110 Motor, Hard Core II, Ares bikekits and noumious frames and forks–everything from nuts & bolts to performance products. It’s the Custom Bike Bible for the year.
ONLY $9.95 + 6.95 Shipping**
