Road King 4/26/04
By Robin Technologies |


Over the last year we’ve tore into this classic 2003, 100th anniversary Road King. I figured I wanted a touring bike for the long haul. The notion was designed around maintaining the 100th theme, adding to the blackness and durability. I wanted a tough black bastard to ride, not detail or polish for shows. A bike for years to come. What could be better?

We kicked it off with light styling and safety accessories like a blacked-out dash, lowered shocks, rewired turnsignals, touring components and detachable back rests.

We worked with a dealer for more involved tech mods and performance enhancements. Our formula was designed around beefing the low-end torque with cams, Screaming Eagle heads, air cleaner and two into one pipes. I ran it directly from the lift to a dyno, for a comparison test, which resulted in 68 horses, an 8-horse increase and 76 pounds of torque, a 6-pound increase.


My old school notions leaned toward blacking out the king. If the frame had been another base color we might have followed it, but unity was the slogan behind design changes. I worked with Custom Powder Coating in Dallas as we stripped the touring model, inventoried the elements and sent them to the masters of powder (214)638-6416.

I rode over to Henry Figueroa’s Auto Restorations, a steel corrugated building on the wrong side of town. We removed the license plate holder and rear plastic fender tip. The filling and paint came from Henry (310) 218-9097. Henry filled the holes in the bottom of the fender and prepare it for George, The Wild Brush, to perform classic pinstriping magic (310) 488-5488.

I wanted to flame the bastard but paid homage to the 100th anniversary of H-D, reluctantly. We compromised and snatched the gold and silver (or gray) from the edge of the 100th tank band and expanded it to other elements of the King.

We installed a factory oil cooler and tested it on the road to Barstow, California. Every goddamn element was covered in techs right here on Bikernet. Keeping the oil at a resonable temperature is critical to long rang reliability.

Since I might ride the King to Sturgis this year and pack a Bikernet babe, we installed a detachable back rest for long distance runs.


“It could be flamed and raked,” Renegade shouted from behind his rigid, kicker-only, magneto charged Shovelhead.

H-D Lowered shocks — For coolness without disturbing the ride.
H-D Shock pump tool — For ease of modifying and checking ride ability for singleor double-up runs.
H-D Taillight/brake light mod — To turn the turn signal lights into brakelights for added stopping visibility.

H-D Digital dipstick — For ease of observing oil temps.
H-D Docking kit — For backrest and fender rack capabilities.
H-D 100th Anniversary Cobra style seat — For coolness.
H-D Blacked out dash panel — For coolness and lack of sun glare on the openroad–get it?

H-D Crash bar bags — For additional touring space.
H-D Mobil windshield — For low or high touring.
H-D Windshield bag — For windshield storage
Screamin’ Eagle Teardrop air cleaner cover–Style.
Screamin’ Eagle Heads–Enhanced flow and increased compression.
Screamin’ Eagle Air Cleaner Kit–Improve air velocity
Screamin’ Eagle Two Into One Touring Exhaust–Matching exhaust with heads.
H-D Speedo/Tach–More tuning information for the rider.
Screamin’ Eagle EFI turner kit–Tuning software.
H-D SE-203 cam set–Specific low end/mid range performance enhancement.
Goodrich Hydraulic lines and fittings–Extended lines for highbars.
Barnett’s Tool– Extended throttle and clutch cables.
Custom Chrome 16-inch High Bars–Changing the nature of the beast.

H-D black mag wheels and floating rotors with black centers–Adding to the blacked out look.
H-D fender brackets–Allowed the solid black Street Stalker fender to be bolted to the touring front end.
Screamin’ Eagle teardrop turnsignals and the narrower light bar–All style
H-D fender, license plate mount–Moved the bracket out of the way.
H-D New oil cooler for 1999 and later touring models–essential to cool the King.
H-D custom billet tab for the rear of the stock seat–We needed an extra one.
H-D Front and rear detachable docking hardware kits–Allows for detachable touring accessories to be mounted
H-D Lower backrest/sissybar–Designed to pleasure the ladies.

H-DClassic hexbolt covers and stainless Allen caps to begin an engine detailing process.
H-DClassic Chrome Axle caps–Factory styling additions that prevent chrome shop runs.


Road King 12/08/02
By Robin Technologies |

If you’re like my freedom seeking self,once in a while youneed to ride. I don’t mean ride to the goddamnbar or even to arally, bike show or event. I’m talking aboutgetting out of town, outof the city, and out of site. That was the mentalplan. What happeneddidn’t exactly fit the criteria, but in somerespects improved on thebasis, in others it failed miserably.
At first I was going to ride alone. At onetime I rode toPhoenix several times alone. I enjoyed it.Riding alone, in a sense, iswhat it’s all about for me, but then I startedmentioning the runto pals. Keep in mind that this was not anetched-in-stone puttin’ proposal, like what youwrite down on your calendar for next weekend.It was a notion, like a kid dreaming of going toDisneyland. I just needed to get out oftown, but I didn’t know when the eventwould take place until I spoke to my ridingpartner of many years, Dr. Hamster. When Imentioned it to him, he said, “Yeah.” Then hegrabbed his calendar. A plan began to form.Initially I wanted to ride to Tombstone and visitthe Kennedy’s and hang out for the weekend.Then Frank Kaisler said that he had businessin Phoenix, and I know a bunch of riders in thecustomindustry there. I contacted a buddy I’ll just callSteve who hadrecently launched himself into a devastatingdivorce by screwingevery other woman he met. The plan wasaltered then modified again.Kenny Price of Samson Exhaust also threwhis helmet in the ring.

Dr. Hamster at Grand CanyonCaverns.
Ultimately Dr. Hamster called with anexact date, we’d rollout after Thanksgiving. Then the hammer wasdropped and riders had to commit to a winterride to Arizona. Frank dropped out, KennyPricehad to go to Bullhead, Arizona on businessand couldn’tmake it.
I spoke to Micah McCloskey from MicahMcCloskey’s CustomCycles and he was primed. Dr. Hamstercalled a buddy who needed toescape, he was also up for it. Steve decidedthat two days after ahemorrhoid operation was too soon to ride.He dropped out. I didn’tcare who came or went. I just wanted to ride.Once we had a date Icalled the Kennedys. We chose the wrongdate. They were going to Vegas forThanksgiving. Another plan alteration. Micahisa died-in-the-woolrider. For 20 years he rode a rigid Indian untilhe shifted to andFXR and felt 16-years-old again. We coulddepend on him, besideshe’s an Ugly and Uglies ride. Micah startedcalling me late at night,”What’s the plan?”We sorted it out. Once Micah was involved hecalled me backand asked respectively, “ya see, I’m a recentlymarried guy. I mayneed to bring my wife.”I didn’t have any problem with that. I justwanted to ride.His wife, Carmela, works for a charity calledthe ExceptionalChildren’s Foundation. It’s the charity that theBeach Ride Supports.Micah is now the president of the Beach RideCommittee. That’s howthey met. Carmela made a couple of calls.Suddenly there was an ECFdonor who recently bought a resort on Route66 in Northern Arizonawho suggested that we create Beach Ride II inArizona. He offered usrooms at his 800 acre facility on historic Route66.

A small portion of the 800 acreaestate.
Micah and Ihatched a plan to ride to Prescott andhopefully see Dawne Holmes, oneof the finest custom painters in thecountry. Then the next morning we’d ridenorth threw Chino Valley to Ash Fork betweenWilliams and Kingman on highway 40. Fromthere we could hook up with Route 66 and findGrand Canyon Caverns and Inn. Next the kickoff time must be documented and shared withthe team of riders. We decided to meet forbreakfast and the corner of the 15 and 10freeways at the Travelers Truck Stop at 6:30a.m. That meant that most of us had torise at 4:30 a.m., to be on the road by 5:30, tomake the one-hour haul out of Los Angeles by6:30. Actually, as development expandsyou don’t reach the outskirts of Los Angelesuntil you pass Palm Springs. The documentwas wax sealed, “be there, or be left behind”.

One of our destinations.
Now for a report on the 2003 100thAnniversary King, my ridefor the Arizona Run. The minute I knew thedate I called FrankKaisler, who was recently the editor of HotRod Bikes, and much moreup on the technical aspects of newmotorcycles. I’ll admit it,goddamnit. We had discussed a tech oninstalling Custom Chrome16-inch Apes on the King. I had ordered theparts and they wereburning a hole in my pocket. We had alocked-in run date. I couldn’tride a stock motorcycle.
We set a date forTuesday the 19th to installthe bars. I will write the tech about thatoperation this week. Helisted the materials I needed. He brought toolsto augment mine. Wespent the entire day rewiring the bars throughthe inside, thenmeasuring the cables. He ordered the clutchcable and throttle cablesfrom Barnett. He brought the hoses andfittings to extend the brakelines. When he left that afternoon the job wasnearly complete, minusthe extended cables. I had made anappointment with the Harley-Davidson fleetcenter to install a performance package onFriday. The cables neededto arrive by Thursday. That didn’t happen, butmy photographer forthe American Rider magazine tech articlecouldn’t make it Friday anyway, sothe operation was rescheduled for Monday.Friday the cables didn’tarrive. I panicked. Frank called and waspromised the cables Mondaymorning. I changed our fleet centerappointment until Mondayafternoon.

The completed King, ready for theroad.
At 9:00 a.m. on Monday morning UPSarrived with the cables.Frank and I went to work. Mechanical projectsrarely ramble towardcompletion as quickly as estimated. Wearrived at the fleet center at1:30 Monday the 25 of November and Alan thelead mechanic informed us that he would beleaving at 4:00. We didn’t complete theperformance operation on Monday, but heassured us that by noon on Tuesday wewould be on the road. That gave me twobreak-in and tuning days before kick-off. Heput in a couple of hours Monday afternoon andthe bike was stripped, the cams pressed outof the cam plate and readied for installation.
Tuesday morning arrived and so did we at8:00 a.m. Alan wasthere, but the big man was slummed over achair. He mumbled something about foodpoisoning and went back to the head. Hemade a gallant effort and worked until 9:00when Gene Thomason Jr. arrived torelieve the watch. As he turned to install thecams, he coached me oneach and every aspect of the operation andmentioned, “I can onlystay until 10:30. I have a court deposition.” Wewere burnin’ daylight, or actually burnin’through days.
Wednesday unfolded thesame at 8:00 a.m. and Alan was back on thejob from the 24-hour flu. He moved around theKing with cunning and expertise. He’s ahelluva mechanic. He completed the camoperation, removed and replaced the heads,installed the intake module and newScreamin’ Eagle Air Cleaner kit, thenScreamin’ Eagle two-into-oneexhaust, and finally a tach/speedometerreplacement.
We rolled out of the fleet center ataround 1:00 p.m., aftera dyno run, on Wednesday one free day beforewe’d “Wind ’em up”. Thebike was running and feeling fine, but I stillhad more minoradjustments with the new clutch cable, I hadto pack and prepare thebike for the run, road test it some more with afew break-in milesand see if the adjustable windshield would fit.It didn’t and neededto be modified. I had my chores cut out for myfeeble ass.Needless to say I struggled throughThanksgiving Day runningto the garage, putting another 40 miles on theclock, checkin’ theoil, rerouting the clutch cable and modifyingthe cool Harleyadjustable windshield for the run.

The modified H-D adjustablewindshield.
Then there was packing for thefirst time with the King. I used the crashbarbags for cable androtor locks on one side and spare gloves,paper work and a digitalcamera on the other. For some reason theEpson digital was set to shoot black and whiteand in my numbness I had no notion of how tochange it, no icons on the camera to indicatewhich button to push until it was too late. Iultimately found out but decided in the gloomto leave italone.
I took spare glasses and a Bandit’sDayroll full of tools justin case.Packing for a ride is always a challenge.Unless you were thePoker God and knew exactly the weather androad conditions, you’reforced to pack shit you may or may not need. Ipacked my usualcolorful array of boxer shorts, but since it wasdownright nippy Iwore long johns daily. Never touched myshorts. I packed the top halfof my Harley-Davidson rain gear since it wasalready raining. I wasstill hoping that it was all a vicious threat, but Ipacked it anyway.I don’t usually carry the pants, but I shouldhave, although my newPakistani leather chaps did a commendablejob in the rain. The cheapbastards failed in other regards which I’ll getto later.
As the Thanksgiving night wore on and mytrips to the garageDiminished, the small droplets of raincontinued. They were like atease tempting the fate of the ride. It wasn’tenough to stop therun, on the other hand it reminded me of fiveyears earlier when Irolled out of town in a sprinkle that turned intoa downpour for 400miles. A gruesome putt. I continued to checkthe weather channel andthe reports were grim. I called Dr. Hamsterand announced my bleakintentions. “If it’s raining,” I said into hismessage machine, “Iain’t going.”
When the clock struck 4:30 a.m. and I satup in bed, I grabbed theremote and turned on the television. Theweather reporter began onthe east coast with dire reports of freezingtemps and snow. Itwasn’t a good sign as I wadded throughreports of historic lows inSouth Dakota, but no rain in the region. After20 minutes of pacingthe bedroom in my boxer shorts, they reachedthe south westregion of the country. The rain probabilitypercentage had diminishedfrom 60 percent to 40, but the storm waslocated directly over ourplanned path for the border. I looked outsideas I dressed. It wasdry, although I could see spotted indicationsthat rain was nearby.
Ikissed Layla goodbye and said, This may onlybe a breakfast run.”At 5:30 a.m. I hit the road on the fresh King. Ijumped on the 110Downtown Los Angeles freeway to the 91Riverside Freeway to the 605Freeway to Joker Machine to the 10 Interstateto Palm Springs andbeyond. At exactly 6:30 a.m. I pulled into themassive, sprawling,plastic, franchise Travelers Truck Stop. Thedam thing is so big thatwhen the other riders arrived they couldn’t findus amongst theeateries, gift shops and 7-11 type storesunder one roof. Hell, evenTaco Bell had taken part of the store.When you’re avoiding junk foodit’s a bitch to be forced to walk through a MacDonalds to get to thetruckers’ kitchen.

Micah McCloskey and Greg and TrishO’Neill fooling around at a gas stop.
Continued On Page 2
Road King 9/10/03
By Robin Technologies |


The King lives again, thanks to the Harley-Davidson Spring catalog supplement. The factory now offers complete blacked out Road King front end components. We replaced the warped nacelle.
With a small brush and a 1/2 pint of gloss black Rustoleum, we touched up chipped fasteners over a couple of Coronas. What’s next? The rear fender needed touch-up. The all-black King was cool, but the damn thing needed some color. That called for old school pinstripping. Finally we liked the new mostly black mags except for the tits around the rim. They seemed out of place. We pondered a solution.

There’s Henry with a Jitter-Bug orbital sander.
We rode over to Henry Figueroa’s Auto Restorations, a steel corrugated building on the wrong side of town. Henry worked for his dad as a kid fixing cars. His mainstay is restoring antique autos and custom paint jobs for four-wheelers from the ’20s through the ’60s (310) 218-9097. Henry said he would fill the holes in the bottom of the fender and prepare it for George, The Wild Brush, to perform his pinstriping magic (310) 488-5488.

Since we didn’t change the color scheme, paying homage to the 100th, we decided to snatch the gold from the edge of the silver band and expand it to other elements of the King. We removed the license plate holder and plastic fender tip in preparation for reworking the fender and filling three holes.

Henry handled the small holes with Z-Grip bondo and welded a plate behind the large quarter-sized hole (used for accessory wiring, then filled it with bondo. With nasty-rough 80-grit sandpaper he shaped the bondo to conform with the fender. Then he used finer sandpaper to continue to smooth the surface until it was as slick as a baby’s ass. Sheet metal and bondo work takes a trained eye and artistic patience. Henry buzzed through it like it was second nature and with a block sander massaging the surface before painting it with House of Kolor primer filler. More sanding with finer, wet-and-dry grits took place before the final black coats were laid over the tip.

It’s the magnificent George, the Wild Brush.
Then we were graced with the talent of George, the Wild Brush, a pinstriper who has been wielding Blue Liner striping brushes for 30 years. As a youngster he worked in the Los Angeles Gasoline Alley. He created wild paint schemes for Mario Andretti, Bill Simpson and Dale Armstrong.

George mixed and matched enamel stripping paints for just the right hue.
He used only enamel striping paints for drying flexibility. He can test, paint and tinker and wipe the surface clean if he’s not happy with the results. “Metallics are much more difficult to work with,” George explained mixing paint and testing the consistency on his delicate brush. “Gold is particularly difficult and may not flow. Anytime I reload the brush there may be a matching problem.” He used talcum powder, to keep his hands from sticking to the metal face being striped, for a pure clean line. With a grease pencil he marked the center of the fenders and went to work freehand, without so much as a sketch.

Sometimes George uses masking tape to find the center of the fender.

Pinstriping is a delicate art form often administered in public.


The front fender gave George the best vantage point and position for striping so it received the finest workmanship.

We wanted an old school appearance and his seasoned talents were perfectly suited for the task. With the rear fender tip touched by the Wild Brush, he moved onto the front Street Stalker fender, then the horn cover and finally a small touch to the jet hot, flat- black-coated Screamin’ Eagle air cleaner cover. George instructed us to wait three weeks before adding protective wax to the finish. He suggested Turtle wax as a polish that works without harmful abrasives or chemicals. That’s it for this issue.


Here’s before and after the Jet Hot flat black coated Screamin’ Eagle Air Cleaner was striped.

Keeping his striping brush loose and flexible before completing the rear fender.

The rear fender, while on the bike, was awkward to stripe without a lift. The paint still needs final polish.

George pointed out a little trick for the powder coated point cover. Instead of striping it, and since our powder crew coated the back side, he rubbed some of the gray enamel into the slots and left it to dry with a light coat of gray on the surface. “That’s not a problem,” George pointed out. “Leave it for a couple of days then polish the cover. It will look as if it was striped.”


I sanded the tits on the wheel with 400 wet and dry just to create a surface that would hold the touch up excercise. I was determined that the legs of the wheels are powdercoated flat black, perhaps over a clear coat that covers the entire wheel. This was a test. The right way might include taking the wheels off, machining the tits away and re-powdercoating the entire wheel.


I used a rag and harsh electrical contact cleaner to prepare the surface for touch-up.
This will tweak your mind. I painted the tits on the alloy wheels with the gold paint first. Then I stood back and eyed the job. It looked sharp and added a touch of color. On the other hand it had that gold-trimmed Cadillac appearance. That was a bastard to swallow.


What’s a poor Bandit to do? I went after the other side of the bike with cheap brushes and black touch-up paint. The exact same procedure on the right, but without the gold paint. Let me know what you think.


That did it. We installed the bags with the left side touched in gold and the right handled with hardened black. I still can’t decide what side I like the best. The women lean toward the gold. Let us know what you think? I still might stripe the wheels, machine them, then black powder both entirely. That’ll answer that goddamn question. See ya next time for our oil cooler install that’s currently being featured in American Rider.
–Bandit

Road King 11/08/05
By Robin Technologies |

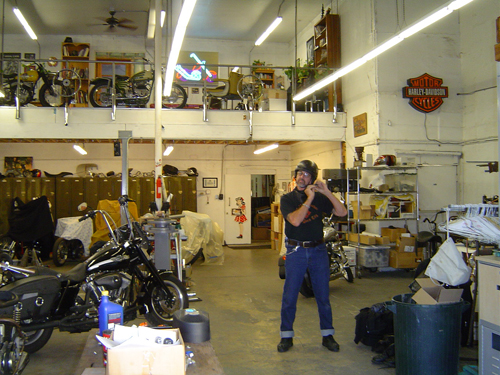
Around mid June Kerry and myself were organizing our trip to Sturgis, when Bandit contacted me an asked how would I liketo ride the Road King to Sturgis. Immediate thoughts were Wholly Shit, I’ve read all about the King on Bikernet and watchedthe different stages Bandit has put it thru, so I was very familiar with it, and for Bandit to be asking me was really a big deal, meaning, I felt honored enough when Bandit invited Kerry and myself to join them on the ride, let alone ride his bike. So youprobably guessed the answer was a big >>>>>> Yes Sir !! thank you very much.
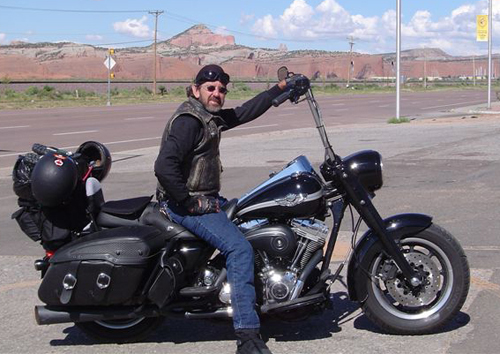
For the readers who aren’t familiar with the Road King, I’ll enlighten you. It started life as a stock 2003, 100th Anniversary model.Bandit said he designed the bike be a big bad assed, blacked out touring bike with heaps of attitude. Bandit and his crew wanted to use as many H-D parts as they could to prove you could build a mean assed bike out of Harley Davidson’s catalogue. They started by blacking out the dash, a set of one inch lowered air shocks and a detachable back rest along with some neat touring components. With the help from a dealer for some more involved tech mods to gain horsepower and some low-down torque, they came up with a formula by adding performance cams, Screaming Eagle Heads, air cleaner kit and two into one pipes powder coated black, giving them 68 horses compared to 60 and torque was 76 pounds with a 6 pound increase. Next they installed a factory oil cooler which Bandit tested on a run to Barstow saying how it kept the oil at a very reasonable temperature which is critical for long term, Twin Cam reliability.
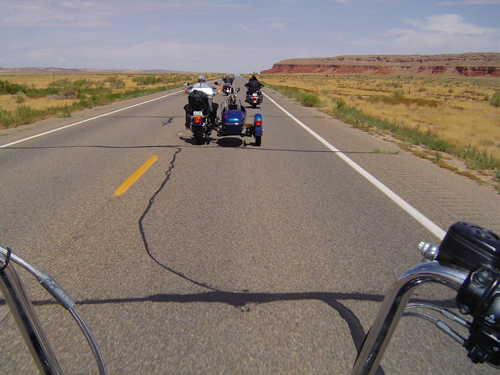
Fast forward to Sturgis, August 2005 and Kerry, my wonderful bride, and myself arriving at the Bikernet Headquarters being greeted by Bandit and the lovely Nyla. We were enjoying a beer while having a grand tour of their unbelievable home when Bandit said, “Get ya helmet Goddamit, we’re going for a ride.”
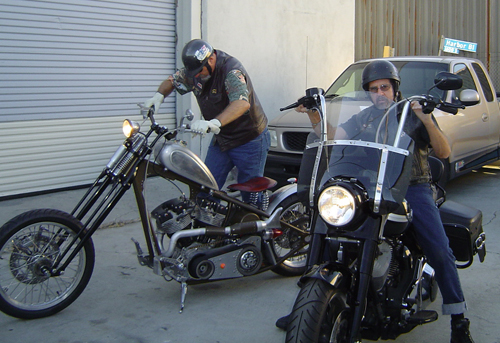
It’s hard to explain the excitement that was welling up inside of me, especially when I first laid eyes on Bandit’s bare boned, mean as shit Shovel, I swear it had a look like, let’s go, I’m ready. And right beside it sat the Road King.
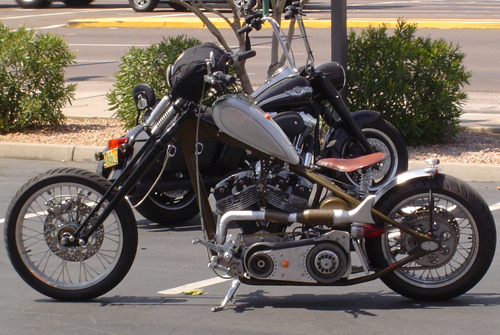
It definitely looked like itwas ready to do some very serious miles, man. It looked beautiful, all blacked out like a road warrior ready for action, 16-inch apes reaching for the sky, a very comfortable looking seat and a detachable back rest for Kerry. I gotta tell you these two bikes were like chalk and cheese, the Road King had all the creature comforts and Bandit’s Sturgis Shovel had absolutely nothing, excepta little back fender and a sprung seat, Shit !!! and he’s riding it to Sturgis, tough sonofabitch, I thought to myself.
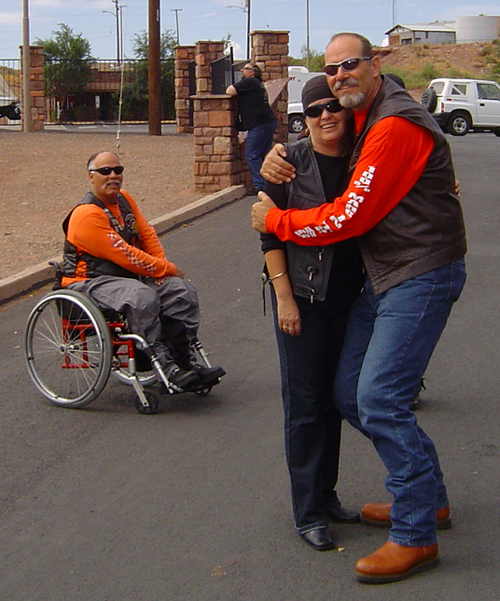
Just as the sun was setting over Long Beach we fired those puppies up and peeled out of the Bikernet Headquarters like two crazed maniacs going for their first ride after a long cold winter, ( sound familiar Bandit ). Seriously thou, we cruised around Long Beach taking in the sights and both of us getting used to our rides. We both had grins from ear to ear, especially when we twisted the wick on these babies, I was blown away, the King with it’s sheer size and weight, had some serious acceleration, man. I was impressed plus having a lot of fun and Bandit’s shovel went like a rocket, with it’s power-to-weight making it an awesome ride.
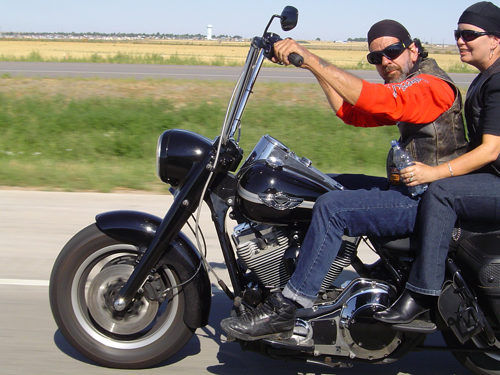
This was going to be my 4th trip to Sturgis (beginning in Australia) and I knew 100 percent this trip was going to be very special, I was feeling right at home on the Road King, everything was perfect except for the bloody windscreen, I think it was set up for Bandits 6′ 4” frame and I could not get used to it, but Harley had it covered. Two seconds and it was off, no problem.
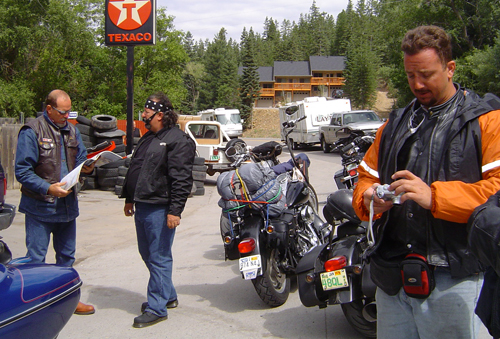
I would love to tell you about our trip to Sturgis, but it’s been covered by Bandit and Johnny Humble, the young gun from Texas, both really great stories and you can still check them out by going to The Events Coverage in Bikernets Department Site.
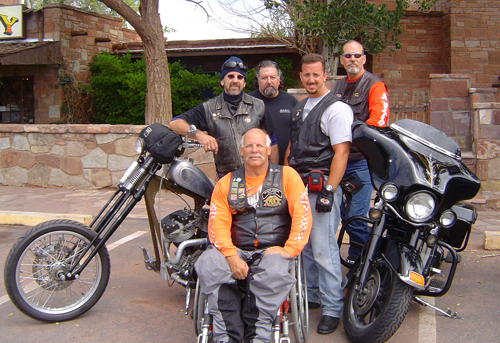
It’s hard to put into words, the true feeling of this road trip with such great company, I will say that we were very privileged to get to ride with them, even thou we live on the other side of the world, I know that Kerry and myself have forged life-time friendships and hopefully will get to do it again some day.
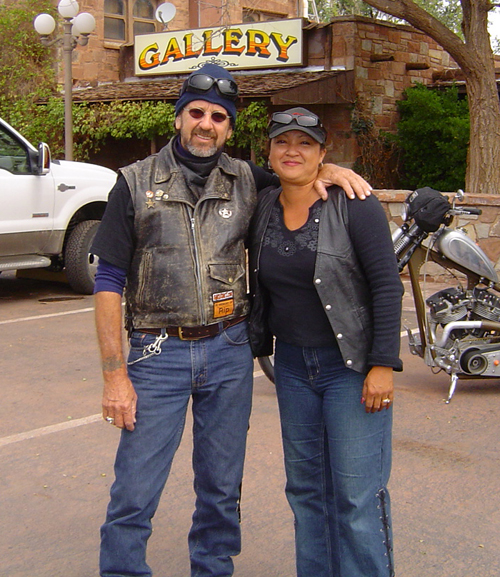
I have been privileged to ride a lot of bikes in my time and I must say the Road King was bloody brillante, we covered 4000 miles all up, came across all types of weather (as we all do) including high altitudes where the King never missed a beat with it’s superb fuel injection and very smooth motor. Seating was great, and I just loved the apes. Not only do they look really cool with an attitude, they were really comfortable.
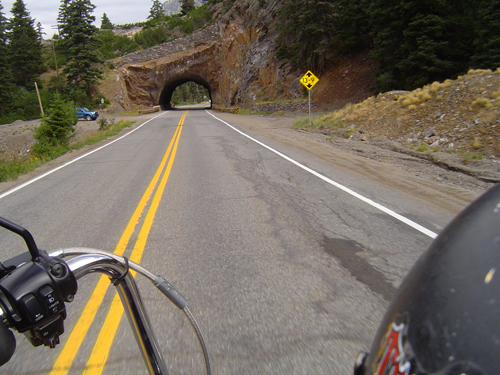
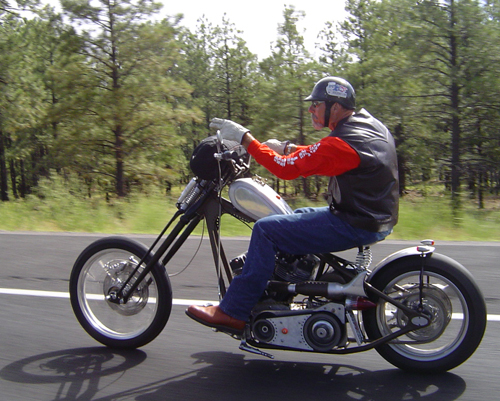
I will post some photos of our trip that you haven’t seen and would like to do a follow up of our trip from where Kerry and myself parted company from the rest of the crew, returning to L.A. via Denver, Santa Fe, Sedona and Vegas.

I would like finish up by thanking Bandit and Nyla for their friendship, hospitality and giving us such a great time, not forgetting the use of their Road King.
Okay guys thats a wrap, hope you like it.
Road King 12/04/02
By Robin Technologies |

Yep, these techs will be backwards. I just rolled in fromArizona after the first 1,000-mile test ride after installinghighbars, performance parts, and modifying the windshield to fit thehighbars. So why publish the techs backwards starting with thewindshield? We’re lazy. This one will be short and the next two,since Frank Kaisler was involved, will be mammoth techs withthousands of photographs. Hang on for them, but if you’ve installedhighbars on a Softail or a King model and have long arms like myself, the windshield may be a problem to attach, but there’s acareful, simple cure.
First put the shield in place and decide if you can endure ahandlebar adjustment or not. If you pull the bars back in line withthe front end, the windshield will fit without a problem. You mightcheck it for 80 mph flexing which could cause rubbing against thebars, cables, brake hoses or wiring (if you didn’t run the wiresinternally). I took short wire ties and held small soft stripes ofrags around the cables that would have been damaged.

So I shoved the bars forward until the windshield would havefallen off the front-end. I’m not a big fan of windshields, but whenyou plan a ride through a 1,000 miles of rain, cold and wet highways, it’s a plus. I used the adjustable windshield from Harley-Davidson which allowed me to raise or lower it. I discovered that the lowered position is actually more comfortable in the rain. If I had raised it, I would have looked through the shield which was scattered with water and streaks. Visibility sucks and distraction wasoverwhelming, so I lowered it and my visibility was perfect while stillmaintaining the comfort and protection of the shield.

So what the hell did I do? I cut scallops in the plasticshield. First I marked off the area of the shield that had to beremoved with 1/4-inch masking tape and began to grind through theplastic with a bench grinder, the finer of the two stones. I tookcare to keep the edge of the plastic aimed down so the stone wouldn’t grab the sonuvabitch and crack it. I ground one corner then the next to search for a basic rounded feel. I avoided sharp edges or grooves that could crack. Since this was no perfect established science, I took my time slicing notches then slipping the windshield into place. I went back and forth to the grinder over and over. You might want to wear a breathing filter during this process and eye protection.

Once I was close to the finished area on one side, I took thewindshield to the vice and with leather pads on either side of themounting bracket clamped it down. Then with a high speed drill and a burr bit began to cut and shape some more. This, I found was difficult and took care not to allow the bit to grab and cut into theclear surface, but I was able to clean the edge some more. Ire-installed the shield again and determined that I was damn close.

Keep in mind that this was a last minute operation onThanksgiving day, between writing projects and packing for a run tothe desert. As the evening closed in it began to rain, a rarity inthis neck of the woods. I jogged in the house and flipped on theweather channel. The gods of the Roulette table had decided that Iwas not supposed to ride this weekend. The only rain east of theMississippi was dead over the 10 interstate from Los Angeles to theArizona State line. That made the windshield project even moreparamount. I dashed back to the garage.

Once I was close to the necessary fitment, style andprecision matching became a consideration. I ran a piece of maskingtape up the side of the stainless steel strut straight up the shieldas a measuring guide. Then I measured up from the horizontal strut to where the cut began. With these measurements I was able to compare them on the opposite side for an even scallop into the shield. I went back to the grinder and to the burr device for the final shaping. I continued back and forth a dozen times from the grinder then the high speed drill and back again. Once I had it nailed down, predominately with the grinder, I used an emery bit to smooth the edge of the Plexiglas.

That completed the cutting and shaping although the unitdidn’t lock entirely into place. I knew that once on the road thewind would prevent it from escaping. One small wire tie held thespring lock on the detachable windshield to the clutch cable foradded insurance. Just under 1,000 miles later I pulled back into SanPedro with a completely successful ride under my sore ass, provingthat careful mods to the Plexiglas windshield are completelypossible. Rah, rah.

Saddlemen Mods To The Shrunken FXR
By Robin Technologies |
In a world where over promising and under delivering has become all too common here is a gem I must share. The Bikernet built Shrunken FXR has become my daily rider and needed a couple small adjustments to be just perfect for me.
One detail was the too small seat or the bike was too fast (pick one). So I rode my bike over to meet the nice folks at Saddlemen and see what they could do to help me out with my seat. Upon arriving at the Saddlemen facility I spent time with guys from the front office to the guys in the shop ( all of whom took great interest in my motorcycle and the seat they were going to design and build). I noticed from the get-go these people were all riders. I shouldn’t be impressed by that, but there are so many folks in this industry who don’t even ride anymore.
We discussed what I needed (lumbar support) and a lip on the edge of the seat to keep me from being bucked off or sliding onto the rear fender. We also discussed the lines of the bike and that in the case of the Shrunken FXR , less was more. After the team and I spent a great deal of time figuring out what we wanted and didn’t want I was able to walk around the shop and see the whole seat making process from start to finish. man was I impressed!
We will bring you the whole story in a Bikernet tech article next week.
–Buster Cates
Saddleman Improves the Amazing Shrunken FXR
By Robin Technologies |

SADDLEMEN MODS TO THE SHRUNKEN FXR–In a world where over promising and under delivering has become all too common here is a gem I must share. The Bikernet built Shrunken FXR has become my daily rider and needed a couple small adjustments to be just perfect for me.
One detail was the too small seat or the bike was too fast (pick one). So I rode my bike over to meet the nice folks at Saddlemen and see what they could do to help me out with my seat. Upon arriving at the Saddlemen facility I spent time with guys from the front office to the guys in the shop ( all of whom took great interest in my motorcycle and the seat they were going to design and build). I noticed from the get-go these people were all riders. I shouldn’t be impressed by that, but there are so many folks in this industry who don’t even ride anymore.
We discussed what I needed (lumbar support) and a lip on the edge of the seat to keep me from being bucked off or sliding onto the rear fender. We also discussed the lines of the bike and that in the case of the Shrunken FXR , less was more. After the team and I spent a great deal of time figuring out what we wanted and didn’t want I was able to walk around the shop and see the whole seat making process from start to finish. man was I impressed!
So many talented folks all working together to put out an amazing array of products designed by and for riders! It was a real treat to see this and made me truly appreciate what they do much more. Great companies, in my opinion, are made of the people who work for them. So I left my bike for mock-up, and received a call back in a week.

When I showed up I saw the foam of the seat had been formed and pan had been constructed. We discussed coverings and stitching, again less is more. They got it and even pointed out to me the lines of the bike would be reflected in the seat.

Three days later I returned to pick up my bike and see my new seat! A seat is the finishing functioning touch to any motorcycle (much more than something you sit on) it must reflect the bike while being comfortable and a key suspension element.

I was so happy to see the seat. It looked amazing and really I could not have imagined it any better than they had built it. I put my helmet on, thanked them and jumped on the bike to ride away. First thing I noticed was the lumbar support made the bike so much more comfortable to ride and kept me in the perfect position to reach all my controls.
The biggest difference was when I hit a huge pot hole (tons of em’ in area) was my ass stayed firmly planted in the seat and the impact was minimal. The seat made my bike complete.
Can’t say enough about how impressed I was with the Saddlemen crew and facility, in short they made my custom bike have a perfectly functional and stylish seat. The perfect blend of function and form. I suggest anyone who needs a seat built or customized give them a call. They are a family team of bikers designing and building products for bikers. I like it!
–Buster
Mudflap Girl FXRs, Part 7 My Son’s almost Grip Ace Wired
By Robin Technologies |
Click here to read the chapter 6: http://www.bikernet.com/pages/story_detail.aspx?id=10268
This is a blast. The year is just starting and shit is flying at us everyday. Gary and the gang from next door delivered enough steel I-beams and C-beams to build a deck, and in two days a gang from Long Beach will deliver a pool table into the Bikernet barracks and gym. And if we are lucky, (today is Wednesday the 3rd of January 2012) we will have all the elements in place to fire my son’s Mudflap girl bike on Tuesday, while IKustom films the event for his TV series. We may even have a live Mudflap Girl in the shop.
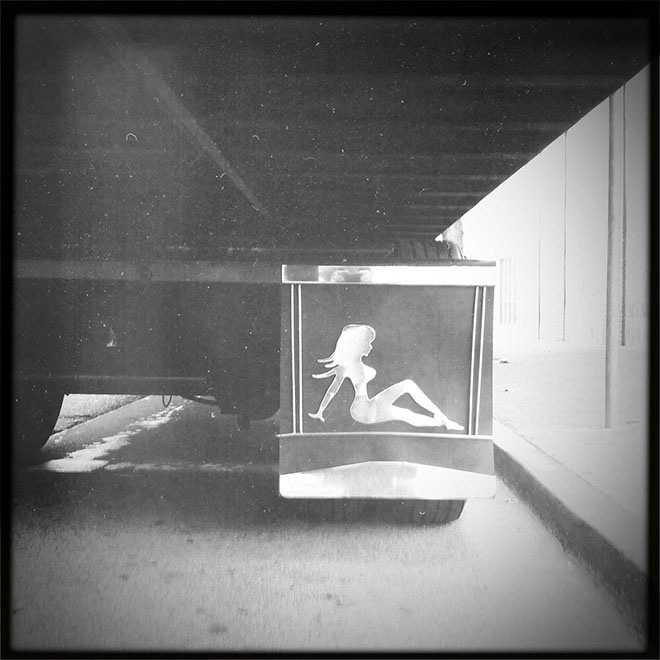
While my Mudflap baby is waiting on a custom Saddlemen seat, I hurriedly shifted back to my son’s version of the FXR. We needed to wrap up some minor elements, and hit the Ace Grip/Wire Plus wiring. Then we would be ready for another Saddlemen seat.
Before I could finalize the primary system, we needed to order a rear belt from Biker’s Choice. One of the major benefits of chains over belts is the mechanics. We had to pull the whole motorcycle apart to install the belt. It had better be the proper length–it was.

It took a while to clearance the outer primary around the Rivera Primo Inc. inner belt drive system. I needed to have the mid controls in place before I could install the weld-on Mr. Lucky kickstand that contoured the frame. All the appropriate elements needed to be in place. With the final linkage in position through a plastic tube that acts as a bushing, we moved forward, we installed the Primo Rivera belt and clutch system, but I still had to make a clutch pushrod. I removed the tranny pipe-side cover and checked the throw-out bearing type.

We finally made it, although my hard-working son was absent. At first, I grappled with the mentoring scenario. I shouldn’t lift a wrench without him on hand. Two elements pulled me from the tough-love fatherly position. Frank is struggling to support two ex-old ladies and three kids. This is a lesson to every young man. Beware.

You can imagine the tug-o’-war that goes on constantly. I’m not completely innocent. I was predominately an absentee father. A decade ago, I spent some time on the board of three group homes for abandoned kids. These kids had no folks and the effects were manifested in their lives like that tsunami in Japan. Kids need parents. Our society is all jacked up when it comes to sex and kids. I won’t go there, but the bottom line is simple: Kids need to be carefully planned and looked after. They need both folks and a stable family. So, I said, “Fuck it!” I’m moving forward to finish Frank’s bike, whether he’s on site or not.


Besides, we are rolling into 2012 and need to wrap up these bikes, road test them, break them in and prepare for the ride to Sturgis. Actually, I started to bug two of my grand kids who are 16 and 18, and very sharp, but ditched high school. Frankie or Frank Jr. is working as a tattoo artist, and I encouraged him to set some goals for 2012. He stepped up to take over the XS project, and came over to help with his dad’s bike. It was good to see him involved.

With the mid-controls in place, I could breakout Mr. Lucky’s weld on kickstand and begin the installation. I needed to make sure to assemble it is a safe location. Any time you have springs, ball bearings, and tiny setscrews, you need to be careful. It’s not a bad notion to perform assembly over a soft rag, so parts can’t vanish into a black hole.


This is actually a simple operation, but it takes 220 volts and a welder, either TIG or MIG. I slipped the supplied spring in the body of the kicker arm, then the ball bearing on top of the spring. Then the bare metal piece is carefully slipped into place. It’s easy to tell how to position the arm and the ball, since there are just two ball indents. So, the flat side of the bare chunk faces forward. Before final assembly, I will completely grease the ball, the spring, the mating surfaces of the weld-on portion, and the axle pin.


With the kickstand arm pushed and held against the spring and the ball, a second set of hands slipped the axle pin into place and started the fine threads. Again, upon final assembly I will blue Loctite the pin threads.


Then I faced the delicate, do, or die job: positioning the weld-on portion. We fitted it several times, then marked the position with a felt pen on the bottom frame rail. Then I loosened the lift clamp, strapped, and rolled the bike over toward the primary side with a strap, until I had it positioned at just the correct angle. This is always a trick. Too far adds dangerous weight to the kickstand and makes the bike awkward to maneuver. If the bike sets too upright, it’s iffy to park, and as with my Shovelhead, I can’t park it in many positions. It wants to pop over. Even the wind can push it over.


With all the touchy elements considered I positioned the Mr. Lucky kickstand against the frame, and folded it up to see how it fit in the running position. It ran smack into the mid controls system, so I adjusted, and we are thinking about running a piece of hose, or even shrink wrap up the kickstand arm to prevent vibration.

With the bike leaned and the arm in the extended position I made two guide marks on the weld-on portion and on the frame rail. Then I could straighten the bike for tacking. I tacked the weld-on bung on both ends, and then tested the position against the straps. Then I ran a bead along both sides with my MIG welder. I plan to double up on the welds with the TIG, once we pull the bike apart.


We were cranking along, but had to step back to my Mudflap girl bike, since the shocks faded and we needed 1-inch longer shocks. We had to pull them apart and add to the bumpers so that the fender would not hit the tire. Progressive has various bumper lengths. The key here is to dismantle the shock, install them, lower the bike until it hits the fender, and make a bumper measurement. Progressive makes hard plastic bumpers in various thicknesses. We made a special tool, used a drill press, and took the shocks apart several times, until we had them dialed in. The key when measuring for shock length is to consider about 1-inch of fade once the shock is installed. We shifted back from a 12-inch shock to 13-inch Progressives.

So, my Mudflap baby was hauled to Saddlemen for the gurus of seats to evaluate. I’ve toured many companies over the years, and the Saddlemen operation is impressive. I met guys who have been making seats for 25 years, and their sons are now working with them. It’s truly a family of operators. They’re very involved in an ongoing hunt for the perfect seat technology. First, they studied foams, and then gels, and now this new design that affords a buffer area to relieve pressure on the spine. We discussed styling and design. Then we peeled out to let the masters consider the options.

We faced an open warm, clear, SoCal day and jammed back into the shop. I started by installing the Biker’s Choice regulator bracket and the Spyke regulator into position. Ray turned to install the S&S carb, since we were faced with the opportunity to install and complete the Crane cam and lifter system. Most Crane products are manufactured by S&S, including their roller rockers for twin cams.


We discovered a crazy tough oil cooler system from Baker Precision, on Signal Hill, and I tacked studs into place on the front frame rails. It’s made in Canada for automotive power steering oil cooling applications. After we installed the belt, we discovered a problem with the rear fender and the belt slot. The fender needed to be removed and reshaped. I also needed to develop a rear brake anchor.


That was the day Buster came by and we decided to go for a ride. I crashed, returned to the shop bruised, but the Shovel kept running. I thought about kicking back and watching Sunday night football, but I needed to pause it, and jammed back to the shop to keep the program rolling on Frank’s bike. While Ray installed the S&S Super E carburetor, I removed the rear wheel, the rear fender, cut a new slot in it, and drilled a hole where the Choppers Inc. Mudflap Girl taillight stem hit the fender.


So here’s the snafu. It surfaced the last time Frank came over. “I didn’t want mid controls,” Frank said. “I wanted forward controls. It’s all your fault.”

In the next segment, we will deal with his changing desires–kids. Then we’ll fire his bike, with the ACE grip wiring system to lead the way.

Sources:
Spitfire
Biker’s Choice
JIMS Machine
MetalSport
BDL/GMA
Wire Plus
Branch O’Keefe
Bennett’s Performance
Custom Cycle Engineering
Saddlemen
Bub
S&S
Mr. Lucky
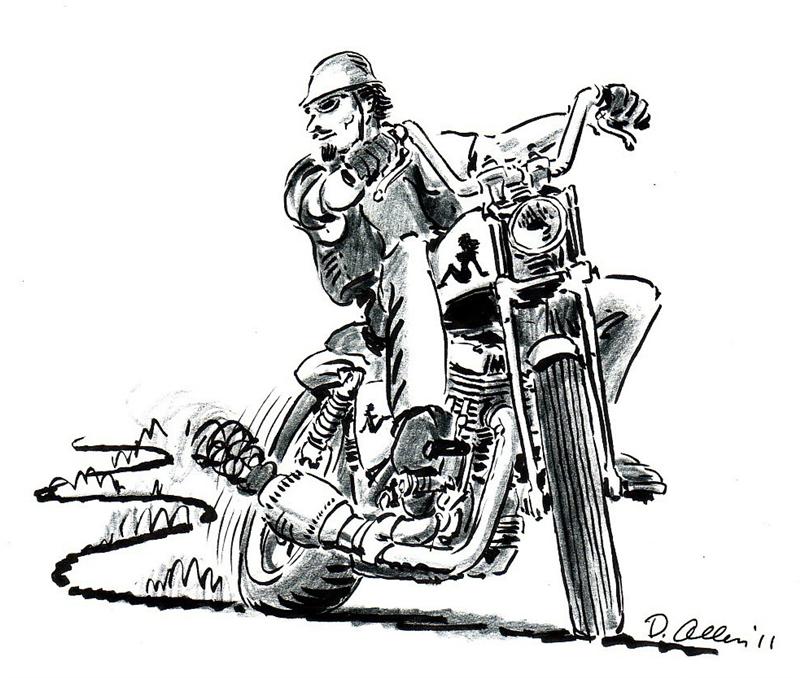
Mudflap Girl FXRs, Part 6 Wiring with Wire Plus
By Robin Technologies |

Wiring is always a treat, unless you use one of those systems in a box like Phil’s speed shop systems. I ran one on my factory racer, and it was a breeze. I’ll try to find a photo. It was designed to mount to the frame seat post. Inside it contained the circuit breaker, the starter relay, the ignition switch, the starter button, high low beam, and horn button. Then a ream of wire rumbled out of a hole. I guided them to the appropriate spots and hook them up. Nothing to it.

In this case, we worked with Wire Plus since they are the masters of wiring kits, Speedos and assorted equipment. They sent me a complete wiring harness with a starter relay, flasher system for turn signals, a 30-amp circuit breaker with mounting strap and rivets. They also included an installation and operator manual for model Wp192, Mid Frame Mount System, with Chopper style harness, with or without turns.

Their manual affords the reader a lighting circuit flow chart, an ignition flow chart, and an accessory flow chart. It demonstrates several ignition switch wiring circuits and handlebar circuits. It even comes with a Wp143 lighting control system for auto-canceling style harness. Actually, I checked the Wire Plus web site and they do make a seat post ignition switch wiring system unit, in a coffin shape, classic, and old school. They also make a cylindrical shaped engine mounted ignition switch housing, and ignition and toggle switches. They have systems that include compression releases–Amazing.

Wire Plus also makes individual wiring products, like their lighting control modules, power modules, plus custom power ports, for plugging in accessories. There’s a reason for going on and on about Wire Plus. Wiring can be a nightmare, and I’m a lazy. I want to be as minimal as possible, for ease and reliability, but I’m fulla shit. Just about the time I think I need to cut turn signals out of my system, someone is wiring in heated grips, or a heated seat, a some sound system, or neon lights under the engine. I avoid anything extra, like the plague. Hell, wire plus make engine mounted electrical port systems, so you can plug in your heated vest, helmet sound system, or whatever.

This is going to be a terrific test. My son’s bike will contain more bells and whistles, and Grip Ace controls in the bars. Tim from Grip Ace from Rivera is coming over to show us how easy it is. On Frank’s bike, we will install turn signals, so anything is possible. We will also wire a metric bike, the XS Yamaha bobber. So, over the next couple of months you will witness three variations, with Wire Plus products.


I start wiring by finding all the components and placing them somewhat in position. Then I search for a place to hide the circuit breaker and a circuit board, or bank of connections. First, we made a trip to the local Marine store and ordered an ignition switch. This included a starter switch, but we were using the Spyke push-button starter mounted to the solenoid. It eliminated the starter relay and any starter switches.

Once I determined a handy location behind one of the Mudfap Girl FXR panels, I drew up a wiring schematic, while referring to the Wire Plus handy manual for guidance. I came up with this nuts notion of hiding the ignition switch under the seat nose, which would position it perfectly for some of the wiring, and run some of it through the backbone of the frame. I grappled with a mounting notion, but Danny came up with the final notion, which took a lot of work, but was highly secure.


Wire plus makes several digital speedos, and several mounting systems for different applications. It was a breeze to mount and wire once I found the mysterious neutral switch connectors, which I ordered from the factory. The WP speedo mounted like a dream on the bars, once I plugged the wiring harness into the rear of the unit, ran the wires under the tank, back to the nerve center for power, then to the speedo sensor, and the neutral switch. Nothing to that one, although I wouldn’t mind running the wire loom through the frame in the future.


Since I was thinking about the rear brake pressure switch, I started to work out my GMA brake systems, and we made some measurements. I ran over to Baker Performance products and in five minutes we had new brake lines cut to size. This was probably the easiest bleeding process I have ever encountered. They were bled and working in no-time. Unfortunately, GMA doesn’t make a clutch lever to match.


On rubber-mounted bikes, I run two grounds. I welded one to the frame and I use one of the Spyke starter mounting bolts as an auxiliary ground. I don’t want to take any chances with the charging system, or the ignition system missing a grounding connection.


I needed to mount an On-On switch in the headlight bucket. It took some hunting for the correct sized switch, then a headlight seal beam from Biker’s Choice, and a lot of digging for a three blade connector. My headlight came from a spot on a police car in the ’30s.


Almost all of my electrical components came from Spyke or Compu-Fire. The Compu-fire ignition system is a breeze. This time I’m running a Compu-Fire single fire ignition system, with their single, dual wound coil, which mounts between the heads, in the standard stock position. It’s all too tight and convenient. Two wires to the coil and one to power and the system is good to go. It’s about that easy to time.

My son showed up with the missing parts for his Bub Bare exhaust system, and we started mounting it. I wish the exhaust guys would make kits with the flanges and retainer spring rings. Some systems come complete, but it’s a drag to run to the dealership, when you’re ready to rock. I understand why they don’t supply them with many system. If the system is replacing a stock system, we just switch out the parts. And these four pieces would jack up the price, but give the customer the option, and the manufacturer could make an extra buck and save the builder time and hassle.


This system slices damn close to $350 and you paint it with whatever heat paint, or heat wrap you like. It’s very similar to my D&D system.


Sources:
Spitfire
Biker’s Choice
JIMS Machine
MetalSport
BDL/GMA
Wire Plus
Branch O’Keefe
Bennett’s Performance
Custom Cycle Engineering
Saddlemen
Bub


Bikernet/Cycle Source 15th Anniversary Subscription Sweeps Bike Build, Sponsored by XPress Lids
By Robin Technologies |

That’s right. You can enter by filling out the coupon, subscribing to Bandit’s Cantina on Bikernet, or to the Cycle Source Magazine. With a Crazy Horse 100-inch engine, and a frame from Texas Bike Works this build is already flying together.
From issue to issue you’ll see your motorcycle being built on the pages of Bikernet and Cycle Source. You’ll witness Gary Maurer from Kustoms Inc. and Ron Harris from Chop Docs bend sheet metal, create one-off components, and shoot one of the sickest old-school paint schemes that you have ever seen…

The team will carefully select components from the best in the industry, including wheels from Ride Wright, electronics from Accel, leatherwork by the master, Howard H. Knight, and controls from Tim at Grip Ace.
“Also, please look at Barnett clutches and let me know what you need,” Prince Najar said. He’s the manager of this process and partner at Biker Pros, who is working closely with our builders, editors, and suppliers.
“Also, Blacksmith Baggerville is interested in creating one-off pegs, brake pedal, grip, internal throttle and air cleaner,” the Prince said.
The parts list for XPress lid chopper build, including a Fab Kevin seat pan and hinge, expands daily.

Gary Maurer plans to split a set of stock fat bobs, modify them and mount them to the Texas Bike Works frame. He will take possession of the frame and Crazy Horse engine this week while the Prince searches high and low for forks cups, a springer front end, tires, rear fender, rear axle, final chain drive components, forward controls, a battery, a Mikuni carb from Rivera Primo, a primary drive system, an air cleaner, front and rear brakes, and the list goes on. Of course the Prince plans on using the D&D performance exhaust system.

“Let your wings fly for now,” Gary said to the Prince in his best motivational sounding voice, modulated by Jack Daniels and soaked in wisdom by some of the best Georgia moonshine.

“Wait,” Ron Harris said, “I have a special request. I need a Goldwing Windjammer fairing.”

“Thanks for reminding me,” Prince Najar said. “I found one, if Maurer will let go of his, then we’re all set.”
Gary Maurer with Jason Ferguson of Texas Bike Works initially designed the hand-built custom frame. Gary sent to Jason a custom bent backbone down to Texas. It features a 1 ¾-inch formed DOM steel tubing arched backbone to be integrated the frame. Jason is an MMI graduate who cut his teeth in Southern California with Johnny Pag and the Biker’s Dream folks in 1993. After the Dream fell apart, but with a great deal of hard knocks experience, Jason peeled out to the Lone Star state, and drove in his stakes in 2006, on the outskirts of Dallas/Fort Worth, in Granbury, Texas.

He spent five years perfecting his first frame jig and has been hand fabricating specialty frames for two years. The fabrication bug inspiration came from the first Motorcycle Mania Discovery show by Hugh King. He watched fabricators work shrinkers/stretchers, English wheels, shapers, and benders, and was suddenly intrigued to try his hand with steel manipulation.


Gary bent the curvy rigid backbone and shipped it to Jason. Jason added 2 inches of stretch up and out, plus an additional 2 inches in the rear. He included 34 degrees of rake in the neck. The rest of the 1 ¼-inch tubing design was up to Jason to enhance lines of the frame and make her flow.


“I don’t have a roller to fabricate those soft bends,” Jason said. But I’m sure that tool rests heavily in the back of his mind. As a kid, his dad was a biker, and Jason was inspired by Arlen Ness digger styles. He hopes to build frames, rollers, and complete bikes around Panheads, Shovels, and Sportsters. His next bike project involves a generator 1966 Shovelhead and a bone stock, never touched Arlen Ness original chassis.


So there’s talented crew for the XPress lid Bikernet/Cycle Source Sweeps biker project, and I would be proud to own any bike built with a Jason Ferguson, Texas Bike Works frame, Fab Kevin components, Crazy Horse engine, and by the crazy team of Gary and Ron. But wait, who the hell is that title sponsor? We are very fortunate to have this coffee company sponsor our build. XPress is a custom French Press coffee cup lid technology, by Smart Cup. Have you heard of French pressed coffee? Well, Smart Cup designed a portable cup that makes a French pressed cup of strong Joe whenever you want it. Over the months ahead, we’ll show you how it works and delivers a superior cup of crushed beans on the go.
Hang on for the next report, and don’t forget to enter, goddammit.
–Bandit
Sources:

Xpress
http://mysmartcup.com/
Crazy Horse
http://www.crazyhorsemotorcycles.com/
Texas Frame Works
www.TexasBikeWorks.com

Kustoms Inc.
KustomsInc@hotmail.com
Chop Docs
www.Chopdocschoppers.com
Fab Kevin
http://www.fabkevin.com/home.htm
D&D Exhaust
http://www.danddexhaust.com/
Wire Plus
http://www.wire-plus.com/
Barnett
Barnettclutches.com
Rocking K Custom Leathers
howard.knight@montana.com
