Bikernet Banner

Updating the Bikernet Experience

Hey, Here’s the deal. We’ve worked and spent an entire year to move all Bikernet Free Content (16,000 articles) onto a fast-acting, mobile-friendly, google accessible, WordPress Platform. ...
Read More

Doug Coffey’s RetroMod Panhead Part 6

I wanted rear belt drive on my new retro modern chopper. All the old rigid framed bikes from the factory were chain drive and they were messy and always need adjustment.
After doing a little research I chose the shortest belt available. It was 123 tooth and had been used on the very first rear belt drives Harley offered on Shovelhead models.
After installing the back wheel and belt I discovered I had two problems. The belt was too long and too wide.Later Harleys have narrower belts so I purchased a 70 tooth narrow rear belt sprocket and slit my belt on the milling machine to fit the late sprocket.
 
 
I wanted rear belt drive on my new retro modern chopper. All the old rigid framed bikes from the factory were chain drive and they were messy and always need adjustment.
After doing a little research I chose the shortest belt available. 
Slitting a wide belt down to 1-15/16.
 
 
The skinny piece I slit off my rear belt. I offered it to a friend with an 883 Sportster. He didn’t see the humor. Haha.
 
 
If you look at the rear axle in the above picture, you see it is almost all the way back in the axle slot and the adjuster is near the end. This bothered me. A new bike should look like a new bike, not one with a belt stretched to the max.. I needed a fix.


I envisioned an axle spacer (photo above left) that doubled as an adjuster plate and would hide the appearance of the rear axle way back in the slot and the adjuster maxed out. So after a little imagineering I grabbed some stainless steel and headed to my milling machine.
 
 
My new axle spacer plates after I finished polishing them.
 
 
I don’t know about you but I think that looks a lot better and was well worth the effort.
Read More

Bennett’s Performance Final, Maybe

Bennett’s Performance touts being the performance test bed for all-things big twin performance and handling in Long Beach, California. The team is also very involved in Bonneville Land Speed Record efforts. Unless the California Air Resources Board decides to shut down every California custom or performance shop, they will be burning rods, turning lathes, and twisting wrenches until they die.

I say, “They,” and I’m referring to Eric Bennett, the boss, and his longtime mechanic and Dad, Bob. Other technicians come and go. Plus, next-door are the men, including Jerry Branch, and John O’Keefe, who are the masters of the flow bench and headwork at the Branch O’Keefe machine shop.

All shops big and small in California live in fear of being shut down. But let’s not go there. For a few minutes let’s pretend that freedom rings in this country and our political structure loves folks who build anything from hot rods to custom motorcycles. They even support the notion that loud pipes saves lives, because it’s true. They love it that guys don’t beat their wives or do drugs, that they learn how to work with their hands and create something one-off, which they can ride to work or to Sturgis with pride. Am I dreaming or what?

Eric recently came across this 2004 Dyna and decided to research every performance resource and build himself the best hot rod Dyna on the planet, as a test project for anything performance, for Twin-Cams. He did, and we followed the process on Bikernet.com, and this is the third and last stellar episode. But wait, their could be more, according to Eric’s assessment at this point.

“I need to change the shocks,” Eric said. “They are too low and shifting the weight to the rear. I need to tighten the handling.”

Eric was pushing is Dyna onto his shop dyno as we strolled into Bennett’s Performance, a very clean and well-organized shop, a couple of weeks ago. “I wanted to dyno it one final time without a rev limiter,” he said and discovered a dyno malady. The battery was low. At about 5500 rpms the dyno results didn’t indicate a smooth transition through the gears, but jumpy results. He was dying to try again, but we were forced to take a break.


“We’ve run across jumpy dyno results with other rubbermounted bikes, specifically Dynas,” Eric said. With the dyno fixed he removed his air cleaner and backing plate to allow the carb to float. Then he changed his 48 mm Mikuni main jet to the next larger size, for more fuel, and he retarded his timing one notch. He pulled it twice on the dyno and was proud to watch it jump from 117 hp, and to 119 hp, and 121 pounds of Torque. The power range was perfect for street use.


Eric now has 1978 miles on the bike since he rebuilt and upgraded the engine from 88 inches to 106. Shortly after the bike was completed and running, his dyno pulls indicated 112 hp and 119 pounds of torque, then 116 hp and 118 pounds of torque with a carb change, more miles and tuning. 


 Our discussion shifted back to handling. “At 100 it starts to wiggle,” Eric said, “There’s too much weight on the back.” He plans to install 14-inch Ohlins. Today, the lower badder look is slipping away for the jacked, terrific suspension, badass, dirt bike, café racer, SOA, go fast appearance.

We discussed the new CCE stiffer rubbermounts for Dynas, which might do the trick. “I still won’t be able to dial-in the handling as well as FXRS, like the Unknown Industry guys,” Eric said. “With my handling issues, they pulled away at just over 100 mph. The front feels fine, but I haven’t decided what to do with my number plate. Newer Dynas have additional gussets, but nothing like the FXR, period!”

He plans to black out the wheels and add Michelin tires, but he loves this engine configuration. “It’s perfect,” Eric said. “I didn’t need to machine the cases or crank up the compression. The cam isn’t radical, and I could run stock cylinders.” Jerry Branch told Eric that engines are like a combination lock. One number off and the system doesn’t work.

He’s currently looking for an ’06 or ’07 Dyna 17-inch rear wheel, and he will run a 160 tire. “It still gets 42 mpg. Reaching more than one horsepower per cubic inch with a naturally aspirated engine. It’s impressive.”

The S&S lower end contains a 4.5-inch stroke with 3 7/8-inch S&S pistons. Eric blocked the Mikuni carb out one inch to allow the air and fuel to atomize more before it reached the intake valves. “It’s a smoother delivery to the chambers,” Eric said. “We were lucky to score a set of Dave Thew heads designed for monster JIMS 116-inch motors by the Branch/O’Keefe team. This combination with 2.02 intake and 1.610 exhaust valves, and some slight porting, coupled with a Redshift .647 lift cam, and 11.5:1 compression gave Dave Thew 132 ass-kicking horsepower and 132 pounds of torque.

Dave’s bike with fat tanks and beach bars could not be beat at the drags.

I spoke to Eric’s dad who talked of his Bonneville bikes and going after a 167 mph record. Eric was the rider. “We couldn’t get over 161, but then I learned about aerodynamics. I gained 9 mph by moving the pipes inboard. We gained another 5 mph when Eric shifted his riding position and tucked one foot behind the primary.” They grabbed a record.

So, you can tell by the smell of go-fast, the posters of Burt Munro on the wall, and the Bennett record next to the counter, that this group is all about motorcycles and folks who ride hard and fast. Hang on for the next report.

Bikernet.com Extreme Bennett’s Performance Tech Chart
 
Regular Stuff
Owner: Eric BennettBike
Name: Brute
City/State: Signal Hill Ca
Builder: Eric BennettCity/state: Signal Hill, CA
Company Info: Bennett’s Performance Inc.

Address: 1940 Freeman Ave,Signal Hill Ca, 90755

Phone: 562 498 1819
Fabrication: Bennett’s
Manufacturing: Harley-Davidson
Welding: me
Machining: me
 
 
Engine
 
Year: 2004
Make: Custom
Model: Twin cam
Displacement: 106 cubic inches
Builder or Rebuilder: Eric Bennett
Cases: H-D
Case finish: Black
Barrels: H-D turned round By Branch
Bore: 3 7/8-inch
Pistons: S & S
Barrel finish: stock
Lower end: S&S
Stroke: 4 ½-inch
Rods: S&S
Heads: Branch #4 Dave Thew mods
Head finish: Stock
Valves and springs: AV&V
Pushrods: S&S
Cams: 585 S&S
Lifters: S&S
Carburetion: Mikuni 48 mm modified by Bennett’s
Air cleaner: S&S muscle
Exhaust: D & D Bob cat modified by Bennett’s
Mufflers: D&D Bob Cat
 

Transmission
 
Year: 2004
Make: H-D
Gear configuration: Stock 5-speed with wpc treatment
Primary: stock
Clutch: Rivera Primo Pro Clutch
Final drive: Stock
 
 
Frame
 
Year: 2004
Builder: H-D
Style or Model: Dyna
Stretch:stock
Rake:stock
 

Front End
 
Make: H-D Speed Merchant
Model: 2004 Dyna sport
Year: 2004
Length: Stock
Mods: Speed Merchant Trees, risers, grips
 
 
Sheet metal
 
Tanks: H-D
Fenders: stock
Panels: stock
Oil tank: factory
 
Paint
 
Sheet metal: nicked Black
Molding: none
Graphics: Nothing yet, maybe pinstriping
Type: Factory
Pinstriping: Maybe George the Wild Brush
 
 
Wheels
 
Front
 
Make: H-D
Size: 19-inch
Brake calipers: Brembo
FrontBrake rotor(s): Lyndall
Tire: Metzler
 

Rear
 
Make: H-D

Size: 16-inchBrake calipers: Stock
Brake rotor: Lyndall
Pulley: H-D

Tire: Dunlop
 
 
Controls
 
Foot controls: Factory stock Master cylinder: H-D
Brake lines: Barnett
Handlebar controls: Factory Clutch
Cable: Barnett
Brake Lines: Barnett
Shifting: Stock
Kickstand: Factory
 

Electrical
 
Ignition: Dyna twin cam 88
Ignition switch: H-D
Coils: H-D
Regulator: Stock
Charging: Spyke
Starter: H-D
Wiring: Mostly stock
Headlight: Alloy Art
Taillight: Alloy Art
 
What’s Left
Seat: Le Pera
Mirror(s): Speed Merchant
Gas caps: Stock
Handlebars: Todd’s Cycle
Grips: Speed merchant
Pegs: Speed Merchant
Oil filter: Hi Flo
Oil cooler: Jag
Throttle cables: Barnett
Fasteners: Unbrako
 
 
Specialty items: Custom Number Plate fabricated by Brandon at Speed Merchant
 
 
Credits: S&S Cycle, Alloy Art, Speed Merchant, Mikuni Carbs, Rivera Primo, Bikernet, Lyndall Racing Brakes.
 
 
Sources 


Read More

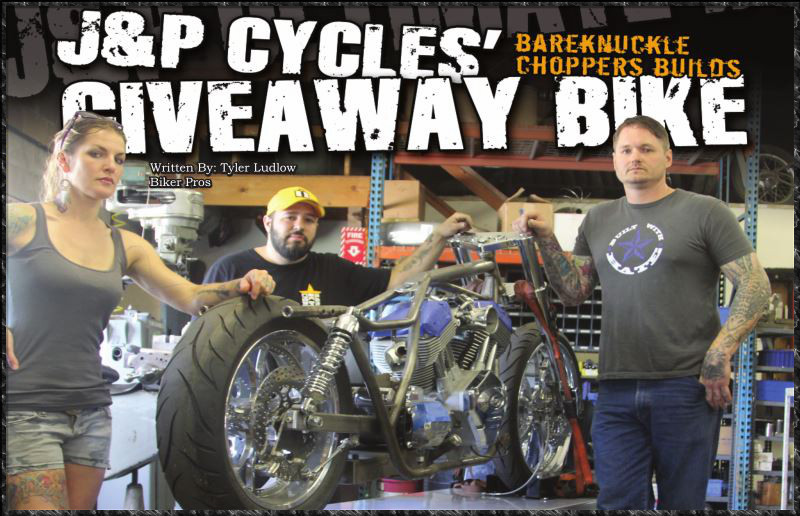
J&P Cycles Giveaway Bike – Part One


Editors note: The following is an introduction to a 5 part tech series which will document the processes used at Bare Knuckle Choppers to transform the J&P Roller with an S&S X-Wedge motor into a street pounding machine to be given away at the 2015 J&P Cycles Open House Rally. 

Clocks dictate so much of our lives. My wake up call is at 6am. Checkout is 9am. I’ve been on the road for 30 of the last 48 hours to get to the roller for J&P Cycles’ Giveaway bike.  At least before Paul Wideman of Bare Knuckle Choppers (BKC) rips into it. Kate, who’s been with me since Atlanta, is from my hometown near Chicago. She knows me better than myself. She’s also the Sicilian version of Jessica Rabbit, if Jessica could belch like a sawed-off shotgun.

“Quit being a little bitch,” she lovingly encourages me. Since I moved to Raleigh, I missed her Mid-Western charm. I give in, and we pull over after sundown and hit the hotel pool for a couple hours, with a garbage can full of Miller Lites. This is when I lose track of time. In the morning I’m meeting Paul Wideman at the crack of dawn. It’s a good thing I’m not building the bike since there’s only six weeks to do it. Well, that and the fact that only the J&P Cycles Ultimate Builder Custom Bike Show champion gets the privilege—and that trophy belongs to BKC. (You can see Paul’s winning bike in the February 2014 edition of Cycle Source.) 


“The roller came in about three days ago. We tucked it back there until you got here to shoot it,” Paul confesses as I get to the shop. It was obvious he had approached it with wrenches in hand, and then had to back away from it. The pro-street style bike looks as if it already has won a couple of ¼ strip races without hitting pavement. All Paul can see is dead weight. Whoever wins the raffle for this bike had better know how to ride fast.


Anyone who has seen a BKC bike knows that there’s nothing you could call an “add-on” or “accessory”. Every part is  essential to the operation of the machine. The Bare Knuckle style is purely functional and unapologetically stripped-down.  The  117”  X-Wedge engine makes the Rolling Thunder FXR frame look beefy, but also brutally fast. Paul gazes at it like a blank canvas- it was obvious the wheels were turning in his head. Like Michelangelo said, “Every block of stone has a statue inside it and it is the task of the sculptor to discover it.”


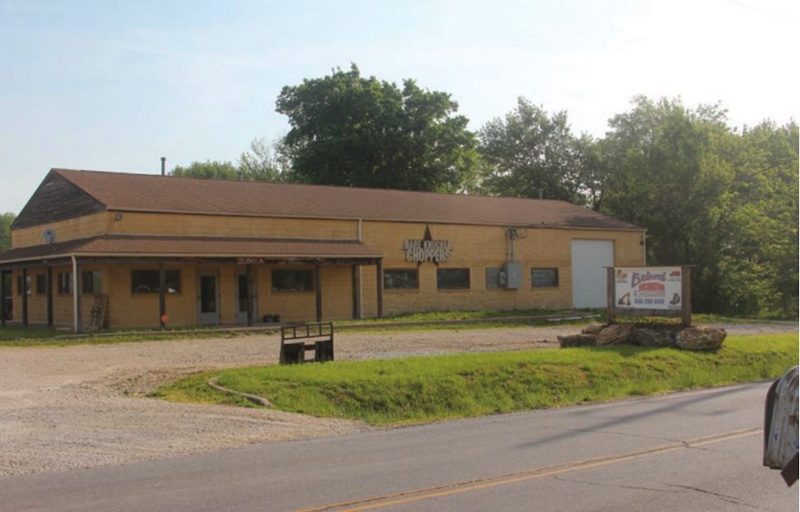
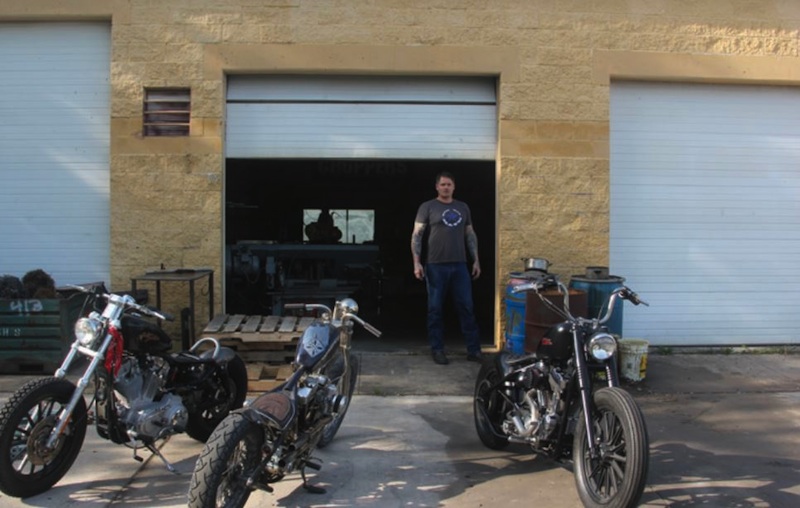
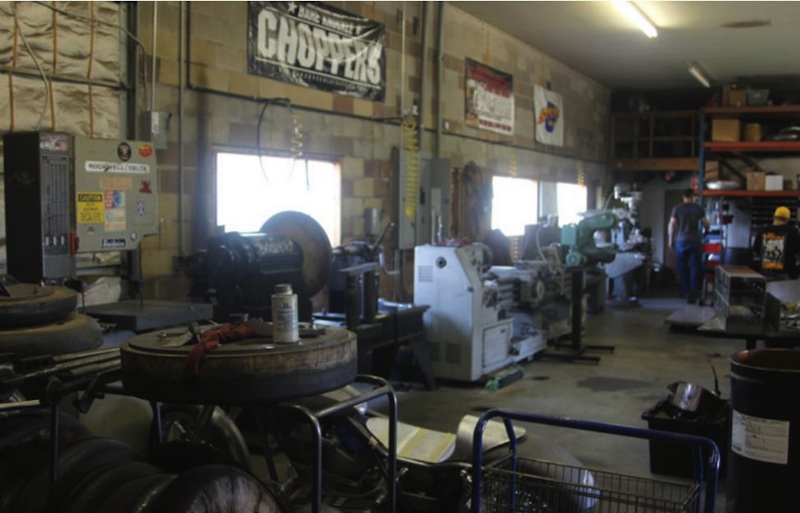
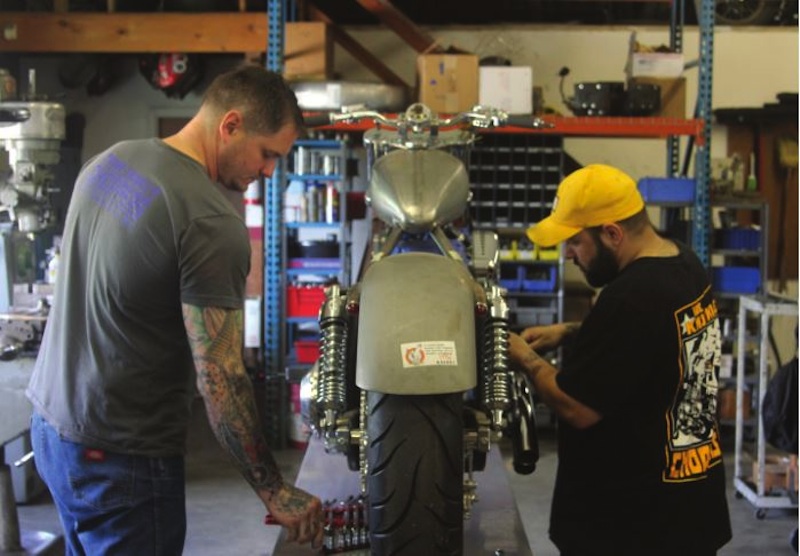
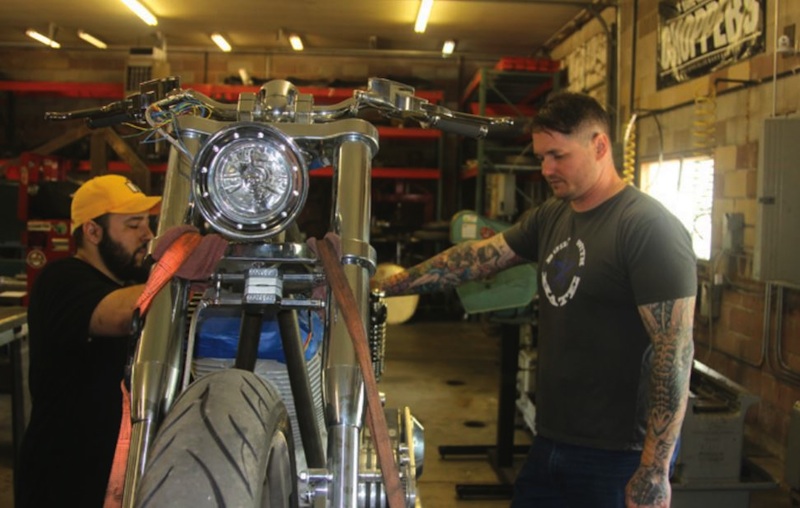
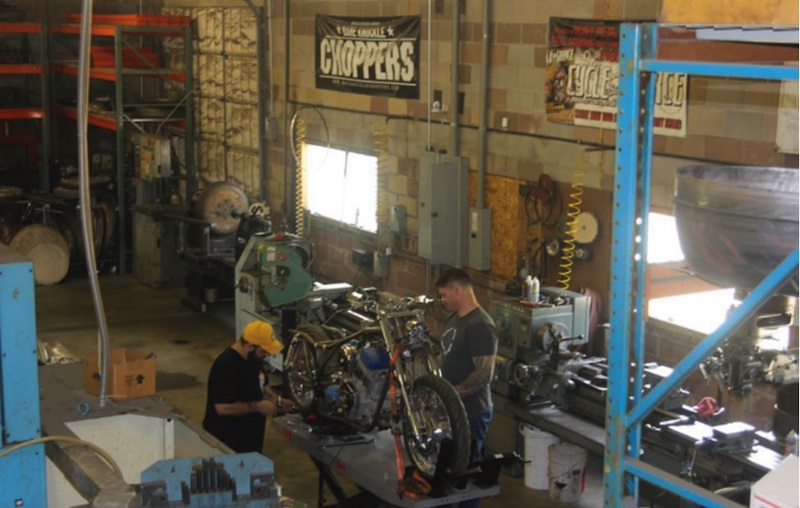
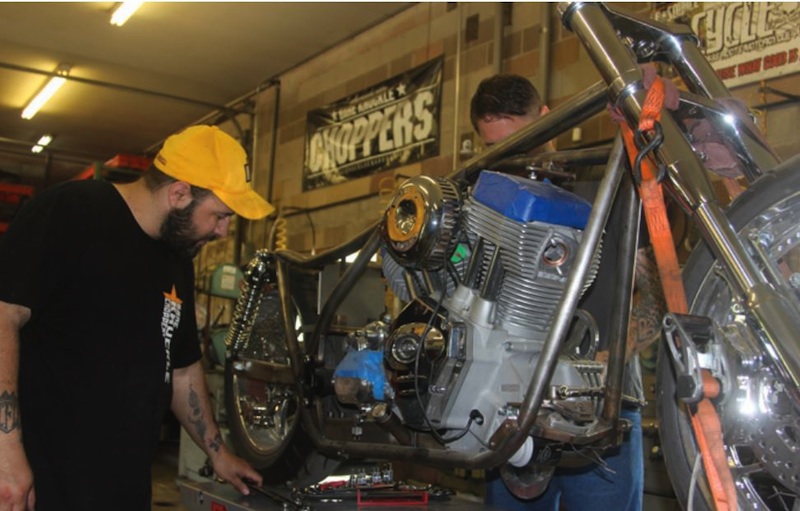
The BKC Shop is truly a sculptor’s paradise. A row of refrigerator-sized lathes, routers, and presses line the perimeter of the compact factory. Many of them are from the 1950’s. Paul has built some of these machines by hand, so working with a Rivera Primo drive and the 54° triple-cam motor was something he felt he could figure it—although he hasn’t even seen one in person before. As we study the project, Paul has gone beyond the day-dreaming stages of the bike, and is envisioning his ride on finished product. Nichole, Paul’s girlfriend and office manager, snaps us back to reality with a list of new orders. The business and bike build will have to share Paul’s attention.


“I’m known for building choppers and bobbers, so this is going to be interesting… Definitely looking forward to the challenge. This bike deserves it.” Paul philosophized. “Obviously it has just gobs of horsepower. I’m excited for whoever eventually gets this thing.” Paul only has six weeks to take this bike from roller to completion to make the tour for J&P’s Ultimate Builder custom bike show, but Paul is confident, despite it being an impossible timeframe for many shops. To stand next to the man and hear his plan, you would think it is already done. “Go ahead and snap some pics of the shop, whatever you need. I have to chew one of my guys out for being late.” This bike is being created for the winner of the J&P Cycle’s Raffle. You can enter to win at the International Motorcycle Show or anywhere you see a J&P Transporter.
 
Follow  Paul  and  the  J&P Cycles Giveaway bike at http://bareknucklechoppers.com/ and  #JPUltimateBuilder  and #BareKnuckleChoppers  on Instagram and Twitter 


J&P Cycles Call Out

J&P is proud to welcome Paul and BKC to their catalog, with more than 10k items available, for the completion of the J&P Cycles Ultimate Builder Giveaway. Zach Parham, General Manager of J&P, is excited to see the final product.

“It’s going to be a great. Paul’s bikes are quite ride-able. We think this bike will be narrow and made to be ridden. He makes the kind of bikes that make someone want to get a motorcycle.I think I’m going to want to take it home for myself.” Zach lamented. Zach and the crew at J&P love customization. 

The bikes that you see out at the J&P transporters are actually their daily drivers when they’re on the road, so they know what it takes to maintain a hard-ridden bike. “If there’s one thing we want our customers to know, it’s that we’re structured to get their parts to them in as soon as two work days, including consumables like tires and oil. We like working with builders because we want people feel comfortable working on their own motorcycles, and show them what they can do with bolt-on parts. We have 35 techs on staff ready for calls every day… They can walk you through an oil change or rebuilding your engine.”


Read More

The Amazing SHRUNKEN FXR Updated

Once upon a time there was a bike built called the Shrunken FXR. Keith “Bandit” Ball, of Bikernet and other assorted fame, built it. By a stroke of good fortune the bike became mine through the generosity and trust of Keith Ball.

This bike was my daily commuter for a handful of years. It was and is always a challenge and a ton of fun navigating the streets and freeways of Los Angeles on two wheels and especially on a custom built motorcycle.

I decided it was time to update the look of the bike as well as do some fine-tuning of a few mechanical items I wanted to switch up a bit. Below is a brief summary of what was done, again primarily with the help of friends and some extra cash from my Pops to help get it all finished up proper.

First I replaced the front fork tubes with new fork tubes made by Forking by Frank. Styles have changes, so I installed new handlebars, 10-inch baby apes mated to Black Boyd Motor Co. risers.

I work at the magnificent ARCH motorcycle company and LA Chop Rods, so natch; I installed Black Anodized hand controls by ISR purchased. They are absolutely the best and contain the mechanical Bandit approved styling.

I replaced the mirrors with 2-inch Blind spot jobs by CRG (Small and work great). We
Powder-coated the classic Performance machine wheels black (Thanks to Custom Metal Finishing in Gardena CA, who handle the high-end ARCH motorcycle extreme perfectionist coating).

We manufactured a new Shift arm and Brake arm to improve function. Ryan Boyd, Boyd Motor Co./Arch Motorcycle, is a master machinist and engineer. He configured then machined these components to enhance the rear brake functions, and it now works like a charm, plus it improved shifting dramatically.
We replaced the pegs with something sport bike like and again Ryan stepped up to design and machine one-off mounting bracket adaptors.

We reworked the exhaust basically back to the original first version, added BBQ paint and LA County Chop Rods baffles.
These upgrades, in addition to the rear shocks by Progressive and my comfy Saddlemen seat make the Shrunken FXR road ready and looking fresh for 2016.

Me owning this bike and updating would not be possible without the help and kindness of the following wonderful humans beings: Keith “Bandit” Ball, Dr. Ladd Terry, Gard Hollinger, Ryan Boyd, Jose Laguna, Saddlemen, L.A. County Chop rods, Custom Metal Finishing, Boyd Motor Co., Frank’s maintenance and engineering.

Here’s a link to the original feature, if you search the Shrunken FXR on Bikernet, you’ll find all the build articles: http://www.bikernet.com/pages/Amazing_Shrunken_FXRThe_Full_Feature.aspx

–Buster Cates

BIKERNET RESOURCES

The Magnificent ARCH motorcycle factory

LA Chop Rods

Saddlemen

BDL

Progressive Suspension

Read More

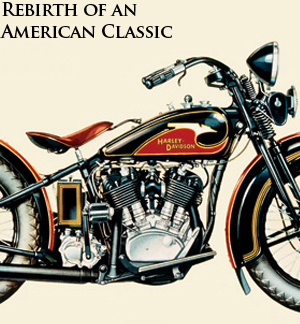
Rebirth of an American Classic: Case Repairs

 
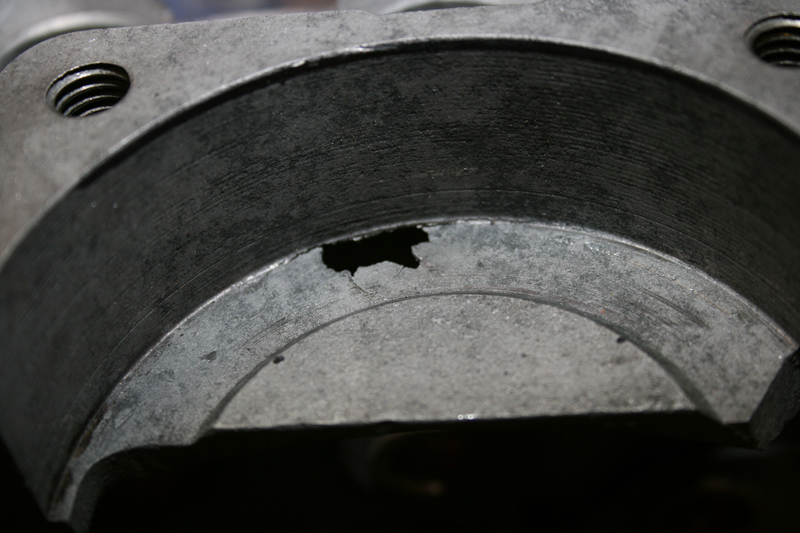
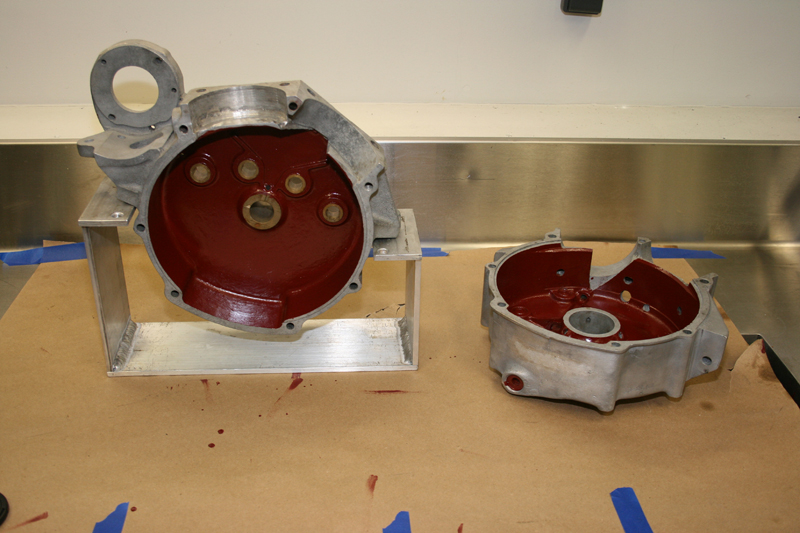
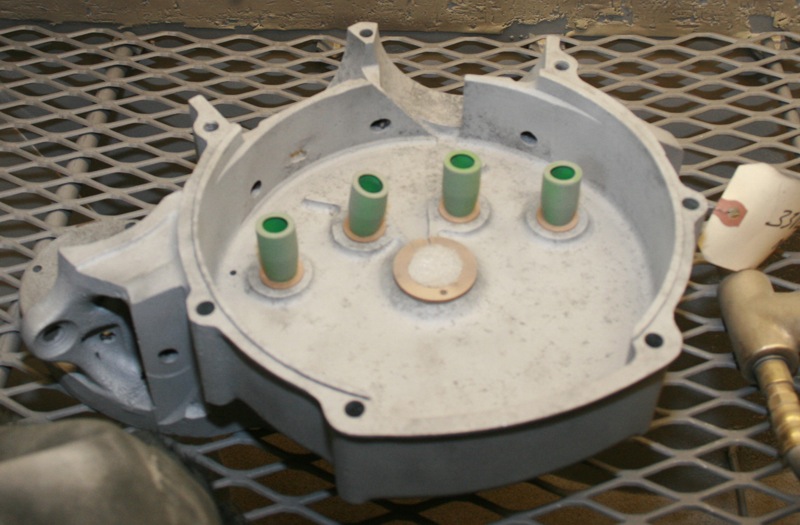
Before the engine could be rebuilt, the cases needed some additional work to repair a damaged portion of the front baffle.  It appears that an unknown piece of debris was wedged between the backside of the baffle and the flywheel which eventually knocked a hole right through the baffle.


Since HD engine cases are made from aluminum, the best method for repairing the hole was to use a TIG welder to fill in the missing material.  The hole was located at the thinnest portion of the baffle, so a piece of copper plate was used to cover the hole and provide support for the weld.


The entire case half was then placed in a parts oven set to 400 degrees Fahrenheit for 45 minutes.  This helped to bake out the old motor oil which had impregnated the case over the years and ensured that the entire case was at equal temperature for welding.  The heating also revealed that there were a number of cracks radiating out from the hole which also needed to be fixed.  By the time the hole, the cracks and the casting imperfections had been repaired, I was left with a good deal of weld to grind away.


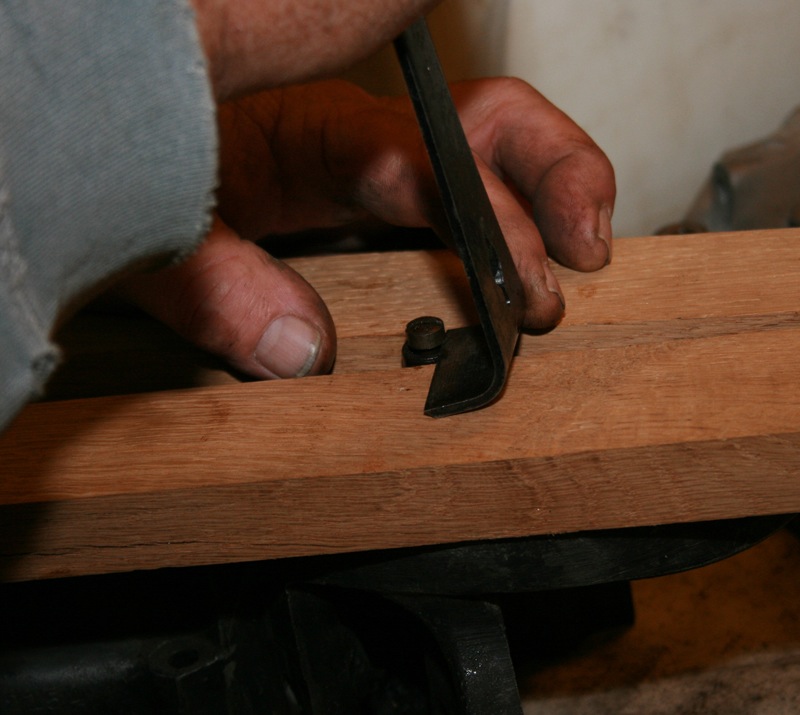
The backside of the baffle was easy to reach and was ground back into shape with the help of a curved template and a flap wheel mounted to a hand drill.  The top of the baffle was much harder to grind with standard tools, so it was necessary to make a custom router bit using an aluminum sleeve epoxied to a ½” four fluted end mill.


Working slowly, I removed about 1/32” of excess weld with each pass of the router.  Liberal amounts of Teflon lubricant was used throughout the process.  After every pass the chips were removed and new lubricant was added to make sure no damage was caused by the aluminum sleeve riding against the case.


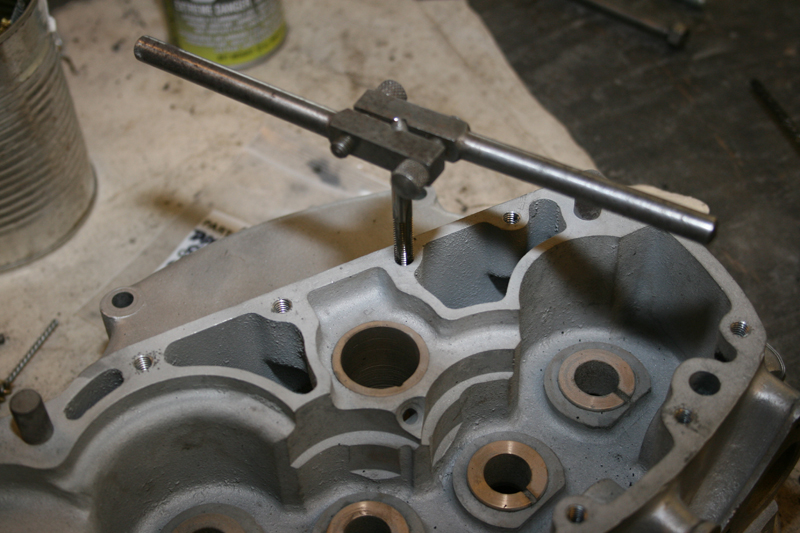
After some final shaping, the repair was complete and I moved onto chasing the threads for all the tapped holes.
 
 
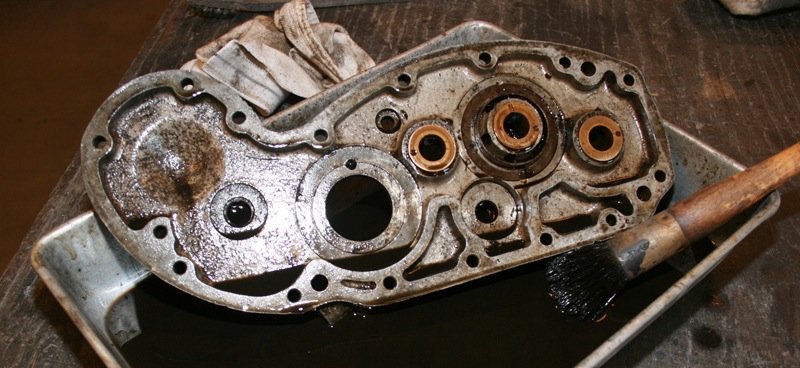
Next, both case halves received a thorough cleaning.  All the holes were cleaned out with wire brushes attached to a hand drill to remove any aluminum chips and other debris.  From there the cases were soaked in warm soapy water and scrubbed with bristle brushes.  Then each case was carefully blown dry with compressed air, paying careful attention to blow out all holes and orifices.


Once the cases were clean and dry, the last step was to apply a coat of Glyptal to the inside of both cases.  Glyptal is an enamel based sealer, so once it dries, it is tough to remove.  To insure that the sealer only coated the intended surfaces, each case half was carefully taped and covered.  Once the Glyptal was applied, it was cured in an over for two hours at 275 degrees Fahrenheit.  The result was a hard slick coat of Glyptal and a set of cases ready for assembly.


Editors Note:
If you would like to contribute to the completion of this bike please use the link below.
 
This project started on Black Friday of 2013 with just a set of engine cases and will end with a complete 1933 Harley-Davidson VL making a cross country run in the fall of 2014.  Already a great deal of progress has been made on the restoration of this motorcycle, but more funding is needed to see this project through to the end.  Additional articles will continue throughout the remainder of this build and will result in a complete digital archive which takes the reader through the restoration of a 1933 Harley-Davidson, step by step.  By making this information available freely online, future vintage motorcycle enthusiasts will be able to rebuild and maintain these great machines.

We have already gained the support of many of the top compaines in the vintage motorcycle industry.  If you would like to see your company’s logo included not only on the motorcycle, but also on every article, please contact me directly to learn more about our marketing campaign and advertising opportunities. EMAIL

 
Sponsored By


Read More

Doug Coffey’s RetroMod Panhead Part 5


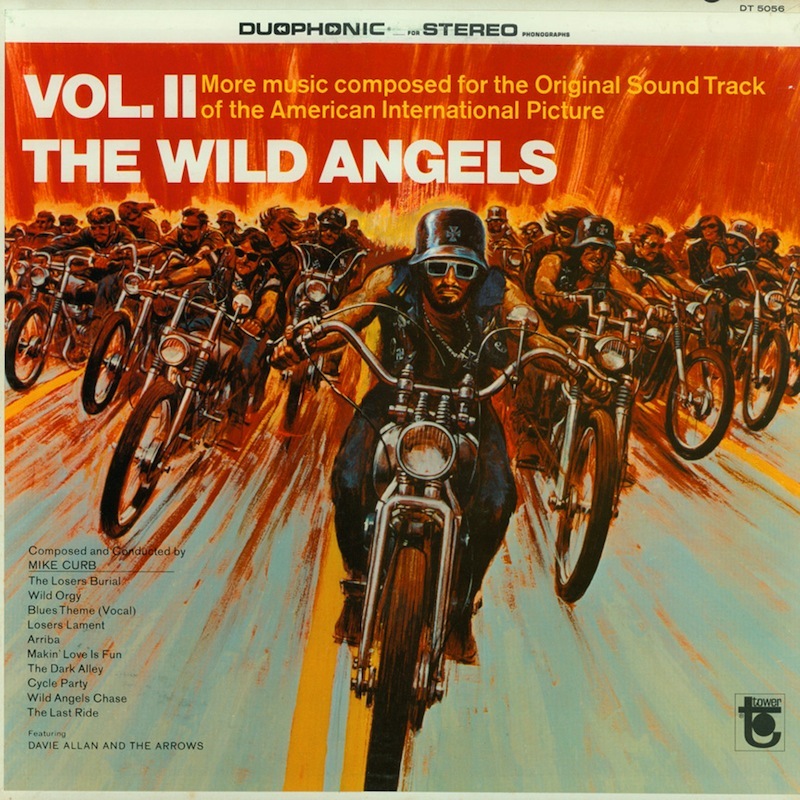
Back in the sixties the movie Wild Angels came out shortly followed by a soundtrack album with a great cover
One of the bikes on the cover caught my eye. The one to the right of the lead bike has a set of low rise Zee style handlebars. Try as I might I could never find a manufacturer low rise Zee bars. Everything available was four inch rise or higher and it is still the same today.
I decided I would make my own Zee bars for this new bike project.
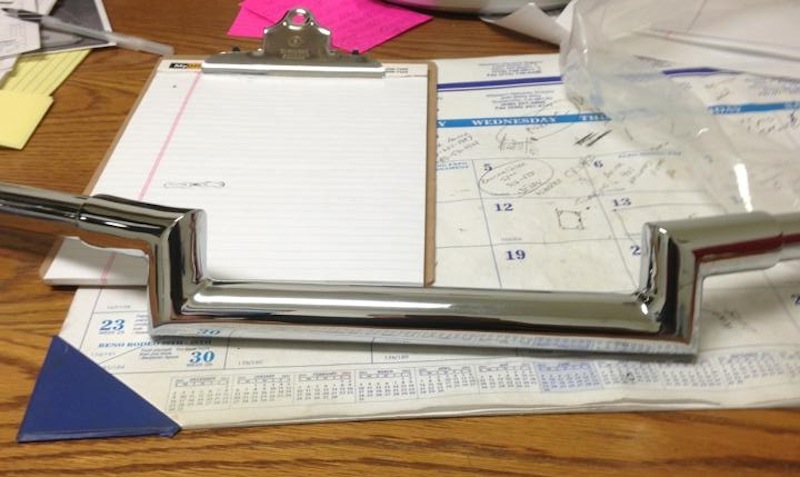
I wanted a beefier look for my handlebars than the usual one inch diameter so I used 1-1/4 inch DOM tubing and cut the pieces to size on my milling machine.
 
 
I made the end pieces from one inch tubing and after welding everything together I finally had some 1-1/2 inch low rise Zee bars
 
 
My good friend Ron McBroom from Paughco offered to chrome plate my bars for me and I think he did a darn fine job.

Risers


I wanted handlebar risers that looked just like original Glide risers but I had a problem. Original Glide risers are made for one inch handlebars and my bars were 1-1/4 inch which is 25% larger.
I wasn’t going to let that stop me so I made a drawing of the original Glide risers scaled up 25% larger.
After boring and tapping a hole to 1/2 x 13 threads per inch for mounting, I bolted them into an angle plate on my mill and bored a 1-1/4 inch hole for the bars.
In the picture at right you can see a stock original Glide riser.


After boring the holes for the bars on my milling machine the risers went back on the lathe for turning.
The left picture shows the turning work done including a guide groove for slitting the caps off later on the mill.
The right picture shows the finished product ready for polishing. I also drilled and tapped the holes for the Allen bolts on the milling machine.


I don’t much care for rubber mounted handlebars so I turned some mounting adapters on my lathe.


Mission accomplished.
(it only took me 45 years to get around to doing this)
Read More

How to replace grips on a Harley-Davidson by J&P Cycles

Today, J&P Cycles shows you how to replace grips on a Harley Davidson motorcycle. From removing your old grips and adding new grips watch the entire process take place.In this video they use a 2013 Harley Davidson Softail Slim for demonstration but the process will be very similar for all motorcycles that utilize dual throttle cables.

Advertisement
Read More

Rebirth of an American Classic: The Build Begins


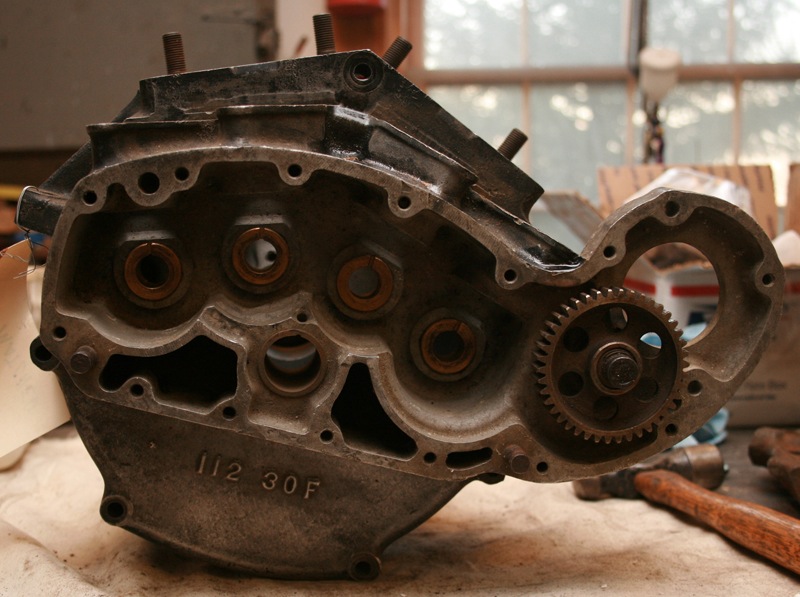
After months of planning, my 1933 Harley-Davidson build officially started on Black Friday.  That’s when I made the long trip up to Replicant Metals (www.replicantmetals.com), located a mere 7 hours north of me in Pennsylvannia.  Owner Tom Feezer was waiting for me with a set of matched 1933 VL cases when I walked into the shop. These will serve as the basis for my build and are the most important part as the VIN number stamped on these cases is what makes the motorcycle a ’33 model. I plan to stay true to what the factory produced in ’33, but technically anything I build with these cases will be titled as a ’33 Harley-Davidson.
 
 
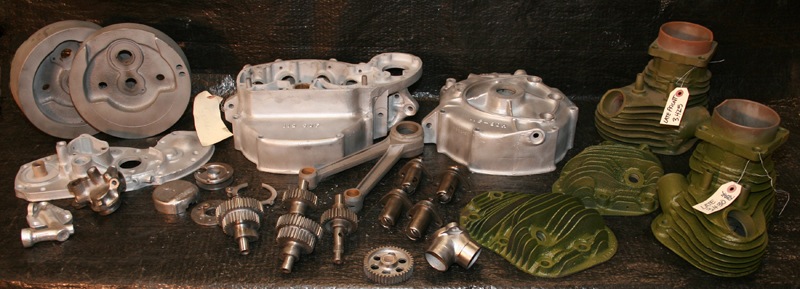
Setting aside the cases, I started making a pile of the other parts: heads, cylinders, cams, flywheels, rods and cam cover. Everything needed a trip through the blasting cabinet to knock off 80 years of built up grease and grime. Before loading up the blast cabinet, some of the parts needed to be broken down further, including the cases and the cam cover.  
Starting with the cases, there were still some cylinder studs which needed to be removed.
 
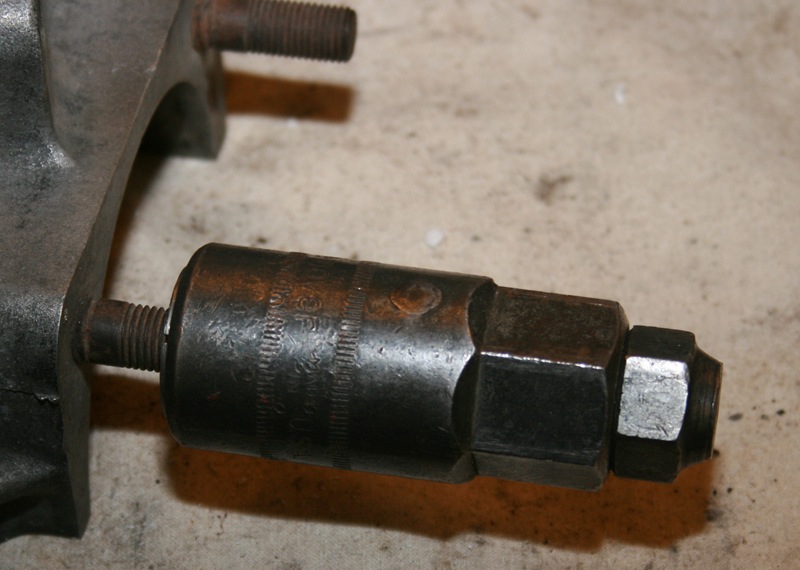
Normally, I’d just use the old two nut trick to back them out, but Tom actually had a specialty tool from Snap-On for removing them. The tool comes with a number of collets which are sized for different thread pitches and bolt diameters.  You screw the collet onto the stud and then slide a collar down over the collet. The opposite end of the collet in threaded on the outside, which allows you to screw a nut onto which forces the collar down the collet. As the collar slides down the collet, it tightens the collet onto the stud. Once the collet is secured onto the stud, you just unscrew the entire set up as one piece. The result is easy stud removal without damaging the stud or the case.
 
 
The idler gear and shaft also needed to be removed which was accomplished by first removing the retaining ring which keeps the gear on the shaft. After removing the retaining ring, the idler gear slid right off without any problems. The shaft proved to be a trickier to get out, but we were able to carefully pry it out after threading a bolt into the end of it.  Using blocks of wood to protect the case, a small pry bar was slipped under the bolt head to pry out the shaft.
 
 
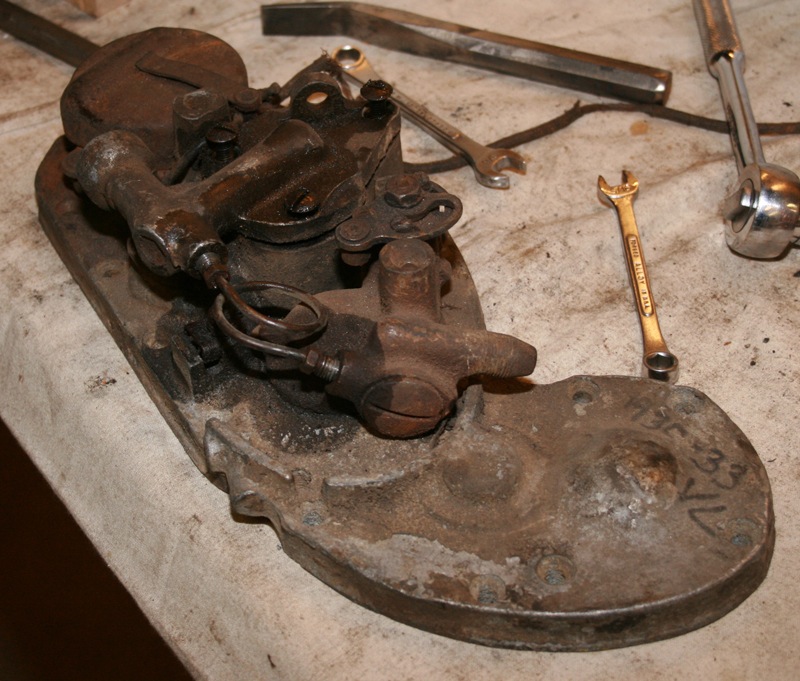
Next I turned my attention to the cam cover, which turned out to be the most complicated part to disassemble. Unlike modern motorcycles, the VL cam cover is used to houses the oil pumps and timer. All of these parts are held in with flathead screws, so special attention was paid not to damage them. The first step was to give everything a get soak in Kroil penetrating lubricant.
 
 
That did the trick for all but one screw. In the end, it took careful heating of the cam cover with a torch to break that last screw loose. These parts had enough surface grease on them that the needed to be cleaned in lacquer thinner to get them to a state suitable for putting in the blast cabinet.
 
 
Now I had enough parts to get started on the blasting process. The cabinet was filled with a fine grain aluminum oxide medium, which is gentle enough not to cause serious damage to the aluminum. Still, it was important to keep the gun moving back and forth to make sure that no one spot was cleaned to aggressively and to keep the overall color and surface texture even. As a precaution, I also taped over the VIN number just to make sure that it wasn’t damaged as well as plugging all the bushing holes.
 
 
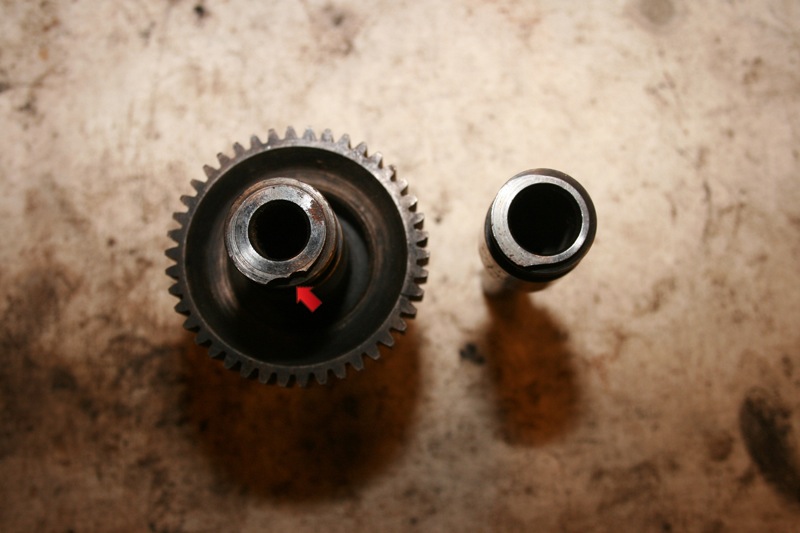
About half a day was spent blasting the cases, cam cover, oil pumps, timer parts, connecting rods and flywheels before I moved onto the cams. The V-series engine uses four gear driven cams, much like a modern Sportster, each cam as one lobe which opens either and exhaust or an intake valve. Upon close inspection of my cams, I discovered that the worm gear on cam #4, which drives the oil pump, was damaged.
 
 
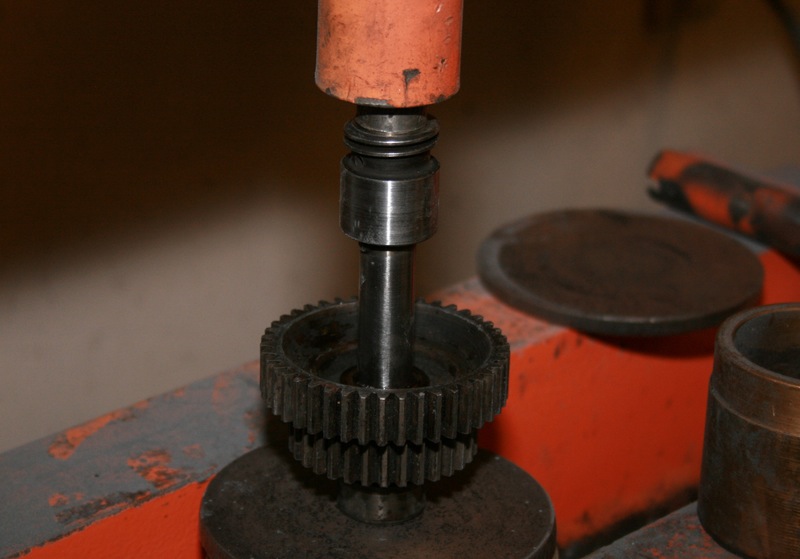
This is an easy fix if you have a replacement shaft available. On V-series cams, the shafts are pressed onto the gear/lobe clusters, so to make this repair I just had to press out the damaged shaft and press in a replacement. Harley designed these cams with an alignment tab, so they can only be assembled in the correct orientation. 
 
 
When the repair was complete, the cams went into the blast cabinet to clean up the gears. I was careful not to blast any surfaces that would come in contact with the bushings in the case or cam cover.
 
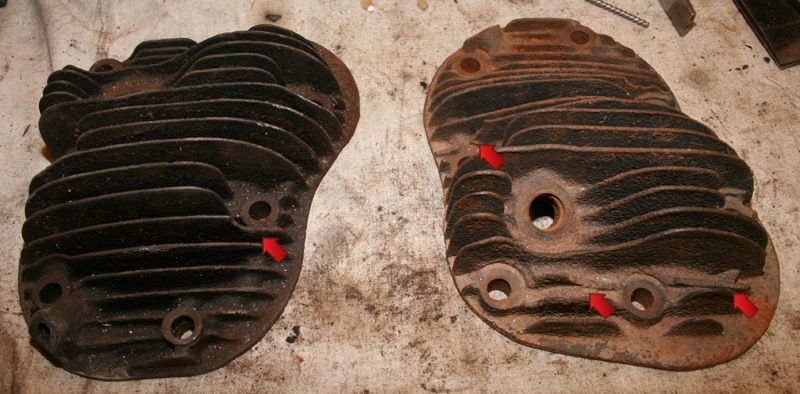
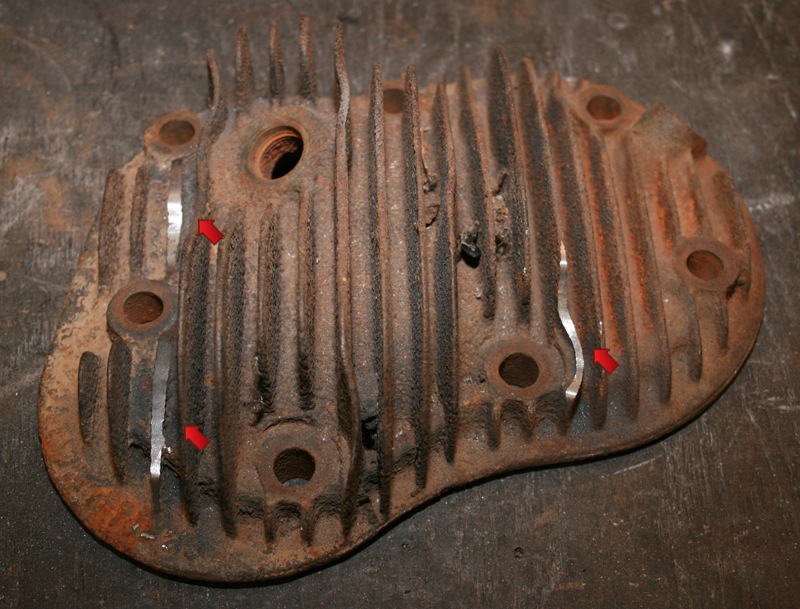
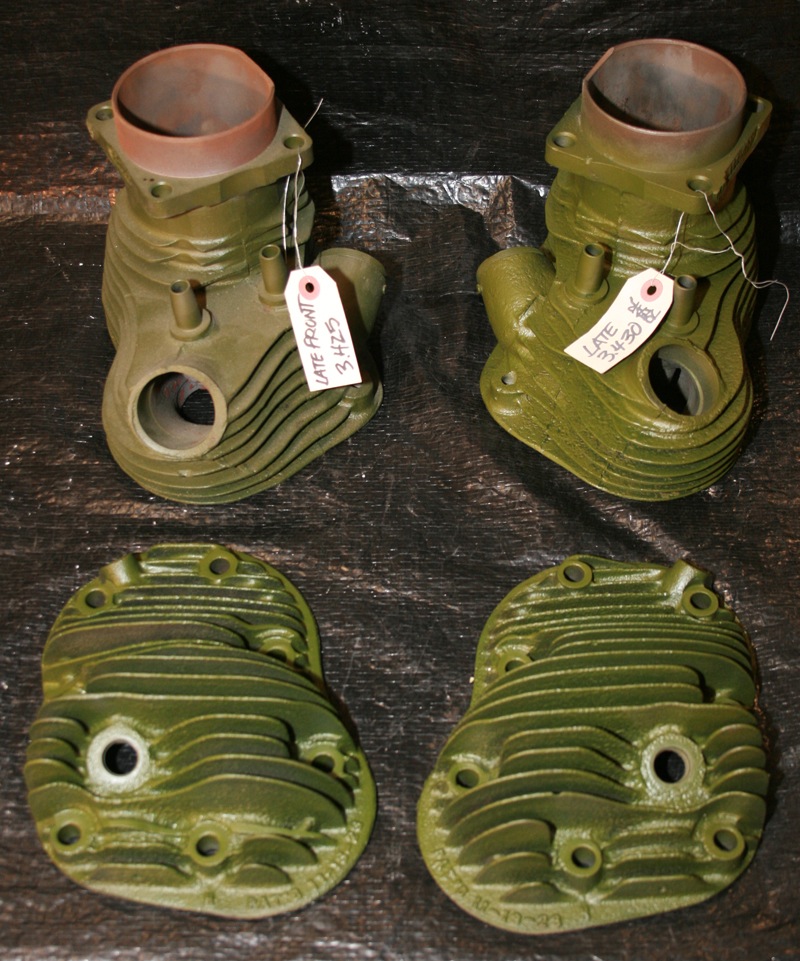
Lastly I turned my attention to the cylinders and heads. The cylinders were in good shape, without any broken fins and only bored .005” and .010” over stock. All they required was removing the old hi-temp paint from the external surfaces in the blast cabinet. The heads had some minor fin damage which is very common on flatheads. Fins can be easily snapped off when removing the heads if the wrong tool is used.
 
 
Since the damage to my heads was not extensive, I decided to use a die grinder to smooth out the broken fins. Once painted, they should blend together nicely and it will take careful inspection to spot the damaged areas. 
 
 
The heads were placed in the blast cabinet for final cleaning. To help protect my freshly cleaned heads and cylinders, they were all sprayed with an aircraft primer made by Tempo. Don’t be alarmed by the green color, they’ll get top coated black.
 
 
After a few pictures were taken, everything was boxed up to be sent out to the machine shop for inspection. After the machinist gives the ok on these parts, they’ll come back to the shop for a final cleaning to remove any debris left by the blasting process. Then it will be time to rebuild the engine.
 
 
Editors Note:
If you would like to contribute to the completion of this bike please use the link below.
 
This project started on Black Friday of 2013 with just a set of engine cases and will end with a complete 1933 Harley-Davidson VL making a cross country run in the fall of 2014.  Already a great deal of progress has been made on the restoration of this motorcycle, but more funding is needed to see this project through to the end.  Additional articles will continue throughout the remainder of this build and will result in a complete digital archive which takes the reader through the restoration of a 1933 Harley-Davidson, step by step.  By making this information available freely online, future vintage motorcycle enthusiasts will be able to rebuild and maintain these great machines.

We have already gained the support of many of the top compaines in the vintage motorcycle industry.  If you would like to see your company’s logo included not only on the motorcycle, but also on every article, please contact me directly to learn more about our marketing campaign and advertising opportunities. EMAIL


Sponsored By:


Read More

What the Hell is 5-Ball Racing?

 
It all started when my mother ran over my metal- flaked Honda 55 Super Cub with a single shotgun pipe. She stormed into our tiny stucco house in Long Beach and announced, “Get that damn thing out from under my car.” Her car was a massive ’59 Ford station wagon. It was 1964 and I was 15.5 years of age. That Honda was my first motorcycle. 
 
 
Mom and I didn’t see eye-to-eye on a couple of issues. The day after I graduated from high school, I joined the Navy and was shipped to a heavy cruiser off the coast of Vietnam for three tours. I fell in love, and got married, to my mother’s chagrin (my loves have always played a major part, as you will see). During that time, I bought my first Harley, a ’69 kick-only XLCH with a magneto and no battery. 
 
 
And so began a life of running wild, building motorcycles, ditching wives, and being involved in Bonneville racing. One of the first bikers I ever met was on a small destroyer, the USS Maddox. Andy Hanson was also building his first ground-up big twin in 1970, and his mentor was the late Bob George. Bob was an engine builder and an innovator. He taught me how to build engines. When I slipped away from the Vietnam War, honorably discharged, while dodging a pot-smuggling bust, I returned to civilian life. I was innocent, I tell ya.
 
They let me out early if I took a trade course, so I took a welding class at Long Beach City College, so I could rake frames. I took the certified welder course. Once clear of the Navy, I enrolled at the liberal arts campus at LBCC and started taking classes. I worked part time at US Choppers in Inglewood, and built engines and bikes on the side. One of the bikes, a Knucklehead, belonged to a high school buddy, Brad. As we were about to finish this wild chop, a new magazine appeared on the racks, Easyriders.
 
 
I wrote the publisher a note about Brad’s Knuckle and Lou Kimzey, the publisher, came to see it. The next thing you know, I was the manager of ABATE, the first grass routes organization fighting for motorcycling freedom in America. Then I became an associate editor of Easyriders magazine. Long story short, I worked for this publishing company off and on for 30 years and built a few bikes during that time. Okay, so during that stretch, I introduced Bob George to the Jammer Cycle bosses, Joe Teresi and Mil Blair. 
 
 
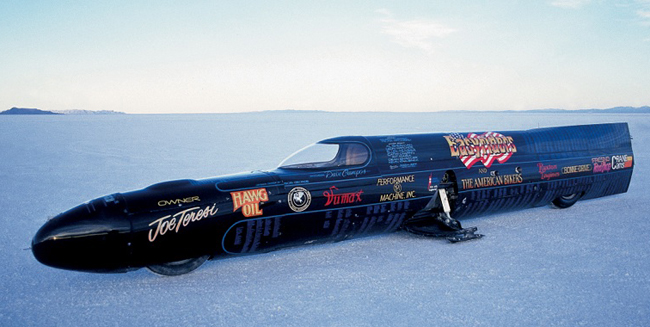
Bob built a streamliner with two 90-inch Shovelhead engines and wanted to go after Don Vesco’s 314 mph motorcycle world land speed record (the granddaddy of records), but he needed financial backing. He couldn’t do it alone. It became the Jammer, then the Easyriders streamliner always piloted by Dave Campos. About this time, I ran off on my first wife and hooked up with a biker broad, who became the second Mrs. Ball and we had a son. That didn’t last long, either.
 
I became more of a crazed bike builder, joined a club, wrote more articles and hooked up with a club sweetie, the third Mrs. Ball. That was the era of sex, drugs, and rock and roll. Nothing lasted more than a minute, and she was gone, but what a party we had.
 
 
Then in the mid ‘80s, I met the most beautiful redhead on the planet and fell in love. I ditched five girlfriends and married the fourth Mrs. Ball. About the same time, Joe Teresi took over the streamliner effort and Paisano Publications. Keith Ruxton became the engine builder/crew chief and Easyriders readers went after that world land speed record. In 1989, we set a major record at 284 mph, but that wasn’t good enough. 
 
 
We returned in 1990 with Micah McCloskey, Dean Shawler, Kit Maria, and a solid bunch and brought the land speed record back to America at 321 mph. We held that record for 16 years, longer than any of my marriages, so number four was history. 


I took a break and then met number five, Rebecca and so 5-Ball was born as a tribute to her and to all the Mrs. Balls in my life. I finally came to the dire conclusion: Marriages weren’t for me. There would only be five. I started writing motorcycle fiction books and they all fell under the 5-Ball brand. Then as the Internet fluttered to life, I started Bikernet.com, also a 5-Ball entity. 


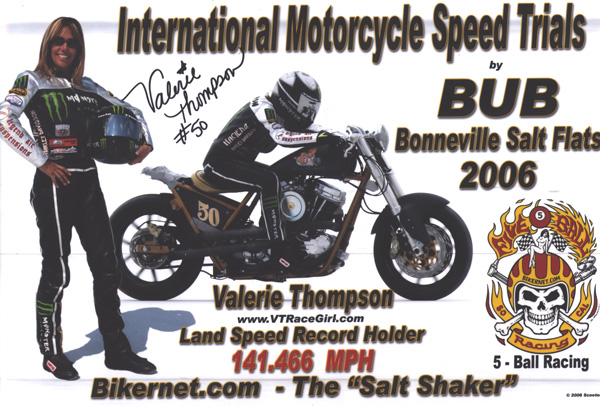
At the time, about the mid ‘90s I would build a motorcycle each year and test it on the roads to Sturgis, often with a bunch called the Hamsters. Then in 2006, we established the 5-Ball Racing Team and returned to Bub’s Bonneville with the first sport-bike Panhead based around John Reed’s V-Bike and Berry Wardlaw’s 120-inch Panhead engine. It was a pure fluke, but Valerie Thompson rode this monster into the record books at a top speed of 152 mph. I was standing on the salt the day the ER record was snatched by the Ack Attack streamliner, 16 years later (342 mph).
 
 
We learned so much that year that we decided to return in 2007 with another Panhead. This time, we built an aerodynamic bullet and our notion was to build the World’s Fastest Panhead. We did set another record in our class with a top speed of 162-mph during horrible salt conditions. 
 
 
I pulled away from the magazine world, but continued to write wild fiction books, and then a Bonneville book around our second Panhead World Record, while building Bikernet.com. Hell, we didn’t know what we were doing. But we did know we were having the time of our lives, writing about motorcycles, building motorcycles, and living the two-wheeled dream.
 
 
I wasn’t much for trophies or organized sports. I liked to sit alone and write a story, or tinker in my shop. I didn’t ride with groups much, but enjoyed the open road alone, in search of the next redhead and bottle of whiskey. I’ve tried to live by the code of the west and always be available to a downed brother or sister.  And I endeavor to help folks in the industry, and with Chris Callen we promote the Motorcycle Riders Foundation Industry Council. 
 
 
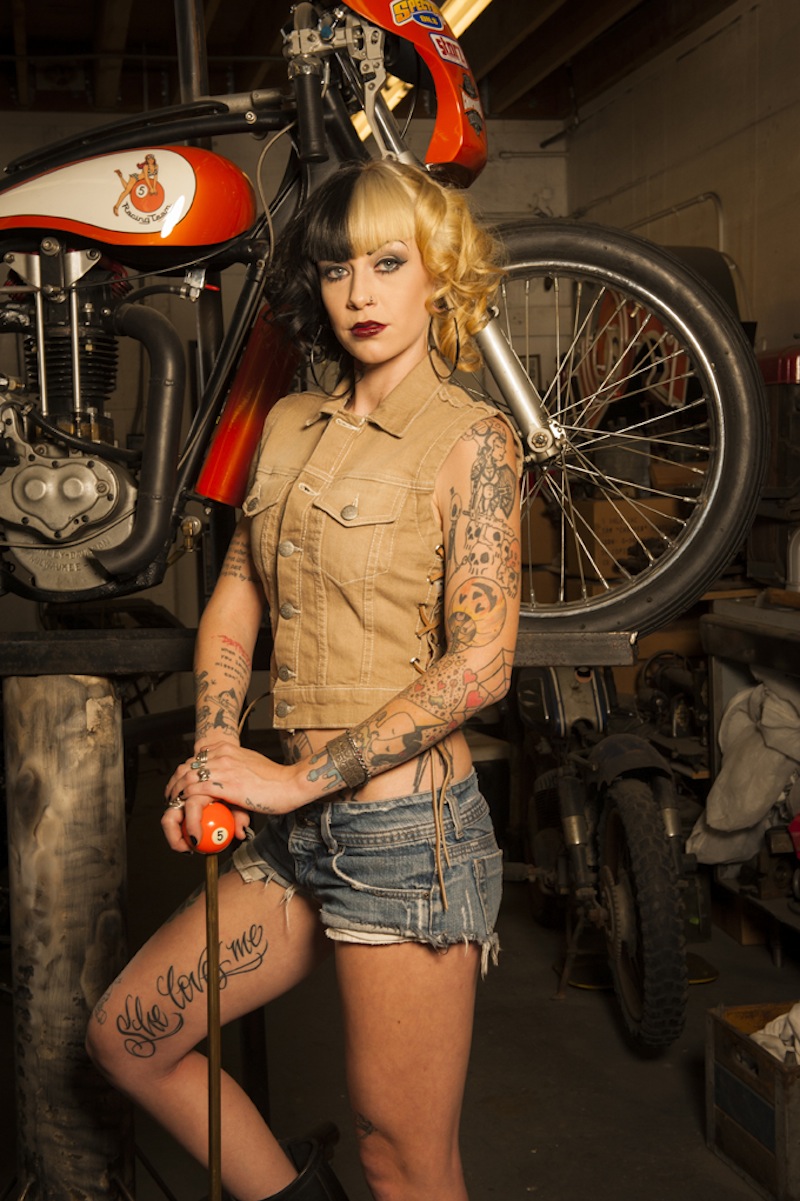
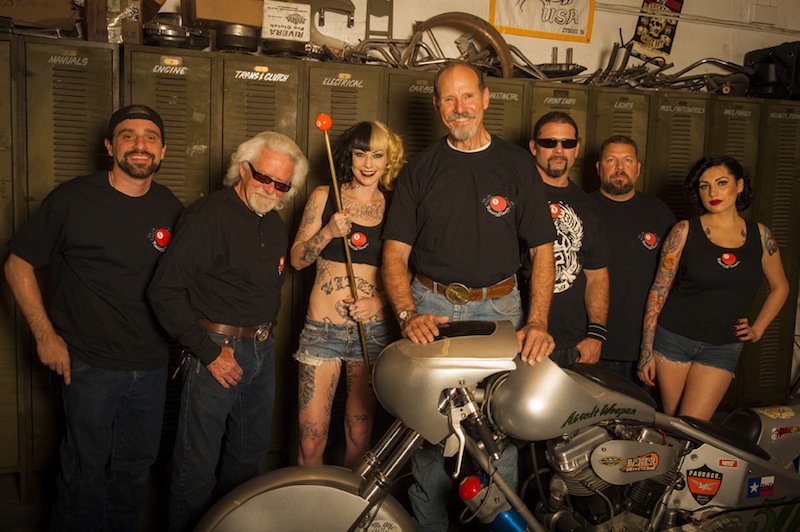
So, a couple of years ago, a young man approached me and wanted to build an apparel line around Bikernet. I leaned back in my tattered leather chair and kicked my boots up on my Panhead desk.  After a shot of Single-Barrel Jack the 5-Ball Racing brand was born. I told him there was no money in it, but Andrew Calogero persisted, while the 5-Ball team prepared for another run at the salt.
 
 
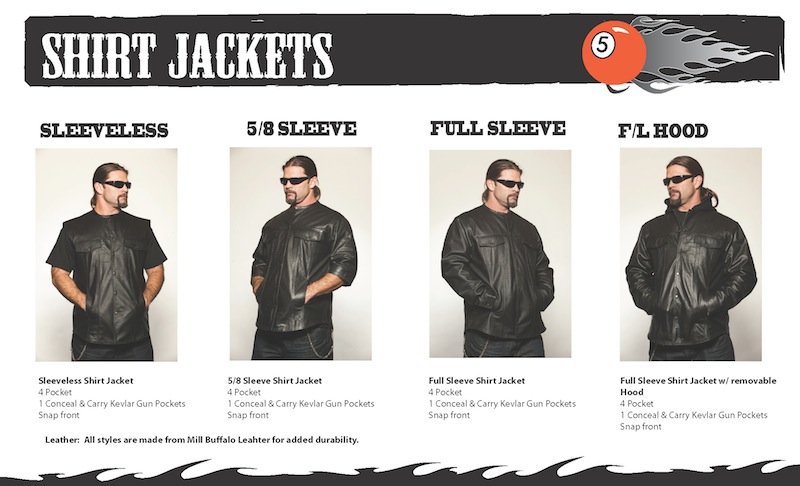
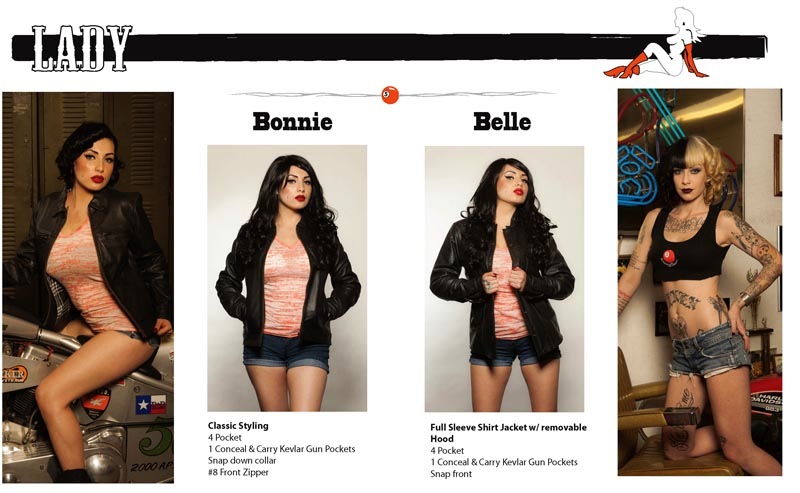
While we grappled with designing and building the first streamlined Belly Tank trike for Bonneville, I hooked up another positive element to the growing team, Bob Kay, a man who has lived and breathed the motorcycle business as long as I have. Andrew is the operations and sales arm (rolled 5-Ball apparel into the J&P catalog), while Bob designed a carefully thought-out line of leather goods, and suddenly we had a 5-Ball Racing line of riding leathers. 
 
 
So, there you have it. We were just a handful of brothers and sisters living the chopper dream, snorting racing fuel, drinking whiskey and running amuck. This year, we hope to roll back to the salt with Ray Wheeler’s 124-inch, turbocharged, Hayabusa-suspended Twin Cam; the 5-Ball 1940 45 flathead with a K-model top end (featured in Cycle Source with an engine built by Departure Bike Works in Richmond, VA), and the JIMS Machine, Paughco, Lucky Devil, 5-Ball streamlined trike. Hang on, because there’s never a dull moment around Bikernet or the 5-Ball Racing headquarters.


Read More

Doug Coffey’s RetroMod Panhead Part 2


I’m using a Baker DD6 transmission and they mount on a 5 speed transmission plate as used in Evolution Softail frames. I don’t care for the flimsy stamped sheet metal trans mounting plates available commercially so I opted to make my own.
Back in the day we used to have V shaped rear foot peg mounting brackets I always thought looked pretty cool and they helped fill in an empty spot in the frame for a ‘tighter’ look I prefer. 
 
 
Here you see me getting started. 
 
 
Four holes later
 
 
With a little machining, we have a transmission mounting plate.
 
 
Here we see the old style foot peg bracket bolted on.
 
 
Now the transmission is in and will line up perfectly with the engine using a Baker billet motor plate that comes with their 3 inch outside belt drive. 
 
Hold on for part 3, when Doug turns a couple chunks of aluminum into a one of a kind OilTank — Richard Kranzler


Read More
Scroll to Top