

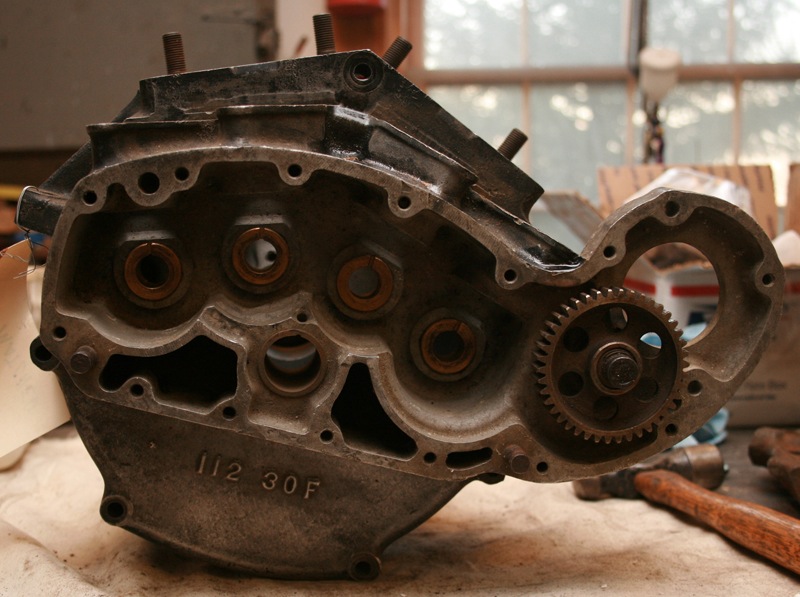
After months of planning, my 1933 Harley-Davidson build officially started on Black Friday. That’s when I made the long trip up to Replicant Metals (www.replicantmetals.com), located a mere 7 hours north of me in Pennsylvannia. Owner Tom Feezer was waiting for me with a set of matched 1933 VL cases when I walked into the shop. These will serve as the basis for my build and are the most important part as the VIN number stamped on these cases is what makes the motorcycle a ’33 model. I plan to stay true to what the factory produced in ’33, but technically anything I build with these cases will be titled as a ’33 Harley-Davidson.
Setting aside the cases, I started making a pile of the other parts: heads, cylinders, cams, flywheels, rods and cam cover. Everything needed a trip through the blasting cabinet to knock off 80 years of built up grease and grime. Before loading up the blast cabinet, some of the parts needed to be broken down further, including the cases and the cam cover.
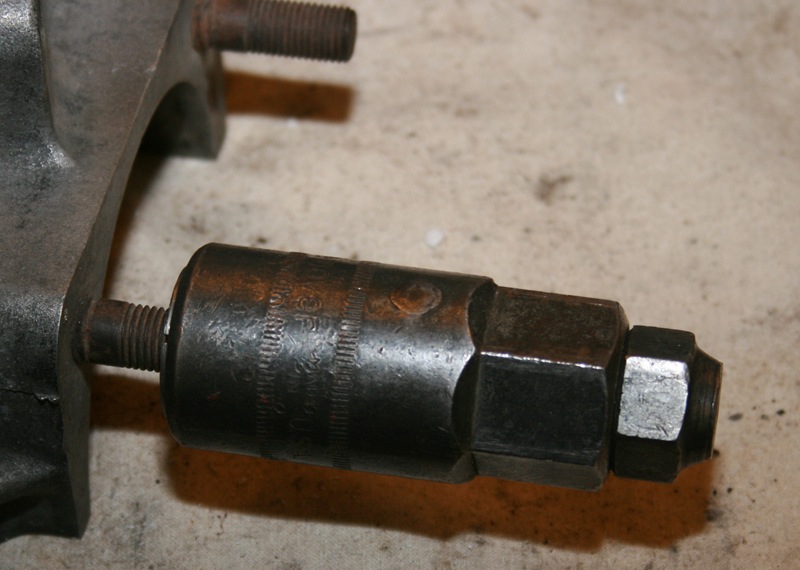
Starting with the cases, there were still some cylinder studs which needed to be removed.
Normally, I’d just use the old two nut trick to back them out, but Tom actually had a specialty tool from Snap-On for removing them. The tool comes with a number of collets which are sized for different thread pitches and bolt diameters. You screw the collet onto the stud and then slide a collar down over the collet. The opposite end of the collet in threaded on the outside, which allows you to screw a nut onto which forces the collar down the collet. As the collar slides down the collet, it tightens the collet onto the stud. Once the collet is secured onto the stud, you just unscrew the entire set up as one piece. The result is easy stud removal without damaging the stud or the case.
The idler gear and shaft also needed to be removed which was accomplished by first removing the retaining ring which keeps the gear on the shaft. After removing the retaining ring, the idler gear slid right off without any problems. The shaft proved to be a trickier to get out, but we were able to carefully pry it out after threading a bolt into the end of it. Using blocks of wood to protect the case, a small pry bar was slipped under the bolt head to pry out the shaft.
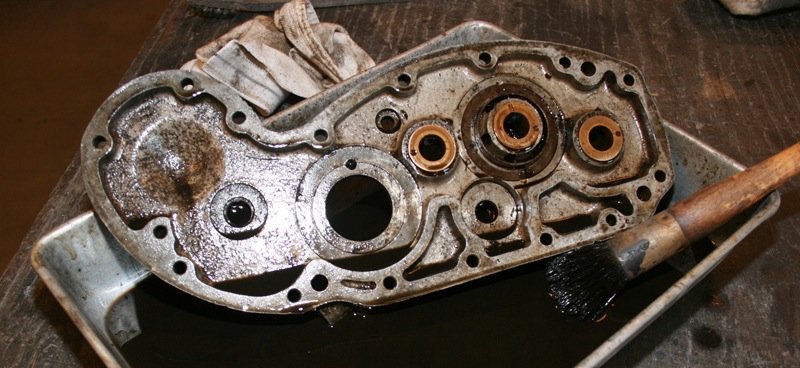
Next I turned my attention to the cam cover, which turned out to be the most complicated part to disassemble. Unlike modern motorcycles, the VL cam cover is used to houses the oil pumps and timer. All of these parts are held in with flathead screws, so special attention was paid not to damage them. The first step was to give everything a get soak in Kroil penetrating lubricant.
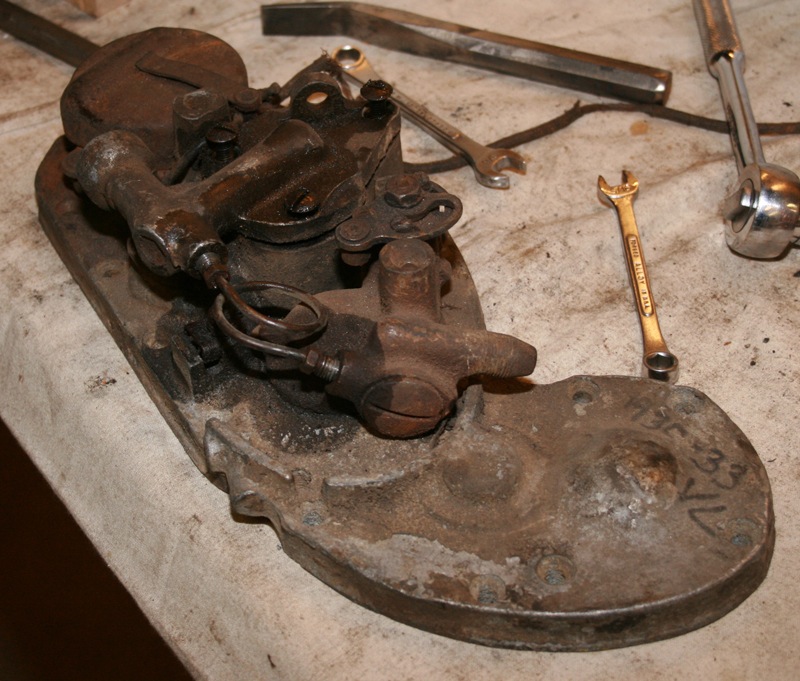
That did the trick for all but one screw. In the end, it took careful heating of the cam cover with a torch to break that last screw loose. These parts had enough surface grease on them that the needed to be cleaned in lacquer thinner to get them to a state suitable for putting in the blast cabinet.
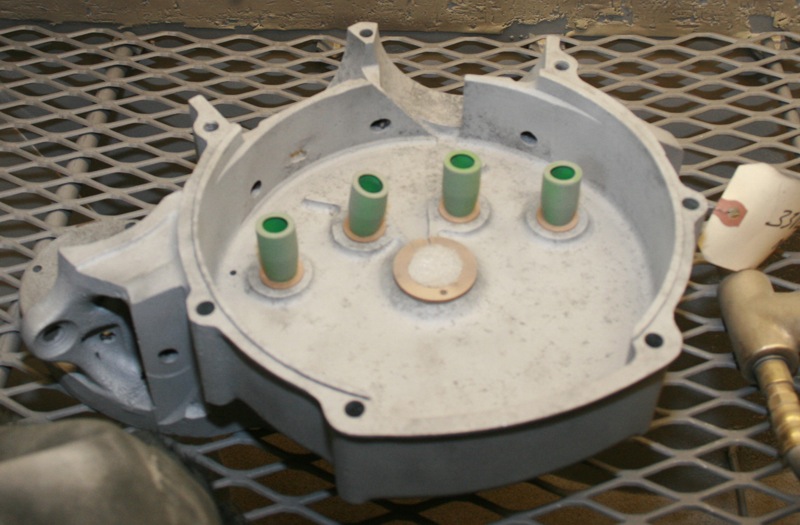
Now I had enough parts to get started on the blasting process. The cabinet was filled with a fine grain aluminum oxide medium, which is gentle enough not to cause serious damage to the aluminum. Still, it was important to keep the gun moving back and forth to make sure that no one spot was cleaned to aggressively and to keep the overall color and surface texture even. As a precaution, I also taped over the VIN number just to make sure that it wasn’t damaged as well as plugging all the bushing holes.
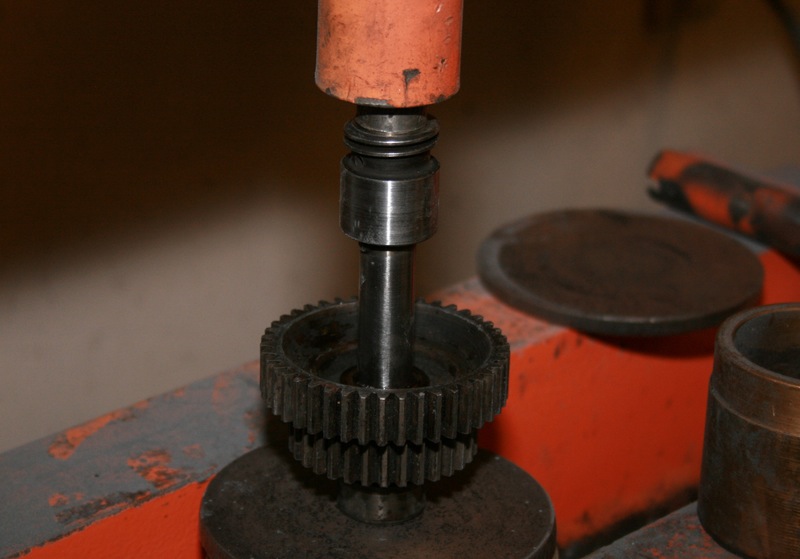
About half a day was spent blasting the cases, cam cover, oil pumps, timer parts, connecting rods and flywheels before I moved onto the cams. The V-series engine uses four gear driven cams, much like a modern Sportster, each cam as one lobe which opens either and exhaust or an intake valve. Upon close inspection of my cams, I discovered that the worm gear on cam #4, which drives the oil pump, was damaged.

This is an easy fix if you have a replacement shaft available. On V-series cams, the shafts are pressed onto the gear/lobe clusters, so to make this repair I just had to press out the damaged shaft and press in a replacement. Harley designed these cams with an alignment tab, so they can only be assembled in the correct orientation.
When the repair was complete, the cams went into the blast cabinet to clean up the gears. I was careful not to blast any surfaces that would come in contact with the bushings in the case or cam cover.
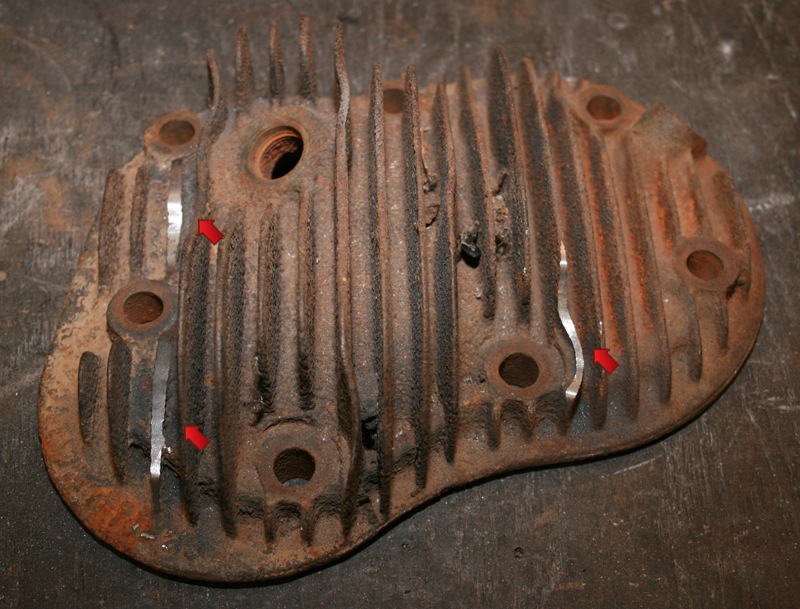
Lastly I turned my attention to the cylinders and heads. The cylinders were in good shape, without any broken fins and only bored .005” and .010” over stock. All they required was removing the old hi-temp paint from the external surfaces in the blast cabinet. The heads had some minor fin damage which is very common on flatheads. Fins can be easily snapped off when removing the heads if the wrong tool is used.
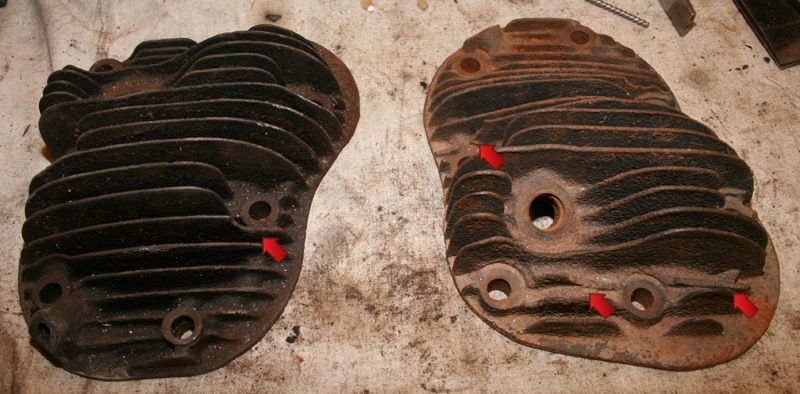
Since the damage to my heads was not extensive, I decided to use a die grinder to smooth out the broken fins. Once painted, they should blend together nicely and it will take careful inspection to spot the damaged areas.
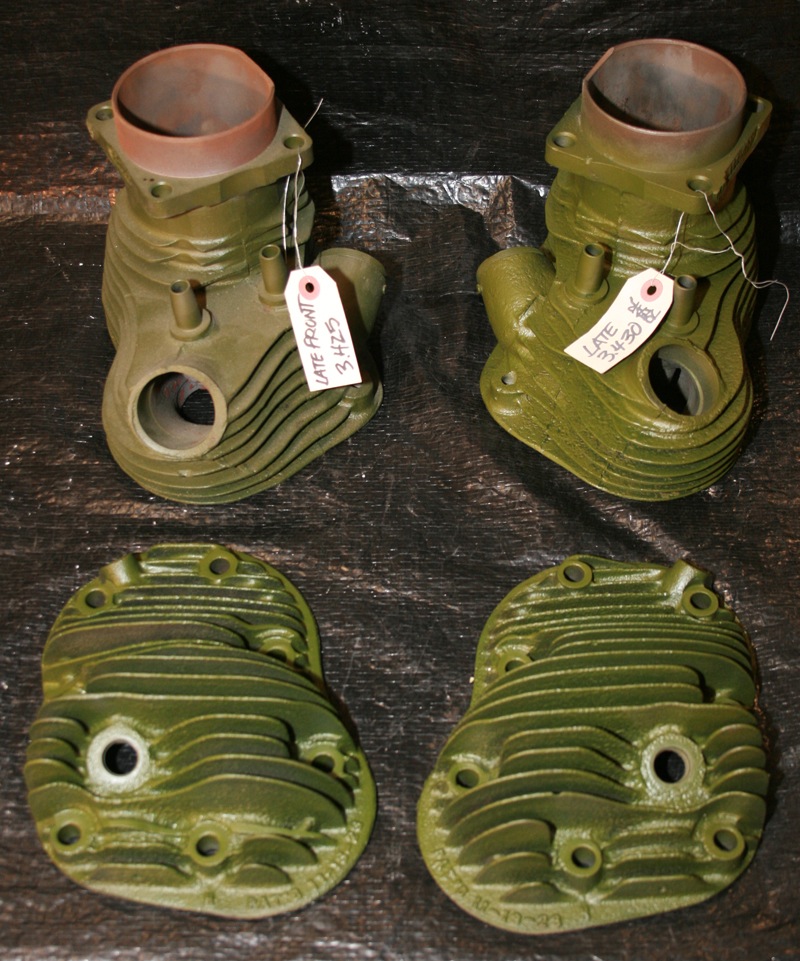
The heads were placed in the blast cabinet for final cleaning. To help protect my freshly cleaned heads and cylinders, they were all sprayed with an aircraft primer made by Tempo. Don’t be alarmed by the green color, they’ll get top coated black.
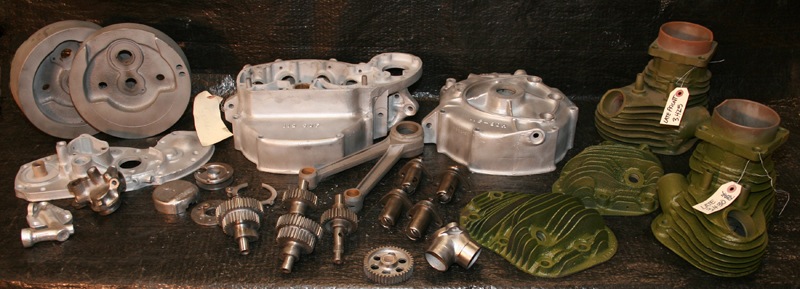
After a few pictures were taken, everything was boxed up to be sent out to the machine shop for inspection. After the machinist gives the ok on these parts, they’ll come back to the shop for a final cleaning to remove any debris left by the blasting process. Then it will be time to rebuild the engine.
Editors Note:
If you would like to contribute to the completion of this bike please use the link below.
This project started on Black Friday of 2013 with just a set of engine cases and will end with a complete 1933 Harley-Davidson VL making a cross country run in the fall of 2014. Already a great deal of progress has been made on the restoration of this motorcycle, but more funding is needed to see this project through to the end. Additional articles will continue throughout the remainder of this build and will result in a complete digital archive which takes the reader through the restoration of a 1933 Harley-Davidson, step by step. By making this information available freely online, future vintage motorcycle enthusiasts will be able to rebuild and maintain these great machines.
We have already gained the support of many of the top compaines in the vintage motorcycle industry. If you would like to see your company’s logo included not only on the motorcycle, but also on every article, please contact me directly to learn more about our marketing campaign and advertising opportunities. EMAIL
Sponsored By:
 |
 |
 |
 |
 |
 |
 |
|
 |
 |
 |
 |
|
|
 |
|
 |
Please follow and like us: