DAYTONA BIKE WEEK BIKERNET WEEKLY NEWS for February 29th, 2024
By Bandit |
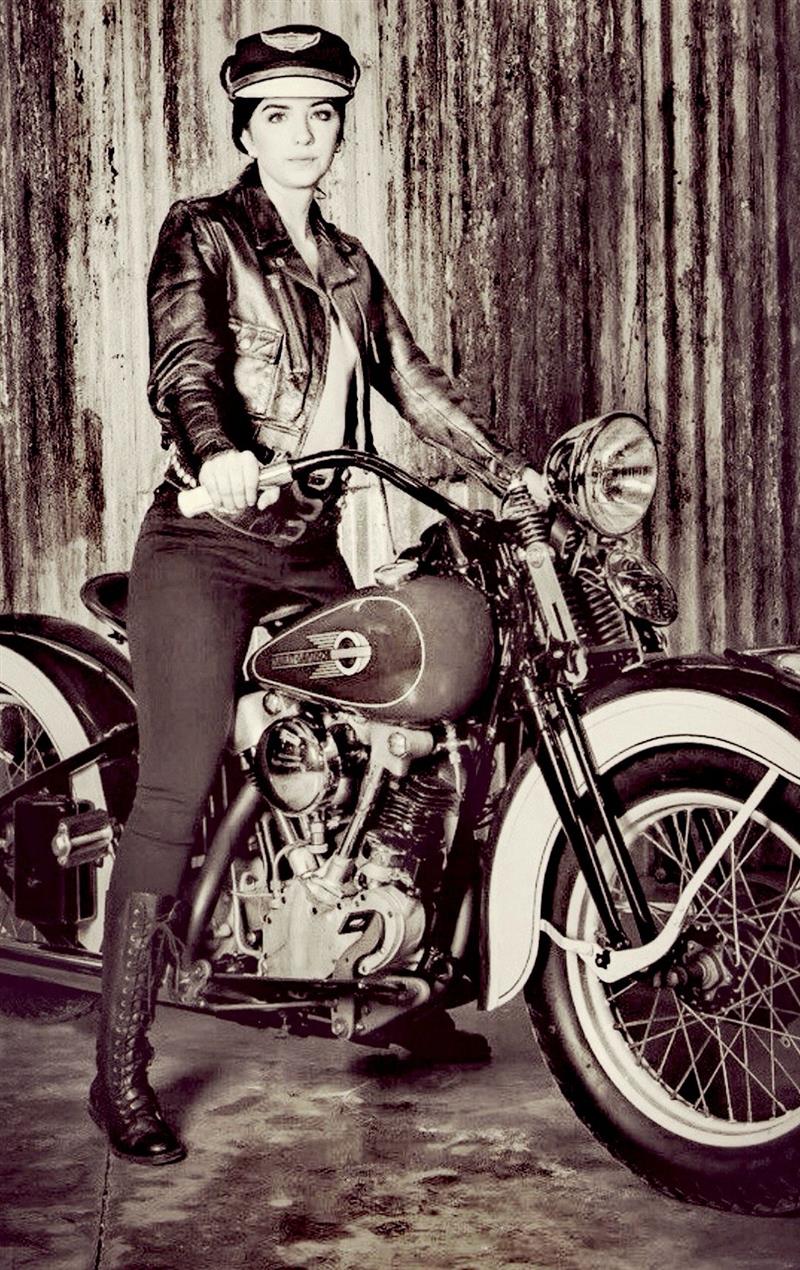
Hey,
It’s nuts this week. I’m working with the Sturgis Museum on the Sturgis Rally annual magazine, Sturgis Museum expansion, community relations, City input, displays and skywalks to the stars.
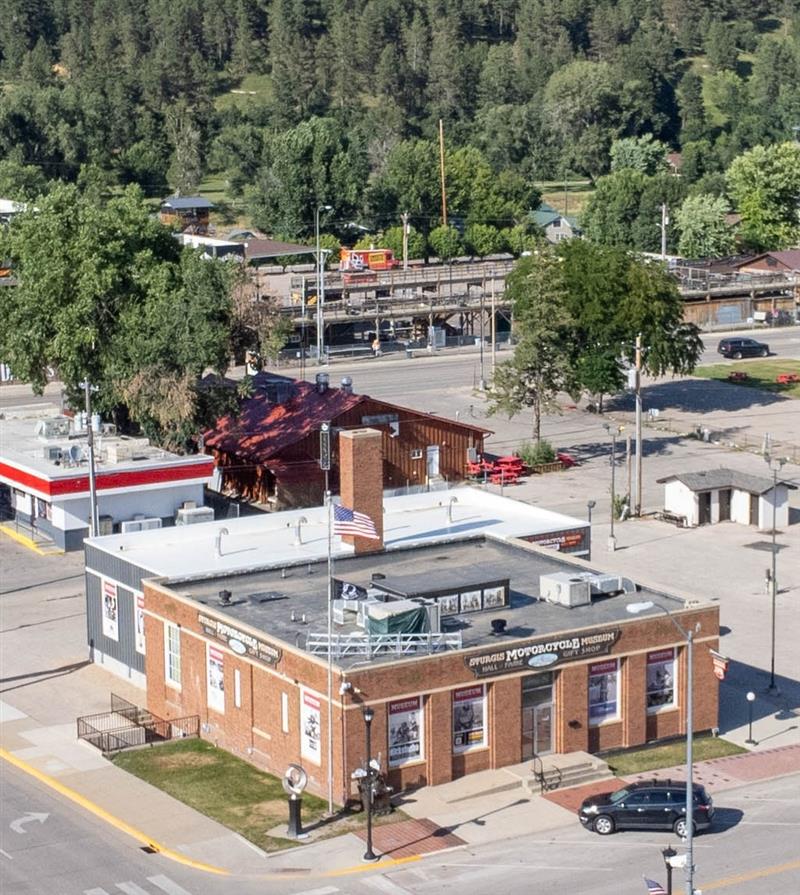
It’s all good, all motorcycles and all positive for Sturgis and the industry. Too bad governments don’t get it. Let’s hit the news.
The Bikernet Weekly News is sponsored in part by companies who also dig Freedom including: Cycle Source Magazine, the MRF, Iron Trader News, ChopperTown, BorntoRide.com and the Sturgis Motorcycle Museum.


WHAT DID I TELL YOU–
EU Proposed Ban on Repairing Cars Older than 15 Years—Management of end of life vehicles. Renewing the car fleet.
When ownership becomes a crime. Bill has already been introduced. Any repairs to the engines, transmission, brakes and body work will be prohibited.
Hang on…


MAKING STUFF HAPPEN BIKERNET WEEKLY NEWS for February 22, 2024– click here to read
Still the coolest biker chick, ever:
https://www.thenews.com.pk/latest/1161487-ann-margret-says-of-course-she-still-rides-her-harley-davidson-at-age-82
At 82, actress and singer Ann-Margret isn’t slowing down, in fact, she’d like to go a little faster.
“I love speed,” says the Viva Las Vegas and Bye, Bye Birdie actress. “Not the drug.” She means actual miles per hour. Speaking with PEOPLE at the Women’s Image Network’s 25th Women’s Image Awards at the Saban Theater in Beverly Hills on Wednesday, the avid motorcyclist says she “of course” still rides her Harley-Davidson.
https://www.msn.com/en-us/music/celebrity/ann-margret-says-speed-keeps-her-going-at-age-82-not-the-drug-exclusive/ar-BB1iRoi8
–Pauly D
Chicago, IL

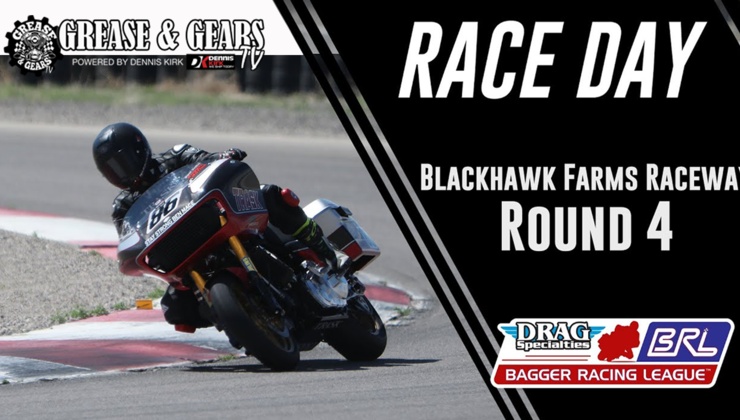
WAIT, HERE’S THE LATEST FROM GREASE AND GEARS TV—
We’re thrilled to announce the release of our latest video, 2023 Bagger Racing League Round 4 – Blackhawk Farms Raceway! We can’t wait for you to see it.
You can watch the video now on our website Grease & Gears TV – please feel free to share it. We hope you enjoy watching it as much as we enjoyed creating it. Thank you for your continued support!

REWORKING THE MUSEUM ENTRY—
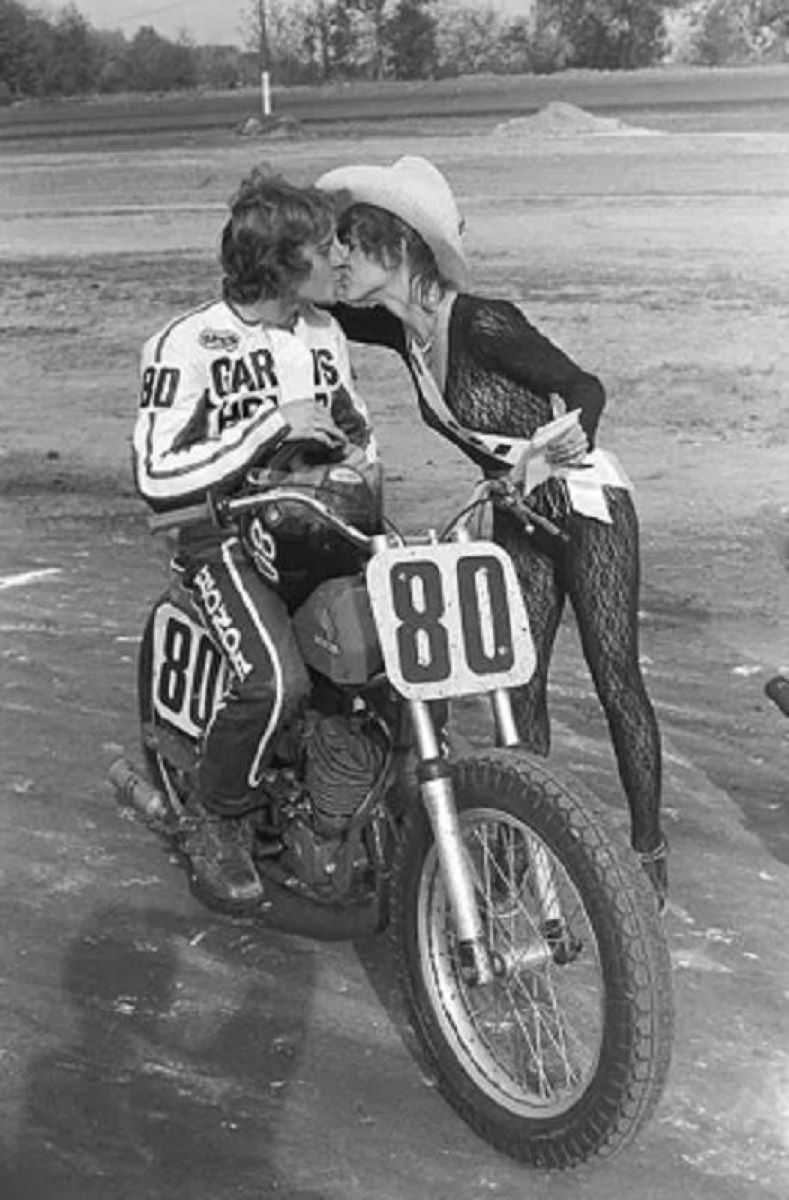
It will house predominately Michael Lichter images of the history of the Rally. We want riders from all over the world to be introduced to the Rally History as they walk in the door. We have the city’s time line, but we are looking for additional input.
“I think it was 1976 that CBS’s 60 Minutes covered it. That made a huge difference,” said Woody the mayor of Buffalo Chip. “We’ll look for some stuff from the Chip.”
I need your help pointing out significant milestones we should feature. I would like to feature a couple of significant events from the Chip including the first year of Mike’s exhibits.
We also want to honor the first year of the HOF. Also, we need to display the Museum’s first year in the Pyramid Bar and the first year in the Post Office and 1975 when the rally expanded to 7 days. We should include the hillclimbs and drag racing.
It’s going to be tough to find Mike’s shots from 1938, so we will rely on other sources. I’m sure Mike will help with his classic City Park images. Of course we want to cover the 50th, the first year of the tower on main street the and the first year of the Legends ride. Natch, racing and touring should be featured.


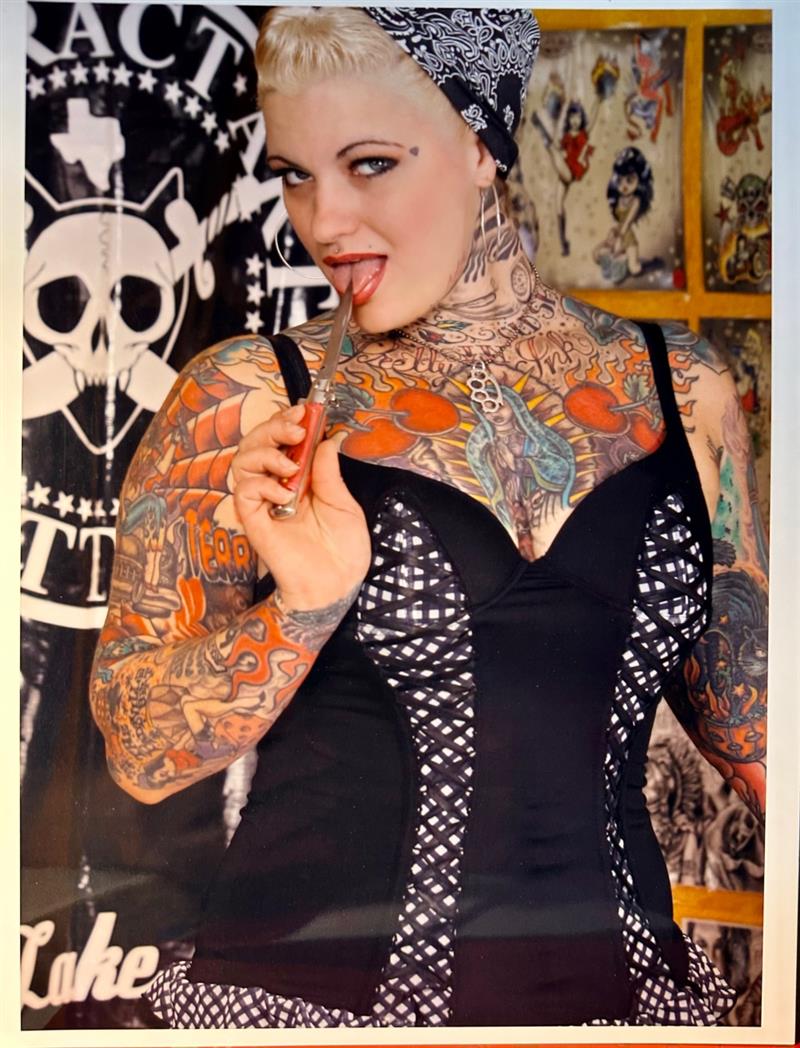
THE TEXAS WEATHER REPORT—or something for Throw-back Thursday.
Trying to clean the current pile on my desk and get it properly filed away. I became lax in 2022 when my mother was in the hospital. Found this young lady in amongst the pile. She was in Hot Bike during your tenure
–RFR

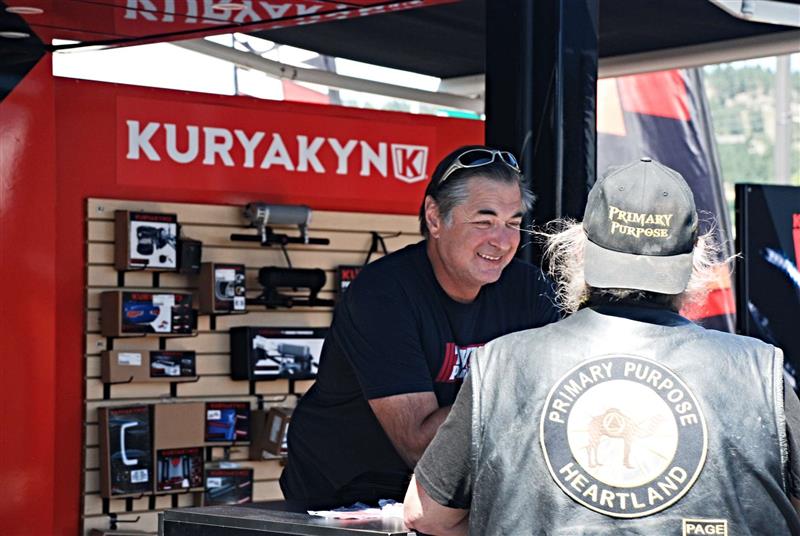
KURYAKYN and Twin Power Set to Showcase Top Accessories at Daytona Bike Week–Free, Custom-Made Hats to be Created On-Site for Riders
Motorcycle enthusiasts attending this year’s Daytona Bike Week are in for a treat, as premier motorcycle accessory brands, Kuryakyn and Twin Power, prepare for their participation in this year’s Daytona Bike Week.
The two brands will share a display at Destination Daytona from March 1 to March 9, staffed with product experts directly from both brands’ headquarters in Texas.
A special feature of the display this year is free, custom-made hats for consumers that stop in. Riders can select a Kuryakyn or Twin Power design and actually watch their cap being made in the booth.
“It’s easy to get excited for Bike Week,” said Twin Power Brand Manager James Simonelli. “It’s the start of the riding season for people all over the country and you can always feel that energy in the air.”
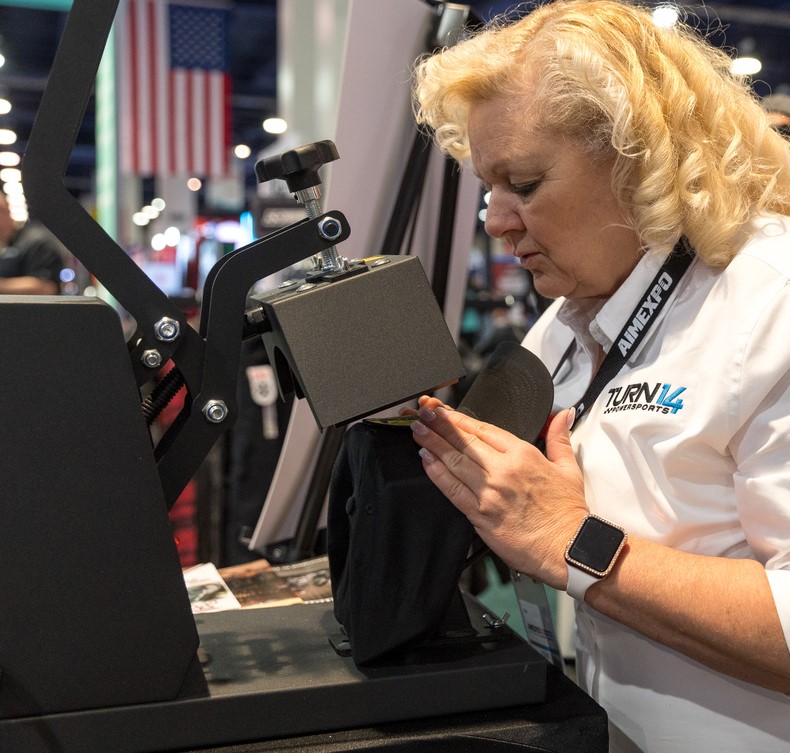
“Our free cap program this year will be really fun” said Simonelli. “And we’ll create their Kuryakyn or Twin Power hat right there in our display.”
Kuryakyn and Twin Power will display many of their most popular products and an even broader selection will be available for purchase at Daytona Harley-Davidson and J&P Cycles, which are all located on the Destination Daytona footprint.
The display will be open from 9am to 6pm daily in the North Lot at Destination Daytona off Highway US Hwy 1 at I-95.

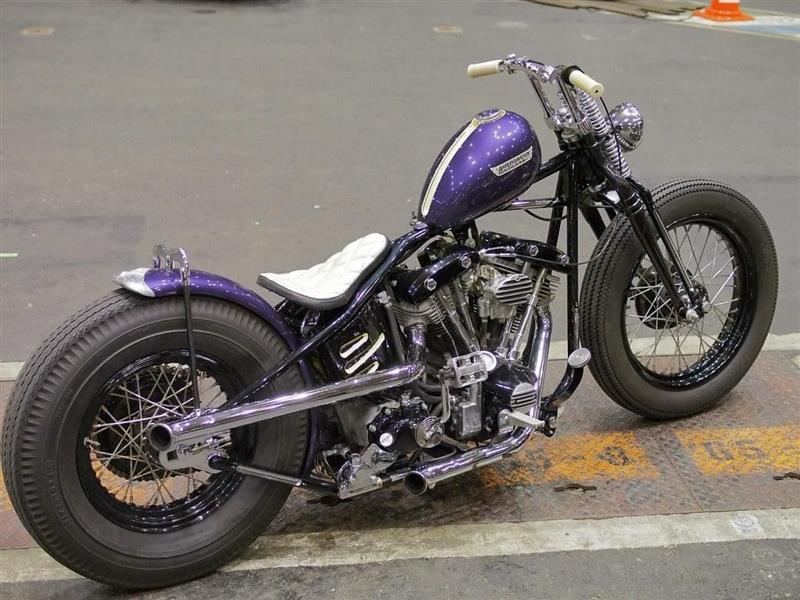
Contact your Representatives and tell them to support and push forward the REPAIR Act! Especially if your Representative is on the House Energy and Commerce Committee, as listed below!

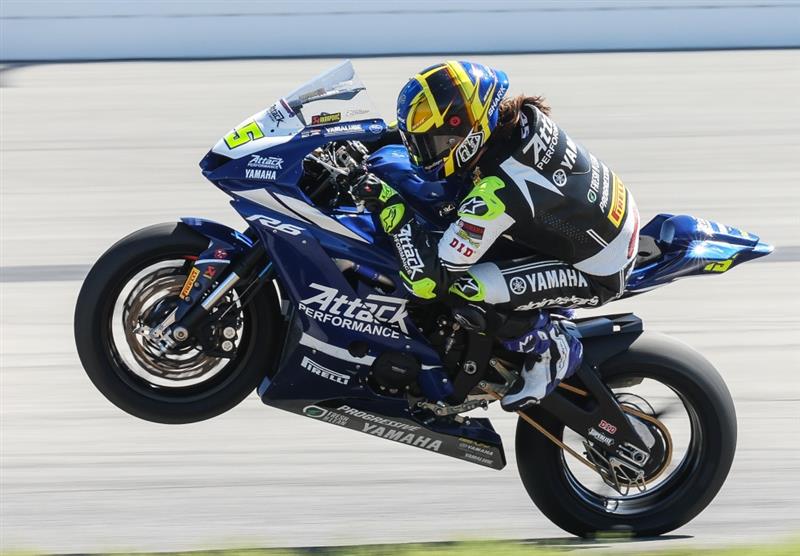
Pirelli Returns to the Iconic Daytona 200 Presented by MotoAmerica
A Talented Roster of Teams and Racers will Compete Aboard DIABLO Superbike Slicks at the 82nd Running of the Daytona 200
Pirelli is gearing up for an exhilarating showdown at the 82nd edition of the Daytona 200 presented by MotoAmerica. Pirelli has claimed three of the previous four titles and is poised to retake the top step of the podium with a star-studded lineup that includes four-time Daytona 200 winner Danny Eslick, the absolute motorcycle track record holder at Daytona International Speedway, Stefano Mesa, 2023 MotoAmerica Supersport Champion, Xavi Forés, Australian rising star, Tom Toparis, the Rahal Ducati Moto team, and many more. From March 7-9, the “World Center of Racing” will be transformed into a 3.51-mile, 12-turn road course that will challenge racer and machine alike.
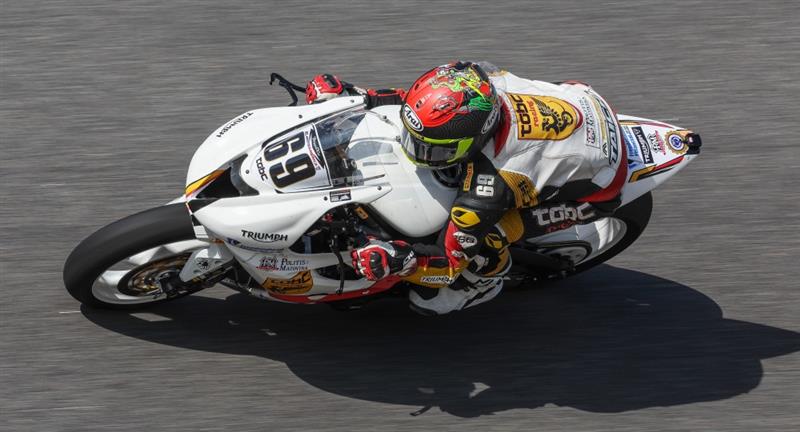
The roster of Pirelli-supported teams and racers includes: TOBC Racing (Danny Eslick – four-time Daytona 200 winner), Attack Performance Progressive Yamaha Racing (Xavi Forés), Boulder Motor Sports (Stefano Mesa), Rahal Ducati Moto (PJ Jacobson, Corey Alexander, and Kayla Yaakov), Get Fast Performance (Jason Farrell), Edge Racing (Jason Waters), as well as Antal Halasz, Arthur Aznavuryan, Darren James, Jessica Capizzi, Tom Toparis, and Tony Storniolo.

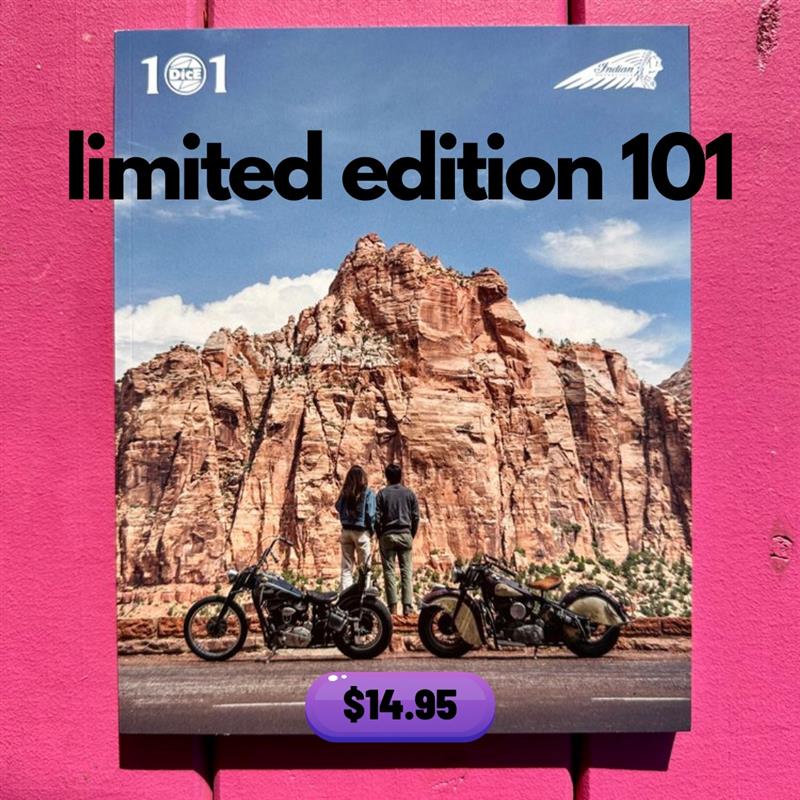
LIMITED EDITION DicE Issue 101 –
$14.95
It’s HERE and it’s a Belter!!
DicE Issue 101 is a beautiful mix of fantastic machines from around the world.
This version features an incredible cover shot by the one and only, Samson Hatae and is in collaboration with Indian Motorcycle.
*Limited Edition Cover – Only 100 made*

.jpg)
Awarded to the standout individuals and organizations that helped cultivate another thriving year of AMA-sanctioned events, the 2023 awards serve as a recognition of those who went above and beyond in the goal to help promote and preserve the motorcycling lifestyle.
“We are grateful to everyone who helped make 2023 another outstanding year of AMA-sanctioned racing and riding,” AMA Director of Racing Mike Pelletier said. “Congratulations to all of the winners, who worked tirelessly throughout 2023 to further the AMA’s reach across the nation.”
For the full list of winners, visit https://americanmotorcyclist.com/2023-ama-racing-organizer-and-volunteer-awards-announced/.


BANDIT’S CANTINA BAD JOKE LIBRARY IS NOW OPEN–
1. I got invited to a party and was told ‘dress to kill’.
Apparently a turban, beard, and a backpack wasn’t what they had in mind.
2. After a night of drinking, drugs and wild sex, John woke up to find himself next
to a really ugly woman.
That’s when he realized he had made it home safely.
3. Seven wheelchair athletes have been banned from the Para-Olympics after they tested positive for WD40.
4. A teenage boy asks his granny: “Have you seen my pills? They were labeled LSD?”
Granny replies: ” The hell with the pills, did you see the dragons in the kitchen?”
.jpg)
5. His wife gets naked and asks her hubby:
“What turns you on more, my pretty face or my sexy body?”
Hubby looks her up and down and replies: “Your sense of humor!” (Hospital visiting hours are 5:00 to 6:00. )
6. A guy’s wife’s back on the warpath again.
Last night she was up for making a sex movie. When she asked him what he thought about it ? The only thing he did was suggest they should hold auditions for her part.
(His viewing will be Saturday from 7:00 till 8:30.)
7. I’ve accidentally swallowed some Scrabble tiles. My next dump could spell disaster.
.jpg)
8. A guy wakes up this morning and could sense something was wrong. He got downstairs and found his wife face down on the kitchen floor, not breathing! He panicked. He didn’t know what to do.
Then he remembered McDonald’s serves breakfast all day.
9. My wife packed my bags and kicked me out. As I walked out the front door. She screamed: “I wish you a slow and painful death, you bastard!” So I replied: “Oh, so now you want me to stay!”
10. I bought my girlfriend a hamster fur coat last week.
When we went to the fair last night it took me 3 hours to get her off the Ferris wheel.
11. The other night, my wife asked me how many women I’d slept with. I told her: “Only you. All the others kept me awake all night!” (The doctor says I should be able to see again in about ten days. The broken arm will take about a month.)
–El Waggs

HONORING DESERT STORM/DESERT SHIELD PARTICIPANTS & FAMILIES
Tomorrow Wednesday February,28,2024-
At 9:30 am VFW Post 305 , 1300 Starr Ave., Eau Claire —near Tank next to World War II stone monument.
February 28 ,2024 is the 33rd anniversary of the Liberation of Kuwait ,described as one of the most brilliant military operations in United States history.
Heather, Blue Marble Pub/ Chippewa Falls is expected to make a donation for the Desert / Storm Shield, stone recognition. Other donations and tentative plans will be announced.
This could be the first of 11 stones That recognizes potential; World War I, Korea ,Vietnam, Cold War, Iraq, Afghanistan, Homefront heroes , National Guard (since 1636) & the six military branch birthdays.
Many of these are now recognized in the existing VFW post 305 Museum . A “possible “ planned expansion going 25 to 30 feet extending out towards Dell pond/ the Chippewa river “could” include a Frank Lloyd Wright type design.
Immediately afterwards, approx 10:15 am, an informal discussion will include other potential Veteran ,military, recognition & patriotic projects.
Included will be preparation for the Great Lakes Harley owners group rally June 6 – 8th,at Chippewa Falls Fairgrounds with our whole region.
Foremost is recognizing Roy Holtz, the first American occupied German soil in World War I. His picture is prominently displayed at Chippewa Falls, Harley Davidson between the men & women’s bathroom.
Roy also has the distinction of being the first & perhaps only American to have been captured & then escaped as a Prisoner of War/ POW on a motorcycle. Roy whose parents immigrated from Germany , while reportedly speaking fluent German- drank vodka with his German captors,underneath the table & escaped.
Roy’s brother Ezra had been sprayed with WWI mustard gas . When laying in a ditch , Ezra heard ,then flagged down a motorcycle Messenger. It was his brother Roy, who perhaps saved EZra’s life.
Lee Veeser was another World War I Veteran motorcycle messenger who had his Harley shot out from underneath him twice . He was reported KIA in local newspapers twice .
Lee was the commander of the largest Wisconsin & then final horse cavalry in Wisconsin. Legitimate documents, show that Lee put bullets in the same hole ,at 50 feet with 50 witnesses.
For information & insight, please feel free to contact me.
Dave Zien
Vfw Post 305 Service Officer/ Cmdr
1716 63rd St
Town of Wheaton/ Chippewa County
Eau Claire Wi 54703
cell / text 715-829-9436 Dave Zien

[page break]
at Daytona Bike Week
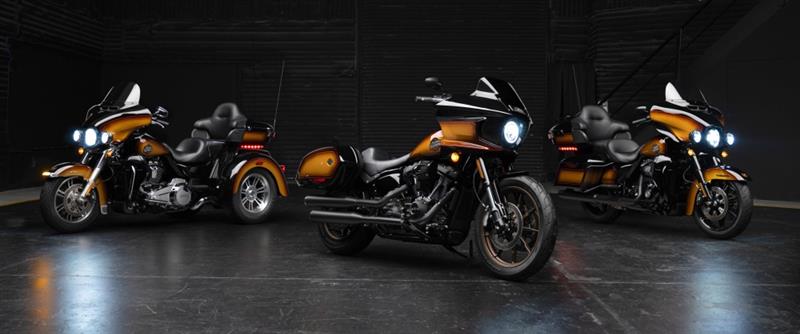
Harley-Davidson today revealed the latest additions to its limited-edition Harley-Davidson Icons Motorcycle Collection and the limited-run Enthusiast Motorcycle Collection, showcasing premium factory-direct custom paint and graphic treatments and paint application technology. Both collections will be displayed March 2-9 during Daytona Bike Week at the Harley-Davidson® Event Display Area at Daytona® International Speedway, and are also available now at authorized Harley-Davidson dealers. The Icons model is inspired by the look of the motorcycles ridden in era of the upcoming film The Bikeriders, which follows the rise of a midwestern motorcycle club, as seen through the lives of its members. The film is scheduled to be released theatrically in the United States on June 21, 2024.
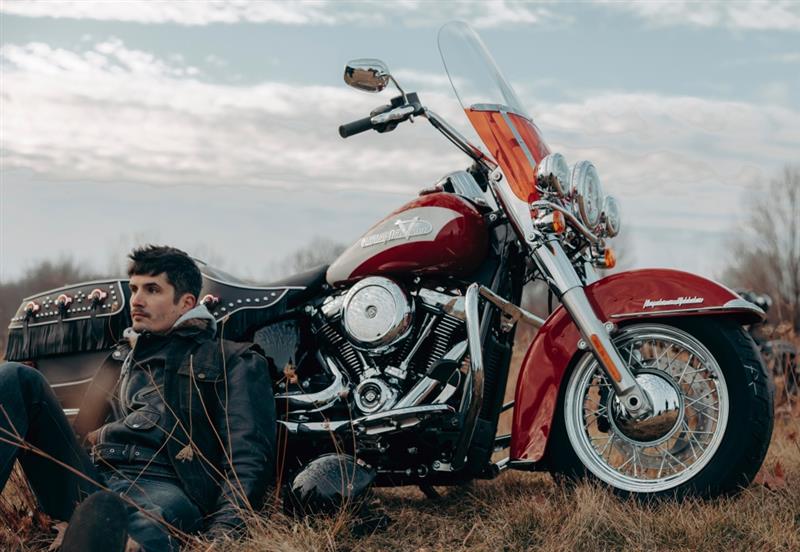
Harley-Davidson Icons Motorcycle Collection: Hydra-Glide Revival Model
The 2024 Hydra-Glide Revival model, the fourth installment in the Harley-Davidson Icons Motorcycle Collection, celebrates the 75th anniversary of the 1949 introduction of the Hydra-Glide telescopic front suspension for Harley-Davidson® E and F models. When Hydra-Glide equipped models were introduced the saddle of a smooth-riding Harley-Davidson® FL motorcycle was an exciting way for many Americans to explore the country on the new network of Interstate highways. Owners of a 2024 Hydra-Glide Revival model can trace their own route to freedom and adventure on a bike inspired by this classic era, while enjoying all the comfort and features of a modern Harley-Davidson® motorcycle.
The Icons Motorcycle Collection is an annual program for the limited release of a new model that offers a fresh interpretation of an iconic Harley-Davidson motorcycle. A limited collection, each model is individually numbered and produced only once. Global production of the Hydra-Glide Revival model will not exceed 1,750 units.
Exclusive Styling Features
The Hydra-Glide Revival model is finished in custom Redline Red paint with a Birch White panel on fuel tank sides, the same design featured on 1956 models. Details include chrome “Harley-Davidson V” tank badges inspired by 1955-56 tank badges and “Hydra-Glide” script badges located on the front fender skirt. The serialized “Hydra-Glide Revival” insert on the handlebar riser cap and Icons Motorcycle Collection graphic on the rear fender identify this limited-production model.
Additional styling features include instrument graphics inspired by those on the 1954-55 speedometer. The two-tone 21-inch (53.3 cm) high detachable windshield features a color-matched lower portion in Redline Red. A chrome round air cleaner cover and chrome steel laced wheels add to the nostalgic look. Front and rear fender trim, engine guard, fork covers, powertrain and exhaust are finished in brilliant chrome.
A solo saddle is finished with a fringed and decorated leather valance, white seam piping and red contrast stitching, and a chrome rail for a nostalgic look. A matching black leather tank strap is embellished with studs and a concho. Leather and vinyl saddlebags are detailed with chrome conchos with acrylic red centers, chrome studs and leather fringe, white seam piping and red contrast stitching. The saddlebags are water-resistant, have keyed locks for security, and have a rigid liner so they will hold their shape season after season.
The Softail chassis hides adjustable mono-shock rear suspension below the seat for dynamic cornering capability and riding comfort while preserving a classic hardtail profile. Electronic cruise control holds a steady speed for comfort on long rides. LED headlamp and auxiliary lamps provide outstanding forward illumination. Standard Anti-Lock Braking System (ABS) offers confident control in a variety of riding conditions.
Tobacco Fade Enthusiast Motorcycle Collection
Together the beat of rock ‘n roll and the syncopated rhythm of a V-Twin engine stir the souls of Harley riders. The 2024 Tobacco Fade Enthusiast Motorcycle Collection celebrates the burst of collective energy released by live music at the corner tavern, at a motorcycle rally, or the live stage at the Harley-Davidson Homecoming™ Festival. The Tobacco Fade paint and graphics scheme, inspired by the classic sunburst wood finish first seen on rock and roll guitars, bass, and drums of the 1960s, make this a special motorcycle for any music lover.
Enthusiast Motorcycle Collection models celebrate Harley-Davidson riders and are inspired by their stories and legacies. This collection of Harley-Davidson motorcycles is available in limited quantities – no more than 2,000 per model – across a curated selection of three motorcycle models.
The Tobacco Fade paint treatment is applied by Harley-Davidson using state-of-the art precision paint tools designed to execute faded panel detailing. A rich caramel-colored pinstripe accents the tone of the metallic gold panel floating just outside the sunburst fade. The fuel tank medallion is inspired by the shape and grooves of a vinyl record, while a graphic on the front fender shaped like a guitar pick, inspired by rock band and instrument logos, speaks directly to the details in the tank medallion.
Tobacco Fade Enthusiast Collection includes:
Ultra Limited Model
Experience premium touring performance with zero compromises in a long-haul touring motorcycle. Classic-style batwing fairing, 4-speaker audio, Tour-Pak® luggage carrier, ultimate comfort for rider and passenger. Mechanical features are identical to 2024 Ultra Limited model.
Tri Glide Ultra
A long-haul touring trike that calls you to go the distance with all the torque, style, premium infotainment and cargo space three wheels can hold. The ultimate in two-up comfort for adventurers who show no signs of stopping. Mechanical features are identical to 2024 Tri Glide® Ultra model.
Special Styling Features on Each Model
Tobacco Fade premium paint
Record-inspired fuel tank medallion unique to this scheme
Stylized guitar pick graphic on front fender
Enthusiast Collection branded logo on top of Tour-Pak luggage carrier or rear fender

NEWS FROM THE MASTER OF LIGHT—
Greetings from Daytona! I’ll be setting up the gallery today and we’ll be off and running here at another Bike Week.
If you read my email below from a few days back, we have some updated information for you.
We’ll have the gallery at Teddy Morse’s Daytona Harley in Ormond Beach in the main parking lot area. As you walk down the main walkway toward the entrance to the dealership, we are just off to the right.
Other updates:
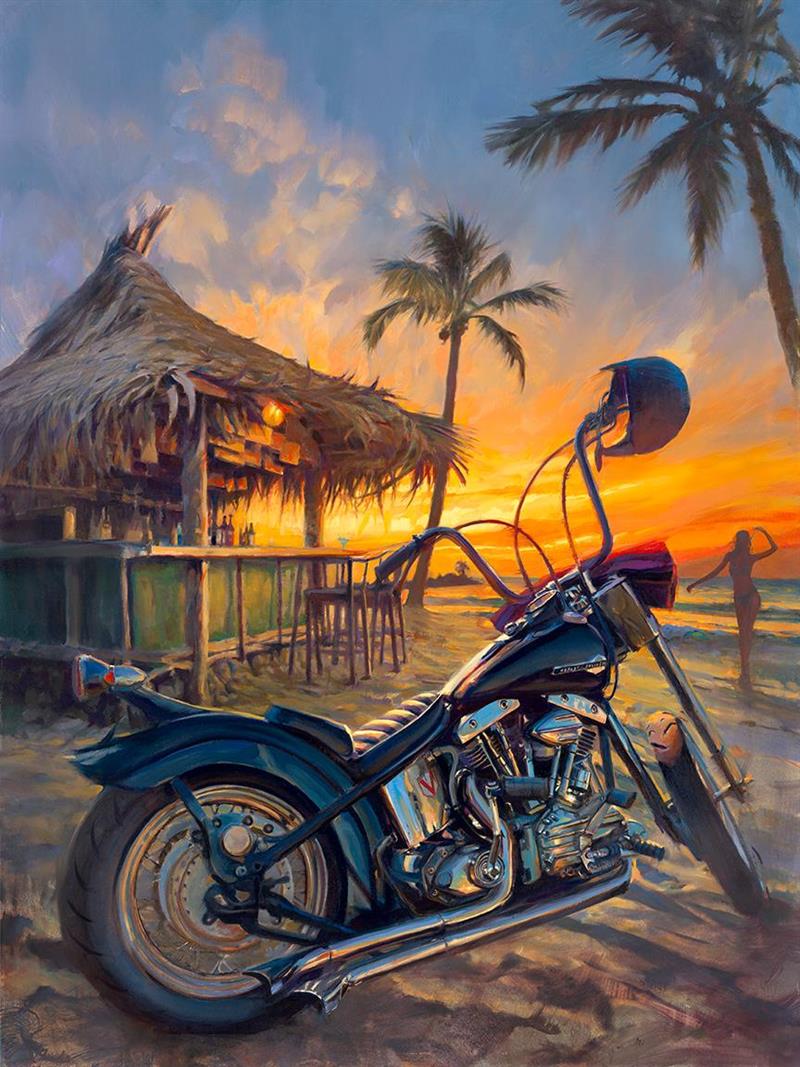
** This year’s Harley-Davidson piece (below) is now titled “5 O’clock in Daytona”.
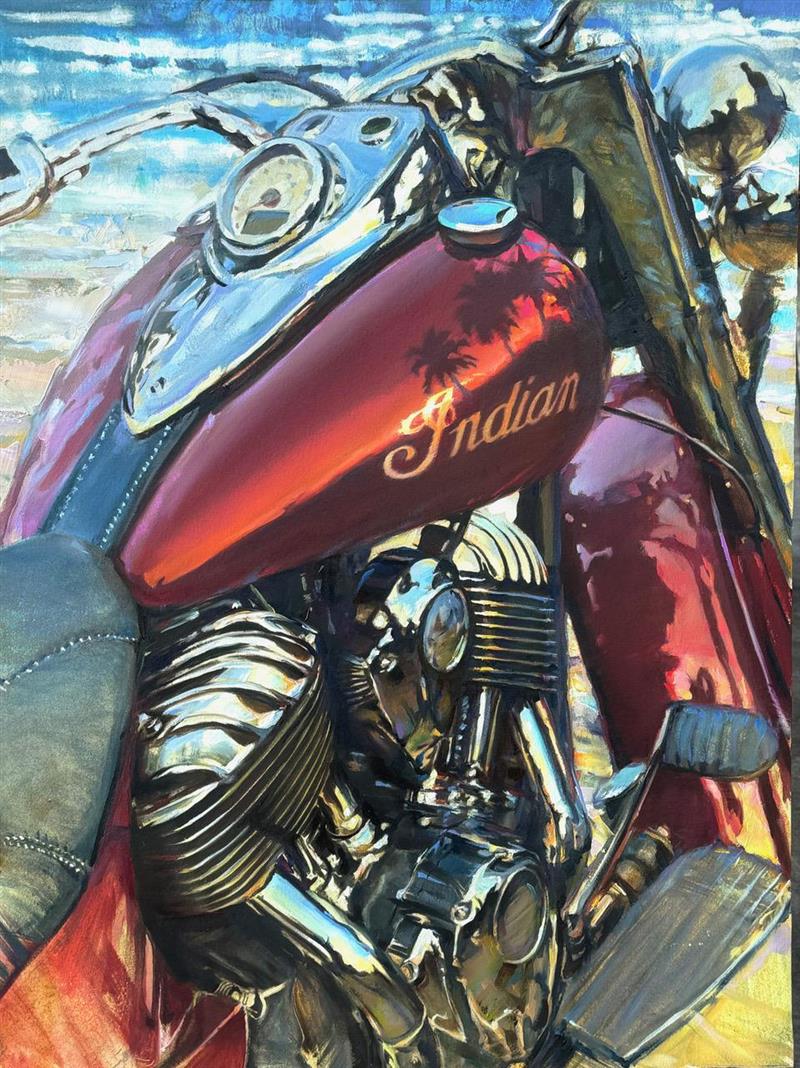
** The Indian motorcycle piece is titled “Beach Buff”. I’ve included the final image below. As David mentioned, “I usually paint old crusty bikes that speak volumes with their patina. On this particular piece, I wanted to capture the feeling of a polished sunny week on the shoreline of Daytona Beach”.
** Please note that David is requiring a $250 deposit on either of these this year.
** Three size options are available for either of the Daytona pieces (see below).
Please let me know if you’d like to reserve either of these.
Thanks for your time and we hope to see you here!
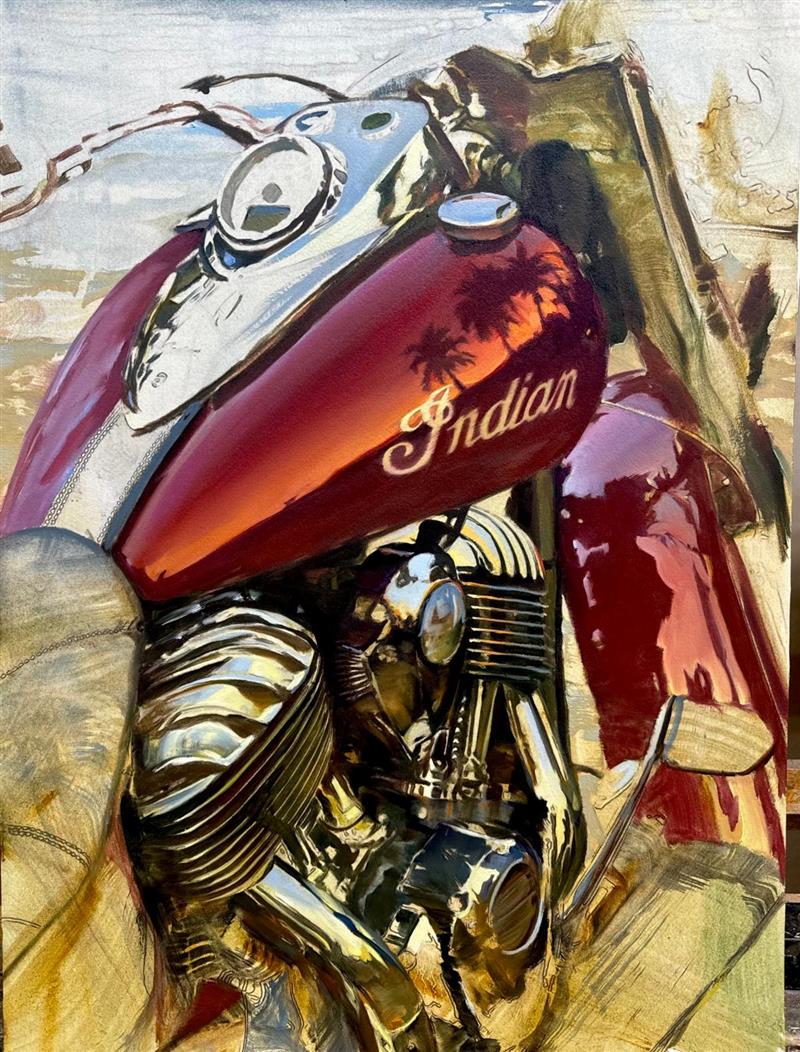
“Beach Buff”
David Uhl
Daytona 2024 Commemorative
As you may know, David has offered a special piece for the Daytona motorcycle rally since 2005. This year, he’ll have two special pieces, one Harley-Davidson and one Indian.
We are pleased to release the first piece (title TBD), featuring Harley-Davidson. I’ve also included a sneak peek at his Indian piece, which he is still working on.
We will have the prints at our gallery in Daytona (at Teddy Morse H-D in Ormond Beach). We’ll be there Feb 29th through March 10th. We will NOT be in the same location as in years past – – they have reconfigured the area – – I’ll let you know our location once they finalize the layout there.
This first piece features David’s ’68 Shovelhead in a beautiful beach side sunset.
Title TBD
David Uhl
2024 Daytona Commemorative
We are now taking orders for the signed and numbered canvas prints, which are available at special Rally pricing through the end of the Bike Week (March 10th).
These Fine Art prints will come framed and will include a Certificate of Authenticity and a special commemorative nameplate. We will also include shipping within the contiguous 48 United States for orders placed by March 10th.
** Image size appx 18 x 24, $925 framed
** Image size appx 24 x 32, $1,895 framed ($1,450 if reserved prior to Daytona gallery opening on Feb 29th)
** Image size appx 30 x 40, $2,895 framed ($2,450 if reserved prior to Daytona gallery opening on Feb 29th)
NOTE: Please contact me about unframed orders.
****David is requiring a $250 deposit with orders this year****
Here’s a look at the second Daytona Commemorative.
Sizes and prices are the same as above.
Painting in progress
Please let me know if you’d like to add either of these (or both!) to your collection.
–Greg Rhodes
International Sales Director
David Uhl Fine Art
Uhl Studios
303-913-4840


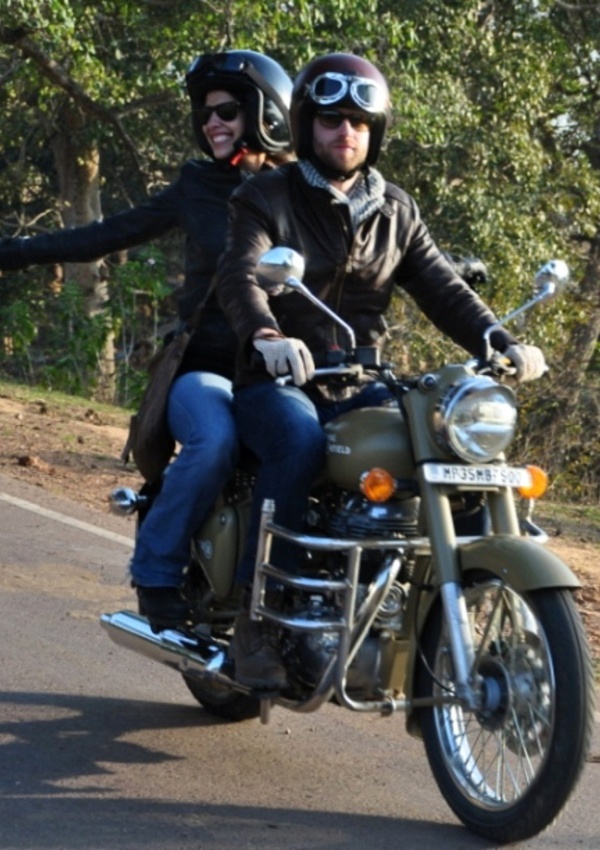
VINTAGE RIDES THROUGH INDIA–Sacred rivers, tigers and erotic temples
Spiti, Uttarakhand, Madhya Pradesh… At Vintage Rides we introduce you to the real India, in regions little visited by Western tourists. Our teams are passionate about finding the most beautiful routes and unique experiences to ensure your experience is beyond compare. Having an experienced local crew makes all the difference!
Including the To the Gateway of Tibet
Adventure Tour in the Himalayas
– The Spiti valley, on the Tibetan border, with its spectacular landscapes,
– The Buddhist monasteries of Tabo, Dhankar and Key,
– A physical challenge on the Himalayan trails!

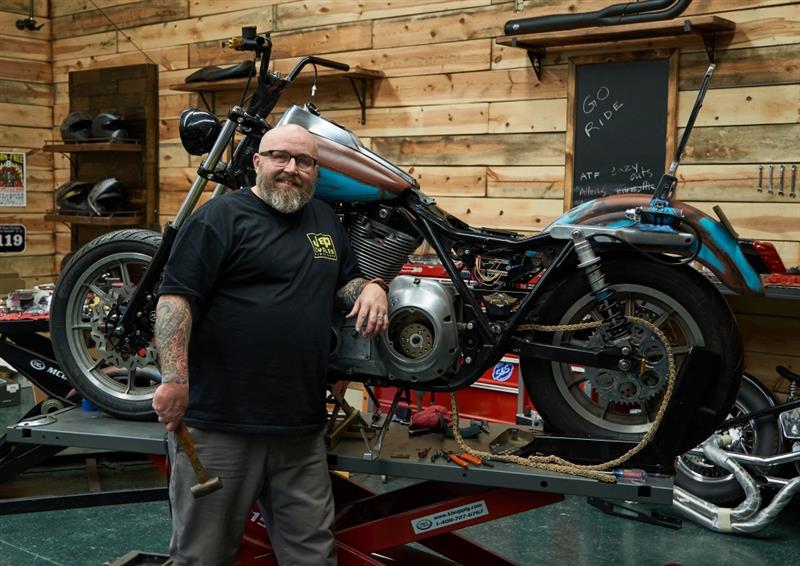
THE BAKER REPORT–Custom FXR Build by J&P
Join Patrick Garvin on an exhilarating adventure as he breathes new life into his 1989 FXR. From its humble origins as a grocery getter, witness the mesmerizing evolution of this bike into a functional work of art.
The FXRS-SP underwent a comprehensive overhaul, stripped down to its frame, and reborn as a no-nonsense hotrod. At the heart of this metamorphosis lies an S&S Cycle T124 powerplant, skillfully complemented by a Baker Drivetrain OD6 Builder’s Kit transmission. Every component in this build was handpicked with a keen eye for enhancing both performance and functionality.
Delving into the details, the old sheet metal received a fauxtina-style paint job, adding a distinctive flair to this restomod-style build while preserving the vintage essence. In this article, Patrick eloquently dissects the intricate thought process behind each decision and the flawless execution of the build. Experience the transformation firsthand as Garvin’s project unfolds, seamlessly turning into a masterpiece built for purpose.

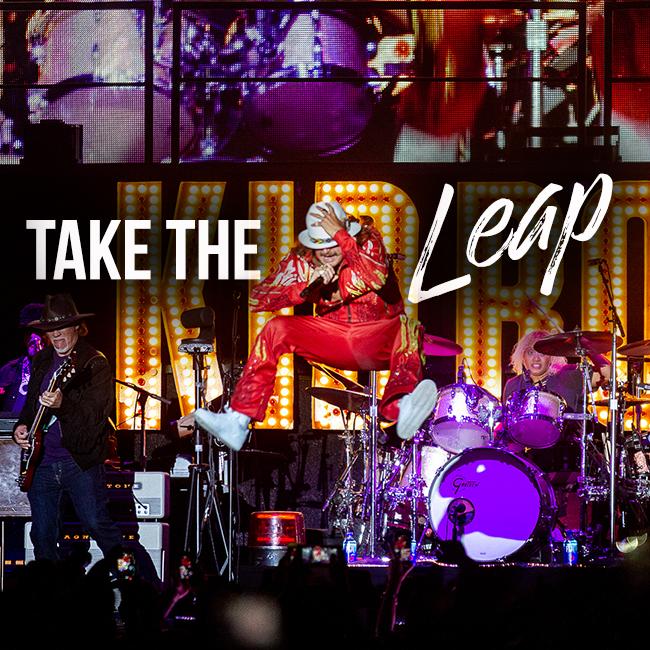
BUFFALO CHIP ACTION–IT’S LEAP DAY!
We’re celebrating the extra day by adding a handful of previously sold-out VIP nights.
Kid Rock and Jelly Roll
LEAP DAY SPECIAL SURPRISE
VIP Added for the Sturgis Rally’s
Two Biggest Nights
TAKE THE LEAP NOW!
These passes will go fast, and you won’t get a second chance like this again.

TODAY’S LEAP DAY SPECIAL
New VIP for Kid Rock
Thursday, Aug. 8, 2024


New EVENT Bikernet Reader Comment!–The World’s Best Custom
https://www.bikernet.com/pages/The_Worlds_Best_Custom.aspx
Do they still hold the custom Bike show in Las Vegas?
— Dale Lea
dalelea2703@gmail.com
Prescott valley, AZ
We reached out to Penny O. the Vegas Queen–Las Vegas BikeFest is no more. John Oakes was going to purchase it and then Covid hit and it all went by the wayside.
Hogs & Heifers’ Rally in the Alley was on hold after they sued the Downtown Grand for shutting down the street. She won her street back but that wasn’t until 2021 and I resigned in March of 2022.
She never brought it back. That event had huge potential. I built it up from 15,000 attendees to 26,000 and $10,000 in sponsorships to $100,000 in sponsorships. It is very costly to close off the streets in Vegas. $14,000 in metro fees alone for our 5-day event.
There is a bar in the downtown area that would like to start up a motorcycle event and a contact reached out to me. I have not spoken to anyone yet.
Do you know of someone that is interested in starting something out here?
–Penny

BAKER IN DAYTONA–Join the BAKER crew for an unforgettable experience at Daytona Bike Week! Here’s where you can catch the crew throughout the week:
March 2
Full Throttle Bike Show @ Destination Daytona
Billy Lane’s Sons of Speed @ New Smyrna Speedway
March 3
Hardcore Performance Show @ Destination Daytona
Warren Lane’s True Grit Show @ The Broken Spoke Saloon
March 4
The Flying Piston Benefit Breakfast @ Destination Daytona
Chopper Magazine’s Daytona Chopper Luau @ Daytona International Speedway
Trike Show @ Destination Daytona
FXR Mixer @ Beaches Daytona
March 5
Cycle Source Custom Bike Show @ The Broken Spoke Saloon
V-Twin Visionary Performance Show @ Daytona International Speedway
Speedworks Performance Cycles Grand Opening
Toce Performance’s Tacos and Burnouts @ Toce Performance
March 6
Renegade Babes Women’s Ride-in Bike Show @ Destination Daytona
Traditional Chopper Magazine’s Chopper Show @ Giuseppe’s Steel City Pizza
Perewitz Cycle’s Custom Paint Show @ The Broken Spoke Saloon
March 7
Willie’s Chopper Time @ Willie’s Tropical Tattoo
Budweiser Bagger Showdown @ The Cabbage Patch
MotoAmerica King of the Baggers Qualifying Round 1 @ Daytona International Speedway
March 8
MotoAmerica King of the Baggers Qualifying Round 2 & Race 1 @ Daytona International Speedway
Dennis Kirk’s Amateur Bike Show @ The Broken Spoke Saloon
WarFighters MC’s Daytona FXR Show @ Blues & Brews Bistro
Interested in having a BAKER GrudgeBox kit installed during Daytona Bike Week? Swing by Cycle Solutions’ booth at Destination Daytona, near Houligan’s Speedway, between February 29 and March 10, 2024! Secure your installation appointment via email (contact@cyclesolutionsonline.com) or by phone (765-768-6000).


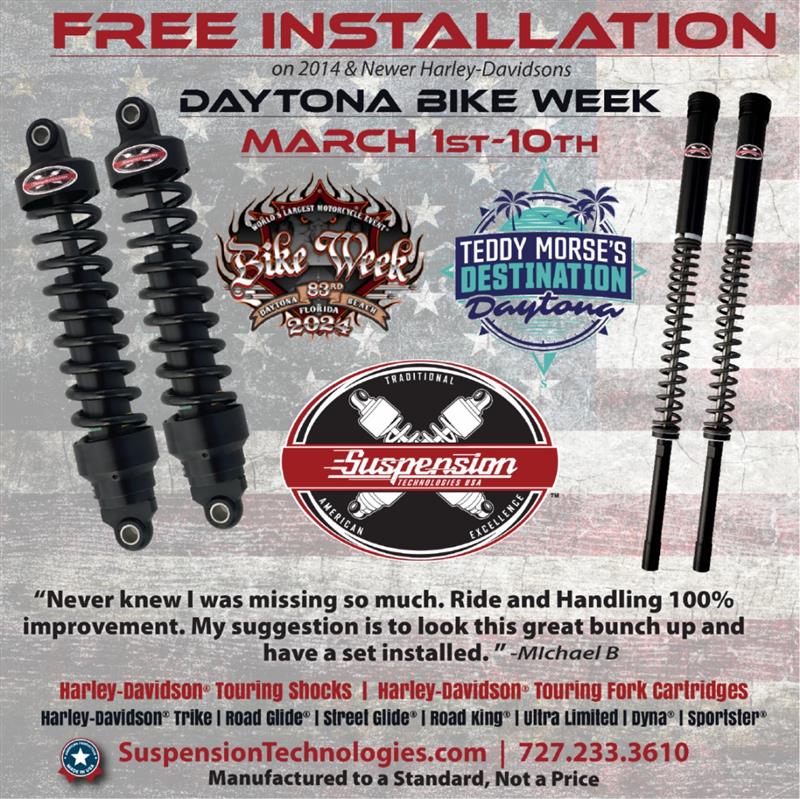
SUSPENSION TECHNOLOGIES IN DAYTONA—
Come See Mike, Steve and the crew to get your FREE Installation of the best Rear Shocks and Front Fork Cartridges your Harley has ever seen!
Our Trailer is located in the Main lot at Teddy Morse’s Destination Daytona for the 83rd Daytona Bike Week! Purchase your Rear Shocks and/or Front Fork Cartridges and you not only get Free Installation, but have the chance to earn a $50 Gift Certificate. Ask Mike when you see him!
Call today to schedule your FREE INSTALL at
Daytona Bike Week:
727.233.3610


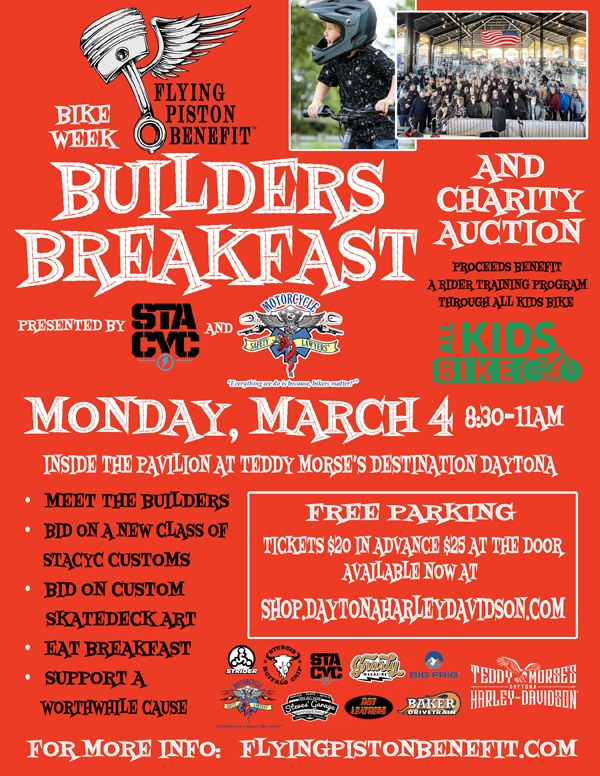
FLYING PISTON Benefit Breakfast Daytona–
Mark your calendars for Monday, March 4th, during Daytona Bike Week for the Flying Piston Benefit Breakfast!
Go to Teddy Morse’s Destination Daytona for this charity breakfast dedicated to teaching kids how to ride bikes, fostering future motorcycle enthusiasts. This event is a must for your Daytona Bike Week calendar, featuring custom STACYC ebikes crafted by talented artists like Athena Ransom, Vanessa Klock, Freddie Arnold, and Bob Kay, alongside unique Skateboard and Growler art. Let’s rally behind the Flying Piston Benefit and spark the love for riding in the next generation!
Can’t make it in person? You can still contribute by donating or participating in the online auction.

[page break]

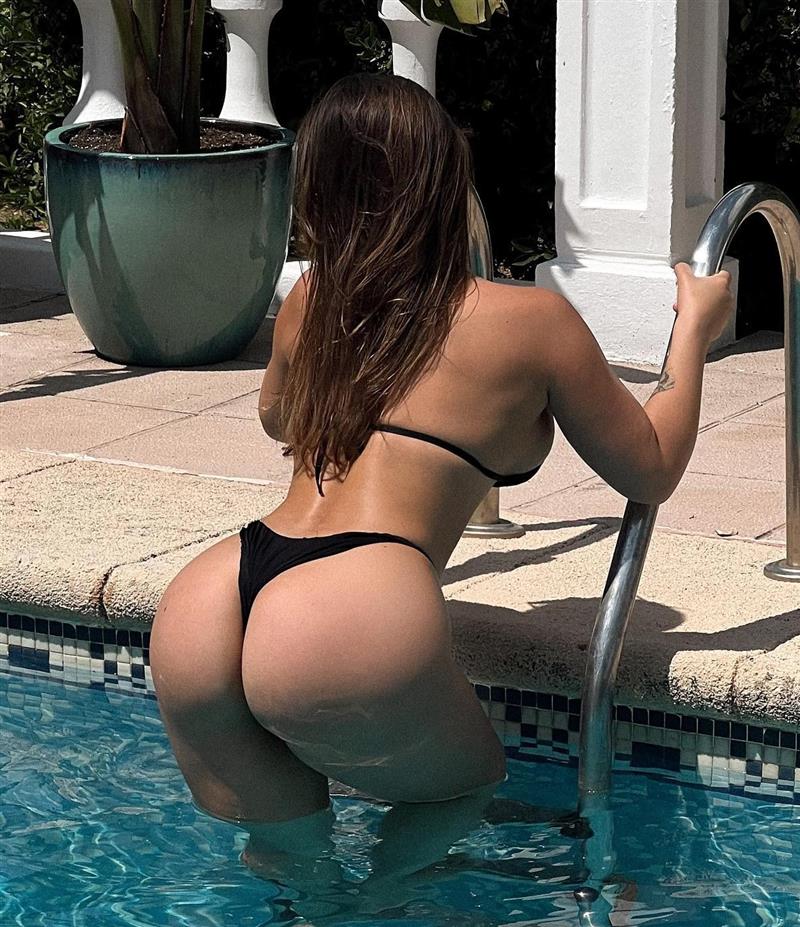
BABE OF THE WEEK—Paloma Freitas

–Sam Burns
Talent Scout
Bikernet.com™

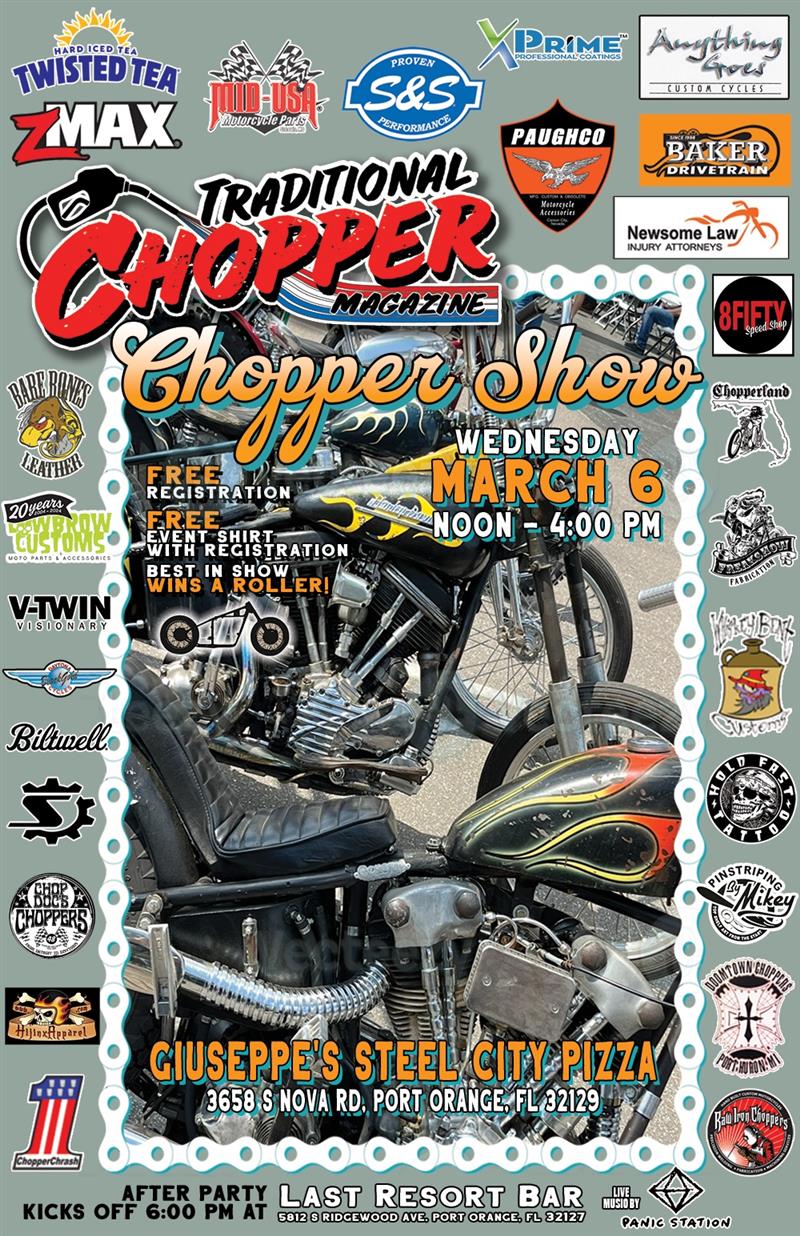
TRADITIONAL Chopper Magazine’s Chopper Show–
Calling all chopper enthusiasts! Bring out your mean machines and show off your custom rides. Whether you’re a seasoned rider or just love the thrill of the open road, this event is for you.
Get ready for Traditional Chopper Magazine’s Chopper Show during Daytona Bike Week! Save March 6th from 12-4 pm for an adrenaline-fueled extravaganza. With an impressive lineup of sponsors and jaw-dropping giveaways, this event promises non-stop excitement.
And here’s the cherry on top: registration is absolutely free, and the first arrivals will snag exclusive event shirts until they run out! But that’s not all – get your wheels in top gear because the “Best In Show” will ride away with a brand-new roller!
But wait, the excitement doesn’t end there! After the show, head over to The Last Resort in Port Orange for the ultimate after-party starting at 6 pm. Jam out to electrifying tunes from Panic Station live on stage while enjoying some hot pizza and ice-cold beers.
Don’t miss out on a full day of choppers, camaraderie, and good times!
–Baker Drivetrain



QUICK, New Bikernet Reader Comment!—
MAKING STUFF HAPPEN BIKERNET WEEKLY NEWS for February 22, 2024– click here to read
I’d imagine it’s a tie with Ms Ann and Raquel on my weakness for redheads, add a little Rita too. I’ve had four come through my life, none currently. Yet, I feel sorry for those who as Jimi Hendrix asked “Are you experienced,” yes to both.
–RFR
Tomball, TX


GREAT NEWS FROM COMPETITION DISTRIBUTING--Harley J & JD 1925-1929 Fuel Tanks Back in Stock!

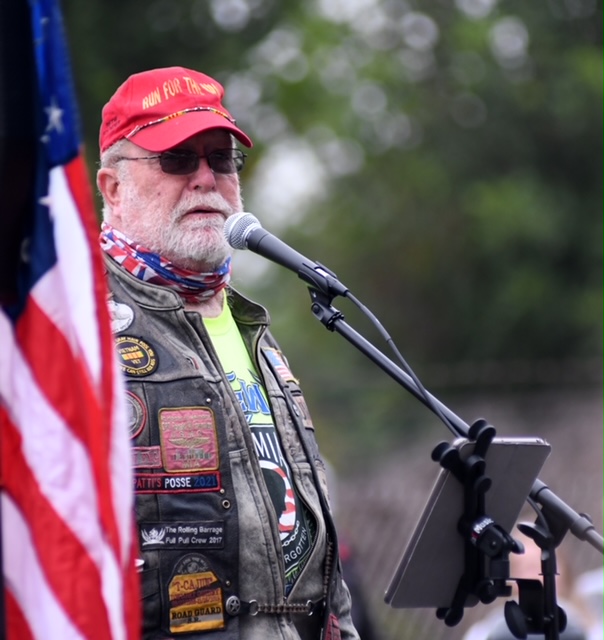
Jiggs Cressy Honored By Sturgis Museum Hall of Fame
Jiggs Cressy, who has been an MRF member for more than twenty (20) years, is to be recognized by the Sturgis Motorcycle Museum Hall of Fame with their esteemed Freedom Fighter Award.
The announcement from the Museum Hall of Fame states:
The 2024 Freedom Fighter Award goes to Jiggs Cressy for his tireless leadership of ABATE of South Dakota, where he served as State Coordinator for fourteen years. Cressy has advocated for South Dakota’s riders in the State Capital countless times and has made eight trips to do the same in Washington as well. Cressy has also received the John “Farmer” Eggers Award, the most prized honor from the Motorcycle Riders Foundation, in 2018.
Congratulations to Jiggs on this well-deserved recognition!
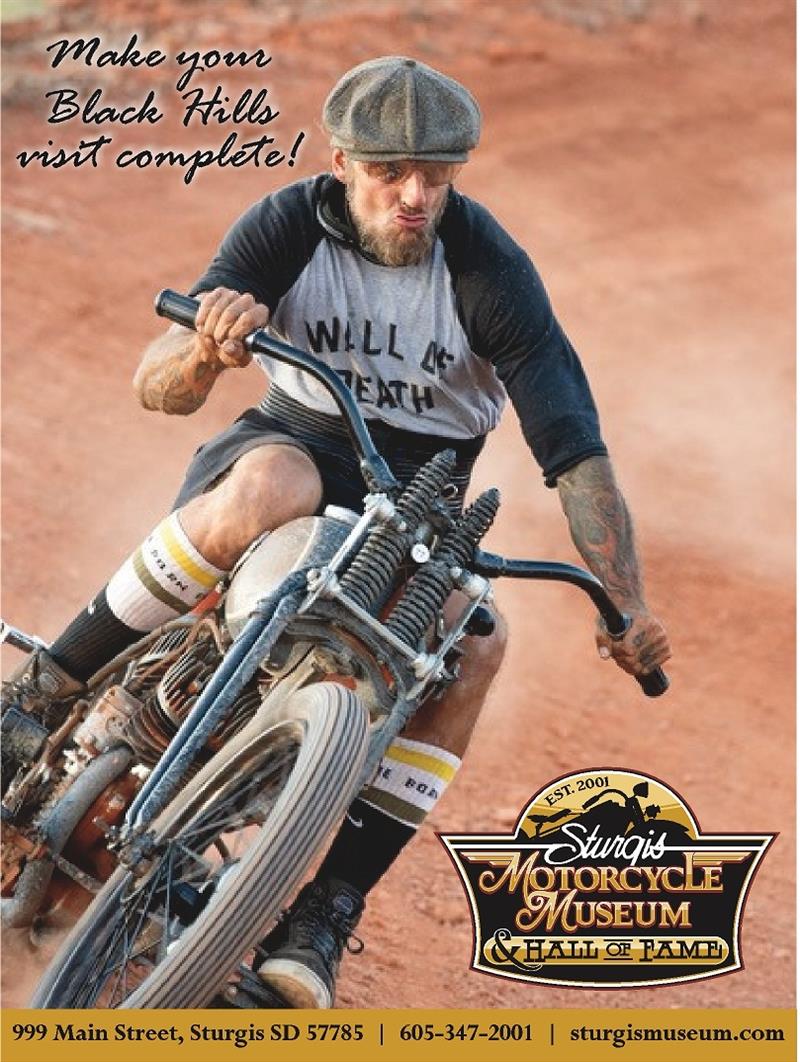
“We are very proud to honor freedom fighters and veterans this year.” –Bandit

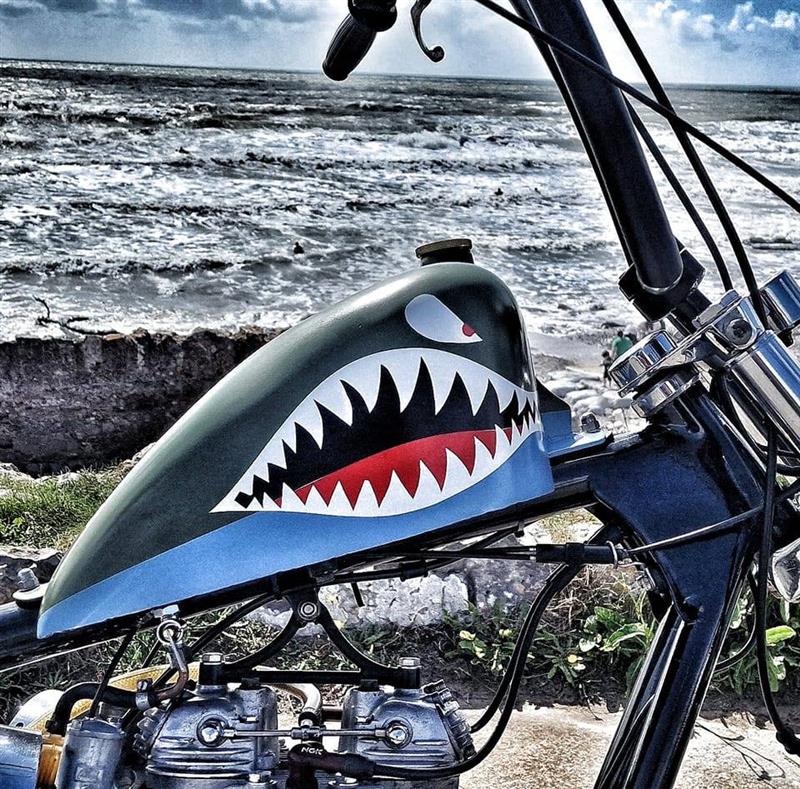
PHOTOGRAPHER OF THE WEEK—John Wood
–Sam Burns
Photo editor
Bikernet.com™

THE LATEST FROM RMJ USA–
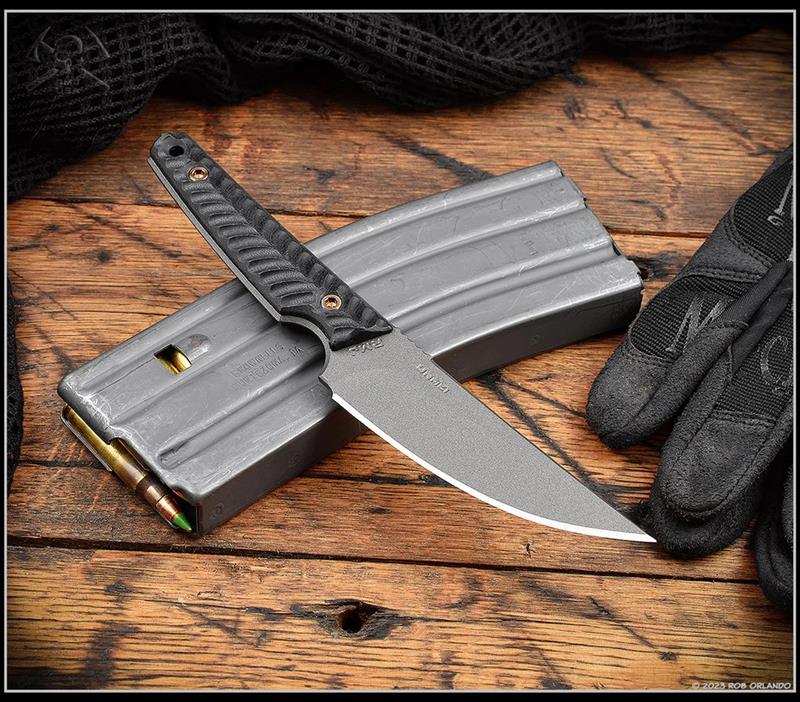
Greetings! One of the most requested knives is back, the Unmei! We’ll have standard Tungsten Gray Cerakote versions as well as hand-textured Blackouts available today at 2;00PM (ET) on our website. As always if you miss the small drop today, our dealers will be stocked up with the lions share next week!
The Unmei is a Japanese Kwaiken style fixed blade knife that excels in both concealed and everyday carry roles. The RMJ rendition of the Kwaiken style functions well in both urban and rural settings and is a great companion for any adventure. Made from .130” thick Nitro V stainless steel, the Unmei weighs in at 3.5 ounces.
The light and thin design makes this a great knife for any slicing needs. The blade has a Cerakote finish for corrosion and glare resistance, and added durability. The beveled and contoured G10 grips feature diagonal texturing for an aggressive but comfortable and secure grip.
Specifications
Overall Length: 8 in
Blade Length: 4 in
Blade Thickness: .130 in
Weight: 3.5 ounces without sheath
Blade: Nitro-V Stainless Steel
Handles: G10
Handle Fasteners: Grade 5 Titanium
Sheath: Kydex with belt clip

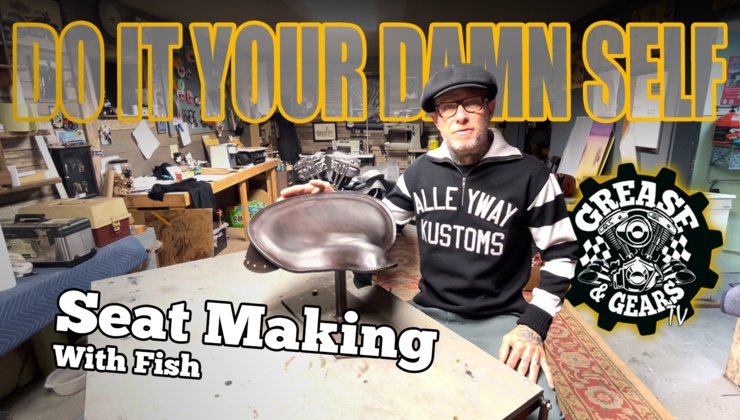
GREASE AND GEARS TV ACTION–We’re stoked to announce the release of our latest video, Seat Making With Fish At Alleyway! We can’t wait for you to check it out.
You can watch the video now on our network Grease & Gears TV – please help spread the word and share it. Tell them you saw it on Grease & Gears TV.

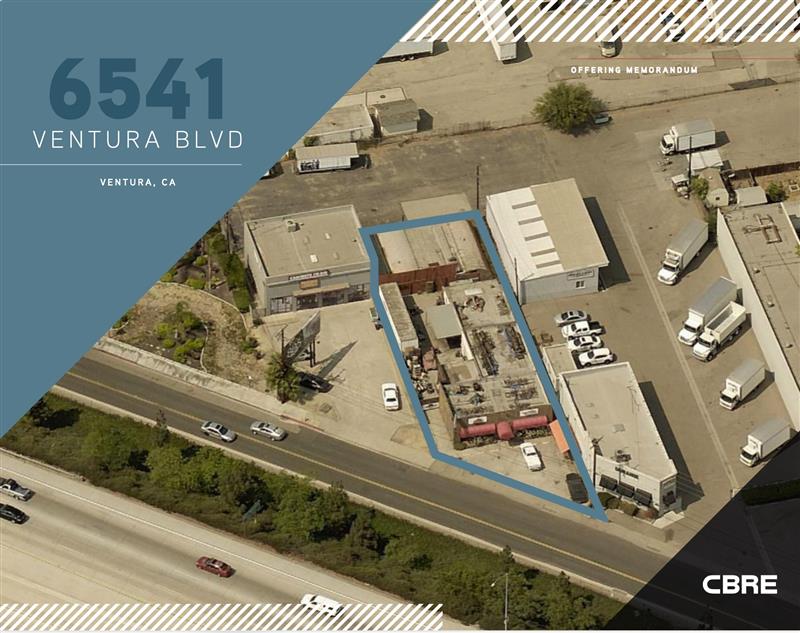
REMEMBER THE SHOP IN VENTURA?—
It’s for sale, right on the Ventura freeway. They just dropped the price to 1.75.
6541 Ventura Blvd. in Ventura, CA.
Slater, Michael A @ Oxnard

IRON HORSE SALOON RALLY ACTION—
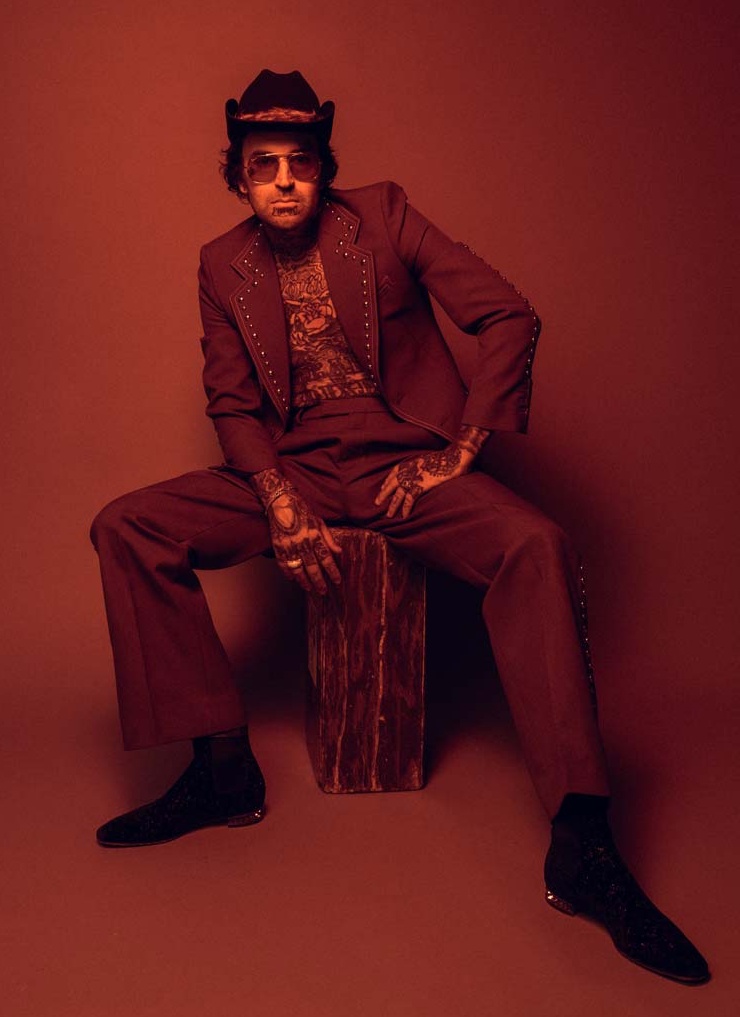
YELAWOLF Saturday, August 10, 2024
FREE CONCERT – NO COVER – NO TICKETS REQUIRED
AGES 21+ WELCOME
Iron Horse Saloon
888 Junction Ave
Sturgis, SD
VIP UPGRADES AVAILABLE

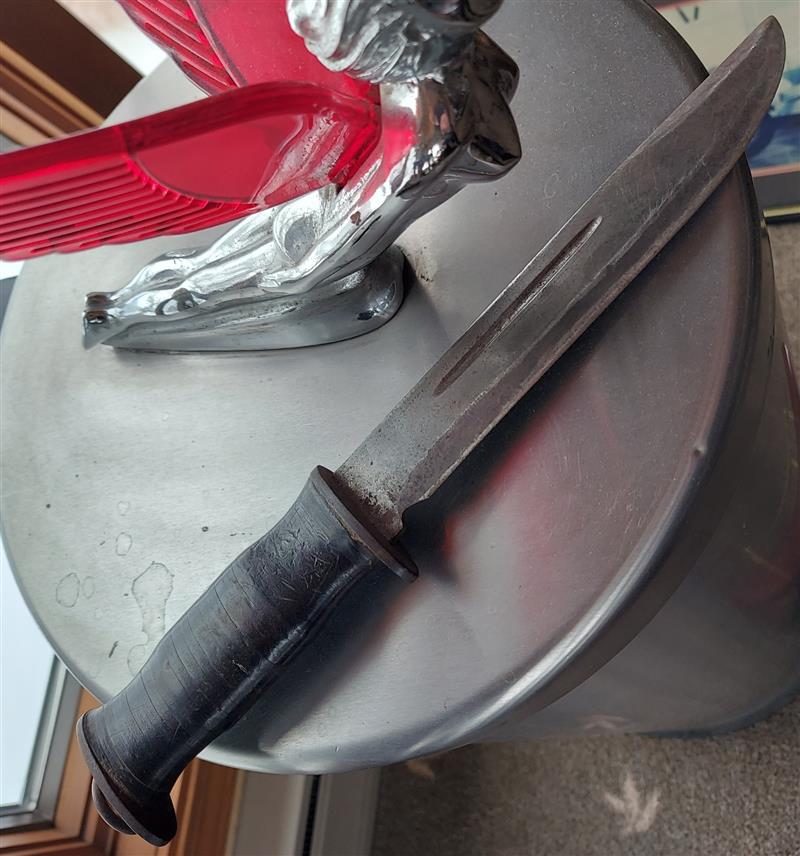
Your DAD`S IS A E.G.Waterman
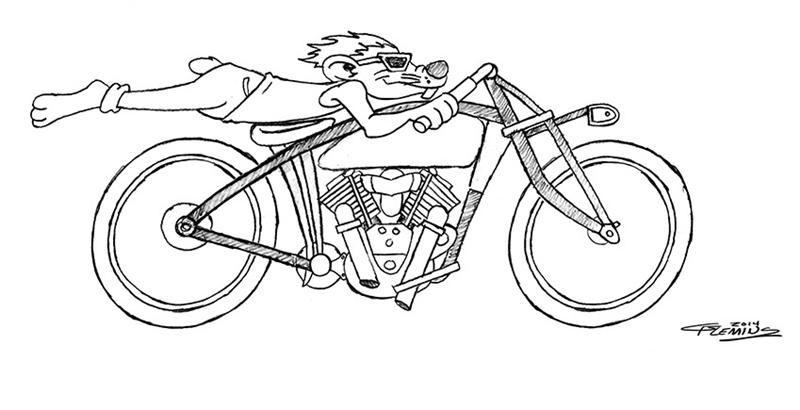
E.G.W. Knife made by E. G. Waterman & Co., New York City. 10 5/8 inches overall with a 6 1/8-inch hollow-ground blade. They were not a military-issued knife, many were purchased and carried to war by soldiers anxious to have a decent knife.
When found these EGW Knives are usually well used or used-up. E.G. Waterman fighting knife was one of the most versatile and hence popular ones. As a fighting knife in the trenches its flat back and solid point of the blade made it very effective.
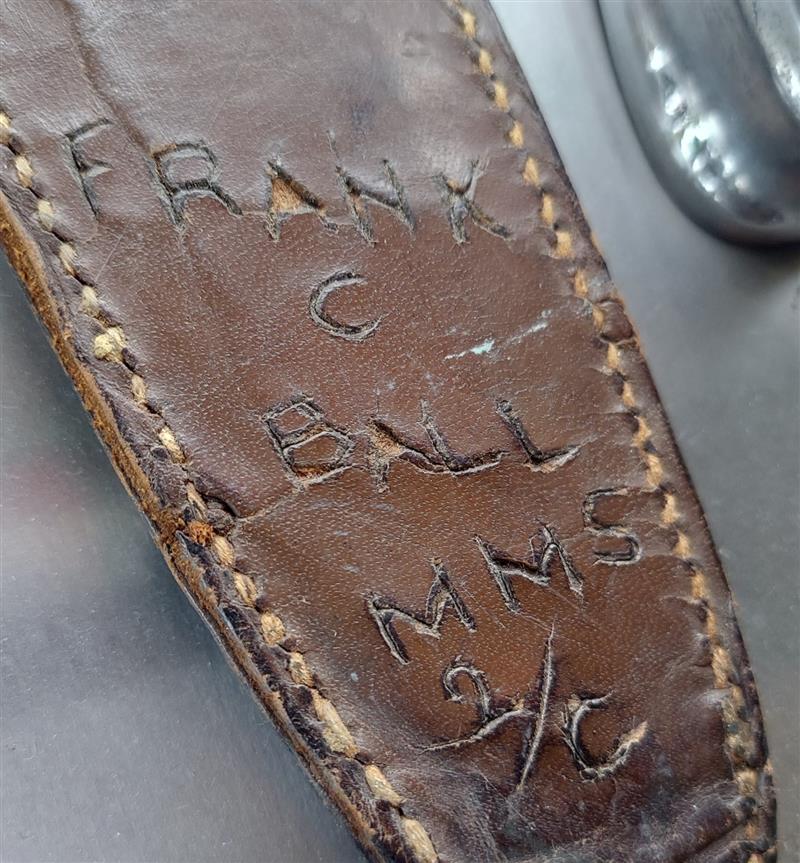
At the onset of WWII everything was in short supply, especially knives. A lot of GIs bought their own until the manufacturers could spool up production. Case, Remington, Cattaraugus, Western, K-Bar and other knife companies made many privately purchased knives; as the war progressed contracts were awarded and many of the “big” knife companies made their knives for issue to the military.
–Bob T.

CALL TO ARMS-–
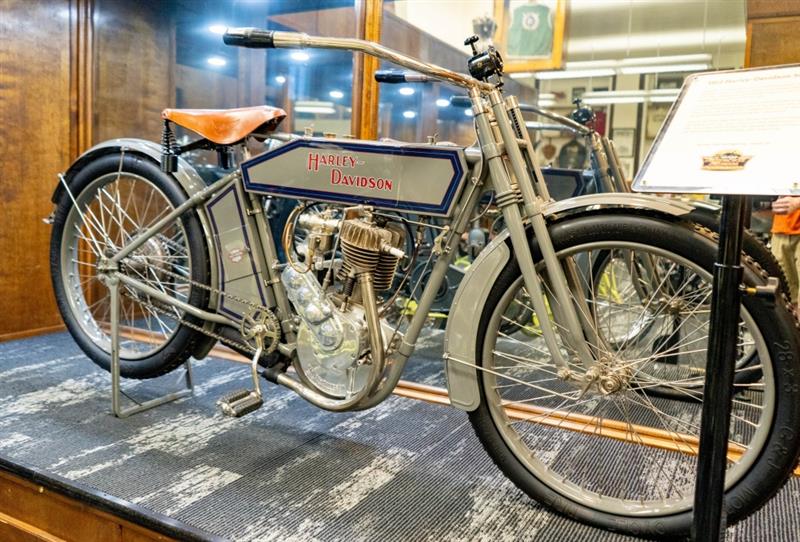
Hamster Adopt a Highway (I-90 Clean Up) is scheduled for Saturday 18, 2024 at 10:00 AM
The Hamster Highway Clean-up will be Saturday, May 18 starting at 10:00AM. Meet at Lucky 13 (Holiday Inn) Spearfish parking lot. We should be done by noon.
We are planning to have a dinner that night at 6:00 PM for spouses and others. Will let you know the restaurant at a later date. Thanks for your help.
Let Ray Spellman 605-645-2566 if you can help.

ABATE OF KANSAS NEWS–
On January 30th 2024 ABATE of Kansas along with the coalition of clubs and the MRF held bikers under the dome at our state capital in Topeka. We sat at tables in the rotunda where we passed out information and motorcycle awareness signs.
A lot of the meeting was made with our legislators about motorcycle issues such as profiling automotive vehicles, pressuring choices in vehicle fuels. Byron Haden president of ABATE of Kansas gave the opening presentation about where we stand on motorcycle issues in Kansas, followed by Eric Rose and Christy Gunderson from Iowa was there with Eric Rogers a guest speaker for M.R.F.
Jimbo from the coalition of clubs along with Tony Railsback our Legislative director for ABATE of Kansas all spoke at the event. I sat at our M.R.F table and the children that you see in the photographs are all members of ABATE of Kansas. One has been a life member since she was four years old.
Gracie and Regan Vagts are our editors’ children and Heidi is my granddaughter. This is our next generation of bikers. While writing my article for ABATE of Kansas I called Tony Rawls Riley about our trip from the meeting of the minds a couple years ago when we stopped in the motorcycle museum in Anamosa Iowa which was awesome. Tony informed me it was closed.
We as bikers need to realize these children are our next generation of bikers and if we don’t act now to persevere their future the only place they will see motorcycles will be in museums. I don’t want my granddaughter to say remember when you used to take me on a ride to the toy run, that was awesome.
–Bill Cooper
Kansas MRF rep.
“That’s why we are working hard on a Sturgis Motorcycle Museum 5-year plan.” –Bandit


ONE OF THE QUOTES OF THE WEEK–
“It is a little embarrassing that, after forty-five years of research and study, the best advice I can give to people is to be a little kinder to each other.” Aldous Huxley
Huxley is reported to have made this statement during a television interview with journalist Mike Wallace in 1958, reflecting on the insights he had gained throughout his life. It encapsulates a sentiment that, despite the complexity of human knowledge and achievement, simple acts of kindness remain profoundly impactful.
— Wayfarer

SOUTH DAKOTA GUN NUT REPORT-–
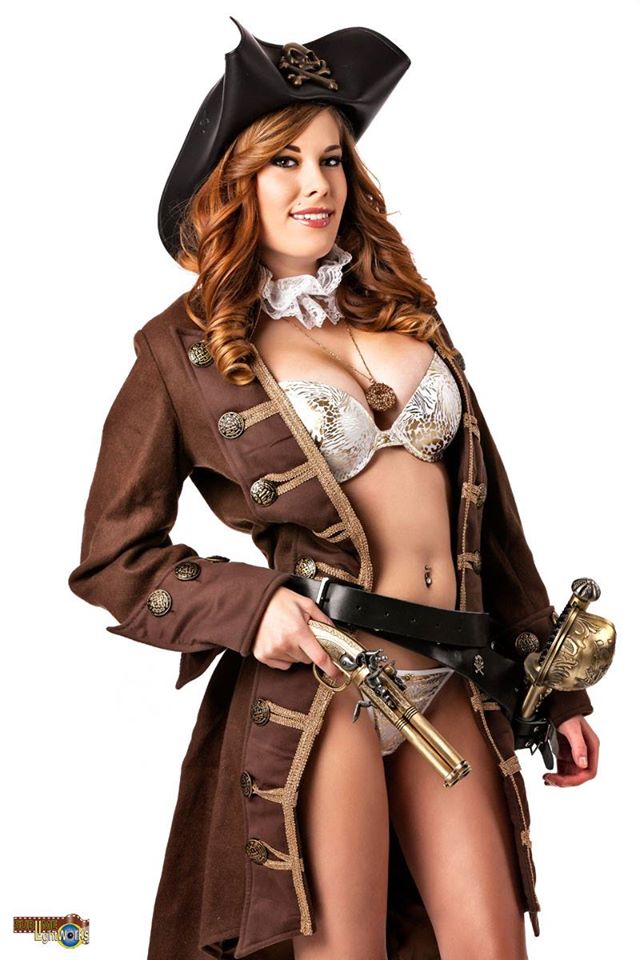
Enhanced Conceal Carry Legislation Headed to Governor Noem’s Desk–
On February 27th, Senate Bill 203 received final passage on the House floor on a vote of 62-8. The legislation will now head to Governor Noem’s desk for her consideration.
SB 203 amends current law, by allowing an individual with an enhanced concealed carry permit and written permission from a school principal or individual with control of supervision of the grounds, to carry at a public primary or secondary schools. This bill recognizes the ongoing effort to protect our most vulnerable by securing our schools.
Stay tuned to your inbox and the NRA-ILA website for updates concerning your Second Amendment Rights and hunting heritage in South Dakota.


COUNTRY MUSIC REPORT—
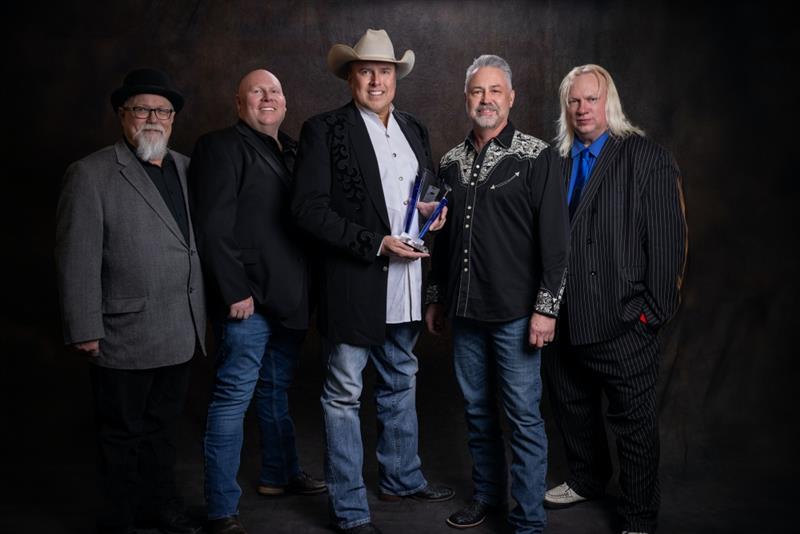
Country music group and 90s hitmakers Ricochet were recently inducted into the Oklahoma Music Hall Of Fame along with Bryan White, Verlon Thompson, Jerry Huffer, Timothy Long, Shelby Eicher, and David Webb. Celebrating music careers from several genres and aspects, the Oklahoma Music Hall of Fame honors Oklahomans who have impacted the music industry. Restless Heart and Oklahoma Music Hall of Fame members Dave Innis and Greg Jennings were on hand to induct Ricochet for this prestigious honor. Also included in the ceremony was Ricochet joining Wade Hayes for a special tribute to the legendary Toby Keith.
“Growing up in Oklahoma, one could only dream of such recognition. We are honored even to be considered, much less be amongst so many Oklahoma icons in the Oklahoma Music Hall of Fame. Thank you to our fans, ENCORE Music Group, for new opportunities, and, of course, the Hall of Fame, for bestowing such an honor.”
– Heath Wright, RICOCHET
“Ricochet has been one of the most important and powerful bands coming from Oklahoma in the past 30 or more years. Each member is highly proficient with their craft, and when they perform you are hearing the result of a group of highly polished and professional musicians that never miss. They put on a show! We are honored to have them inducted into our Oklahoma Music Hall of Fame.”
– Tony L. Corbell, Executive Director
RICOCHET is:
Heath Wright – Lead Vocals, Lead Guitar & Fiddle
Chris Hempfling – Drums & Vocals
Larry Hight – Steel Guitar, Electric and Acoustic Guitar, Saxophone & Vocals
Bruce Bennett – Bass & Vocals
RICOCHET is the only country group to chart our National Anthem and is in constant demand to perform it live. They have released their current album ‘Ricochet Then & Now… The Hits & More.’ Ricochet continues to play their chart-topping, gold-selling single, “Daddy’s Money,” along with their Top-10 hits, “What Do I Know,” “Love Is Stronger Than Pride,” and the Top-20 “He Left A Lot To Be Desired.”
Track listing for ‘Ricochet Then & Now… The Hits & More’
THEN:
What Do I Know
Daddy’s Money
Love Is Stronger Than Pride
He Left A Lot To Be Desired
What You Leave Behind
That’s Love
NOW:
Keep You Lovin’ Me
No Wrong Way
It’s Gonna Be Something
The Beauty of Who You Are
Feel Like Fallin’
I Knew
I Had To Be
Sweet Tea
Freedom Isn’t Free
RICOCHET On Tour:
Mar 09 Flickinger Center for Performing Arts / Alamogordo, N.M.
Apr 20 McPherson Opera House / McPherson, Ks
May 18 Poconos Park / Bushkill, Pa.
May 19 Cadillac Ranch / Oxon Hill, Md.
May 25 Wyloh Ranch / Grandview, Texas
Jun 07 Milligan June Jubilee w/Collin Raye / Milligan, Neb.
Jun 08 CMA Music Fest / Nashville, Tenn.
Jun 29 Riverfest / Conway, S.C.
Jul 02 PRIVATE EVENT / Bismarck, N.D.
Jul 04 Murray State University / Murray, Ky.
Jul 20 El Dorado Springs Park / El Dorado Springs, Mo.
Aug 03 Daniels County Fairgrounds / Scobey, Mt.
Sep 06 Silver Dollar City / Branson, Mo.
Sep 20 URA Seeger Memorial Auditorium w/Terri Clark / West Lebanon, Ind.
Sep 21 BMI Event Center w/Terri Clark / Versailles, Ohio

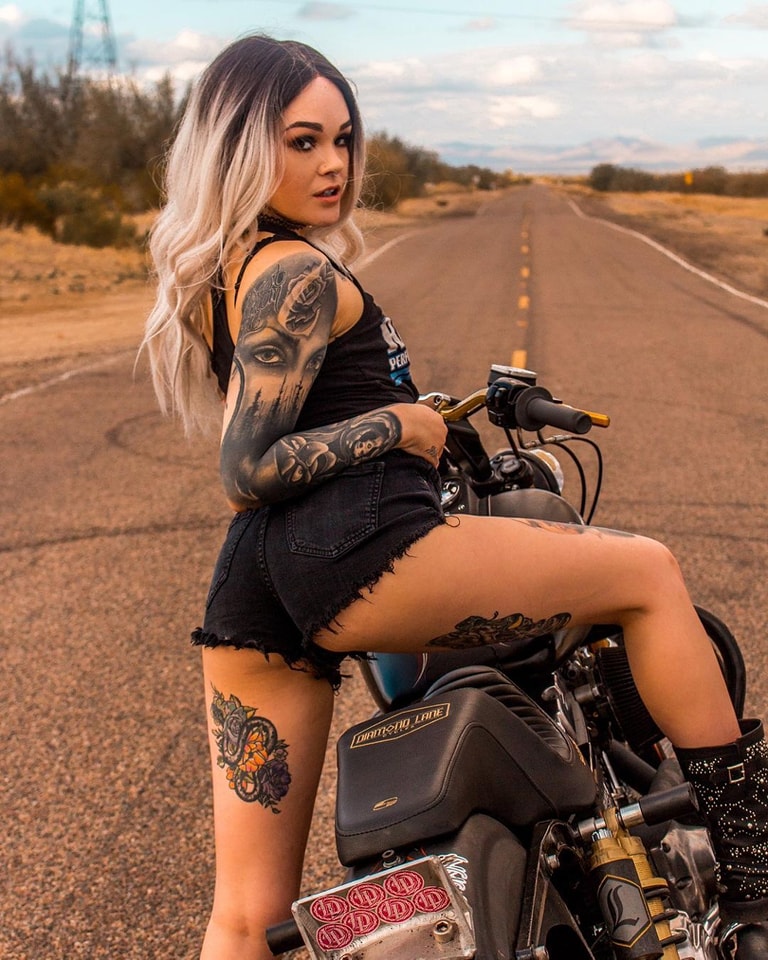
We are trying to get a handle on the annual Sturgis magazine, the museum entry way, museum expansion efforts, you name it.
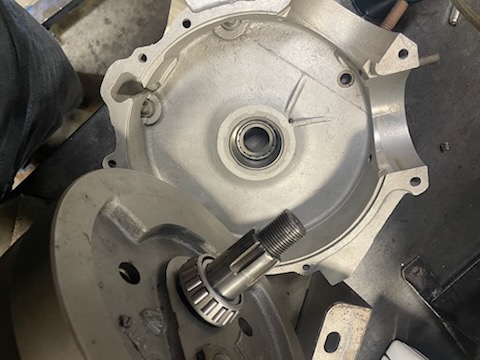
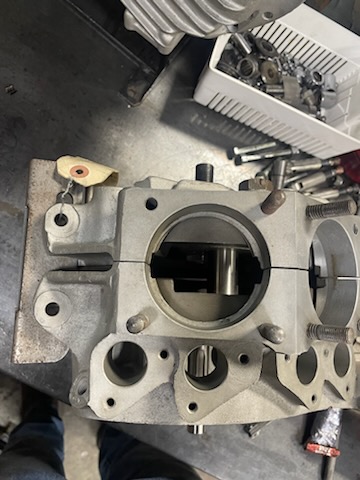
But I spoke to Lee Clemens and Brian from Departure Bike Works and got excited. They are making serious progress with the Bonne Belle 45 flathead engine. We basically installed a Sportster lowerend into the cases and created a Timken bearing left case, so I can run a 5-speed transmission, electric start and belt drive.
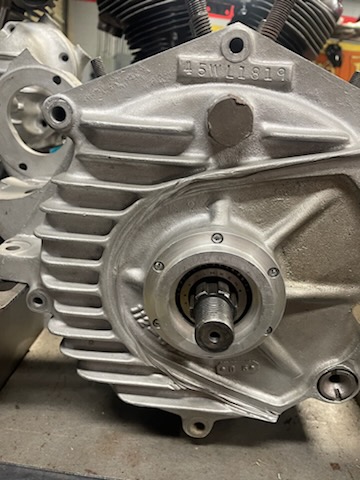
The cases are now buttoned up, but we needed a set of rods.
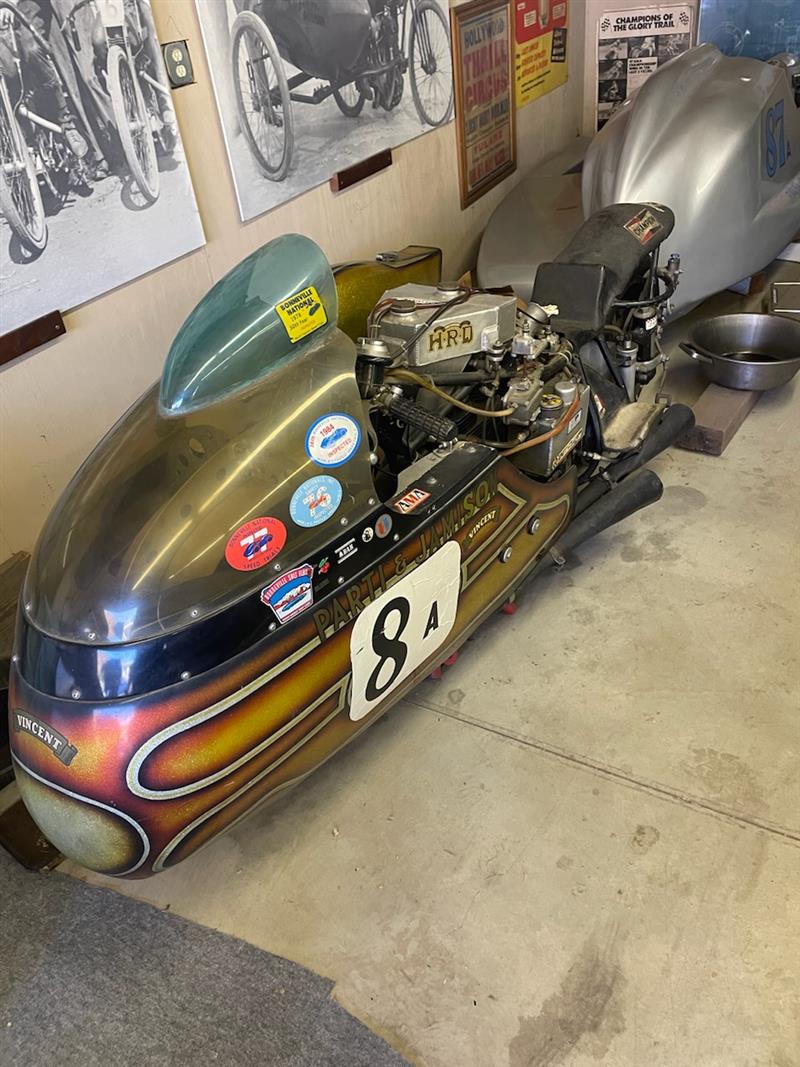
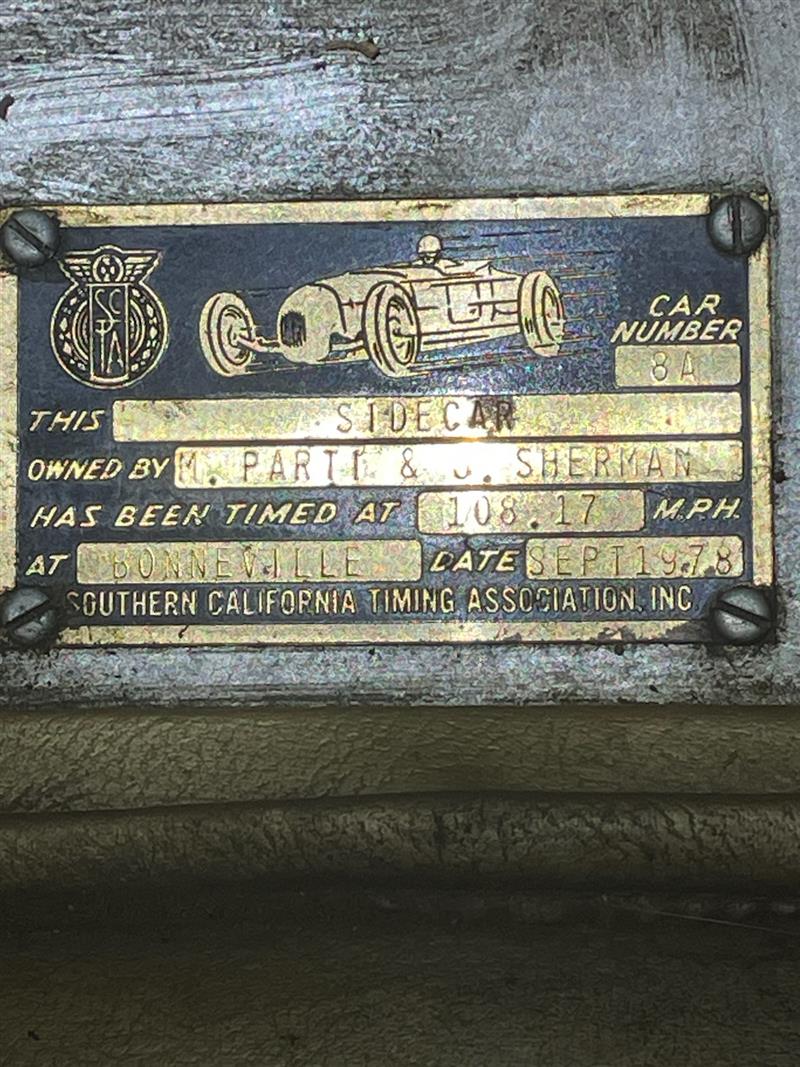
Speaking of the museum, I have a couple of connections for antique bikes. This Mike Parti race bike surfaced, but the owner wants to sell it and the Sturgis museum doesn’t have the funds or a system to go after bikes financially. Another item for the board agenda down the road.
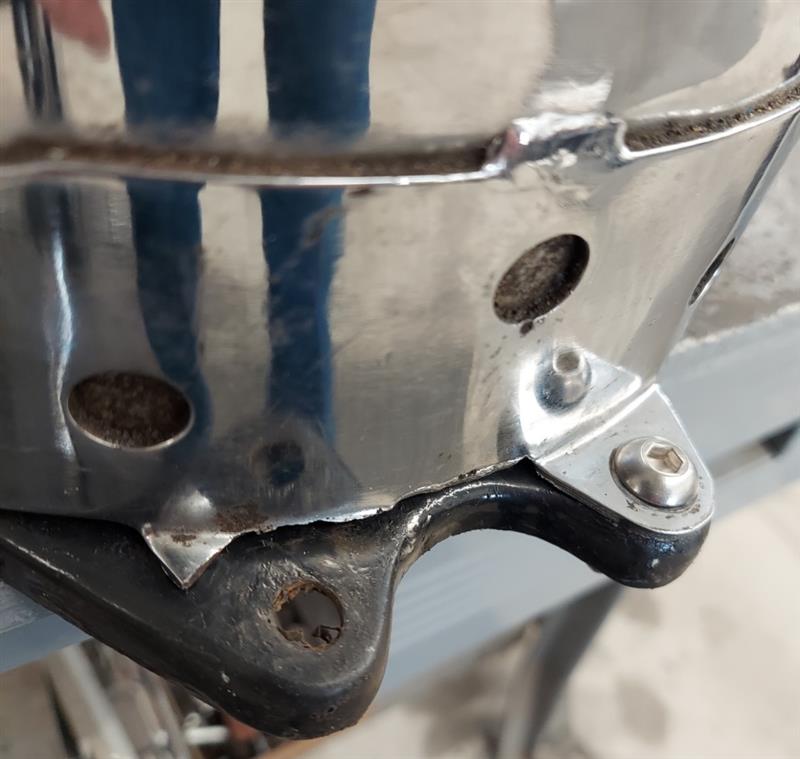
Meanwhile back in Deadwood, John’s ’60 Panhead is making progress. His oil tank was missing a tab, so I hauled it to the 5-Ball shop for repairs.
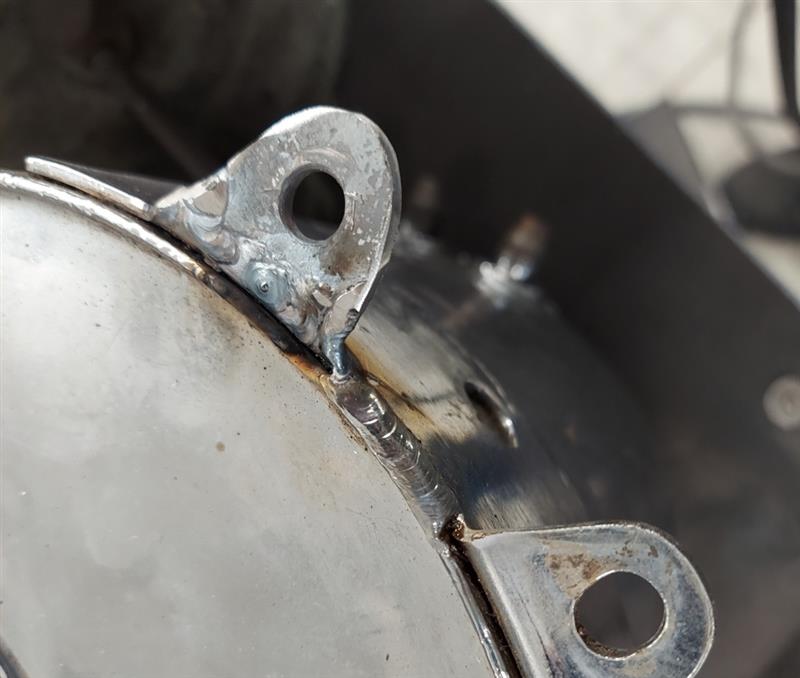
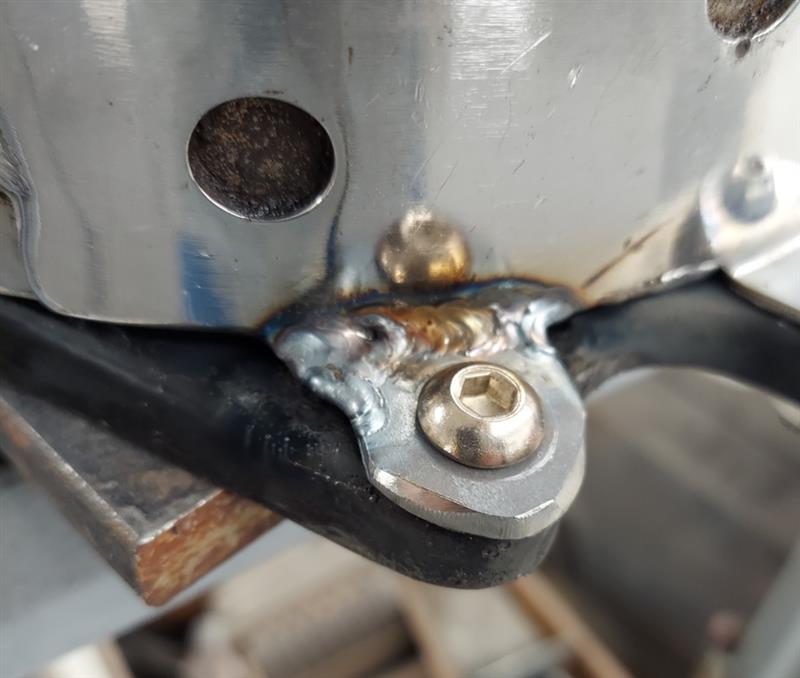
Here are the shots of it completed. Tig welding seems to handle chrome better that a MIG.
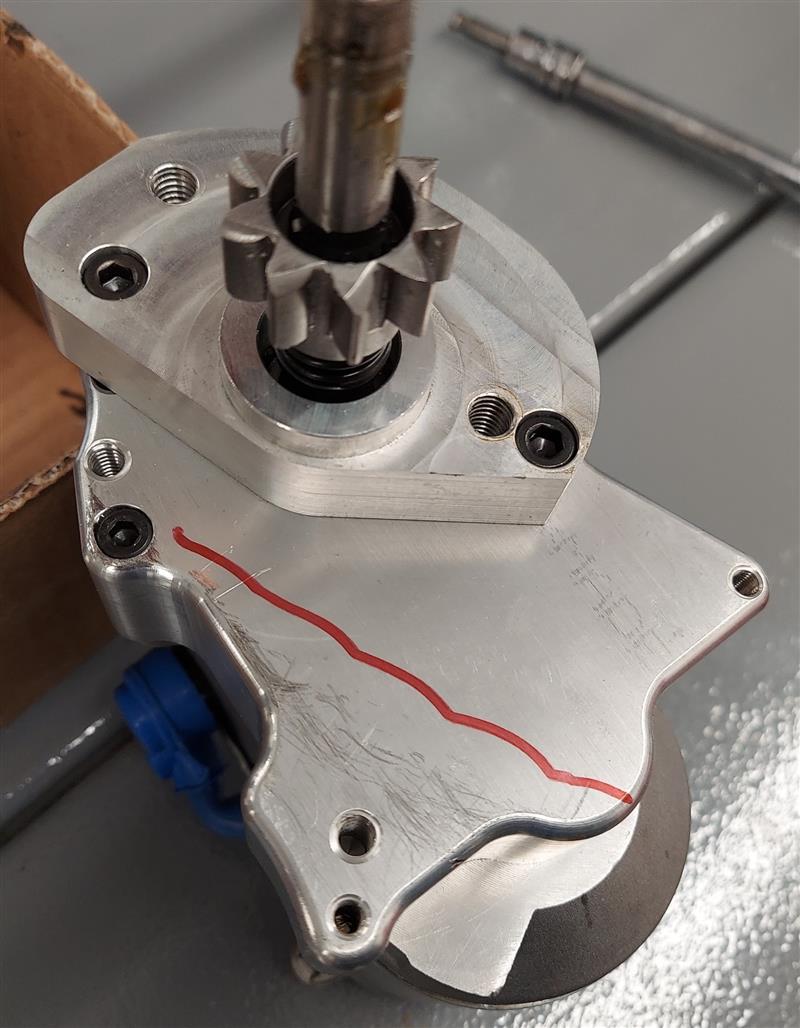
I’m hoping for some time in the shop this weekend. The entire driveline is lined up, but with the starter in place the standard 530 chain rubs the casing. I’m searching for options.
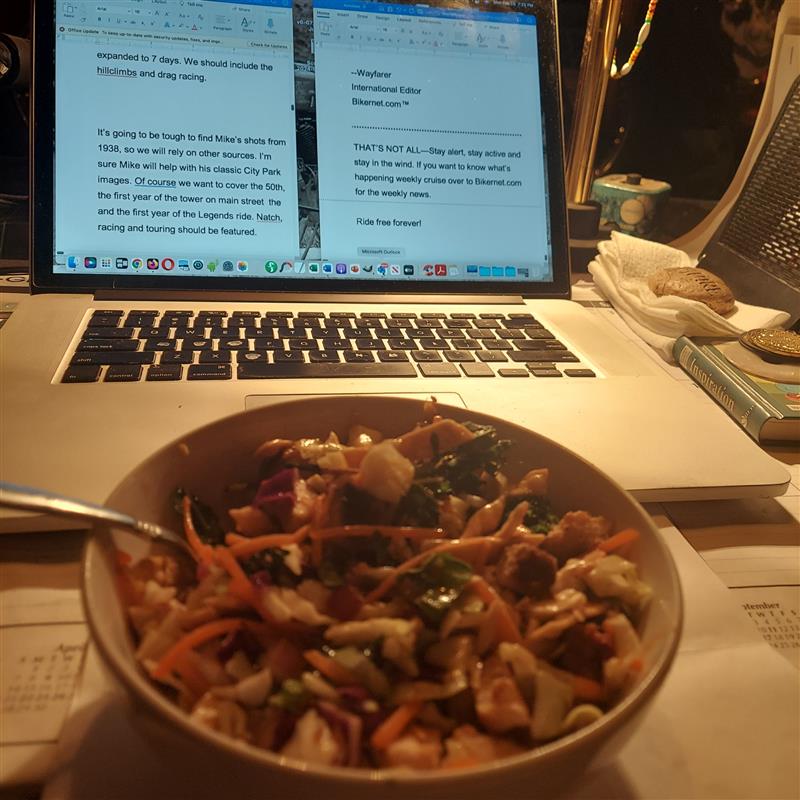
With the Redhead missing in action, I’m working into the wee hours. That’s all going to end tomorrow when she returns and demands that I sit at the fucking dinner table for chow.
Hope bike week is a hit and everyone rides safe.
–Bandit
Baker Drivetrain in Daytona
By Wayfarer |
Join the BAKER crew for an unforgettable experience at Daytona Bike Week! Here’s where you can catch the crew throughout the week:
March 2
Full Throttle Bike Show @ Destination Daytona
Billy Lane’s Sons of Speed @ New Smyrna SpeedwayMarch 3
Hardcore Performance Show @ Destination Daytona
Warren Lane’s True Grit Show @ The Broken Spoke SaloonMarch 4
The Flying Piston Benefit Breakfast @ Destination Daytona
Chopper Magazine’s Daytona Chopper Luau @ Daytona International Speedway
Trike Show @ Destination Daytona
FXR Mixer @ Beaches DaytonaMarch 5
Cycle Source Custom Bike Show @ The Broken Spoke Saloon
V-Twin Visionary Performance Show @ Daytona International Speedway
Speedworks Performance Cycles Grand Opening
Toce Performance’s Tacos and Burnouts @ Toce PerformanceMarch 6
Renegade Babes Women’s Ride-in Bike Show @ Destination Daytona
Traditional Chopper Magazine’s Chopper Show @ Giuseppe’s Steel City Pizza
Perewitz Cycle’s Custom Paint Show @ The Broken Spoke SaloonMarch 7
Willie’s Chopper Time @ Willie’s Tropical Tattoo
Budweiser Bagger Showdown @ The Cabbage Patch
MotoAmerica King of the Baggers Qualifying Round 1 @ Daytona International SpeedwayMarch 8
MotoAmerica King of the Baggers Qualifying Round 2 & Race 1 @ Daytona International Speedway
Dennis Kirk’s Amateur Bike Show @ The Broken Spoke Saloon
WarFighters MC’s Daytona FXR Show @ Blues & Brews BistroInterested in having a BAKER GrudgeBox kit installed during Daytona Bike Week? Swing by Cycle Solutions’ booth at Destination Daytona, near Houligan’s Speedway, between February 29 and March 10, 2024! Secure your installation appointment via email (contact@cyclesolutionsonline.com) or by phone (765-768-6000).
TELL ‘EM BIKERNET.COM SENT YA
BMX Triple Challenge Season: Podium Sweep for Team Monster Energy
By Wayfarer |
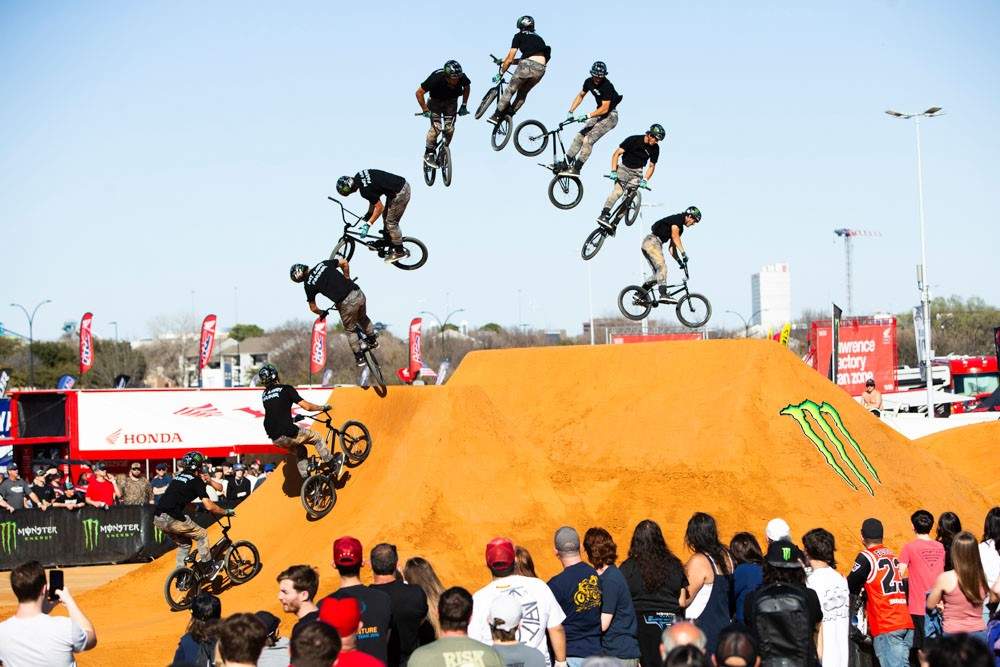
- Podium Sweep for Team Monster Energy with Jaie Toohey Taking 2nd Place and Ryan Williams 3rd Place
- Best Trick: Ryan Williams Claims 1st Place, Joined by Baker (2nd Place) and Andy Buckworth (3rd Place)
- The 2024 BMX Triple Challenge Season Concludes with Overall Championship Titles for Baker (1st Place), Williams (2nd Place), and Daniel Sandoval (3rd Place)
ARLINGTON, Texas – February 24, 2024 – The 2024 season is officially a wrap! Monster Energy congratulates Monster Army rider Brady Baker on winning the BMX Dirt competition at the 2024 Monster Energy BMX Triple Challenge in Arlington, Texas. In the final stop of the 2024 season, the 21-year-old from Toms River, New Jersey, claimed his second consecutive victory of the year and won the overall series championship title.
Monster Energy swept the entire podium, with 32-year-old Australian Jaie Toohey from Lake Munmorah taking second place and 29-year-old Ryan Williams from Sunshine Coast, Australia, in third. The dominance continued in the spectacular Best Trick contest, with Williams taking the win, followed by Baker in second place and 33-year-old Andy Buckworth in third.
Team Monster Energy also swept the three top spots in overall standings: First place in the 2024 Monster Energy BMX Triple Challenge series went to Baker. Trailing only two points behind, Williams finished second place, and 29-year-old Daniel Sandoval from Corona, California, landed in third place. Way to wrap up a strong season!
Presented by Monster Energy as the official title sponsor, the BMX Triple Challenge has been known as the most progressive contest series in BMX dirt for the past eight years. As a major platform, the open-invite event pitches the sport’s most established athletes against up-and-comers looking to make a name for themselves. Traditionally, the three-part BMX dirt competition takes place during select Monster Energy Supercross events.
From February 23-24, the final stop in Arlington wrapped up the season outside AT&T Stadium. On a burly three-jump dirt course, the best riders on the circuit battled for a last chance to sweep the season championship title.
Riding conditions were perfect, with hardly a cloud in the sky and high temperatures. The wind was unrelenting during qualifying on Friday, but gusts settled down on Saturday. The level of riding in the semi-finals was mind-blowing, with several top-scoring runs landed.
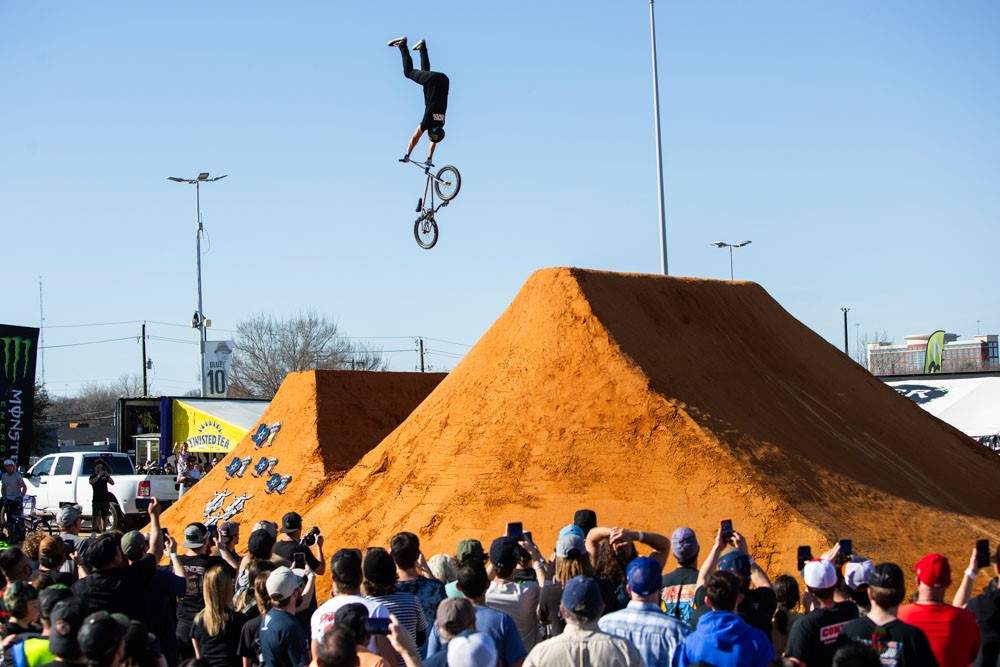
In the final, 21-year-old Monster Army rider Brady Baker from Toms River, New Jersey, dropped in as the top qualifier from the semis. After kicking off the year with a second-place finish in Anaheim and then clinching the win in Glendale only two weeks ago, Brady Baker continued to ride that wave in Arlington with flawless runs stacked with bangers. He earned the top spot with a jaw dropping run comprising of a backflip triple tailwhip, cashroll whip, and 720 double barspin.
Also claiming a podium spot, 32-year-old Australian Jaie Toohey from Lake Munmorah, Australia, took second place. After a few nothing-front bike flips gone awry, the best-of-three-run format benefited Jaie Toohey when he put it all together with a double backflip, nothing-front bike flip, and a quad tailwhip.
Completing the team’s podium sweep, 29-year-old Ryan Williams from Sunshine Coast, Australia, claimed third place by landing a double backflip 360, no-hander frontflip, and double backflip on the final hit.
When the action moved into Best Trick, Williams continued to stoke the crowd by throwing down the heaviest tricks of the weekend. A mind-boggling double backflip 360 – a never-been-done trick nicknamed the “Aussie Roll” – earned A-Willy the top spot.
Baker took home second place in Best Trick, netting crucial championship points that would give him the edge for the overall season title. Buckworth took third place in the heated session.
When it came to awarding the trophies for overall winners, three Monster Energy riders took top honors in the 2024 BMX Triple Challenge series: First place went to Baker, who graduated from a young upstart to a household name within a single season. “To podium at all three stops and win the overall, it doesn’t feel real,” said Monster Energy’s Baker.
Trailing only two points behind in season standings, Williams finished in second place, and Daniel Sandoval in third place.
For more on Brady Baker, Jaie Toohey, Ryan Williams, Daniel Sandoval, Andy Buckworth, and the Monster Energy BMX team, visit www.monsterenergy.com. Follow Monster Energy on YouTube, Facebook, Instagram, Twitter, and TikTok for exclusive updates as the BMX season continues.
Send a Letter to EPA Opposing California’s ICE Ban
By Wayfarer |

Final Call: Oppose California’s ICE Ban
The California Air Resources Board’s (CARB) “Advanced Clean Cars II” (ACC II) regulations ban the sale of new internal combustion engine vehicles by 2035. ACC II requires that 35% of new cars, SUVs, and small trucks sold in California must be zero-emissions vehicles (ZEV) starting in 2026. The regulation increases ZEV sales requirements by 6% to 8% annually through 2035, when 100% of new vehicles sold in California must be ZEV – eliminating the sale of any new vehicles that are gas-powered.
Before ACC II can be implemented, CARB must receive a waiver from the U.S. Environmental Protection Agency (EPA) for its regulation to take effect. SEMA opposes ACC II because seventeen states, representing nearly 40% of the American population, have previously adopted California motor vehicle emission laws. To date, nine states and the District of Columbia have already adopted ACC II; three states have adopted ACC II through 2032, which requires 87% of new motor vehicle sales to be ZEV; and two states have started the regulatory process to adopt ACC II
Making Stuff Happen Bikernet Weekly News for February 22, 2024
By Wayfarer |
Hey,
What a whacky, wonderful week. Not sure where to start, but there’s a message here somewhere.
I’m now on the board of directors of the Sturgis Museum. Tomorrow it’s back to the museum to work with the staff on the magazine.
I’m trying to build a 3-5 mile track in the Badlands. Assalt Weapan is going back to the Salt if we can go at all.
Let’s stay proud, active and always riding free.
–Bandit
Click here to read this Thursday’s Edition of the weekly news only on Bikernet.com
* * * *

Why wait? Discover the life beyond the horizon.
Click to know Cantina Membership options
MAKING STUFF HAPPEN BIKERNET WEEKLY NEWS for February 22, 2024
By Bandit |

Hey,
What a whacky, wonderful week. Not sure where to start, but there’s a message here somewhere.

Berry Wardlaw is going to take the Assalt Weapan back to Bonneville if we can go at all. I’m trying to build a 3-5 mile track in the Badlands.

I’m now on the board of directors of the Sturgis Museum and I investigated expanding our footprint we have in downtown Sturgis. We could possibly take the building from 10,000 to a 70,000 square feet and 4.5 stories of world class museum.
I’m also working on the museum annual magazine. There’s so much we can do with it next year, but for now the deadline is just a month away.
Let’s hit the news. Way more to come.

The Bikernet Weekly News is sponsored in part by companies who also dig Freedom including: Cycle Source Magazine, the MRF, Iron Trader News, ChopperTown, BorntoRide.com and the Sturgis Motorcycle Museum.


STURGIS MOTORCYCLE MUSEUM REPORT—
It is currently zoned General Commercial, which would allow us to build 4.5 stories high. There is little or no chance of a zoning change but variances to the rules are available.
For instance, if we don’t put a door on the back of the building, we might be able to push the size of the building closer to the alley. I measured roughly 50 feet behind the building and the requirement is a 15 foot setback.

There is also a special variance for buildings on Main and a portion of Junction. They can be built to the sidewalk. If you look across Junction, there are two commercial buildings built right to the sidewalk. That’s potentially 15 more feet to the west.
Regarding the flood plain, If we tear down the existing building, we may lose the basement. But we can build a building into the parking lot as long as it doesn’t break the no-rise rule. That means we can’t cause the flood to rise. To ensure flood waters are allowed to flow naturally we may need to include flood vents under the new structure.

Here are some numbers: The current museum is approximately 6,198 square feet with the addition of the basement it may be 10,000 square feet. The building is approximately 78 feet by 91 feet.
If we can expand 10 feet to the west, 35 feet toward the alley or north and 50 feet into the parking lot (east) the building will become 138 by 126 or 17,388 square feet. If we can go up 4 stories, that would make it 69,552 square feet and the tallest building in Sturgis.

I will look into costs and concept drawings. I would like to work with Ron Waldren and Jason Anderson, both local contractors. Ron has been very involved in all of Scott Jacob’s Deadwood buildings.
Ultimately, this would be a five-year plan to build a state of the art motorcycle museum in Sturgis for the city, for the Rally and for the Motorcycle Industry.

–Bandit


BRAND New Bikernet Reader Comment!–
VLXAFL5 Part 7 Final Assembly Begins
https://www.bikernet.com/pages/VLXAFL5_Part_7_Final_Assembly_Begins.aspx

Looks sweet. Waiting on next installment and seeing finished product. Great work!
–Rhys
Daytona, FL


“Every great dream begins with a dreamer. Always remember, you have within you the strength, the patience, and the passion to reach for the stars to change the world.”
~ Harriet Tubman


THE DAV REPORT—
In just a few days, we’ll gather for DAV’s annual Mid-Winter Conference where we will discuss critical legislative priorities and share advocacy strategies and resources to improve the lives of veterans. And DAV National Commander Nancy Espinosa will address lawmakers on Capitol Hill about the issues that matter most, including:
Bolstering funding for mental health services to reduce veteran suicide. Learn more >> Veterans Mental Health and Medical Benefits | DAV
Ensuring equity for health care and benefits for women and minority veterans. Learn more Women Veterans Issues: Latest Updates
Expanding the VA’s capacity to deliver quality, timely care for all veterans. Learn more >> https://www.dav.org/get-help-now/va-benefits-help/
Thanks to dedicated members like you, DAV is at the forefront of legislative victories for America’s veterans. But there’s still work to do.
We look forward to continuing to push these essential fights forward for veterans like you. Thank you so much for being a member of DAV and helping us improve the lives of all veterans.
–Joy J. Ilem
National Legislative Director


STURGIS MOTORCYCLE MUSEUM UPDATES—
Irish Rich’s custom gets voted in. The Sturgis Museum has a curation committee who decide which bikes are accepted into the museum where they are carefully display, documented and insured.
Currently the Museum is just around 10,000 square feet and contains almost 80 historic race, custom and antique bikes.
If you are interested in having your motorcycle displayed in the Sturgis Museum see below for the chairman’s info. He also operates a bike shop on the Chip property if you need repairs during the rally.

Paul Fosdyck
Fozzy’s Cycle Shop
563.949.9596
2108 Cooper Loop
Sturgis, SD 57785
http://fozzyscycleshop.com

Here’s info about Rich’s bike:
Built in 2014. Frame is 1 of 2 frames built in this configuration from West Coast Choppers. 6 over Harley springer. 21 & 15 in. wheels, rear wheel is Dick Allen. Oil tank wraps around rear fender, electrics are under transmission. ’79 H-D Shovelhead, 86 cu. in. all S&S internals. Delcron trans case, Baker 6 sp. gearset. All fabrication & assembly by Irish Rich (me).
Winner of 6 major shows during the Sturgis Rallys. Grand National Roadster Show Chopper Class winner. IMS Ultimate Builder Bike Show Custom Classic Class winner. Many radical custom class wins. Invited Builder Hot Bike/ Street Chopper 1,000mi. Tour. Black Hills Motorcycle Show Chopper Class winner. Feature bike Street Chopper magazine Spring/Summer 2017 issue.
Regards, Rich
–Bandit


NEW BILTWELL STRAPS—
We’ve used everything to strap gear to our bikes and settled on these rugged, made-in-Utah Voile straps as the best solution.
Durable as all hell and they work in all weather conditions. These are made of ultra-tough stretch polyurethane, including the UV-resistant additive that increases their lifespan. Their heavy-duty heat-treated aluminum or nylon buckles feature a slim profile for packing efficiency and extra durability.

These straps are the definitive way to secure your gear, so toss those cheesy bungee cords! Available in black or orange and in 20″ or 32″ sizes.

LIFESTYLE CYCLES DEAL OF THE WEEK–Stock# 12926
2008 FLSTN Softail Deluxe Cruiser with only 26,310 miles!
https://www.lifestylecycles.com/
Lifestyle Cycles can bring any bike back to life and one of the motorcycles we are most satisfied about bringing back to the floor is this 2008 FLSTN Softail Deluxe Cruiser, so do not miss the chance to purchase this beautiful work of art!
* Striking Red Orange Paintjob the just gleams in the sunlight!
* Very Clean and Polished!
* Polished 18-Inch Chrome Spoke Front and Rear Rims
* Chrome Front End
* 5-Inch Chrome Risers with a 2-Inch Pullback
* 4-Inch Chrome Handlebars
* Chrome Engine Guard
* Harley Two Seater
* Chrome Sampson Dual Fishtail Exhaust
* These tires are ready to rip! not cracks, no tread showing, absolutely well kept!
* There is still plenty of miles to gain on this motorcycle!
This bike is only $11,995.00
Plus license, $85.00 documentation fee, and local sales tax. NO HIDDEN FEES like some dealers. And we have no reconditioning or prep fees. This bike has passed Lifestyle Cycles rigorous 92-point safety/mechanical/structural inspection.This motorcycle has not been refurbished and does not come with any warranty expressed or implied! EXTENDED WARRANTIES are available!
Fill out an online application today. We have EZ FINANCING
Lifestyle Cycles is located at 1510 State College Blvd,Anaheim,CA,92806. Open 7 days a week.
NOT LOCAL? WE HAVE SHIPPING AVAILABLE! Call today (714) 490-0155.


THE SOUTH DAKOTA GUN NUT REPORT–
This week, two anti-gun measures, House Bill 1153 and House Bill 1174, were defeated in committee, stopping them from advancing this legislative session.
HB 1153 imposed a reporting requirement for lost or stolen firearms and provided penalties for failing to report the incident to law enforcement agencies within 48 hours. Failing to report within this time frame could result in a person being guilty of a Class 1 misdemeanor. Additionally, any individual or entity who sells guns would have been required to provide the purchaser with a copy of the Act and a notice stating that failure to report a lost or stolen firearm could result in criminal penalties.
HB 1174 established new storage requirements for firearms, potentially forcing gun owners to spend more money on items like gun safes. Failing to satisfy the bill’s stringent storage requirements could result in someone being charged with a Class 1 misdemeanor. The bill also imposed civil liabilities on gun owners if their firearms were used in a crime.
The NRA will continue to work with lawmakers, defending your Second Amendment rights by opposing bills like HB 1153 and HB 1174.
Continue to check your inbox and www.nraila.org for updates concerning your Second Amendment Rights and hunting heritage in South Dakota.


NEW FROM PAUGHCO—
The Paughco Team has developed a couple of systems to allow a brother or sister to run disc brakes on wheels without rotor flanges.

Custom ‘Narrow’ Star Hubs And 21-inch Front Wheel Assemblies
All new from Paughco with help from LA Speed Shop, these exclusive “Narrow” Star Hubs feature ¾-inch sealed roller bearings installed in a special narrower-than-stock hub for narrow fork applications. They have the old school look that custom builders want, but now have the ability to work on ¾-inch axles for most narrow Paughco Springers and narrow glide OEM forks.

Paughco also designed a simple billet disc rotor spacer that bolts on using stock brake drum lug nuts that permits the use of 2000-up 11.5-inch-diameter brake rotors and small custom calipers.

These Star Hubs are available separately in chrome or black paint as well as in 40-spoke 21 x 2.15-inch complete wheel assemblies with your choice of chrome or black finishes. A great finishing touch on any custom bike build.

236SH Chrome narrow Star Hub ONLY
236SHB Black narrow Star Hub ONLY
236-S40F Chrome 21″ x 2.15″ wheel assembly
236-S40FB Black 21″ x 2.15″ wheel assembly
236BRS Polished billet brake rotor spacer


QUICK, OPEN THE BANDIT’S CANTINA BAD JOKE LIBRARY—
An elderly man in Louisiana had owned a large farm for several years.
He had a large pond in the back. It was properly shaped for swimming, so he fixed it up nice with picnic tables, horseshoe courts, and some apple, and peach trees.
One evening the old farmer decided to go down to the pond, as he hadn’t been there for a while, and look it over.
He grabbed a five-gallon bucket to bring back some fruit.
As he neared the pond, he heard voices shouting and laughing with glee.
As he came closer, he saw it was a bunch of young women skinny-dipping in his pond
He made the women aware of his presence and they all went to the deep end.
One of the women shouted to him, “We’re not coming out until you leave!”
The old man frowned, “I didn’t come down here to watch you ladies swim naked or make you get out of the pond naked.”
Holding the bucket up he said, “I’m here to feed the alligator. . . ”
. . . Never under-estimate the ability of us old folks to think fast . . .
–EL Waggs


NEW CLIMATE ANTI-DOOM MOVIE--“Climate: The Movie” in The Netherlands on March 14
The Clintel Foundation together with the American producer Tom Nelson proudly presents the Dutch premiere of Climate: The Movie (The Cold Truth) on March 14 in the Figi Theatre in Zeist, The Netherlands. Tom Nelson will be present and answer questions after the screening.
Dutch people can book their tickets (12.50 euros) online in our Clintel Webshop . If you are living outside The Netherlands and want to attend this event please contact Clintel director Marcel Crok at marcel.crok@clintel.org.
In 2007, the film The Great Global Warming Swindle was released (available online for free here), made by British filmmaker Martin Durkin for Channel 4. At the time, the film was the counterpart to Al Gore’s An Inconvenient Truth.
Podcast host Tom Nelson interviewed Durkin about his film twice last year and encouraged him to make a sequel. That movie is now finished and is called Climate: The Movie (The Cold Truth).
Almost all of the scientists interviewed in the film are also signatories of Clintel’s World Climate Declaration. In that respect, the film is a real Clintel film.
We understand that for most of you it will be quite some travelling (and cost) to attend this premiere. It would be a great opportunity to meet each other though. Zeist is near the city of Utrecht and about one hour from Schiphol airport by either train or car. Please contact us if you need any help with practical things like accomodations and/or transport.
For practical questions, please contact our relations manager Evert Doornh of, evert.doornhof@clintel.org.
Looking forward to meet you in Zeist on March 14.
–Guus Berkhout, President of Clintel
Marcel Crok, Director of Clintel


NEW FROM LOWBROW–
If the VANS Waffle Sole Pattern is perfect for your feet…
Imagine the grip it will give your hands, man!
The line of Vans Grips by ODI has been expanded from normal rubber grips to also include Lock-On Grips.
What are lock-on grips, you say?
Lock-on grips have a billet aluminum, clutch-side clamp, ensuring 100% slip-free performance, guaranteed!
They also feature an in-molded throttle tube – no more swapping new grips onto your old throttle tube!
Available for cable throttle applications, as well as TBW (throttle by wire) as found on late model bikes.
Made In The U.S.A.


DICE BRINGS YOU THE BORN FREE BOOK– Born Free 10 Book
Let’s fire up your weekend with a mega sale on these.
270 photos from the legends Ben Zales & Shane Markland from the 2018 Born Free show.
PLUS, it’s HALF PRICE too.
$24.95


NEWS FROM THE FACTORY, HAS LIVE WIRE FAILED-–
The Q4 numbers are in and LiveWire CEO Karim Donnez claims the eBike OEM is on a charge. “LiveWire concluded 2023 with a strong Q4 performance, delivering on units and operating loss guidance for the full year.” However it seems as if a net loss of nearly $110 million could be subject to interpretation.
The Q4 numbers are in and LiveWire CEO Karim Donnez claims the eBike OEM is on a charge. “LiveWire concluded 2023 with a strong Q4 performance, delivering on units and operating loss guidance for the full year.” However it seems as if a net loss of nearly $110 million could be subject to interpretation.
“We saw the successful delivery to market of S2 Del Mar,” notes Donnez. “The first model built on our S2 platform continues to generate a positive response from the media, our retailers and our riders. We expect 2024 to be a year highlighted by product innovation, market expansion, and continued cost improvements.”
The company’s consolidated net loss was $109.6 million for the year ended 2023 compared to $78.9 million for the year ended 2022. The increase of $30.7 million was in line with expectations, driven by a provision for an obligation for excess inventory components, increased selling, administrative and engineering expense for product development costs relating to the S2 platform, delivery of Del Mar and additional costs to stand up the organization as a stand-alone public company.
The Company also had an increase of $9.1 million of non-operating mark-to-market expense resulting from the increase in the fair value of warrant liabilities year-over-year which was offset by an increase of $9.3 million in interest income. All of these expenses resulted in 660 units being sold around the world via a network of “retail partners” according to LiveWire’s SEC filings.


PRIVATE AUCTION COMING—
Led by a RevTech replica of Peter Fonda’s Easy Rider bike and a couple of original Denver Choppers customs, an eclectic array of vintage motorcycles, biker memorabilia, neon advertising signs and billboards will be auctioned off on February 29.
The motorcycle memorabilia is from the personal collection of French fashion designer Robin Chrétien, whose luxury denim brand Robin’s Jean is known as a cult classic.
–DEALER NEWS


[page break]

OPEN LETTER TO THE GOVERNOR OF WYOMING—
This is an open letter to Governor Mark Gordon.
You stated that Wyoming “will be the first carbon negative state.” You say you will lead the initiative to “decarbonize[e] the West”.
Sen. Steinmetz and other legislators challenged you to support your claims of this supposed looming CO2-driven “climate crisis” in a debate represented with competent scientists from both sides of the climate issue.
Initially you accepted, then you reneged. You told the Legislature that a debate is “unfruitful.”
Clearly, you believe that your own views about CO2 can unilaterally commit our state to vast industrial and economic change and should not be questioned. The undersigned legislators and citizens, confident that we share the views of a large majority of Wyoming’s residents, disagree vociferously with you.
You owe us defense of the science behind your conclusions – unless you expect us all to accept your declaration as diktat because, in your words, “one side of that [CO2] argument currently holds most of the levers of regulation”. This is nonsense to us. The BLM similarly “holds most of the levers of regulation” over its radical RMP land use proposal. Do you plan to surrender with a whimper on this matter also?
Governor, the plain fact is that you made the Harvard statement on your own, without statutory authority, without economic or budgetary analysis, without revealing the technology, without knowing its cost, availability or practicality. And worst of all, without consulting Wyoming’s citizens or the Legislature.
You even stated, without any evidence, that “your views are “well respected” in Wyoming. We could not differ more strongly!
After your declarations about ‘carbon negative’ and decarbonizing, we ask what limits you do you see to your authority? In your November 20 letter to the Legislature reneging on your earlier agreement to debate, you dismissively labeled people like us as ignorant dissenters seeking “venal political gain.” This is not how we conduct our affairs in Wyoming.
Contrary to the assertion in your letter, CO2 as a driver of a climate crisis is NOT a settled scientific matter. See the attachment to this letter with graphs provided by CO2 Coalition researchers.
The data show slightly increasing temperatures in Wyoming since 1895, due solely to a slight rise in nighttime temperatures. High temperatures are slightly decreasing.
The data show slightly increasing precipitation. During these years, CO2 in the atmosphere increased — to levels which are still low when looked at in geologic time.
Adding to atmospheric concentration of the essential plant food CO2 has raised crop yields and led to a general greening of our planet, including in Wyoming.
During these 128 years, there have been warmer and colder periods, drier and wetter periods. The trends are benign, not alarming. This is not the crisis you claim it to be. We call this ‘cycles in the weather’! We assert that Wyoming (and the world) would benefit from more atmospheric CO2, not less.
In your world, science flows from your policy opinions. In our world, policy flows from the science. Respectfully, you have the policy backward because you have the science backward.
You say your real energy policy is “all of the above”, implying that current fossil fuel industries can stay viable while you ‘decarbonize’. These are fundamentally contradictory positions.
They are no defense of our fossil fuels industries, instead they are an attack! We know as well as you that ‘carbon-negative’ requires either shutting down (or vastly limiting) our fossil fuel extraction industries or saddling them with the ruinous financial burden of deploying unproven new technology to isolate CO2.
It’s time for you to be honest with citizens of Wyoming.
–From Cowboy State Daily:
You can see the complete Letter to the Editor in Cowboy State Daily.


ANOTHER MAGNIFICENT QUOTE OF THE WEEK–
“How wonderful it is that nobody need wait a single moment before starting to improve the world.”
~ Anne Frank
From the Epoch times


TRIKE REVIEW OF THE WEEK–Polaris Slingshot vs. Morgan Super 3
Aaron Robinson and I took to the streets in and around Los Angeles to spend three days with two of the most polarizing vehicles on the road today: The Morgan Super 3 and the Polaris Slingshot.
The Morgan Super 3 has a longer history and more charm. This 2023 model traces its lineage back over a century to 1909 when Henry Fredrick Stanley Morgan first put a vehicle of his own design into production. The design was born from thrift. After learning that cyclecars were not taxed the same as motorcycles, his plan to construct a bike utilizing the 7-hp Peugeot twin-cylinder morphed into a plan to build a trike, with two wheels up front and a backbone frame to support the single rear wheel.
The latest version of the Morgan is the Super 3, and it changes the form a bit by tucking a Ford-sourced, 1.5-liter three-cylinder engine behind a small, semi-circle grille and under the low and sleek hood that establishes the very aeronautical shape of the body. A Mazda-sourced five-speed manual transmits the engine power to the rear wheel using a bevel gear and belt drive. The whole shape would be even more fuselage-like if it weren’t for the sideboards attached to each side behind the front wheels that are designed to hold luggage. Even your spare socks get the open-air experience.
It shakes a little at idle. The steering wheel is small and inputs all feel quick no matter how many times I tell myself “slow hands” while diving through corners in the Malibu canyons. Within the narrow body shape, the pedal box is cramped. There is no room for a dead pedal, leaving me to try and brace myself against the floor and the sideboard, which drives my left knee into the metal eyelets that create a kitschy bungee-cord storage system. Maybe I just need a pair of driving gloves to wedge in there. It would fit the aesthetic, but a seemingly better solution is for the car to gain an inch at nearly every measurable point. Interior, exterior, and suspension travel all would benefit from a little more space or travel.
Since the Morgan is registered as a motorcycle, helmet laws do apply depending on your jurisdiction, and while behind the wheel we often prefer the additional insulation a helmet provides. The small windshield bumps the current of air up (but not completely overtop) the occupants, and the wind buffeting we experience is just like what we feel in a motorcycle. The H-pattern five-speed hails from the NC-generation (2005–2015) Mazda Miata and makes freeway entry or just motoring about engaging and fun.
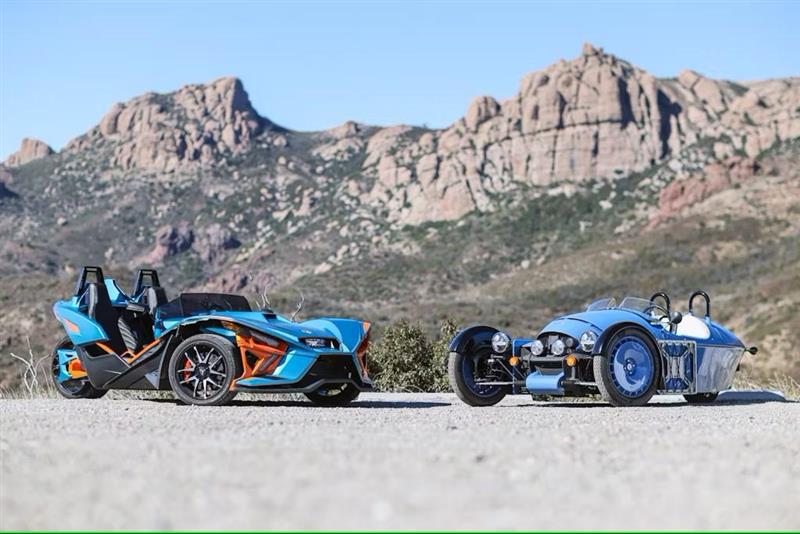
Here are the specs.
Specs: Morgan Super 3
Price: $53,937.98/$79,028 (Base/as tested)
Powertrain: 1.5-liter three-cylinder, five-speed manual transmission
Horsepower: 118 hp @ 6500 rpm
Torque: 110 lb-ft @ 4500 rpm
Layout: rear-wheel-drive, no-door, two-passenger roadster
0–60 mph: 7 seconds
Polaris Slingshot
The Slingshot has been sold since 2009 and has experienced few changes in those 14 years. The largest is the switch from a Chevrolet-sourced Ecotec inline-four to an in-house, Polaris-sourced Prostar 2.0-liter inline-four. This engine is part of what makes the Slingshot charming. It pulls strong from low rpm and continues to sweep smoothly up the tachometer to a 10,000-rpm redline. Said engine is mated to the same Miata transmission as you’d find in the Morgan.
the Slingshot is no laughing matter. Compared with the Morgan, it is relatively luxurious: There is power steering hidden under the clamshell, which was welcome when swapping from one to the other. The “interior” has simple vinyl bucket seats with good bolstering that feature both heating and cooling for the back and bottom. It’s clear that Polaris has powersports experience because the fit and finish is nice despite everything needing to be some form of plastic to handle the exposure that comes when you ditch a roof. Close your eyes while sitting in the driver’s seat of the Slingshot, and it all feels like a car. Open your eyes, though, and the sounds and smells of the world come through stronger than ever. Once out of traffic, the sounds and smells of the wild canyons permeate your senses and create an escape. The front wheels are out in the wind and so are you.
Specs: 2023 Polaris Slingshot R
Price: $33,999 ($34,299 in California)/$33,999 (Base/as tested)
Powertrain: 2-liter inline four-cylinder, five-speed manual transmission
Horsepower:203 hp @ 8250 rpm
Torque: 144 lb-ft @ 6500 rpm
Layout: rear-wheel-drive, no-door, two-passenger roadster
0–60 mph: 5.3 seconds
— Kyle Smith
See the whole story on Hagerty Media


SAWICKI NEWS—
The Full Throttle Custom Bike Show in Greensboro, NC was a huge success on all fronts! Met some great people at the booth, sold some merch, and even a few exhaust systems. Honestly, our biggest takeaway was the level of custom and vintage motorcycles that were a part of the attraction. Lincoln and his team really outdid themselves on this one.
Scenes from the 2024 Full Throttle Custom Bike Show
Next up on our road schedule is Mama Tried Show – NOT TO BE MISSED. This is one of the best of the best gathering of motorcycle people and the horses they road in on. Located at The Rave in Milwaukee, WI February 24th & 25th.
Amazing bikes from your favorite known and unknown builders bookended by Flat Out Friday flat track races and crazy parties all over the city. You really gotta be there to know.
We’ll be setup with a booth and Dumptruck will be on the mic as the emcee so come party! Check out scenes from last year’s Mama Tried Show & Flat Out Friday in the video below.
Plus, we’ll be at Daytona Bike Week spreading the love – stay tuned for where to find us!
–Sawicki exhaust


BOOK RECOMMENDATIONS OF THE WEEK—
I just finished a book by Bret Baier, “To Rescue the Constitution”. Good read. It dealt with the early challenges and the tensions between the north and south that existed before the country was born.
The book focused of George Washington’s part in guiding the new country in its infant stages of being. At the end of the book is the farewell message which was the precursor to the peaceful transfer of the office. Should be a must read for many of those seeking office today.
Also just finished the book by Willie G. “Born Free”. I saw you mention this book the other day on your site and saw it at the book store and grabbed it. Since it was a shitty weekend weather wise sat down and knocked it out in a day. It is an easy flowing style which maps his journey from college through art/design school and finally landing back home at the company his grandfather, his brothers and a friend started. A tour that spanned fifty years and counting. He is a very lucky guy who lived the cliché, “If you loved what you are doing as a job you don’t work a day in your life.” Terrible paraphrase but the idea is there.
It shows he is truly a humble man of exceptional talent and vision. He was certainly a driving force from designing many now classic bikes to being in the group the essentially saved the H-D brand from fading away and after tough times came out on top.
–Rhys


TEXAS WEATHER REPORT-–
How I spent my Saturday morning, when I’m the youngest of all 3 of us and I have a bad kicking knee. A ‘59 that doesn’t want to start, but the roller battery was dead, hanging out at MC Creations makes me appreciate that little button!
I did learn the individual I got the RP turn signals from are off his FXR. He sold it when he moved to Vermont and bought a KTM, which is a bit more adaptable to the Vermont weather.
Yesterday had the AC on, today and tomorrow highs in the mid 40s, with a possible light freeze tomorrow morning and then back to back to the eighties next week.
Looks like I have signals and the lower mount in route from Vermont and he was cool and gave me a package deal! And even sent a response saying the shipping was $20 less than eBay charged. He doesn’t have a lot of sales or a lot of anything on his page, so I was unsure about proceeding? Yet when I inquired about the edges of the signals, almost immediately sent me pictures! It’s difficult to tell if he rides and this was his fairing parted out or he is just a purveyor of parts?

Going up to MC to see if he has the shifter arm, thankfully the shaft splines are okay. Yet I’m back to the same dilemma on the RP as I was on the since 2019 now leaking Dyna, as there is no budget left! To “Properly” replace ”the transmission shaft bushing on the now removed inner primary. The pulley has to be removed and if you’re that far in, then you might as well replace the transmission seal and put a chain conversion on it! Because you know that primary seal, isn’t going to do its job, even new, now that you’ve disturbed it!
The FXRD King sent this below, so it at least it increases the odds of finding the gauges for my friends 86-92 T-fairing.
***In 1986 they made just over 1000 FXRD’s in three colors, 278 in candy burgundy slate gray, 318 in blackberry metallic & 396 candy blue slate gray.
The fairing and lowers however are the same from 1986-1992 when they discontinued the FXRT. 1986 was the redesign of the fairing and the introduction of the one year only FXRD. The motor company used that fairing on the FXRT as well from 86-92
The FXRT and FXRP fairing are the same from 83-85 only the FXRP continued to use that fairing after 86.
–RFR-FXR Life


ANOTHER QUOTE OF THE DAY–
“Too many people spend money they earned..to buy things they don’t want..to impress people that they don’t like.”
~ Will Rogers


CLIMATE TRIAL–How Things Stand
Mann vs Steyn: The Judgment
February 12, 2024
As many of you know, late on Thursday a Washington, DC jury found that
a) plaintiff Michael E Mann had suffered no actual damages from Steyn’s National Review post; but
b) ordered defendant Steyn to pay him one million dollars anyway.
Late on Friday, the otherwise lethargic District of Columbia Superior Court entered the jury’s verdict in final judgment.
What happens now? Well, in the next few weeks, there will be certain “renewed” motions from defendants that one is obliged to do, although they are highly unlikely to find favor with Judge Irving. After that, the case will be appealed by all parties – loser Steyn because he wants the decision overturned, and winner Mann because he wants the original corporate defendants, National Review and the Competitive Enterprise Institute, put back in the dock. (Irving, the “fifth trial judge”, dismissed them from the case a couple of years back.)
The DC Court of Appeals, being the way it is, is likely to accede to Mann’s wishes, but not Steyn’s. How long that will take is hard to say, but, given the length of the last merely “interlocutory” appeal, it’s unlikely to be quick. At that point, Mark will go to the US Supreme Court. A minimum of four out of nine judges is required to grant a writ of certiorari and hear the case. As Amy K Mitchell noted on Friday, one of them, Samuel Alito, grasped the implications of Mann vs Steyn half-a-decade back:
The petition in this case presents questions that go to the very heart of the constitutional guarantee of freedom of speech and freedom of the press: the protection afforded to journalists and others who use harsh language in criticizing opposing advocacy on one of the most important public issues of the day. If the Court is serious about protecting freedom of expression, we should grant review.
–Mark Steyn


S&S NEWS — Dyna Qualifier 2-into-1 Exhaust
The H-D Dyna platform has a cult-like following with people constantly working to push more performance out of their bikes. S&S has thrown gasoline on their fire with the launch of this ‘King of the Baggers’ race-inspired Qualifier 2-1 exhaust.
Available in brushed stainless and Guardian Black finishes, these exhausts feature full heat shields, equal-length head pipes and a stepped header to “make power and rattle cages. Like all of our exhausts, these are designed and made in the USA.”
If you are looking for the perfect ‘dance-partner’ for this Qualifier 2-into-1, S&S recommends its Air Stinger – “take the existing high flow Stealth air cleaner and replace the air smoothing Stinger with a similarly shaped filter element. The increased filter surface area equates to a +55% gain in airflow over a factory filter in an M-8.
S&S CYCLE INC.
www.sscycle.com


PRO STOCK Motorcycle’s WAR Introducing Reddy Parts to NHRA—
NHRA Pro Stock Motorcycle’s White Alligator Racing (WAR) is making big moves, as the popular team recently changed ownership. Today the team announces Alabama-based Reddy Parts as its first ever primary partner.
“Reddy Parts is a resourceful company whose product line is perfect for the NHRA drag racing community,” said WAR owner/tuner Tim Kulungian. “They provide rubber tracks, teeth, and undercarriage wear parts for construction and mining vehicles, so they’re the perfect match for the hard working, enterprising NHRA audience.”
Alabama-based Reddy Parts sources and sells the best rubber tracks, steel undercarriage components and high quality hardware for buckets and blades from all around the world inside the USA.

“We couldn’t be more excited to represent Reddy Parts or more proud that they chose us to do the job,” added Kulungian.
Reddy Parts continues a focus that WAR has established, representing industrial partners that are tailor-made for NHRA. While Reddy Parts will be the primary sponsor of the team, WAR’s bikes will continue to feature their own individual sponsors, including the Trick-Tools Suzuki ridden by 2023 NHRA Rookie of the Year Chase Van Sant.
“NHRA racers, crew, and fans are a perfect sampling of our core customers,” said Chase’s father Bruce Van Sant, the founder and owner of Trick-Tools. One small example of the benefits of NHRA exposure occurred when recently retired Funny Car driver Tim Wilkerson came to the Trick-Tools booth at PRI this year looking for tools for his team.
The WAR bike of Chris Bostick is still available for sponsor representation, so join the team!
White Alligator Racing is now known as WAR powered by TK Motorsports.
Find out more about Reddy Parts at https://www.reddyparts.org/
Keep up with WAR at https://www.facebook.com/WhiteAlligatorRacing
–Tim Hailey


[page break]

QUICK, New Bikernet Reader Comment!—
THERE’S HOPE BIKERNET WEEKLY NEWS for February 15th, 2024–click here to read.
I have been carrying a S&W #642 for five years now and have been happy with it. The grip is a little small. I have kept it on mine as it fits nicely in a jacket pocket. Have you had a chance to shoot it yet?
— Paul J Reeves
Henderson, NV


CALIFA ANTI-HELMET RELIEF BILL—
California bill would offer motorcyclists religious exemptions from wearing helmets
Turban-wearing Sikh motorcyclists would be free to ride helmet-free in California if Assembly Bill 2392, proposed by Fresno Assembly member Esmeralda Soria, becomes law this year.
California’s helmet law for motorcyclists was passed in the 1990s as a public safety issue, but for former Fresno City Councilmember Soria the measure violates the right to religious freedom for Sikhs.
In advocating the measure, Soria said: “Many Sikhs are motorcycle enthusiasts and they deserve to continue their privilege to ride while at the same time, respecting their freedom of religion in a way that supports safety.”
As Soria noted, California is home to half of the Sikhs in the United States — an estimated quarter million people. Sikhism is a monotheistic faith with origins in 15th-century India.
The right of Sikhs to wear turbans is gaining a growing recognition in the United States, with the Marine Corps recently granting members of the religion to do so in boot camp.
“AB 2392 ensures we safeguard our Sikh community’s right to practice their religious expression freely, while also protecting their and other motorcyclists’ safety on California’s roads” Soria said.
–By Jim Guy
Sacramento Bee


BANDIT QUOTE OF THE WEEK—
All Americans are suffering disproportionately from Climate Alarmism and Doomsday predictions over free countries that believe we’re living in the best of times not the worst.
–Bandit
Janitor
Bandit’s Cantina


YOU CAN ADVERTISE IN THIS ANNUAL RALLY PUBLICATION–
We are excited to offer you the opportunity to promote your business in the 2024 – 2025 Official Sturgis Publication, a project presented by the Sturgis Motorcycle Museum & Hall of Fame. and the city of Sturgis.
This annual publication provides information to people visiting our area all year long by featuring stories, photographs, and advertisements from local businesses. Beginning in May, we will distribute 20,000 complimentary copies to 100’s of locations across South Dakota.
Your ad will not only promote your business but also support the Sturgis Motorcycle Museum & Hall of Fame, a 501(c)3 non-profit and the City of Sturgis.
To showcase your business, please complete the information requested via the attached link or email us at Magazine@sturgismuseum.com and request your spot. The deadline is April 1, 2024.
https://form.jotform.com/240356732803151
To see the previous magazines https://sturgismuseum.com/pages/magazine
Rate sheet attached.
We would love to have your business highlighted this year. If you have any questions, please contact us using the information provided below.
Warm regards,
–Heidi Haro / Donna Baird
Sturgis Motorcycle Museum & Hall of Fame, a 501(c)3 non-profit
Magazine@sturgismuseum.com
605-347-2001/ 999 Main Street/ Sturgis Sd, 57785


GREASY KULTURE– It’s never cost less to complete your collection
Nudge! Our back issue bundles now let you CHOOSE the copies of Greasy Kulture Magazine you want to buy, so you can make big savings on the back issues you’re missing.
Get three brand new digest (A5 size) back issues of your choice (any available issues 1-30) for just £5! Shop the Digest Issue Bundle.
And three bigger, more recent back issues (any available issues 31-78) for just £10! Shop the Big Issue Bundle.
Remember to fill out the issues you want in the customer notes box when you check out of our webstore! Or we’ll send you a random selection.
You can see which back issues are available and which are sold out, HERE.


WE ARE WORKING ON A STURGIS MOTORCYCLE MUSEUM AD—
And I picked the following images to be considered. We will make a decision, so give me your suggestions, quick.
(I think this one is my favorite, above)
Wall of Death rider Rhett Rotten racing an old bike on the Sons of Speed banked oval track at the Full Throttle Saloon during the Sturgis Black Hills Motorcycle Rally. Sturgis, SD, USA. Tuesday, August 6, 2019. Photography 2019 Michael Lichter.
Filename
190806-MLSD-184908B.jpg

OceanBlu is a handmade Speedway race bike built by Samuele Reali of Abnormal Cycles, Milan, Italy was built as a Tribute to Franz Langher. The one speed NSU SSR 500 CC Langher Monocilindrico is a powerful yet simple bike with no brakes, lights or electronics and is made to only go left! What’s the Skinny? 2019 exhibition artwork from the Motorcycles as Art series at the Sturgis Buffalo Chip. Sturgis, SD, USA. Monday, July 29, 2019. Photography ©2019 Michael Lichter.
Filename
190729-Reali-Speedway-191152.jpg

Carey Maynell racing his Harley-Davidson in the Sons of Speed vintage racing at the Full Throttle Saloon during the 78th annual Sturgis Motorcycle Rally. Sturgis, SD. USA. Thursday August 9, 2018. Photography ©2018 Michael Lichter.
Filename
180809-MLSD-161545.jpg

Passion Built exhibition artwork in the Buffalo Chip’s Motorcycles as Art gallery during the 78th annual Sturgis Motorcycle Rally. Sturgis, SD. USA. Friday August 10, 2018. Photography ©2018 Michael Lichter.
Filename
50-180810-MLSD-134409.jpg

OceanBlu is a handmade Speedway race bike built by Samuele Reali of Abnormal Cycles, Milan, Italy was built as a Tribute to Franz Langher. The one speed NSU SSR 500 CC Langher Monocilindrico is a powerful yet simple bike with no brakes, lights or electronics and is made to only go left! What’s the Skinny? 2019 exhibition artwork from the Motorcycles as Art series at the Sturgis Buffalo Chip. Sturgis, SD, USA. Monday, July 29, 2019. Photography ©2019 Michael Lichter.
Filename
190729-Reali-Speedway-191927.jpg
–Bandit


SPEAKING OF THE MUSEUM
Sturgis Motorcycle Museum Announces 2024 Inductees to Hall of Fame
The Sturgis Motorcycle Museum and Hall of Fame today announced the museum’s Hall of Fame Class of 2024. This distinguished lineup is composed of individuals with a diverse range of accomplishments … from Hollywood fame, to racing championships, to business success. Honorees this year have supported veterans and the elderly, advocated for motorcyclists’ rights, and have shown artistic talent on canvas as well as on two wheels.
“The Hall of Fame Class of 2024 is notable for its deep roots in the culture of motorcycling,” said Museum Board President Craig Bailey. “Each one of the honorees has uniquely touched our sport and the riding community. We couldn’t be happier to recognize these truly special individuals.”
The class of 2024 includes both Hall of Fame inductees and three special award winners.

James Gregory – James an honored Vietnam Veteran served our country in the Marines for over 20 years before creating and leading the first Run For The Wall in 1989. This annual cross-country run and its arrival in Washington DC on Memorial Day Weekend are the country’s most visible support for POW’s and those Missing in Action.

Roger Goldammer – Roger gained fame as the three-time winner of both the AMD World Championship of Custom Bike Building and the Las Vegas Artistry in Iron Show. A post-high school apprenticeship, time studying at the Motorcycle Mechanics Institute and tutoring by a Harley performance guru helped him hone his craft. A fellow bike builder introduced him to land speed racing, which influenced his bike building style and has driven his passion for performance at the salt flats.

Ed Kerr – Ed discovered early in life that he had a passion for motorcycling and a talent for building award winning custom motorcycles. Many of his two-wheeled creations won shows and were featured on the covers of popular motorcycle magazines. Ed is a founding member of Hamsters USA and is proud of the organization’s numerous charity events, including his efforts to raise nearly $100,000 for Meals on Wheels.

Christine LePera and Bob LePera Jr. – This sibling duo carries on the legacy of success at motorcycle accessory manufacturer LePera Industries, which was started by their father in 1972. Bob Jr., the design visionary, and Christine, the marketing and business development guru, keep their company at the top of the industry and both are proud of their company’s support for all types of riders.

David Uhl – David started his career as a commercial illustrator, producing hundreds of best-selling apparel designs for a Harley-Davidson licensee. In 1998, he began creating fine art based on historic motorcycle imagery and became the first licensed oil painter for Harley-Davidson. His portfolio includes several iconic paintings, including a commissioned work presented to the Pope Francis at Harley-Davidson’s 110th Anniversary celebration in Rome.

This year’s Lifetime Achievement Award will be presented to Pete Hill. Hill, who owns a shop in South Carolina, has mastered the creation of race-winning performance motorcycle engines and serves customers from around the globe. He is also an accomplished motorcycle drag racer earning numerous wins and championships, including nine Top Fuel wins in Sturgis.

The 2024 Freedom Fighter Award goes to Jiggs Cressy for his tireless leadership of ABATE of South Dakota, where he served as State Coordinator for fourteen years. Cressy has advocated for South Dakota’s riders in the State Capital countless times and has made eight trips to do the same in Washington as well. Cressy has also received the John “Farmer” Eggers Award, the most prized honor from the Motorcycle Riders Foundation, in 2018.

James Sherwin “Bud” Ekins is the 2024 honoree for the Kickstands Down Award. Bud was widely regarded as one of the film industry’s most accomplished stuntmen and was famous for his work in films like “The Great Escape” and “Bullitt.” Before venturing into the film industry, Ekins had success in off-road racing, participating in notable events including the International Six Day Trial, the Mint 400 and the Baja 500. (Kickstand’s Down is a posthumous award presented to an individual worthy of additional recognition.)
The induction breakfast ceremony will be held on Wednesday, August 7, 2024, at The Lodge at Deadwood.
ABOUT THE STURGIS MOTORCYCLE MUSEUM AND HALL OF FAME
Founded in 2001, the non-profit Sturgis Motorcycle Museum and Hall of Fame is located at the heart of the world’s largest motorcycle event, the annual Sturgis Rally. It is a top year-round tourist destination in South Dakota and is considered a “must see” experience for visiting riders. The museum’s collection features over 80 vintage and custom motorcycles, which is one of the world’s largest permanent collections of custom and modified motorcycles. The exhibits also feature an extensive collection of art, including paintings, illustrations, and sculptures. The Museum’s Hall of Fame, which precedes the opening of the museum, includes nearly 280 noted individuals from the motorcycle industry and motorcycle culture around the world. The annual Hall of Fame induction ceremony takes place during the Sturgis Rally each August.
Tickets sales open March 1, 2024. For corporate tables, please call Heidi or Penny at 605-347-2001.
— by Steve Piehl, Authentic CX, LLC,


ONE MORE QUOTE OF THE WEEK–
“Whenever you are asked if you can do a job, tell ’em, “Certainly, I can!” Then get busy and find out how to do it.”
Epoch Times


SOUTH DAKOTA GUN NUT REPORT– Enhanced Conceal Carry Bill Passed in the Senate– Yesterday, February 21st, Senate Bill 203 was passed in the Senate with a vote of 31-3 and will move to the House. The bill allows gun owners with enhanced concealed carry permits and with written permission by the school’s principle, to conceal carry on public school grounds.
Please contact your representative and ask them to SUPPORT SB 203 by using the Take Action button below.
Today, February 21st, Senate Bill 203 was passed in the Senate with a vote of 31-3 and will move to the House. The bill allows gun owners with enhanced concealed carry permits and with written permission by the school’s principle, to conceal carry on public school grounds. Please contact your representative and ask them to SUPPORT SB 203 by using the Take Action button below.
SB 203 amends current law, by allowing an individual with an enhanced concealed carry permit and written permission from a school principal or individual with control of supervision of the grounds, to carry at a public primary or secondary schools. This bill recognizes the ongoing effort to protect our most vulnerable by securing our schools.
Additionally, House Bill 1228 is scheduled for a hearing tomorrow morning at 10 a.m. in the Senate Agriculture and Natural Resources Committee. HB 1228 will allow sportsmen and women to wear fluorescent pink as an alternative to hunter orange, providing additional choices in the field while maintaining the spirit of the law. Please contact your senator and ask them to SUPPORT HB 1228 by using the Take Action button below.
Stay tuned to your inbox and the NRA-ILA website for updates concerning your Second Amendment Rights and hunting heritage in South Dakota.


FLORIDA VULNERABLE ROAD USERS ACT BEING CONSIDERED—
General Bill by Judiciary Committee and Criminal Justice Subcommittee and Redondo and Smith (CO-SPONSORS) Lopez, V.
Violations Against Vulnerable Road Users: Requires person who commits infraction that causes serious bodily injury to, or causes death of, vulnerable road user to pay specified civil penalty; requires person’s driver license to be suspended for specified period; requires person to attend specified driver improvement course.
Rogue is watching this bill. Motorcyclists are considered vulnerable road user and could be impacted. It also could lead to additional regulations against bikers to make them less vulnerable. Be careful.
–Bandit


ROGUE’S THOUGHTS–
I’m not really in favor of it, as I personally believe that it can open a can of worms that could lead to making motorcyclist less vulnerable if they wore all the gear all the time.
I have not contacted my legislators to ask they vote for it, But I have not spoken out against it either.
This is an ABATE of Florida thing and I do believe a majority of people involved voted to go this way. This was already well in the works before I started attending meetings again.
I found out about it because I am signed up with the Florida Legislature to inform me of any bills pertaining to motorcycles and some other items. Of course, now that ABATE has put me back on their mailing list, I am getting daily reports and requests to contact my legislators.
I have already seen court cases where the lawyers are trying to use the motorcyclist was not wearing a helmet so he or she did not do everything they could to prevent the seriousness of the injury. Thus, asking for a lower settlement. I should note this even happened in cases where there was no head injury.
The lawyers are using the if you can’t baffle them with your brilliance baffle them with your bullshit defense and get away from Their Client Caused The Collision.
–Rogue


LET’S ROCK, IT’S BUSY OUT THERE—
It’s dinner with Ron, a contractor tonight at Scott Jacob’s Brewhouse in Deadwood. Then tomorrow it’s back to the museum to work with the staff on the magazine.

I want to congratulate Randy Simpson, formerly of Milwaukee Iron and his wife Ronda, their son just got his Phd. See, even grubby bikers can have cool kids.

Randy celebrated and bought this busted wishbone Panhead roller. “I’ve got to dust off the old frame table to straighten this one,” Randy said.


My brother in Long Beach sent me some of my dad’s stuff including this Seabee knife he used in Guadalcanal during WWII.

My grandson couldn’t resist and bought this rebuilt by Ryan McQuiston, Panhead engine this week. He had to show it off.

Between Museum projects, including a major project with Grease & Gears TV, I’m working on the Knucklehead. I fought the exhaust system in place and the oil tank with Sturgis leather straps. I’m a little concerned about vibration with this bike.

The Chubby Chipmunk is out of town, but she managed to ship some chocolate truffles to my son, in Texas, for his Birthday.

Between non-stop projects, I ran over to Panhead John’s to help him install his engine. Lookin’ good.

Let’s stay proud, active and always riding free.
–Bandit


Funky Panhead Part 4, New Frontend Installed
By Robin Technologies |

I spent a lot of money and time rebuilding an old 41mm wide glide for my 1969 Panhead build. It was one of those crazy builds, fulla twists and turns, but the glide haunted me.

It wasn’t long enough. I would have liked it to be 2-over for a better stance for a rider 6’5” tall. I squeaked another inch out of it with spacers over the springs. Of course, it rode like shit. I adjusted it, but it still rode badly. Maybe I’m getting old, but I don’t like that excuse. This bastard rode hard even with the wide, soft, cop solo seat.

Then the glide actually broke down. I lost the mechanical brake springs. They broke on the way to a Seal Beach car show. I limped home never daring to use the front brake for fear it would lock up and send me flying over the bars. I wanted to run a vintage mechanical brake set-up for the old look. In the past I was always able to make mechanical brakes work fine.
Finally, I started to notice how the lower aluminum leg jerked on the brake side. It needed new bushings. I reached out to Larry Settle, of Settle Motorcycle Repair in Harbor City. He knew of an old guy who rebuilt lower legs, but he might have retired. That was going to be my next move, tear the front end apart and ship it out, to have the lower legs rebuilt. Plus, they leaked. That also bothered me.

Then I got a call from the masterminds at Paughco. They recently developed a new springer configuration, because so many overseas manufactures stole their classic, flat side design. They came up with a solid, round-leg springer sort of in keeping with the early springers, before the VL or the big twin taper-leg springers. I love the Paughco taper-leg springers. They are classic. This one is distinctive in its simplicity.

There are several benefits of Pauchco’s 50-years of building springers. They are contained in the tree construction, the bends of the legs and the rockers. These front ends are meant to be ridden long and hard.

They also make a stock length front end and a 3-over, which I went for, when I made the deal to trade my glide for a new Early-styled round-leg Paughco springer. We made the clandestine swap at the recent David Mann Chopperfest, behind one of the old WWII buildings, so Dave Hansen wouldn’t see us and tax us for making deals without his approval.

I also attacked the rear of the bike with an old buddy seat, spring system to give the rear some suspension. It was a leap of faith that worked out like crazy, but I will get to that.

I requested the front end without chrome or powder, because of my patina effort. I painted the bare parts with a light coat of Rust-oleum primer and then a coat or two of Rust-oleum satin black. No matter how many times I’ve looked at that word in my long lifetime, I can never remember how to spell Rust-oleum.
Then I lashed the front end with some bicycle chain and smoothed and dinged the edges of the top triple tree. Paughco designed a new top tree to allow their risers, to be installed in the rear legs with1/2-fine thread studs or bolt common risers to the 3.5-inch center-to- center glide-like holes. I decided to go with the rear legs and cut the heads off ½-inch fine stainless bolts and made studs out of them.
I screwed 1-inch of the studs into the rear legs and had an inch for the Paughco classic brass risers. I used stud-green Loctite in the legs and ran a nut down to hold them firmly into place overnight. I removed the nut when I installed the brass risers.


I installed the bottom bearing over the small dust shield against the bottom tree. I found a piece of thick 1/8-inch wall, 1.25 O.D. tubing and used it as a tool to drive the Timken bearing over the raised bearing surface on the solid neck stem. I also fed as much grease into the bearing as possible. For some odd reason, I had to clearance the dust shields to make them fit over the solid Paughco stem.

Back to the grease. I’m still using a large tin can of military bearing grease. I’ve had it since the ‘60s. About five years ago, someone gave me a new full can. I’ll bet I never get to it in my lifetime.

I was recently given some cool CMD Extreme Pressure lube tubes. We used it on Frankie’s FXR neck bearings, but in the heat, it started to drip and run down the leg of the front end, annoying. The old Navy bearing grease is the shit.


Okay, so I slipped the neck shaft with the lower greased bearing into place against the greased race in the neck cup and spun on the crown nut against the top bearing and upper dust shield, after it was clearance. Here’s another benefit of classic Paughco construction. A lot of frontend manufacturers dodge using a threaded nut between the top tree and the neck bearing.

It comes in so handy while installing a front end. It holds it in place to allow you to position the top tree comfortably. It also allows you to adjust the bearing tension. Then you can install the top tree and the top nut and tightened the hell out of it without messing with your bearing adjustment.

The Paughco front end comes with the rockers mounted and in place. No adjustment necessary. They are lubed and ready to rock.

I removed the solid brass, 4-inch Paughco dogbone risers from my old stainless-steel bars and was careful to install them on the stainless studs watching for the studs to turn or not. I tightened them down and adjusted the rubber mounted dogbone to align with the bars. Then I installed the bars once more.

I grabbed one of James old Dyna front wheels and used it to mockup the front end. Steve Massicote from Paughco recommended a left ‘88- ‘99 single-piston H-D Softail caliper on an 11.5-inch rotor with a 2-inch center hole to fit a pre-’99 Harley hub. He shipped a solid aluminum hub to Black Bike wheels.

Black Bike Wheels has helped me out a couple of times. I remember taking a dinged steel rim spoked, 21-inch wheel to them. The technician popped the unit in a vice, smacked it with a soft hammer and it was golden. They also built the 23-inch wheels on my flat-sided tank, factory racer. Amazing wheels.
They expanded and moved to Van Nuys, California. They now manufacture any-sized spoked wheels for any make or model motorcycle. They build their own hubs, rims, and spokes. They can lace and true anything and powder, polish or chrome any of their products.

In this case, we are going with a used, dull, aluminum, 19-inch rim and unpolished stainless rim, for the patina look. So, there’s some old and some new to this beast. I will add an old pre-’99 factory rotor to a Paughco aluminum hub, which we might black out, or Paughco was going to send me a hub cap, I could flat black and add a little rust.
We’re getting close, but I had to take it out on the road and see how it handled with the sprung seat. I took the seat bar out, because it was going to smack the fender. I added a straight piece of steel to the center and it gave me an additional 2 inches of travel. I’m still going to do something to protect the fender.

Okay, so this puppy hasn’t run in a couple of months but fired right to life. I maneuvered around the shop and into the street for a test run. What an amazing difference. The turning radius was way better and it blasted around the rough streets without an issue. What an amazing difference in ride and handling.

Don’t get me wrong. You can’t beat a glide for top end runs and the twisties, but for a classic cruiser, this puppy now hit the spot.
Hang on for the wheel and disc brake install.
–Bandit
Funky Panhead Sources:
S&S
Biker’s Choice
STD
www.STD.com
JIMS Machine
Lowbrow
Mallory
www.mallory.com
Accurate Engineering
www.accuratengineering.com
Bennett’s Performance
Paughco
Departure Bike Works
www.departurebikeworks.com
Spectro Oils
Chopper Dave
www.chopperdave.com
Black Bike Wheels
www.blackbikewheels.com
Funky Panhead Part 3: The Feature
By Robin Technologies |
My grandson wrecked his Dyna. He thinks he went down on a slippery west side LA boulevard, but the bike looks like he was rear-ended, which launched his girlfriend. She was seriously damaged, but survived. He got scuffed and walked away.
He needed a place and some guidance with his ’05 Dyna. He could have sold it and moved on, but he was so impressed with the performance after Bennett’s Performance tuned it and added some S&S TC cams, he didn’t want to let it go.
I called Dr. John about his frame and spoke to Eric Bennett. Dr. John was able to straighten the frame without a complete teardown. Amazing.
Next, we jammed to the Long Beach Swap Meet to find Dyna parts and didn’t find much. We bought a later model touring swingarm with a 1-inch axle, because I planned to upgrade his suspension wherever possible, but the touring swingarm wasn’t right. Larry Settles from Settles Customs in Harbor City fixed us up with a solid late model Dyna swingarm.

Anyway, we rambled throughout the packed aisles looking for parts and I came across a large flatbed truck sporting a line of new, bare rigid frames. Great looking frames and I inquired. Kraft Tech only sells to distributors like Biker’s Choice, but they bring a few frames to the swap meet once in awhile and the price was right.
The Kraft Tech frames were obviously set up for Evo engines and 5-speed transmissions, but looked almost stock. I couldn’t resist. We carried that frame up and down aisles until we finally headed toward the exit with no Dyna parts and a set of stock Softail tanks, perfect for the frame.
As I meandered toward the exit, my cell phone rang. It was Brad Olsen, an old friend who recently scored an Oregon shop’s inventory and stashed it in a warehouse near a river leading to the sea.
“Yo,” Brad said. “I need to recoup some of my investment. Do you need a Panhead engine?”
I about shit my pants. I had just scored a sharp rigid frame, a set of fatbobs, and I knew I had a 5-speed Softail transmission at the Bikernet Headquarters. What the fuck? Hell yes, I needed a Panhead engine!
As it turned out, the engine was seriously incomplete, but with a good twist. The ’69, last kidney, Shovelhead right case was mated to a ’79 left case, which would allow me to run an alternator and Evo primaries. I hauled ass home from the swap meet and started to dig through drawers, cabinets, and lockers looking for parts.
I created a pile next to my lathe, but when I stood up, I wondered why the hell I needed another motorcycle. That wasn’t the mystic point at all. Fuck it, I was inspired and on a roll.
Here’s a code that works for us bikers. I tell young guys frequently to start to create equity in their lives for the future. You can buy and turn houses. You can restore a car, write a book (not a good idea), paint a painting, etc. But if you’re a biker, building bikes is perfect. No, they are not always worth a bundle, but they are like putting money in the bank. Think about that the next time the ol’ lady bitches at you for building another motorcycle. What’s she doing to build equity for your future?
Even before the swap meet kicked me into gear, I was moved by Go and Tasumi at Brat Style in Long Beach. Michael Lichter introduced me to them, just down the street on the evil industrial west side of Long Beach. They build the coolest shit on the planet with a major twist. Everything is vintage, seriously vintage. Go can build a totally custom tank and install it on a ’39 Indian Scout frame, but by the time he’s done, you would bet it’s a stock part and 70 years old.

His amazing painter adds the final twist, Deny 528. Maybe I should keep this a secret. But fuck it, it will slip out anyway. Deny studied and practiced to create original paint patinas for a year to prefect his process. He’s got it nailed.
I was gone. I couldn’t think of anything else but this Panhead project. I dug around and Mike from Pacific Coast Cycles, in Long Beach, came up with an oil tank. He’s a major fan of Kraft Tech frames.
“Everything just slips together,” Mike said. And he’s also a major fan of Paughco springers. They may be more expensive than overseas copies, but it’s your life you’re riding on. He has about a dozen rollers in his one-man shop. If you’re after a cool project, give him a call.
Daily, I made lists of needed parts and started to make calls. I couldn’t stop, and then my grandson flew to Deadwood to be a part of Scott Jacob’s Artist Retreat. Suddenly he wanted to go to Sturgis. I came up with a plan. I rode to Sturgis and back last year, so this year, we could alternate the plan. How about taking two old bobbers to Sturgis for the kicks?
The Sturgis 2017 plan formulated. Suddenly, I had a deadline. Oh, what the hell? I was inspired by many factors, but I still needed a few pieces to make it happen.
The engine was missing a cam and most of the cam case elements. It needed a carb, intake, distributor, oil pump and I started digging around. I had a set of rebuilt Panheads, but they were early model and this puppy would need outside oilers. I started to ask around.
Berry Wardlaw from Accurate Engineering offered to help, when I couldn’t find any Panheads through STD. Billy McCahill had issues with his foundry and didn’t have castings. Berry checked with a couple of distributors and no one had any in stock.
Berry searched forums and then found a set on Ebay. I immediately ordered them from Wilson Cycles, Inc. in Roswell, GA, but when they arrived, I encountered a problem. One was perfect with valves, an O-ring intake manifold flange and the outside oiler boss. Unfortunately, the other didn’t have an outside oiler fitting. It was an early model.
We hit the swap meet again and found a cop solo seat from a major seat guy, who had a pristine stock seat. I had an old hinged fender from an early swingarm Pan. I knocked out the pin and installed the bobbed fender with the help of Lowbrow’s new universal fender bracket. It’s strong as a bull and fit like a champ. My funky MIG weld didn’t hold a candle to the precision Kraft Tech TIG welds on the frame. Sorta embarrassing…
I dug out a Softail 5-speed transmission, and tried to figure out the plate to mount it. I called Chris at Kraft Tech and quizzed him. I have a Paughco offset 5-speed plate but needed a stock ’86-’99 Softail tranny plate for a 5-speed. There are so many configurations and Paughco has them all.
I want to write a tech about ordering frames and all the configurations available. It’s not just about rake and trail anymore or wide tires, but left and right side drives, which transmission, which set of gas tanks and the type of seat being used. The list goes on. Hopefully, if the Paughco crew can help out, and with Biker’s Choice, we can make it happen.
I found an old 41mm wide glide front end at the swap meet. Ultimately, I wasn’t happy with it, but we made it work (I hope) with an old drum front brake. I found some neck bearings and replaced the junk one. I tore the whole front end apart and cleaned it. The springs didn’t match, but I worked it out with Progressive springs. The Paughco axle did the trick to allow the brake and star hub to be installed. A local shop laced the star hub to an old 18-inch used aluminum rim.
I spoke to the guys at Spectro about which fork oil to run in the legs. Joe Russo recommended Fork Oil Type E. 20 SAE, since it’s an one-up light bobber. “Heavy two-up bikes would use the 40 SAE,” said Joe.
The brothers at Paughco are the best and have the best. After digging through my shit, I needed just a handful of vintage parts and pieces from the Paughco factory, like the correct front axle for an early glide. I made the mount for an old spotlight out of a bracket I built for a Bonneville bike but never used.

I needed the right side rear brake lever, mounting plate, return spring and plunger, but I had three Wagner master cylinders. This Kraft Tech frame was set up for a Softail-style rear disc brake. Years ago, we installed PM brakes on Dale Gorman’s Softail and I ended up with his stock solid aluminum Fatboy rear wheel and brakes. They would do the trick.

I had most of the pieces for the left side forward controls, except for one, and Paughco had it, the shift linkage arm. And I didn’t plan to run a dash, but I needed something for electrics, a switch, whatever. I ordered a Paughco universal tin toolbox and then discovered something wild at an antique store—a K-model motorcycle trophy a heavy casting.

The notion was to build a simple, easy-to-handle bobbed Panhead. But for some odd reason, finding an early automatic-advance distributor turned out to be a problem. I didn’t want any extra bells and whistles on this bike, no advance and retard mechanism, jockey shift, etc. Then I found a Mallory electronic ignition system in a locker from our ’06 Bonneville effort. I spoke to Berry Wardlaw from Accurate Engineering and it did the trick. I rocked. He coached me on timing it.

I went through the front end from stem to stern, drilled lightening holes in the brake backing plate and found a set of stock configuration stainless bars and some goofy 4-inch aluminum risers using a stock cap. I still needed the cable, lever and cable adjuster. I called Barnett’s. They had everything I needed.

The bike was headed back together for Sturgis. If the paint and engine comes together, I could be cool for the run.
In a sense, this project was indicative of this time in my life and the life of many bikers everywhere. I asked myself if this should be a life and times story. Could I make sense of my life at this point?

I’m feeling stressed at almost 70 and I don’t get it. Actually I do, but I don’t want to feel anything but nirvana. Hell, I built a motorcycle nirvana right on the coast, across the street from the Port of Los Angeles. But there’s something not right about that. ?
They are now calling it America’s Port, yet the port has basically shit on the town adjacent to one of the richest ports in the world.
Okay, so I started this Panhead project in the middle of a war over whether combustion engines will still be around in another decade. What the fuck? No wonder our industry is in a state of upheaval. Most folks think bad thoughts every time they get into their cars as if they are having a nasty affair with the earth on the other side. Brings me down, but I fight back. I try to keep folks informed regarding their rights and the issues. It torments me. I want freedom and fun back.
So, when the shit brings me down I try to jump down into my shop and work on a bike. The Panhead became a mission for freedom for my soul. I needed relief from the stress.
On the other hand, life couldn’t be better. We have more resources than ever before, if the government doesn’t make them all illegal. For instance, you can build anything your heart desires. This Pan is a terrific example.
Sure, it’s a Pan but it has a ’69 right case and a ’79 left case, which allows me to make it look like a Pan, yet run an electronic, automatic advance distributor, an Evo to Twin Cam alternator, and a spin-on oil filter, which allows me more oil capacity and more protection for the engine.
The heads are brand new STD outside oiler Panheads with knock-off rocker blocks. The STD heads breath better than stock and contain improved valves and springs.
I’m running hydraulic JIMS machine cam followers, S&S adjustable pushrods, an S&S mild cam and an improved S&S oil pump. Even the Kraft Tech TIG welded frame is modified for almost any engine and allowed me to run a rear Softail disc without doing a thing.

Basically, I could build 1998 rigid Panheads all day long with super-strong late model 5-speed transmissions, and BDL belt drives with any EVO starter. I was good to go.
I wanted to use a Linkert Carb and I had a couple rebuilt by Mike Egan. We planned to run two on a stroked Knucklehead. They were M-35s for early 45 flatheads. I decided to try one using the small venturi for snappy throttle response notion, like we’ve done with 42 mm Mikunis.
Bob Bennett went through the engine and I supplied parts where I could. You can no longer order any performance parts in California. They were banned by the California Air Resources Board, supported by the MIC. Unless companies want or can afford to spend hundreds of thousands trying to have each part tested to receive an Executive order through the MIC, they can’t be sold here. If you can’t buy a cam in California, how does the largest market in the US impact the smaller states?

Needless to say, I made my own pipes using a too bitchin’ shorty muffler from Rick Krost at US Choppers, who only deals with vintage bikes anymore. He’s done with anything new. The muffler was amazing; at least, I thought so. Deny, the man behind the vintage paint job, came over and I showed him the muffler and what I intended with the stock squished pipe under the engine.

We discussed having the pipe angle up with the bottom frame rail toward the axle, but we both looked at each other with dismay. I’m not a fan of anything that interferes with the line of the frame. Then I mentioned my appreciation for shotgun pipes and Deny’s blue-gray eyes lit up. I messed with parts and pieces, including the stock squish pipe. I like how it came out.
I worked with Tim at San Pedro muffler to make a couple of exhaust flanges to fit over the Panhead exhaust manifold. I was only able to use one, because the front pipe needed to turn abruptly.

I tried several different welding moves with this endeavor. The pipes from San Pedro are 1 ¾-inch aluminum coated chunks, coupled with old bare steel bends, chromed pieces and even an old Pan squish pipe. It was chromed at one time. I had to use various pieces and some were slightly different diameters. I don’t know why, but initially I thought about gas welding with steel rod, but the various metals, even ground and cleaned, weren’t happy with oxygen acetylene, maybe because of the carbon deposits on the inside of the old pipe pieces.
Various pipe manufacturers skimp on funds by running thin-walled tubing and blowing through it is easy. I shifted to MIG welding because of speed and convenience. Also, tacking pieces in place is much easier with a one-handed Miller MIG welder. I ended up carefully MIG welding most of the bends and pieces, but then added some braze just to add color to the pipes.

The pipe brackets were a trip of found brackets and chunks, but finally the pipes were strong enough to stand on and secured comfortably to the heads.
I used care with the driveline alignment. The engine, a mixture of years, fit perfectly in the frame without shimming. I used the BDL inner primary to align the engine and trans.

Moving right along, when I needed to escape the government control freaks, I darted into my shop and hid out, rebuilding the old Wagner master cylinder with Paughco re-pop controls. The rebuild kit arrived from Biker’s Choice and Twin Power. James and the Twin Power crew are on a mission to create and manufacture stock replacement parts for old and new Harleys. I dug out old manuals from Panheads to Shovelheads and Evos and followed them.

With Spectro Oils I studied brake fluids and I think I installed the Wagner and the Softail Caliper with DOT 4. According to vast research, the Wagner could have been DOT 3 originally and the Softail Caliper was DOT5. They don’t mix. Later, I flushed the system with DOT 5 a couple of times and will do it again in the near future. Dot 5 is less corrosive than Dot 3 or 4 but doesn’t work as well as Dot 4. Dot 5 also won’t mess with your paint.

I stashed the ignition switch in the Paughco toolbox I mounted between the stock Softail gas tanks. I made a goofy bracket running off a stock frame tab and it worked like a champ. I mounted a 15-amp circuit breaker in the box and an idiot light, to prevent me from walking away and leaving the switch on. Let’s see if it works.

Bob Bennett timed the engine with Berry’s instructions and I monkeyed with the Linkert Carburetor. I also made the top end oil lines with old parts and True Value Hardware, which is usually a tremendous source for fasteners, but pricey.

I installed a Biker’s Choice oil pressure gauge. Erik Bennett gave us the look and his dad suggested I run an adjustable valve in the line to the heads so we don’t cause the lower end pressure to drop. I did thanks to True Value, but we discovered a tiny hole in the valve, which wide open might do the restricting job. I’m still investigating it.

I wired the bike with old Harley fabric-wrapped wire and fiber-wound loom. I needed to replace the front vintage spot light sealed beam. And one of the spring hold-downs broke. I need to find them.
The stout rear fender didn’t need supports but I needed a place to mount the LowBrow vintage taillight and license plate mount, so I started to dig around.

I came up with a Road King front fender bumper rail set. With a little braze, some ball bearings and some imagination, it worked like a champ.

I need to give some credit. The day I fired her for the first time, I ran into a problem. I ran oil through her first to make sure it was getting to the top end, but noticed oil seeping out of the lifter stool gaskets, as if the crank case filled with oil. I checked with Eric Bennett and then a young Hamster stopped over, Tony Sportalli. We made an oily mess chasing all my new oil lines looking for a mistake.

I used those stock pinch oil line clamps and they are bastards to remove. We ended up removing half of them, and in some cases, replacing them with standard screw-on hose clamps. Then Tony pointed out that the oil wasn’t coming from the gaskets but holes in the JIMS lifter stools. Unbelievable. They drill through the stools to create an oil passage, but it was up to someone to press in plugs or set screws. We taped set-screws and we were golden. Thanks Tony.
There you have it. Now I’m in the Eddie Trotta break-in mode and the search for a pink slip and registration. It’s a kick, starts and runs like a champ. It’s a breeze to ride and the front end now works. Let’s see what happens next.
–Bandit

OWNER: Keith “Bandit” Ball
CITY: Wilmington Ghetto
FABRICATION BY: Bandit
YEAR: 19-something Panhead
MODEL: FL
VALUE: Very little
TIME: 4 months

ENGINE
YEAR: ’69 and ‘79
MODEL: FL
BUILDER: Bennett’s Performance
IGNITION: Accurate Engineering
DISPLACEMENT: 74 cubic inches
PISTONS: V-Power
HEADS: STD
CAM: S&S
CARB: Linkert
AIR CLEANER: Chopper Dave
EXHAUST: Bandit
PRIMARY: BDL

TRANSMISSION
YEAR: 1990
MAKE: H-D
SHIFTING: Foot
CLUTCH: BDL

FRAME
YEAR/MAKE: 2017 Kraft Tech
MODEL: Classic Rigid
RAKE: Stock
STRETCH: None

FRONT END
TYPE: Wide glide
BUILDER: H-D
EXTENSION: None
TRIPLE TREES: Cast iron H-D

WHEELS
FRONT
SIZE:18-inch
FRONT TIRE: Avon
FRONT BRAKE: Mechanical

REAR
SIZE: 16-inch
REAR TIRE: Dunlop
REAR BRAKE: H-D disc

PAINT
PAINTER: Deny 925
COLOR: Orange and Cream
TYPE: Old

GRAPHICS: 5-Ball
CHROMING: Paughco

ACCESSORIES
BARS: Stainless
RISERS: Old aluminum
HAND CONTROLS: mixed

FOOT CONTROLS: Paughco
FUEL TANK: Stock Softail
OIL TANK: Pacific Coast Customs
FRONT FENDER: None
REAR FENDER: H-D
SEAT: Swap meet
HEADLIGHT: Old accessory spot
TAILLIGHT: Lowbrow

SPEEDO: None
CABLES: Barnetts

PHOTOGRAPHER: Markus Cuff


Funky Panhead Part 5: New front wheel and disc brake
By Robin Technologies |

Okay, so the classic 19-inch spoked wheel rolled in from Black Bike Wheels, in Van Nuys. They have grown to build spoked wheels for every make and model in virtually every size. Too cool. If you need a spoked wheel give them a call and speak to Elliot or Eric. Tell them Bikernet sent you.

The wheel, with a tough used and stained aluminum racing rim, unpolished stainless-steel spokes and a blacked cast aluminum Black Bike hub painted and scratched by me looked perfect. It was shipped, carefully packaged with the machined center spacer, Timken bearings and new seals wrapped securely and separately.

At first, I thought I would haul it to the local bike tire repair shop on Western, in Harbor City. It’s a cool little gas station turned motorcycle tire repair shop. It’s a classic and they will replace and balance any motorcycle wheel on the planet. Unfortunately, I didn’t feel like fighting traffic and I had a couple of other things going.

I crawled up onto our clean room, where I stash wheels and tires and dug around for 19-inch tires. I had two. One was a classic Avon Speed Master 3.00. The other was another Avon Tyre 100/90/19, a Venom. The rim was tough to measure the width, but it seemed to be 3 inches wide or slightly less.

Frankie was headed over, so I asked him to hit Cycle Gear for an innertube. As it turned out they had more than one size, so I went for the 3-inch job. I hadn’t mounted a tire in years but decided to go for it. I had several tire spoons and soapy water. The tube was called double tough and it was.
I took a large glass jar and pumped some dish detergent into it and water. I used the skull-faced pan brush to scrub the inside of the rim. I backed up the cleaning effort with a scotch-brite sponge. The used rim contained rubber residue, which needed to be removed. I scrubbed for awhile.

I slipped a couple of 2 by 6 boards under the rim, so as not to ding the hub or rim. I checked the rotation of the tire and the position of the rotor and popped the heavy bead of the tire over the edge of the rim. This was the easy part. Then I carefully worked the tube into the tire and against the wall already positioned over the rim.

The ultra-thick tube made the job tough, as if there wasn’t the space, I needed to feel the tube within the tire. I did my best to push the rim against the inside of the opposing wall of the tire.

The stem was interesting, and I made a special hook to help guide it through the rim stem hole. Also, a tricky maneuver.

I slathered the tire and the rim bead with soapy water and started to work the bead over the edge of the heavy rim with tire spoons. I had four. I tried to use the smoothest one and be careful not to pinch the tube.

Nervous but determined, it was a fight, but the tire bead finally popped over the edge of the rim. I added some air to the tube, but not a lot. I soaped the rim some more and bounced the tire around the shop and then added more air. It worked, amazing.

I put about 50 pounds of air pressure in the wheel and the Avon Tyre didn’t have a problem seating in its rim position.

Next, I greased the bearings and installed them on one side of the wheel and used a large socket and a rubber hammer to install the seal. The socket just barely fit into the hub, so it grabbed the OD of the seal and didn’t damage the seal mechanism. I tapped it into place and turned the wheel over.

I installed the carefully machined, by the Black Bike team, center spacer and the other heavily greased Timken bearing and seal. Then I turned the Black Bike Wheel over again and installed the rotor with the speedo drive spacer. I used 5/16 allens ¾ inch long. Ultimately, they were going to hit the caliper bracket, so I replaced them with domed stainless Allens and thin lock washers for more clearance. Damn, I still need to tighten them with blue Loctite.

Then I started to mess with the group of Paughco spacers I had. I put together the right grouping for the brake side on the right. This put both disc brakes on the same side of the bike. I liked that and that’s what Steve, from Paughco recommended.

With the caliper bracket race greased and in place on a special Paughco wheel spacer, I carefully measured for the tire to be centered in the frontend. This was a trick to determine the center of the tire and then the center of the front end and determine how much I needed to be machine off the spacer.


As it turned out it was about ¼ of an inch off caliper bracket spacer. I machined the spacer and tapered the spacer on the other side to allow it to fit properly in the seal. I put it together and dug around the shop for enough parts to make a brake system work. I found a front brake caliper for a Softail springer and Paughco sent me a right-side bracket, which I dunked in bleach to give it that patina look.


I sorta figured out how all the pieces fit together, and I had an 11.5-inch rotor. I also had a stock master-cylinder, which almost matched the stock (another year) clutch cable perch on the other side. Then I needed a brake line the right length and with Banjo fittings on each end. Amazing, I had one that reached with some slight modifications.

In this case, I just filled the reservoir with DOT 5 and started to pump slowly and watch for bubbles. Before I knew it, the damn thing was bled and we’re ready for a test ride. Hang on!
–Bandit

Funky Panhead Sources:
S&S
Biker’s Choice
JIMS Machine
Lowbrow
Mallory
www.summitracing.com
Accurate Engineering
www.accurate-engineering.com
Bennett’s Performance
Paughco
Departure Bike Works
www.departurebike.com
Spectro Oils
Chopper Dave
www.chopperdaves.com
Black Bike Wheels
www.blackbikewheels.com

FUNKY PANHEAD PROJECT, Part 1
By Robin Technologies |

My grandson wrecked his Dyna. He thinks he went down on a slippery west side boulevard, but the bike looks like he was rear-ended, which launched his girlfriend. She was seriously damaged, but survived. He got scuffed and walked away.
He needed a place and some guidance with his ’05 Dyna. He could have sold it and moved on, but he was so impressed with the performance after Bennett’s Performance tuned it and added some S&S TC cams, he didn’t want to let it go.
Anyway, we rambled throughout the packed isles looking for parts and I came across a large flatbed truck and a line of new, bare rigid frames displayed in front. Great looking frames and I inquired. Kraft Tech only sells to distributors like Biker’s Choice, but they bring a few frames to the swap meet once in a while and the price was right. In fact the owner’s son, Chris, was on hand and he recognized me and offered me a better deal.
The frames were obviously set up for Evo engines and 5-speed transmissions, but looked almost stock. I couldn’t resist. We carried that frame up and down isles until we finally headed toward the exit with no Dyna parts, but the frame and a set of stock Softail tanks, which the frame was set up for.
As I meandered toward the exit, my cell phone rang. It was Brad Olsen, an old friend who recently scored an Oregon shop’s inventory and stashed it in a warehouse near a river leading to the sea. “Yo,” Brad said. “I need to recoup some of my investment. Do you need a Panhead engine?”
I about shit my pants. I had just scored a sharp rigid frame, a set of fatbobs, and I knew I had a 5-speed Softail transmission at the Bikernet Headquarters. What the fuck? Hell yes, I needed a Panhead engine!
As it turned out, the engine was seriously incomplete, but with a good twist. The ’69, last kidney, Shovelhead right case was mated to a ’79 left case, which would allow me to run an alternator and Evo (Baker tins) primaries. I hauled ass home from the swap and started to dig through drawers, cabinets, and lockers looking for parts.
I created a pile next to my lathe, but when I stood up, I wondered what the hell I needed another motorcycle for. That wasn’t the mystic point at all. Fuck it, I was inspired and on a roll.
Here’s a code that works for us bikers. I tell young guys all the time to start to create equity in your lives for your future. You can buy and turn houses. You can restore a car, write a book (not a good idea), paint a painting, etc. But if you’re a biker, building bikes is perfect. No, they are not always worth a bundle, but they are like putting money in the bank. Think about that the next time the ol’ lady bitches at you for building another motorcycle. How’s she doing to build equity for your future?
Even before the swap meet kicked me into gear, I was moved by Go and Tasumi at Brat Style in Long Beach. Michael Lichter introduced me to them, just down the street on the evil industrial west side of Long Beach. They build the coolest shit on the planet with a major twist. Everything is vintage, seriously vintage. Go can build a totally custom tank and install it on a ’39 Indian Scout frame, but by the time he’s done, you would bet that’s stock part and 70 years old.
What completes his bike building twist? It was his amazing painter, Deny 528. Maybe I should keep this a secret. But fuck it, it will slip out anyway. I hope to feature one of Deny’s bikes this week, a restored (don’t forget that word) 1946 Indian Chief.
I was gone. I couldn’t think of anything else but this Panhead project. I dug around and Mike from Pacific Coast Cycles came up with an oil tank. He’s a major fan of Kraft Tech frames. “Everything just slips together,” Mike said. And he’s also a major fan of Paughco springers. He has about a dozen rollers in his one-man shop. If you’re after a cool project, give him a call.

Daily, I made lists of needed parts and started to make calls. I couldn’t stop and then my grandson flew to Deadwood to be apart of Scott Jacob’s Artist Retreat. Suddenly he wanted to go to Sturgis. I came up with a plan. I rode to Sturgis and back last year, so this year, we could alternate the plan. How about taking two old bobbers to Sturgis for the kicks?
We could stuff them into the back of a van and cut a dusty trail, but they would need to be short and tight. We would take the Panhead and a Shovelhead I’ve had for years, built by the guys at Strokers Dallas under the boss, Rick Fairless. We were about to chop the Shovelhead some with a Paughco scalloped gas tank, bars, solid brass risers, and a Softail oil bag. That would do the trick.
The Sturgis 2017 plan boiled in our minds. Suddenly, I had a deadline. Oh, what the fuck? I was inspired by many factors, but I still needed a few pieces to make it happen.
The engine was missing a cam and most of the cam case elements. It needed a carb, intake, distributor, oil pump and I started digging around. I had a set of rebuilt Panheads, but they were early model and this puppy would need outside oilers. I started to ask around. I also needed the right year cam cover and I found one on line.
Berry Wardlaw from Accurate Engineering offered to help when I couldn’t find any through STD. Billy McCahill was having issues with his foundry and didn’t have castings. Berry checked with a couple of distributors and no one had any in stock.


Berry searched forums and then found a set on Ebay. I immediately ordered them from Wilson Cycles, Inc. in Roswell, GA, but when they arrived, I encountered a problem. One was perfect with valves, an O-ring intake manifold flange and the outside oiler boss. Unfortunately the other didn’t have an outside oiler fitting. It was an early model.
All right, we will deal with that problem, with Dr. Feng, our officially certified aluminum TIG welder. As it turned out, working with Ebay, I received a call from Billy McCahill, of STD and RSR, or Ryde Shop Racing. He’s like a mad scientist, but he said they made a mistake two years ago and shipped out this order to a shop in Georgia. They never heard a word until I surfaced. I hauled the internal oiler head to their Downey shop and they replaced it. I was there for 30 minutes and heard 30 industry stories, some of which I will share in the news. Amazing!

We hit the swap meet again and found a cop solo seat from a major seat guy, but he had a pristine stock seat. I had an old hinged fender from an early swingarm Pan. I knocked out the pin and installed the bobbed fender with the help of Lowbrow’s new universal fender brackets.


It’s strong as a bull and fit like a champ. My funky MIG weld didn’t hold a candle to the precision Kraft Tech TIG welds on the frame. Sorta embarrassing…

I dug out a Softail 5-speed transmission, but I’m trying to figure out the plate to mount it—I did today. I called Chris at Kraft Tech and quizzed him. I have a Paughco offset 5-speed plate but need a stock ’86-’99 Softail tranny plate for a 5-speed. There are so many configurations and Paughco has them all.


I want to write a tech about ordering frames and all the configurations available. It’s not just about rake and trail anymore or wide tires, but left and right side drives, which transmission, which set of gas tanks and the type of seat being used. The list goes on. Hopefully, if the Paughco crew can help out, and with Biker’s Choice, we can make it happen.

I found a wide glide front end at the swap meet, Ultimately, I wasn’t happy with it, but we made it work, (I hope) with an old drum front brake. I found some neck bearings and replaced the junk one. I tore the whole front end apart and cleaned it. The Paughco axle did the trick to allow it to be installed. A local shop laced the star hub to an old 18-inch used aluminum rim.


I spoke to the guys at Spectro about which fork oil to run in the legs. Joe Russo recommended Fork Oil Type E. 20 SAE, since it’s a one-up light bobber. “Heavy two-up bikes would use the 40SAE,” said Joe.

The brothers at Paughco are the best and have the best. After digging through my shit, I needed just a handful of vintage parts and pieces from the Paughco factory, like the correct front axle for an early glide. I made the mount for an old spotlight out of a bracket I built for a Bonneville bike but never used.


I needed the right side rear brake lever, plate, return spring and plunger, but I had three Wagner master cylinders. This Kraft Tech frame was set up for a Softail style disc brake. Years ago, we installed PM brakes on Dale Gorman’s Softail and I ended up with his stock solid aluminum rear wheel and brakes. They would do the trick.

I had most of the pieces for the left side, except for one, and Paughco had it, the shift linkage arm. And I didn’t plan to run a dash, but I needed something for electrics, a switch, whatever. I ordered a Paughco universal tin toolbox and then discovered something wild at an antique store, a K-model motorcycle trophy and it’s a heavy casting.


The notion is to build a simple, easy to handle bobbed Panhead. But for some odd reason, finding an early automatic-advance distributor is not easy. I don’t want any extra bells and whistles on this bike, no advance and retard mechanism, jockey shift, etc. Then I found a Mallory electronic ignition system in a locker from our ’06 Bonneville effort. I spoke to Berry Wardlaw from Accurate Engineering and it will do the trick. I’m rocking.

I went through the front end from stem to stern, installed new bearings, cleaned it, drilled lightening holes in the brake backing plate, and found a set of stock configuration stainless bars and some goofy 4-inch aluminum risers using a stock cap. I’m still working on the cable, lever and cable adjuster. I called Barnett’s today.


The bike is already headed back together for Sturgis. If the paint and engine comes together I should be cool for the run. Hang on for the next report.
Sources:
Paughco
Pacific Coast Cycles, Long Beach
Barnett’s
Kraft Tech
Spectro
Baker Drivetrain
www.bakerdrivetrain.com
S&S

LowBrow
