The Amazing Shrunken FXR Part 5
By Robin Technologies |

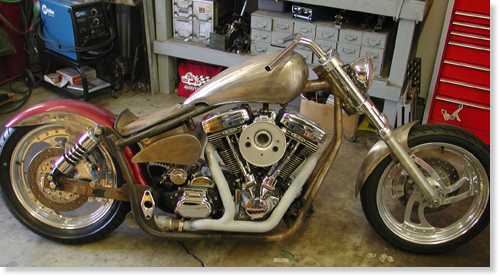
You’ve been there. You handed the Makita cordless drill toyou’re drunken buddy, and he drilled a hole in your big screentelevision. You tried to wrap the extension cord around his neck andfinish him off. We came close to blows in the garage a couple ofmonths back. I spent days carefully welding chunks of Samson exhaustpipes together to form a one-of-a-kind exhaust system.
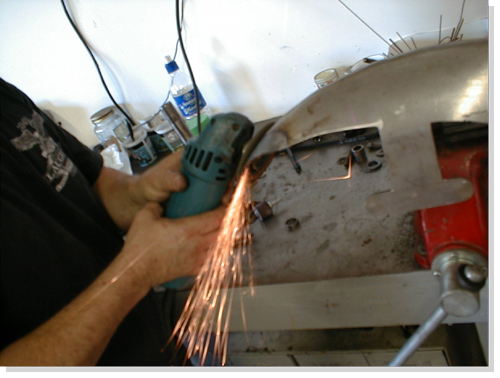
All the welds were performed with gas and hanger rod. Thepipes weren’t perfect, but they fit the bill. They were actuallyintended to be prototypes, to be duplicated by a paid professional.After the first pass was completed the pipes fit like a glove,although they were artistically rough around the edges. Nuttboy cameby on his Wednesday afternoon escape, and I handed him a highspeedgrinder and instructed him to round off the welds. I worked onanother project and paid no attention while sparks flew. When he wasfinished he tapped me on the shoulder and said humbly, “Not sure thisis what you had in mind.”
He had ground right through the pipes and left gapingholes alongside most of the welds. In addition, I discovered to myteeth-grinding dismay, that there were still large sections of thepipe ground so thin, that as soon as the torch tip came within 6inches of the surface the pipe melted away. I spent another whole dayfilling the gaps. Who knows what will happen when the struggling bikefires to life. We’ll have the only exhaust system on earth withbaffles throughout.
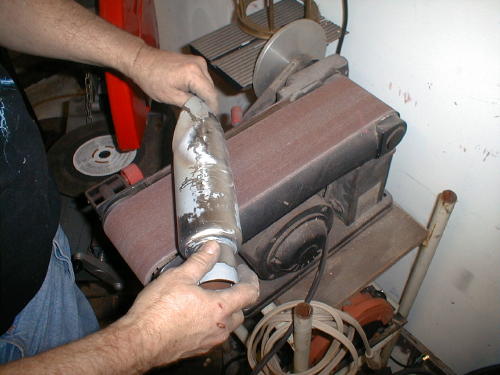
That’s not all. The grief continued. I hand made a mufflerusing a portion of a Samson baffle. We purchased a chromed, truckfender tip from San Pedro Muffler and went to work, but after hoursof screwing with the shiny metal we almost shitcanned the unit. Thefender tip was made out of a strange metal, almost pot metal, thatdidn’t seem to take to the gas welding and wouldn’t respond tobrazing. For every hole I filled, another crack lurked. I welded,then smoothed on a bench grinder only to find cracks and holes tofill again. The shorty muffler probably weighs 50 pounds due to thevast layers of welding rod. As it stands, this is a pure prototypeexhaust system. We should use it for testing then shitcan the rankpiece of shit and start over.
Click to order Catalog!
Frustrated, but pleased with the overall look we were readyfor final metal work. This bike is being built by inexperiencedhands, not professionals, in our backyard garage. Sure, I’ve builtsome bikes, but I wouldn’t consider myself a metal fabricator. I cameup with the initial design and we roughed out elements, but we neededa master metal worker to finish what we started. There are preciousfew, true metal craftsman, who I know. One is Billy Westbrook,another is Jesse James and recently, in the news, we displayed metalwork by Roger at Goldammer (Goldammer Cycle Works Ltd.,www.goldammercycle.com ,1-250-764-8002). High quality workmanship.
They’re out there but not on every corner. I stumbledonto another super-slag artist under my nose. James and LarryFamighetti are Hamsters and own a corrugated steel metal shop inHarbor City, California, called Fam-Art. You’d be tweaked to rumbledown Narbonne Street and stumble across this rusting corner buildingthat’s got to be the oldest swaying dump on the block. Theyspecialize in structural steel (you could never tell it from theircreaking tin shed) for homes and buildings. Large chunks of steel,massive shredders, presses and welders are scattered around the funkylocation that’s reminiscent of the first shack Harleys were built in.

Nuttboy and I darkened their doors a couple of times toask them to flame-cut a couple of chunks of steel for our fenderbrackets. The more I hung around the more quiet-James began to showme steel components he had fashioned for some of the local riders. Herebuilt and reformed Harley taillights to eliminate all the edges andgrooves, then welded them to fenders so that ultimately there were noseams. The more I gawked at the sculptured parts, that demonstratedhis ability, the more I knew we had discovered a man capable of BillyWestbrook fabrication qualities. We hauled the entire FXR to Jamesthe next week.
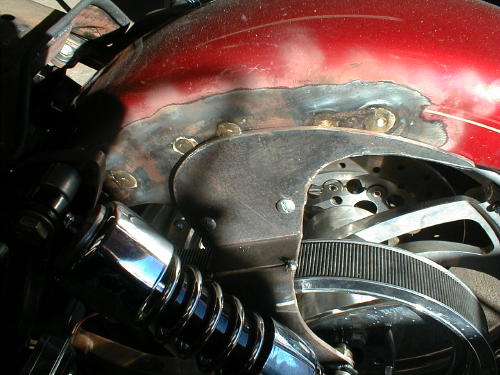
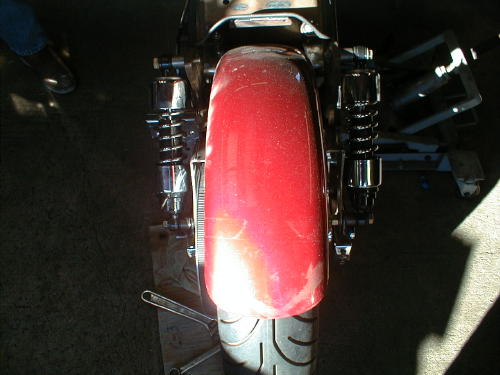
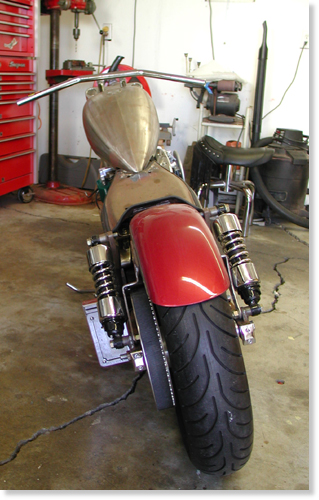
James relocated the straps in such a way to narrow the shockplacement keeping that shrunken look in mind.
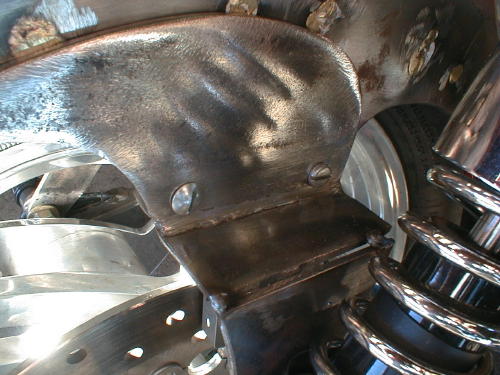
This is a close-up of the right fender strap. It’s beencorrected, reformed and readied for final welds.
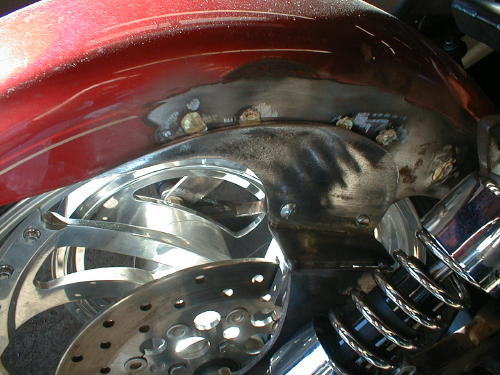

We cut and fitted the tank and made the mounts, butJames filled the underside, rear section for a perfect fit.
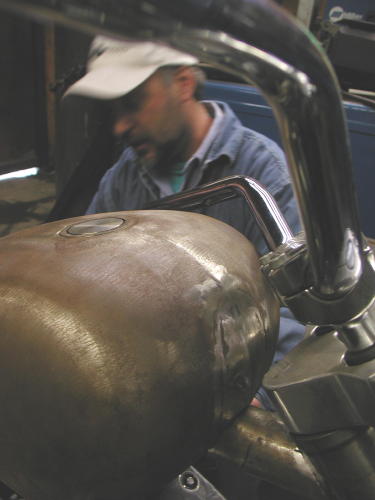
We jacked up the front of the tank and mounted it, butJames filled it and formed the front of the tank to match the customridge along the top. He even made paint work suggestions that I foundinteresting. “If you paint a ridge like this with a light color,”James said, “The ridge will disappear.”
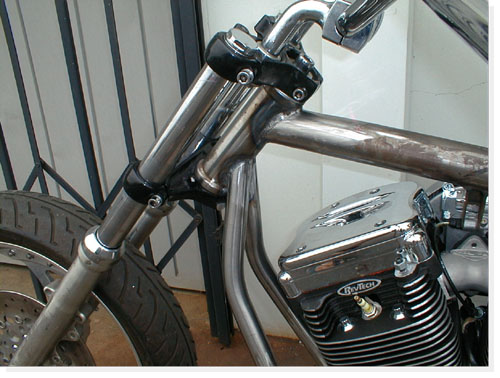
We decided to paint the bike a light House of Kolors pearland create a dark teardrop panel on the top of the tank. He alsocreated and welded fork stops to the neck.
As we rolled out of the shop that day James still hadfinal welds to complete. He straightened out our seat pan, but neededto figure out a mounting arrangement. Finally we needed the CyrilHuze front fender brackets checked and welded into place.
We should have the Shrunken FXR back in our clutches inthe next couple of weeks. We need to finish our rear brake andshifting mechanisms with Giggie from Compu-Fire, fire it up for atest ride and tear it down for paint.
Oh, I need to untie Nuttboy. I need that extension cord.

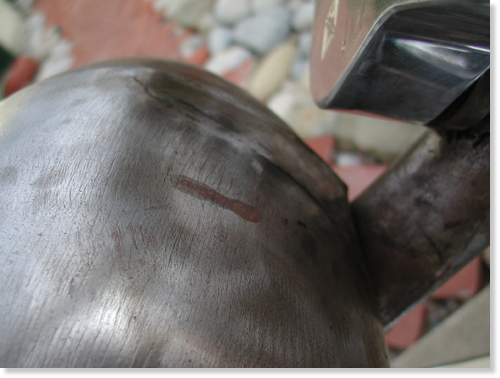
The Shrunken FXR returned recently from Fam Art, in HarborCity, California (310-326-2141). They welded, shaved, mounted theseat, manufactured fork stops and saved our poor- construction asses.James Famighetti mounted our Cyril Huze front fender, welded andformed the tabs and informed us that the Avon Venom was too large forthe narrow glide front end. It was our turn to work on it.
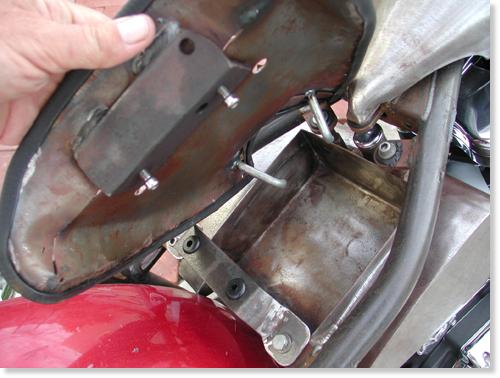
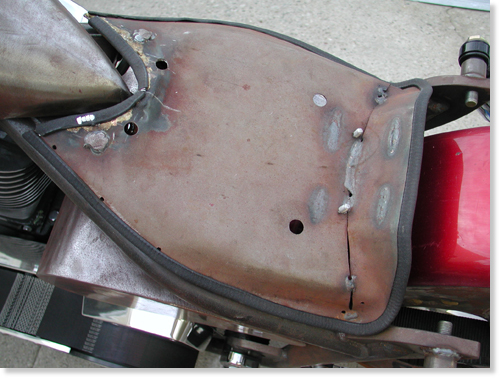
Note that James mounted the seat pan so that the edges wouldnot touch the frame paint in the future.
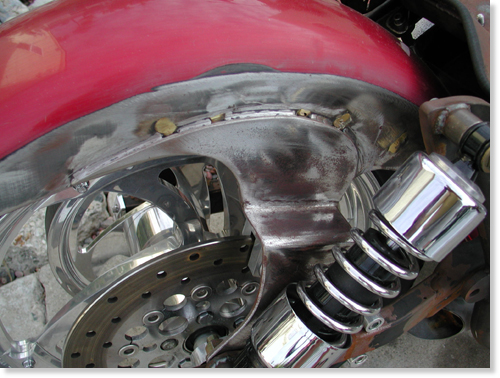
Like any self-respecting bikers we hate to have a bike, oreven components out of our mistrusting mitts. We had another dilemmathat needed handling. The bike still didn’t have a kick stand, and weused two 2 by 4’s, to hold it upright, when not perched on the lift.There’s a trick to this maneuver. If I backed the Pro Street FXR outof the garage and wasn’t hauling the wood planks, I was screwed. Ifalone, I could stand there for hours waiting for someone to strollpast carrying two 2 by 4s–unlikely. After a couple of unsteadyoccurrences, the bike didn’t move without the wood chips on the seat.You can imaging the major pain in the ass this caused.

We ordered a weld-on, Sportster style, kick stand fromCCI, and it arrived complete, with all chromed hardware and thebracket to be welded on the frame. There was one problem indetermining the position. The front Avon was a 100/100 18-inch, andwe planned to replace it with a 90/90. We needed to have the finishedPerformance Machine wheel in place.
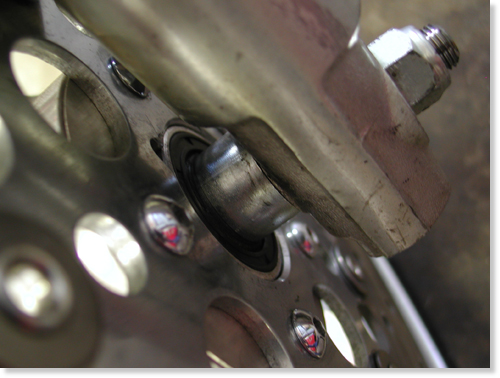
The Avon Road Runner tire arrived, and we had it installed at thelocal Yamaha dealer. James pointed out to us that our front tirespacing wasn’t perfect so I sliced a spacer to give us about a1/4-inch spacer on the right side of the wheel and about a 3/4 inchspacer on the left. The tire, almost centered, now had clearance, andthe wheel floated effortlessly under the modified Cyril Huze frontfender.
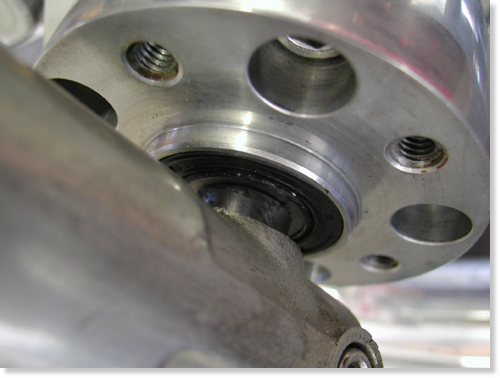
Now we were cleared to install the Hot Match weld-on kickstand.This is a tricky assembly process. First, you need to be absolutelysure you don’t plan to change the front wheel, to a 21, or extend thefront forks. If you do, the kickstand will need to be bent ormodified to fit. It’s not the end of the world, but it will destroythe chrome.
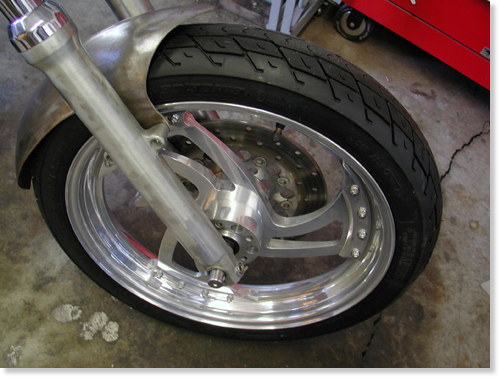
The other trick is determining the right position. Here’swhat my feeble brain told me, since the directions with the Hot Matchdidn’t cover positioning, except to recommend that you take yourtime–no shit. First I stood my Road King straight up and lifted theside stand until it was locked in place. Then I measured from thepoint that would touch the pavement to the ground. It varied fromaround 2.5 inches to 3 inches. I noted that the Hot Match lever wasnearly 3 inches shorter from the point of contact to the center ofthe pivot point. I took that into consideration. I also noted that Ihad lowered my King with shorter shocks, then added a larger Avontyre (a 150). Ground clearance was also a consideration.

Then we picked a placement area on the frame. Our designcalled for little or no forward controls. I kept the tab under theBDL belt drive system and hidden as much as possible, without beingso far back as to create a balance problem. If the weight is forwardof the kickstand, sometimes it can topple the bike. One otherconsideration. When the stand pops up you need to be able to reach itwith a toe, and it better not ride on the belt, or you’re toast. Makesure to check all that, before you burn any rod.
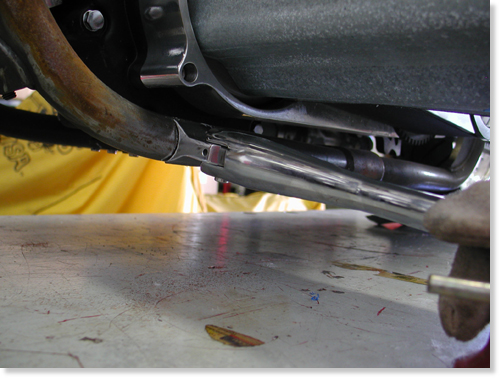
I sprayed the frame rail and the components with asilicone splatter preventative. It obstructs slag from sticking tocomponents. It also made the frame a slipper bitch. I tried settingthe stand end on a socket nearly 3 inches off the deck. Then Iconsidered the differing lengths of the stands and shifted to 2.5inches. Sin Wu was called, from the bedroom, to hold the stand firmlyin place. I marked it, with a grease pencil, then ground the edges ofthe bracket to be welded to the frame. Extra grinding took place toform a snug, metal to metal fit. In order to make all this work weneeded to partially assemble the kickstand without the ball andspring.
The easy-to-read directions called for disassembly, but we left ittogether and used it to hold the bracket in place for tacking. Beforetacking I backed the bike out of the clamp, holding it upright,positioned the bracket in the white grease pencil marks and leanedthe bike carefully until the stand rested on the flat surface. Itlooked cool, so we re-clamped the bike securely, held the stand inplace, protected the belt from hot slag and tacked the sucker withour Millermatic welder. Then we took the stand arm off the bracketand welded it some more. That would hold it securely until we torethe bike down for paint.
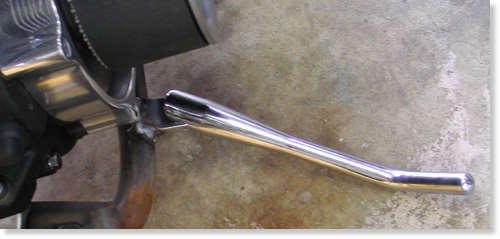
The Hot Match unit from Custom Chrome is a well madeprecision unit delivered show chromed. The instructions includedrecommendations to apply anti-seize to the spring and ball. Theyendorse using Red Loctite on the pivot pin threads. We didn’t becausethe bike would be torn down for paint in the near future. The armneeds to be placed firmly over the bracket and pushed into placebefore the pin will ease into the hole from the bottom. It doesn’thurt to have a spare set of hands and someone holding the bike.There’s also a pivot pin set screw to prevent losing that preciouspivot pin and kick stand arm, on a desert highway, in the middle ofArizona.
That’s it, except to mention that when we head to thepaint shop, we need to tape off the chrome bracket, so the painterwill paint over the welds but not the chrome tab.

As you can see this bike is damn close to the spray booth.I need to coerce Giggie, from Compu-fire, to ride his FXR out to theBikernet Headquarters with our mid-controls. Once the Joker Machinehandlebar controls are bolted to the modified bars, we’re ready for atrial run, then off to paint. Stay tuned.

–Bandit

Custom Chrome ® and Chrome Specialties ® have joinedforces to bring you the most comprehensive product offering in theHarley-Davidson ® aftermarket! At over 1,400 pages and over 25,000part numbers, our 2003 Catalog features everything from nuts & boltsto HR3 bike kits, and sets the NEW industry standard.
ONLY $9.95 + 6.95 Shipping**
–Bandit
Back to Part 4…
The Amazing Shrunken FXR Project Part 2
By Robin Technologies |
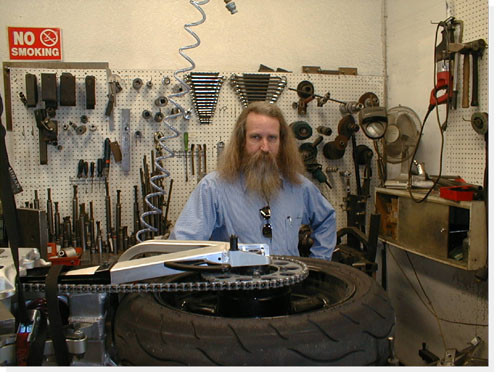
Like the enigmatic fortunes you find inside thosefolded Chinese cookies, our visit with Dr. John–the”frame doctor,” was a mix of New Age mysticism andpractical guidance. The week before, Bandit and Ibrought the rolling Pro-Street frame to the gooddoctor. We gave the him our best ideas of what wethought the bike should become. Basically, we wantedthe bike to fit my body proportions, to shrink theframe around the engine and to still have elements ofa street chopper.
Bandit and I had been trying to create a bike that hada real “signature” identity, yet we weren’t sure whatthat would mean. We tried to convey our concepts withawkward babbling.
Stroking his long, gray beard with a knowing gravity,the doctor calmly listened to our ravings. Eventuallyhe gave us a broad grin through the tangle of beardand said, “Don’t worry, boys, I understand exactlywhat you need.”
We had left the bike with vague misgivings.”Do you think he really has a clue what we want?” Iasked Bandit.
“I dunno,” Bandit said, staring off into the acrid,smog-laden sky.”The guy’s kind of strange, but everyone I’ve talkedto says the guy’s a wizard,” Bandit musedmysteriously.
When we pulled up to Dr. John’s shop, there was ourcreation leaning up against the wall. Not averse tostreet-corner poetry, I intoned, “What a bitchin’fuckin’-lookin’ bike.”
“Man, that bike is really unique,” Bandit exclaimed ina more civilized tone.
As we oohed and ahhed about the bike, Dr. John camearound the corner, grinning. I jumped onto theseat-less bike and grinned. It fit perfectly, betterthan an O.J. leather glove.
“I really think you’ve got something good goingthere,” the doctor spoke with unconcealedappreciation. “I wasn’t sure it was going to workuntil I got into it. The bike began to speak to me. Ithink it’s got the right karma,” the doctor spoke withmysterious gravity.
All this mystery was not without reason. Dr. Johnstarted this trek to ultimate frame adjustment workingat Goodyear Tires. A fortuitous opportunity, sponsoredby Goodyear, for advanced training at L.A. Trade Techgave him the chance to try motorcycle repair.Recognizing that he was more interested in bikes thantires, he began a course in bike repair withinstructor Pat Owens.
Dr. John soon connected up with a bike shop calledMotorcycle Menders. Right away, he could tell that hehad a better-than-average sense of what was needed tofix most frames. Eventually, he opened his first shopin Covina in 1983. In 1990, he moved to his presentlocation in Anaheim.
Dr. John’s expertise is extended to both traditionalstreet choppers and to the more exotic road racebikes, where competitive tolerances and alignmentshave seconds off of lap times. The challenges to hisexpertise in frame adjustment include the extremes ofcreating a bike for a 6’9″ rider and a Harley with a25″ over stock front end. For his own use, he isbuilding a karma-tingling three-wheeler with a VWengine.
In his shop, amongst a tangle of tweaked Ninjacarcasses, “destruction derby” ATV frames, twistedchopper forks and even a mangled Vespa body, Dr. Johnholds court. Side-tracking his stories about gettinginto the frame adjustment business, he mixes conceptsof metal stresses with ideas of mental stresses,Eastern philosophy, acupuncture points, shakras andauras, martial arts movements, elements of a good dietand muscle alignment of the spine.
The conversation stumbles easily into his personalexperiences. After an injury of his own, he explored avariety of methods of pain control, eventually meetingan American Indian psychic whose exotic beautyhypnotized him as much as her cosmic consciousness.Here, a glint comes to his eyes and a wry smile bringsone corner of his mouth up. “A rare beauty,” hemuses. “An aura just like Cleopatra of ancient Egypt.”
Bandit nodded in agreement repeatedly, like thoseDodger dolls that bobble in the back windows of cars,to the good doctor’s banter. Bandit slurped his greentea while listening to enchanting tales spun by theDoctor. While I shoveled in heaps of steaming andspicy-hot Kung Pao chicken, my eyes teared up and mynose started running.
“The magnetic flow is a flux of energy in the bodyof…” The steaming pots of green tea and plates ofexotic Chinese food sent wisps and tendrils dancing inthe air above our table like a chorus of swaying,sensual nymphets.
“The assorted colors of shakra balance…” Thisadventure had the aura of Zeke the Splooty about it.We were on a cosmic motorcycle Magical Mystery tour.
An hour or so later, Bandit and I were back on the 91Freeway with the bike strapped to the bed of hispickup, staring ahead kind of dumbly. “What a trip,Dr. John is,” I said.
“Yeah, but I think he did a great job on the frame,”Bandit said.
“Yeah, cosmic man,” my head was stuck in the ’60s.”What do we do now?” I asked.
“Let’s check out some trippy paint for the bike,”Bandit smiled. “Let’s drive down to Stanton and see ifWes at Venom can come up with something exotic enoughfor this mystery machine.”
“Go for it,” I laughed.
It’s days like these that make bike building seem likethe right thing to do. Bandit slapped in a tape of’60s funk and we were sailing down the road like acouple of latter-day Kerouac and Keseys.
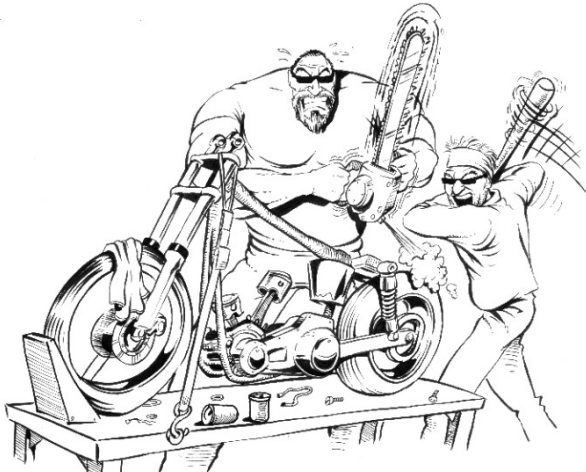


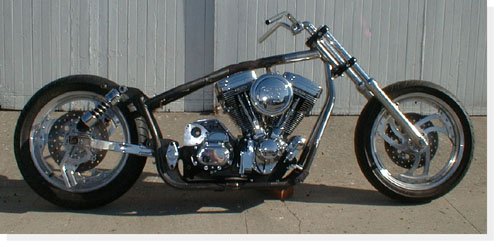
“Hand me a bigger hammer, goddamn it,” Bandit hollered across the garage. We were slamming together as much steel as we could to get this Frankenstein of a bike together in time to show it to the crowds at the Queen Mary Motorcycle Show this weekend.So far this week we’ve managed to cut 1.5 inches off the swing arm. This brings the wheel into the back end of the bike at the point of the pivot. We are designing the bike with brevity in mind. We are hoping that the finished impression will be a bike shrunken around the RevTech 88-inch motor and Rev Tech 6-speed. Oh, we’ll have devilish accents here and there, but the overall concept is lean and mean.
To that end, we are cutting off any unnecessary tabs and struts. Of course, everything changes as soon as a UPS box arrives. Joker Machine parts arrive every couple of days. The foot controls arrived. The new front Avon tire should be here Monday or Tuesday. It arrived, we had it mounted pronto and the fender was looking good. I hauled it to Urs who is a master body man and he widened it to fit perfectly. Having the right tools makes a big damn difference.

A new front tire was called for because the sexy front fender from Cyril Huze was too narrow, since he builds bikes for 19 and 21-inch from wheels and we’re running an 18 (our fault).
After banging the hell out of the fender to try to squeeze out a fraction of an inch clearance, we decided on a smaller sized tire. We ordered an 18/ 100-90. We hope this will allow us at least 3/8-inch all around.
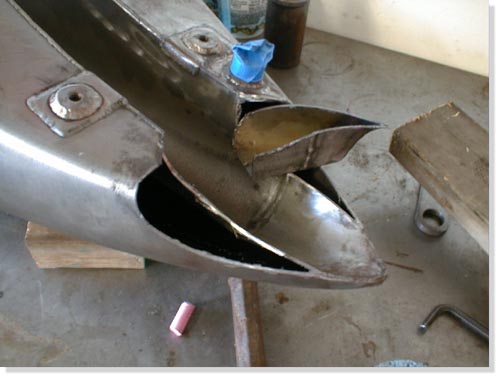
The new Cyril designed stretched tank arrived with the fenders. We cut out part of the bottom of the tank at the back where the front of the seat is, since every goddamn thing we do is backwards. Every builder in the country stretches bikes, we shrink ’em, so the tank won’t fit without mods. This move helped bring the tank down closer to the engine and since the FXR is short, well you get the picture. The tank tabs are in place and welded.
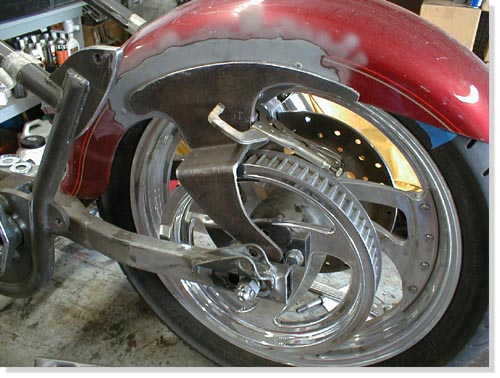
We decided to use an old rear fender off one of Bandit’s past bikes–a Fatboy. We turned it around backwards, the front end will be bolted to the center of the swing arm. Our next problem was how we were going to hold up the stern. After a lot of head scratching, cussing and phone calls we met with master fabricator James Famighetti who suggested that we create our own struts that will be bolted on the inside of the lower rear shock absorber bolt, then welded to the outside of the fender in such a way as to add to the over all look and strength of the fender and conceal the stock aspects. Mounting fenders to swingarms is treacherous. It will vibrate like a dog attacked by killer bees, so it better be strong and still able to remove for touchup.
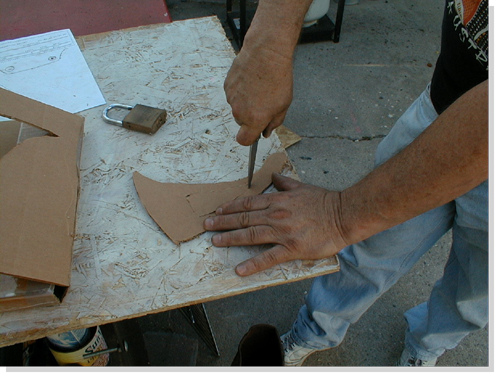
No problem, you say? Ah, ha, not so easy kimosabe! We are pretty sure the strut will have enough clearance for the Rev-Tech brakes on the right side of the rear tire. When you come around to the left side, you’ve got the pully to contend with. So on this strut we added a 2″ dog leg to clear the pulley. I made up the patterns on cardboard and the Fam-Art brothers cut and bent the pieces. Then it was time to fit. We’re getting there.

The BDL pulley from CCI is smaller than the one we used for the mock up. So with our fingers crossed, when all these parts come together this week it will be amazing if they all fit. They did, well, perhaps not perfectly, but we’re getting close.They did, well, perhaps not perfectly, but we’re getting close. If not, “Bandit, get me a bigger hammer, goddamn it!”
Here’s the score. The fender needs tabs and it’s ready. The rear fender needs rivet removal and the massive tabs tack welded. The shock tabs have been cut since the Progressive Suspension shocks from Custom Chrome need to be set wider away from the fender tabs. Let’s see if we can make it to the show. We’re still waiting on Huze oil tank mounting tabs.

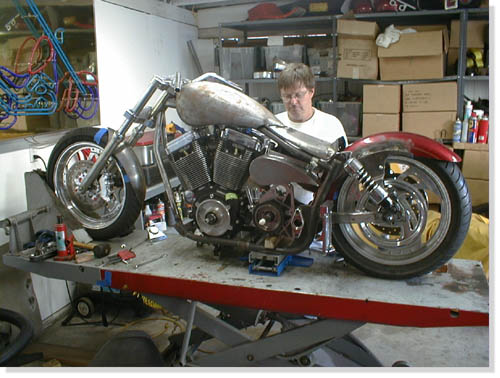
The saga of the Amazing Shrunken FXR continues. This project is notonethat is merely slapping together after-market products to build a facsimileof a customized Harley-Davidson.From the start, Bandit and I sought to create a unique ‘signature’ bike.Even though we have used a lot of after-market products, most have beenmodified to fit our design plan. The products we use, from the FXRPro-Street frame to the Rev-Tech engine to the Joker Machine qualitycomponents, to Cyril Huze, Avon and BDLare some of the finest products available.

Because some of the fundamental elements of design were modified, we havebeen constantly fabricating new brackets, tabs, mounts, and studs. Eachmodification created new issues relating to the fit and function of thedrivetrain. It seems as if we’ve bolted and unbolted the elements of this bike ahundred times.For example, the frame was modified by Dr. John to fit the Rev-Tech engineinto our overall design concept. The top motor mount was bent to fit thenewspacing. We used this motor mount point to position the Cyril Huze teardropgas tank. When we positioned the tank we related it to the handle barclearance at maximum turn position. Rubber mount brackets were welded inplace. The tank was cut at the underside back end to fit low on the frame.It looked hot. Next I cut the La Pere seat pan to hug the pointed rear ofthe gas tank and strengthened the seat back. There is a continuousdouble-‘swoop’from the handle bars to the back of the rear fender. The seat pan lookedhot.

Then we tried to put the engine in. It didn’t look fit. The engine wasmere fractions of an inch from fitting. Even if we could have hammered itinplace the subsequent tight tolerances would surely create problems as thebike rattled and roared down the road.
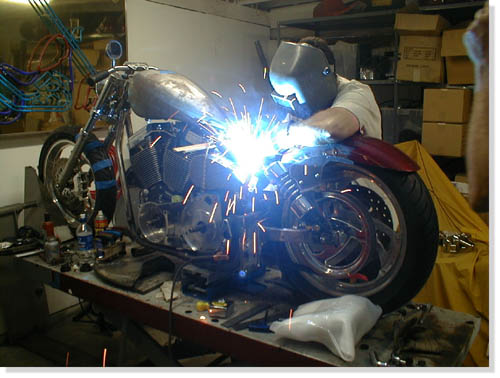
At this point, we cut the original tank brackets and repositioned themodified tank a little higher on the top frame tubing. The tank looked hot,the engine fit, but now the handle bar swing is a fraction of an inch tooclose to the tank. This means we will probably have to have custom handlebars.
It still looks good and we’re still optimistic. Even as wedroppedthe tank down on the new rubber mount brackets and began putting in the5/16″bolts, we found that the right rear bolt was too long to fit. So we got abolt with a thinner head and with my small fingers, I got the bolt in andstarted. We were still looking hot.
We decided to see if the belt fit since Bandit had cut andrewelded the swingarm 1.5 inches shorter for that Amazing Shrunkenlook. Bandit said no, the belt wouldn’t fit. It wasn’t suppose to. Isaid it looked close. As welooked at the bike we realized we’d had to remove the engine, drop thetransmission, which meant we’d have to support the swing arm. It alwaysseems harder than hell to make something easy. So with a couple of scissorsjacks, hunks of wood, and a crow bar, we were able to loosen the rubbermounton the left side of the pivot point of the swing arm. Then we gingerlyslipped the belt in, put the rubber mount back and bolted everything backtogether. Damn! It fit perfect and we were looking hot.

Wait a minute. The right side of the belt was almost touching the edgeofthe back fender. Quick surgery with a saws-all cut a chunk out of thefender. Fender fits, belt don’t rub, bike still looks hot.
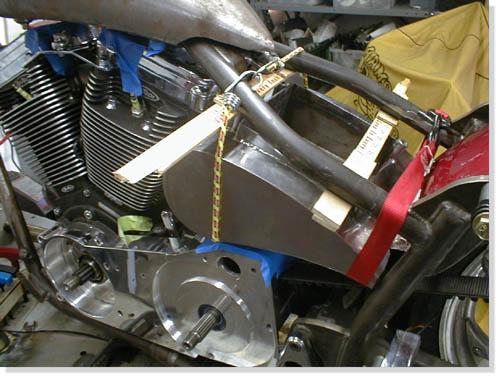
As we cram more operational parts together, the room to move gets lessandless. Next we positioned the oil bag, which also brought up the issue ofthebattery accessibility. With bungee cords, a busted yard stick and some woodshims, we finally got the bag in what seemed a reasonable position. Fourrubber mounted brackets were fabricated then welded into place. It lookedHot. Everything was bolted in place. And everything looked Hot.
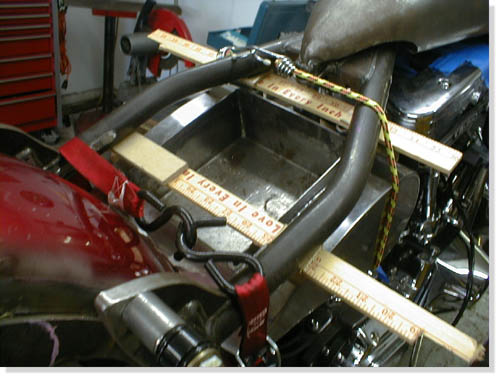
Ah, but not so fast kimosabe. We shaved the fins off the back ofthe oil bag for more clearance. With the two rubbermounts in place atthe rear of the oil bag under the seat pan we had enough clearancefor the battery, in the front for the engine and exhaust, under itfor the starter motor, but no clearance for the ever moving rearfender. It needed at least 1.5 inches of shock play since it’sattached to the swingarm. We had to peel the bag out of the frame andtake it to the Famighetti’s metal fab shop, Fam-Art, for theirexpertise. They came up with a plan to scoop out the back of the bagto the battery box without shortening the overall look of the bag.Then the fender will have the clearance to move with the swingarm andstill look hot.
Next, we neet to investigate whether the Joker controls canbe mounted mid frame. At the same time we will begin fabrication ofthe Amazing exhaust system. It’s gotta be lookin’ hot one way oranother.

–NuttBoy
To Continue……..
Back to Part 1……..
Back to Custom Chrome on Bikernet……..
Back to Joker Machine on Bikernet……..
1928 Shovelhead Comes To California Part VIII
By Robin Technologies |

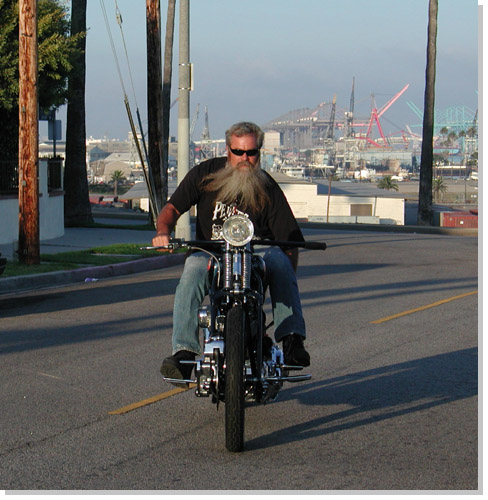
Master builder and mechanic, Deacon, from Pro-Street in Oahu.
Bob Kay. from American Iron Horse. was a bro and shipped the retro Shovelhead. from Strokers in Dallas. to LifeStyle Cycles in Orange County, California along with a new batch of Dallas Choppers. It arrived the day before a handful of weary travelers stumbled into Los Angeles. on their way home, from Sturgis, Glen and Kerry Priddle were headed back to Australia after spending almost a month, with a dozen Aussies, roaming the mid west.
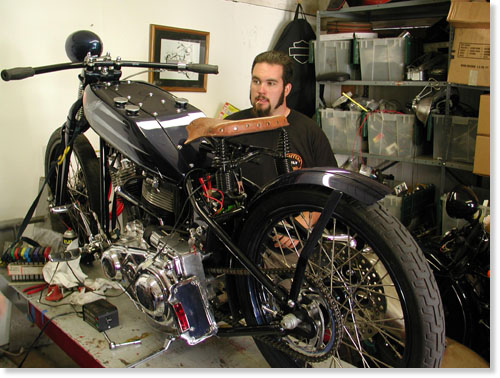
Deacon’s son Chase and the 1928 Shovelhead.
Deacon, his son Chase, and the son’s girl Amanda rode several thousand miles averaging 95 mph wherever they rode. Deacon and Chase are both master mechanics. The ol’ man’s shop, Pro-Street, is located on Oahu, (808) 236-0405 and he’s negotiating with Billy Lane of Choppers Inc. to build engines for Billy’s Discovery Channel Bikes. His son is working in Oregon, but as soon as he returns, he’s packin’ his shit and heading back to the islands.
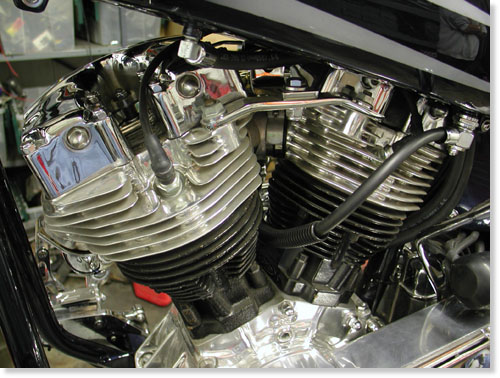
JIMS machine rebuilt and detailed the engine. It was sharp and runs like a top.
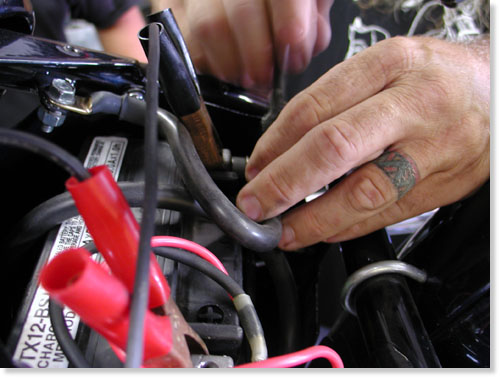
Charging and checking battery connections.
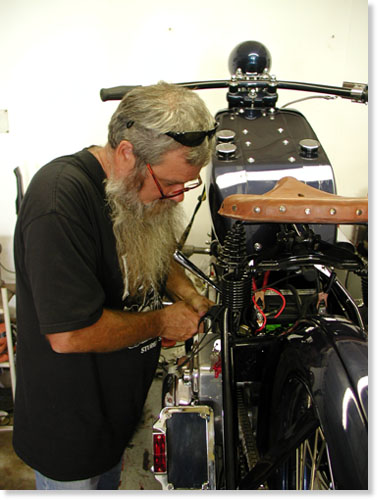
Deacon checking the solenoid.
Deacon rolled into the Bikernet Headquarters just as the Shovel arrived and we attempted to fire the beast to life. I moved the seat forward, detailed the front end and charged the battery. But, even with a fresh battery, she wouldn’t engage. Deacon suspected the aftermarket solenoid. Seems the spacers and gaskets are too thick, just enough to prevent the solenoid from grabbing the shaft. I trimmed the gasket with an Exacto blade and Deacon ground the face of the spacer. Installed, it worked like a champ. We took it for a ride.
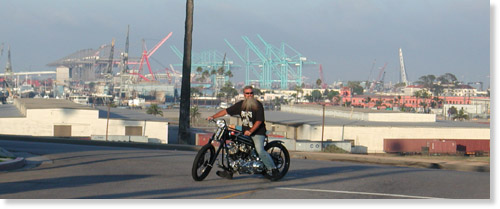
Los Angeles Harbor and our first roadtest.
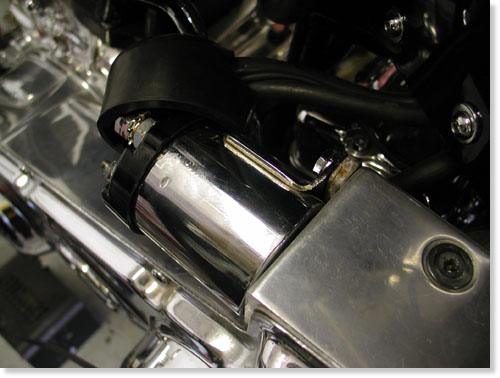
First Deacon checked the connections and voltage at the solenoid. He also shorted across the leads with an Allen wrench to see if the circuit was operating properly.
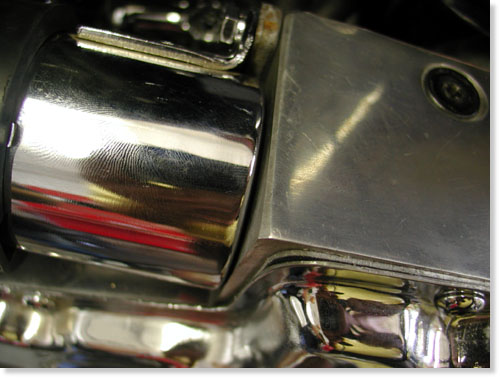
The solenoid replaced after the gasket around the base was trimmed and the spacer, behind the unit, shaved. Worked perfectly.
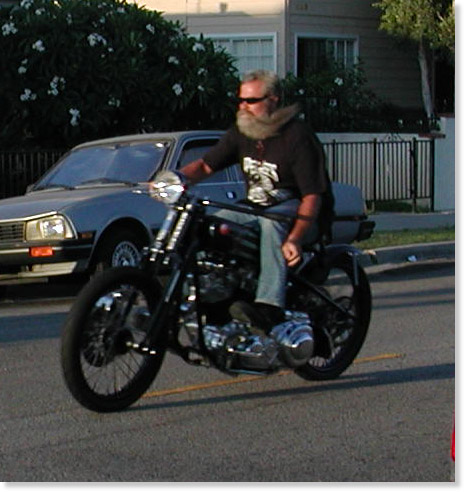
Checkin’ the gears.
It was impossible to jam the suicide shifter into nuetral once the bike was running, even while rolling. Deacon and chase adjusted the clutch, and recommended a Rivera, old school, clutch pack to eliminate chatter and afford the rider smoother shifts. The clutch wobbled and was too tight to find neutral. They loosened the springs until only a thread showed past the adjustment nuts and the spring retainer ran true.
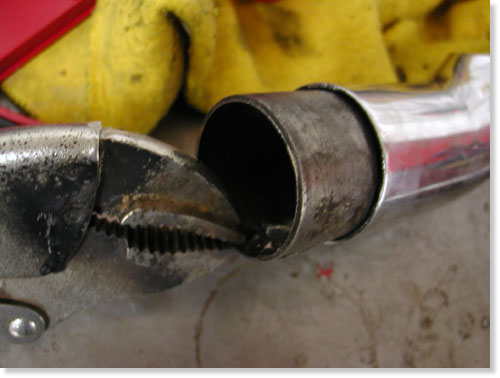
Can you see the cracks?
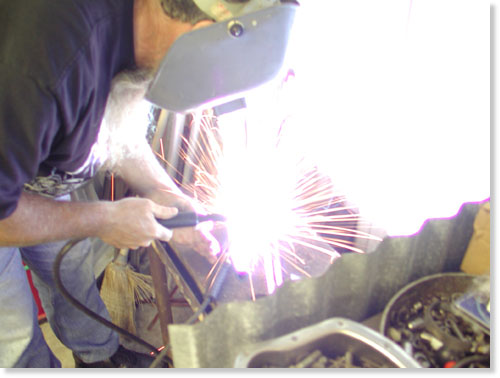
The Millermatic 175 hard at work.
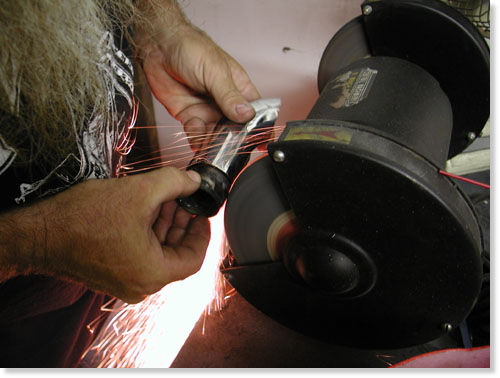
Deacon built a bead then ground it smooth as a baby’s ass.
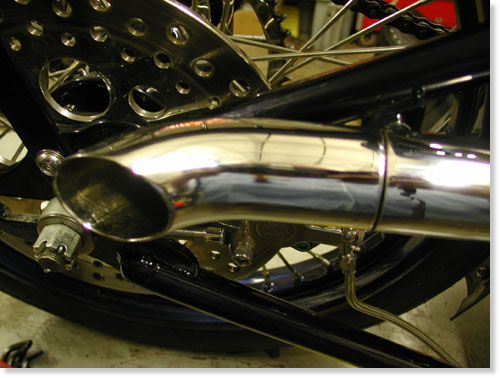
The tip installed, solid as a rock.
I developed padded fork stops and while running we noticed that the clean, handmade, Stroker’s pipe tip was rattling with only one bolt holding it. Upon removal we discovered that the area around the installation nut had already cracked and Deacon grabbed the Millermatic. He welded the cracks and nut for more strength. Then we discovered that the tip shelf was too small, so the pipe end had a tendency to vibrate. Deacon went back to the welder and built a bead around the outside, of the shelf, then ground it to fit. A much cleaner/tighter fit, and the pipe didn’t require an additional fastener.
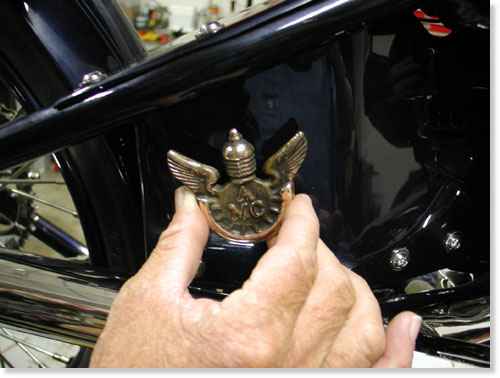
Anybody know how old this cast bronze emblem is?
While in Hawaii at the first Choppers Only Show in Wakiki, I gave Deacon, the promoter, a handmade belt buckle for being a gracious host. He returned the favor with an old license plate doodad from the Antique Motorcycle Club. It was destined for the Shovelhead.
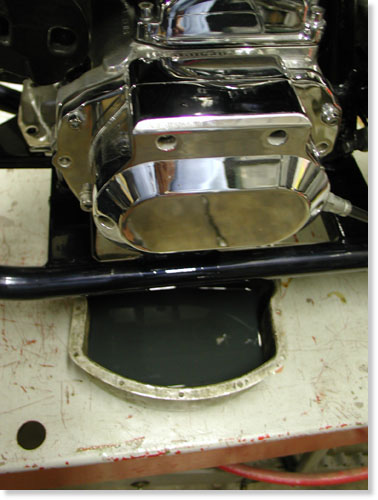
While testing the shifting, clutch and tranny, the gears seemed to bang harshly. We checked the oil level, which seemed precariously low. It wasn’t bad, but we drained the oil and replaced it with fresh Custom Chrome tranny lube.
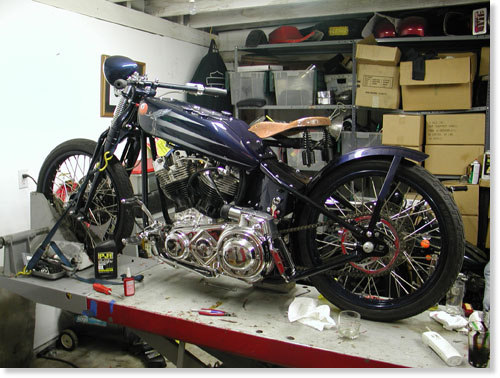
The 1928 Shovel was ready to rock and so were we. Deacon and Glen broke out harmonicas and kicked off the blues. They sampled the Irish whiskey, Tullamore Dew, Sin Wu barbecued and the party rolled on.
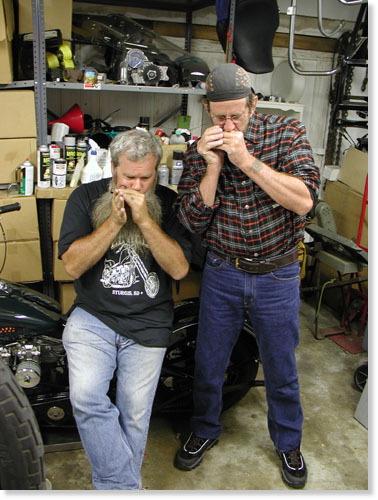
Deacon and Glen bringing down the Bikernet Garage.
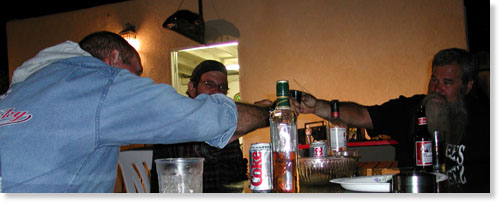
One mo’ shot of Tullamore Dew.
Helluva night, sharp bike and times to always remember. The next day Deacon air-freighted his 2003 FLH to Oahu and grabbed a flight. His son and Amanda boarded their basket case Softail and rode north. Glen and Kerry hid out in Los Angeles and waited for their flight back to Australia, and we dusted off the headquarters and pretended to go back to work.
Stay tuned for the next adventure of the 1928 Shovelhead.
–Bandit
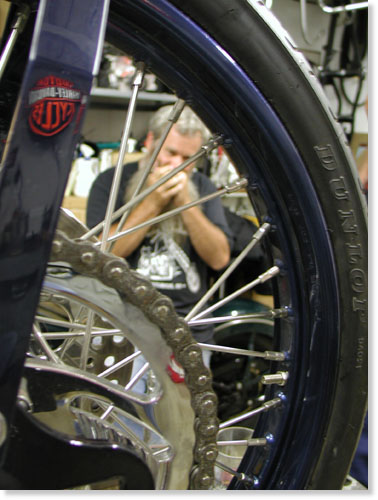

The Road King Report Installment 1
By Robin Technologies |
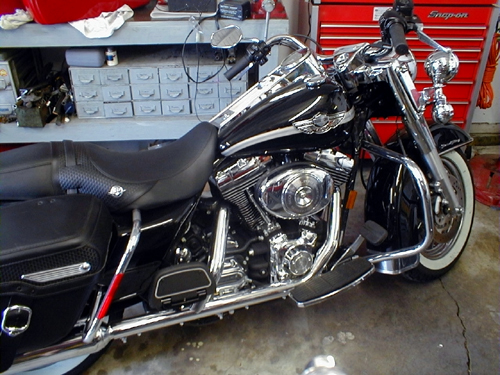
ROAD KING REPORT–Initially I had some questions regarding Road Kings. I wanted to know some about the frame geometry. I perfer a little trail over low speed, parking lot handling. I like to run fast and stable. Next I’m old school. I perfer a bike with minimun extras so I lean toward a carb model over the fuel injection, EFI models.
I immediatly spoke to an expert, Paul from Charlotte, H-D:First as you always say “What year is the damn thing”??????? If it’s a newer model why get rid of the EFI?? The new stuff works good. Harley has new sofware to tune the thing, just out from the dealer show. This will put a big hurt in the Powercomander II and any other after market add on stuff!!!! It’s in the new P&A book for ’03 in the Screamin Chicken (Eagle) section. I like the new Dephi stuff. Also BC Gerolamy has a new dual throat induction throttle body for the Delphi system that is kick ass!!
To take off the system, man it’s lot’s off work. The ECM has all this start up shit it goes thru. checking all the system’s and sensors. Again I have never done this. So to be honest I just don’t know for sure on this one. I can run it by Old Bob tomorrow and see what his thoughts are on both the frame/trees and removing the EFI.
On the frame, my first thought is no. Are you familiar with what they did to the trees? They are not like the old FL stuff at all. The stem is in front of the fork tubes. This makes it a self centering front end. One of the tests they have to do at Talledega on the track is to smack the handle bars hard at 80 MPH++ and see if the damn thing will straighten itself out!!!!
I’ve never thought about doing this so who knows maybe it could be done. Christ you come up some stuff man. Was Jack Daniels involved in all this brain storming??
A week later…
’03 is good year for the Road Queen. The EFI is much better than years past.My question to you is why do you want to loose the EFI?? What are your plans?? Pipes, Big Bore, Stroker kit?? We just did a 103 Stroker kit with cams, heads and a V&H 2-into-one pipe, megaphone, on a ’03 Road Queen for a salesman. He should have used a Thunder Header but most of these clowns want the magazine yuppy chrome look. Shine and billet are in I guess, drives me nut’s!!!!!
You can remove the fuel pump and that shit from the tank. You can put a regular fuel valve in the tank in place of the EFI fuel line. There are two bung’s on the left side of the tank, one is plugged. I did make an adapter for a fuel valve for a Softail EFI bike once. The guy bought these tanks at a swap meet and didn’t know they were for fuel injection.
I think maybe you might just need to change the ECM from EFI to a Carb. ECM. Disconnect the senor’s, eng. temp, crank pos., induction module stuff. Do the tank, install a carb and you might be just be down the road. That way you could leave all the stock wiring and shit in place if you ever wanted to go back to EFI.
On the trees I guess when they went to that style the early top tree was just turned around for that newer style configuration. Don’t know about the setup now. If you did a rotation of the top tree putting the fork tubes forward the bars would be in a different forward location. That would screw up all that headlight cover shit. You might be able to put a complete early FL front end on. Hey maybe even the adjustable sidecar trees. Remember them? The front fork’s are non-air assist now.
I’ll keep plugging away on this “Amazing Raked Road Queen” project for you. I can check out some front end’s and take a better look. Also will try to call tech services at H-D and see what won’t say!!!
–Later, PSD
Bikernet East – Zebra’s Chop Unveiled
By Robin Technologies |
| When the dust and metal filings settled, the smoke cleared, and the greasy gang of wrenches at the famous Bikernet Garage sobered up, before us stood a gleaming new chopper, complete and ready to break in, save for a few minor tweaks and a seat.
 The Zebra entry for the Bikernet ChopOff 2000 was complete. The Great Northern Steamer, scheduled to blast from the Caribbean shores of South Beach, Miami, all the way to the western Badlands of Sturgis, South Dakota, stood shimmering in the Southern California sunshine. A moment of silence occurred naturally. Then Bandit farted. The Great Northern Steamer is the first complete entry (or virtually so, save for custom seat, a bit more paint, and a few tweaks and adjustments) to come off the steaming chopper assembly line at the Bikernet West garage in San Pedro.
 She’s a fast horse, with no bells, no whistles and a low, clean look. This is a true garage chop. Comprised of our favorite parts from our bad-assed vendors who work with us at Bikernet, the Zebra chop should be a joy to ride and not bad on the eyes either. She’ll roll on new Avon rubber, a 21 up front and a 150/16 in the rear, which is as wide as you can go on a stock softy frame without moving swingarms and trannys. We kept her this way because we know a lot of bros don’t have access to zillion-dollar bank accounts and nine-month time periods to re-engineer entire frames. The Zebra chop was purposely built to be an every-man’s chopper—something any of us could build right in our own garage with a bit of determination and hard work. The Avon rubber will be wrapped around newly released Harley-Davidson Thunderstar rims. The engine is a salty RevTech 88 from Custom Chrome and came out of the box humming like a dragon sitting on a cattle prod. I can’t wait to get past the break-in and give that big horse some oats and see what she’ll do.
 Expect me and whatever lucky lass I decide to strap on the back to arrive early in Sturgis this year. The tranny is a pussy-smooth Baker 6-speed, known for strength (I’m a bit heavy handed on clutches as Bandit is always pointing out) and high-end gearing. I prefer the left lane. We took the narrow-glide front end off the Bandit II along with the lighthouse-bright Headwinds headlight and slipped it on. I might have Eddie Trotta at Thunder Designs in Ft. Lauderdale, Florida, (where the bike will be received after being shipped from our garage in San Pedro by Ken Gold) throw on a set of wide-glide triple trees. The jury is still out on that one. Eddie and his men will also be in charge of sharp shooting our work, checking for any errors, and handling break-in oversight. All the wiring was done by our resident electrical genius, Bandit, who spent the better part of his three tours in Vietnam keeping the big guns of his heavy cruiser wired tight and barking day and night. The handlebars are Cyclesmith and set flat and low, like the horns on the big bulls that periodically tried to hook my guts out when I rodeoed. Everything hangs off a Ron Paugh special, a Paughco frame, stretched five inches and raked. She’s got a Harley-Davidson battery. The pipes are also from the Bandit II and were initially a ThunderHeader system, the header part, which we sliced off. Now it’s a pair of flashing noise downspouts that make the big RevTech 88 sound like God falling down the stairs when you roll it on. Talk about a sound boner. The call of this big bull will swoon any lass who’s not deaf. The Ride Lo lowering kit actually took the chop a bit too low and we’re planning on having Eddie Trotta’s boys crank it up a few inches so when I load my 220-pound ass on along with a couple hot rod blondes I scoop up from the topless beach in Miami (I’m not kidding, bros, it’s topless, you should visit), the sucker won’t spark all the way to SD. It’s a chain drive up front, rubber in back. I know everyone says the chains look good in the rear, but they buzz the guts out of my ladies and I’d rather have a 20-year-old, six-foot goddess from Spain on back than a sparkly chain any day. I can do more with the Spaniard when I get to where I’m going, if you get my drift. The oil bag was a complete motherfucker and we re-hung it about as many times as a cattle rustler in Kansas who gets caught on your favorite horse with your old lady thrown over the saddle horn and your best rifle in the scabbard. Phil Stadden painted the custom front fender and stock Fat Boy rear fender, which we bobbed considerably. The paint job matches the existing burgundy paint on the Paughco frame, which was one of the parts we got back from West Coast Choppers. Still waiting on the others. I’ll store my gas in a stretched FXR tank that was jerked long by Russ Tom in Seattle.
 We have a left mirror, the right seems to be lost in the West Coast Choppers abyss of “missing” parts, so I may have to buy two new mirrors or just run the right side glass. I will take the German Feminine (we’re a bit on the outs at the moment, so we’ll see how this part goes) up to Eddie Trotta’s Thunder Design in Ft. Lauderdale when the Great Northern Steamer gets in and measure for a seat and passenger footpegs. I’m going to try to construct a good-looking seat that seats two comfortably, but retains the very low-profile look of the bike we’ve created. The footpegs will probably sit about an inch behind mine, since the German Feminine was born with enough leg to wade in the deep end of the pool. We may also add a very striking and radical sissybar to keep all of my lovely European sweethearts on the scoot as I cavort about the balmy regions of Miami. At the moment, the highest point on the entire bike sits at about belt loop height and I’d like to keep it that way. But if I have to add a sissybar to keep my ladies from burning their breeches on the twirling rear Avon, then I’ll construct something radical and good looking to throw behind them. If I can get Bandit away from the Jack and women to actually send one out, I’ll probably also throw one of the very handy and well-designed Bandit Dayrolls up front to hump gear and any small tools. Thanks to all the bros at Bikernet West who helped wrench together my entry for the Bikernet Chop-Off 2000. Bandit was the master wrench in charge and spent many a thankless hour, welding naked and screaming in the spooky recesses of the Bikernet garage in San Pedro and deserves a clean clap on the back for a job well done. I’ll keep you posted as I run the new horse through her break-ins down in the 100-degree heat of Little Havana and blow off that new chop smell. Hope all you bros out there are getting your scoots ready for the big run and we look forward to blasting north into the Badlands for some serious partying, eating, drinking, and of course loving the ladies in Sturgis. Now the focus shifts to getting Bandit’s entry completed. His scoot is looking damned good so far and the air wrenches are singing the Bikernet national anthem day and night. Bandit and I will be arriving on (we hope) the 5th, covered in bug guts and bragging rights to start campaigning for the big vote to see which chop the bros chose as the Bikernet Chop of the Year.
 Grease up and get your gear, bros, it’s almost time for the big run... May the best badass win. See you in Sturgis. Ride hard, Bikernet East |
Bikernet West – Mikuni Carburators to the Rescue
By Robin Technologies |
With Sturgis 2000 looming over Bandit’shead we’ve been firing away at the getting the job done. Bikernet Eastmachine was well out in front in the competition when we wheeled the Agent’slow slung Softail onto a slick Gold Rush semi and said goodbye as the rig,packed with Ultra machines, Big Dogs and customs from the west coast, headedeast. Eddie Trotta from Thunder Design was more than happy to have thebike unpacked in his shop in Fort Lauderdale, so he could point a fingerat Bandit’s creation for Agent Zebra and bust out laughing, “You expectto ride that to Sturgis?” he said rolling on the floor of his shop. Weweren’t discouraged and neither was Bandit as we strapped the road wingswheels, the Weerd Brothers Front end on the Daytec rigid and went to work.
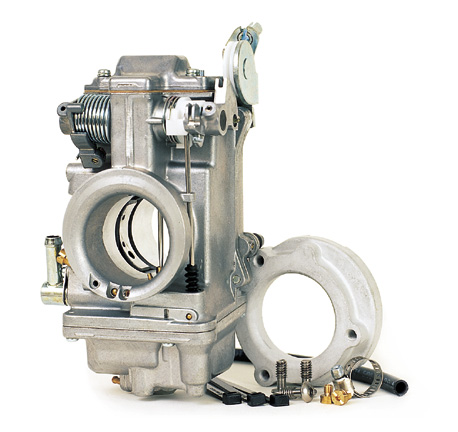
This was no ordinary installation. First,time was a factor, second it’s no normal, stock carburetor swap. The 98-inchS&S motor offered taller cylinders and improper intake manifold fitment.The stock Super E S&S manifold was too big for the 42 mm polished MikuniCarburetor. Stock manifolds shove the carb out too far and aren’t wideenough for the tall S&S cylinders so a quick call was made to JamesSimonelli of S&S who rushed the correct manifold to Mikuni. Lee alsowanted to explore an American Iron Horse manifold available for their customswhich pull the carb in closer to the engine and “L.T.” or James Littleof American Iron Horse moved equally fast and the parts were in hand inone day. The next hurtle: The cables. A call went out to Xavier at BarnettCables who turned about a set of Mikuni compatible cables which are setup the same as stock H-D cables, but cut to Bryan’s specifications forthe job. They also arrived in time.
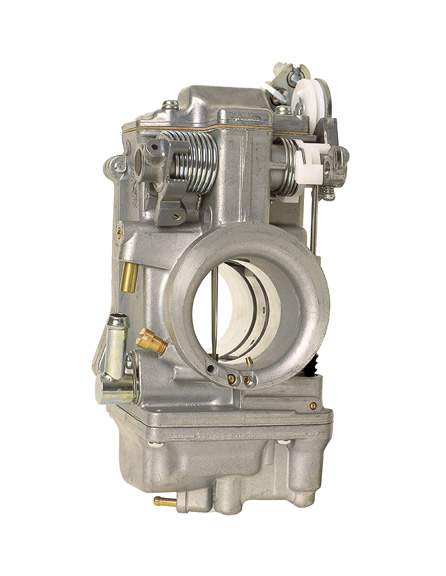

Bryan pointed out an adjustment on theleft side of the carb as you face it, a main jet air adjustment. He toldme to inform Bandit to turn it out a half turn in Denver for more compatiblerunning in altitudes. The bike immediately fired to life for the firsttime. Two weeks to go.
Bikernet West – Belt Drives Limited Open Belt Installation
By Robin Technologies |
 Here’s the deal. With less than two weeks to go I’m praying, laughin’, grinning and scrambling. The paint finally arrived from Harold Pontarelli of H-D Performance of Vacaville, California, and the dark haired beauty wanted to be at the shed when I opened it. I paced the floor waiting for her alabaster legs to bring her quiet self up the sagging stairs and into the world headquarters of bikernet.com. We took the carefully packed boxes to the basement where we were attacked by the foam peanuts assigned to protect the polished finish. First it was slabs of pressed foam, then thousands of bouncing peanuts, yards of plastic wrap, then plastic bags and bubble wrap until we finally reached the bright candy blue finish with cream flames, silver inserts, for dimension, and gray pinstriping. Unbelievable! The perfect match for the bike. I’m jazzed. But let’s explain some of the praying that’s going one. BDL Belt drives, especially this one in particular, are simple to install. Incredibly simple, but there’s a caveat, a loophole or a tiny chink in the armor. It’s called alignment and spacing. Hot Rod Bikes recently published a full-on BDL installation, and I read it several times. It never made any sense to my simple mind, yet it was full of very precise instructions. The key is how you install and space the motor and tranny. It turns out that your inner primary, or in our case, the motor plate, is the best alignment tool you have. According to Frank Kaisler, the editor, you leave the engine and tranny loose, bolt the inner primary or belt plate to the engine then pull the tranny into place and bolt it up tight and start checking under the engine and tranny for gaps with feeler gauges. In the article it showed big Frank filling the gaps with spacers as thin as .010. Damn, that’s getting touchy. Recently a Bikernet reader, Breeze, sent me the following on BDL installation suggestions and I added my two cents worth to his experience: “When I was installing the BDL 3-inch open kit (the one that comes with the motor plate) I was having a bitch of a time gettin’ the belt on. So, I called and got to talk to their tech support.”
“Anyway Buddy Bob, tech master, says, “Oooh, just file the pulley splines (Photo 1) it will go right on.” Filing splines applies to S&S motors with slightly larger main shafts, like .001 so take your time and it will work out fine. If you don’t and force the pulley on, you may have a serious problem taking it off. I used a handmade puller from the bottom of the tool box to get the pulley back off.” “As far as alignment I use the good ol’ straight edge across the pulleys method. Check at top, center, and bottom, to get things straight on both axis. I do this without the belt and space the front pulley out so you can use feeler gauges to compare the front to back space between the rear pulley and the straight edge. Of course the ultimate alignment test is to run it and see how the belt is tracking. It should not wander and should track on the front pulleys outer flange and center on the rear pulley.” “I think they have a great design there, it is one of the smoothes clutches I’ve run, but you need to check tolerances for reliable running. Be sure to follow the instructions on the clutch install, the Locktite they tell you to use on the basket splines is important for the basket to seat properly.” “They call me the Breeze, I keep rolling down the road!” Well, that’s the Breeze’s story. In fact Breeze has given me a couple more things to check. I put one of the polished rotor covers on, which threw my pulley alignment out of whack, so I had to take it back off. I’d rather have reliability that flash. Before you attempt to install the belt drive check these alignment areas. Bolt your rear motor mount bolts down tight, without the top one in place. With feeler gauges check the front motor mount. Space the front ones if there is any gap. Now bolt down the tranny plate and the tranny except for the single bolt on the right side (Photo 2.)
Check the clearance to the final stud from the frame and correct the spacing. Now with everything loosened up install the inner primary. The BDL system comes with a very heavy duty clutch bearing, so the the stock bearing race must be removed. Fortunately I had a JIMS puller for just that application.
That and a couple of crescent wrenches and the puppy was gone, and the new bearing installed. Slide the clutch and front pulley on, and make one more alignment check as you rotate the motor (Photo 4).
Grease the starter shaft and bolt in the starter pinion gear. Next install the clutch pack as per the manual. You can now install the belt guard and adjust the clutch. I’m carrying another set of clutch studs and springs, in case the clutch begins to slip. I’m hauling along another belt for safety, also. Couple of years ago, I ate one (it wasn’t a BDL, though). Seems like a lot of work, but actually this is one of the cleanest, simplest systems out there, and once you have it dialed in, you can put it on and take it off in minutes. Damn, I running out of time. Gotta git to the wiring. Rock and roll. –Bandit
|
Bikernet West Bogged Down In Pheonix
By Robin Technologies |
|
I knew it! The sonuvabitch couldn’t make it to the Badlands and back on that piece of shit. I knew it! The way Bandit mounted that tank was fucked from the beginning.
 I told him. Nuutboy told him. Harold Pontarelli told him. Shit, his 78-year-old mother told him. Did the big bastard listen? Nooo. So it jumped off the frame in Aspen, Colo., and landed in his lap.
 Yeah, they welded it up in Aspen with the help of Randy Aron from Cycle Visions in San Diego, and he limped into Sturgis, rode around the Badlands for the week and then the scoot was kidnapped from him by someone who knows what the fuck he’s doing, namely Paul Yaffe from Paul Yaffe Originals in Phoenix. Paul is working with Kyle of Independent Tanks, who hand makes steel tanks from heavy 16-gauge material. It’s about time someone grabbed that bike before it exploded into flames and scorched the ornery sonuvabitch.
 So we sent that fly-bitten claybrain to Phoenix for a welding lesson and instructions on how to properly mount a gas tank. If he wasn’t such a hasty-witted old fool, he would have put the bike together right the first time.
 Here are shots of the existing piece of shit with the new tanks recommended by Paul, who builds some of the most innovative bikes on the planet.

 Paul’s philosophy is to manufacture enough custom components to allow his customers to build something without doing a piece-meal job. “Instead of buying fenders from me that don’t fit the other guys’ frame properly and then mount a gas tank from so and so, and nothing fits properly, I want to give the customer half a chance to build a world-class custom on his own.” Paul’s positioning himself, unlike Bandit, to afford customers with frames, plus the fenders, tanks and billet components to match. Paul began his operation building LED taillight products. Unlike the slob who runs this joint, Paul is a young man of vast energy and talent who could not contain himself building bikes with existing components. He began building his own fenders, air cleaners, frames, etc. The young upstart with the flaming red hair does share one notion with Bandit: “If you’re going to build a new full-custom for a customer, I want the bike to be a reliable runner, of the newest technology, or how can you call it a new bike?” So all of Paul’s bikes are built with Harley-Davidson Twin Cam drive lines. “I use as much Harley stuff as possible,” Paul said. “Plus the factory is going crazy building more new accessories all the time. The selection is growing by leaps and bounds.” Damn, if I told that lunkhead Bandit once, I told him a thousand times, it’s time to move away from the Evolution shit into the real world of Twin Cams. But that motley-minded minnow is still out in the garage trying to put two Mikuni’s carbs on his ’48 Panhead. If you want to check true customs, built to ride, check Paul’s site http://www.paulyaffeorginals.com Finally, after much consternation, Bandit succumbed to one of Paul’s buddies, Kyle at Independent Gas Tanks. These are new, contoured tanks and here’s how ya do it right.
 Kyle has been building his own line of steel gas tanks for two years. Prior to ’98, he built tanks for Roger Borget for three years and before that he built Porsche 911 race cars. He won’t get near aluminum. “Not with the engine sizes that are bouncing around in these frames,” Kyle said. None of his creations are Mig welded, either. “I only Tig weld my tanks. I’m glad to work with builders and make suggestions.
 I’ve hand-built over 1,000 tanks for Harleys, and if told the brand frame, the stretch and rake, I usually know which tank works the best. I can go with one of my six to eight standard styles, or I can design something out of this world. I can make a bike blend into the crowd or stand out anywhere.” Kyle’s tanks come with mounting straps. Don’t just weld ’em on and go, though. “Depending on how the tank is designed to mount will depend on if the existing tabs will work immediately or need to be modified,” Paul said. In this case, he created some spacers to allow the tank to set on the frame perfectly to capture the look the big bastard wanted, then he cut the tabs and tacked them to the frame. Next he removed the tank and solid tacked the tabs. He put the tank back on and made sure everything was in place. These tanks are handmade and not manufactured with a jig, so no two tanks are alike.
 The tabs were finish welded and the tanks shipped to Harold Pontarelli for repaint. Paul welds everything with Tig because the Argon gas shield makes for a more controlled burn. It gives him better penetration and a less brittle weld than a Mig. Kyle had one other recommendation. He often gets calls from brothers requesting tanks after they have taken their frame to the powdercoater. Don’t do that. Make sure all the sheet metal is prepped and assembled before any finish work is undertaken. In fact, many builders ride scoots without paint for a hundred miles or so before tearing down for paint. Saves the headache, and makes for a much tighter custom.
 Of course the whole operation must have a photo finish. Two days before the Love Ride, the tank is floating into town via Harold and eight H-D Performance troopers. The bike is rumbling in on the back of Paul Yaffe’s custom trailer. The two will meet with Bandit in Woodland Hills for the install and road test for the parties to come that weekend. He doesn’t deserve this scoot. It should be mine. –Renegade
|
| |
Bikernet West – Amazing Progress
By Robin Technologies |


|
Late into the evening, Bandit, Nuut Boy, and my wonderfully-knowledgeable- self hammer, weld, bolt, space, and tear our beards out moving forward on Bandit’s rigid. The Weerd Bros front end is in place with the Roadwings 21-inch, 40-spoke wheel. The rear is a 180-18, both with Avon tires. The frame is stretched 6 inches up and 2 out. The trees on the clean front end are raked 6 degrees (photo 1). The S&S 98-inch stroker is bolted in place as is the 5-speed Sputhe trans.
We set the engine and tranny in place and then found a scrap inner primary to line everything up. With the stock 32-tooth pulley on the tranny, we put a 70-tooth narrow belt pulley from Harley on the back with a 134-tooth belt. It was too long. We tried to get a hold of the frame manufacturer for some guidance, but they wouldn’t get back to us, so we had to wing it. We had another option. Run a Harley Thunderstar 65-tooth wide pulley for taller gearing for the trip. We picked up a 130-tooth belt and it fit like a glove. The pulley on the wheel also felt good and afforded us plenty of tire clearance with the offset frame. With the rear wheel in the center of the adjustment axle slot and the tire centered in the frame, it was time to fit the rear fender. The rear fender was a Milwaukee Iron job, which took some time to mount up. First we centered the tire in the frame. Ignore the offset rear leg. Center it in the frame using the cross member behind the seat as a guide. We centered it then strapped chunks of 3/4-inch board (photo2) to the tire with green paint masking (low tack) tape.
Then we slipped the fender in place after the rear belt was adjusted. Again, make sure the fender is centered over the tire. The fender didn’t contour the tire completely, so you must decide what area you want contoured. We decided on the top, most visible area. Make sure the slot for the belt rides a good two inches above the belt and at least a 1/4-inch from the inside.
Then the Samson exhaust was removed from the box. They don’t build exhaust for rigids so natch the Dyna exhaust didn’t fit, since with rubbermount frames the engine sets higher in the chassis. They were also over 10 inches different in length. For performance we cut them to a more equal length (photo 4), about 27 inches.
We also ordered baffles and we cut them (guessing) to give the 2 1/4-inch exhaust some back pressure. Then we mounted them. The front pipe was way too close to the deck, so we cut 2 inches out of it and gas welded the pipe back together. During this process we were able to bring the pipe into closer alignment with the rear exhaust. None of the brackets would work so the madman with a torch went to work building brackets. The seat was also a trick. Bandit purchased an old cop solo with the plunger t-bar from 34th Station, a bike restoration shop on Pacific. After much contemplation he decided that he had to mount springs under the seat for something of a ride, but springs were a problem. He had some success with a set of valve springs on his dicey Knucklehead, “Made all the difference in the world,” Bandit said while pondering the ride. But the old Bates tapered 2- or 3-inch springs generally bottom out under any load. Then a bolt of lightening hit while attending the Harley-Davidson new model presentation to the motorcycling press. In addition to all the new models for 2001, they were showing off their new police bike, which had a sprung seat. Bandit drew the 4-inch crescent wrench he’s been carrying in his pocket for the last 32 years and began to take the springs off the new 2001 model. Seven factory executives struggled to pull him off the new demo bike. “But wait, guys. I just want to borrow ’em,” he screamed, pulling on his crescent wrench. Back at the top-secret massive 50-square-foot Bikernet testing facility, the gang was taking more measurements. It was determined that if he could narrow the seat one inch, all would fit, and the seat spring studs would line up with the center of the frame tubes. A call was made to California Harley-Davidson to order the springs, ASAP. Nuut Boy went to work stripping the seat to just the pan. With a die-grinder he cut a 1-inch strip out of the center of the pan then laid enough brazing rod into the jagged gap to sink a battleship. We decided not to use the old t-bar and with some standard 3/8-inch round stock, fashioned a triangle brace under the seat for support.
|
1928 Shovelhead Runs Part VII
By Robin Technologies |

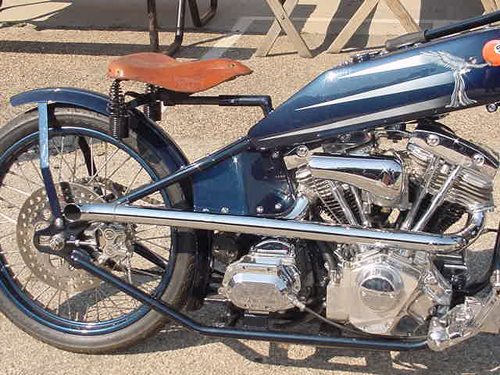
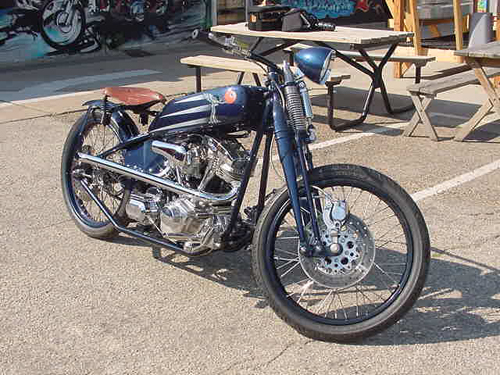
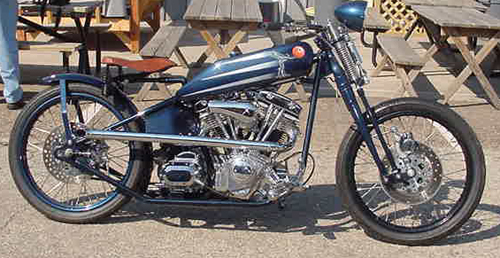
Here’s the deal. The 1928 project was recently completed except for a stylish exhaust system. The antique notion was based on racers from the ’20s, something way off the pavement, open and short.
JR, the service director of Strokers, explained the steps, “They were cut and pasted together. Bits and pieces from the scrap yard, combined with pre-bent 1 3/4-inch diameter 16-gauge tubing, which is similar to stock. We also used stock exhaust manifold chunks off scrapped systems.”
He hung up, and I sat back in my chair perplexed. I was faced with the same daunting task when we built the Amazing Shrunken FXR pipes. I had a myriad of questions and called back.
“Hold on JR,” I said trying to capture his attention while he was carb tuning a running, 100-inch, RevTech motor.
“What the hell do you want?” he said in a Texas gunslinger drawl.
“Do the pipes have baffles? I asked holding the phone like you grasp a girl you don’t want to lose.
“Nope,” JR said.
“Are there any brackets other than the exhaust manifolds?” I rattled the question rapid-fire quick, hoping that he wouldn’t hang up.
“One,” he said, “anything else?”
“Yep,” I barked.
“I gotta go,” JR fumbled and the straight-pipe, 100-incher roared.
“Wait,” I begged.
He hung up. I looked at the phone as if someone sliced the wires leading to the pole, and the died. The next day I called back. JR was off on Tuesday. I called Wednesday and the receptionist fed me to the service department. The service writer was courteous, told me JR was in but couldn’t find him.
I called the next day. He was on the premises but unavailable. I called the following day, still no JR. I was growing a complex. I called everyday for a week, no luck. I went around him to his boss, the magnificent Rick Fairless, the mastermind behind Strokers of Dallas with Strokers Ice House, one of the most happening biker bars in the South. An e-mail sprang back. JR suffered a heat stroke after road testing a new Big Dog, for two hours in 102 degrees, then helping his daughter move to college. I felt like shit.
Apparently heat strokes are notorious and can become an annual nightmare. This was his third devastating attack. We finally hooked up again, and he coughed up his exhaust pipe making secrets. Strokers is noted for their customs, which rock from old school radical choppers to hand-fabricated marvels. JR is learning more and more fabrication techniques to expand the shop’s capabilities.
“We’ve been performing sheet metal functions, with hammers, successfully,” JR said, “but with an English wheel and Yoder hammer machine, we can speed up the process. I’m taking classes.”
They don’t manufacture many exhaust systems, and when they do it’s by hand.
“You can buy exhaust pipe segments, 1 3/4-inch to 2 1/2 inches in diameter, from hot rod shops, and piece any pipe together,” JR explained. “We buy “U”, “S” shaped bends and straight chunks.”
Since I also faced the delicate job of trying to hold two chunks perfectly in line and tacking them, I asked JR how he handled the task.

“We discovered magnet clamps for holding chunks of pipe,” JR said, “they’re available from Harbor Freight Tool Supply. I made flat clamp brackets in dissimilar lengths from 3 to 6 inches long with a variety of holes drilled in them in an arch. There are two “C” clamps attached, on at either end. I welded bolts to the clamps so I can move them from hole to hole, on the bracket, or change the angle.
I asked a final nervous question about the allowable gaps when tacking pipes.
“I try to make the fit as close and precise as possible,” Jr explained. We continue to grind the edge of the pipe with a 90-degree, die grinder and a 2-inch 3M sanding disc. We also have a band saw with a tilt-able head for slicing exhaust at just the right angle.”
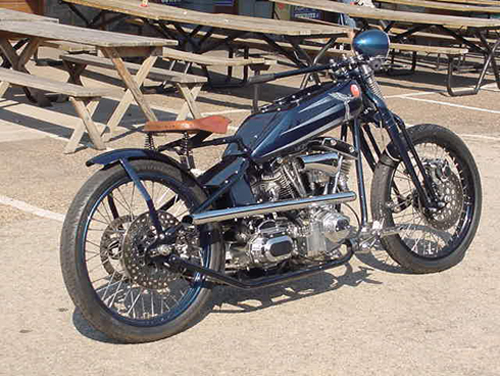
“The pipes haven’t blued,” I said looking at the shots.
“Yeah,” JR said. “We use three coats of Blue Shield by Kreeme, the guys who make the tank sealant.”
“So how loud are these puppies?” I asked holding my breath. They looked like window breakers.
“Not bad,” He muttered looking at the shop clock. I was burnin’ daylight in Dallas. “They’re loud enough that ya know what ya got.”
“That’s it,” I said. “I won’t darken your phone again.”
“It’s happy hour at Strokers,” JR barked, and I could sense that I was losing him.
“It’s party time,” were his final words.

