Bikernet East – An Eagle in the Garage
By Robin Technologies |
| Custom Chrome introduces the world’s first rocket-powered Zebra. The power plant of the Great Zebra Northern Steamer for Bikernet Chop-Off 2000 by Special Agent Zebra 05.22.00. The Great Zebra Northern Steamer is to be a biker’s bike. No fantasyland Hollywood bullshit in the way of $80,000 paint jobs or diamond encrusted spokes, no chop-shop hoopla, the Zebra Steamer is going to the root of American bike building, tight, right, fast, and reliable. It’s being built by the rider, with help from Bandit, Wrench, the Chinaman and the torque kings at Casa El Horsepower, in an anonymous garage in San Pedro, California.
These suckers come complete with carb and ignition system. It is literally bolt-in ready when it comes off the truck with any OEM or custom frame that will hold an Evolution. The RevTechs aren’t a cheap amalgamation of aftermarket pieces. The entire system is designed on a CAD (computer assisted design) system, just like the ones used at the big automotive plants. This means you get the latest in engine technology available. Every component is created from new tooling techniques in a state-of-the-art ISO manufacturing plant. But high-tech engineering manufacturing equipment and techniques aren’t any good without great concepts to use them on. Again, Custom Chrome has put its money where its product is and created some revolutionary new thinking in big twins. The RevTech engines use no head or base gaskets. Why? Because they leak and they blow. Instead, CCI uses ultra-high temperature O-rings, which are hard as hell itself. Ignition is computer controlled. They come in 88 and 100-inch displacement. The 88s have 4 1/4 flywheel stroke with a 3 5.8 bore. The 100s boast 4 3/8 stroke and 3 13/16-inch bore. The cases are cut from 356T6 cast aluminum. Every stress point contains added materials for increased strength (read: you don’t walk across the Mojave Desert in August). They also have removable press-in/bolt-in bearing inserts on both the left and right sides of the cases and removable bottom sump-plate permits internal inspection. RevTech’s cylinders have increased fin surface in high-heat areas, for advanced cooling (Fourth of July runs, anyone who rides in New Orleans on the I-10 during rush hour or Miami before or after Christmas day). Steel liners are Perma-locked into the outer aluminum castings. The pistons are cast for controlled expansion, which reduces engine noise and wear.
Special Agent Zebra |

| |
Bikernet East – The Rolling Chassis
By Robin Technologies |
|
The competition has changed, expanded. Can home-built choppers fly to Sturgis? Can Jesse James build a chop and actually ride it, with all his tools, mechanics, equipment, lathes, milling machines, and money? Can Billy Lane from Choppers Inc. build a bike by hand while wanton women dance seductively around him daily in him Maimi based studio. Can two crazed fools from Bikernet build two chops in a small San Pedro garage with limited tools and no cash and make it to the Badlands? Another builder has entered the competition, Japanese Jay from the local motorcycle shop, Station 34 in San Pedro. He’s building a rat Shovelhead, I think.

While we’re damned low on time and still trying to recover property from West Coast Choppers, we’ve decided to get together two running choppers and ride them proudly to Sturgis. We’ve called in all our heavy clients, folks like RevTech, Weerd Bros., and Custom Chrome, Baker, Paughco frames, Headwinds, Harley-Davidson, and put them abreast of our situation and we’re receiving outstanding support as always. Our new goal for the Chop-off 2000, is to race to Sturgis, with back tire fires and heads full of fresh Jack on our custom, hand-built machines. Bandit and I are going back to our roots, building our own scoots, with our own hands, the way we like ’em, fast and simple, no bullshit, no backing out. These will be independence choppers, American-style, no bullshit politics, attitude, downtime, and loss of parts. We just want to ride. As for the vote to see which chopper the world of bikers like best? I’ll still kick Bandit’s sorry ass from here to Lead and back, I’ll have his woman, his whiskey, and he’ll have a view of my back tire all the way. May the best badass win. See you in Sturgis. Saddle up and ride. My Bandit-smashing nightmare is well under way and I’ve employed the assistance of the talented, albeit nuts, Chinaman and the master of horsepower, Wrench. At the moment, I’m way ahead of Bandit. Nothing new there. Billy Lane is hard at it. Jay’s engine is in the frame, and Jesse James, well, he’s in Europe being interviewed by the Pope. In just a few days we’re already working with a rolling chassis. The new horse is sitting on some good-looking chromed Thunderstar wheels from our bros at Harley-Davidson, 21 inches up front and 16 in the back. We chose Performance Machine brakes to stop the monster, once I get to Sturgis. Until then, they’ll get little if any use, since it’s a race. We have the Paughco frame resurrected from the Bandit II, plus a Paughco oil bag. We were going to use the rear axle and oil bag from Bandit’s other chopper, but West Coast Choppers seemed to have somehow misplaced them. The tank will be a Russ Tom Harley-Davidson/Seattle custom stretch. This is where I’ll keep the fuel that Bandit will breathe the fumes from as we streak north. For a front end, I’m going to use a Harley-Davidson narrow glide, which we’re planning to widen with new triple tits. Joel at Headwinds is the man behind the lighthouse-powerful headlamp system, to light my way. I know I can ride from L.A. to Sturgis straight through, because I’ve done it before, but I expect a great deal of whining and crying from the very soft-assed Bandit. The engine will be a beautiful new RevTech 88-inch CAD designed, fire-breathing whip-lashing, get-the-hell-out-of-my-way twin. The whole crew at Bikernet is pumped to test out one of these killer-tech twins as it’s the first RevTech we’ve gotten to try and we’ve got high hopes for her. The engine came complete with a RevTech carb, increased cooling fin surfaces, no head gasket, never-fail O-rings, high-performance, computer-controlled ignition, and it fits the custom frame with no modifications needed—we hope. Just bolt and scream, which is how we like it. And by the way, if you’re wishing you could get one of these fine RevTech monsters in a 100-inch, you can. To transfer all this power to the flypaper-sticky Avon in the back, we’ll be employing a Baker 6-speed tranny. I’ve not yet had the pleasure of running a Baker 6, but Bandit assures me they are as smooth and stout as a bottle of 20-year-old Jack. Can’t wait to marry it to the RevTech and watch them have some of the honeymoon torque sex. And Avon Tires, of course, will be providing the glue to keep me on the road all the way into South Dakota. If you’ve never owned a set of Avons, you’re missing out. |
Bikernet West – Zebra’s Chop is in the Lead
By Robin Technologies |
In his sullen mood, he continues to assist his brother Agent Zebra, although some of the parts he’s now bolting on the Agent’s Paughco/Custom Chrome monster look suspiciously familiar. Could it have been an inside job? Could he need cash to pay the rent? Could another psycho girlfriend have taken him for more than his heart? –Snake
|
Bikernet West Bogged Down In Pheonix
By Robin Technologies |
|
I knew it! The sonuvabitch couldn’t make it to the Badlands and back on that piece of shit. I knew it! The way Bandit mounted that tank was fucked from the beginning.
 I told him. Nuutboy told him. Harold Pontarelli told him. Shit, his 78-year-old mother told him. Did the big bastard listen? Nooo. So it jumped off the frame in Aspen, Colo., and landed in his lap.
 Yeah, they welded it up in Aspen with the help of Randy Aron from Cycle Visions in San Diego, and he limped into Sturgis, rode around the Badlands for the week and then the scoot was kidnapped from him by someone who knows what the fuck he’s doing, namely Paul Yaffe from Paul Yaffe Originals in Phoenix. Paul is working with Kyle of Independent Tanks, who hand makes steel tanks from heavy 16-gauge material. It’s about time someone grabbed that bike before it exploded into flames and scorched the ornery sonuvabitch.
 So we sent that fly-bitten claybrain to Phoenix for a welding lesson and instructions on how to properly mount a gas tank. If he wasn’t such a hasty-witted old fool, he would have put the bike together right the first time.
 Here are shots of the existing piece of shit with the new tanks recommended by Paul, who builds some of the most innovative bikes on the planet.

 Paul’s philosophy is to manufacture enough custom components to allow his customers to build something without doing a piece-meal job. “Instead of buying fenders from me that don’t fit the other guys’ frame properly and then mount a gas tank from so and so, and nothing fits properly, I want to give the customer half a chance to build a world-class custom on his own.” Paul’s positioning himself, unlike Bandit, to afford customers with frames, plus the fenders, tanks and billet components to match. Paul began his operation building LED taillight products. Unlike the slob who runs this joint, Paul is a young man of vast energy and talent who could not contain himself building bikes with existing components. He began building his own fenders, air cleaners, frames, etc. The young upstart with the flaming red hair does share one notion with Bandit: “If you’re going to build a new full-custom for a customer, I want the bike to be a reliable runner, of the newest technology, or how can you call it a new bike?” So all of Paul’s bikes are built with Harley-Davidson Twin Cam drive lines. “I use as much Harley stuff as possible,” Paul said. “Plus the factory is going crazy building more new accessories all the time. The selection is growing by leaps and bounds.” Damn, if I told that lunkhead Bandit once, I told him a thousand times, it’s time to move away from the Evolution shit into the real world of Twin Cams. But that motley-minded minnow is still out in the garage trying to put two Mikuni’s carbs on his ’48 Panhead. If you want to check true customs, built to ride, check Paul’s site http://www.paulyaffeorginals.com Finally, after much consternation, Bandit succumbed to one of Paul’s buddies, Kyle at Independent Gas Tanks. These are new, contoured tanks and here’s how ya do it right.
 Kyle has been building his own line of steel gas tanks for two years. Prior to ’98, he built tanks for Roger Borget for three years and before that he built Porsche 911 race cars. He won’t get near aluminum. “Not with the engine sizes that are bouncing around in these frames,” Kyle said. None of his creations are Mig welded, either. “I only Tig weld my tanks. I’m glad to work with builders and make suggestions.
 I’ve hand-built over 1,000 tanks for Harleys, and if told the brand frame, the stretch and rake, I usually know which tank works the best. I can go with one of my six to eight standard styles, or I can design something out of this world. I can make a bike blend into the crowd or stand out anywhere.” Kyle’s tanks come with mounting straps. Don’t just weld ’em on and go, though. “Depending on how the tank is designed to mount will depend on if the existing tabs will work immediately or need to be modified,” Paul said. In this case, he created some spacers to allow the tank to set on the frame perfectly to capture the look the big bastard wanted, then he cut the tabs and tacked them to the frame. Next he removed the tank and solid tacked the tabs. He put the tank back on and made sure everything was in place. These tanks are handmade and not manufactured with a jig, so no two tanks are alike.
 The tabs were finish welded and the tanks shipped to Harold Pontarelli for repaint. Paul welds everything with Tig because the Argon gas shield makes for a more controlled burn. It gives him better penetration and a less brittle weld than a Mig. Kyle had one other recommendation. He often gets calls from brothers requesting tanks after they have taken their frame to the powdercoater. Don’t do that. Make sure all the sheet metal is prepped and assembled before any finish work is undertaken. In fact, many builders ride scoots without paint for a hundred miles or so before tearing down for paint. Saves the headache, and makes for a much tighter custom.
 Of course the whole operation must have a photo finish. Two days before the Love Ride, the tank is floating into town via Harold and eight H-D Performance troopers. The bike is rumbling in on the back of Paul Yaffe’s custom trailer. The two will meet with Bandit in Woodland Hills for the install and road test for the parties to come that weekend. He doesn’t deserve this scoot. It should be mine. –Renegade
|
| |
1928 Shovelhead Comes To California Part VIII
By Robin Technologies |


Master builder and mechanic, Deacon, from Pro-Street in Oahu.
Bob Kay. from American Iron Horse. was a bro and shipped the retro Shovelhead. from Strokers in Dallas. to LifeStyle Cycles in Orange County, California along with a new batch of Dallas Choppers. It arrived the day before a handful of weary travelers stumbled into Los Angeles. on their way home, from Sturgis, Glen and Kerry Priddle were headed back to Australia after spending almost a month, with a dozen Aussies, roaming the mid west.
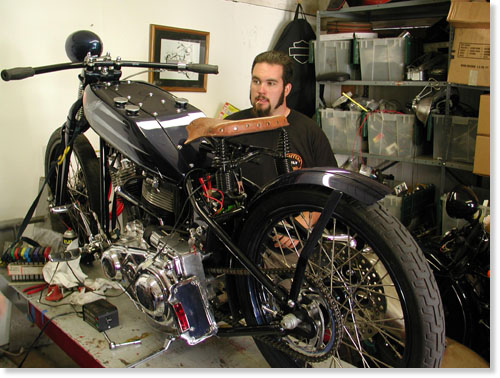
Deacon’s son Chase and the 1928 Shovelhead.
Deacon, his son Chase, and the son’s girl Amanda rode several thousand miles averaging 95 mph wherever they rode. Deacon and Chase are both master mechanics. The ol’ man’s shop, Pro-Street, is located on Oahu, (808) 236-0405 and he’s negotiating with Billy Lane of Choppers Inc. to build engines for Billy’s Discovery Channel Bikes. His son is working in Oregon, but as soon as he returns, he’s packin’ his shit and heading back to the islands.
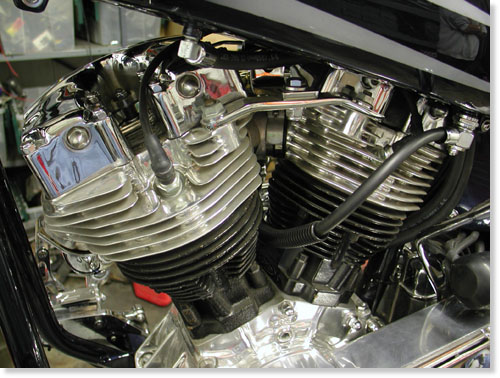
JIMS machine rebuilt and detailed the engine. It was sharp and runs like a top.
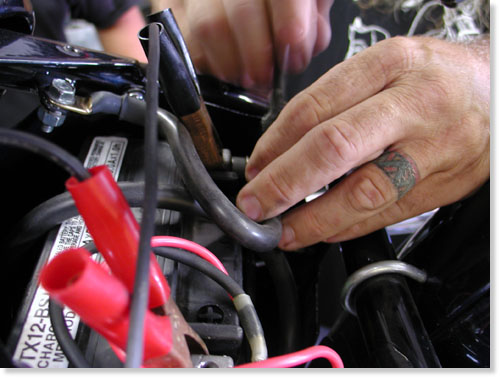
Charging and checking battery connections.
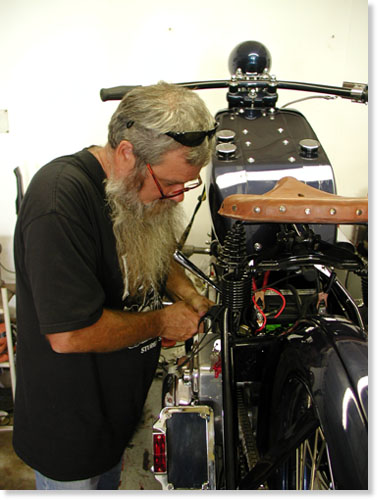
Deacon checking the solenoid.
Deacon rolled into the Bikernet Headquarters just as the Shovel arrived and we attempted to fire the beast to life. I moved the seat forward, detailed the front end and charged the battery. But, even with a fresh battery, she wouldn’t engage. Deacon suspected the aftermarket solenoid. Seems the spacers and gaskets are too thick, just enough to prevent the solenoid from grabbing the shaft. I trimmed the gasket with an Exacto blade and Deacon ground the face of the spacer. Installed, it worked like a champ. We took it for a ride.
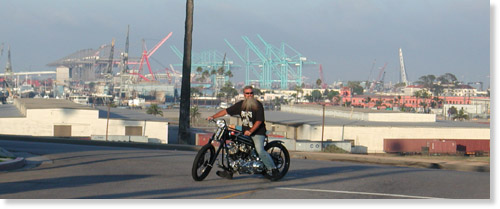
Los Angeles Harbor and our first roadtest.
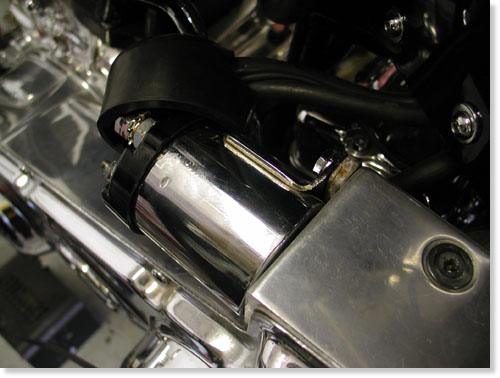
First Deacon checked the connections and voltage at the solenoid. He also shorted across the leads with an Allen wrench to see if the circuit was operating properly.
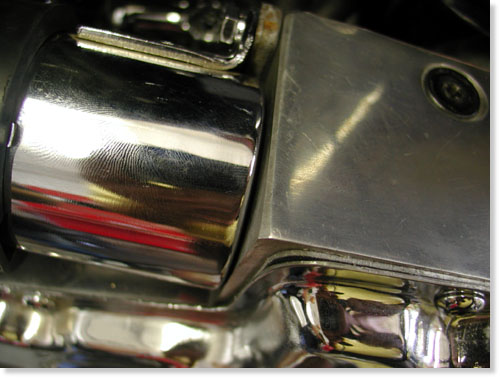
The solenoid replaced after the gasket around the base was trimmed and the spacer, behind the unit, shaved. Worked perfectly.
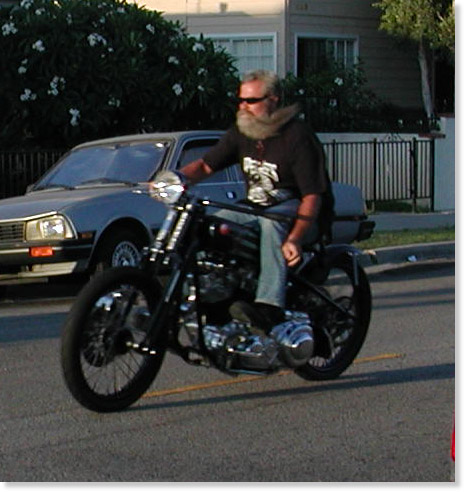
Checkin’ the gears.
It was impossible to jam the suicide shifter into nuetral once the bike was running, even while rolling. Deacon and chase adjusted the clutch, and recommended a Rivera, old school, clutch pack to eliminate chatter and afford the rider smoother shifts. The clutch wobbled and was too tight to find neutral. They loosened the springs until only a thread showed past the adjustment nuts and the spring retainer ran true.
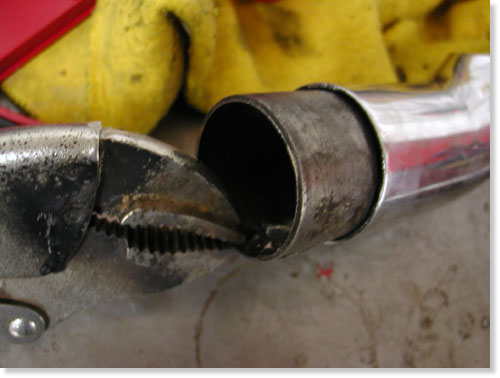
Can you see the cracks?
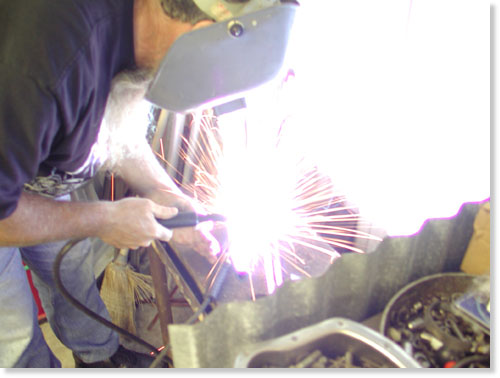
The Millermatic 175 hard at work.
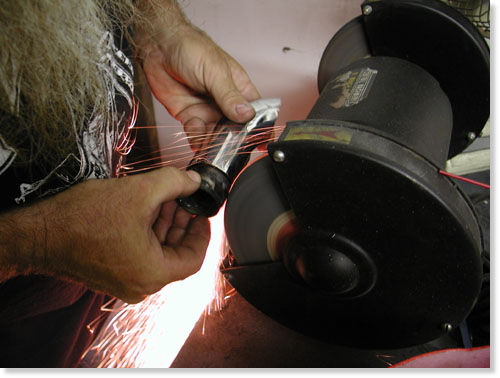
Deacon built a bead then ground it smooth as a baby’s ass.
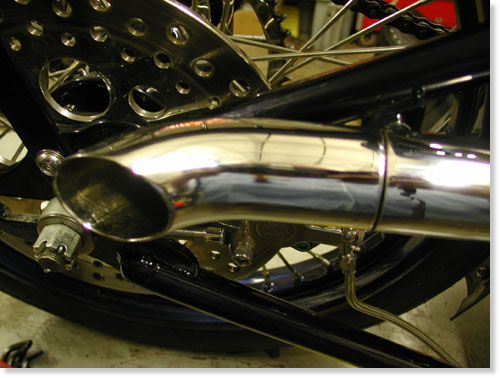
The tip installed, solid as a rock.
I developed padded fork stops and while running we noticed that the clean, handmade, Stroker’s pipe tip was rattling with only one bolt holding it. Upon removal we discovered that the area around the installation nut had already cracked and Deacon grabbed the Millermatic. He welded the cracks and nut for more strength. Then we discovered that the tip shelf was too small, so the pipe end had a tendency to vibrate. Deacon went back to the welder and built a bead around the outside, of the shelf, then ground it to fit. A much cleaner/tighter fit, and the pipe didn’t require an additional fastener.
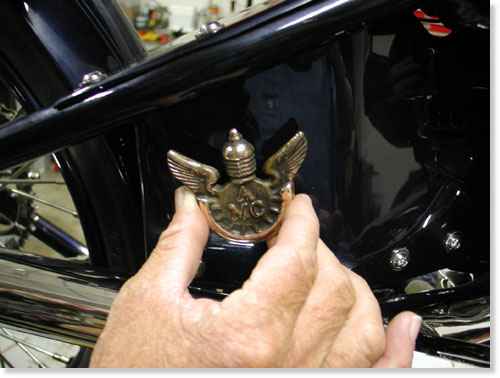
Anybody know how old this cast bronze emblem is?
While in Hawaii at the first Choppers Only Show in Wakiki, I gave Deacon, the promoter, a handmade belt buckle for being a gracious host. He returned the favor with an old license plate doodad from the Antique Motorcycle Club. It was destined for the Shovelhead.
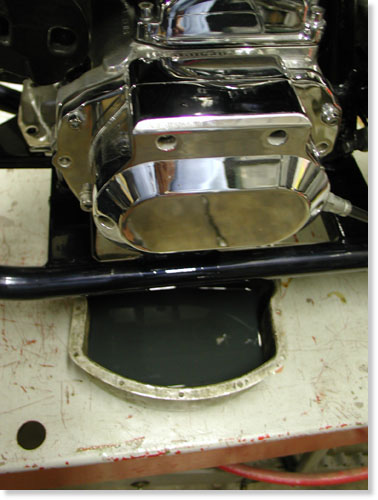
While testing the shifting, clutch and tranny, the gears seemed to bang harshly. We checked the oil level, which seemed precariously low. It wasn’t bad, but we drained the oil and replaced it with fresh Custom Chrome tranny lube.
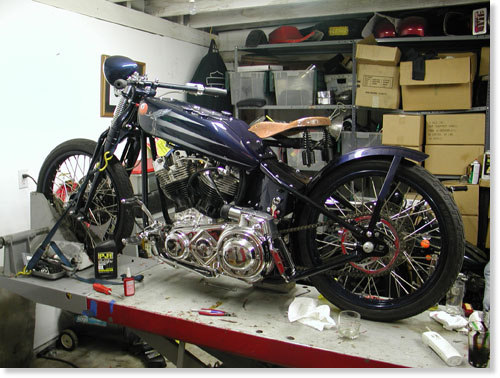
The 1928 Shovel was ready to rock and so were we. Deacon and Glen broke out harmonicas and kicked off the blues. They sampled the Irish whiskey, Tullamore Dew, Sin Wu barbecued and the party rolled on.
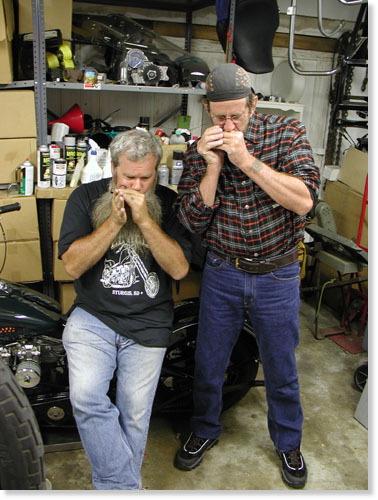
Deacon and Glen bringing down the Bikernet Garage.
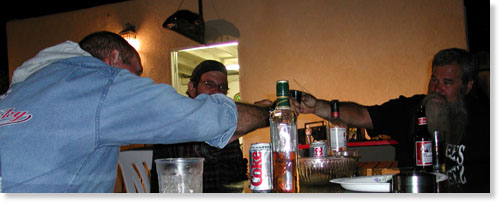
One mo’ shot of Tullamore Dew.
Helluva night, sharp bike and times to always remember. The next day Deacon air-freighted his 2003 FLH to Oahu and grabbed a flight. His son and Amanda boarded their basket case Softail and rode north. Glen and Kerry hid out in Los Angeles and waited for their flight back to Australia, and we dusted off the headquarters and pretended to go back to work.
Stay tuned for the next adventure of the 1928 Shovelhead.
–Bandit
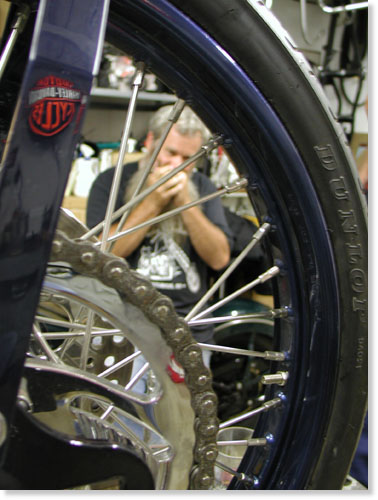

Bikernet West – Mikuni Carburators to the Rescue
By Robin Technologies |
With Sturgis 2000 looming over Bandit’shead we’ve been firing away at the getting the job done. Bikernet Eastmachine was well out in front in the competition when we wheeled the Agent’slow slung Softail onto a slick Gold Rush semi and said goodbye as the rig,packed with Ultra machines, Big Dogs and customs from the west coast, headedeast. Eddie Trotta from Thunder Design was more than happy to have thebike unpacked in his shop in Fort Lauderdale, so he could point a fingerat Bandit’s creation for Agent Zebra and bust out laughing, “You expectto ride that to Sturgis?” he said rolling on the floor of his shop. Weweren’t discouraged and neither was Bandit as we strapped the road wingswheels, the Weerd Brothers Front end on the Daytec rigid and went to work.
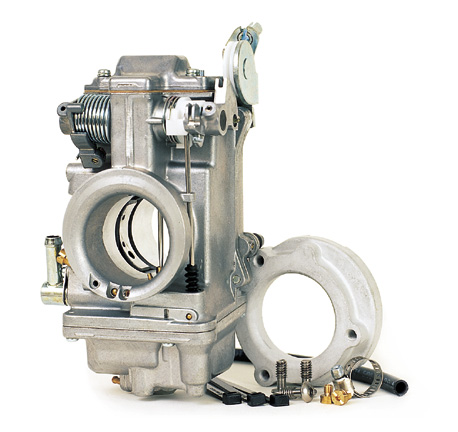
This was no ordinary installation. First,time was a factor, second it’s no normal, stock carburetor swap. The 98-inchS&S motor offered taller cylinders and improper intake manifold fitment.The stock Super E S&S manifold was too big for the 42 mm polished MikuniCarburetor. Stock manifolds shove the carb out too far and aren’t wideenough for the tall S&S cylinders so a quick call was made to JamesSimonelli of S&S who rushed the correct manifold to Mikuni. Lee alsowanted to explore an American Iron Horse manifold available for their customswhich pull the carb in closer to the engine and “L.T.” or James Littleof American Iron Horse moved equally fast and the parts were in hand inone day. The next hurtle: The cables. A call went out to Xavier at BarnettCables who turned about a set of Mikuni compatible cables which are setup the same as stock H-D cables, but cut to Bryan’s specifications forthe job. They also arrived in time.
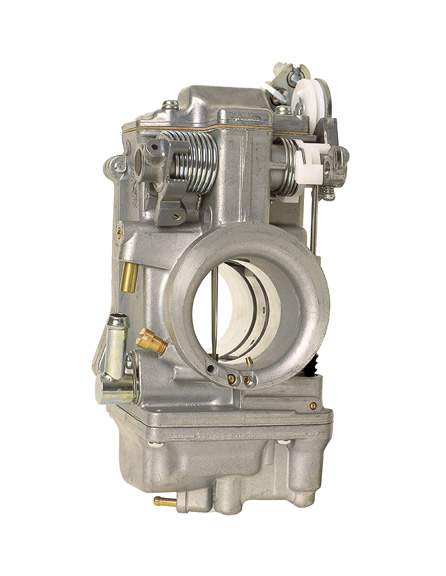

Bryan pointed out an adjustment on theleft side of the carb as you face it, a main jet air adjustment. He toldme to inform Bandit to turn it out a half turn in Denver for more compatiblerunning in altitudes. The bike immediately fired to life for the firsttime. Two weeks to go.
Sturgis 2000 Project Bike Crew
By Robin Technologies |
| Daytec Center 17469 Lemon Street Hesperia, CA 92345 (760) 244-1591 |
Downtown Harley-Davidson Russ Tom 6727 Martin Luther King Way Seattle, WA 98118 (818) 901-7037 |
Bay Area Custom Cycles Ron Simms 25224 Mission Blvd. Hayward, CA 94541 |
| Milwaukee Iron Randy Simpson 3000 Lenox Lynchburg, VA 24501 |
Headwinds Cycle Products Joel Felty P.O. Box 661213 Arcadia, CA 91066-1213 (818) 359-8044 |
Custom Chrome, Inc. See your local dealer Or Call (800) 729-3332 |
| Performance Machine Ted Sands 6892 Marlin Circle LaPalma, CA 90623 (714) 523-3000 |
South Bay Chrome 2041 S. Grand Ave. Santa Ana, CA 92705 (714) 434-1141 |
S&S Cycle Rt. 2 Box 215 County G Viola, WI 54664 (608) 627-1467 |
| Rich Products 12420 San Pablo Ave. Richmond, CA 94805 (510) 234-7547 |
HiTech Products 11023 Glenoaks Blvd., Unit H Pacoima, CA 91331 (818) 834-1060 |
Hannon’s Machine Shop 21050 Mission Blvd. Hayward, CA 94541 (510) 581-5315 |
| Corbin 11445 Commercial Parkway Castroville, CA 95012 (408) 633-2500 |
Weerd Bros. Inc 329 W. Lone Cactus, #10 Phoenix, AZ 85027 (623) 869-9477 (623) 869-9478 FAX |
SJP Engineering www.sjp-engineering.nl |
| Joker Machine 1078 West Kirkwall Road Azusa CA 91702 (626) 334-9371 www.jokermachine.com |
||
1928 Shovelhead Project Part V
By Robin Technologies |


The pressure is on. Lena Fairless, a 15-year-old bubbly Texas beauty, is after Bandit. This hell bent young woman plans to become his sixth wife. To lure the big bastard from the coast, Easyriders of Dallas has been working hard on his Shovelhead under Lena’s strict direction.
Even this article was investigated while the shop fabricator was sick in bed awaiting surgery. Lena’s wrath reached him bed side. “Keep the project moving,” she screamed into the phone, “we’ve sent out the wedding invitations.” We couldn’t find Bandit for comment.
At this point the motorcycle is almost ready for paint, powder and chrome. According to Jim, who coughed up blood as we forced him to speak clearly into our failing 20-year-old tape recorder, “Since the bike is designed to be reminiscent of the ’20s vintage motorcycles, instead of lots of chrome we’re going with a matching powdercoat on the rims and rear legs of the front end.
“We have finished much of the detail in the form of the handmade Milwaukee Iron handlebars by Randy Simpson with the internal throttle control from Pat Kennedy, which I installed just before the ambulance came to get me. As they attempted to load me from the concrete floor onto the gurney, Lena asked if I could finish the exhaust system.
“We ordered the material and the flanges from Paughco, the one company that devotes most of its energy to building retro parts. I welded the 1 3/4-inch tubing to the Paughco flanges as the EMT tried to insert an IV into my right arm. We designed the rear of the pipe to be adjustable. The kicked-out cap is removable, along with the mounting bracket, so that the baffle can be removed and adjusted for tuning. The pipes will be finished with Jet Hot coating to avoid the problems of chrome and give the pipes a lasting, even finish.” Jim mumbled the words then passed out.
Lena moved quickly to the portable refrigerator that rattled in the corner of Jim’s small mobile home on the edge of the Texas plains. She’d told him that he had to continue to work despite his illness, but without pay because she didn’t want to risk a workman’s compensation claim. Tough broad. As they wheeled him out of the 107-degree shop without so much as a fan, Lena slapped Jim until he returned to consciousness and explained the seat mounting assembly to me. He machined and welded a piece of tubing into the seat downtube, then welded it in place. From there he machined a piece of solid stock that the seat clamps to. It was designed to move the seat to the rear to enhance the leg room for Bandit and prevent the seat from lingering over the tank. It too will be powdercoated.

The final panel over the tank hides the oil line connections on the left side. The gas stays in the right side. It also hides most of the electrical components, including the regulator and ignition module. Jim made the oil lines from seamless cold pulled stainless tubing.
As you look at the photos, you’ll notice how the taillight and license plate are mounted off the turned brake caliper bracket. Bandit, under a great deal of pressure from his next wife, was asked what he thought of the progress of his custom scoot. Thinking quickly, he reviewed his options while complimenting Jim’s workmanship. But he knew that if the bike was torn and shipped to paint soon that he would be facing life-changing stress–another marriage. Could he actually move to Texas and face another marriage? He reviewed his options as he watched the battered craftsman slip in and out of consciousness. A trickle of blood ran from the corner of his eye. His skin was as white as the lines on the highways running out of town and it took three able-bodied men to shore him up to even a sitting position to face his employer’s daughter.
Bandit succumbed to his own pressure and complained of the flap-like license plate, asking to move it. I was astounded by Jim’s reaction. His artistry came first over his failing heart and the aneurysm creeping steadily toward his brain. He admitted that he too was unsure of the appearance of the license and could possibly conjure up something different. Just then the skies opened up and a summer thunderstorm struck, rattling windows throughout the region. That was nothing compared to the blistering reaction by the 15-year-old high school student.
She ditched school and forced Jim, who was hospitalized at the time, to come up with an award-winning taillight concept and license plate bracket and illustrate it. This is the illustration, and the entire staff concurs that it is brilliant. The taillight will be hand fabricated into the reproduction ’20s fender with LED lights for illumination. The license plate will be mounted to the frame and the rear of the inner primary with steel brackets to avoid any semblance of billet aluminum. The slim, contoured assembly housing the lights will contain 10 running LEDs with an additional six for braking. The license plate bracket will also contain several white LEDs for illumination of the plate. Jim passed out shortly after this illustration was finished and we scurried from his room to avoid the temptress, Lena, who dragged several nurses down the hall to demand more work from Jim.
This machine will ring the wedding bell or break more than just Jim’s back. Rumor has it that Bandit is going to Texas, but avoiding Dallas, to board the tramp freighter “Leon” for his escape from the country. Another report will be forthcoming.
–Wrench
Bikernet West – Belt Drives Limited Open Belt Installation
By Robin Technologies |
 Here’s the deal. With less than two weeks to go I’m praying, laughin’, grinning and scrambling. The paint finally arrived from Harold Pontarelli of H-D Performance of Vacaville, California, and the dark haired beauty wanted to be at the shed when I opened it. I paced the floor waiting for her alabaster legs to bring her quiet self up the sagging stairs and into the world headquarters of bikernet.com. We took the carefully packed boxes to the basement where we were attacked by the foam peanuts assigned to protect the polished finish. First it was slabs of pressed foam, then thousands of bouncing peanuts, yards of plastic wrap, then plastic bags and bubble wrap until we finally reached the bright candy blue finish with cream flames, silver inserts, for dimension, and gray pinstriping. Unbelievable! The perfect match for the bike. I’m jazzed. But let’s explain some of the praying that’s going one. BDL Belt drives, especially this one in particular, are simple to install. Incredibly simple, but there’s a caveat, a loophole or a tiny chink in the armor. It’s called alignment and spacing. Hot Rod Bikes recently published a full-on BDL installation, and I read it several times. It never made any sense to my simple mind, yet it was full of very precise instructions. The key is how you install and space the motor and tranny. It turns out that your inner primary, or in our case, the motor plate, is the best alignment tool you have. According to Frank Kaisler, the editor, you leave the engine and tranny loose, bolt the inner primary or belt plate to the engine then pull the tranny into place and bolt it up tight and start checking under the engine and tranny for gaps with feeler gauges. In the article it showed big Frank filling the gaps with spacers as thin as .010. Damn, that’s getting touchy. Recently a Bikernet reader, Breeze, sent me the following on BDL installation suggestions and I added my two cents worth to his experience: “When I was installing the BDL 3-inch open kit (the one that comes with the motor plate) I was having a bitch of a time gettin’ the belt on. So, I called and got to talk to their tech support.”
“Anyway Buddy Bob, tech master, says, “Oooh, just file the pulley splines (Photo 1) it will go right on.” Filing splines applies to S&S motors with slightly larger main shafts, like .001 so take your time and it will work out fine. If you don’t and force the pulley on, you may have a serious problem taking it off. I used a handmade puller from the bottom of the tool box to get the pulley back off.” “As far as alignment I use the good ol’ straight edge across the pulleys method. Check at top, center, and bottom, to get things straight on both axis. I do this without the belt and space the front pulley out so you can use feeler gauges to compare the front to back space between the rear pulley and the straight edge. Of course the ultimate alignment test is to run it and see how the belt is tracking. It should not wander and should track on the front pulleys outer flange and center on the rear pulley.” “I think they have a great design there, it is one of the smoothes clutches I’ve run, but you need to check tolerances for reliable running. Be sure to follow the instructions on the clutch install, the Locktite they tell you to use on the basket splines is important for the basket to seat properly.” “They call me the Breeze, I keep rolling down the road!” Well, that’s the Breeze’s story. In fact Breeze has given me a couple more things to check. I put one of the polished rotor covers on, which threw my pulley alignment out of whack, so I had to take it back off. I’d rather have reliability that flash. Before you attempt to install the belt drive check these alignment areas. Bolt your rear motor mount bolts down tight, without the top one in place. With feeler gauges check the front motor mount. Space the front ones if there is any gap. Now bolt down the tranny plate and the tranny except for the single bolt on the right side (Photo 2.)
Check the clearance to the final stud from the frame and correct the spacing. Now with everything loosened up install the inner primary. The BDL system comes with a very heavy duty clutch bearing, so the the stock bearing race must be removed. Fortunately I had a JIMS puller for just that application.
That and a couple of crescent wrenches and the puppy was gone, and the new bearing installed. Slide the clutch and front pulley on, and make one more alignment check as you rotate the motor (Photo 4).
Grease the starter shaft and bolt in the starter pinion gear. Next install the clutch pack as per the manual. You can now install the belt guard and adjust the clutch. I’m carrying another set of clutch studs and springs, in case the clutch begins to slip. I’m hauling along another belt for safety, also. Couple of years ago, I ate one (it wasn’t a BDL, though). Seems like a lot of work, but actually this is one of the cleanest, simplest systems out there, and once you have it dialed in, you can put it on and take it off in minutes. Damn, I running out of time. Gotta git to the wiring. Rock and roll. –Bandit
|
Bikernet West – The Chop Lives
By Robin Technologies |
|

The speedometer arrived from the Dallas Easyriders with a little over 24 hours to kick-off. The cable was coiled in a cardboard box waiting and the drive unit was already bolted to the front wheel. Unfortunately, the cable was the wrong unit and a hunt began for the proper cap. A call from Phil, the Hamster painter, encouraged Bandit to send a young lady to see Jim at Drag Bike Engineering. He had the cable and, at three in the morning, Bandit was installing it. We will also follow this series with an article on the Weerd Bros. front ends. This is a ball-milled wide glide that, depending on what ruler you use, is approximately 14-over. According to Bandit, who is in the garage packing as I hit the keys, the front end is light handling with narrowed flat track bars due to the six degrees of additional rake. Even with an overall 44 degrees of rake, the front sliders are smooth and work effortlessly. Although this is a European-built front end with metric Allen head fasteners, it’s highly adjustable with removable fender mounts and brake caliper mounts that can be installed on both lowers or either one or none for the hardcore muthas.
 Bandit’s about to take his Blue Flame for a final test ride with his bed roll centered over the Weerd Bros. front end. Yesterday, during the heat of the harbor day, a small Fed Ex package arrived. It was from C.J., the old biker engraver. Inside was a Bikernet engraved point cover, a “Bandit” money clip, and a flamed mag light. When more photography is revealed of the Blue Flame, the Bikernet logo with our babe mascot will be revealed in all her nearly nude glory. Damn, when she walks into the sagging headquarters, everything stops, as if a contact high permeated the garage. In a daze we watch her every fluid move. By reader demand we will post a photograph of the lavish facility in the next couple of weeks.
 The bastard is rolling out in the wee hours of the morning and the race will be on for the Badlands. Agent Zebra will be heading out of Miami at noon on Saturday heading north and into Tennessee, as Bandit heads east across the border into Arizona where he will relieve his helmet of duty and ride on in freedom toward Phoenix.
 More reports are forthcoming. Live from the Bikernet World Headquarters in San Pedro, California. This is Renegade. Over and out.
|
