Bikernet West – The Blue Bomb Explodes
By Robin Technologies |
In a mad rush to build and break-in a monster Simms built S&S motor rigid before the long haul to Sturgis, Bandit makes an abrupt move. At the final hour he decided to take the frame to a local powder coater in Orange County who is capable of layering on a two or three stage powder coating process. After much deliberation with the entire staff, the decision to attempt a match between the frame and sheet metal was made. Nuutboy pointed out that the powder coated frame would be more resilient to wear and tear. Snake, in a rare lucid moment, noted that we wouldn’t be able to cover Bandit’s crappy welds with bondo, because powder coating is baked at such a high temperature that it melts the bondo. Overnight shipping would have been less than $100 to truck the delicate metal parts to Sacramento for Harold Pontarelli to paint. In contrast if we had the frame powder coated locally, we could have it back in three days and be working on the bike. On top of the concern for the various components being shipped, damaged, lost or dented- which would really set things back- there was the overall concern of time. We needed to be building a bike. Some of the Bikernet gang like Renegade, who was pissed that we weren’t working on his bike (he won’t ever let any of our mitts near it), Snake, Nuutboy, and my most informed self, huddled around a large bottle of Jack and a small bonfire in the junkyard rubble behind the Bikernet World Headquarters in San Pedro, California to take a vote. Bandit was somewhere inside the luxurious offices chasing a new female recruit, an oriental girl, whom he had failed to introduce to the rest of us. He was building a deep-seated resentment amongst the staff. “I say, fuck that bastard, let’s burn his frame,” Renegade said taking a hit on the freshly opened bottle of Tennessee champaign. “You say that every day,” Snake mumbled filling his large rusting flask with the bottle while guzzling the last remaining can of Bud from his 12 pack. No one else drinks beer. “We’re supposed to be deciding whether to ship or powder coat,” Nuutboy said standing on the edge of the fire holding a wad of tools in each hand. He doesn’t drink, but smokes joints incessantly and fidgets constantly. “We’re running out of time.” The evening went south from there. More riders showed up, Japanese Jay from the antique bike shop, 34th Station, came by. Chris from Hill Products wandered in and filled his boot flask, put in his two-cents worth and moved on. Nuutboy and I pondered the question until we heard the giggling stop from inside the Headquarters and the large thump of boots against rickety floors. Bandit appeared bleary eyed but content and placed his vote. If we could get a sample of the paint color on a separate rod we could ship it to Harold for a paint match. We went to work. We delivered the frame to Primo Powder Coating in Huntington Beach, California (714) 596-4242. They had a sample of the metallic blue we were after, waiting for us. We immediately took that sample to a mail box joint and shipped it overnight. The tank and fenders were carefully boxed up and shipped to Harold via UPS second day air. Then we delivered the chrome to Orange County Plating (714) 532-4610 where they immediately photograph the items and enter them into a computer. In four days we had the frame and chrome back and were in the process of building the bike. Harold moved on the paint quickly, but even with a simple flame job on the table, a couple of days was spent at the body shop, then paint prep and primer, then undercoats of silver base were followed by a matching blue candy with a hint of pearl, then drying time before the graphics could be laid out. Two weeks have slipped past, but the progress with the frame in hand is considerable. The engine and tranny are bolted in. The Weerd brothers front end is in place. The wheels and P.M. brakes are in place along with the Samson exhaust system. Wiring will begin this weekend. Then with the BDL 3-inch primary belt in place we will haul the bike to Mikuni for a Carb and go for a ride. Here’s a sample of the paint from Vacaville, California near Sacramento.     –Wrench
|
1928 Shovelhead Project Part V
By Robin Technologies |


The pressure is on. Lena Fairless, a 15-year-old bubbly Texas beauty, is after Bandit. This hell bent young woman plans to become his sixth wife. To lure the big bastard from the coast, Easyriders of Dallas has been working hard on his Shovelhead under Lena’s strict direction.
Even this article was investigated while the shop fabricator was sick in bed awaiting surgery. Lena’s wrath reached him bed side. “Keep the project moving,” she screamed into the phone, “we’ve sent out the wedding invitations.” We couldn’t find Bandit for comment.
At this point the motorcycle is almost ready for paint, powder and chrome. According to Jim, who coughed up blood as we forced him to speak clearly into our failing 20-year-old tape recorder, “Since the bike is designed to be reminiscent of the ’20s vintage motorcycles, instead of lots of chrome we’re going with a matching powdercoat on the rims and rear legs of the front end.
“We have finished much of the detail in the form of the handmade Milwaukee Iron handlebars by Randy Simpson with the internal throttle control from Pat Kennedy, which I installed just before the ambulance came to get me. As they attempted to load me from the concrete floor onto the gurney, Lena asked if I could finish the exhaust system.
“We ordered the material and the flanges from Paughco, the one company that devotes most of its energy to building retro parts. I welded the 1 3/4-inch tubing to the Paughco flanges as the EMT tried to insert an IV into my right arm. We designed the rear of the pipe to be adjustable. The kicked-out cap is removable, along with the mounting bracket, so that the baffle can be removed and adjusted for tuning. The pipes will be finished with Jet Hot coating to avoid the problems of chrome and give the pipes a lasting, even finish.” Jim mumbled the words then passed out.
Lena moved quickly to the portable refrigerator that rattled in the corner of Jim’s small mobile home on the edge of the Texas plains. She’d told him that he had to continue to work despite his illness, but without pay because she didn’t want to risk a workman’s compensation claim. Tough broad. As they wheeled him out of the 107-degree shop without so much as a fan, Lena slapped Jim until he returned to consciousness and explained the seat mounting assembly to me. He machined and welded a piece of tubing into the seat downtube, then welded it in place. From there he machined a piece of solid stock that the seat clamps to. It was designed to move the seat to the rear to enhance the leg room for Bandit and prevent the seat from lingering over the tank. It too will be powdercoated.

The final panel over the tank hides the oil line connections on the left side. The gas stays in the right side. It also hides most of the electrical components, including the regulator and ignition module. Jim made the oil lines from seamless cold pulled stainless tubing.
As you look at the photos, you’ll notice how the taillight and license plate are mounted off the turned brake caliper bracket. Bandit, under a great deal of pressure from his next wife, was asked what he thought of the progress of his custom scoot. Thinking quickly, he reviewed his options while complimenting Jim’s workmanship. But he knew that if the bike was torn and shipped to paint soon that he would be facing life-changing stress–another marriage. Could he actually move to Texas and face another marriage? He reviewed his options as he watched the battered craftsman slip in and out of consciousness. A trickle of blood ran from the corner of his eye. His skin was as white as the lines on the highways running out of town and it took three able-bodied men to shore him up to even a sitting position to face his employer’s daughter.
Bandit succumbed to his own pressure and complained of the flap-like license plate, asking to move it. I was astounded by Jim’s reaction. His artistry came first over his failing heart and the aneurysm creeping steadily toward his brain. He admitted that he too was unsure of the appearance of the license and could possibly conjure up something different. Just then the skies opened up and a summer thunderstorm struck, rattling windows throughout the region. That was nothing compared to the blistering reaction by the 15-year-old high school student.
She ditched school and forced Jim, who was hospitalized at the time, to come up with an award-winning taillight concept and license plate bracket and illustrate it. This is the illustration, and the entire staff concurs that it is brilliant. The taillight will be hand fabricated into the reproduction ’20s fender with LED lights for illumination. The license plate will be mounted to the frame and the rear of the inner primary with steel brackets to avoid any semblance of billet aluminum. The slim, contoured assembly housing the lights will contain 10 running LEDs with an additional six for braking. The license plate bracket will also contain several white LEDs for illumination of the plate. Jim passed out shortly after this illustration was finished and we scurried from his room to avoid the temptress, Lena, who dragged several nurses down the hall to demand more work from Jim.
This machine will ring the wedding bell or break more than just Jim’s back. Rumor has it that Bandit is going to Texas, but avoiding Dallas, to board the tramp freighter “Leon” for his escape from the country. Another report will be forthcoming.
–Wrench
Bikernet East – The Rolling Chassis
By Robin Technologies |
|
The competition has changed, expanded. Can home-built choppers fly to Sturgis? Can Jesse James build a chop and actually ride it, with all his tools, mechanics, equipment, lathes, milling machines, and money? Can Billy Lane from Choppers Inc. build a bike by hand while wanton women dance seductively around him daily in him Maimi based studio. Can two crazed fools from Bikernet build two chops in a small San Pedro garage with limited tools and no cash and make it to the Badlands? Another builder has entered the competition, Japanese Jay from the local motorcycle shop, Station 34 in San Pedro. He’s building a rat Shovelhead, I think.

While we’re damned low on time and still trying to recover property from West Coast Choppers, we’ve decided to get together two running choppers and ride them proudly to Sturgis. We’ve called in all our heavy clients, folks like RevTech, Weerd Bros., and Custom Chrome, Baker, Paughco frames, Headwinds, Harley-Davidson, and put them abreast of our situation and we’re receiving outstanding support as always. Our new goal for the Chop-off 2000, is to race to Sturgis, with back tire fires and heads full of fresh Jack on our custom, hand-built machines. Bandit and I are going back to our roots, building our own scoots, with our own hands, the way we like ’em, fast and simple, no bullshit, no backing out. These will be independence choppers, American-style, no bullshit politics, attitude, downtime, and loss of parts. We just want to ride. As for the vote to see which chopper the world of bikers like best? I’ll still kick Bandit’s sorry ass from here to Lead and back, I’ll have his woman, his whiskey, and he’ll have a view of my back tire all the way. May the best badass win. See you in Sturgis. Saddle up and ride. My Bandit-smashing nightmare is well under way and I’ve employed the assistance of the talented, albeit nuts, Chinaman and the master of horsepower, Wrench. At the moment, I’m way ahead of Bandit. Nothing new there. Billy Lane is hard at it. Jay’s engine is in the frame, and Jesse James, well, he’s in Europe being interviewed by the Pope. In just a few days we’re already working with a rolling chassis. The new horse is sitting on some good-looking chromed Thunderstar wheels from our bros at Harley-Davidson, 21 inches up front and 16 in the back. We chose Performance Machine brakes to stop the monster, once I get to Sturgis. Until then, they’ll get little if any use, since it’s a race. We have the Paughco frame resurrected from the Bandit II, plus a Paughco oil bag. We were going to use the rear axle and oil bag from Bandit’s other chopper, but West Coast Choppers seemed to have somehow misplaced them. The tank will be a Russ Tom Harley-Davidson/Seattle custom stretch. This is where I’ll keep the fuel that Bandit will breathe the fumes from as we streak north. For a front end, I’m going to use a Harley-Davidson narrow glide, which we’re planning to widen with new triple tits. Joel at Headwinds is the man behind the lighthouse-powerful headlamp system, to light my way. I know I can ride from L.A. to Sturgis straight through, because I’ve done it before, but I expect a great deal of whining and crying from the very soft-assed Bandit. The engine will be a beautiful new RevTech 88-inch CAD designed, fire-breathing whip-lashing, get-the-hell-out-of-my-way twin. The whole crew at Bikernet is pumped to test out one of these killer-tech twins as it’s the first RevTech we’ve gotten to try and we’ve got high hopes for her. The engine came complete with a RevTech carb, increased cooling fin surfaces, no head gasket, never-fail O-rings, high-performance, computer-controlled ignition, and it fits the custom frame with no modifications needed—we hope. Just bolt and scream, which is how we like it. And by the way, if you’re wishing you could get one of these fine RevTech monsters in a 100-inch, you can. To transfer all this power to the flypaper-sticky Avon in the back, we’ll be employing a Baker 6-speed tranny. I’ve not yet had the pleasure of running a Baker 6, but Bandit assures me they are as smooth and stout as a bottle of 20-year-old Jack. Can’t wait to marry it to the RevTech and watch them have some of the honeymoon torque sex. And Avon Tires, of course, will be providing the glue to keep me on the road all the way into South Dakota. If you’ve never owned a set of Avons, you’re missing out. |
1928 Shovelhead Runs Part VII
By Robin Technologies |

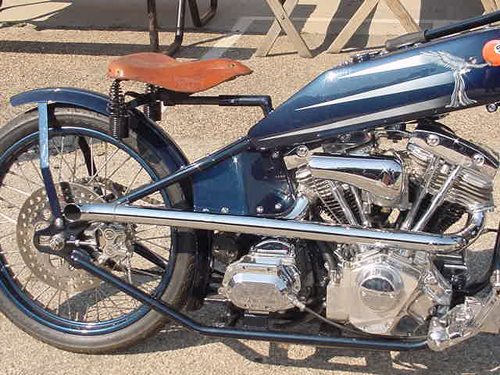
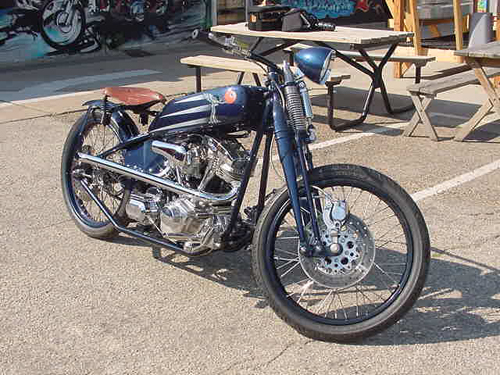
Here’s the deal. The 1928 project was recently completed except for a stylish exhaust system. The antique notion was based on racers from the ’20s, something way off the pavement, open and short.
JR, the service director of Strokers, explained the steps, “They were cut and pasted together. Bits and pieces from the scrap yard, combined with pre-bent 1 3/4-inch diameter 16-gauge tubing, which is similar to stock. We also used stock exhaust manifold chunks off scrapped systems.”
He hung up, and I sat back in my chair perplexed. I was faced with the same daunting task when we built the Amazing Shrunken FXR pipes. I had a myriad of questions and called back.
“Hold on JR,” I said trying to capture his attention while he was carb tuning a running, 100-inch, RevTech motor.
“What the hell do you want?” he said in a Texas gunslinger drawl.
“Do the pipes have baffles? I asked holding the phone like you grasp a girl you don’t want to lose.
“Nope,” JR said.
“Are there any brackets other than the exhaust manifolds?” I rattled the question rapid-fire quick, hoping that he wouldn’t hang up.
“One,” he said, “anything else?”
“Yep,” I barked.
“I gotta go,” JR fumbled and the straight-pipe, 100-incher roared.
“Wait,” I begged.
He hung up. I looked at the phone as if someone sliced the wires leading to the pole, and the died. The next day I called back. JR was off on Tuesday. I called Wednesday and the receptionist fed me to the service department. The service writer was courteous, told me JR was in but couldn’t find him.
I called the next day. He was on the premises but unavailable. I called the following day, still no JR. I was growing a complex. I called everyday for a week, no luck. I went around him to his boss, the magnificent Rick Fairless, the mastermind behind Strokers of Dallas with Strokers Ice House, one of the most happening biker bars in the South. An e-mail sprang back. JR suffered a heat stroke after road testing a new Big Dog, for two hours in 102 degrees, then helping his daughter move to college. I felt like shit.
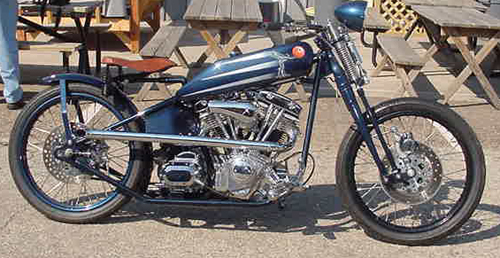
Apparently heat strokes are notorious and can become an annual nightmare. This was his third devastating attack. We finally hooked up again, and he coughed up his exhaust pipe making secrets. Strokers is noted for their customs, which rock from old school radical choppers to hand-fabricated marvels. JR is learning more and more fabrication techniques to expand the shop’s capabilities.
“We’ve been performing sheet metal functions, with hammers, successfully,” JR said, “but with an English wheel and Yoder hammer machine, we can speed up the process. I’m taking classes.”
They don’t manufacture many exhaust systems, and when they do it’s by hand.
“You can buy exhaust pipe segments, 1 3/4-inch to 2 1/2 inches in diameter, from hot rod shops, and piece any pipe together,” JR explained. “We buy “U”, “S” shaped bends and straight chunks.”
Since I also faced the delicate job of trying to hold two chunks perfectly in line and tacking them, I asked JR how he handled the task.

“We discovered magnet clamps for holding chunks of pipe,” JR said, “they’re available from Harbor Freight Tool Supply. I made flat clamp brackets in dissimilar lengths from 3 to 6 inches long with a variety of holes drilled in them in an arch. There are two “C” clamps attached, on at either end. I welded bolts to the clamps so I can move them from hole to hole, on the bracket, or change the angle.
I asked a final nervous question about the allowable gaps when tacking pipes.
“I try to make the fit as close and precise as possible,” Jr explained. We continue to grind the edge of the pipe with a 90-degree, die grinder and a 2-inch 3M sanding disc. We also have a band saw with a tilt-able head for slicing exhaust at just the right angle.”
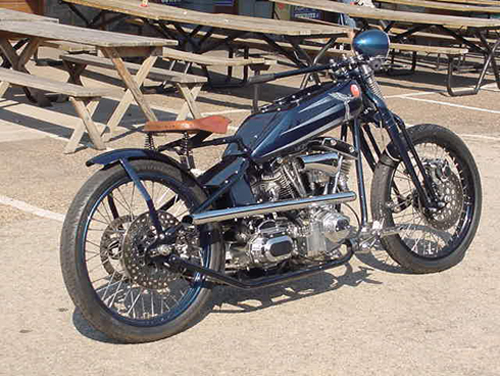
“The pipes haven’t blued,” I said looking at the shots.
“Yeah,” JR said. “We use three coats of Blue Shield by Kreeme, the guys who make the tank sealant.”
“So how loud are these puppies?” I asked holding my breath. They looked like window breakers.
“Not bad,” He muttered looking at the shop clock. I was burnin’ daylight in Dallas. “They’re loud enough that ya know what ya got.”
“That’s it,” I said. “I won’t darken your phone again.”
“It’s happy hour at Strokers,” JR barked, and I could sense that I was losing him.
“It’s party time,” were his final words.

The Road King Report Installment 1
By Robin Technologies |
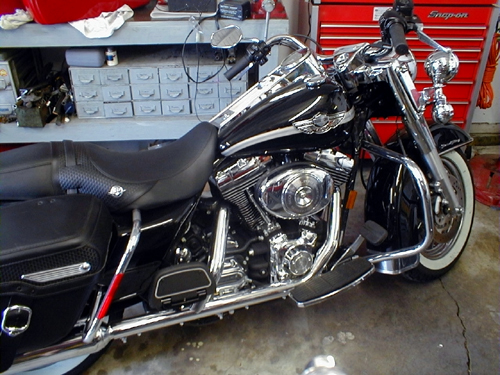
ROAD KING REPORT–Initially I had some questions regarding Road Kings. I wanted to know some about the frame geometry. I perfer a little trail over low speed, parking lot handling. I like to run fast and stable. Next I’m old school. I perfer a bike with minimun extras so I lean toward a carb model over the fuel injection, EFI models.
I immediatly spoke to an expert, Paul from Charlotte, H-D:First as you always say “What year is the damn thing”??????? If it’s a newer model why get rid of the EFI?? The new stuff works good. Harley has new sofware to tune the thing, just out from the dealer show. This will put a big hurt in the Powercomander II and any other after market add on stuff!!!! It’s in the new P&A book for ’03 in the Screamin Chicken (Eagle) section. I like the new Dephi stuff. Also BC Gerolamy has a new dual throat induction throttle body for the Delphi system that is kick ass!!
To take off the system, man it’s lot’s off work. The ECM has all this start up shit it goes thru. checking all the system’s and sensors. Again I have never done this. So to be honest I just don’t know for sure on this one. I can run it by Old Bob tomorrow and see what his thoughts are on both the frame/trees and removing the EFI.
On the frame, my first thought is no. Are you familiar with what they did to the trees? They are not like the old FL stuff at all. The stem is in front of the fork tubes. This makes it a self centering front end. One of the tests they have to do at Talledega on the track is to smack the handle bars hard at 80 MPH++ and see if the damn thing will straighten itself out!!!!
I’ve never thought about doing this so who knows maybe it could be done. Christ you come up some stuff man. Was Jack Daniels involved in all this brain storming??
A week later…
’03 is good year for the Road Queen. The EFI is much better than years past.My question to you is why do you want to loose the EFI?? What are your plans?? Pipes, Big Bore, Stroker kit?? We just did a 103 Stroker kit with cams, heads and a V&H 2-into-one pipe, megaphone, on a ’03 Road Queen for a salesman. He should have used a Thunder Header but most of these clowns want the magazine yuppy chrome look. Shine and billet are in I guess, drives me nut’s!!!!!
You can remove the fuel pump and that shit from the tank. You can put a regular fuel valve in the tank in place of the EFI fuel line. There are two bung’s on the left side of the tank, one is plugged. I did make an adapter for a fuel valve for a Softail EFI bike once. The guy bought these tanks at a swap meet and didn’t know they were for fuel injection.
I think maybe you might just need to change the ECM from EFI to a Carb. ECM. Disconnect the senor’s, eng. temp, crank pos., induction module stuff. Do the tank, install a carb and you might be just be down the road. That way you could leave all the stock wiring and shit in place if you ever wanted to go back to EFI.
On the trees I guess when they went to that style the early top tree was just turned around for that newer style configuration. Don’t know about the setup now. If you did a rotation of the top tree putting the fork tubes forward the bars would be in a different forward location. That would screw up all that headlight cover shit. You might be able to put a complete early FL front end on. Hey maybe even the adjustable sidecar trees. Remember them? The front fork’s are non-air assist now.
I’ll keep plugging away on this “Amazing Raked Road Queen” project for you. I can check out some front end’s and take a better look. Also will try to call tech services at H-D and see what won’t say!!!
–Later, PSD
1928 Shovelhead Comes To California Part VIII
By Robin Technologies |


Master builder and mechanic, Deacon, from Pro-Street in Oahu.
Bob Kay. from American Iron Horse. was a bro and shipped the retro Shovelhead. from Strokers in Dallas. to LifeStyle Cycles in Orange County, California along with a new batch of Dallas Choppers. It arrived the day before a handful of weary travelers stumbled into Los Angeles. on their way home, from Sturgis, Glen and Kerry Priddle were headed back to Australia after spending almost a month, with a dozen Aussies, roaming the mid west.
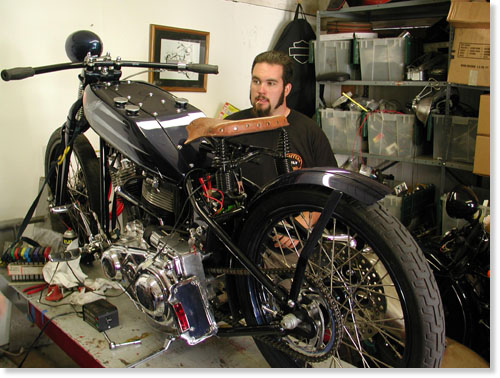
Deacon’s son Chase and the 1928 Shovelhead.
Deacon, his son Chase, and the son’s girl Amanda rode several thousand miles averaging 95 mph wherever they rode. Deacon and Chase are both master mechanics. The ol’ man’s shop, Pro-Street, is located on Oahu, (808) 236-0405 and he’s negotiating with Billy Lane of Choppers Inc. to build engines for Billy’s Discovery Channel Bikes. His son is working in Oregon, but as soon as he returns, he’s packin’ his shit and heading back to the islands.
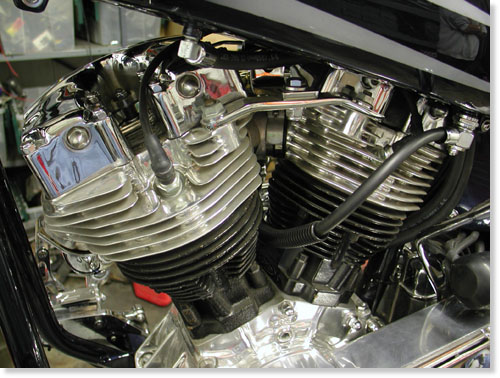
JIMS machine rebuilt and detailed the engine. It was sharp and runs like a top.
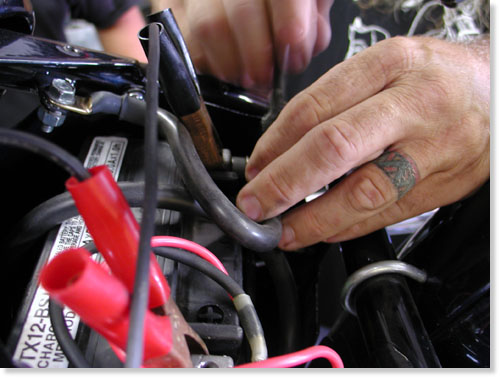
Charging and checking battery connections.
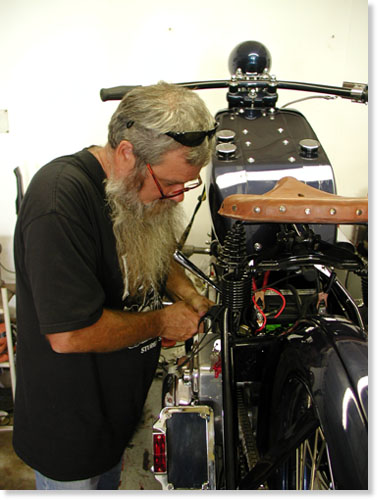
Deacon checking the solenoid.
Deacon rolled into the Bikernet Headquarters just as the Shovel arrived and we attempted to fire the beast to life. I moved the seat forward, detailed the front end and charged the battery. But, even with a fresh battery, she wouldn’t engage. Deacon suspected the aftermarket solenoid. Seems the spacers and gaskets are too thick, just enough to prevent the solenoid from grabbing the shaft. I trimmed the gasket with an Exacto blade and Deacon ground the face of the spacer. Installed, it worked like a champ. We took it for a ride.
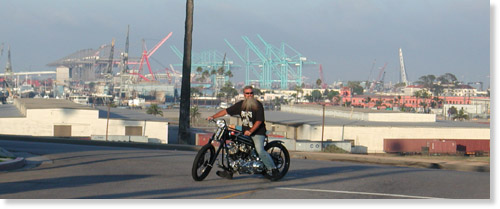
Los Angeles Harbor and our first roadtest.
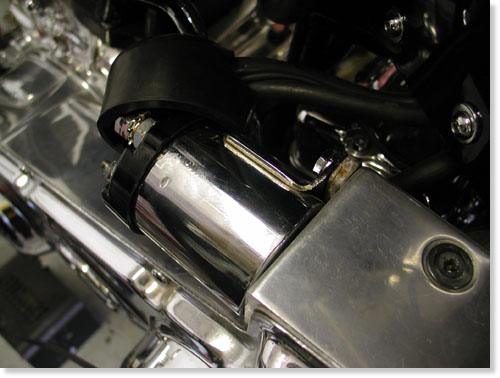
First Deacon checked the connections and voltage at the solenoid. He also shorted across the leads with an Allen wrench to see if the circuit was operating properly.
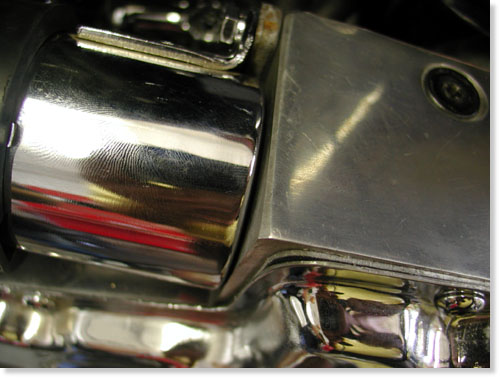
The solenoid replaced after the gasket around the base was trimmed and the spacer, behind the unit, shaved. Worked perfectly.
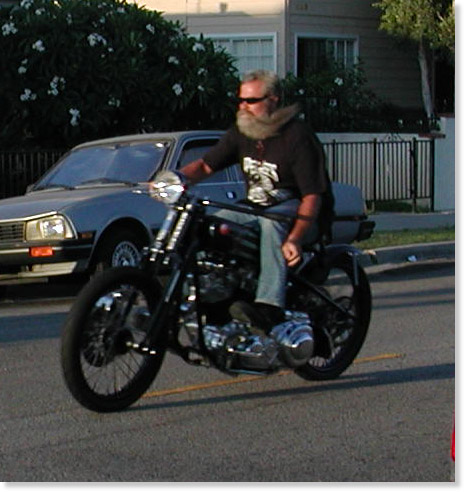
Checkin’ the gears.
It was impossible to jam the suicide shifter into nuetral once the bike was running, even while rolling. Deacon and chase adjusted the clutch, and recommended a Rivera, old school, clutch pack to eliminate chatter and afford the rider smoother shifts. The clutch wobbled and was too tight to find neutral. They loosened the springs until only a thread showed past the adjustment nuts and the spring retainer ran true.
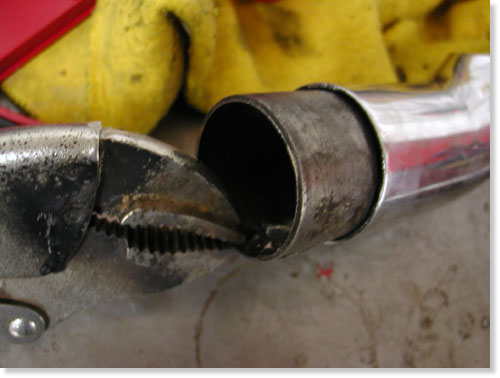
Can you see the cracks?
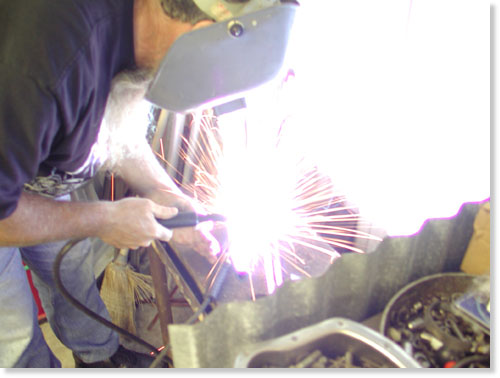
The Millermatic 175 hard at work.
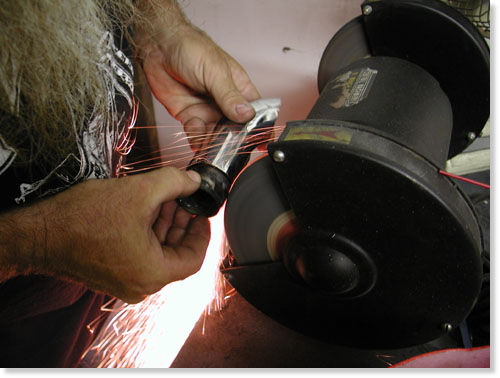
Deacon built a bead then ground it smooth as a baby’s ass.
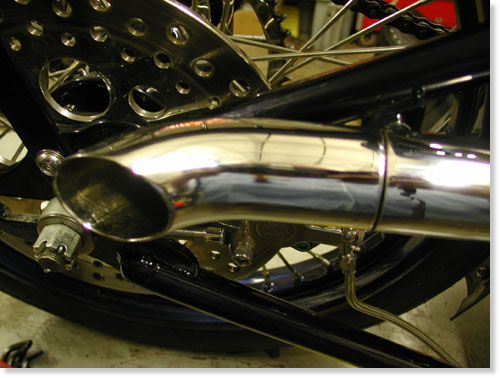
The tip installed, solid as a rock.
I developed padded fork stops and while running we noticed that the clean, handmade, Stroker’s pipe tip was rattling with only one bolt holding it. Upon removal we discovered that the area around the installation nut had already cracked and Deacon grabbed the Millermatic. He welded the cracks and nut for more strength. Then we discovered that the tip shelf was too small, so the pipe end had a tendency to vibrate. Deacon went back to the welder and built a bead around the outside, of the shelf, then ground it to fit. A much cleaner/tighter fit, and the pipe didn’t require an additional fastener.
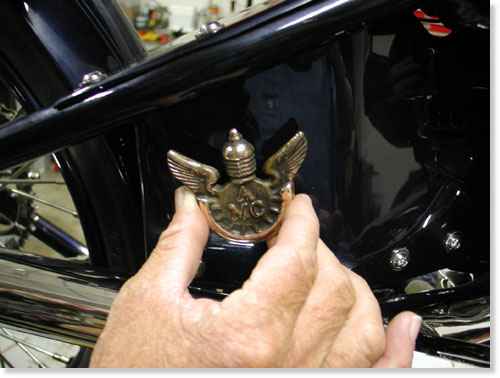
Anybody know how old this cast bronze emblem is?
While in Hawaii at the first Choppers Only Show in Wakiki, I gave Deacon, the promoter, a handmade belt buckle for being a gracious host. He returned the favor with an old license plate doodad from the Antique Motorcycle Club. It was destined for the Shovelhead.
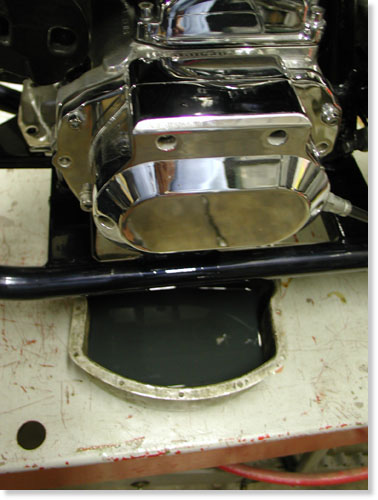
While testing the shifting, clutch and tranny, the gears seemed to bang harshly. We checked the oil level, which seemed precariously low. It wasn’t bad, but we drained the oil and replaced it with fresh Custom Chrome tranny lube.
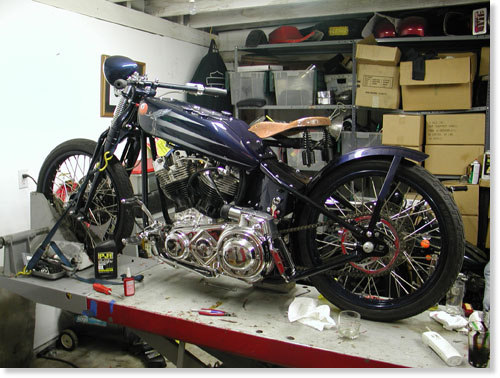
The 1928 Shovel was ready to rock and so were we. Deacon and Glen broke out harmonicas and kicked off the blues. They sampled the Irish whiskey, Tullamore Dew, Sin Wu barbecued and the party rolled on.
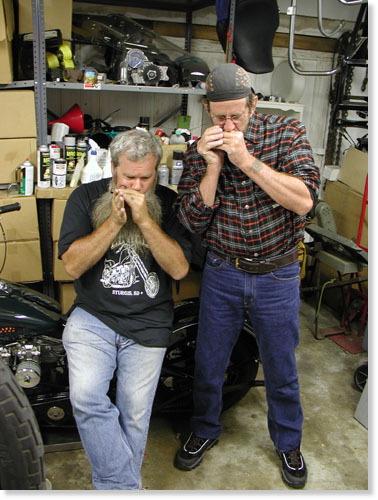
Deacon and Glen bringing down the Bikernet Garage.
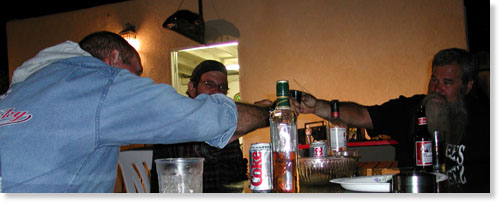
One mo’ shot of Tullamore Dew.
Helluva night, sharp bike and times to always remember. The next day Deacon air-freighted his 2003 FLH to Oahu and grabbed a flight. His son and Amanda boarded their basket case Softail and rode north. Glen and Kerry hid out in Los Angeles and waited for their flight back to Australia, and we dusted off the headquarters and pretended to go back to work.
Stay tuned for the next adventure of the 1928 Shovelhead.
–Bandit
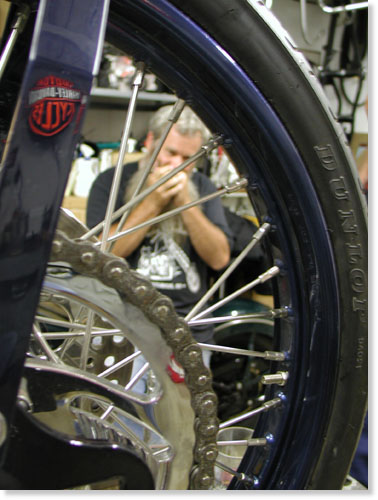

Bikernet East – Zebra’s Chop Unveiled
By Robin Technologies |
| When the dust and metal filings settled, the smoke cleared, and the greasy gang of wrenches at the famous Bikernet Garage sobered up, before us stood a gleaming new chopper, complete and ready to break in, save for a few minor tweaks and a seat.
 The Zebra entry for the Bikernet ChopOff 2000 was complete. The Great Northern Steamer, scheduled to blast from the Caribbean shores of South Beach, Miami, all the way to the western Badlands of Sturgis, South Dakota, stood shimmering in the Southern California sunshine. A moment of silence occurred naturally. Then Bandit farted. The Great Northern Steamer is the first complete entry (or virtually so, save for custom seat, a bit more paint, and a few tweaks and adjustments) to come off the steaming chopper assembly line at the Bikernet West garage in San Pedro.
 She’s a fast horse, with no bells, no whistles and a low, clean look. This is a true garage chop. Comprised of our favorite parts from our bad-assed vendors who work with us at Bikernet, the Zebra chop should be a joy to ride and not bad on the eyes either. She’ll roll on new Avon rubber, a 21 up front and a 150/16 in the rear, which is as wide as you can go on a stock softy frame without moving swingarms and trannys. We kept her this way because we know a lot of bros don’t have access to zillion-dollar bank accounts and nine-month time periods to re-engineer entire frames. The Zebra chop was purposely built to be an every-man’s chopper—something any of us could build right in our own garage with a bit of determination and hard work. The Avon rubber will be wrapped around newly released Harley-Davidson Thunderstar rims. The engine is a salty RevTech 88 from Custom Chrome and came out of the box humming like a dragon sitting on a cattle prod. I can’t wait to get past the break-in and give that big horse some oats and see what she’ll do.
 Expect me and whatever lucky lass I decide to strap on the back to arrive early in Sturgis this year. The tranny is a pussy-smooth Baker 6-speed, known for strength (I’m a bit heavy handed on clutches as Bandit is always pointing out) and high-end gearing. I prefer the left lane. We took the narrow-glide front end off the Bandit II along with the lighthouse-bright Headwinds headlight and slipped it on. I might have Eddie Trotta at Thunder Designs in Ft. Lauderdale, Florida, (where the bike will be received after being shipped from our garage in San Pedro by Ken Gold) throw on a set of wide-glide triple trees. The jury is still out on that one. Eddie and his men will also be in charge of sharp shooting our work, checking for any errors, and handling break-in oversight. All the wiring was done by our resident electrical genius, Bandit, who spent the better part of his three tours in Vietnam keeping the big guns of his heavy cruiser wired tight and barking day and night. The handlebars are Cyclesmith and set flat and low, like the horns on the big bulls that periodically tried to hook my guts out when I rodeoed. Everything hangs off a Ron Paugh special, a Paughco frame, stretched five inches and raked. She’s got a Harley-Davidson battery. The pipes are also from the Bandit II and were initially a ThunderHeader system, the header part, which we sliced off. Now it’s a pair of flashing noise downspouts that make the big RevTech 88 sound like God falling down the stairs when you roll it on. Talk about a sound boner. The call of this big bull will swoon any lass who’s not deaf. The Ride Lo lowering kit actually took the chop a bit too low and we’re planning on having Eddie Trotta’s boys crank it up a few inches so when I load my 220-pound ass on along with a couple hot rod blondes I scoop up from the topless beach in Miami (I’m not kidding, bros, it’s topless, you should visit), the sucker won’t spark all the way to SD. It’s a chain drive up front, rubber in back. I know everyone says the chains look good in the rear, but they buzz the guts out of my ladies and I’d rather have a 20-year-old, six-foot goddess from Spain on back than a sparkly chain any day. I can do more with the Spaniard when I get to where I’m going, if you get my drift. The oil bag was a complete motherfucker and we re-hung it about as many times as a cattle rustler in Kansas who gets caught on your favorite horse with your old lady thrown over the saddle horn and your best rifle in the scabbard. Phil Stadden painted the custom front fender and stock Fat Boy rear fender, which we bobbed considerably. The paint job matches the existing burgundy paint on the Paughco frame, which was one of the parts we got back from West Coast Choppers. Still waiting on the others. I’ll store my gas in a stretched FXR tank that was jerked long by Russ Tom in Seattle.
 We have a left mirror, the right seems to be lost in the West Coast Choppers abyss of “missing” parts, so I may have to buy two new mirrors or just run the right side glass. I will take the German Feminine (we’re a bit on the outs at the moment, so we’ll see how this part goes) up to Eddie Trotta’s Thunder Design in Ft. Lauderdale when the Great Northern Steamer gets in and measure for a seat and passenger footpegs. I’m going to try to construct a good-looking seat that seats two comfortably, but retains the very low-profile look of the bike we’ve created. The footpegs will probably sit about an inch behind mine, since the German Feminine was born with enough leg to wade in the deep end of the pool. We may also add a very striking and radical sissybar to keep all of my lovely European sweethearts on the scoot as I cavort about the balmy regions of Miami. At the moment, the highest point on the entire bike sits at about belt loop height and I’d like to keep it that way. But if I have to add a sissybar to keep my ladies from burning their breeches on the twirling rear Avon, then I’ll construct something radical and good looking to throw behind them. If I can get Bandit away from the Jack and women to actually send one out, I’ll probably also throw one of the very handy and well-designed Bandit Dayrolls up front to hump gear and any small tools. Thanks to all the bros at Bikernet West who helped wrench together my entry for the Bikernet Chop-Off 2000. Bandit was the master wrench in charge and spent many a thankless hour, welding naked and screaming in the spooky recesses of the Bikernet garage in San Pedro and deserves a clean clap on the back for a job well done. I’ll keep you posted as I run the new horse through her break-ins down in the 100-degree heat of Little Havana and blow off that new chop smell. Hope all you bros out there are getting your scoots ready for the big run and we look forward to blasting north into the Badlands for some serious partying, eating, drinking, and of course loving the ladies in Sturgis. Now the focus shifts to getting Bandit’s entry completed. His scoot is looking damned good so far and the air wrenches are singing the Bikernet national anthem day and night. Bandit and I will be arriving on (we hope) the 5th, covered in bug guts and bragging rights to start campaigning for the big vote to see which chop the bros chose as the Bikernet Chop of the Year.
 Grease up and get your gear, bros, it’s almost time for the big run... May the best badass win. See you in Sturgis. Ride hard, Bikernet East |
Bikernet East – An Eagle in the Garage
By Robin Technologies |
|
Custom Chrome introduces the world’s first rocket-powered Zebra. The power plant of the Great Zebra Northern Steamer for Bikernet Chop-Off 2000 by Special Agent Zebra 05.22.00. The Great Zebra Northern Steamer is to be a biker’s bike. No fantasyland Hollywood bullshit in the way of $80,000 paint jobs or diamond encrusted spokes, no chop-shop hoopla, the Zebra Steamer is going to the root of American bike building, tight, right, fast, and reliable. It’s being built by the rider, with help from Bandit, Wrench, the Chinaman and the torque kings at Casa El Horsepower, in an anonymous garage in San Pedro, California.
These suckers come complete with carb and ignition system. It is literally bolt-in ready when it comes off the truck with any OEM or custom frame that will hold an Evolution. The RevTechs aren’t a cheap amalgamation of aftermarket pieces. The entire system is designed on a CAD (computer assisted design) system, just like the ones used at the big automotive plants. This means you get the latest in engine technology available. Every component is created from new tooling techniques in a state-of-the-art ISO manufacturing plant. But high-tech engineering manufacturing equipment and techniques aren’t any good without great concepts to use them on. Again, Custom Chrome has put its money where its product is and created some revolutionary new thinking in big twins. The RevTech engines use no head or base gaskets. Why? Because they leak and they blow. Instead, CCI uses ultra-high temperature O-rings, which are hard as hell itself. Ignition is computer controlled. They come in 88 and 100-inch displacement. The 88s have 4 1/4 flywheel stroke with a 3 5.8 bore. The 100s boast 4 3/8 stroke and 3 13/16-inch bore. The cases are cut from 356T6 cast aluminum. Every stress point contains added materials for increased strength (read: you don’t walk across the Mojave Desert in August). They also have removable press-in/bolt-in bearing inserts on both the left and right sides of the cases and removable bottom sump-plate permits internal inspection. RevTech’s cylinders have increased fin surface in high-heat areas, for advanced cooling (Fourth of July runs, anyone who rides in New Orleans on the I-10 during rush hour or Miami before or after Christmas day). Steel liners are Perma-locked into the outer aluminum castings. The pistons are cast for controlled expansion, which reduces engine noise and wear.
Special Agent Zebra |

| |
Bikernet West – Electronics in a Weekend
By Robin Technologies |
|

Wiring is the nemesis of man, the puzzle of the best builders, the hornet’s nest of breakdown treachery. Bandit sat for hours drawing a wiring schematic for Agent Zebra’s Softail, only to rip it to shreds and toss it in the trash. He made lists while Sin Wu brewed strong coffee and baked peanut butter cookies. Bandit barked and growled for a couple of days with each run to the marine store for connectors, to the electronics store for switches, to the Custom Chrome catalog for components. The same formula fit his own West Coast entry in the Sturgis Bikernet Chop-Off. We knew as soon as he mentioned that the bike was ready to wire, that we should pack our shit and leave. We took the case of Jack fifths, the girls, and checked into the nearest fleabag motel. While we sat around the stanky pool and partied, Bandit thought about each wire, each connection, and each component. His mentor, Giggie from Compu-Fire, was his only sounding board and the only sonuvabitch big enough to snap back when Bandit growled about wire gauge or lost connectors. He wired the bike entirely with 14-guage wires. The only other sizes used were for the battery cables (stock units) and the wire that ran from the battery to the ignition switch (12-guage). Even when the sexually starved statuesque Asian roamed into the garage with cocktails, adorned in a sheer negligee, she was ordered back to the headquarters. Soon she found another plaything to keep her occupied, but that’s another story. Wiring, in the big guy’s mind, is a process of understanding what is happening with each component, where each component is located, watching for the safety of each wire, keeping the bike sanitary, and organizing each group of wires. Each wire is covered with shrink tubing, each connector supported with additional shrink tubing. Each bike had a minimum of wires carefully placed. Each bike had a minimum of components to keep the wiring process uncomplicated or enhance the reliability of the machine. No turn signals, no handlebar controls, and no micro switches. He used only millspec (military specifications) or marine quality switches. Vibration is a killer on motorcycles and much the same on boats, in addition to the moisture considerations. One additional component made wiring simple and risk free, the Custom Cycle Engineering starter mounted mechanical switch. (Check the article here in the Garage.) This unit eliminated the starter button, the starter relay, and all the associated wires. You must make sure you will have access to the switch, which is mounted directly on the starter, under the oil bag, (Photo 2) which can easily be interfered with by the position of the exhaust pipes.
 Photo 2
The concept is that you physically push the solenoid into contact with the starter gears and electrically engage the starter. We chose a Compu-Fire starter from Custom Chrome to kick this 98-inch monster to life. The key thing on fucking up starter motor installation is over tightening the brass lug wire fitting. It may turn the connection on the inside of the starter and ruin the contacts. Compu-Fire has designed a new line of starters which feature 6:1 gear reduction (Photo 3) and a 6-pole permanent magnet field to eliminate starter stall-out.
 Photo 3
These units deliver maximum cranking torque without overloading the battery. They also eliminate starting problems on fuel injected bikes. Only two switches were used and one 30-amp H-D (common at any electronic or auto parts store) circuit breaker. One on-off marine toggle for the ignition, which energized the Compu-Fire single-fire ignition system, the hydraulic brake switch, and the taillight. Since all the sweet parts like handlebar controls, foot controls, mirror, and taillight were Joker Machine components, he was in luck. Joker works the brake light switch into the body of forward controls, which eliminated the bulky hydraulic switch, the junction, and a two-piece rear brake line. Another wire went to the other switch, an on-off-on switch for the headlight (high/low beam). Two wires were run from it to the headlight. Daytec does a beautiful job of running guide tubes in the frame to hide the wires. Initially, if you chose to do so when ordering a Daytec frame, you can have two inserts welded to the frame seat post rail for electric box mounting. We ordered the certs for this frame but decided that with the simplified wiring program we could stuff switches and all the wires into the structure of the top motor mount. This was Giggie’s suggestion and Bandit readily agreed (a miracle). With careful measurements the switch holes were drilled with several bits until a 1/2-inch hole for each switch was attained. The only guide hole that the frame was missing was one for the headlight wires, but two wires were run through shrink tubing to the headlight and through a 5/16 hole in the motor mount. One wire was run from one side of the ignition switch to the circuit breaker, another, the 12-guage wire ran to the battery. From the circuit breaker a wire ran to the taillight down another guide hole along with the brake switch wire. From the brake switch another wire ran to the taillight, brake element. We also used a Compu-Fire regulator, which mounted to the front of the motor. One wire ran from the regulator back to the hot lead on the Compu-Fire starter motor. Bandit used the excess 12-guage wire to run from the battery to the hot side of the ignition switch. Giggie recommends that you use crimpers designed for Duetch connectors for a solid, vibration-handling connection. Bandit used water resistant connectors from a West Marine store. After some 20 hours in the garage, Bandit was finally lured into a well warmed King size bed by Sin Wu and her girlfriend Coral as the sun came up, but at that point the bike was ready to be fired to life. The question was, could Bandit be fired to life? –Wrench
|
Bikernet West – Belt Drives Limited Open Belt Installation
By Robin Technologies |
 Here’s the deal. With less than two weeks to go I’m praying, laughin’, grinning and scrambling. The paint finally arrived from Harold Pontarelli of H-D Performance of Vacaville, California, and the dark haired beauty wanted to be at the shed when I opened it. I paced the floor waiting for her alabaster legs to bring her quiet self up the sagging stairs and into the world headquarters of bikernet.com. We took the carefully packed boxes to the basement where we were attacked by the foam peanuts assigned to protect the polished finish. First it was slabs of pressed foam, then thousands of bouncing peanuts, yards of plastic wrap, then plastic bags and bubble wrap until we finally reached the bright candy blue finish with cream flames, silver inserts, for dimension, and gray pinstriping. Unbelievable! The perfect match for the bike. I’m jazzed. But let’s explain some of the praying that’s going one. BDL Belt drives, especially this one in particular, are simple to install. Incredibly simple, but there’s a caveat, a loophole or a tiny chink in the armor. It’s called alignment and spacing. Hot Rod Bikes recently published a full-on BDL installation, and I read it several times. It never made any sense to my simple mind, yet it was full of very precise instructions. The key is how you install and space the motor and tranny. It turns out that your inner primary, or in our case, the motor plate, is the best alignment tool you have. According to Frank Kaisler, the editor, you leave the engine and tranny loose, bolt the inner primary or belt plate to the engine then pull the tranny into place and bolt it up tight and start checking under the engine and tranny for gaps with feeler gauges. In the article it showed big Frank filling the gaps with spacers as thin as .010. Damn, that’s getting touchy. Recently a Bikernet reader, Breeze, sent me the following on BDL installation suggestions and I added my two cents worth to his experience: “When I was installing the BDL 3-inch open kit (the one that comes with the motor plate) I was having a bitch of a time gettin’ the belt on. So, I called and got to talk to their tech support.”
“Anyway Buddy Bob, tech master, says, “Oooh, just file the pulley splines (Photo 1) it will go right on.” Filing splines applies to S&S motors with slightly larger main shafts, like .001 so take your time and it will work out fine. If you don’t and force the pulley on, you may have a serious problem taking it off. I used a handmade puller from the bottom of the tool box to get the pulley back off.” “As far as alignment I use the good ol’ straight edge across the pulleys method. Check at top, center, and bottom, to get things straight on both axis. I do this without the belt and space the front pulley out so you can use feeler gauges to compare the front to back space between the rear pulley and the straight edge. Of course the ultimate alignment test is to run it and see how the belt is tracking. It should not wander and should track on the front pulleys outer flange and center on the rear pulley.” “I think they have a great design there, it is one of the smoothes clutches I’ve run, but you need to check tolerances for reliable running. Be sure to follow the instructions on the clutch install, the Locktite they tell you to use on the basket splines is important for the basket to seat properly.” “They call me the Breeze, I keep rolling down the road!” Well, that’s the Breeze’s story. In fact Breeze has given me a couple more things to check. I put one of the polished rotor covers on, which threw my pulley alignment out of whack, so I had to take it back off. I’d rather have reliability that flash. Before you attempt to install the belt drive check these alignment areas. Bolt your rear motor mount bolts down tight, without the top one in place. With feeler gauges check the front motor mount. Space the front ones if there is any gap. Now bolt down the tranny plate and the tranny except for the single bolt on the right side (Photo 2.)
Check the clearance to the final stud from the frame and correct the spacing. Now with everything loosened up install the inner primary. The BDL system comes with a very heavy duty clutch bearing, so the the stock bearing race must be removed. Fortunately I had a JIMS puller for just that application.
That and a couple of crescent wrenches and the puppy was gone, and the new bearing installed. Slide the clutch and front pulley on, and make one more alignment check as you rotate the motor (Photo 4).
Grease the starter shaft and bolt in the starter pinion gear. Next install the clutch pack as per the manual. You can now install the belt guard and adjust the clutch. I’m carrying another set of clutch studs and springs, in case the clutch begins to slip. I’m hauling along another belt for safety, also. Couple of years ago, I ate one (it wasn’t a BDL, though). Seems like a lot of work, but actually this is one of the cleanest, simplest systems out there, and once you have it dialed in, you can put it on and take it off in minutes. Damn, I running out of time. Gotta git to the wiring. Rock and roll. –Bandit
|
