
Sorta the same equation in reverse fits Bennett’s. They are located on an alley, but it’s about as clean and wide as a comfortable two-lanner, and the buildings are pristine and orderly. Hell, there’s even some landscaping bordering the buildings. Eric and his dad keep the shop tidy and it’s open and painted white on the interior and the exterior. Makes it easy to take tech shots.

So we got to work. Eric hadn’t ridden his own motorcycle in six months, broke up with his girlfriend three times, and needed his two-wheeled Valium. Working with D&D, they altered a stock D&D system to fit ’91 to ’13 Dynas. The heat shield was modified and the system was ceramic-coated for a long-lasting satin black. He also had to modify the mounting bracket for the performance pipe system. Eric is going to share his mods with the D&D gang so they can make adjustments to their manufacturing process for these model years.


Eric’s first move was to avoid a potential problem with the 5-speed tranny main shaft inner primary race. They occasionally drift inwards from the inner primary toward the tranny main shaft seal and damage the threads. A malady solution included installing a JIMS inner primary bearing upgrade Kit.


Here’s what the JIMS team has to say about it: Thinking of running an open primary system, or looking for added durability in your high output engine? JIMS now has a double-row ball-bearing with seal and retaining ring kit.
For use on 1990 to 2006 FLH and FXST, and on 1990 to 2005 Dyna models or any 5 or 6-speeds using H-D bearing No. 9135.
Note: Not compatible with Bandit clutch kits.

Eric used his Custom Cycle Engineering swing arm punch to remove the stock bearing. Then he used JIMS tools, including the race puller No. 34902-84 and the seal installer No. 967, to press in the bearing to the perfect depth. The JIMS kit removes the main-shaft bearing race.


With the bearing pressed in perfectly, Eric installed the snap ring with the flat side toward the transmission, then the JIMS seal. It was time to install the inner primary using 22 foot-pounds of torque on the 5/16 bolts with a dab of blue Loctite.


He was ready to install the new Rivera Pro Cutch, but first he had to press out the stock clutch hub. The performance differences in the clutches were obvious. The difference in the fiber surface areas was substantial. For big-inch motorcycles, the more surface contact area, the better.


Per the Rivera/Primo instructions, we needed to soak the Rivera clutch plates in ATF transmission fluid before assembly. “If we don’t, Ben Kudon, from Rivera will bust my balls,” Eric said trembling. Per the instructions, we soaked them for 10-15 minutes.


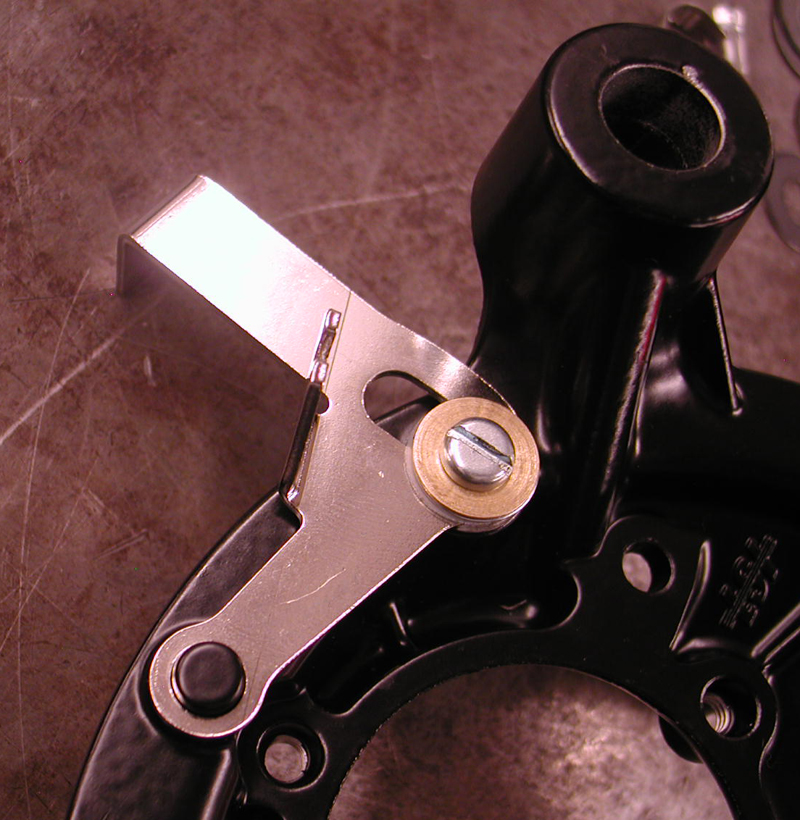
While waiting, we installed the stock compensating sprocket using a 2.5-inch socket and Loctite, and the primary chain adjuster. Eric installed the clutch hub with a 1 3/16 socket, being careful to handle the left-handed threads. Then he installed the first thick steel plate into the hub, followed by a fiber, then steel, and then another fiber plate.

Eric runs ATF fluid in his primary. With the pressure plate in place, the diaphragm and the retainer, the clutch was a done deal. “Don’t over-tighten the fasteners against the locking ears,” Eric pointed out.

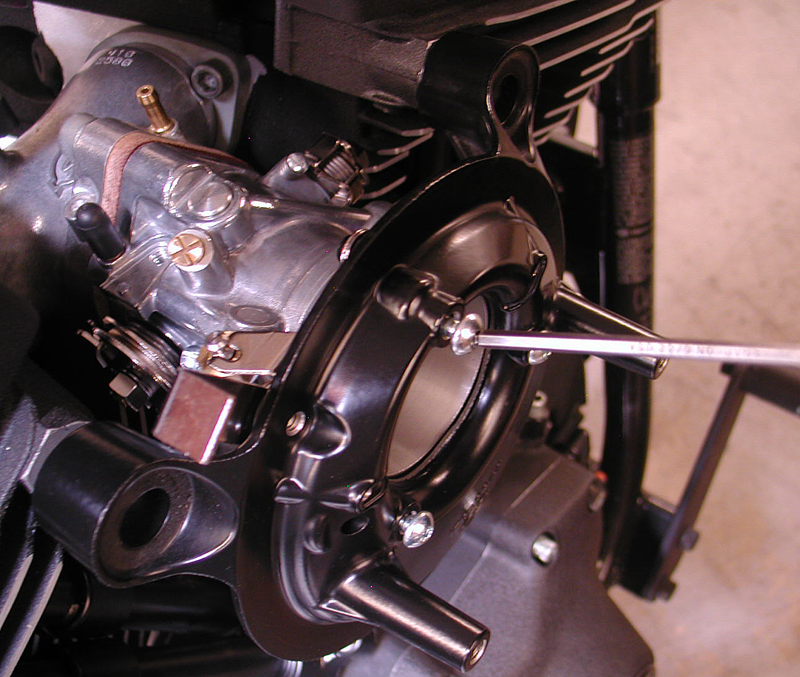
Eric uses JIMS guide pins to hold gaskets in place, so the primary could be slid into place without fighting the gasket. They are easy to make, or just buy a set the perfect length from JIMS. He tightened the stock primary to 120-inch-pounds of torque.


Between the last time I darkened the Bennett’s Performance door and this point, Eric and John O’Keefe from Bennett’s Performance had a brain fart to machine only Twin Cam cylinders to give them a drag bike appearance. Eric volunteered to be first and tore his engine apart again.
[page break]


John O’Keefe has given this signature look a new name: Branch Race Cut Cylinders. Eric chose to be the trial run and they cause a stir around the shop. Currently, the Branch team doesn’t have enough cylinders to offer an exchange service, but you can send your cylinders out, and depending on the shipping service you select, get them back within a week.


He installed the carb with the isolator block and new S&S O-rings dry. “If the surfaces are in good shape,” Eric said, “you don’t need grease or sealants. They just cause problems for the next mechanic.”
We took a break, since Eric was working with a Speed Merchant and Alloy Art on a couple of custom products, plus a couple of items needed powder-coating. Eric was anxious for final assembly and to fire the monster for the first time and go for a ride.

When I returned, Eric was installing a new H-D floating rotor on the rear wheel of his bike. “You can’t install the rear wheel until you pull the wiring into place.” Eric pointed out the wiring pocket in front of the rear wheel cavity, which is very tough to reach with the rear wheel in place. “Only ’05 and earlier Dynas were set up this way. It’s a pain in the ass.”


Okay, this may get a tad confusing, but I’ll do my best. Alloy Art is a machine shop and they build parts for companies like Speed Merchant and Harley-Davidson. They machined these Speed Merchant triple trees for Dynas, in keeping with Buell configuration and agile handling. You can see the difference.


He greased the neck bearing and the Timken, and began to slip the fully adjustable stock forks into place. With the dust shield in place, the top triple tree was added.


Eric chose to run Alloy Art super clean rear turn signals, no fronts, and an Alloy Art tight billet headlight and grips. He also installed good and tight Alloy Art urethane riser bushings. Next came his own headlight mount bracket and the Alloy Art billet headlight, plus his handlebars and controls, and the Dakota Digital dash, speedo, tach, and data acquisition system. Then he pulled the stock wiring harness runs into place under the rear fender and installed the stock wiring plugs.


The Alloy Art rear turn signals required drilling one hole for a signal wire. Then it was a matter of installing his pre-ordered Goodrich front and rear brake lines. He installed and adjusted the pull throttle cable first, then the push. He slipped chunks of ½ inch black shrink tubing over the dual throttle cables and used them as guides. Once the cables were run and comfortable, he used a heat gun to tighten the shrink-wrap.


Sources:
Bennett’s Performance
Rivera Primo
S&S
Branch O’Keefe![]()
Alloy Art
TEL: 626 963 5021
FAX: 626 335 3685
CONTACT@ALLOYART.COM
154 S. VALENCIA ST.
GLENDORA, CA 91741
Speed Merchant
www.thespeedmerchant.com
info@tsmracing.net
