Doug Coffey’s RetroMod Panhead Part 4
By Robin Technologies |
Bikernet Project: Widowmaker Charity Build, Part 4
By Robin Technologies |
I cannot stress enough to plan ahead.
The “Grip Ace” makes for a super clean and simple install without the dopey look of stock switch housings. If you are not familiar with this product, visit them at www.gripace.com. This product allows you to have all of your bike functions literally at your fingertips of your left hand. The system is compiled of a four button key pad that is installed on your left hand grip and a slim line module that can easily hidden almost anywhere on your bike.
The wiring is super simple. Once your left hand grip is fitted with the key pad, run your preformed wire and plug through your bars and plug into the module. All of your bike functions are wired to the module. The unit comes with clean and clear wiring instructions and easy to follow schematics. On our bike, we chose to keep the system super clean and mounted our key pad to the inside tunnel of the gas tank. As for the rest of your wiring, test each circuit as you assemble it. Try not to rely on butt connectors, solder as many of your wire connections as possible and keep in mind the serviceability of the bike. Make sure that future removal of the headlight and rear fender can be done by unplugging the wiring rather than cutting it.
Item Five: Last pieces of the puzzle, installation of the tins. This can be the most rewarding part of the job, seeing your new bike in all its glory or it can be a bad day and a trip back to the painter. Make sure you take your time in this installation. Make good choices of hardware. I personally like to use rubber washers on painted surfaces so as not damage the paint with the installation of the mounting hardware. Once everything is hooked up, top off your fluids and add only enough fuel to get the bike running. I suggest this in case there is a an issue of a gas leak or oil leak that may require you to remove the tank.
Once everything has checked out, get out and enjoy that first test ride. Make it short, come back, check everything over. Once all is good, pack up and enjoy your new ride.
Doug Coffey’s RetroMod Panhead Part 5
By Robin Technologies |
Risers
Bikernet Project: Charity Bike, Widowmaker Style
By Robin Technologies |
“A man’s got to know his limitations”-Dirty Harry
The Widowmaker crew is ready to do everything from rebuilding the top end of your old Sportster, fabricating a set of head turning handlebars, or adding class to your fresh-off- the-showroom floor Milwaukee Iron, by installing Hank’s custom two-into-one pipes. Then giving her the iconic Widowmaker designed and fabricated intake so she can breathe 15 horses faster. Your ride isn’t made-in-the-USA? No worry, Hank has a solid record of having a complete disregard for the national origin of any type of stray bike landing on his doorstep. He’ll take it and improve on your ideas, or, like he did two years ago, just take a crotch rocket, chop it up, lay his magic welding rod upon it and get top prize at the Ray Price Capital City Bike Fest in Raleigh, NC.
Each year for the past eight years, the Widowmaker family had been organizing a very successful ride raising money to help families deal with their child’s medical expenses. This year is different; Hank is fabricating a custom motorcycle which will feature his signature hand made parts recognizable throughout North Carolina as the Widowmaker brand. The plan this year is to sell raffle tickets and raise $25,000 and give five local families in need, $5,000 each, to help with the medical care of their child. We caught Hank early in the planning stages and wanted to share his progress of this project to the announcement of the winner on September 26th at Ray Price Harley Davidson’s Capital City Bike Fest in Raleigh, North Carolina.
Bikernet is going to follow Hank through the process of building a custom chopper and staying within the basic interactions between: cost, skill level and availability of tools. This is the first in a series of five articles in which we will be going over some issues that need to be addressed prior to putting fire to metal or pen to paper.
Here’s Hank layin’ it out straight for you in his words: Set the goal and make a plan…then be flexible while you work towards that goal. Reaching that goal is the successful art of harmonizing your choices with your plans within the parameters set by your skills, or as Dirty Harry would say, “A man’s got to know his limitations.”
Be honest in evaluating your skill level; choose a bike that works within your ability and the tools you’ve got in the shop. For example, I would not recommend a 2005 fuel injected V-twin to anybody but an advanced builder. If your strong suit is not electrical, stay away from electronic bikes. Stick with the basic skills for a basic drive train and fuel delivery. Use the theory of K.I.S.S.- Keep It Simple Stupid. A carbed Sportster has been a simple and proven canvas for decades of custom builders of all skill levels. Carbed metric bikes are getting more attention partly due to popular magazines such as The Horse-Backstreet Choppers and Cycle Source. The metrics tend to lose their value quicker yet remain reliable, but the metrics need a more fluent skill set. Sportster tooling is basic, aftermarket parts are readily available.
Choosing a bike. Choosing your donor can be difficult. However, surfing the internet somewhat simplifies this option. Knowledge is power, knowing people helps. Know your surroundings and what you are willing to do to get what you want. What are you limitations? If you find a great deal on a bike but its 1,000 miles away, is it worth the drive? Consider any time, effort and expense in acquiring the donor bike or parts for your project. Speedy decision making is the key to sealing any internet deal. If you find a good deal, jump on it. There are plenty of up and coming backyard builders, and many are out there in the fast lane. This is where your skillset, tooling, and above all- your planning comes into play. Choosing a bike that best fits your ability is better than choosing a bike that better fits your wallet. Knowing your limitations will save aggravation and keep you from wasting time and money. Decide if you want a running bike or not. Running bikes are easier to start with. You’re trying to re-engineer the bike completely. If you decide an engine rebuild fits your plans, your market for a donor bike expands considerably.
Choosing a wrecked bike. First question, does it run? Look at causes of failure. How bad of a hit did the bike take and where? What are you changing about the bike and how does this affect what your plans are? Is the front end in the frame? Are you replacing the frame? Looks can be deceiving. Frame can be bent. Always check. Where was the impact? What deemed it totaled? What condition is the engine? Compression Test? A compression test tool can be easily found at your local auto parts store. Review the specific bikes requirements before performing the test. Basic actions, remove spark plug, disconnect ignition coil, install tester. Spin engine over with throttle open. Evaluate readings. Every engine has different specs. Know your specs. You should not have a difference of more than 10% from one cylinder to the other. This will give you an idea of overall internal condition. An easy way to decide if you have leaking rings or valves is to squirt some oil into the cylinder. Retest them if you have a poor reading. If your value goes up, the rings are bad and the valves may be ok. How long has it been sitting? Perform a Cylinder Leak Down Test using another tool easily found. This can be confusing to understand. You will have 2 gauges. One showing the air coming into the cylinder, the other showing a percentage of air lost. The more air lost, the worse the condition of the internals of the engine, i.e. valves, rings, etc. Make sure the valves are closed and engine is on Top Dead Center (TDC) for that cylinder. Does it run? Get a grasp on the variables of how long it has sat, what is the overall shape of bike? How many miles? Is the speedo stuck on a certain speed? This is a good indication of speed of impact. Is it water cooled? How will this affect your ability? Can you rework the design of the cooling system? Have a game plan for the bike. What parts will you have to fabricate to use in your build? Again, what is your skill set and tooling for the bike? Plan ahead. How far can your abilities carry you and what do you have to buy or source. Make sure your plans also consider the laws of you state for signals, light sizes, handle bar heights, fork lengths? Look at the overall of the bike. What is damaged, where, why, how come?
In this build, we are using a wrecked ’99 Yamaha Road Star 1600. The insurance company determined the bike was “totaled” based on overall damage vs. cost of repair and value of a repaired bike. The bike was running good and in good riding order. The majority of damage was isolated to the front and right side of bike. Fender, exhaust, tire, turn signal bar, etc. (insert pix here). (talking about points of impact, overall condition and damage). But the overall running works of the bike were intact and in good running order.
Having a plan. For this project, we chose this bike specifically based on availability and cost. Knowing our skill set on the front end, we knew this bike would be a challenge, but be a great build. We already planned ahead. We had a Crafttech frame with a 240 back tire that needed a large displacement motor. The 1600 cc Road Star engine fit the bill. Now this comes into tooling. Keep posted to see how the overall pieces are made to fit. See you next month.
SPONSORS
Triangle Cycles
Grip Ace
Chop Rods
Fastnel of Roxboro, NC
Amzoil
Ah-maiz-in Paint and Finish
Carolona Custom Powder Coating
Turner Asphalt of Raleigh, NC
Camp Bow Wow
Chandler’s Towing
Peak City Trucking
Carolina Ceramic Coating
Brandon’s Harwood Floor and More
Rebirth of an American Classic: Case Repairs
By Robin Technologies |
|
|||
|
|||
|
|||
|
|
The Mudflap Girl FXR Saga
By Robin Technologies |
It all started when a brother was desperate for cash and I bought a basket case Dyna, and with the help of JIMS machine turned it into an FXR. I started to build it for my son, Frank, the tattoo artist, around an old Kenny Boyce-styled pro street frame. Making progress on this build, with a massive upside down Custom Chrome front end, a brother stumbled into my shop and told me about Paul Cavallo and Spitfire Motorcycles.
Paul’s been around the industry for a couple of decades. When the economy tanked, he hung on with his dad and started Spitfire motorcycles. He was struggling and a brother thought I could help by using a couple of his Spitfire components on a Bikernet.com build. I went to visit Paul and was inspired by his non-stop drive to create new components daily, build world-class old school chops for customers, and kick ass at shows all over the country.
Then I was hit with the bike builder blues. My girlfriend left and I was forced to sell my 2003 Road King, leaving me with a ratty rigid Shovelhead and a Bonneville racer to ride. I needed a new girl and a long distance rider. Too often, around the campfire we debated twin cams versus Evos and most of the bros confirmed the solid stature of the FXR configuration. A plan formulated to build myself another FXR. I returned to Paul’s shop to cut a deal on a chassis for myself. Both were stretched, almost single-loop, long-distance riders with Spitfire Girder front ends.
Paul’s team built my chassis in pure traditional FXR style and Frank’s in the pro street configuration. We re-manned Frank’s FXR engine in black and chrome, and I ordered a bone-stock crate H-D 80-inch Evo. Both transmissions were rebuilt by the JIMS crew to be 6-speed overdrive units. I went with chain final drive and Frank used a stock belt.
The overwhelming concept revolved around building a bike that’s a chopper to the bone, but could be easily ridden across the country. My stretched gas tank holds well over three gallons, the oil tank contains nearly four quarts of oil, and I installed an oil cooler for heat waves. The Spitfire bars are held in place with Custom Cycle Engineering dog bone rubber-mounted classics.
I used Contrast Cut Performance Machine grips and pegs for style, yet road comfort. The bike is rubber-mounted for vibration-free riding. I worked closely with David Zemla of Progressive suspension until we configured a shock system capable of affording me some suspension with somewhat limited travel.
The girder is an uplifting quandary. With the Spitfire structure I could feasibly install almost any shock system, with whatever spring rate I decided on. I’m still messing with the gas-operated Rockshox.
I’m missing the best part, the Saddlemen seat. This seat was carefully configured at the Saddlemen manufacturing facility in Los Angeles, from the heavy-duty fiberglass seat pan to the spine-relieving slot, to the better than foam gel, and the ultimate breathing resilient fabric. That puppy is amazing.
The engine is virtually stock with the exception of a Bennett’s Performance-installed Andrews Cam, S&S oil breather gear, and Branch flowed heads, all their state-of-the-art valves and springs, and intake manifold. I ran an Andrews EV-27 cam and Andrews chrome-moly adjustable pushrods for less flex, a new cam bearing and the Branch flowed stock heads, for 8.9:1 compression, 78 cc Branch-flowed chambers, and 75-80 horses at 2,600 rpms.
The bike was built specifically for the road, but with chopper styling. I can’t leave anything alone, or ride a stock bike. It’s against my nature, but I can ride a scooter that will get me there comfortably in style.
For the first time in my bike-building life, I built this bike in bare form, wired it, and rode it for almost eight months. The benefits are immense, since I could make changes and adjustments throughout this road or rode research period. It gave me an extended period to investigate color schemes, build the front fender, break stuff, repair, and outright replace components, including my goofy chain guard.
It’s odd, but even with 2,000 miles under her belt, I still came up with last-minute changes during the paint and powder process. I added a keyless ignition system from Digital Dawg, which proved to be a safety and security feature. The drawback to riding a bare vehicle for an extended period included rust and oil management.
Still, when I assembled the bike for the final time, I ran into rear powder-coated fender expansion, and adjustments to the position of my one-off Spitfire oil bag to prevent chain damage. Maybe a rear belt would have been a wiser decision, maybe not.
Finally, the Mudflap Girl represents the open road. She represents the drawbacks of industry when it takes our girls away from us. And lastly she represents the desire to find our Mudflap Girl at home or down the road.
Name: Keith “Bandit” Ball
Owner: Lt. Ball
Builder: Ballintsky
Year, Make & Model: 2012 Mudflap Girl FXR
Assembly/Builder: Ballorama
Timeline: 8 months
Year/Model: 2012 Girder
Builder: Paul Cavallo, Spitfire Motorcycles
Type: Girder
Triple trees: Spitfire
Extension: 9 inches over stock
Year/Model: 2011 H-D
Rebuilder: New
Displacement: 80 cubic inches
Lower End: assembled by S&S
Balancing: S&S
Pistons: H-D
Cases: factory
Heads: Branch O’Keefe
Cams: Andrews
Lifters: S&S
EFI/ Carb: Trock modified CV
Air Cleaner: Roger Goldammer
Pipes: D&D
Ignition: Crane Hi-4
Year/Modifications: 2012 JIMS overdrive 6-speed
Engine sprocket: BDL
Trans sprocket: JIMS 23-tooth
Wheel sprocket: 51-tooth
Secondary drive: Biker’s Choice chain
Year: 2012
Designer/Builder: Paul Cavallo/Spitfire Motorcycles
Rake/Stretch: 5 inches up, 2 out
Bars: Spitfire
Risers: Custom Cycle Engineering dog bones
Fenders: Bar Knuckle/Toby/Bandit front, Biker’s Choice rear
Gas Tank: Biker’s Choice
Oil Tank: Spitfire
Headlight: Old spot
Taillight: Donkey from Biker’s Choice
Speedo: Wire Plus
Pegs: Performance Machine Contrast Cut
Electrics: Wire Plus, Digital Dawg (keyless), Biker’s Choice
Seat: Custom by Saddlemen
Front Wheel: Metalsport
Front Tire: Avon
Size: 19
Rear Wheel: Metalsport
Rear Tire: Avon
Size:
Hubs: Metalsport
Rotors: Metalsport
Brakes: GMA
PAINT
Bodywork/Molding: none
Painter: Chris Morrison and George the Wild Brush
Color: Super silver
Powdercoating: Worco silver and asphalt satin black
Biker’s Choice
BDL
Custom Cycle Engineering
D&D Exhaust
JIMS
MetalSport
S&S
Saddlemen
Spitfire
Wire Plus
J&P Cycles Giveaway Bike – Part One
By Robin Technologies |
Bennett’s Performance 2004 Dyna Build 106-Incher
By Robin Technologies |
Eric Bennett grabbed the shop door chain and hoisted the roll up door for the first time, in 2000. He started his mechanical career as a certified diesel mechanic with 60-weight always flowing through his blood stream. Finally, he gave into his entrepreneurial spirit and his desire to make motorcycles his life—he opened his own shop on Signal Hill. The rest is motorcycle history, much of it spent at the Bonneville Salt Flats with his dad, Bob.
He recently owned a modified twin cam FLH, but a customer made him a deal he couldn’t refuse, so he let it go. Then a deal on a Dyna surfaced and he made a quick move to snatch it. This time, he decided he would take it to the concrete and rebuild every aspect of the bike to be moderately fast, ultimately reliable, precise, and built with absolutely all the best mechanical intentions and components in mind. You get to see the 106-inch project unfold before your very eyes right here.
One of the benefits of running a service center in the largest city in Los Angeles County includes encountering every possible mechanical malady and the ability to research whatever solution might be necessary. Since LA is also the motorcycle media hub, he has constant opportunities to test anything new on the market. After working on Twin Cams since their introduction into the market in 1998, Eric has watched every configuration, modification, performance recipe, and model roll in and out of his shop.
With this build he could pour every lesson and improvement into his own ride. It started as a bone stock 2004, 88 cubic inch TwinCam. Eric could choose from any hot rod configuration in the world, but he chose to roll with a 106-inch kit from S&S and Branch re-tuned heads. He started the process by installing a JIMS Timken conversion into his left case and welding his crankpin into the S&S lower end after it was balanced.
“With superior S&S flywheels, I didn’t need to monkey with the cases,” Eric said.
He bored the stock barrels from 3 ¾ to 3 7/8 inches and increased his stroke from 4 inches to 4.5. With JIMS tools he pressed in the JIMS race (using green Loctite) (9-59-1) while keeping his fixture perfectly flat and the hole in the race at 12 o’clock.
Using a JIMS fixture tool, he was able to drill guide holes in the case for Timken bearing and race oiling. The JIMS tool holds the drill and guides it. The drills are set to indicate the depth. Otherwise, he would need to use transfer punches and a milling machine. Then he used another JIMS tool to drill for the race fastener holes, and used tap guides to prevent misalignment.
“I’ve made tap guides for every size tap,” Eric said.
One of the benefits of the higher quality Timken lower end bearings is their ability to lock the lower-end into place.
“I have never seen a Timken bearing fail,” Eric said. Until recently Timken’s were used since 1957. “I’ve seen dozens of roller bearing failures!”
The cost saving shift to roller bearings started in 2003 during the 100th anniversary season. “The best Twin Cams were built in 2002,” Eric confirmed. “Better engines, still carbureted and with 1-inch axles for strength and stability.”
Eric used red Loctite on the race screws. He uses a tool for installing both Timken races at the same time. Kelly McKernnan, an amazing machinist out of Portland, Oregon, manufactured it.
The next phase included welding the S&S flywheels. Anytime Eric has a twin cam lower end out of a customer’s bike, he welds the crankpin in place with stainless TIG rod. It doesn’t create much heat and is not a structural weld; it just cements alignment and prevents shifting. He always checks the true after welding.
Next, he installed the Timken bearing by heating the race to expand it, and it slippped over the shaft easily. There is very little endplay in the shaft, just .001-.002-inch. Eric cinched down the top bearing with another JIMS tool, then pressed in the main seal and spacer with yet another JIMS tool.
At this point, we shifted to pressing the new S&S cam bearings into the new heavy-duty Screamin’ Eagle cam plate for hydraulic cam tensioners, but Eric chose to shift to an S&S gear drive system, so he blocked off the oil passages to the hydraulics.
He installed Torrington cam bearings in the right case prior to installing the new cams. His plan called for installing a D&D Bob Cat exhaust system, which is 20 pounds lighter than a stock exhaust. D&D pipes come bolted together with all spring clips, flanges, and heat shields in place. “They take like two minutes to install,” Eric said.
“It’s the easiest system I have ever installed,” Eric said. “It comes with the all the components needed and the heat shields in place. No shimming is necessary or egg shaping holes.”
Day 2
We took a break for the day and grabbed a beer. But the next day, Eric installed a heavy duty Harley-Davidson pinion shaft bearing kit using a JIMS pinion bearing tool and it was time to slip the cases together with Yamabond on the case edge, while applying assembly lube on the pinion shaft. The case bolts were torqued to 18-22 ft. lb.
“Don’t forget the new oil pump O-ring when installing the high flow H-D pump,” Eric pointed out. Eric has an engine-building quirk. He continually turns the engine over, while rolling through the build process, and constantly tests for changes. “I want to catch anything that might bind early on,” Eric said. We actually ran into a small glitch while installing the cam plate.
But first, he installed the oil pump return gears, and then the separation washer and the spring, before the feed gear. He bolted the cam plate in place with ¼ -20 fasteners torqued to 120-inch- pounds. He used guide pins to help align the oil pump, and turned the engine over while tightening the pump so it would seat itself properly. He tightened two oil pump bolts, then removed the guide pins, and then tightened the other two Allens.
While aligning the cam drive gear dots, he installed the cams and used red Loctite on the drive gear Allen bolts, but used assembly lube on the washer for more accurate torque values and to prevent the bolt from galling against the washer surface for a false torque reading.
As we wrapped up the operation for the day, Eric installed the lifter with the oil holes facing the cam cover, then the guide pins, caskets and covers. No more lifter stools.
Day 3
Eric sub-leased a portion of his Signal Hill building to Branch O’Keefe, perhaps the best head porting business in California. I don’t want to put down any performance heads, but Jerry Branch, who is now about 82, built a helluva business around head performance.
Here’s a description of their heads from the Branch-O’Keefe site:
This is where is all began. Branch-O’Keefe is known throughout the industry for legendary cylinder head modification service. Our extensive reworking of stock Harley-Davidson cylinder heads begins with removal of the stock valve seats and guides. Next, the combustion chambers are heliarc welded to add additional aluminum alloy in the combustion chamber and around the valve seats for re-machining.
The valve seat pockets are then machined for larger nickel-chrome valve seats, and the combustion chamber is cut from the stock low compression rectangular shape to the legendary Branch “bathtub” chamber. After cutting the combustion chamber, new oversize valve seats and performance-quality valve guides are installed to tighter than stock tolerances.
The heads then advance to the porting room where the ports are fully hand-ported, blended and polished to Branch’s exacting specifications as proven on the dyno and flow bench. The head’s gasket surface is machined an additional 0.050-inch, which raises compression slightly. Finishing up, new oversize intake and exhaust valves (hard chrome stainless steel with stellite tips, polished face) are installed in bigger seats with a machined race-quality valve job and then hand-lapped. New seals and a high quality high-lift radius spring kit complete the installation.
The Branch O’Keefe head components are damn impressive from the titanium upper collars to the single oval wire spring with more travel and a larger diameter spring material. They have developed heads for JIMS big inch motors that produce 132 horsepower and ft-lb of torque, at an absolutely stock reliability level, even on a B motor. So natch, Eric had John O’Keefe and his master right-hand man, Paul go through his heads. Actually they used a formula they call the Dave Thew head. It’s a nickname for a performance formula. Dave beat everyone with these Branch O’Keefe head configuration. I will outline the different formulas next week.
We started the day installing S&S pistons with wrist pins first, since the oil rings pass over the wrist pin holes. Seems odd, but it’s the nature of the short-skirted piston. “Actually it allows for more skirt on stroker motors and does away with stroker plates,” Eric said. “This piston configuration will keep a stroker running longer.” The oil ring must be positioned with the dimple in the wrist pin area in a particular location to prevent rotation. The S&S pistons use four-piece oil rings with a removable ring land.
Eric installed the bottom compression ring so that the opening faced the exhaust port area. “No gaskets are used on the bottom of the cylinders,” Eric said, “just O-rings.” He compressed the rings carefully, lubed the inside of the freshly bored cylinder and slid the cylinder into place. Then Eric spun the motor over to check for binding. “I can’t wait to hear the D&D pipe.”
Eric started to install the heads using Cometic gaskets. The heads were torqued to Cometic specs and then he set to installing the rocker boxes and the fasteners, which were torqued to 22 foot-pounds. He started from the inside and worked out. Then he slipped in the S&S Quickee-Install intake pushrods for maximum valve opening. “I run premium S&S lifters with travel limiters,” Eric said. “They become solids at high RPMs.”
He tightened each pushrod until the valve slipped off the seat, and then let it bleed down, for about 10 minutes. He backed off the adjustment until he could spin each pushrod (one at a time). Then he backed off just one complete turn or six flats.
These shots were taken before John O’Keefe came up with a crazy notion to machine Twin Cam cylinder fins in a round configuration. Eric was knocked out by the procedure and pulled his barrels for the process.
In the next episode, Eric will slip the beautiful 106-inch Twin Cam into the stock frame, and we will discuss JIMS tools, while replacing the inner primary bearings, the slightly modified Dyna D&D pipe, and then and the new Rivera Primo clutch, the S&S G carb, and a new S&S high flow air cleaners.
Sources:
Bennett’s Performance
S&S
JIMS
Doug Coffey’s RetroMod Panhead Part 2
By Robin Technologies |
Timbo’s ’64 FL Restoration (Part One)
By Robin Technologies |
Not too long ago, my good friend Timbo approached me with a proposition, restore his 1964 Harley FL, I agreed. Problem was, it’s in a box, literally! So after a brief discussion on exactly what we wanted to do, how much it would cost and the possible value at the end of the rainbow, I started the Hard Ride back from Hell with the old ’64. I picked up the bike, basically a roller and all the boxes of parts that came with it. As you probably expected, this will be a frame up restoration as close to factory specs as I can get it.
There will be some minor changes, which I’ll talk about as we go along. First thing was to lay it all out and take inventory to see what was missing. After some research, I found replacing parts for the ’64 surprisingly easy thanks to J&P Cycle, Biker’s Choice, and the internet. I ordered the Vintage catalog J&P Cycle puts out and started researching parts I needed to replace.
I also found a local polishing company and chrome hardware supplier (needmorechrome.com) to make life easier. Tear down was a snap. Make sure you bag or box all your parts as you go and label what they are, and in some instances what order they go in. It’s not a bad idea to take lots of photographs for future reference. Sometimes a parts manual comes in handy.
After tear down, I started the fun stuff, going through each and every part, each nut and bolt and cleaning them. Some parts and hardware will not be salvageable, so you’ll have to replace them with either new, or good condition used. I found that there is a tons of vendors on line for just about everything you need. Buying new parts from the catalog is not always the best answer, especially if you’re on a budget like I am.
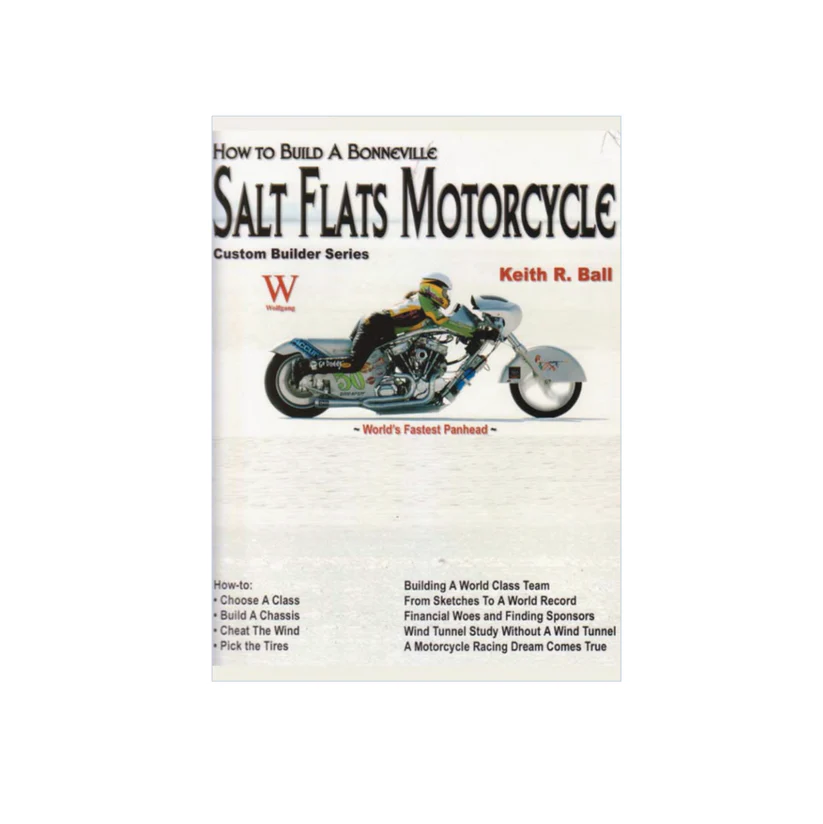
So shop around, do some research, you may be able to save as much as 50% sometimes. You will also need repair manuals and a few restoration guides like the one my friend Bandit sent me for reference from Wolfgang publishing, thanks Bandit. It has been very useful so far. This is the first of many articles on this restoration project. As the months progress, I’ll try and give you a detail look at what’s involved with a full-blown restoration.
Tail Gunner out for now, see ya next month!