The Mudflap Girl FXR Saga
By Robin Technologies |
It all started when a brother was desperate for cash and I bought a basket case Dyna, and with the help of JIMS machine turned it into an FXR. I started to build it for my son, Frank, the tattoo artist, around an old Kenny Boyce-styled pro street frame. Making progress on this build, with a massive upside down Custom Chrome front end, a brother stumbled into my shop and told me about Paul Cavallo and Spitfire Motorcycles.
Paul’s been around the industry for a couple of decades. When the economy tanked, he hung on with his dad and started Spitfire motorcycles. He was struggling and a brother thought I could help by using a couple of his Spitfire components on a Bikernet.com build. I went to visit Paul and was inspired by his non-stop drive to create new components daily, build world-class old school chops for customers, and kick ass at shows all over the country.
Then I was hit with the bike builder blues. My girlfriend left and I was forced to sell my 2003 Road King, leaving me with a ratty rigid Shovelhead and a Bonneville racer to ride. I needed a new girl and a long distance rider. Too often, around the campfire we debated twin cams versus Evos and most of the bros confirmed the solid stature of the FXR configuration. A plan formulated to build myself another FXR. I returned to Paul’s shop to cut a deal on a chassis for myself. Both were stretched, almost single-loop, long-distance riders with Spitfire Girder front ends.
Paul’s team built my chassis in pure traditional FXR style and Frank’s in the pro street configuration. We re-manned Frank’s FXR engine in black and chrome, and I ordered a bone-stock crate H-D 80-inch Evo. Both transmissions were rebuilt by the JIMS crew to be 6-speed overdrive units. I went with chain final drive and Frank used a stock belt.
The overwhelming concept revolved around building a bike that’s a chopper to the bone, but could be easily ridden across the country. My stretched gas tank holds well over three gallons, the oil tank contains nearly four quarts of oil, and I installed an oil cooler for heat waves. The Spitfire bars are held in place with Custom Cycle Engineering dog bone rubber-mounted classics.
I used Contrast Cut Performance Machine grips and pegs for style, yet road comfort. The bike is rubber-mounted for vibration-free riding. I worked closely with David Zemla of Progressive suspension until we configured a shock system capable of affording me some suspension with somewhat limited travel.
The girder is an uplifting quandary. With the Spitfire structure I could feasibly install almost any shock system, with whatever spring rate I decided on. I’m still messing with the gas-operated Rockshox.
I’m missing the best part, the Saddlemen seat. This seat was carefully configured at the Saddlemen manufacturing facility in Los Angeles, from the heavy-duty fiberglass seat pan to the spine-relieving slot, to the better than foam gel, and the ultimate breathing resilient fabric. That puppy is amazing.
The engine is virtually stock with the exception of a Bennett’s Performance-installed Andrews Cam, S&S oil breather gear, and Branch flowed heads, all their state-of-the-art valves and springs, and intake manifold. I ran an Andrews EV-27 cam and Andrews chrome-moly adjustable pushrods for less flex, a new cam bearing and the Branch flowed stock heads, for 8.9:1 compression, 78 cc Branch-flowed chambers, and 75-80 horses at 2,600 rpms.
The bike was built specifically for the road, but with chopper styling. I can’t leave anything alone, or ride a stock bike. It’s against my nature, but I can ride a scooter that will get me there comfortably in style.
For the first time in my bike-building life, I built this bike in bare form, wired it, and rode it for almost eight months. The benefits are immense, since I could make changes and adjustments throughout this road or rode research period. It gave me an extended period to investigate color schemes, build the front fender, break stuff, repair, and outright replace components, including my goofy chain guard.
It’s odd, but even with 2,000 miles under her belt, I still came up with last-minute changes during the paint and powder process. I added a keyless ignition system from Digital Dawg, which proved to be a safety and security feature. The drawback to riding a bare vehicle for an extended period included rust and oil management.
Still, when I assembled the bike for the final time, I ran into rear powder-coated fender expansion, and adjustments to the position of my one-off Spitfire oil bag to prevent chain damage. Maybe a rear belt would have been a wiser decision, maybe not.
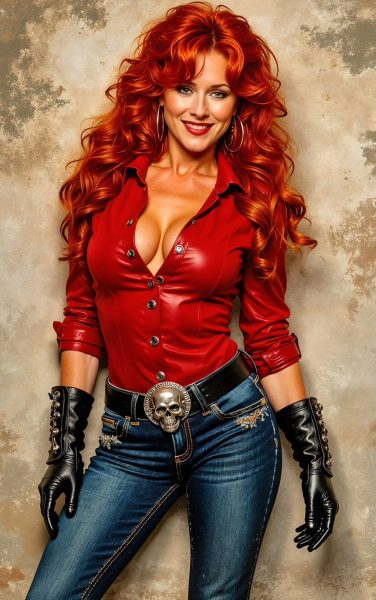
Finally, the Mudflap Girl represents the open road. She represents the drawbacks of industry when it takes our girls away from us. And lastly she represents the desire to find our Mudflap Girl at home or down the road.
Owner: Lt. Ball
Builder: Ballintsky
Assembly/Builder: Ballorama
Timeline: 8 months
Builder: Paul Cavallo, Spitfire Motorcycles
Type: Girder
Triple trees: Spitfire
Extension: 9 inches over stock
Rebuilder: New
Displacement: 80 cubic inches
Lower End: assembled by S&S
Balancing: S&S
Pistons: H-D
Cases: factory
Heads: Branch O’Keefe
Cams: Andrews
Lifters: S&S
EFI/ Carb: Trock modified CV
Air Cleaner: Roger Goldammer
Pipes: D&D
Ignition: Crane Hi-4
Engine sprocket: BDL
Trans sprocket: JIMS 23-tooth
Wheel sprocket: 51-tooth
Secondary drive: Biker’s Choice chain
Designer/Builder: Paul Cavallo/Spitfire Motorcycles
Rake/Stretch: 5 inches up, 2 out
Risers: Custom Cycle Engineering dog bones
Fenders: Bar Knuckle/Toby/Bandit front, Biker’s Choice rear
Gas Tank: Biker’s Choice
Oil Tank: Spitfire
Headlight: Old spot
Taillight: Donkey from Biker’s Choice
Speedo: Wire Plus
Pegs: Performance Machine Contrast Cut
Electrics: Wire Plus, Digital Dawg (keyless), Biker’s Choice
Seat: Custom by Saddlemen
Front Tire: Avon
Size: 19
Rear Wheel: Metalsport
Rear Tire: Avon
Size:
Hubs: Metalsport
Rotors: Metalsport
Brakes: GMA
PAINT
Bodywork/Molding: none
Painter: Chris Morrison and George the Wild Brush
Color: Super silver
Powdercoating: Worco silver and asphalt satin black
BDL
Custom Cycle Engineering
D&D Exhaust
JIMS
MetalSport
S&S
Saddlemen
Spitfire
Wire Plus
Bennett’s Performance Final, Maybe
By Robin Technologies |
Bennett’s Performance touts being the performance test bed for all-things big twin performance and handling in Long Beach, California. The team is also very involved in Bonneville Land Speed Record efforts. Unless the California Air Resources Board decides to shut down every California custom or performance shop, they will be burning rods, turning lathes, and twisting wrenches until they die.
I say, “They,” and I’m referring to Eric Bennett, the boss, and his longtime mechanic and Dad, Bob. Other technicians come and go. Plus, next-door are the men, including Jerry Branch, and John O’Keefe, who are the masters of the flow bench and headwork at the Branch O’Keefe machine shop.
All shops big and small in California live in fear of being shut down. But let’s not go there. For a few minutes let’s pretend that freedom rings in this country and our political structure loves folks who build anything from hot rods to custom motorcycles. They even support the notion that loud pipes saves lives, because it’s true. They love it that guys don’t beat their wives or do drugs, that they learn how to work with their hands and create something one-off, which they can ride to work or to Sturgis with pride. Am I dreaming or what?
Eric recently came across this 2004 Dyna and decided to research every performance resource and build himself the best hot rod Dyna on the planet, as a test project for anything performance, for Twin-Cams. He did, and we followed the process on Bikernet.com, and this is the third and last stellar episode. But wait, their could be more, according to Eric’s assessment at this point.
“I need to change the shocks,” Eric said. “They are too low and shifting the weight to the rear. I need to tighten the handling.”
Eric was pushing is Dyna onto his shop dyno as we strolled into Bennett’s Performance, a very clean and well-organized shop, a couple of weeks ago. “I wanted to dyno it one final time without a rev limiter,” he said and discovered a dyno malady. The battery was low. At about 5500 rpms the dyno results didn’t indicate a smooth transition through the gears, but jumpy results. He was dying to try again, but we were forced to take a break.
Eric now has 1978 miles on the bike since he rebuilt and upgraded the engine from 88 inches to 106. Shortly after the bike was completed and running, his dyno pulls indicated 112 hp and 119 pounds of torque, then 116 hp and 118 pounds of torque with a carb change, more miles and tuning.
Our discussion shifted back to handling. “At 100 it starts to wiggle,” Eric said, “There’s too much weight on the back.” He plans to install 14-inch Ohlins. Today, the lower badder look is slipping away for the jacked, terrific suspension, badass, dirt bike, café racer, SOA, go fast appearance.
We discussed the new CCE stiffer rubbermounts for Dynas, which might do the trick. “I still won’t be able to dial-in the handling as well as FXRS, like the Unknown Industry guys,” Eric said. “With my handling issues, they pulled away at just over 100 mph. The front feels fine, but I haven’t decided what to do with my number plate. Newer Dynas have additional gussets, but nothing like the FXR, period!”
He plans to black out the wheels and add Michelin tires, but he loves this engine configuration. “It’s perfect,” Eric said. “I didn’t need to machine the cases or crank up the compression. The cam isn’t radical, and I could run stock cylinders.” Jerry Branch told Eric that engines are like a combination lock. One number off and the system doesn’t work.
He’s currently looking for an ’06 or ’07 Dyna 17-inch rear wheel, and he will run a 160 tire. “It still gets 42 mpg. Reaching more than one horsepower per cubic inch with a naturally aspirated engine. It’s impressive.”
The S&S lower end contains a 4.5-inch stroke with 3 7/8-inch S&S pistons. Eric blocked the Mikuni carb out one inch to allow the air and fuel to atomize more before it reached the intake valves. “It’s a smoother delivery to the chambers,” Eric said. “We were lucky to score a set of Dave Thew heads designed for monster JIMS 116-inch motors by the Branch/O’Keefe team. This combination with 2.02 intake and 1.610 exhaust valves, and some slight porting, coupled with a Redshift .647 lift cam, and 11.5:1 compression gave Dave Thew 132 ass-kicking horsepower and 132 pounds of torque.
Dave’s bike with fat tanks and beach bars could not be beat at the drags.
I spoke to Eric’s dad who talked of his Bonneville bikes and going after a 167 mph record. Eric was the rider. “We couldn’t get over 161, but then I learned about aerodynamics. I gained 9 mph by moving the pipes inboard. We gained another 5 mph when Eric shifted his riding position and tucked one foot behind the primary.” They grabbed a record.
So, you can tell by the smell of go-fast, the posters of Burt Munro on the wall, and the Bennett record next to the counter, that this group is all about motorcycles and folks who ride hard and fast. Hang on for the next report.
Address: 1940 Freeman Ave,Signal Hill Ca, 90755
Size: 16-inchBrake calipers: Stock
Brake rotor: Lyndall
Pulley: H-D
Bikernet Bike Build: BETSY’S REVIVAL STORY Part 2
By Robin Technologies |
Ahuge expression of gratitude goes out to my friend Steve Brownell forselflessly donating his time and materials to bring this GypsyMachine back from the dead. As a fellow biker himself Stevereiterated to me a manta I hear and have used time and again, “That’swhat we do, brother.” With a new lease on life I closedthe tailgate behind the NEW girl, gave Steve a big appreciative hug,then drove off waving as I watched Steve and the crew in the rearview sending us on our way to future adventures yet to come.
Bennett’s Performance Dyna Build, Part Two
By Robin Technologies |
Sorta the same equation in reverse fits Bennett’s. They are located on an alley, but it’s about as clean and wide as a comfortable two-lanner, and the buildings are pristine and orderly. Hell, there’s even some landscaping bordering the buildings. Eric and his dad keep the shop tidy and it’s open and painted white on the interior and the exterior. Makes it easy to take tech shots.
So we got to work. Eric hadn’t ridden his own motorcycle in six months, broke up with his girlfriend three times, and needed his two-wheeled Valium. Working with D&D, they altered a stock D&D system to fit ’91 to ’13 Dynas. The heat shield was modified and the system was ceramic-coated for a long-lasting satin black. He also had to modify the mounting bracket for the performance pipe system. Eric is going to share his mods with the D&D gang so they can make adjustments to their manufacturing process for these model years.
Eric’s first move was to avoid a potential problem with the 5-speed tranny main shaft inner primary race. They occasionally drift inwards from the inner primary toward the tranny main shaft seal and damage the threads. A malady solution included installing a JIMS inner primary bearing upgrade Kit.
Here’s what the JIMS team has to say about it: Thinking of running an open primary system, or looking for added durability in your high output engine? JIMS now has a double-row ball-bearing with seal and retaining ring kit.
For use on 1990 to 2006 FLH and FXST, and on 1990 to 2005 Dyna models or any 5 or 6-speeds using H-D bearing No. 9135.
Note: Not compatible with Bandit clutch kits.
Eric used his Custom Cycle Engineering swing arm punch to remove the stock bearing. Then he used JIMS tools, including the race puller No. 34902-84 and the seal installer No. 967, to press in the bearing to the perfect depth. The JIMS kit removes the main-shaft bearing race.
With the bearing pressed in perfectly, Eric installed the snap ring with the flat side toward the transmission, then the JIMS seal. It was time to install the inner primary using 22 foot-pounds of torque on the 5/16 bolts with a dab of blue Loctite.
He was ready to install the new Rivera Pro Cutch, but first he had to press out the stock clutch hub. The performance differences in the clutches were obvious. The difference in the fiber surface areas was substantial. For big-inch motorcycles, the more surface contact area, the better.
Per the Rivera/Primo instructions, we needed to soak the Rivera clutch plates in ATF transmission fluid before assembly. “If we don’t, Ben Kudon, from Rivera will bust my balls,” Eric said trembling. Per the instructions, we soaked them for 10-15 minutes.
While waiting, we installed the stock compensating sprocket using a 2.5-inch socket and Loctite, and the primary chain adjuster. Eric installed the clutch hub with a 1 3/16 socket, being careful to handle the left-handed threads. Then he installed the first thick steel plate into the hub, followed by a fiber, then steel, and then another fiber plate.
Eric runs ATF fluid in his primary. With the pressure plate in place, the diaphragm and the retainer, the clutch was a done deal. “Don’t over-tighten the fasteners against the locking ears,” Eric pointed out.
Eric uses JIMS guide pins to hold gaskets in place, so the primary could be slid into place without fighting the gasket. They are easy to make, or just buy a set the perfect length from JIMS. He tightened the stock primary to 120-inch-pounds of torque.
Between the last time I darkened the Bennett’s Performance door and this point, Eric and John O’Keefe from Bennett’s Performance had a brain fart to machine only Twin Cam cylinders to give them a drag bike appearance. Eric volunteered to be first and tore his engine apart again.
[page break]
John O’Keefe has given this signature look a new name: Branch Race Cut Cylinders. Eric chose to be the trial run and they cause a stir around the shop. Currently, the Branch team doesn’t have enough cylinders to offer an exchange service, but you can send your cylinders out, and depending on the shipping service you select, get them back within a week.
He installed the carb with the isolator block and new S&S O-rings dry. “If the surfaces are in good shape,” Eric said, “you don’t need grease or sealants. They just cause problems for the next mechanic.”
We took a break, since Eric was working with a Speed Merchant and Alloy Art on a couple of custom products, plus a couple of items needed powder-coating. Eric was anxious for final assembly and to fire the monster for the first time and go for a ride.
When I returned, Eric was installing a new H-D floating rotor on the rear wheel of his bike. “You can’t install the rear wheel until you pull the wiring into place.” Eric pointed out the wiring pocket in front of the rear wheel cavity, which is very tough to reach with the rear wheel in place. “Only ’05 and earlier Dynas were set up this way. It’s a pain in the ass.”
Okay, this may get a tad confusing, but I’ll do my best. Alloy Art is a machine shop and they build parts for companies like Speed Merchant and Harley-Davidson. They machined these Speed Merchant triple trees for Dynas, in keeping with Buell configuration and agile handling. You can see the difference.
He greased the neck bearing and the Timken, and began to slip the fully adjustable stock forks into place. With the dust shield in place, the top triple tree was added.
Eric chose to run Alloy Art super clean rear turn signals, no fronts, and an Alloy Art tight billet headlight and grips. He also installed good and tight Alloy Art urethane riser bushings. Next came his own headlight mount bracket and the Alloy Art billet headlight, plus his handlebars and controls, and the Dakota Digital dash, speedo, tach, and data acquisition system. Then he pulled the stock wiring harness runs into place under the rear fender and installed the stock wiring plugs.
The Alloy Art rear turn signals required drilling one hole for a signal wire. Then it was a matter of installing his pre-ordered Goodrich front and rear brake lines. He installed and adjusted the pull throttle cable first, then the push. He slipped chunks of ½ inch black shrink tubing over the dual throttle cables and used them as guides. Once the cables were run and comfortable, he used a heat gun to tighten the shrink-wrap.
Sources:
Bennett’s Performance
Rivera Primo
S&S
Branch O’Keefe
Alloy Art
TEL: 626 963 5021
FAX: 626 335 3685
CONTACT@ALLOYART.COM
154 S. VALENCIA ST.
GLENDORA, CA 91741
Speed Merchant
www.thespeedmerchant.com
info@tsmracing.net
How to replace grips on a Harley-Davidson by J&P Cycles
By Robin Technologies |
Today, J&P Cycles shows you how to replace grips on a Harley Davidson motorcycle. From removing your old grips and adding new grips watch the entire process take place.In this video they use a 2013 Harley Davidson Softail Slim for demonstration but the process will be very similar for all motorcycles that utilize dual throttle cables.
Rebirth of an American Classic: Transmission Rebuild
By Robin Technologies |
We have already gained the support of many of the top compaines in the vintage motorcycle industry. If you would like to see your company’s logo included not only on the motorcycle, but also on every article, please contact me directly to learn more about our marketing campaign and advertising opportunities. EMAIL
|
|||
|
|
||
|
|
|
|
|
|
|
|
|
|
|
|
|
|
|
|
Doug Coffey’s RetroMod Panhead Part 5
By Robin Technologies |
Risers
Rebirth of an American Classic: The Build Begins
By Robin Technologies |
|
|||
|
|||
|
|||
|
Mudflap Girl FXR Part 12—She meets S&S
By Robin Technologies |
Here’s the link to Mudflap Girl Part 11: http://www.bikernet.com/pages/Mudflap_Girl_FXRs_part_11_The_First_Road_Test.aspx
My son’s Mudflap Girl FXR is running and partially broken in. I even, finally, dialed in the Wire Plus Speedometer, and it’s working. I wish I knew what I was doing wrong, but that puppy works like a champ. I enjoy the tightness of the display and ease of installation. In that small cylindrical Wire Plus display, I get a speedo, a tach, trip gauge, neutral light, turn signal indicators, oil idiot light, and what else?
Okay, so it’s time to turn the Pro Street version of the Mudflap over to my son, Frank, but first we couldn’t leave the bone stock remanufactured 80-inch Evo engine alone. I reached out to S&S for a cam recommendation, and they recently built a relationship with Crane Cams.
Bruce recommended the following stock engine formula: S&S Super E carb, Crane Hi-4 ignition, S&S Cam and S&S easy-adjust pushrods, a Crane dual-fire coil, and the S&S 33-4250 breather and shim kit, for just enough pump to let this motor breathe.
I hauled the Mudflap beast on my Kendon tilt-up combo trailer to Bennett’s Performance, a very clean shop, next to Branch O’Keefe Flowmetrics, on Signal Hill. Eric Bennett, the boss, bought the Bikernet Hearse, immediately fired his girlfriend and started to cruise the backstreets of Long Beach. He traded his bagger for a Sons of Anarchy Dyna, and is about to turn the 88-inch twin cam into a 106-inch S&S night flier. His band, the Signal Hill Billies, transformed their usual light country western twang into dark blues. What the hell did I do? We will bring you reports on his engine transformation. I could swear the all-black lowered hearse smirks at me whenever I roll into his parking lot, but we won’t go there.
I pulled up the other day to find Frank’s Mudflap Girl on a lift center stage. No sooner did I enter the shop when Eric slipped out the back. A mysterious tech sauntered out of the engine room with long gray hair. “Don’t take my picture,” he said, “and don’t mention my name in the article.”
I’ve known him a long time. He’s an experienced Bonneville racer and a multiple-tour Vietnam vet, about my age. He’s only been married once, and is still married to the same woman. “I swear,” he said, “I’ve never pulled my military issue bayonet on my wife.”
I’ve been married five times and Eric three, and he just broke up with his long-time girlfriend. Maybe the graybeard tech with his twisted grin was trying to say something.
What the hell could I say? I set the box of parts on the lift and started to blow the dust off the fresh engine. Eric gave me a new cone gasket, seal, and a Torrington cam bearing, in case the fresh engine was fitted with a poor quality INA bearing—it was. I removed the pipes. The tech removed the plugs, and we jacked up the bike. He popped the pushrod covers and broke out the bolt cutters to remove the stock pushrods without removing the rocker boxes.
“I roll the engine over so the valves are closed when I cut the pushrods,” Graybeard said, “so the valves don’t slam shut when the pushrods snap.”
Then he removed the point cover, and the crane Hi-4 ignition plate. “There needs to be a washer under the fastener holding the Crane point breaker plate,” he barked.
Unfortunately, I had installed the Crane system and breaker plate—my bad. I thought about my fifth wife. He pulled the cone cover with a rare Trock tool, since the master is no longer with us.
With a couple of JIMS magnetic, or H-D lifter tools the lifters were held out of the way while he pulled the stock cam and checked the bearing.
Sure enough, it was an INA cam bearing with about half the rollers of the high quality Torrington cam bearings.
JIMS tools makes a handy cam bearing puller, which was installed, and swiftly, perfectly yanked the stock bearing free. Eric made specific machined aluminum drivers for installing new bearings, which were carefully tapped into place. After it was installed, he reached in to make sure the bearing spun free, with no binding.
Next, he aligned the timing marks on the pinion gear and set up the new S&S breather gear.
Steel breather gears have better dimensional stability than plastic gears. Embedded particles can damage the crankcase breather gear cavity. A screen provides better protection than a slotted gear, so small particles are prevented from entering the gear cavity, where they may damage the gears and oil pump.
The S&S steel gear with welded in screen with larger diameter holes provides improved air flow/oil scavenging from the flywheel cavity. Crankcase flywheel cavity vacuum and oil scavenging are further improved by optimized breather window timing. Breather oil trap scavenging is significantly improved by increased scavenge port duration. These improvements are the result of exhaustive research using digital sampling and data acquisition equipment.
This gear was the standard size for late 1977—‘99 Harley-Davidson big twins. Breather gear kits include breather gear and steel endplay shim kit.
With the new S&S breather gear installed, he started to adjust the endplay with a .120 shim. “That’s usually the one,” he said. As it turned out, we went with .110-inch shim after he checked the fitment with a straight edge. Then he performed a similar operation with the cam to check endplay. We discovered that a .055-inch thick shim was needed in addition to the existing flat shim. He dug around and found one, and we were set to test it with another JIMS special tool.
The S&S 510V bolt-in cam works well with stock or ported heads. The improved ramp design results in low valve train noise. It’s meant for engines up to 96 inches and with compression as high as 10:1. It’s designed to pull its best results in the mid to upper rpm range, 3000 to 5000 rpm.
It was time to set the cam timing with the pinion bearing and breather gear slots. Then the mystery tech cleaned some of the case threads with a tap. “Too much Loctite,” he said. He touched all the stock ¼-20 Allens with blue Loctite and installed the cone and torqued them to 110 inch-pounds. He installed the appropriate washer in my breaker plate, and then the timing plate.
Before he removed the Crane Hi-4 ignition plate, he scribed the plate and the case so the timing would be right where I placed it when everything was put back together—that is, if I didn’t fuck it up in the beginning.
I peeled the S&S quick-adjust pushrods out of their vacuum-packed container and shortened them for ease of placement. These S&S jobs were a breeze. He checked for all the needed pushrod gaskets, and we compared the pushrod lengths to use the short ones on intake valves and the long ones for the exhaust.
“I adjust them the old school way,” he said. “I make sure one intake lifter is at the top of its cycle, and then adjust the other. Then visa-versa.” He waited 20 minutes between adjusting valves for the stock lifters to bleed down, but while he waited, we started to install the pipes. “No time to lose.” He made sure each pushrod would spin after it bled down. In each case, he took the slack out of the pushrod and then turned it out four turns or 24.5 flats. Once he tightened the pushrod lock nuts, he would take the half flat out of the adjustment.
Here’s the Quickee Pushrod Supplement from S&S: To install S&S quickee pushrods, thread the jam nut off the threads towards the ball end and screw the adjuster into the pushrod tube until the threads disengage and the pushrod can be collapsed
When installed and adjusted, S&S Quickee Pushrods must have a minimum thread engagement of .500 or half an inch (Pushrod tube to Adjuster, not including the jam nut) or severe damage to the pushrod as well as your engine may occur.
When adjustment is complete, the jam nut must have full thread engagement with the adjuster screw. If you do not have full engagement, the pushrod is not correct for the application or position.
S&S Quickee Pushrods for S&S Shovelhead and all big twin engines contain two long and two short pushrods. All Sportster model and Harley-Davidson twin Cam 88 pushrodes are the same length.
We replaced the pushrod cover clips with another JIMS tool, and I finished installing the Spitfire brake master cylinder and pedal. Once together, we turned on the gas, hit the starter and it fired right to life. Our very experienced Vietnam vet tech let her warm up, adjusted the carb and quietly returned to the engine room to work on a twin cam engine build for a customer. It’s time for my son to pick up his bike and head for a paint shop or the hills.
S&S
Bennett’s Performance
Wire Plus
JIMS
Spitfire
Timbo’s ’64 FL Restoration (Part One)
By Robin Technologies |
Not too long ago, my good friend Timbo approached me with a proposition, restore his 1964 Harley FL, I agreed. Problem was, it’s in a box, literally! So after a brief discussion on exactly what we wanted to do, how much it would cost and the possible value at the end of the rainbow, I started the Hard Ride back from Hell with the old ’64. I picked up the bike, basically a roller and all the boxes of parts that came with it. As you probably expected, this will be a frame up restoration as close to factory specs as I can get it.
There will be some minor changes, which I’ll talk about as we go along. First thing was to lay it all out and take inventory to see what was missing. After some research, I found replacing parts for the ’64 surprisingly easy thanks to J&P Cycle, Biker’s Choice, and the internet. I ordered the Vintage catalog J&P Cycle puts out and started researching parts I needed to replace.
I also found a local polishing company and chrome hardware supplier (needmorechrome.com) to make life easier. Tear down was a snap. Make sure you bag or box all your parts as you go and label what they are, and in some instances what order they go in. It’s not a bad idea to take lots of photographs for future reference. Sometimes a parts manual comes in handy.
After tear down, I started the fun stuff, going through each and every part, each nut and bolt and cleaning them. Some parts and hardware will not be salvageable, so you’ll have to replace them with either new, or good condition used. I found that there is a tons of vendors on line for just about everything you need. Buying new parts from the catalog is not always the best answer, especially if you’re on a budget like I am.
So shop around, do some research, you may be able to save as much as 50% sometimes. You will also need repair manuals and a few restoration guides like the one my friend Bandit sent me for reference from Wolfgang publishing, thanks Bandit. It has been very useful so far. This is the first of many articles on this restoration project. As the months progress, I’ll try and give you a detail look at what’s involved with a full-blown restoration.
Tail Gunner out for now, see ya next month!