Big Guy Softail Frame Modification


softail before

softail after

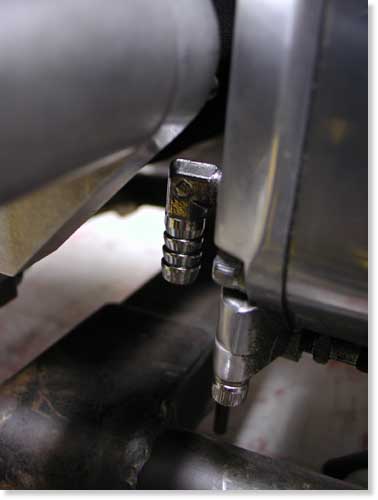
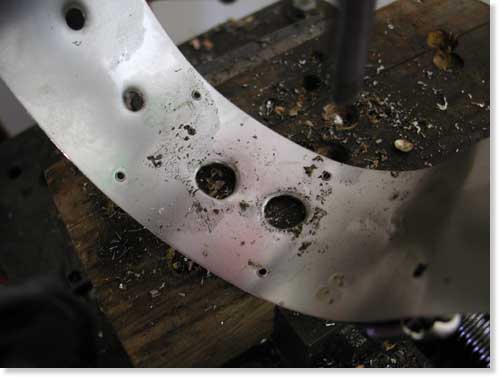
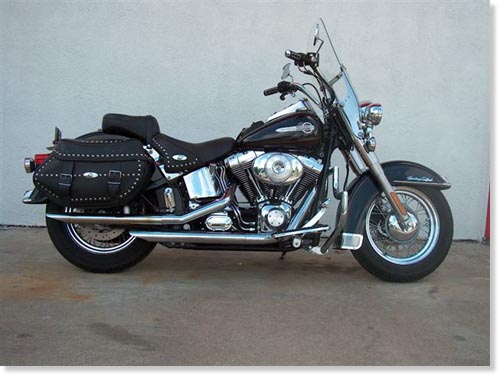
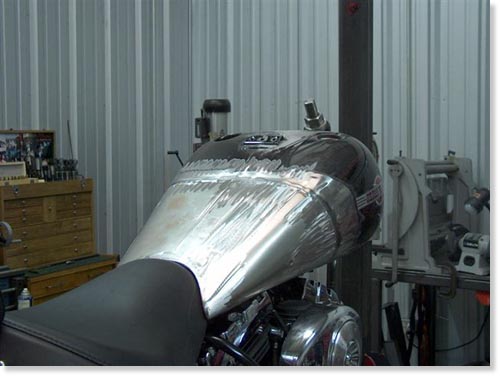
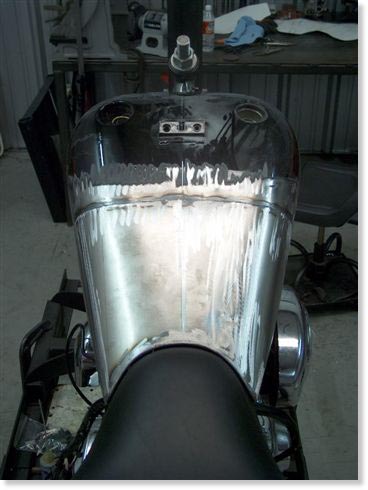
The before (top) and after shot of the Heritage modification.

A full moon glowed over the harbor the night a call came through from an irate reader, “You bastards had a Softail project and never finished it,” the caller exclaimed frothing at the mouth. “I'm comin' all the way to Califa to snatch your women, drink your whiskey and ride your Panhead home.”

I freaked. It wasn't the women or the whiskey, but the '48 El, dual-carbed Pan was family. That couldn't happen. That night I slept fitfully, tossing and turning, as if battery acid was dripping in my eyes. I had sizzling heartburn until the phone rang the next morning and I bolted out of the sack, as if a 9-point earthquake rocked the Bikernet headquarters. I lifted the receiver tentatively, “Yep?”

“My '91 Sporty was lacking in style and sex appeal,” Terrie said excitedly, “when my husband purchased his custom Road King from Lucky Devil. I was not going to allow him to out do me, so I decided to see what Kent & Eric could do for me. We explored all the options and wound up digging into my stock Sportster…”

I was going out of my mind. This woman disturbed my WA while my mind spun with terror over the loss of my Panhead. What did I care about her Sportster?

“The transformation began with conceptual design discussions,” she blithered while I sat on the edge of the bed and sensed the enraged reader storming closer to the headquarters. “As the project progressed, Lucky Devil kept me involved in all major design considerations. I can't tell you how happy I was with the end results. Would you feature it?”

“Okay, okay,” I said reaching for my pint of Jack on the dusty bed stand. I was half out of my mind. Who the hell was Lucky Devil?

“That'll be great,” she chimed in.

I was as depressed as an Cuantanamo Bay terror suspect.

“You should see their Softail frame stretch,” she muttered as if trying to spur the lagging conversation.

“What,” I snapped? There was hope suddenly. She told me about the two Houston builders, Kent and Eric, but there was a twist. She didn't know which guy owned what name?

“They go by Lucky Devil,” Terrie said concern in her voice. “I don't know which is Lucky and which is Devil? I don't know which is Eric and which is Kent. I swear, every time I'm in the shop Lucky becomes Devil and visa-versa.”

I was intrigued and gave them a call. I didn't care who I talked to. Within minutes they e-mailed images and the tech was in motion. Watch for Terrie's Sportster tech next week. I needed to move on this one.

softail tanks off

Eric and Kent have been in the metal fabrication industry for over a decade. Kent made handicapped people smile for five years building adaptive equipment, then another half decade welding and fabricating. The partnership has flourished in Houston for a year. Kent even has his own mobile secret frame table.

eric cutting up frame

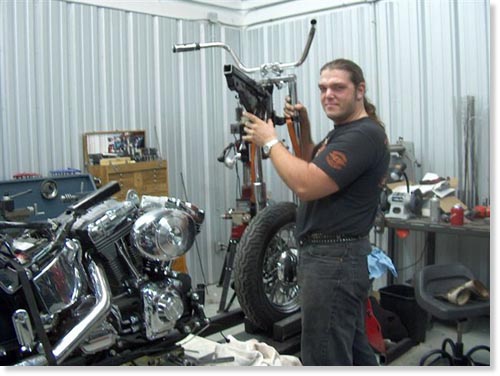
That's Lucky, Devil, Kent or Eric. Who knows?

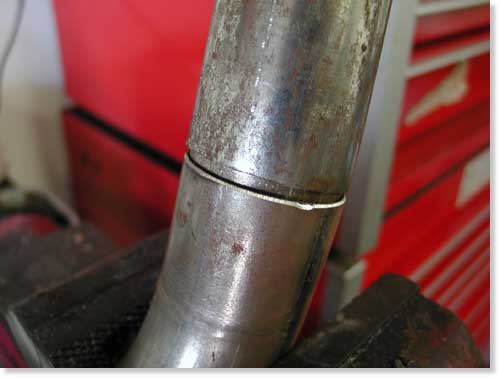
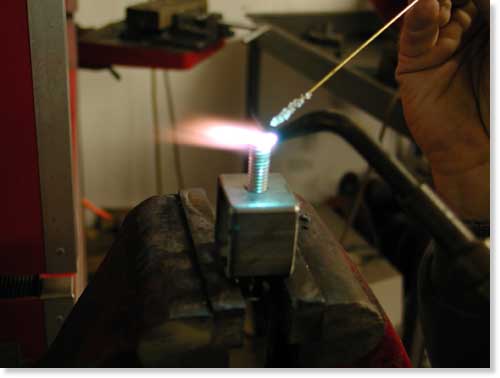
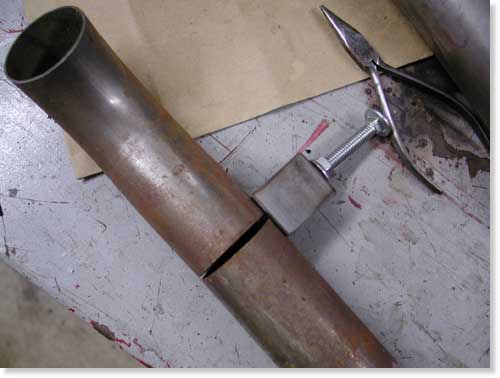
“We stretched the backbone of Darryl's Heritage 2 inches and the down tubes 5 inches, and we only increased the rake 2 degrees,” said Lucky. They used the same quality seamless tubing as the factory an TIG welded the .120 wall mild steel segments into place.

Darryl the owner

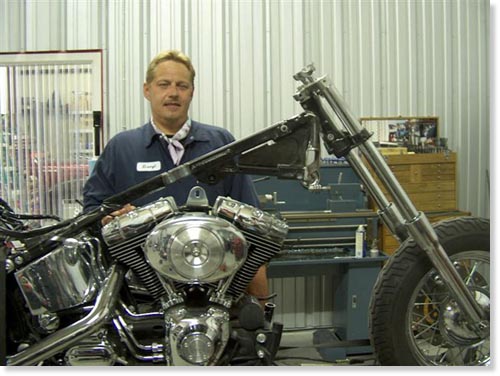
We know that this is the bike owner, Darryl. That's all we know.

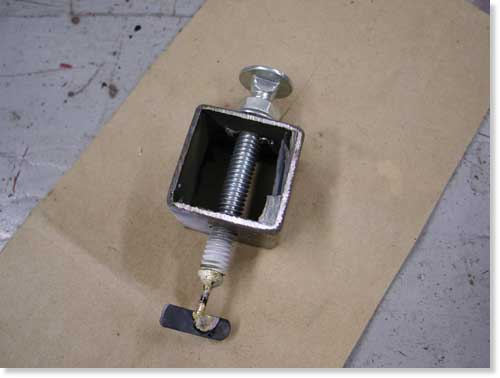
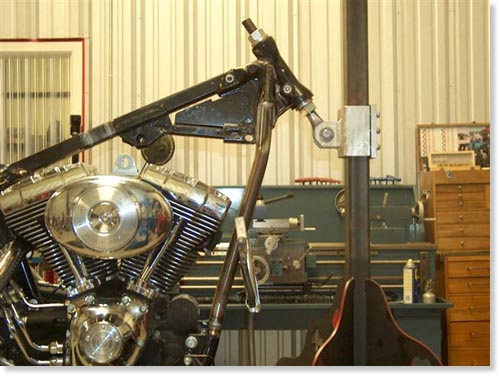
“First we remove the front end and replaced the tubes with 6-inch over units. Then we stretched the square tubing back bone and set up the bike with the front end on the neck. Finally the downtube segments were tacked into place,” one of the partners explained. The frame was modified to make the front end length work perfectly.

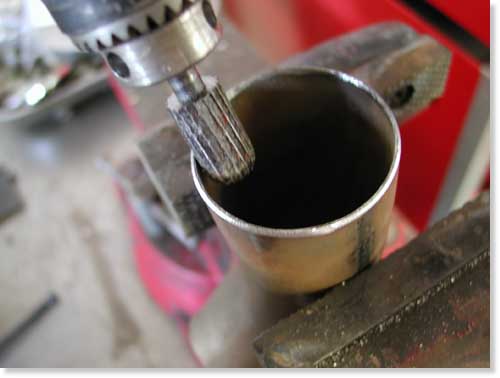
“We ground out the tubing from the neck casting and replaced it with fresh material,” the Devil whispered.

bare metal stretch angle shot

The stock frame was raked to 34 degrees, so this mod only bumped it to 36 degrees.

“After we installed the 6-inch over tubes,” Lucky explained, “we carved the plates out of the slider covers and made stretched covers with cold-rolled mild steel plate. Then the cowbells were chromed,” Lucky told me, I think. They also performed a cosmetic stretch on the tank.

“This was a fun project, it's not often you get to chop out a bagger,” Kent said, although I'm not sure.

stretched tank top shot

It takes 2-2.5 days to perform a front loop modification.

“We like them to handle well,” Lucky added, “No flopping around.”

A custom tank stretch takes 1.5 days.

“But the bike was down just under a month,” the Devil added. “Painters have a way of burnin' daylight.”

I couldn't tell who was who, either Lucky or Devil, but they do sharp work: Phone # 281-477-3590. Hope I sent that angry reader an e-mail in time. Thanks guys!

LUCKY DEVIL BANNER

Click to see more from Lucky Devil

Please follow and like us:
Pin Share

Amazing Shrunken FXR 12: Tools And Linkage

Samson

tranny link cut

The stock tranny linkage cut to work as our brake linkage.

A week ago I worked on the brake controls with some success. After fabricating a mastercylinder bracket and actually drilling the holes in the proper location, it wouldn’t work. I needed to turn the master cylinder upside down. I called Frank Kaisler to confirm that it was a remote possibility, it was. I cut another chunk of steel plate, drilled the holes again and dug through drawers to find a pushrod. Nothing.

master cyl. 1

Parts and pieces we used to cobble together brake linkage.

master cyl in place

The master cylinder in place upside down under the tranny.

shift rod cut

The stock stainless shift rod cut for a master cylinder pushrod.

I used a stainless steel shift rod unit for lots of adjustment, but had to grind/taper the end to fit. I also used the transmission shift lever for the connection. I cut Giggie’s brake axle to length and sliced the tranny shift linkage. Then I welded the linkage to the axle. That was a mistake. I should have machined the pieces to fit together, but it will work. The other end of the linkage was the perfect mate for the shift rod I cut and fashioned for the handmade master cylinder push rod. I lucked out. I think it’s cool.

oil fitting

The inlet oil fitting had to be moved to make room for the brake linkage.

link welded to axle

Here’s the tranny-gone-brake linkage welded to the brake axle.

That was last weeks endeavor. This week I stumbled. It all began with a set of exhaust I fabricated, from bits and pieces of other exhaust, for the Amazing Shrunken FXR. They worked out all right until my humble associate, Nuttboy, was assigned to grind the welds. Ya see, I held one piece of pipe against another and tacked them. The mating surfaces were not aligned perfectly, so when Nuttboy unleashed the Makita grinder to round off the welds he cut right through the pipes forming cavern-like gaps.

The pipes weren’t half bad until he destroyed them. Although, I could take a chunk of the blame.

kf insert

Kustom fab uses pipe inserts to hold pipes aligned securely for welding.

enlarging kf insert slot

I had to enlarge the slot to make the insert fit.

grinding inside of pipe kf

The insert won’t slip into place with burrs in the pipes. I had to grind them clean.

Lots of builders in the industry make their own one-off custom exhaust, so I started asking around about tools. Most don’t have tube benders, so they follow the same strict regime I did. They piece exhaust systems together using bits and chunks of other systems. One company will ship you a kit of various bends to work with. I inquired as to how shops held two chunks of tubing together in order to MIG, TIG or even gas weld pipes. The information highway opened up to me. Roger from Kustom Fab in highway takes a 1-inch section of like pipe, slices it (so the O.D. shrinks) and shoves it in one section of pipe then in the other. Simple system that adds strength but reduces the I.D.

kf insert in place

Here’s the insert in place. It works well and adds strength but will restrict exhaust flow.

kf insert final

This system also makes welding easy.

Avon Banner

parts and peices

Some of the junk I dug up to kick-off my pipe clamp tool experiment.

Another builder told me of a C-Clamp arrangement using angle iron to lock chunks of pipe in-line. Scott from Chica’s explained a small unique tool that pulls the segments of pipe together using feeler gauge thin material. After tack welding the pipe segment, the clamp is loosened and the feeler gauge material slips out. Irish Rich pointed out that large hose clamps and chunks of angle iron work fine to hold pipes for tacking.

block clamp wo feeler

This was my bullshit attempt at building this tool.

brazing block bolt

I brazed the feeler gauge to a nail and the nail to the end of the bolt.

block clamp w feeler

Here’s the completed tool. It looks better than it works.

block clamp in pipe

This shows the clamp in place. In order for it to work properly a notch needs to be ground in the pipe for the nail shaft, which is thicker than the feeler gauge.

The guys at Chica’s also told me about a wide stainless hose clamp with slots or holes that can be used to hold two tubes together during the tacking stage.

stainless pipe clamp

I found this puppy at Home Depot and thought I had hit gold.

drilling stainless clamp

I drilled the stainless strap with a small drill then 1/2-inch for tacking room.

Then Fab Kevin clued me into Holley, the hot rod car part builder, who makes a sleeve that holds two pipes in alignment for tacking. I looked them up on the Internet.

diagram

Our “Alignment Weld Sleeve” allows the fabricator to align, hold and weld two pieces of mild steel tube without help. Because no rod is needed, the welder has a free hand. The “Alignment Sleeve” assures a perfectly aligned joint with no weld slag inside to reduce the tube diameter and restrict air flow. Perfect alignment and just the right amount of welding material results in a very professional looking weld. Weld Sleeves are packaged 20 sleeves per bag.

angle irons clamp to pipe

See, I couldn’t find a hose clamp to do the job. I need another hardware store run.

This is where the story runs astray. I followed each veteran’s suggestion and began to fabricated every exhaust pipe alignment device known to man. I cut, brazed, hit Home Depot, bought clamps, hoses, sliced my only .013-inch feeler gauge, dug through drawers and took photos along the way. No shit, I fucked up every tool design suggested.

stainless clamp on pipe

This is how it’s supposed to work. Unfortunately the clamp I bought was too large.

I didn’t have two hose clamps that would pull the angle iron hard against the tubing. The wide stainless clamp notion was golden, but I bought the wrong size at Home Depot. The feeler gauge routine was followed to the finish, but my tool doesn’t work without a notch snipped in the pipe. The C-clamp notion is too involved for my thinking so I decided to buy two clamps and modify them. Of course I didn’t have two spares to screw with. And finally the perfect solution from Holley was unavailable from my local auto parts store. I’m forced to buy their catalog.

Cclamp notion

This is the C-clamp notion. I’ll build it after I hit Home Depot again.

If tonight you called and offered me a cool million to build an exhaust system, I still don’t have the tools. I need to hit Home Depot again. I almost fired myself last night, but you get the idea.

–Bandit

Custom Chrome Banner

Please follow and like us:
Pin Share